When applying equalization to your master, equalization settings specific to the signal you’re working on will need to be applied. Although each master is unique, there are some common aspects of equalization amongst all mastering sessions that you should keep in mind and follow when applicable.
There are a lot of mastering equalizers. Some are incredibly complex and versatile, while some are simplistic emulations of analog hardware.
When applying equalization to your master, it helps to know exactly what you’re doing, how what your applying is affecting the signal, and how specific equalizers will offer unique and useful functionality.
With that in mind, we’ll cover various mastering equalizer plugins that you might use for your session, explain what they’re doing and observe the curves they introduce.
Additionally, we’ll discuss some fundamentals about equalizing when mastering to get a better understanding of how you should EQ your master.
If you’re an artist of an engineer, and you have a mix that you need mastered, send it to us here:
We’ll master it for you and send you a free sample for you to review.
When applying equalization to your master, there are some things to keep in mind, including how much amplification or attenuation to use, the best phase settings, etc. Although all rules can be taken with a grain of salt, they’ll typically keep you from making mistakes during your mastering session.
Notice that the curve is not greater than 3dB.
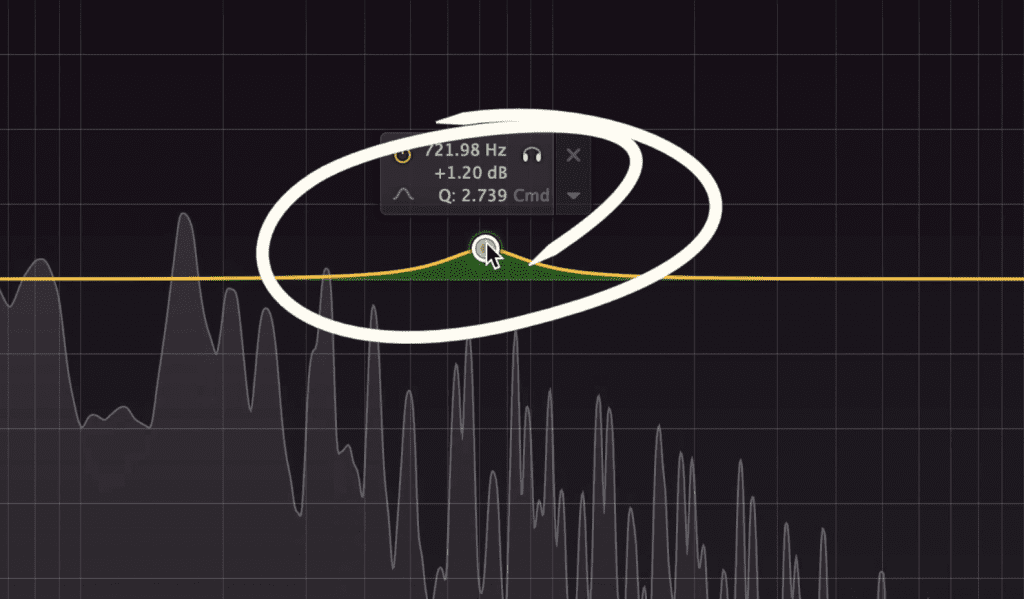
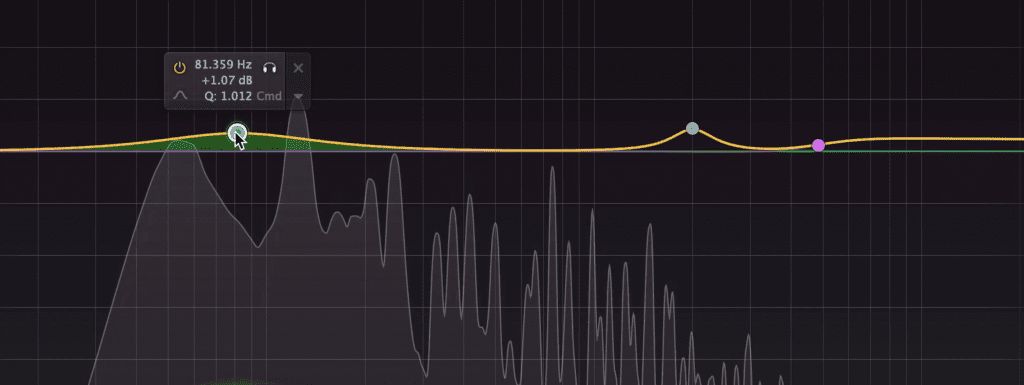
First and foremost, it’s best not to make any changes greater than 3dB during a mastering session. Unless you’re trying to fix a serious issue with a mix and you don’t have access to the mix session for a revision , you should typically stay within the .25dB to 2dB range for amplification or attenuation.
This will keep you from making an aggressive and noticeable change. Since mastering should typically be subtle, and equalization is the easiest way to make noticeable changes to a signal, you need to be thoughtful when applying it.

The phase of the signal greater changes the timbre and accuracy of the curve.
Another thing to keep in mind is how your equalization will change the phase of your signal. When using a zero-latency or natural phase-type of equalizer, you’ll inevitably change the phase of your signal whenever making a boost or cut.
These phase changes will alter the curve that you’re trying to make - this can sound good in certain circumstances; however, sometimes you’ll want very precise and accurate changes. When this is the case, it’ll be better to use linear phase processing.
80Hz, 2kHz, and 5kHz and above, are all good starting points when EQing a master.
Lastly, it should be noted that I can’t give you exact frequencies to amplify, since each master is different. However, if you’re completely in doubt, I’d recommend using a small bump at 80Hz, a small bump at 2Hz, and a subtle shelf at 5kHz and up.
Although this won't work in every situation, this should accomplish a louder kick, a more prominent vocal, and a clearer overall master. Again, this won’t work in every circumstance, but this is a good starting point if you’re in doubt.
For some mastering equalizers, check out this video:
The type of equalizer you’re using for a mastering session will depend on what you’re trying to accomplish; if you want broadband changes to your signal, an analog emulation EQ will work well. If you want to make surgical changes to your master, a digital-based EQ is best.
Analog emulation plugins rarely show how they're changing the signal.
Let’s look at both to get a better understanding of how they affect a signal.
One of the most effective ways that plugin marketers and developers can get you to use or purchase a plugin is by keeping things somewhat mysterious. This is really effective when it comes to analog emulation plugins since there’s no display to show what’s being altered.
However, if we use a frequency curve analyzer, we can get a better idea of what’s changing and to what extent.
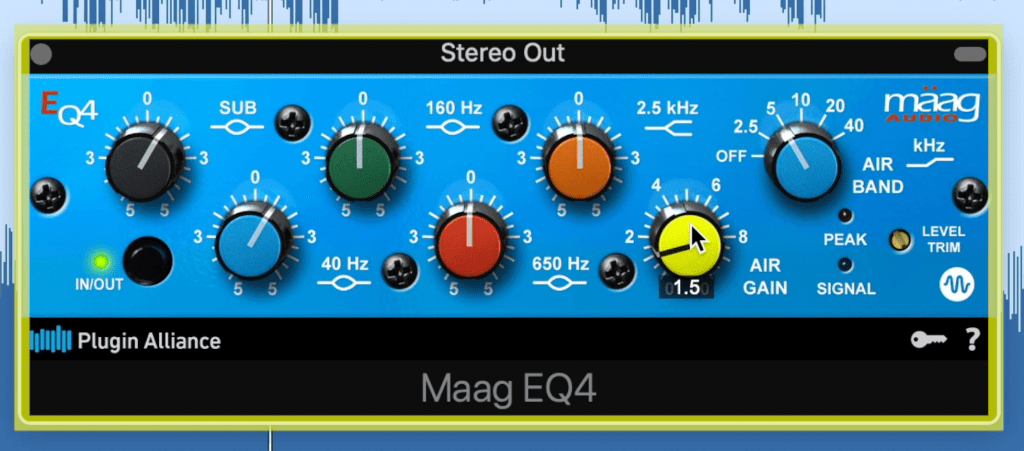
For our example let’s use the Maag EQ4.
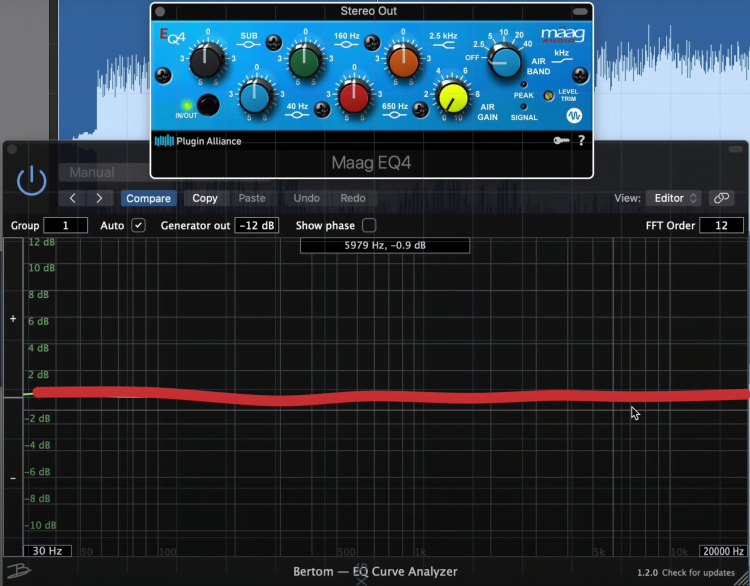
Here's the initial curve created by the Maag EQ4.
We can see that the curves, although unique, aren't anything that you couldn't accomplish by using a typical equalizer.
Granted, the Maag EQ4 utilizes supersonic frequencies, however, this can also be accomplished with certain digital equalizers.
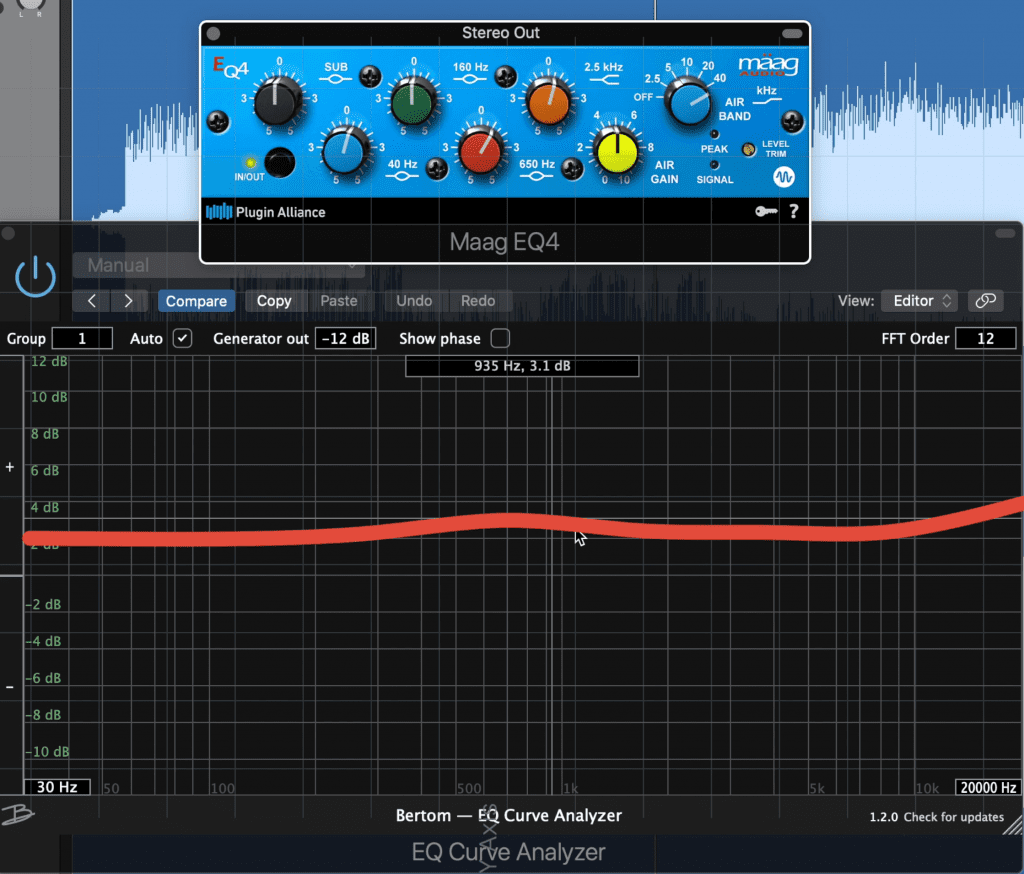
Notice that this curve could be recreated with another digital-based EQ.
What really makes these equalizers indicative of the gear that they emulate are the curves. The curves are closely modeled off of the original gear, which can be useful if you want your master to sound a little closer to an analog master; but other than this, there isn’t too much that’s different from digital-based equalizers.
Another thing to keep in mind is how these equalizers alter the phase. Most will utilize a natural phase setting whereas others might introduce a linear phase setting to keep things as accurate as possible.
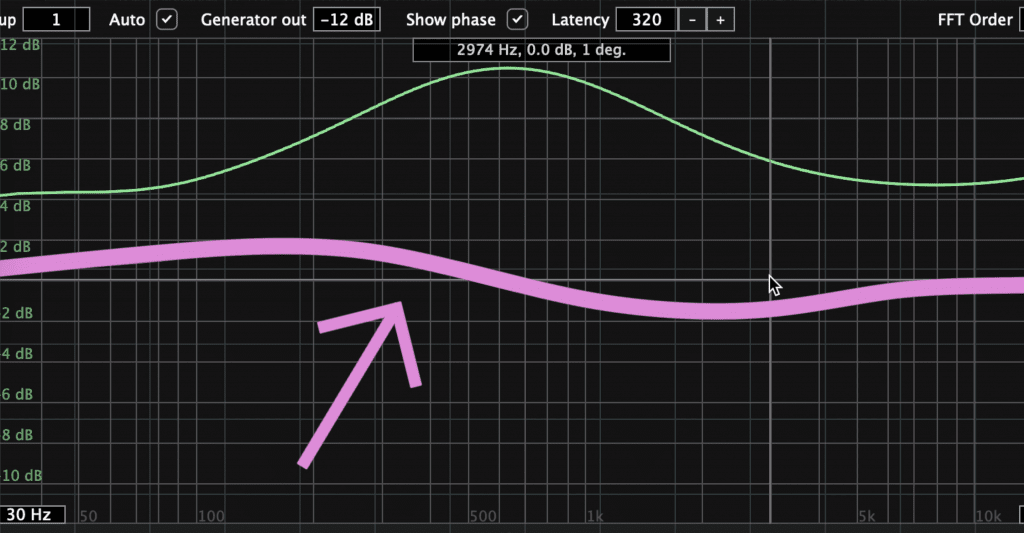
This pink line shows the phase chases caused by the Maag EQ4
Ideally, these emulations will introduce phase changes that are as close as possible to the original gear.
If this is the case, then this gives you even more of a reason to use these plugins, since they truly will sound similar to the original equipment.
These plugins are best when you’re trying to create an overall tone - by this, I mean that you want to create large changes to your master, with natural-sounding curves. If you want to create a very specific alteration to your master, this wouldn’t be the best equalizer to use.
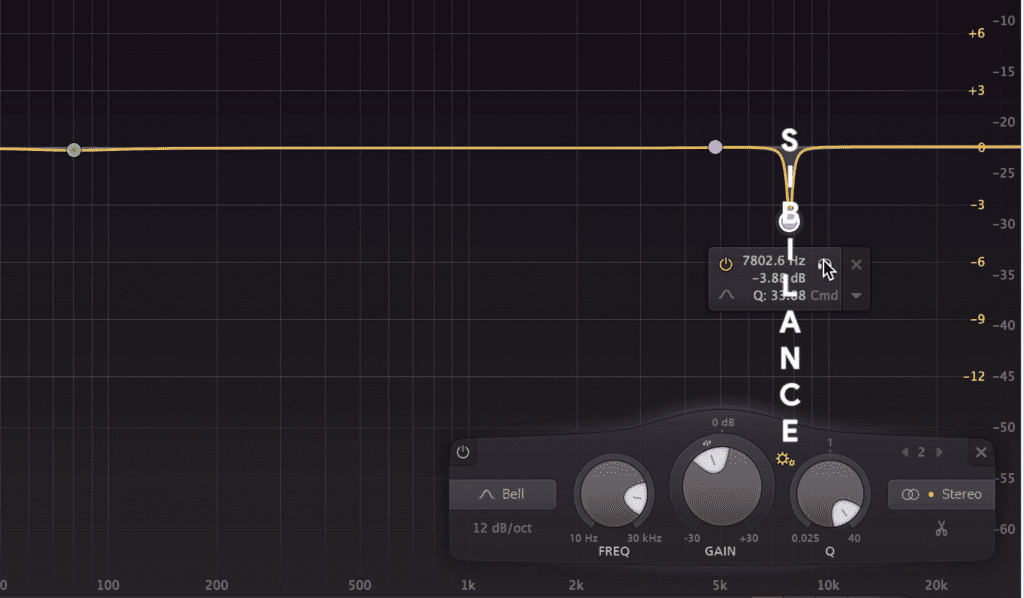
If you need to attenuate something specific, like sibilance, a precise equalizer is a better option.
Again, if you want to make surgical changes to your master, you’ll need to use an equalizer that’s capable of making these types of changes. So for example, if there is some sibilance you want to attenuate, or maybe a specific harsh sound that exists only within a range of 20 or 30Hz, it’s best to use a more accurate equalizer.
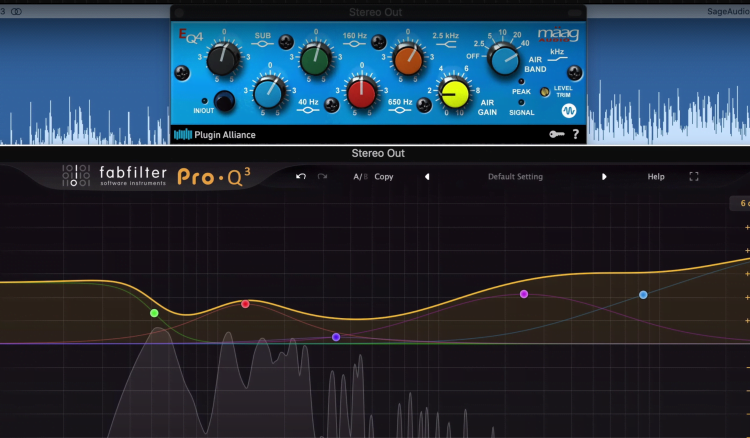
Here, we tried to emulate the curve of the Maag EQ4 with the FF Pro-Q 3.
If you want to learn more about equalization and phase, take a look at this video:
When using an equalizer during your mastering session, it’s a good idea to see if you can alter the processing from left and right to mid and side. If your equalizer allows for this, then you can use the equalizer to widen or narrow your stereo image.

You can boost the mid and cut the side to narrow the stereo image, and vice versa.
We covered this pretty in-depth in another video that we created recently titled: ‘How to Create Stereo Width in your Master’ so take a look at that if you’d like to learn more, but we’ll cover some more of the basics here.
Essentially, you can use a mid-side equalizer to increase the amplitude of the side image, resulting in a wider stereo image.
This is a common practice in mastering and is a great way to accomplish an impressive stereo width without introducing unwanted phase changes to your signal.
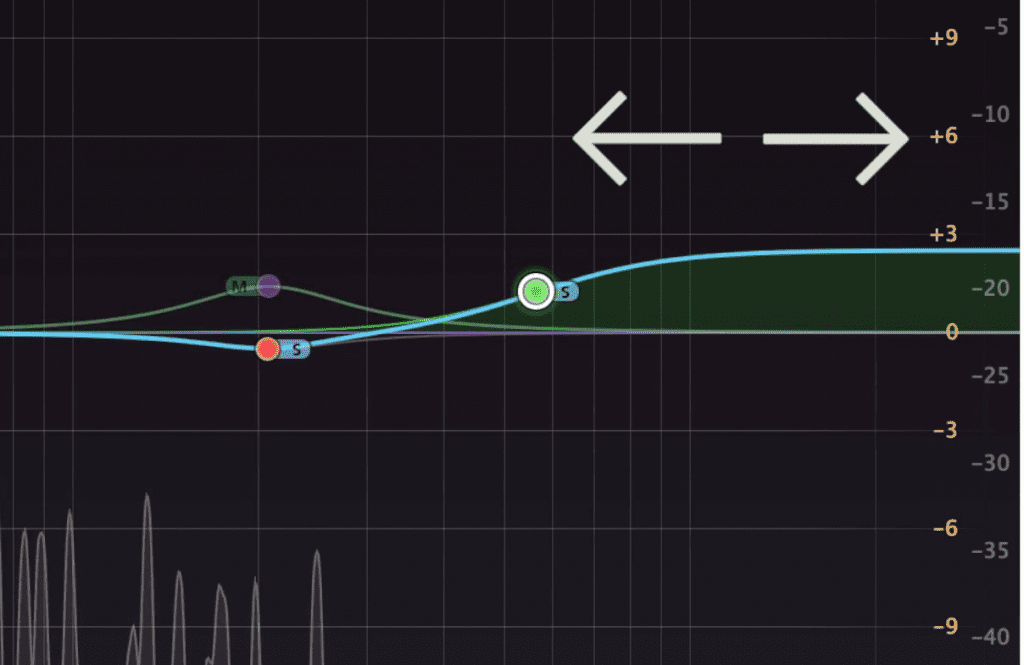
Amplifying the side image will widen the overall stereo image.
I’d recommend using mid-side processing to amplify your mid-kick at 80Hz, and your vocal at 2kHz. Then attenuate the side image at these frequencies to reduce phase cancellation.
You’ll find that combining the amplification of certain frequencies on the mid-image, while attenuating those same frequencies on the side image will make those boosts even more apparent.
When EQing your master, you should keep the fundamentals of equalization in mind.
Don’t make changes greater than 3dB, and use linear phase when you want accurate equalization.
Additionally, it’s important to when to use analog emulation plugins and when to use digital-based equalizers. Analog plugins are better suited for general changes and overall alterations to the timbre.
Digital-Based equalizers are better for very specific changes.
Lastly, you can use mid-side equalization to alter the stereo image of your master.
If you’re an artist of an engineer, and you have a mix that you need mastered, send it to us here:
We’ll master it for you and send you a free sample for you to review.
There are 8 unique value-points inside the Sage Audio membership, so let’s go over each one so you can decide if it’s the right fit for you.
1. 50 Free Mastered Songs Per Year
2. 1-on-1 Mentorship
3. Unlimited Mixing Feedback
4. Sage Audio University™ (SAU) — (Mixing and Mastering Education Platform)
5. Mixing and Mastering Competitions
6. Community
7. 70+ GB of Curated Sage Audio Downloadable Content, Including:
8. 700+ Video Catalog


