Step 1: Using a Mid-Side Equalizer, Attenuate the Side Image with a high-pass filter up to 130Hz
Step 2: Use Mid-Range Based Parallel Compression, Follow with Low-Level Compression
Step 3: Compress or Saturate the Signal, Follow with Multi-band Expander
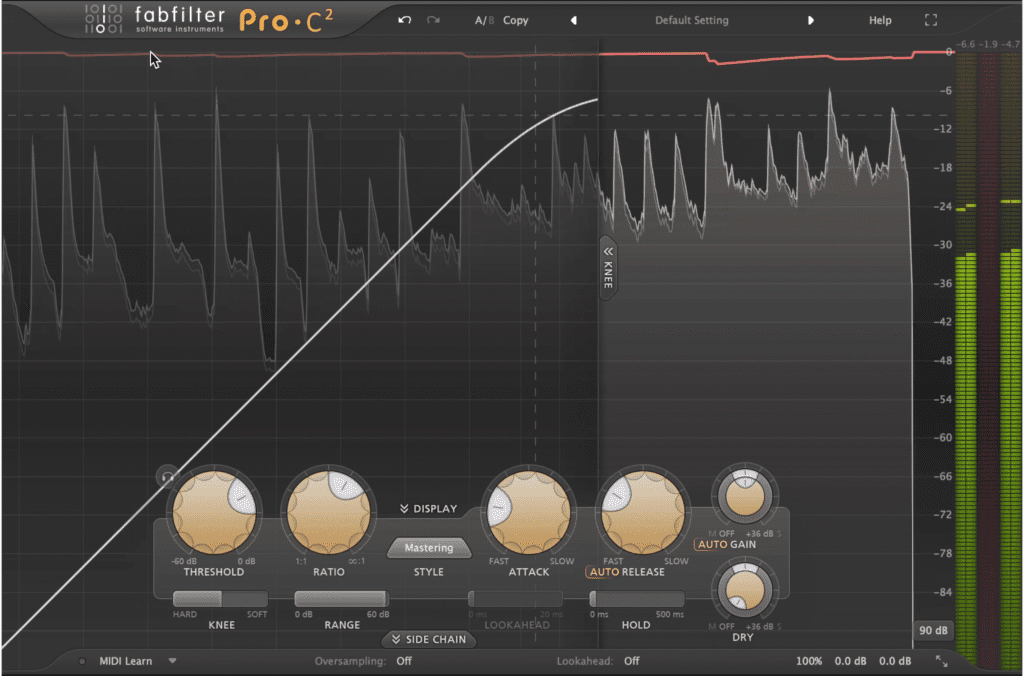
Step 4: Measure the Loudest Peak and Try to Control the Signal Prior to Limiting
The difference between a good master and a great one can be the result of just a few extra steps or small changes.
Since we’re working with a full stereo mix, every small detail needs to be taken into consideration. With that in mind, we wanted to share How to Improve Your Masters 20% in Less Than 10 Minutes.
These techniques can take your master from good to great without being incredibly complex or convoluted.
We’ll do everything step-by-step so that you can replicate these techniques from home or in your studio.
If you have a mix that you need mastered, send it to us here:
We’ll master it for you and send you a free sample to review

Using an EQ with Mid-Side capabilities, we'll attenuate the side image's low frequency range.
This is one of my favorite mastering and mix bus techniques - if you’ve watched our videos before, you’ve most likely seen me talk about it.
Essentially, if you use a mid-side equalizer and attenuate the side image with a high pass filter, you’ll reduce phase cancellation in the low frequencies of your master.
It’s an incredibly quick and easy way to make your low end mono, and in turn, more driving and focused.
I’m going to use the FabFilter Pro-Q 3 for this, but if you’re using Logic Pro X you can use the stock Equalizer for this. If you’re using a different DAW, Melda Audio’s equalizer is free and capable of mid-side equalization.
So, Step 1: Insert the Equalizer on Your Master’s Track or the Stereo Output
Step 2: Create a band and place it on the side-image of the signal.
Step 3: Create a high-pass filter, and attenuate up to about 130Hz.
Step 4: Change the slope of the filter to 24dB per octave.
Step 5: Monitor what you’ve attenuated, and alter any settings as needed.
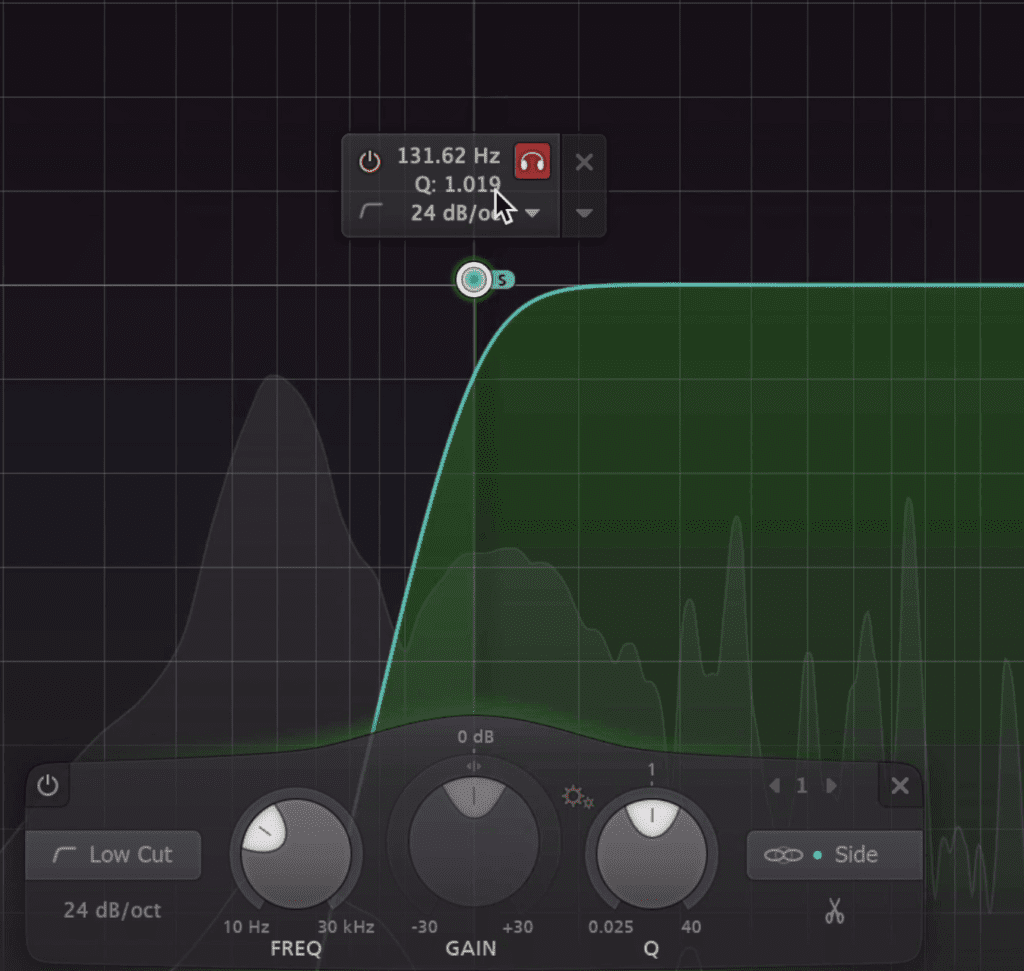
You can monitor what you've attenuated by clicking the headphones icon.
Be sure not to move the filter much higher than 130Hz, or you may start to cut into your guitars, synths, and other instruments that often work well on the side image.
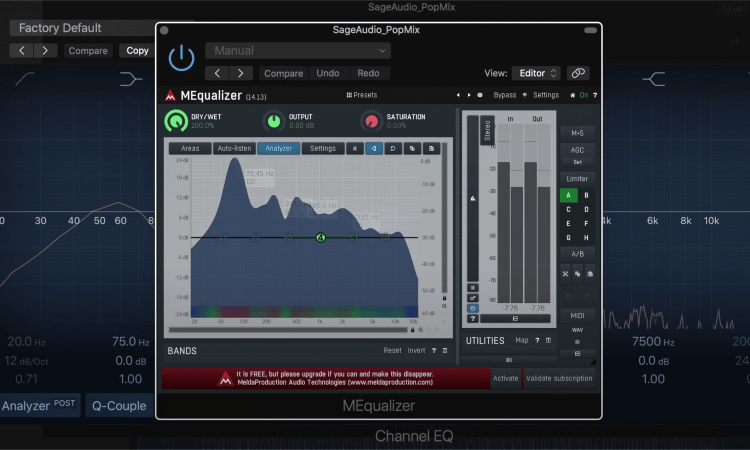
If you don't have the FF Pro Q 3, you can use these 2 shown plugins.
For more free EQ plugins, check out our video:
Parallel compression helps to add body and power to a master.
Parallel compression is a great way to add some character and a lot of power to a master. By compressing the signal heavily and blending it in with the original or unprocessed signal, we can achieve just the right amount of compression without resorting to a squashed and unpleasant sound.
The setup we’ll use here has been adapted to focus the efforts of the parallel compression solely on the mid-range, arguably the most important part of a master and the area that holds the majority of the instrumentation.
Step 1: Create a bus send and auxiliary track,set your send to unity.
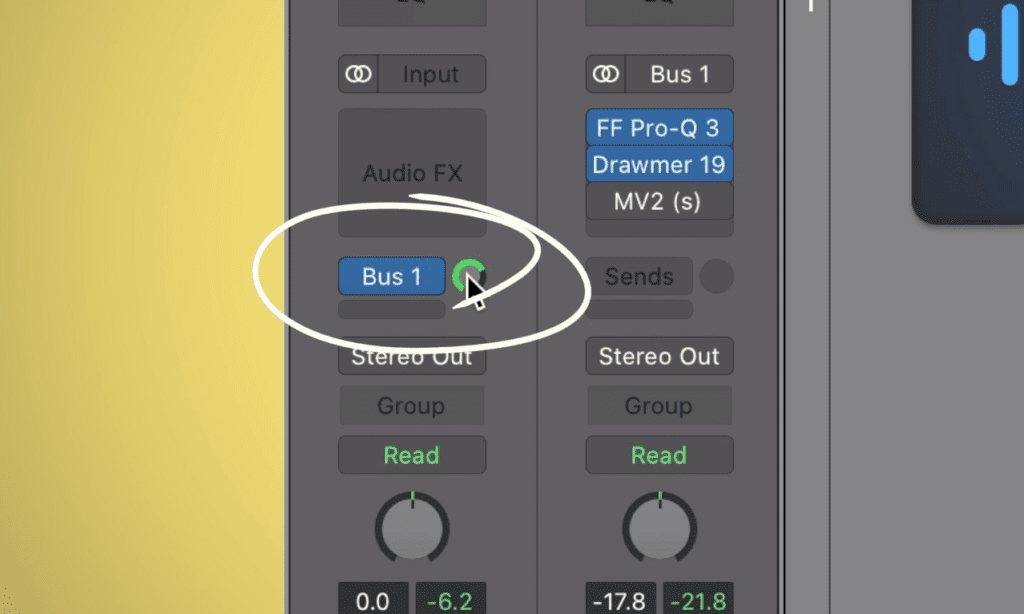
Create a bus send and set it to 0dB.
Step 2: After titling the auxiliary channel, insert an equalizer. With this equalizer create 1 high-pass and 1 low pass filter. This will isolate just the mid-range.
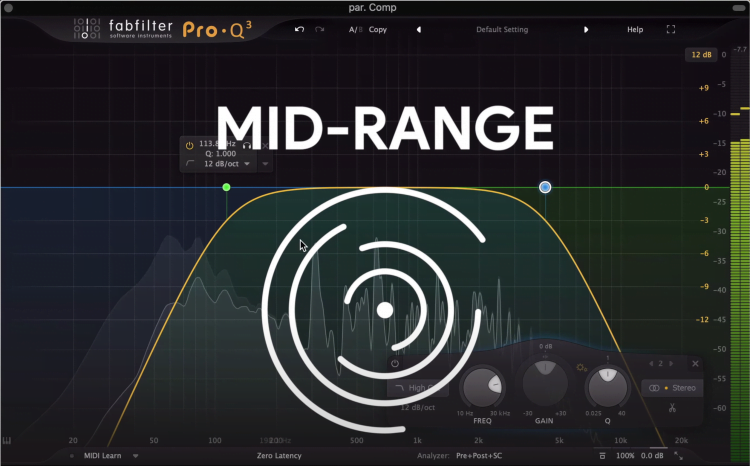
Insert an EQ and use 2 pass filters to isolate the mid range.
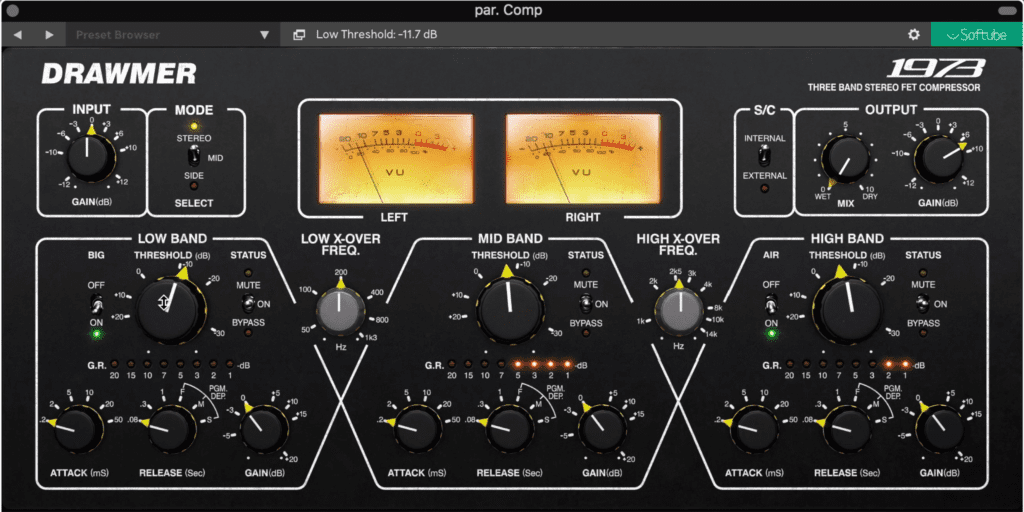
Step 3: Insert the Parallel Compressor of your choosing. I like to use one that’s colorful or imparts subtle harmonic distortion onto the signal and uses a more or less non-linear compression type,but what you choose is up to you and depends on the genre you’re working on.
Step 4: Compress the signal heavily. I prefer to lower the channel fader of the auxiliary channel a fair amount, and then raise the level with the output of the compressor. This creates even more character.
Step 5 (optional): If you’re finding that you’re not getting enough character out of the parallel compression alone, follow it with a low-level compressor. This will augment quieter aspects of the signal, bringing forward some subtle distortions and previously masked details.
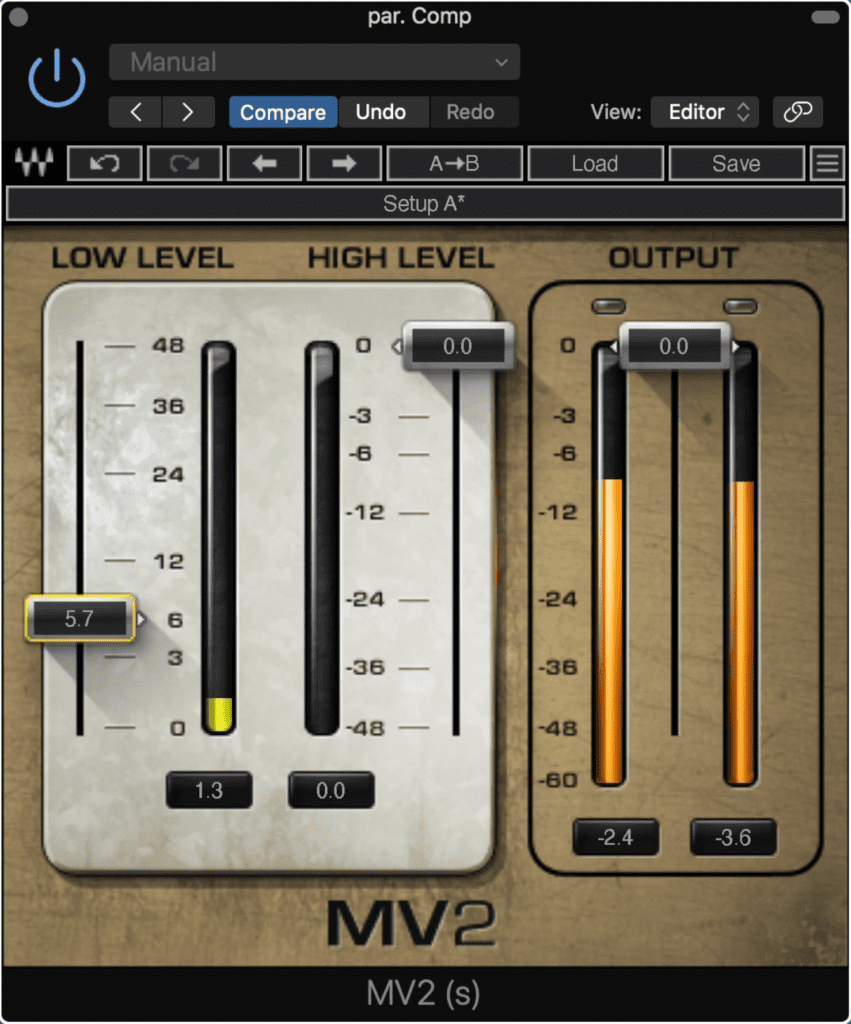
If desired, follow the compression with a low-level compressor/
After compression, you can use expansion to enhance a signal.
Compression is an important part of mastering a song, but it’s not always needed. That said, if the mix you’re working with is already compressed enough, you can skip this step.
But, if the master is lacking some control and could using some gluing together, use either compression or saturation to tie the loose ends together.
Furthermore, you can follow the compressed signal with a multi-band expander. This accomplishes 2 things:
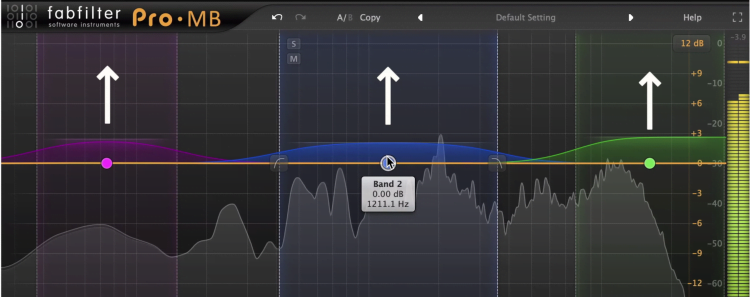
The signal is made more dynamic and detailed.
So in short, if you do decide to compress your mix, try following it with a multi-band expander. If you do, you’ll make your master controlled but dynamic, and detailed.

Soft-knee compression is better sounding when controlling peaks than brickwall
Out of all of the techniques we’ve covered here, this is by far the most challenging. So if you find that it’s not working for you, just remember it may take some practice.
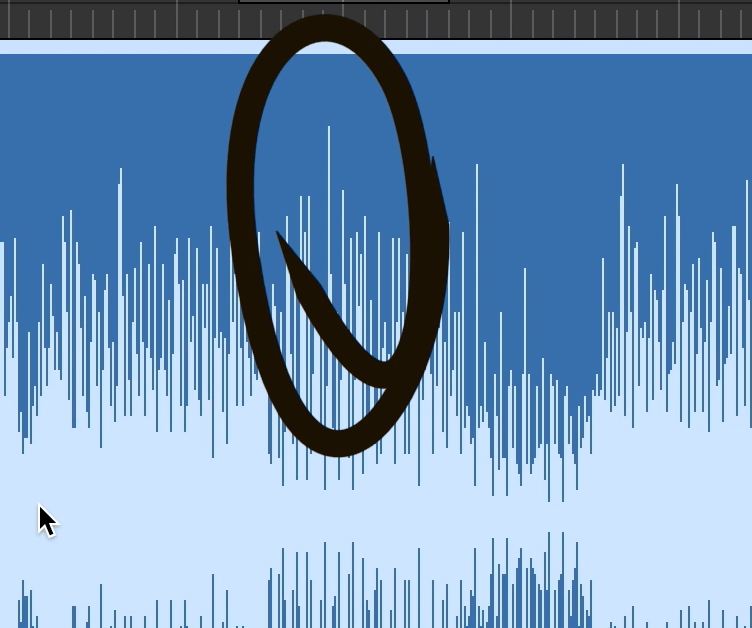
Circled is the highest peak in the song.
In short, you decide on a dynamic range for the loudest section of the song you’re mastering, say 5dB. The section that you pick will typically be a chorus, but if you’re in doubt observe the waveform to the loudest part of the song.
Then, you increase the amplitude of the mix until the loudest peak is as close to 0dB as you can make it without using limiting.
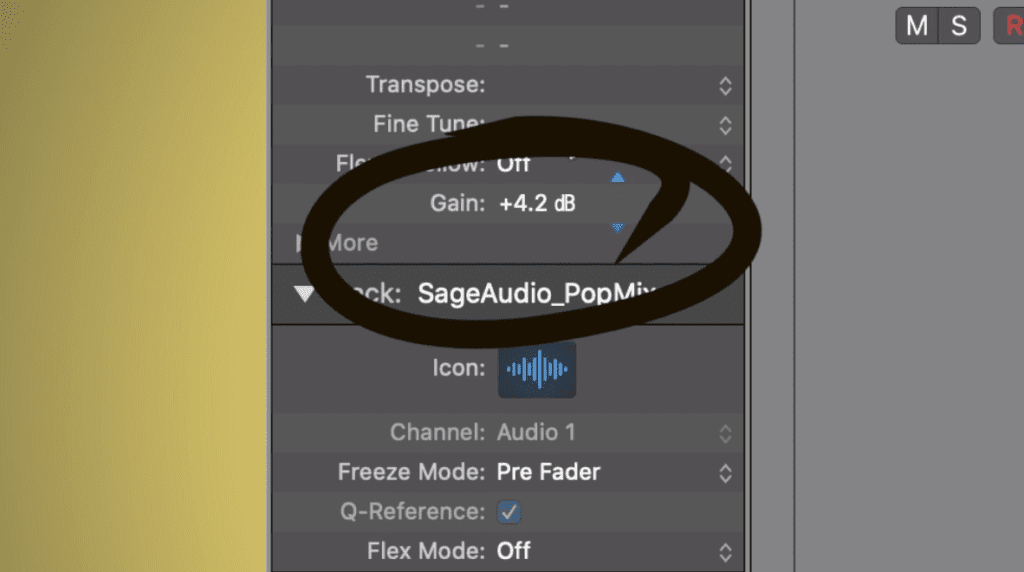
Clip gain can be used to increase the level of the track right before peaking.
So if done correctly, the max peak of the signal should be -0.1dBTP, and you should have 5dB of headroom from the quietest part of the signal.
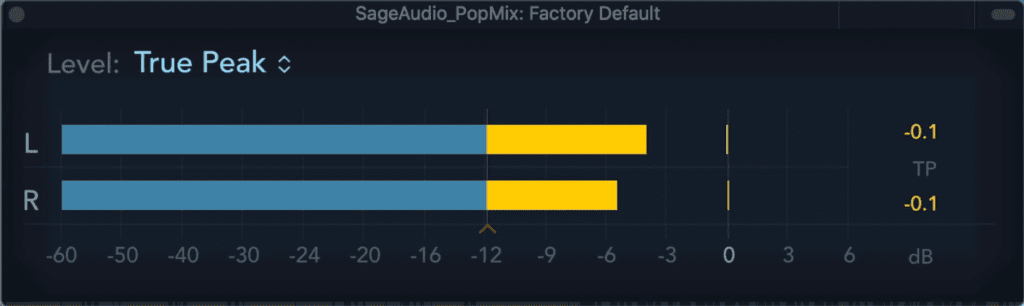
Notice that the signal peaks at -1dBTP.
If the dynamic range is greater than the predetermined dynamic range that you picked, again in our example 5dB, use compression and/or saturation to control it. I’d use a soft-knee compressor for a more natural sound.
After compression and only once the signal falls within the range that you set for yourself do you introduce the limiter.
This way you know exactly what your dynamic range is, and you use natural-sounding soft-knee compression or saturation to achieve it, not a brick-wall limiter.
Getting the right balance between compression and your dynamics can be challenging, and will definitely be more time consuming than defaulting to brick wall limiting, but it definitely improves the sound of your master.
After some practice, you’ll be able to achieve this in only a couple of minutes.
Experiment with this technique and let us know if you think it improves the sound of your master.
For more information on mastering and headroom, check out our video:
For a quick and easy way to improve your master, try adding a high-pass filter to the side image of your master - this makes the low-end mono and in turn, more focused.
If the master needs more power, use a bus and auxiliary track to create parallel compression. On the auxiliary track, insert an equalizer before the compressor that isolates the mid-range.
If the master is too dynamic, compress, or saturate the signal, but then, follow the compressor with multi-band expansion.
Lastly, try to control the dynamic range to a predetermined amount prior to using a limiter. Ideally, a compressor will handle the attenuation of a signal and the limiter will be used to add gain and subtle brick wall limiting.
If you have a mix that you need mastered, send it to us here:
We’ll master it for you and send you a free sample to review
There are 8 unique value-points inside the Sage Audio membership, so let’s go over each one so you can decide if it’s the right fit for you.
1. 50 Free Mastered Songs Per Year
2. 1-on-1 Mentorship
3. Unlimited Mixing Feedback
4. Sage Audio University™ (SAU) — (Mixing and Mastering Education Platform)
5. Mixing and Mastering Competitions
6. Community
7. 70+ GB of Curated Sage Audio Downloadable Content, Including:
8. 700+ Video Catalog


