In EDM, some inexperienced listeners and engineers misunderstanding equalization, thinking that it's all about bass. The truth is that every mix comes down to creating space and balance. Does everything have a space or does it blend in? Is it muddy and confusing or well defined? The EQ (or equalizer) takes the highest priority in a mix so it's important to understand it and employ it with precision.
When starting to EQ the synths, vocals, or percussion, they usually have a wide range of frequency. Some maybe even reaching to 20hz. These synths are high quality but not always flawless, similar to recorded tracks. This means that these tracks can carry information from the highest to the lowest parts of the frequency spectrum. The only problem is that these synths can’t all take up a wide range of the spectrum, it will get muddy fast!
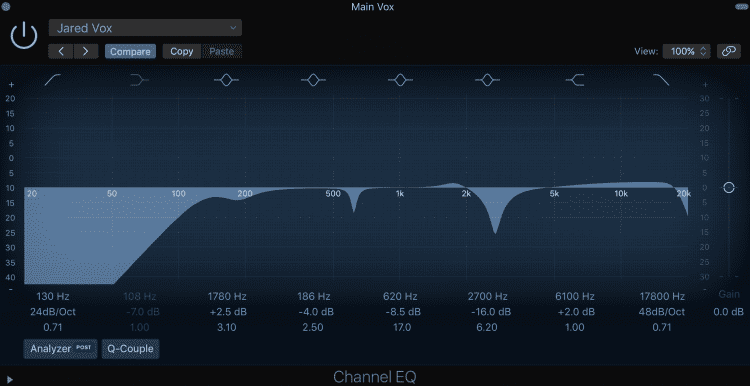
The first line of defense audio engineers will use is the highpass or lowpass function. These functions can quickly and drastically cut out unneeded frequencies. This process isn’t meant to replace a normal low or high shelf though. The kind of information this is used for is, rumble, hissing sounds, or crackle. Synths will have from time to time these issues but these problems will be prominent in vocal tracks or samples mostly and need to be cut out. Highpass and lowpass functions do this well and quickly makes quick work of these problems and it is very easy. Something that is not used very much though, is using the highpass and lowpass for frequencies above 50hz or below 15khz. Highpassing up to 150hz for a male vocal may be an excellent decision to cut out any extraneous information. Ultimately this information may not be heard and will not enhance the sound. Same process with an 808 kick. The bulk of the information will likely be below 5khz or even lower. Any information higher can be completely cut to make sure that it won’t interfere with higher percussion parts. A great question to ask is, “does this play a big part in the tone of the track?” On a small scale this may seem unnecessary, minute work but on a large scale this will produce clarity and cleanliness in your mix.
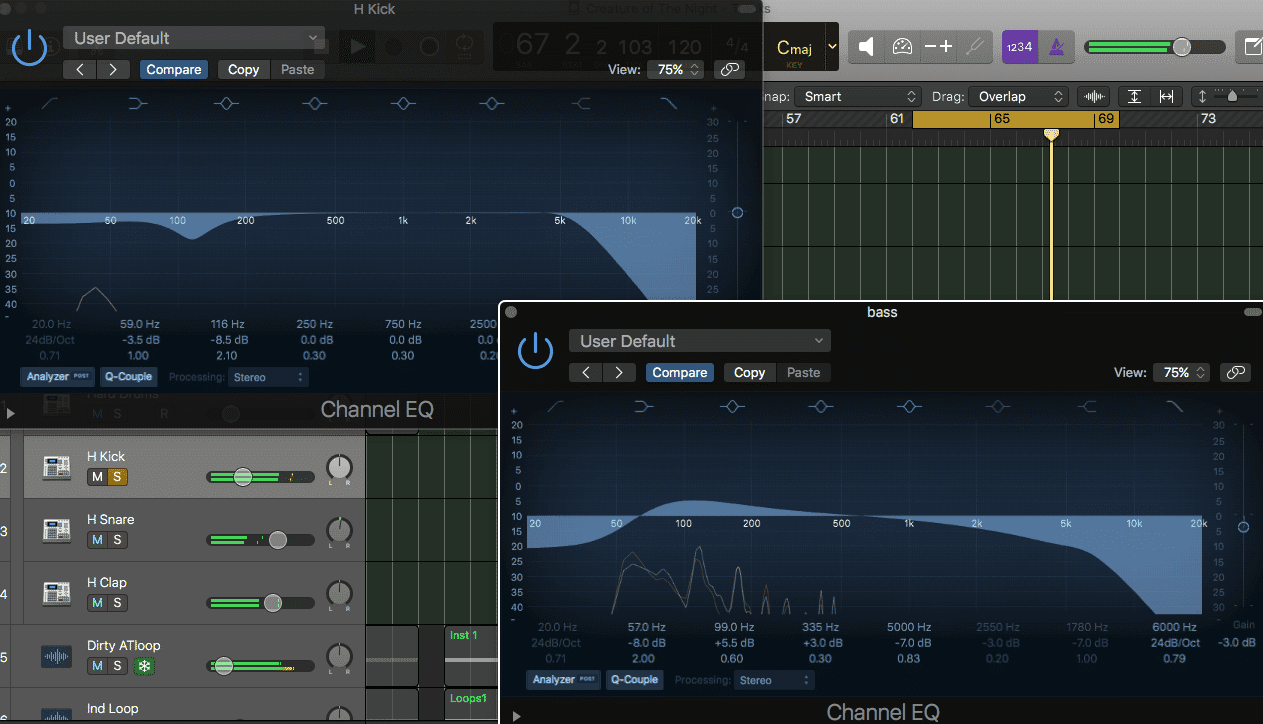
Before we run to highpasses and lowpasses for everything, we must make sure to not overdo it. When EQing a bass guitar track we may be tempted to cut around 80hz to make enough room for a kick. For some tracks this may do the trick but in general you are cutting out some vital information. We need room for the kick drums, especially in EDM, but there will important sound in the lowest parts of a bass guitars tone that will greatly influence the sound quality of the bass. A great thing to do in this case may just be a 4-8db cut in the 60-80hz range with a low shelf rather than a hard cut. When lowpassing a low or mid-tom, we may think to cut at 3khz to make space for a high hat or huge synth line. The problem must be evaluated on a case by case basis but you can’t just go around cutting transients, especially from percussion. There might be some high transient information that is essential to the “gigantic tom” sound used in many EDM tracks. It may be very safe to cut around 10-15khz but not any lower. As much as this may seem like a grey area, it relies mostly on the ear and the specific case.
People like to have personal space, the same is with audio tracks! The main reason we EQ anything is not make something “sound good”, we are trying to carve out spaces for everything. A great place to start is with the more important parts of the mix. For your song it may be the kick, snare, and the vocals. For others it may the snare, brass, and melody synths. Whatever it is, carefully mold these tracks to perfection. Makes sure they have their own space and slightly remove what they don’t need. From here it’s like a puzzle or tetris. Everything has a spot and you need to put it there.
A major area of concern in this genre is in the realm of bass and low-mid tracks. This area gets confused a lot of the time and causes problems. Not many realize or can hear that the bass and the kick cannot go in the same space! This is a very small area of frequencies and there may be a few things that are fighting for that space. Luckily we have some guidelines we follow. When talking about the lowest end around 40-70hz we have the kick. The only exception would be using 808’s as your only kick, they can and should take up this area, or if you are employing sidechaining to your bass. This then can be broken. This obviously means that bass shouldn’t go where the kick is and you should cut a few db here.

warm, low-mid tracks may compete for this space and they are allowed to mix in the 150-300hz range more but it depends on your tracks and what your ears are saying. Pads, strings, heavy chord synths and other similar tracks will be in this range and it would be wise to carefully carve out space where the bass is, but also maintain the core of the “warm” tonality that is often desired in EDM. This area can also be where the toms, snare, and other synths may lie. This obviously means that you have to choose carefully what gets what space and what can miss out on a few hertz. It mostly just comes down to careful listening. This low-mid area is a wise area to highpass out of most tracks because how little this spot can hold.
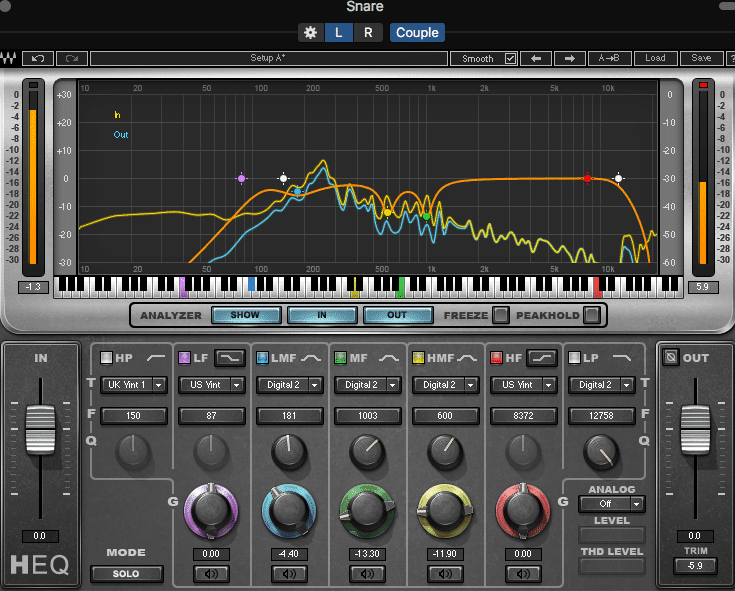
When dealing with tracks that are endlessly customizable and ever-changing, we can come across annoying frequencies and problems areas in the mix. The same is with samples. These samples will have problems of their own and may not help your mix out too much. Surgical EQs are narrow curves that are used to “fix” any frequencies that are damaging the sound of the mix. Most times, this tactic is used on ringing snares but it can be used countless other ways too.

When a vocal track doesn’t sound quite right I often will take a very boosted, very narrow EQ curve and sweep the spectrum to find the problems. If the track sound harsh I will try to find the area that is making this sound. If it the sound is too “boxy”, I know where to look but I also know if I use a surgical EQ and I can find other frequencies it may help to cut. Still, sometimes the problems don’t stand out to me so I employ a different strategy that I have found helps. Widen the Q and sweep sections of frequencies to find the problem area. This may help you realize that a wider EQ curve may help your mix more. Once these problems areas are found it’s time to cut them. This doesn’t always mean to cut 8-12db but it may! Usually a nice middle ground is 4-6db of attenuation for larger cuts. After making and edits always check the EQ by bypassing it to see if you made a positive difference. If it sounds bad in context (or even by itself) then readjust. If it doesn’t create room in the mix for other things then adjust again.
When mixing, if you want to turn up a certain track or a group of tracks, it’s usually better to turn down all the rest before even thinking about turning anything up. The same goes with EQing. If you go into EQing a sound you need to focus on what areas of the mix are being eaten up by other instruments. Turn down those areas and continue to search for places you can cut in order to make the mix sound clean! Continue to to turn down the problem frequencies in the EQ and all of a sudden you’ll find yourself with a track that sounds clean with the rest of the mix. More importantly though, you won’t need to boost any frequencies to get to the goal. At this point though, the track could lack the sound that you are looking for. If it’s “technically” right but sounds like garbage then you may need to keep cutting, adjusting how much you have cut, changing where you cut, or as a last resort, boost. Boosting is not all bad and may be the exact thing you need, but be careful that you are creating space instead of taking up more space.

When constructing a mix, carefully deciding on EQing can make or break a mix. Tracks all have a dedicated place in the mix and they all serve a purpose and it’s our job to make the space so they can fit. If you follow these guidelines and use your ear, you can have a great professional mix.
There are 8 unique value-points inside the Sage Audio membership, so let’s go over each one so you can decide if it’s the right fit for you.
1. 50 Free Mastered Songs Per Year
2. 1-on-1 Mentorship
3. Unlimited Mixing Feedback
4. Sage Audio University™ (SAU) — (Mixing and Mastering Education Platform)
5. Mixing and Mastering Competitions
6. Community
7. 70+ GB of Curated Sage Audio Downloadable Content, Including:
8. 700+ Video Catalog