Do you want your vocals to have that thick, huge sound you hear on so many successful artists? Vocals that sound so full and present? Is there a common formula that is being repeated across different genres, producers and engineers? The answer to these questions is yes.
This “magical formula” happens when different vocal tracks consist of the same melody. This process is called vocal stacking. There are different ways of doing this, but a popular technique is to have your main vocal track (this will be the loudest vocal, panned at the center), and two other independently recorded vocal tracks that are panned slightly left and right (you should experiment with panning while sweeping your doubled and tripled vocals close to the center or a little further out near the sides). For this process, you want the centered vocal be the loudest, while keeping the volume from other takes lower in the mix. You can also record another vocal take an octave lower than the lead, and turn it way down in the mix (the goal is to feel it, not hear) and pan center. This will give more weight to the vocal.
It is crucial for you or your engineer to have a set of tools available to achieve this process. You need your vocals to play in tune and on time. The beauty of vocal stacking, is these different recordings come together and sound as one. You can’t have different takes of breaths and background noise going on between takes, or your vocal will sound like a chaotic wreck. It is very important to have the tracks cleaned up before the mixing process begins. This means the tracks have to be edited. This editing process should include reducing/taking out background noise between takes, the tracks should be edited with a high pass filter and/or low shelf equalization (low shelf eq can be used to control proximity effect) to get rid of the unwanted sub and bass artifacts in the voice. Equalizing and compressing the vocals should make it a lot easier to get a more cohesive blend. Some great plugins/gear for this process are the BAX EQ by Plugin Alliance or Universal audio for gentle high pass equalizing and low shelving, any of the SSL channel strip plugins or FabFilter Pro-Q 2 for a gentle of more extreme approach of the previous eq methods, but any equalizer with a smooth octave filter that has an adjustable high pass and low shelf control should do just fine. For taming the dynamics of the vocals, it really just depends on how they are presented and what style of music you are working with. Your main goal with compression for vocal stacking should be to tame the transients without making the background tracks stick out too much level wise, which means you may be better off using a VCA or FET style compressor. Waves’ Renaissance Vox is also a great plugin for making the vocals sit tight in the mix. Now that you have your vocals cleaned up, it will be much easier to blend. The final stage to achieving the perfect vocal sound begins with pitch correcting and time aligning the tracks.
I have presented a few different techniques to time align and pitch correct your vocal tracks while using Logic Pro X, ReVoice Pro 3, and Pro Tools.
There are many great time aligning and tuning tools nowadays that are extremely efficient and easy to use. Some will even come with your DAW. One of the fastest time aligning software that comes standard within a DAW is Logic Pro X’s Groove Track. You can set a track to be your groove track, and time align other tracks so they synchronize with your main track. This is a super efficient and incredibly easy way to align your vocal tracks and get that thick vocal sound you’ve been wanting!


Another great tool for time aligning tracks (to achieve this same result) is called ReVoice Pro 3 made by Synchro
Arts. Not only does it specialize in vocal alignment, you can also use it for incredibly accurate pitch correction, and
even ADR (the process of re-recording dialogue after filming to improve audio quality).
Time Aligning Multiple Vocal Tracks: 1. Make sure you have output tracks for your original background vocal tracks. To create output tracks, on your top menu bar of the application select, Tracks>Add Tracks, or shift+command+n. 2. Create an APT (Audio Performance Transfer Process) by pressing the “b” key. 3. Select “APT" (under Selected Process). 4. Click on the purple preset button and select “Tightest Time & Pitch” or “Tight Timing Only” (depending on tuning preference). 5. Make sure your lead vocal is selected as Guide, and the track you wish to synch to your guide is selected as Dub. 6. ReVoice PRO 3 makes it incredibly easy to process multiple tracks at the same time. To do this, simply check the “Fix Offset” box. 7. Select the output you’d like. 8. Select "Create Multiple Processes” down arrow. 9. Select the correct number of processes you’d like (depending on how many vocal stacks). 10. Click "New Process”.
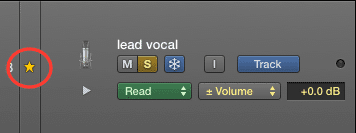
Precise tuning with ReVoice Pro 3’s Selector Tool: 1. Make track full screen by selecting the button located on the far left in the three row column (for a better view, you can zoom with the “t” key, and to zoom out use the “r” key). 2. To set the scale of the song, click on the “All Notes” button located at the bottom right of the application. 3. To change the display to show bars and beats, click on the “Time” button at the bottom of the application and select “Bars & Beats”. 4. Make sure your lead track is solo’d with the “S” labeled button on the left of your track. 5. Right click on the lead vocals waveform.
Quick tuning with ReVoice Pro 3’s Correct Pitch Tool: 1. Press “k” to select the Correct Pitch Tool. 2. Select the audio you wish to tune. 3. A box will appear on the bottom right of your edit screen. Select the tuning percentage as needed (most likely the higher percentages should be best for the sake of this technique).
Time Aligning Multiple Vocal Tracks: 1. Make sure you have output tracks for your original background vocal tracks. (To create output tracks, on your top menu bar of the application select, Tracks>Add Tracks, or shift+command+n). 2. Create an APT (Audio Performance Transfer Process) by pressing the “b” key. 3. Select “APT" (under Selected Process).
Synchro Arts ReVoice PRO 3 is an incredibly strong and versatile application that can be customized to your editing-hearts content. There are many different ways of completing tasks with a melting pot of various workflows (similar to learning a new DAW). I highly recommend watching the many tutorial videos Synchro Arts makes for this application. You can find them on their website - http://www.synchroarts.com
If you don’t have access to these tools, editing by slicing audio and manually moving/stretching your tracks to sync
with the lead vocal, though fairly time consuming, is still a great method. The goal to manual editing is to get the
start and end points of every note aligned with lead vocal.


It is crucial to make sure every consonant from your other takes are not overpowering your lead vocal. Untamed sibilance is a deal breaker for vocal stacking. Solve sibilance issues by using volume automation to manually turn down certain syllables, or use a desser. Your goal should be to only allow your lead vocal track to have sibilance. Another thing to watch out for is making sure the vocal takes don’t have unwanted background noise. It will sound
like a clustered mess if you don’t cut the audio between takes. After you feel confident with your edits, always check for any missed errors. The best way to do this is solo the vocal tracks and listen to them from start to finish. Happy editing!


