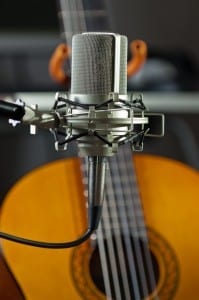
10 Tips for Recording Guitars

Recording great-sounding guitars can often be a daunting task. There are countless ways to get what you are looking for, and it all boils down to what works best for you. Here is a helpful list that covers some of the basics to help you start recording great tracks before sending in a song for audio mastering.
- The most important step in recording great guitar sounds is to ensure that the guitar is in the best condition possible. Many people often overlook the importance of playing with new strings, checking out the neck, making sure it is straight, tuning, tightening the input jack, and checking that all pickups are working properly. It is completely worth the few extra bucks to get new strings or even take the guitar into a professional for adjustments and the correct setup.
- It is imperative to check tuning before every take. Listeners will be able to hear an instrument that is out of tune even if it is only a fraction off, which could ultimately ruin a great song. When tuning, it is best to stretch out the strings with your hand and then tune. This will make the strings less likely to get out of tune due to the climate in the room you are playing in.
- Try to keep your distance from computer monitors and other electronic devices because the pickups will actually pick up unwanted frequencies and sounds. Move around and find the best spot in the room with the least amount of unwanted sounds.
- Record tracks using 2 different guitars. Single coiled and humbucker guitars offer great varieties of sound. The single-coil will capture the higher tones, whereas the humbuckers are perfect for a fuller, lower sound.
- It is ideal for recording guitars by miking the amp and capturing the sound it produces and how the room shapes the sound. Suppose you do not have the means to record using a mic or don't have a reasonably good-sounding acoustic space; keep in mind that many amps have great quality line-outs that can often produce awesome tones.
- When miking the amps, try different mic placements throughout the room. Try moving the mic further from the amp or even pointing the amp towards a corner and the mic behind it. Also, try positioning the mic towards the center cone of the speaker for a deeper sound and away from the center to capture brighter tones with acoustic guitars, mic near the soundhole to get the lower tones, and near the 12th fret for a bright sound from the strings. The possibilities are endless, and experimenting could lead to the perfect sound you are looking for.
- A helpful trick for trying to find a good placement for a mic is to move your head around the amp or room and let your ear be the judge of the best spot.
- Experiment with different mics and different amps if you have the extra equipment. It's better to record multiple instrument tones and have many options when mixing instead of limiting yourself and only having a couple of tracks to work with.
- If possible, try playing outside of the room that the amp is miked in so you can hear the actual tones that are being recorded.
- When doubling guitars, record two different performances instead of simply copying and pasting the same track into the mix. The slight differences in the takes will give you a much better, fuller sound instead of only adding to the volume.
Conclusion:
Experimenting on mic placement and tone adjustment cannot be stressed enough. There is no one set way to record any instrument, but these tips will definitely help build the foundation of recording great-sounding guitars before mixed and sent in for cd mastering services.


