Best Mastering Chain
Insert 1: FabFilter Pro Q 3 - Subtractive Equalization
Insert 2: Soothe 2 - De-essing and High-end Compression
Insert 3: FabFilter Saturn 2 - Saturation and Harmonic Distortion
Insert 4: Softube Tape - Saturation, Stereo Widening, Gentle Equalization
Insert 5: Oxford Inflator - Loudness Enhancement, Harmonic Distortion
Insert 6: Weiss EQ1 - Additive Equalization
Insert 7: Weiss DS1 MK3 - Compression, Limiting, Stereo Imaging
Insert 8: FabFilter Pro L2, or Oxford Limiter - Limiting, Output Level Setting
Optional: Weiss De-esser - Control Sibilance Prior to Distortion
Right off the bat, it’s important to recognize, that there is no absolute best mastering signal. Subjectivity, as well as multiple factors like genre, frequency response, the mix’s dynamic range, and a lot of other variables, will all affect how to master a track.
However, there are some signal chains though that work incredibly well and can be adjusted to fit just about any circumstance.
Mastering is subjective in many ways, and will depend on the tracking and mixing sessions.
The signal chain that I’ll be describing here is one of, if not the best plugin signal chain that I’ve come across after experimenting with various plugins. Collectively, and in this particular order, the tone, impressiveness, balance, and overall enjoyability of the music are increased dramatically, in my opinion.
We’ll cover the 8 inserts used in this chain, explain what they’re doing, why they’re in this order, and listen to how they impact the sound of the music step-by-step.
So if you’re looking for a great signal chain, or you simply want to compare yours to another chain, read on or watch the video embedded above.
If you’re looking to hear your music mastered with an all-analog signal chain, send it to us here:
We’ll master it for you and send you a free sample to review.
Insert 1: FabFilter Pro Q 3 - Subtractive Equalization
The Pro-Q 3 allows for subtle, colorless equalization. This makes it a great first insert in a mastering signal chain.
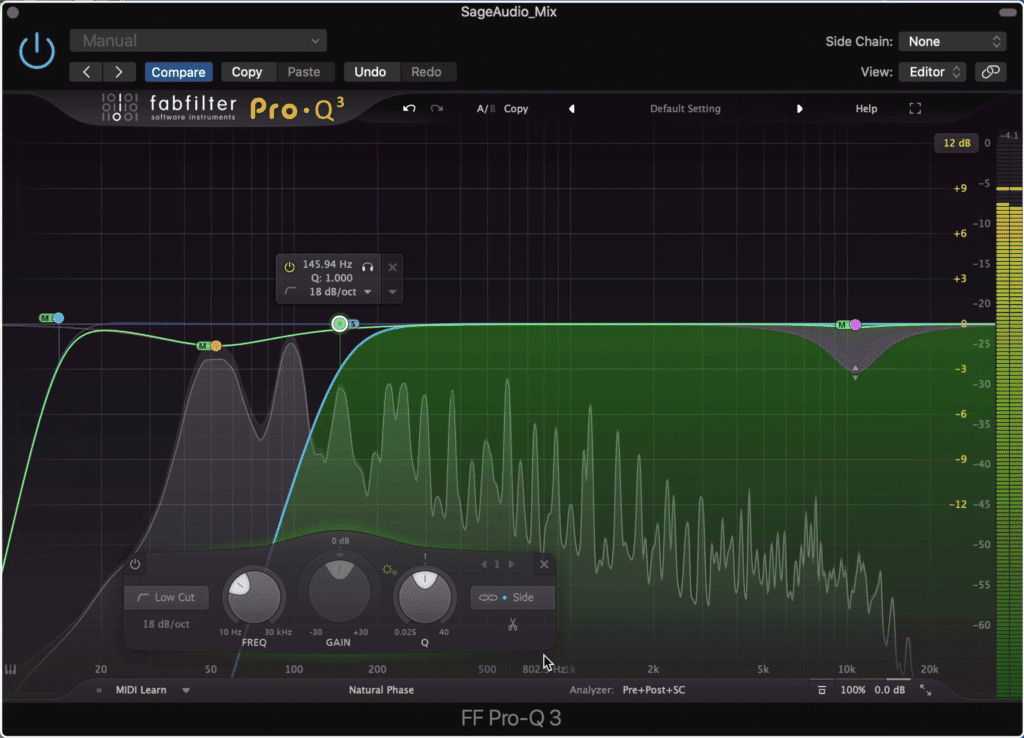
The Pro Q 3 offers colorless equalization, perfect for attenuating problem frequencies.
With it, you can decrease the amplitude of various aspects of the signal, to balance it out before any amplification occurs.
Because this plugin is mid-side, you can attenuate some of the side image to cut low frequencies, and make them mono. Furthermore, you can cut out frequencies below 15Hz to give yourself some more headroom.
Lastly, I used a narrow dynamic band to attenuate some of the sibilance of the vocal. These settings, in combination with a neutral phase setting, give me a good foundation for the subsequent steps.
Insert 2: Soothe 2 - De-essing and High-end Compression
Soothe 2 is an interesting and unique plugin. It attenuates frequencies dynamically and based on the incoming signal.
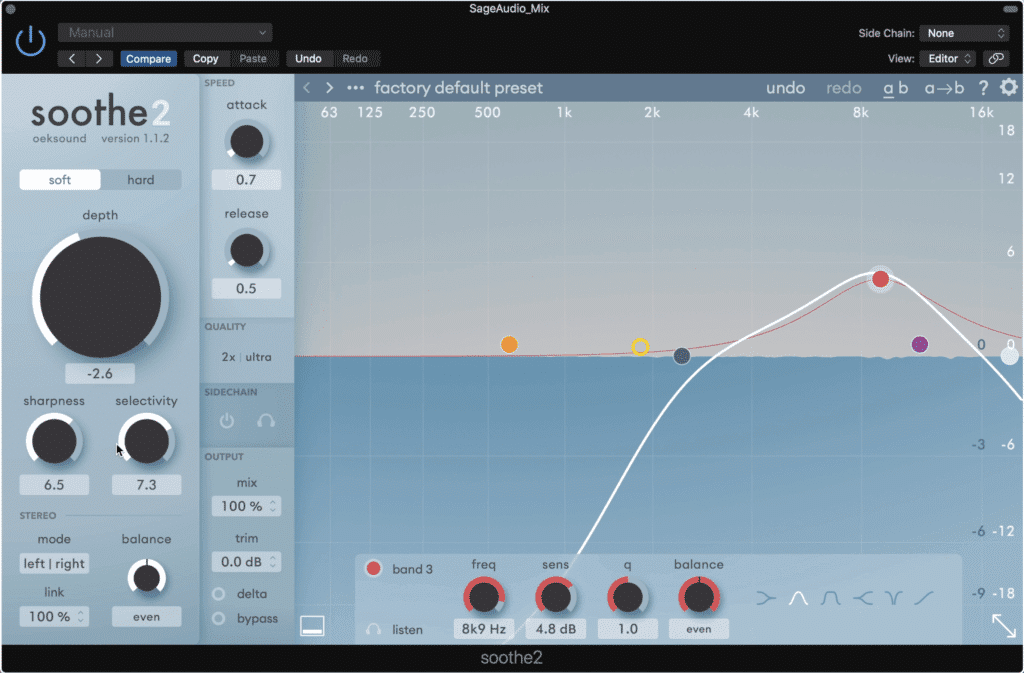
Soothe2 is great for dynamically reducing sibilance and other harsh tones.
This can be used during mastering to control sibilance and other harsh frequencies in an incredibly accurate way.
Whereas a multi-band compressor woulda attenuate unrelated frequencies, as would most de-essers, Soothe 2 attenuates just the relevant parts of the signal.
Using its EQ-like display, I limit the processing just to the higher aspects fo the frequency spectrum.
I used the soft setting, as well as limited the amount of attenuation occurring. Furthermore, I used 2x oversampling, and the ultra mode to minimize phase cancellation and aliasing.
Lastly, I increased the sharpness to make the attenuation more precise.
I use this plugin before saturation or distortion to ensure that I’m not increasing the perceivability of some of the more aggressive frequencies.
Insert 3: FabFilter Saturn 2 - Saturation and Harmonic Distortion
Saturn 2 is an amazing plugin for saturation and harmonic generation. One of its presets has been a go-to for me for years.
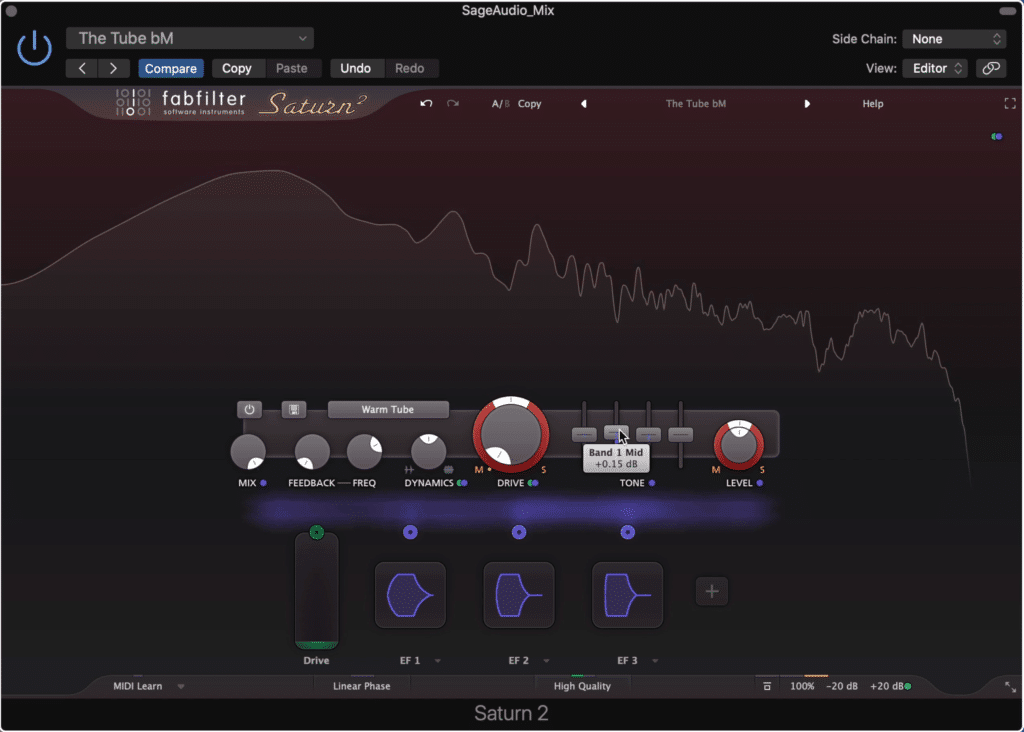
Saturn 2, and its tube setting, are amazing for mastering and fill in the frequency spectrum.
The Tube offers unique and powerful harmonic distortion and compression. What I like to do is split the processing into 3 bands to give myself some more control.
When the highs are a little harsh, I’ll use warm tape saturation to keep them present, but to a lesser extent. Similarly, if the lows are weak I can use the gentle saturation algorithm to make them more aggressive. In this case, I stuck with the warm tube setting.
Another thing to note is that when you divide the signal, you’re no longer affecting all bands in a similar way. The Modulation and filters created by the preset remain on the middle band and don’t transfer over to the new low and high bands.
I find that this works well since these settings are best suited for affecting the mid-range of a master.
Lastly, the linear phase option makes the distortion more accurate, or in other words with less unwanted artifacts. High quality introduces oversampling to avoid aliasing.
For more info on the Saturn 2, and other distortion plugins, check out our video on the topic:
Insert 4: Softube Tape - Saturation, Stereo Widening, Gentle Equalization
There are a lot of Tape plugins out there, but this one is subtle enough to work well for mastering.
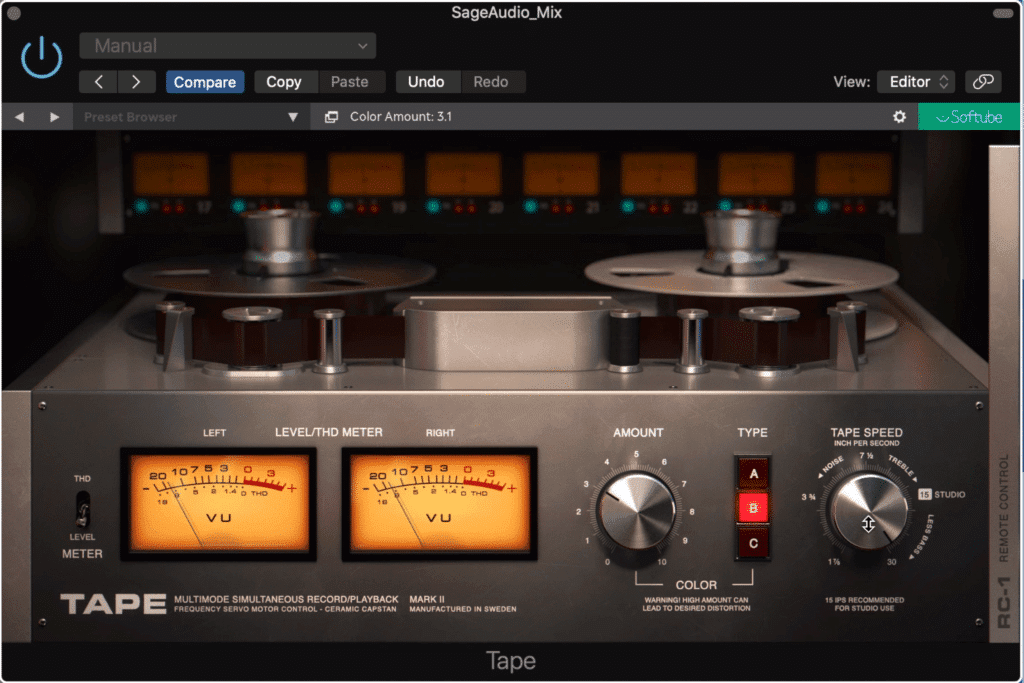
The Tape plugin add very subtle harmonic distortion and compression, as well as cleans up some of the lows.
With just a little saturation at tape type B, I found that this master filled out nicely. Furthermore, I increased the tape speed to 30 inches per second for a cleaner sound , with slightly attenuated lows. This setting simply worked better for the mix, but you’ll find it works well for a lot of masters.
In the controller section, I boosted the highs slightly, and very subtly increase the crosstalk. This introduces mild phase cancellation between the left and right channels which spreads the signal further into the stereo field.
Insert 5: Oxford Inflator - Loudness Enhancement, Harmonic Distortion
The Sonnox Oxford line of mastering plugins has been around for a little while. Impressively, they still hold up to this day.
This is especially true for their inflator.
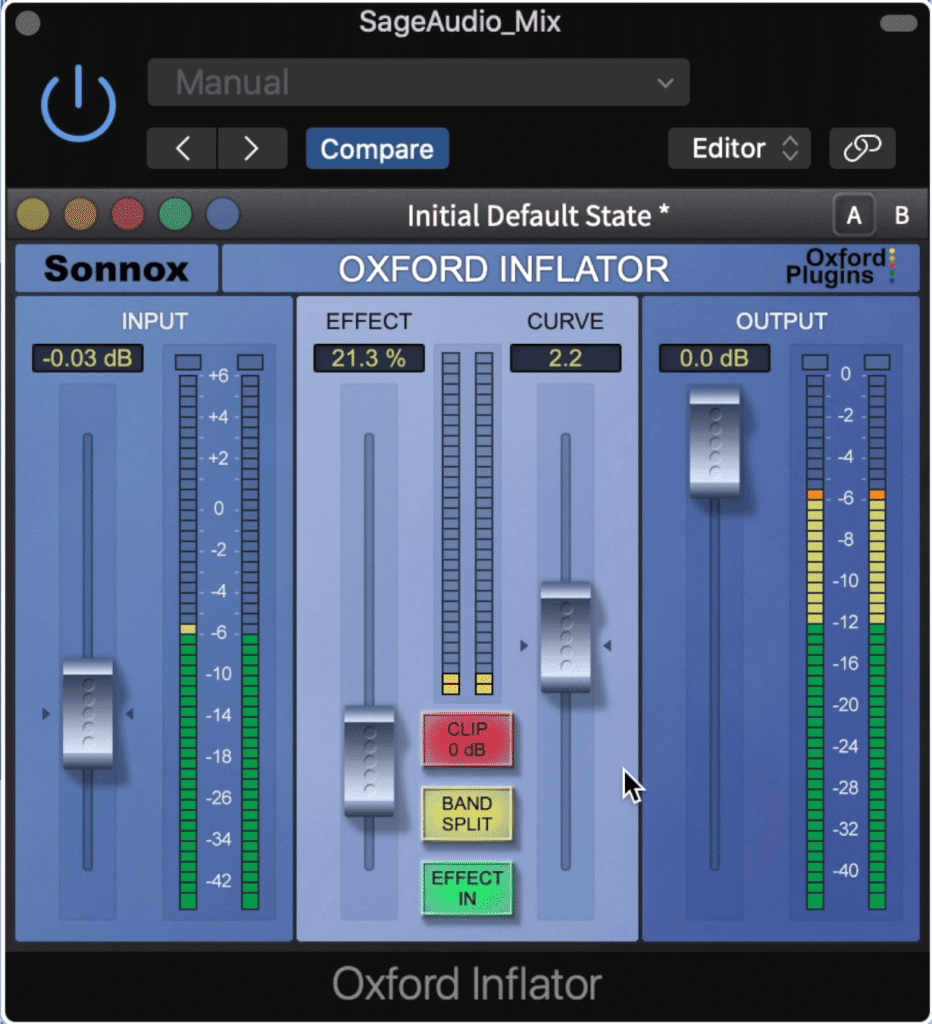
The Oxford Inflator does a great job at bringing some of the lesser heard aspects of the signal forward.
Keeping the input and output the same, I increased the effect of the plugin to around 20 percent. Additionally, I used Band Split since it preserved the high frequencies a little better to my ear.
If you use this setting be sure to keep an eye on your output, as it may cause increases in amplitude and subsequent clipping.
For the curve, I increased it very subtly to create a low-frequency heavy tone, but try negative curves for a more subtle effect with slightly more harmonic distortion.
I like using this plugin after my saturation plugins since it brings forward some of the harmonies that they created.
Insert 6: Weiss EQ1 - Additive Equalization
The Weiss EQ1 is a perfect addition to any set of plugins - as a line for line recoding of the original hardware, it’s hard not to love how transparent this equalizer sounds.

The Weiss EQ offers incredibly clean and pleasant sounding additive equalization.
I like using the linear phase mode for an incredibly clean and smooth tone, then I’ll subtly increase some of the lows, mids, and highs.
Nothing too complex here - we’re just using a very nice equalizer to subtly increase what sounds good about the track.
Insert 7: Weiss DS1 MK3 - Compression, Limiting, Stereo Imaging
Like the previous Weiss plugin, this one is an exact model of the digital code used to create the hardware unit.
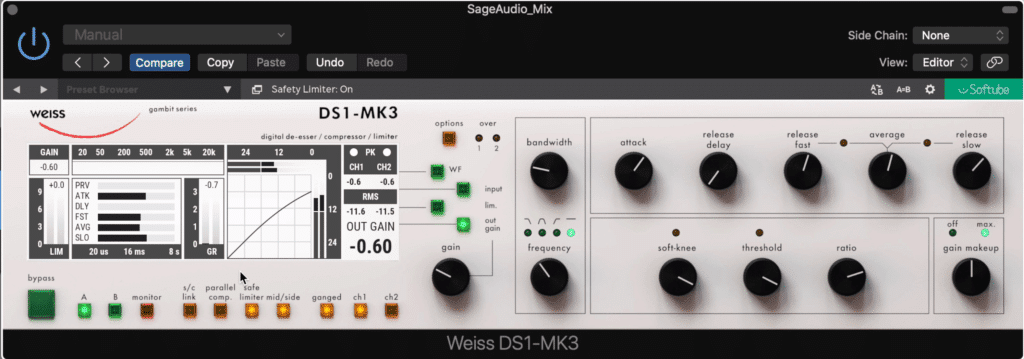
The DS1 both compresses and limits. This gives the signal a full and rich sound.
With the DS1, I’m going to use both compression and limiting. For this, I’m using safe limiting to avoid clipping, and mid/side processing to compress the mid-channel, in turn making the sides more pronounced and increasing the stereo width.
I achieve anywhere from 1 to 2dB of compression, and 2 to 3dB with the limiter. I also use automatic makeup gain from the compressor - I find that this provides a rich and full sound.
I keep my attack relatively quick at 20ms and the release between 40 to 100ms.
Lastly, I reduce the output gain, because we have one more step to complete before the master is done, and I want to avoid clipping.
Insert 8: FabFilter Pro L2, or Oxford Limiter - Limiting, Output Level Setting
Although we’ve already limited with the DS1, I really like the sound of combining 2 limiters. This way, the processing can be split between the 2, and you can get the timbre of both.
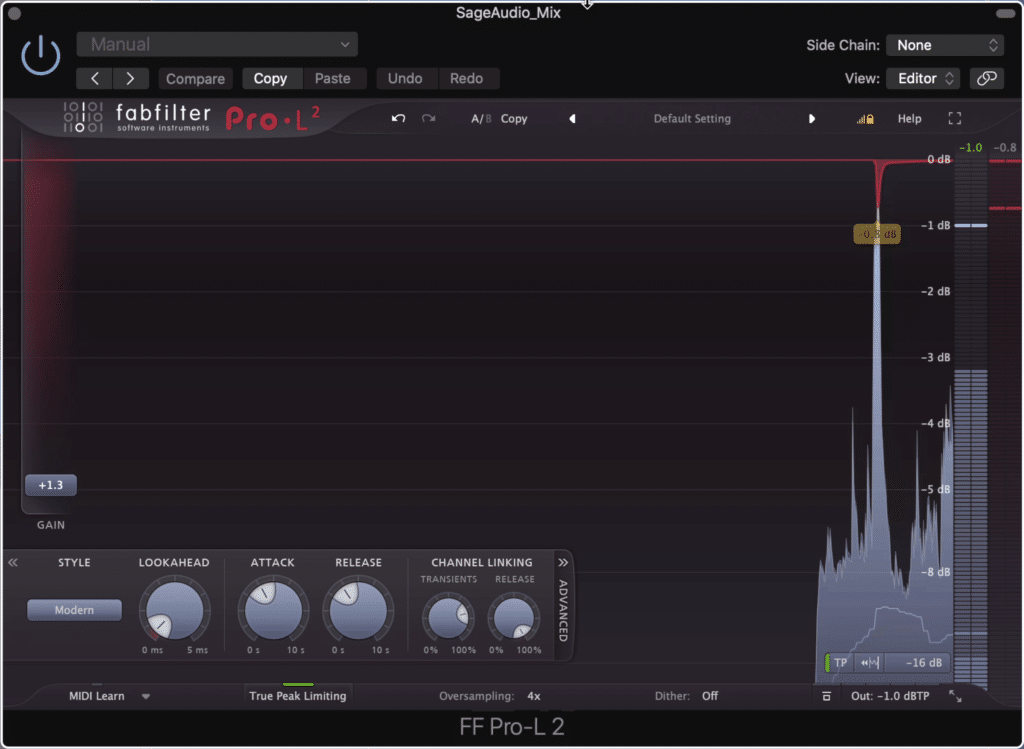
Using the FabFilter Pro L2 and its modern setting results in clean limiting.
I like the transparency of the FabFilter L2 for this, especially on the Modern setting. This is a great option for avoiding distortion. Using a little lookahead, oversampling, true peak detection, and lowering the plugin’s output to compensate for gain changes during encoding is also a good idea.
The Oxford Limiter on the other hand has a more powerful sound - slightly warmer, and a bit more pop-centric. The enhance slider sounds like the inflator a bit and pulls some of the lesser heard details forward.
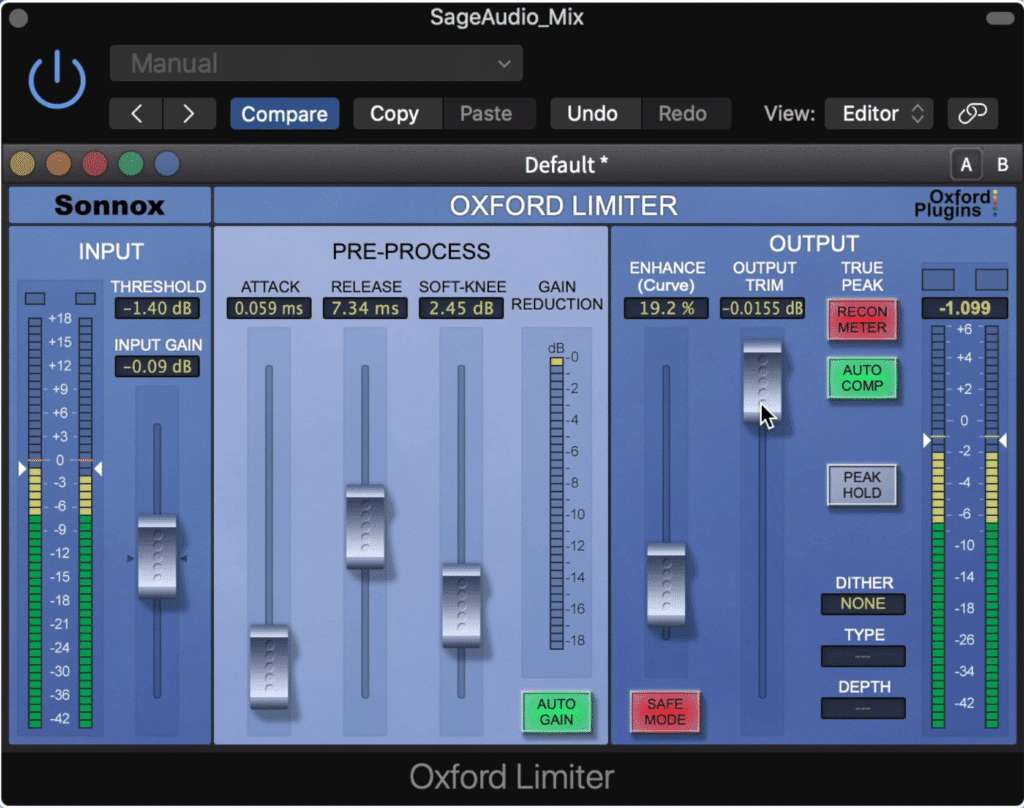
The Oxford limiter gives a more pop centric sound with mild and pleasant distortion
The auto comp ensures that clipping distortion doesn’t occur, but it doesn’t hurt to lower the output level a little as well.
Lastly, I don’t use dither since it really isn’t need in 24-bit recordings.
If you'd like to learn more about this 2 limiter technique, check out our video on the topic:
Optional: Weiss De-esser - Control Sibilance Prior to Distortion
For this particular song, I did use a de-esser; however, I’m showing it here after the fact, because I don’t think it belongs in every signal chain.
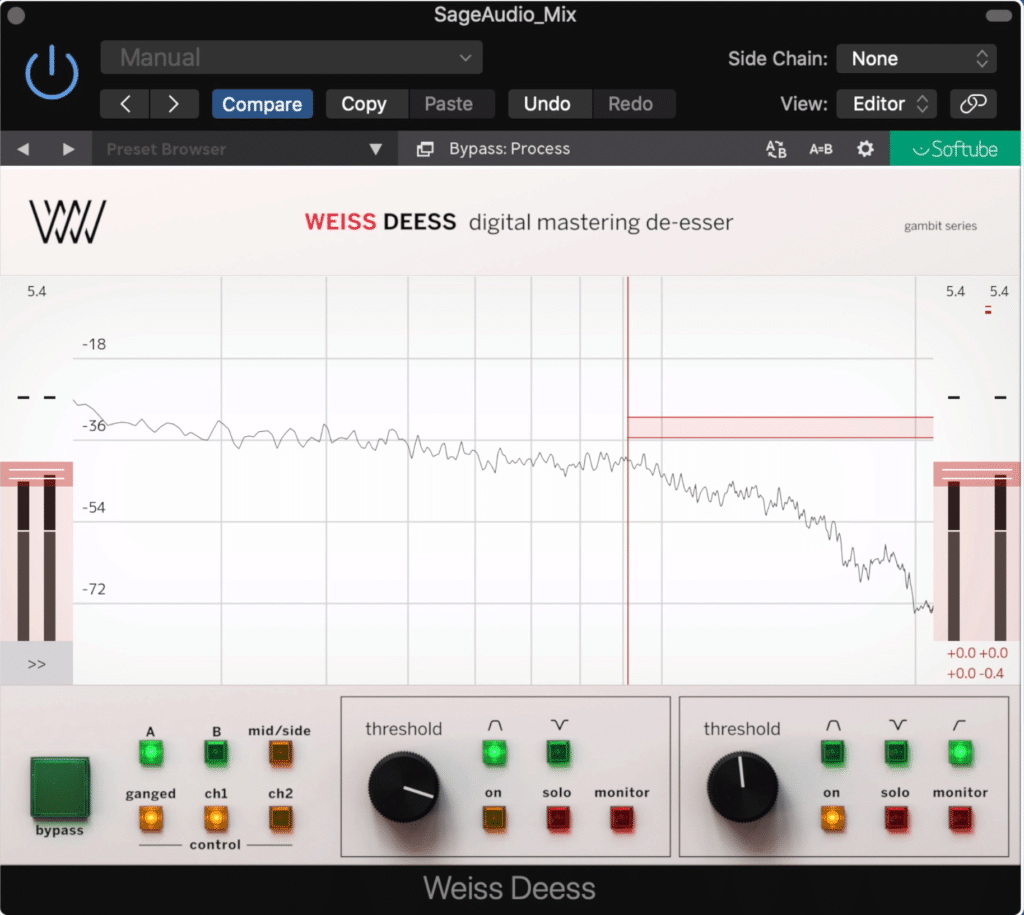
If needed, a de-esser before the soothe2 plugin can help tame shrill sibilance.
This mix in particular had some harsh sibilance that needed to be handled earlier on. I put this plugin prior to soothe 2 to help control the high-frequency range.
I used a quicker attack, longer release, and used only the high pass filter de-esser. Furthermore, I kept the range smaller to avoid significant compression.
Conclusion
Although there is no such thing as the best mastering chain, this is a great one to use if you’re looking to try something new.
The quality of the plugins, their order, and how they’re implemented help to create an impressive master.
Try this chain out, and maybe combine it with other methods like parallel compression to see if it augments your masters. If it does, let us know in the comment section of the video.
If you’re looking to hear your music mastered with an all-analog signal chain, send it to us here:
We’ll master it for you and send you a free sample to review.


