How to Make Any Master Sound Better in 3 Easy Steps | Best FREE Mastering Secrets Revealed!
Time Any Dynamics Processing to the Track’s BPM
Use Linear Phase Processing when Creating High-Pass Filters
Introduce Dynamic Equalization or Expansion before Limiting
How to Make Any Master Sound Better in 3 Easy Steps | Best FREE Mastering Secrets Revealed! - in Depth
As the name of this post suggests, we’re looking at simplistic and easy ways to improve a master. Nothing here is too complex or requires too much of your time and energy.
But, each step can have a big impact on the quality of your master.
We’ll cover each one of these steps, describe why the step is important and beneficial, and then listen to the technique being performed on a stereo mix to get a better understanding of each.
If you’re an artist or engineer, and you have a mix that you’d like to hear mastering, send it to us here:
We’ll master it for you and send you a free mastered sample for you to review.
Time Any Dynamics Processing to the Track’s BPM
Dynamics processing, whether it’s compression, expansion, transient shaping, limiting, or saturation is at the heart of mastering.
So much of mastering comes down to how the various dynamics of the master are controlled.
You might have 4 or 5 dynamics processors being utilized for different purposes on a master - each shaping the sound. Despite their separate roles, there’s one thing that can uniform amongst all of them.
Although it’s great to set your attack and release settings to what sounds best, it’s also a great practice to set it to the BPM of your track. Ideally, a plugin will be able to sync to the BPM automatically, but this is rarely the case.
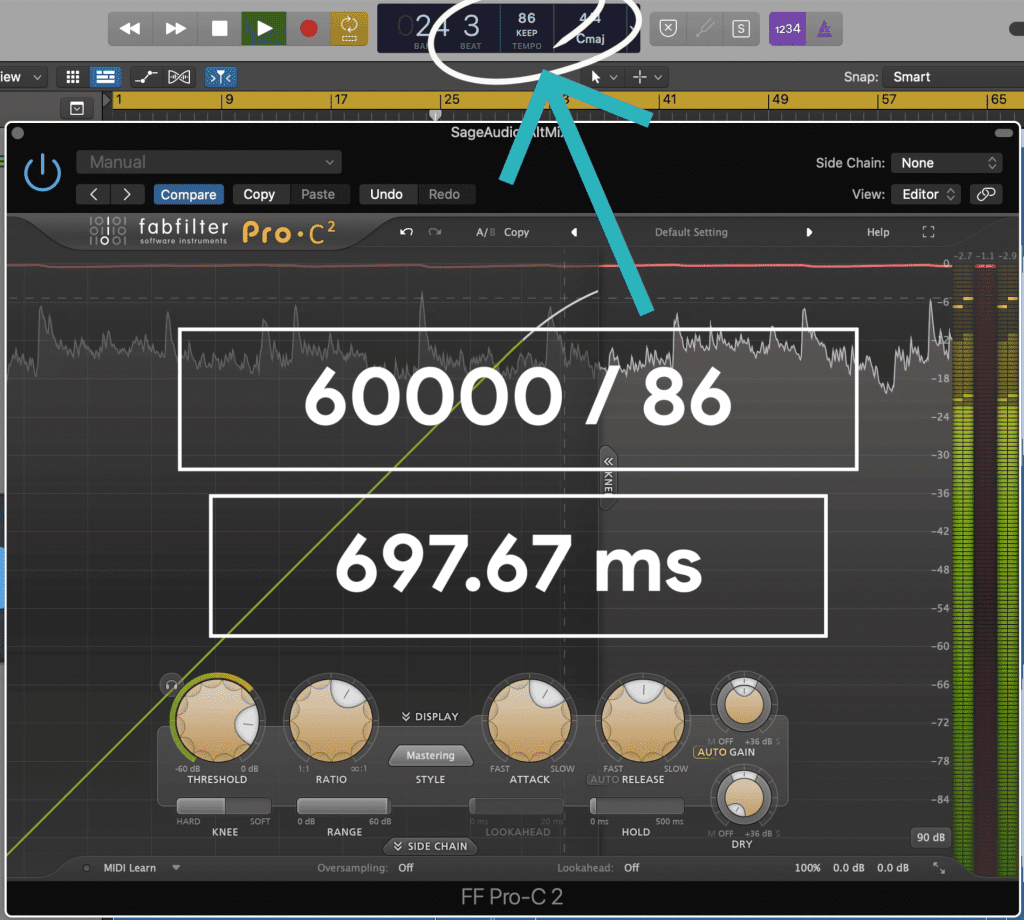
Divide 60000 by your BPM to get 1 quarter note in milliseconds.
If you want to set the BPM of your dynamics processor to the BPM of the track you’re working on, and it doesn’t let you do this within the plugin, simps follow this easy equation:
60000 / BPM.
This will give you the time of 1 quarter note in milliseconds. Enter this time into your compressor, expander, or other processor and you’ll find that your master sounds a little more musical.
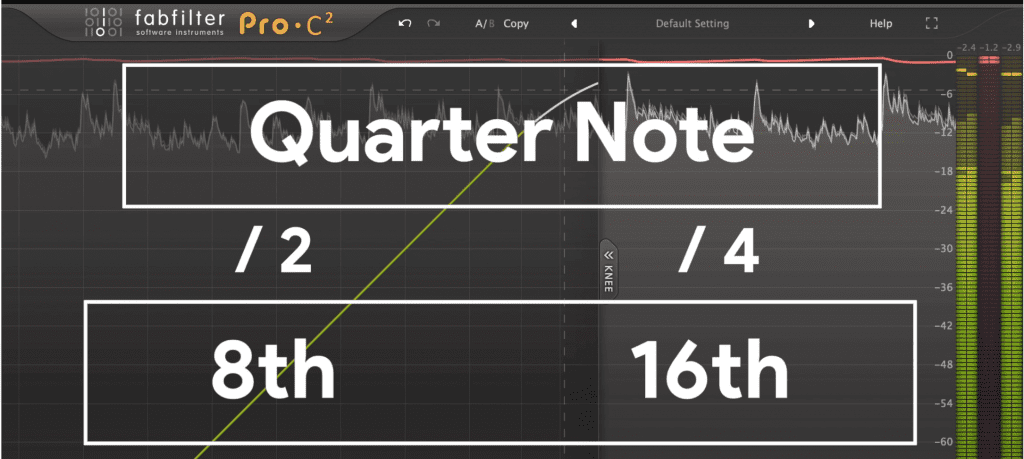
Divide this number further to get 8th and 16th notes.
If a quarter note interrupts an aspect of the mix or compresses in a way that doesn’t flow with the timing of the sound, try dividing quarter note, by 2 or 4 to get 8th and 16th notes respectively.
Or you can multiply it by 2 to get a half note for a smoother, less dynamic sound.
Lastly, try multiplying the original value by 1.5 to get dotted notes or .667 for triplets.

Shown is how to get dotted notes and triplets.
Try these various settings out and find one that works best for the song you’re mastering. Odds are, the different processors will have different timings due to the unique jobs they’re performing, but as always use your ears.
To learn more about compression techniques, check out this video:
Use Linear Phase Processing when Creating High-Pass Filters
High-pass filtering isn’t super common when mastering, but it can play a vital role. If you use a mid-side equalizer, you can attenuate up to 130Hz on the side image and up to 20Hz on the mid image.
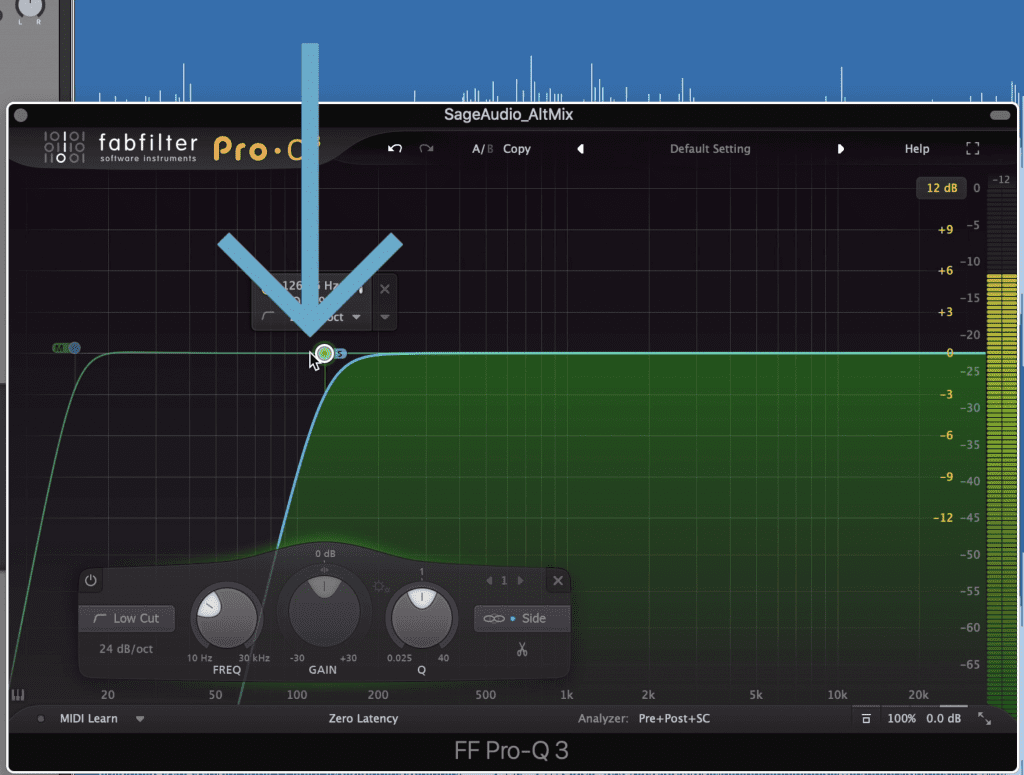
A high-pass filter can be used on the side image to make the low-end mono.
By cutting up to 130Hz on the side image you make the low-end mono , and by cutting up to 20Hz on the mid-image you can increase your master’s headroom without changing anything perceivable about the track.
But, if you use certain filters you may be causing some unwanted phase shifts. When you use high-pass filters while using a zero-latency mode, you inevitably cause changes to your phase.
The pink line that represents phase shows how the high-pass filters alter phase.
If we use the Bertom Analyzer, and we observe the pink line, we can see that changes to the low-frequency spectrum drastically alter the phase of the signal in that area.
This means that the changes we’re making may not be entirely accurate due to phase cancellation.
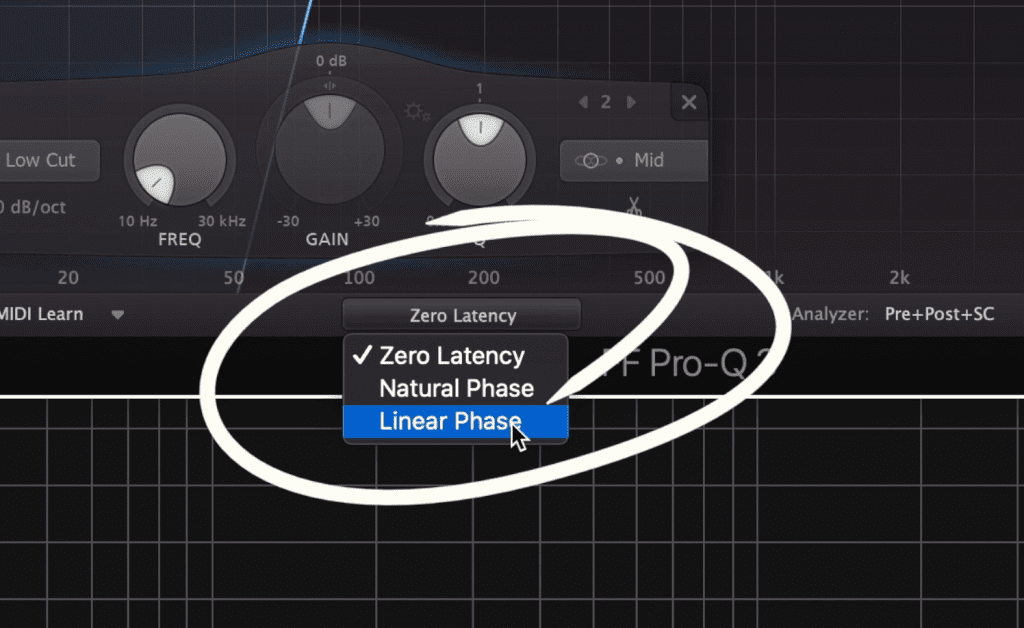
Using linear phase avoids changes to the phase of a signal.
If we were mixing this wouldn’t be a big issue, but since we’re mastering, any change to the signal can have a huge impact.
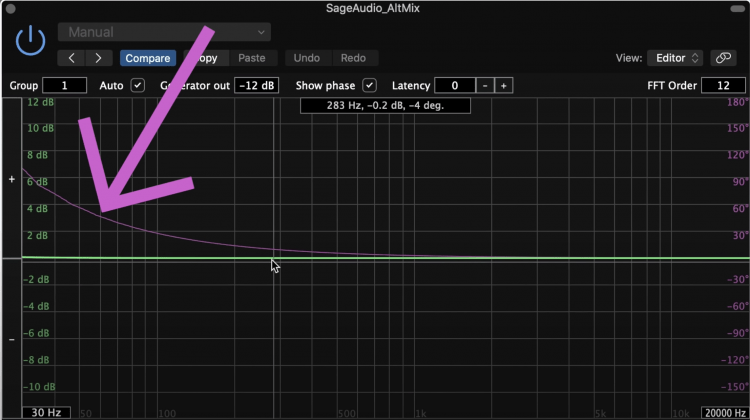
That’s why it’s wise to use linear phase processing when making these types of cuts during a mastering session. By doing so, phase shifts like the ones shown won’t occur as drastically, if at all.
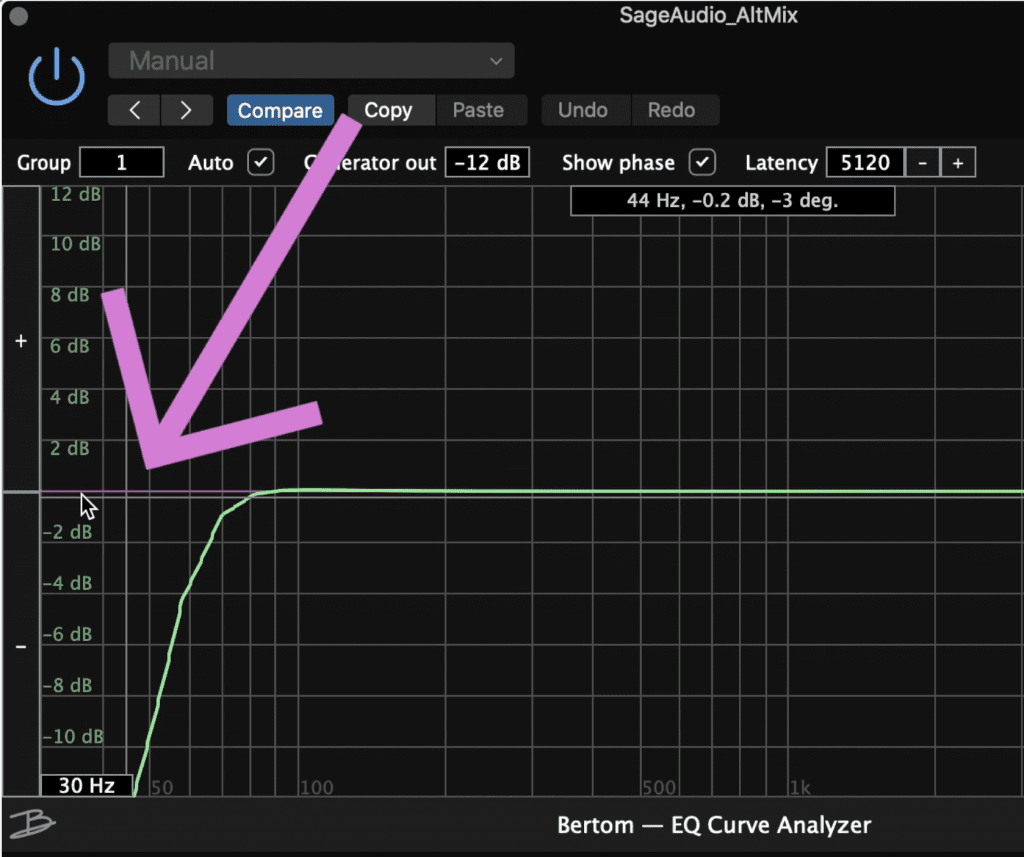
Notice that the phase is almost entirely unaffected.
This means you’ll have more accurate equalization. Although this is helpful, keep in mind that Linear phase may not always sound better. What sounds better will depend on your preference, and the source material you’re working on.
For more information on Linear phase and how EQ shifts the phase of a signal, check this out:
Introduce Dynamic Equalization or Expansion before Limiting
Limiting is often thought of as a killer of dynamics, but, by placing a dynamic equalizer or multi-band expander before the limiter, you can really retain a song’s dynamic range.
Dynamic equalization before limiting can add some needed dynamics back into your signal.
There are a lot of great presets that you can use for this, but it’s probably best to use your ears and listen intently to what you’d like to expand.
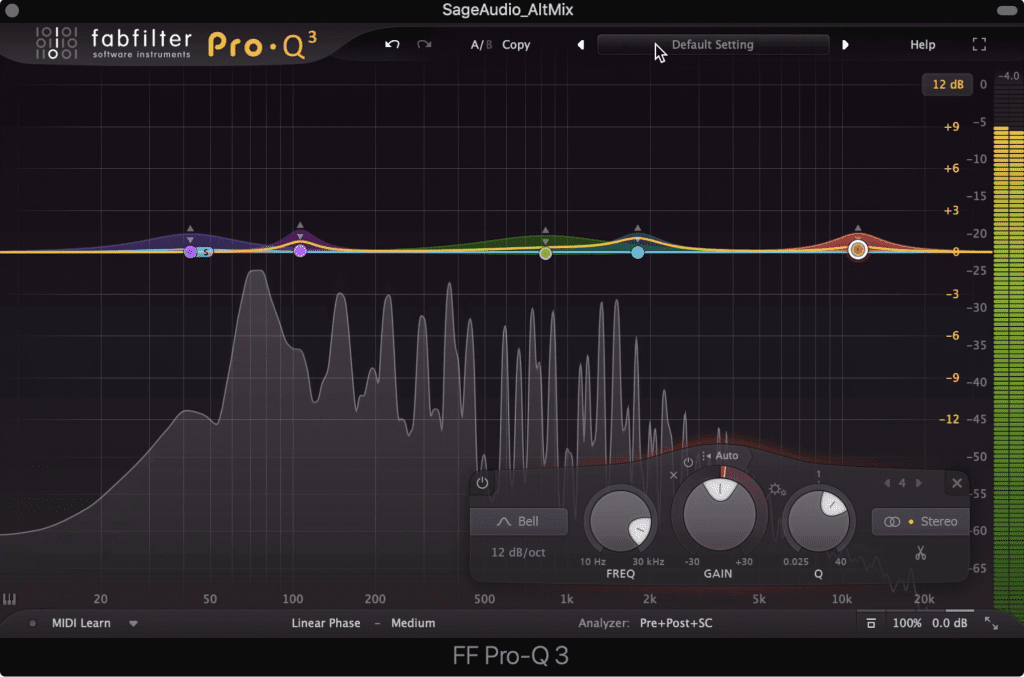
If you think you’ll need a fair amount of filters, try dynamic equalization. The FabFilter Pro-Q 3 is a great option since it allows you to create multiple bands, change their Q settings, and adjust the range of the expansion.
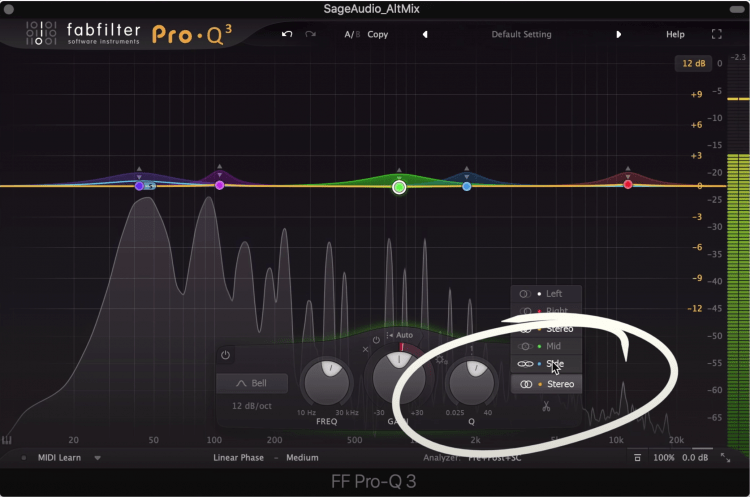
These bands can be made mid or side, making the stereo image dynamic as well.
Additionally, you can use mid-side dynamic equalization which will make your stereo width dynamic as well.
Keep in mind that you won’t be able to adjust the attack and release times of these bands, but, the Pro-Q 3 will use slower times for low frequencies and faster times for higher ones to ensure that distortion doesn’t occur.
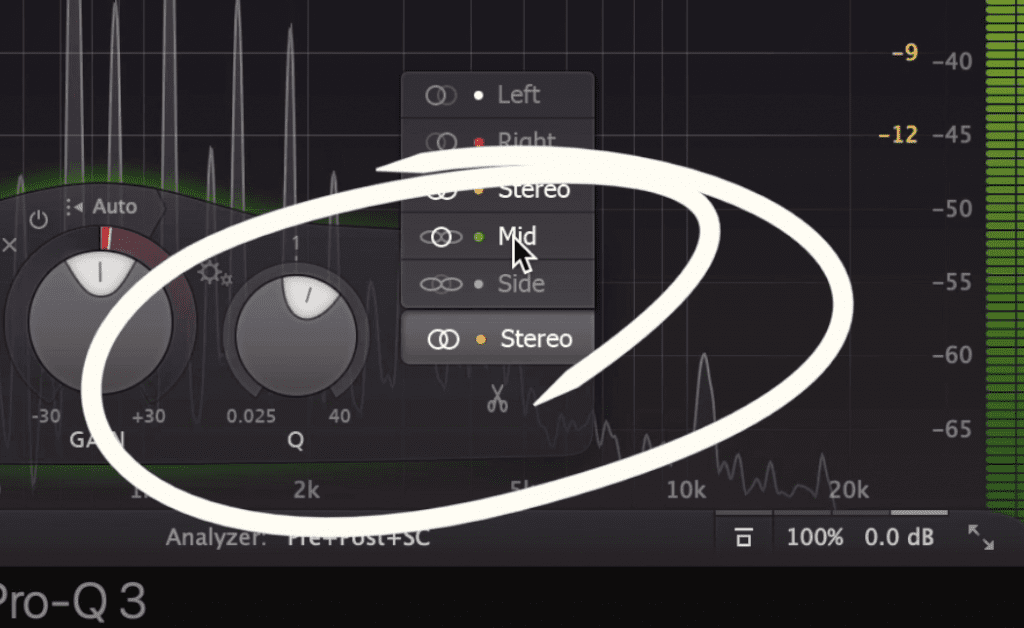
Shown is how to alter a band's image.
If you’d prefer to adjust the attack and release times try using a multi-band compressor for multi-band expansion.
If you’re in doubt about where to start, you can expand the kick and snare, which happen roughly around 80Hz and 240Hz respectively.
Then, you can expand the high-frequency range to add some air to the master and make the cymbals, high-hats, aspects of the snare, and other instruments more dynamic. In my opinion, using expansion on these frequencies can be a lot more effective than simply equalizing them.
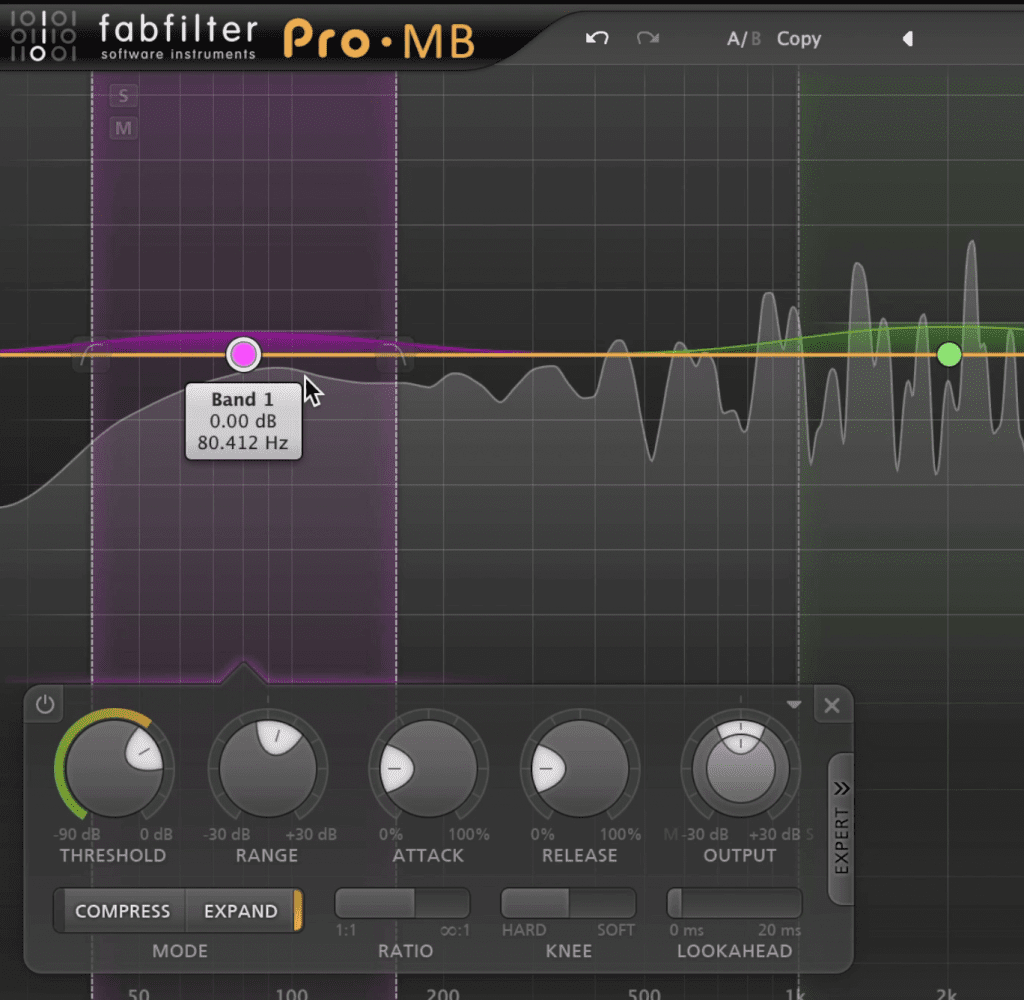
Use multi-band expansion if you want more control over the filter's attack and release settings.
If you adjust the threshold just right, you can avoid amplifying the frequencies for unwanted sibilance, and only have the expansion for the instrumentation you want - something that wouldn’t be possible with a regular shelf filter.
Lastly, try expanding some of the mids to get the vocal to cut through. This might not work in every situation, but you can center the frequency on the vocal to help.
If you can’t find it or you’re in doubt, 2kHz is a good center frequency for bringing the vocals forward.
Before you limit, make sure that your signal isn’t peaking prior to being sent to the limiter.
Conclusion
What’s great about these techniques is that they’re all easy to accomplish. Whether it’s using one processor with automatic settings, performing a simplistic calculation, or simply changing an equalizer’s settings to linear phase, these steps can really improve your master.
If you’re using dynamics processing, try setting the attack or release times to be in-time with the tempo of your track.
If you’re noticing that your equalization doesn’t seem as accurate as you want it to be, try linear phase processing.
And if you feel that your master is lacking dynamics, put a dynamic equalizer or multi-band expander before your limiter.
If you’re an artist or engineer, and you have a mix that you’d like to hear mastering, send it to us here:
We’ll master it for you and send you a free mastered sample for you to review.


