How to Use Mid-Side Processing Like a Champ before Mastering | It Involves Your Stereo Imaging
We’ve all been there - we take a break from our mix, thinking that after we’ve given our ears their much needed respite, we’ll return to the same, sonically spectacular masterpiece we left only moments ago.
Unfortunately, what we often return to is a messy, muddled, imaging nightmare. When faced with such a task, if you don’t know where to start, it can be both daunting and frustrating.
Thankfully, there is one trick that although is by no means a panacea, can help clean up that mix and get you one step closer to sending your track off to mastering.
Its called mid-side processing, a term thrown around often in the audio community but rarely demonstrated in any practical manner - but if you follow certain steps, and take the time to understand it on a fundamental level, you’ll find yourself in possession of a new and powerful tool.
The mid-side processing discussed here will be in regards to equalization, how to affect your stereo imaging using mid-side equalization, and how you can alter it’s stereo output to further these effects.
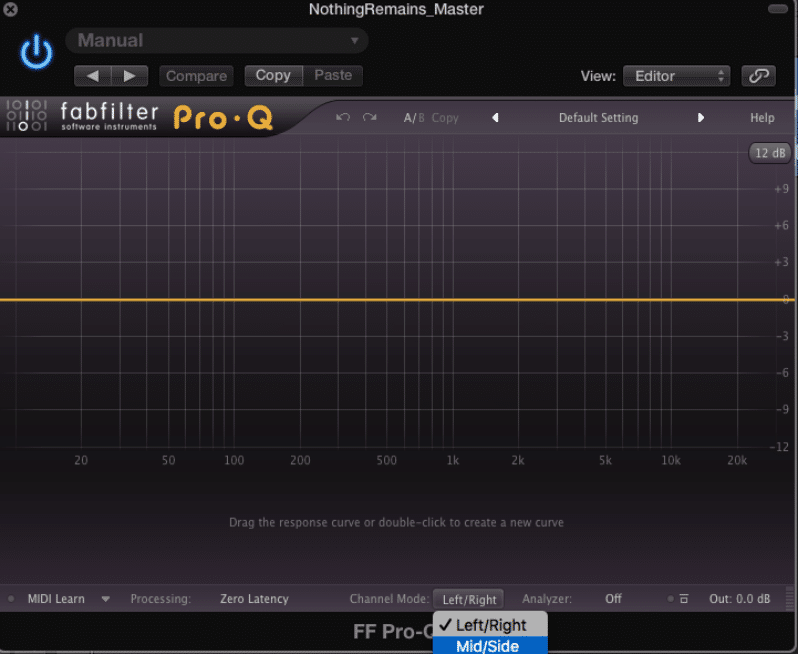
The first thing you need to do is enable the mid side function of your equalizer - that is, if its default function is “Left/Right.” Although this may seem obvious, it is without a doubt how to start this process.

Change Setting to Mid-Side Processing
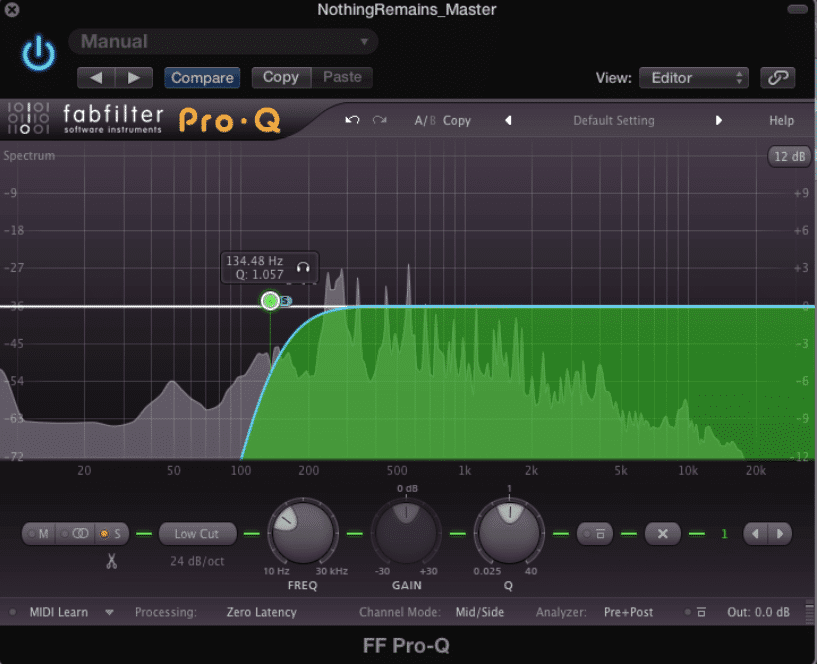
Once the channel mode of your equalizer has been changed to “Mid/Side,” create a low-cut filter on your side channel, and move it up to anywhere between 100 to 200 Hertz.
Personally I always set mine to roughly 135 Hertz - it seems like a great mid ground, but more likely it’s simply a force of habit.

High-Pass Filter Low-Frequencies During Mid-Side Processing
What you have effectively done at this point is significantly attenuate the low end in your stereo signal. In turn all sonic energy, all frequencies below your side-low-cut filter have become mono.
- If you’d like to see how this has affected your output, you can set your analyzer to a “Pre+Post” equalization setting to see the difference.
- Also you can add a sound field imager after this equalizer, such as Isotope’s Insight, in the master signal to examine how changing the side-low-cut filter affects the overall stereo imaging.
To speak about this musically, the kick and bass are now centered , and any processing such as delay or reverb that had caused those low frequencies to bleed into the stereo image have been attenuated.
This will “tighten” up the low end so to speak, and help to alleviate the aforementioned mud.
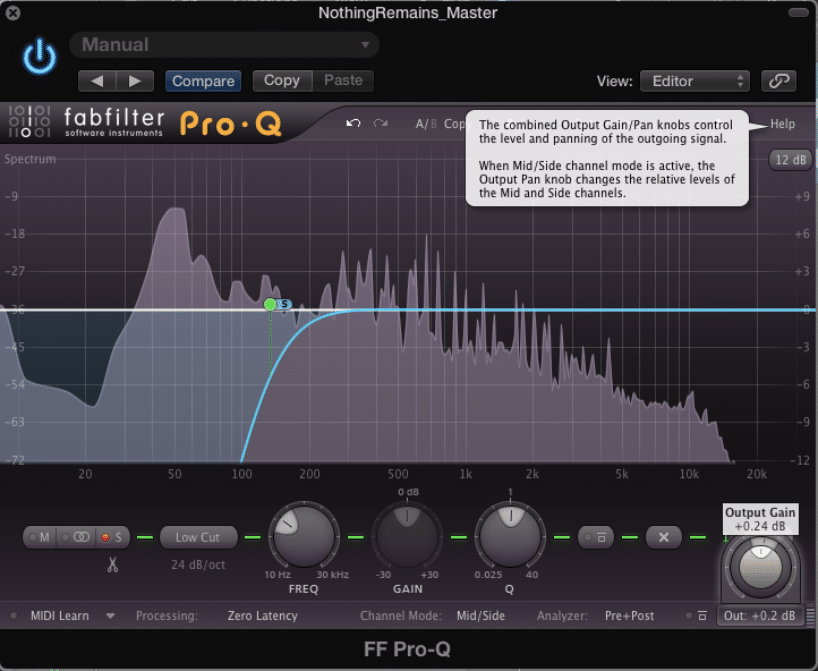
This is one last step that can give you even more control over your mix by altering its stereo image. A pan pot is a typical function on an equalizer’s output - especially one that is a step or two up from a stock plugin.
In most scenarios, pan pots will either send the signal to the left or the right - when Mid/Side is activated, the two options become Mid and Side respectively.
As shown in the image above, you can alter the output by increasing or decreasing either the mid or the side of your mix.
As you'd imagine, increasing the gain for the side signal will result in a wider mix ; conversely, increasing the gain for the mid signal will focus the mix.

Experiment with High-Pass Filter Frequency Points During Mid-Side Processing
Conclusion
Mid-side processing can be powerful if used well and can take us one step closer to sonic bliss. Experiment with this process until you feel comfortable with it. Once you are, you can reassess how close you are to a finalized mix.


