I Tested 3 Plugins Our Subscribers Recommended
Invisible Limiter G2 - A.O.M
Boost Rev. B - URSA DSP
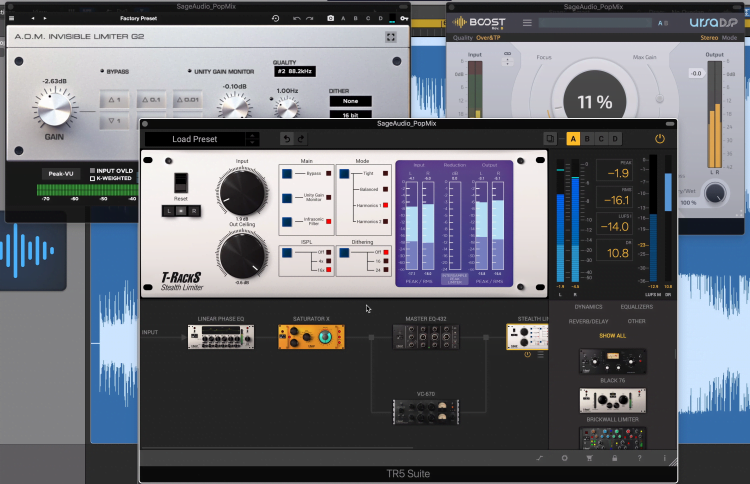
TR5 Suite - IK MultiMedia
Our subscribers definitely know a lot more plugins than we do. That’s why when they recommend something, we listen!
Let's look at 3 plugins recommended by subscribers
Today we’ll cover 3 plugins that our subscribers seem to recommend a lot. We’ll cover the functionality of each one of these plugins, and listen to them on some various genres to hear how they sound.
If you’re an artist or engineer, and you have a mix that you need mastered, send it to us here:
We’ll master it for you and send you a free sample of it to review.
Invisible Limiter G2 - A.O.M
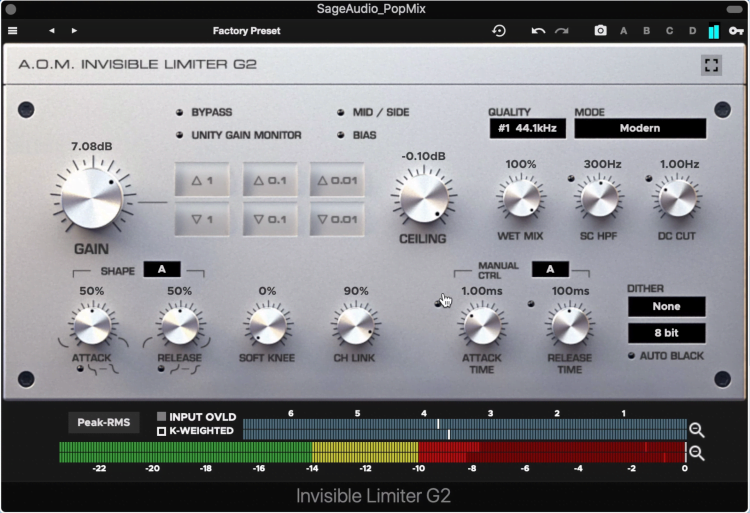
The invisible limiter has a great timbre to it, despite being marketed as a transparent limiter.
Invisible limiter ironically has a really cool timbre to it. Despite the name, this is a great limiter to use if you’re trying to add some coloration to the signal you’re mastering.
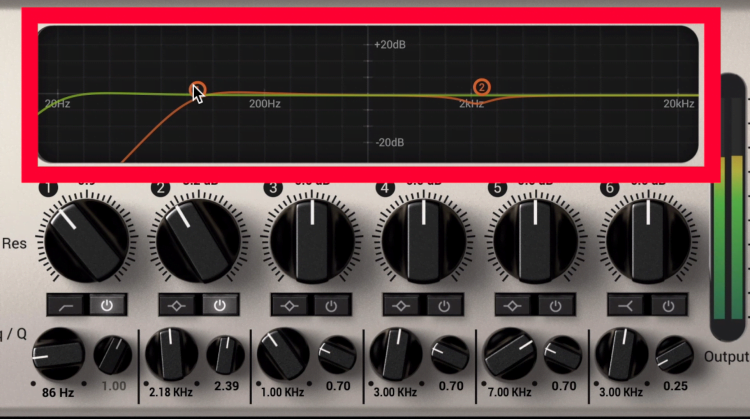
On the left side is the gain, and controls to fine-tune how much gain you’re adding. You can also internally bypass the plugin, switch to mid-side processing, enable a unity gain monitor to hear how it sounds with added amplitude, and introduce bias which will mildly affect the frequency response.
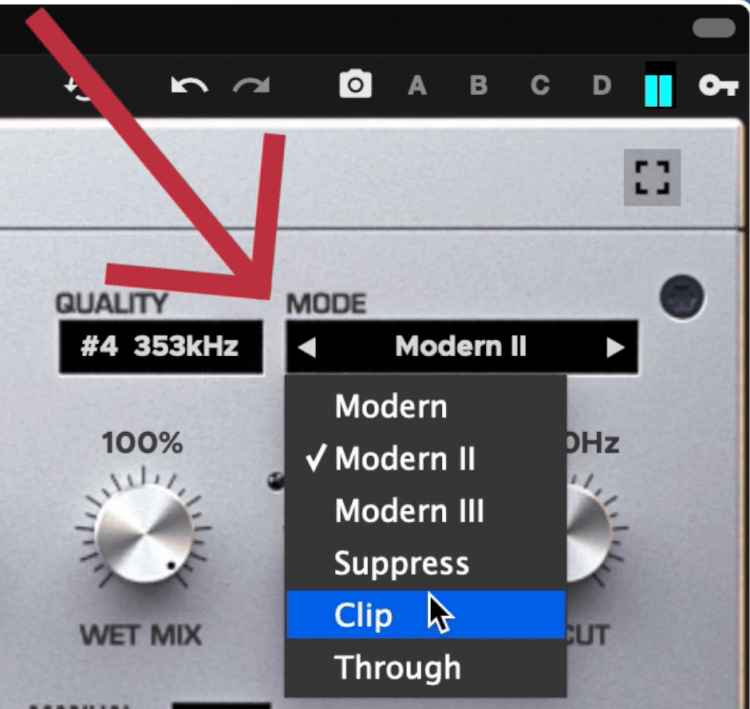
The plugin includes multiple algorithms.
To the right, you can lower your ceiling, affect the wet/dry, introduce a high-pass filter, and a DC cut if you have a DC bias.
Up top, you can increase the oversampling, and change the Mode, which introduces a different limiting algorithm with a unique timbre.
Below, you can manually affect your attack and release time, as well as alter the shape of this release.
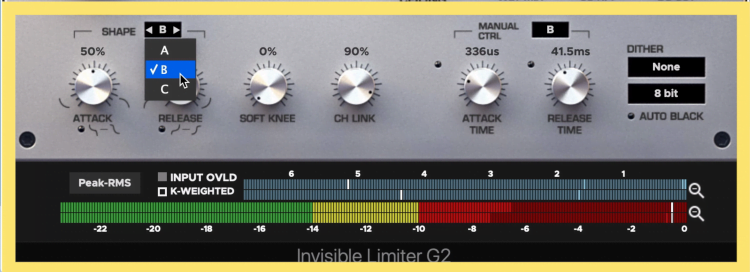
In the bottom section you can alter the attack and release, as well as the shape of the limiting.
The shape of the attack and release can be controlled even more to create a unique timbre. You can also change the soft-knee setting to include more or less compression and link or unlink your channels.
Lastly at the bottom, you can switch between measurement types to know how your limiting is affecting the signal.
For more limiters, here's a helpful video:
Boost Rev. B - URSA DSP
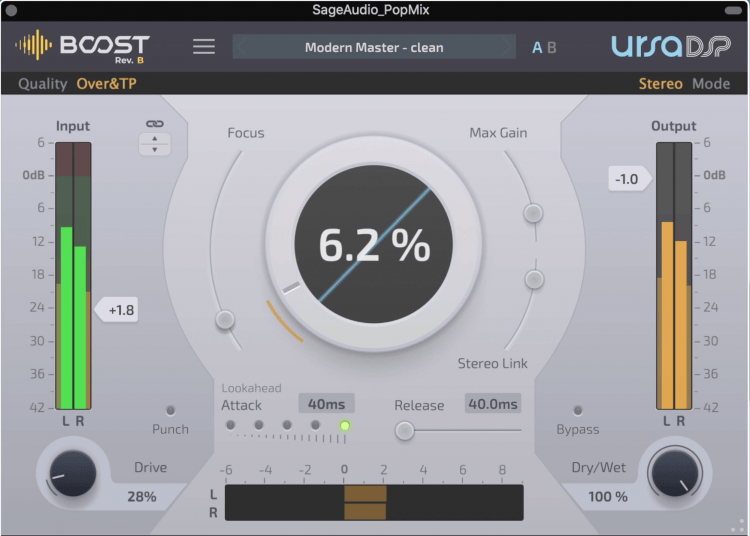
Boost includes multiple types of processing, like maximization, limiting, and more.
Boost in a plugin we’ve covered before, but, they just updated the plugin with some great new functions.
This plugin includes multiple forms of processing that are super helpful when mastering. It’s a limiter, a maximizer, a saturator, a transient expander, and a low-level compressor.
This makes it perfect for augmenting quieter aspects of the signal, making it sound full with a little distortion, and then pushing the signal higher with the limiter and maximizer.
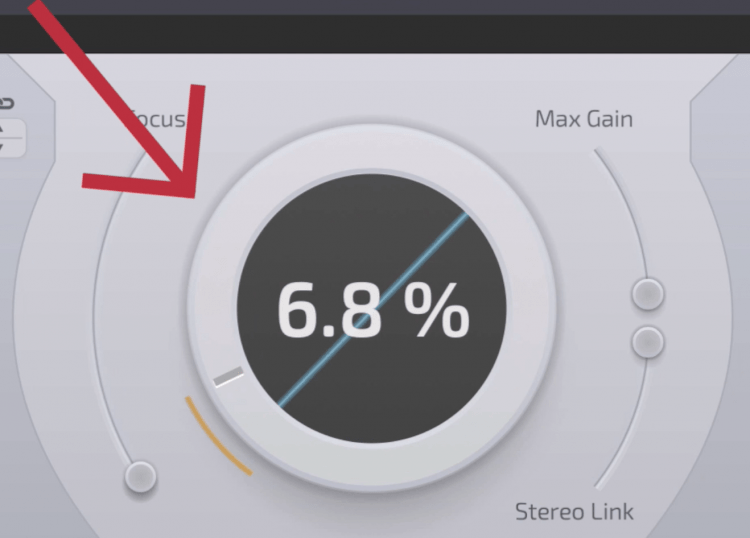
The dial in the middle is maximization.
For maximization, use the big dial in the middle. To introduce low-level compression, increase the Focus slider’s value.
To cause saturation, increase the drive dial, or switch it to Punch for transient expansion.
To engage the limiter, increase the input - the signal will automatically hit a brick wall ceiling.
What’s new is a quality section with which you can introduce oversampling and true peak detection.
You can affect the stereo link as well.
Additionally, the signal can be stereo or mid-side, and stereo linking can be disabled.
All-in-all this is a great plugin to get if you’re just starting to master music and you want something that’ll cover a lot of bases. But it’s also great if you’ve been mastering for a while, since the quality of the plugin is up there with some of the best mastering software.
Let’s listen to the plugin and it’s various functions. We’ll use it on the same pop and rap mixes as before.
For more plugins recommended by subscribers, check this out
TR5 Suite - IK MultiMedia
With this last plugin, we’re cheating a bit. This isn’t so much a plugin as it is a matrix for creating a signal chain with multiple plugins.
But, people swear by this developer for this mastering, so we need to take a look at it.
This suite would be great for developing a vocal chain, or maybe affecting a stem or bus, but it works really well for mastering too.
It makes routing super simple. Just double-click the plugin that you want to include on the right. Do this for a couple of plugins then drag them into the place you want them.
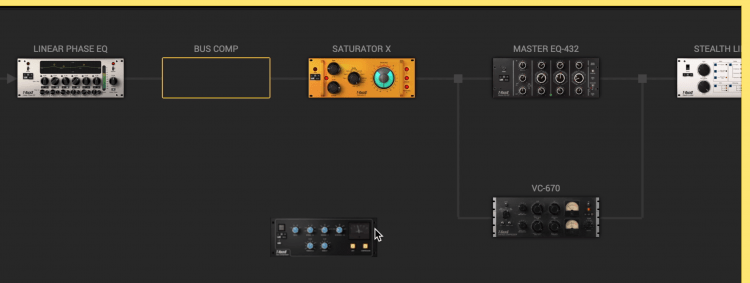
The routing can be altered very easily from within the suite.
If you want to make one parallel, simply drag it below another plugin and the suite will automatically put it in parallel.
You can even change when the signal leaves the main chain and when it joins it again.
Although we can’t cover every plugin here in-depth, let’s look at an example chain that could work well when mastering.
I’ll start with a linear phase EQ. I’ll enable its linear phase setting, and switch the plugin to mid/side routing. Then I’ll create a slight cut on the mid up to about 20Hz, and a high pass filter up to about 100Hz on the side.
Here are the settings I used for the first insert.
This way the low-end stays mainly mono. Then I’ll cut a little of 2k on the side image to make the mono vocal stick out more.
Next, I’ll use a saturator with very subtle settings since we’re mastering. I chose the Steel setting, but, there are a lot of options here.
Then I split the signal and sent part of it to a parallel compressor. With the compressor, I heavily compressed the signal and then adjusted the output to introduce the squashed signal subtly back in.
At the same time, I used mid/side equalization on the primarily signal path, and increased some of the highs on both the mid and side, some of the kick and vocal ranges on the mid, and a little low mids on the side to add some body.
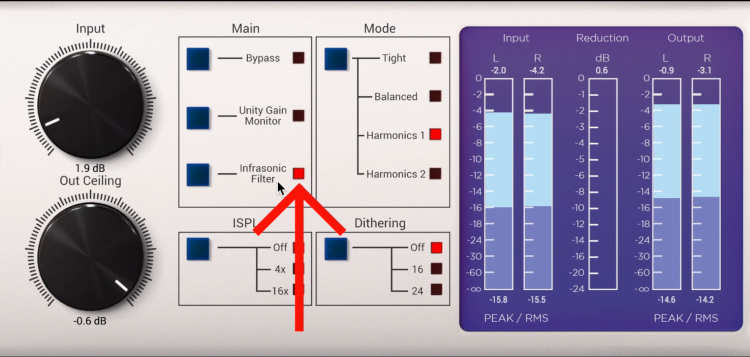
The infrasonic filter increases headroom without reducing perceivable signal.
I ended the chain with the Stealth Limiter, which has a really nice and transparent sound. I used an infrasonic filter to cut out low frequencies which would never be perceived but still take ump headroom.
I also increased oversampling to make the limiting more accurate. I switched between the various modes and settled on harmonics 1 for the mild distortion it imparted on the signal.
You may have noticed already, but the Suite shows the Peak, RMS, LUFS, and dynamic range during the processing.
This is super helpful if you have a target loudness or range in mind. Also, it lets you switch between multiple chains up top - so if you’re experimenting with multiple settings you can quickly swap between them.
Now I definitely didn’t cover everything there is to cover about this suite, but hopefully, this gives you a good just of how to master with this plugin. I think right now this suite, which includes 9 of these mastering plugins is $150 so it’s a pretty great way to get introduced into mastering.
Conclusion
Thanks to our subscribers, we’ve been introduced to new and exciting plugins that make mastering easier, more enjoyable, and most importantly make our masters and videos better.
Some of these plugins are more advanced, and some are easier to pick up. Regardless, there’s something here for any engineer no matter how long they’ve been mastering music or producing.
If you’re new to mastering, try the IK Multimedia suite, and maybe Boost.
If you’re looking for a new and versatile limiter, try Invisible Limiter. And if you’re in need of low-level compression and maximization, Boost is a fantastic plugin to try out.
If you’re an artist or engineer, and you have a mix that you need mastered, send it to us here:
We’ll master it for you and send you a free sample of it to review.


