Best Vocal Chain
Optional: Gate
Insert 1: FabFilter Pro-Q 3, Subtractive EQ
Insert 2: Weiss Deesser, Sibilance Compression
Insert 3: Oeksound Soothe2, Sibilance Compression
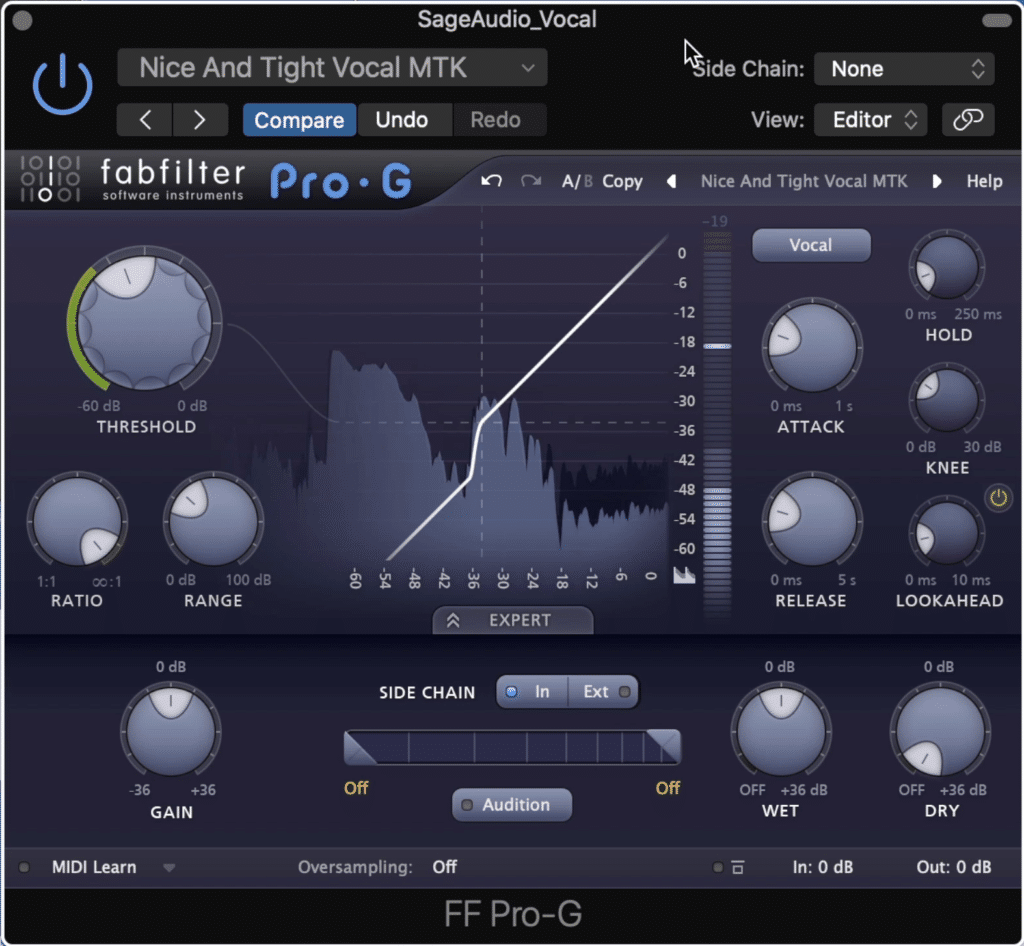
Insert 4: FabFilter Pro-C 2, Compression
Insert 5: FabFilter Saturn 2, Saturation
Insert 6: Seventh Heaven Pro, Room Emulation
Insert 7: Oxford Inflator, Compression
Send 1: Seventh Heaven Pro, Reverb
Send 2: Arturia Memory Brigade, Delay
Send 3: Antares Auto-tune, Vocal Tuning
Getting the right vocal sound can range from being a challenge to an absolute pain. It’s by far, the most obsessed-over aspect of mixing.
Fortunately, it doesn’t have to be frustrating. Granted there will always be some tweaking to do, however, some signal chains can be used on just about any vocal to make it sound better.
The vocal chain that we’re showcasing today follows both conventional and unconventional mixing techniques. It utilizes some fantastic plugins , but know that if you don’t have the same library of plugins, you can substitute some of the ones here with the ones you have.
Also, it helps to keep in mind that this is somewhat subjective and depends on a lot of variables. Different vocals will require different chains, but at the very least, this chain will provide a great foundation from which you can work.
If you’re working on a mix, and you’d like to hear how it would sound mastered, send it to us here:
We’ll master it for you and send you a sample to review.
Optional: Gate
Gating is optional, but can be helpful for quickly cutting out unwanted background noise.
Before we start getting into the signal chain, we do have one option step - gating. Although it’s best to edit out any parts of the vocal that you don’t want to be present, gating can save you some time, or make the vocal sound a little more natural.
I like to utilize the range of a gate to attenuate the signal if it falls below the threshold , but not cut it out completely.
Additionally, it’s a good idea to use gating first in your signal chain if you do intend to use it since this ensures that breathes or other unwanted sounds don’t get amplified by other forms of processing.
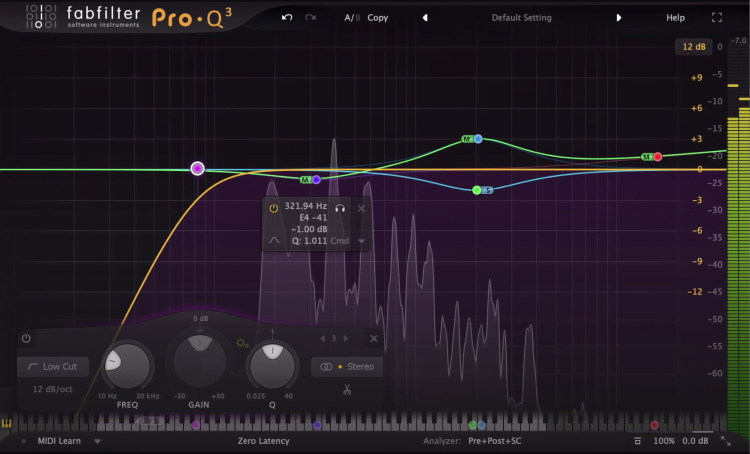
Insert 1: FabFilter Pro-Q 3, Subtractive EQ
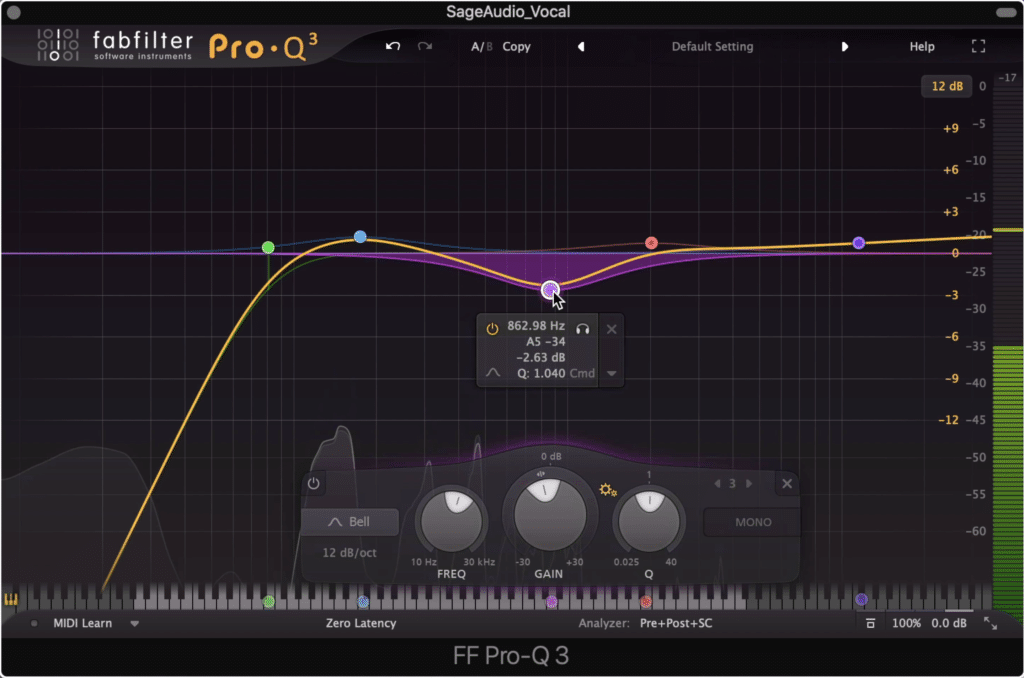
Equalization is a powerful tool - use it early on to shape the vocal.
Subtractive equalization is a great first step - with it you can attenuate any aspects of the frequency response that you don’t want to be amplified later on.
You can also subtly amplify aspects of the vocal , but keep in mind that this is going to cause more aggressive subsequent processing.
Additionally, as we stated earlier, feel free to use a different clean equalizer here instead of the Pro-Q 3.
Insert 2: Weiss Deesser
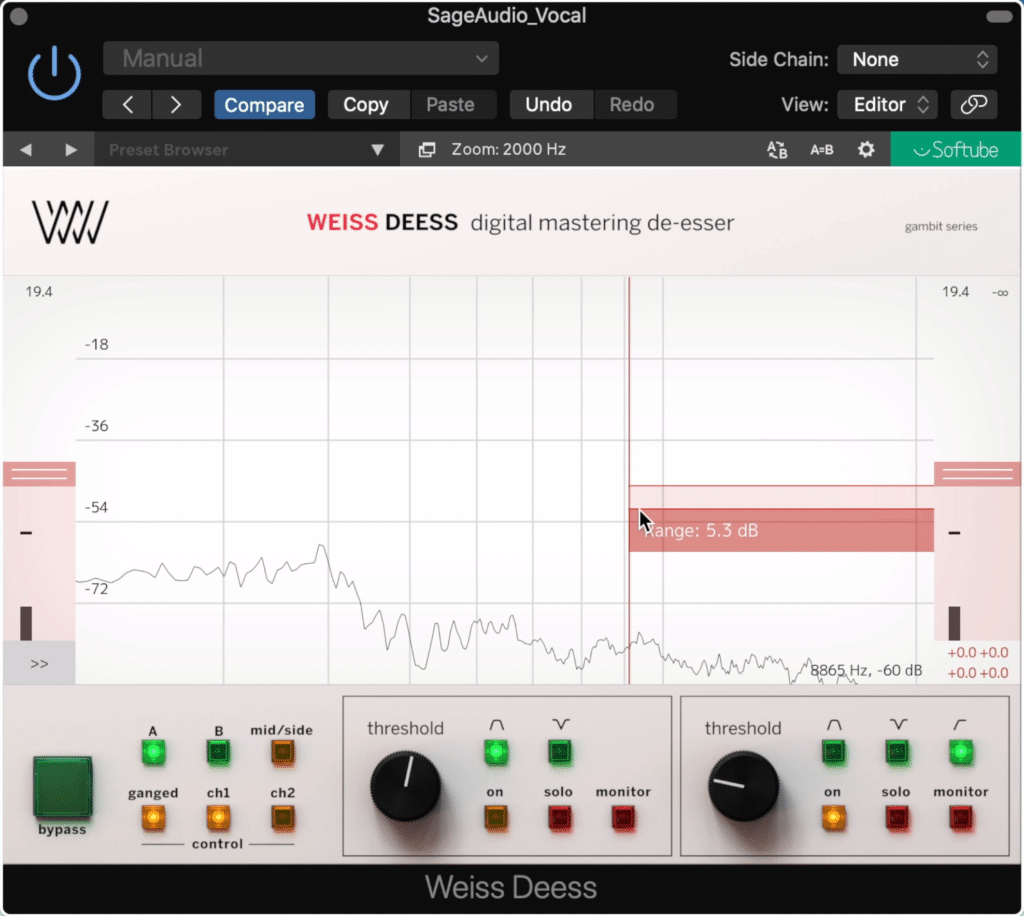
Using a deesser helps control sibilance before it gets amplified by saturation or additive equalization.
Next up, it’s time to attenuate any additional or unwanted sibilance. Taking care of this now ensures that you don’t need to use aggressive processing later on.
How much you attenuate will depend on the vocal performance and content ; however, I like to avoid compressing more than 5dB if possible.
If your vocal doesn’t need to be de-essed, then of course skip this step, but it's included here since most vocals will need it.
Insert 3: Oeksound, Soothe2
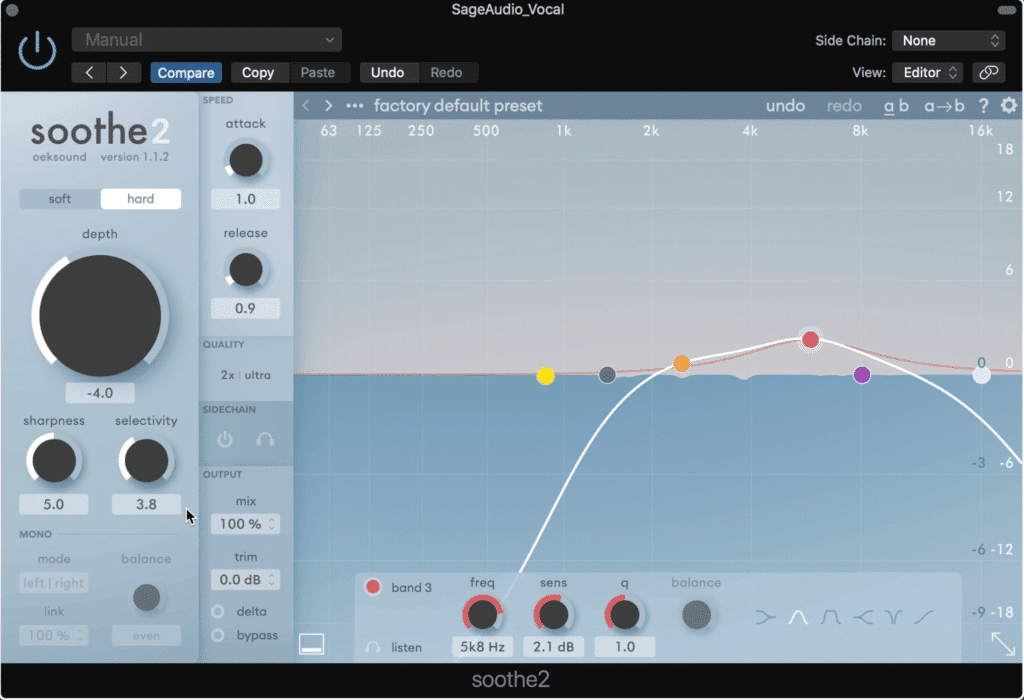
This unique plugin helps dynamically attenuate sibilance.
Soothe2 is a unique plugin. It dynamically attenuates the signal in particular areas to reduce any harshness it may have.
I like using this plugin in tandem with the de-esser to pick up anything that it might have missed.
When using this plugin, I’ll use the ultra-resolution mode to minimize the effect of phase cancellation and unwanted artifacts.
Additionally, I keep the attenuation pretty minimalistic - which I monitor using the delay function to ensure too much isn’t being cut out.
Furthermore, using the bands available I make sure I’m only allowing the plugin to affect the high-frequency range, somewhere around the sibilance of the vocal.
Insert 4: FabFilter Pro-C 2, Compression

The Pro C 2 does a lot in our chain. It compresses and adds a fair amount of clean gain.
This is the stage where a lot changes. The settings we’re going to use with the Pro-C 2 should, if done correctly, add a lot gain, character, presence, and truly balance the vocal’s dynamics.
Using the vocal setting, we’ll lower the threshold until we get about 6 to 7dB of attenuation.
Furthermore, we’ll use the automatic make-up gain function and the autorelease to make the setting more program dependent and dynamic.
I’ll also set a faster attack, and turn on very mild lookahead to avoid distortion.
Lastly, to avoid any additional distortion from aliasing, I’ll use 2x oversampling. Whether or not you use this function will depend on the sampling rate at which you recorded your vocal.
The lower your sampling rate, the more likely it is that oversampling will be needed.
To learn more about compressing, check out a video on the topic which uses the FF Pro-C 2:
Insert 5: FabFilter Saturn 2, Saturation
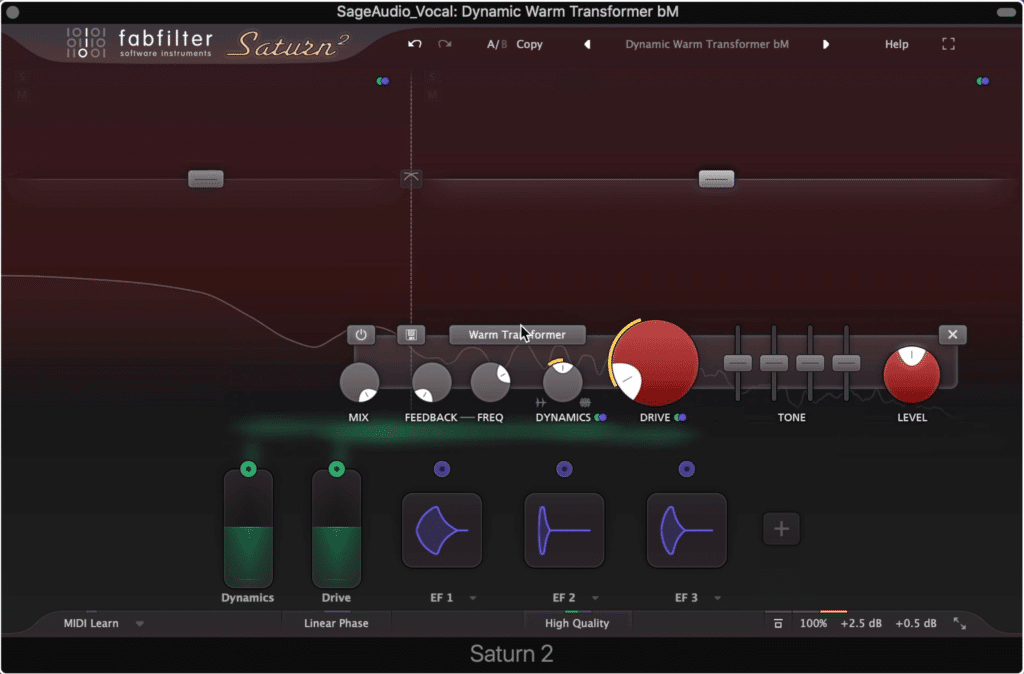
The Saturn 2 adds pleasant sounding harmonic distortion. This preset uses program dependent distortion for a more realistic effect.
With our frequency spectrum balanced, sibilance tamed, and our dynamics balanced, we can now begin to amplify aspects of the vocal.
What I want to do first is add harmonics and some unique coloration to the vocal. Using the Saturn 2, I’ll select the preset Dynamic Warm Transformer.
I find that this preset quickly adds a fair deal of pleasant harmonic distortion , and makes the sound more indicative of a recognizable classic analog sound.
Although it sounds great right off the bat, I’ll reduce the mix amount to about 40% - but use more if you find that you want a more aggressive and prominent lead vocal.
From there I’ll enable linear phase for a smoother sound, and make other small changes like adjusting the high frequencies to better suit the mix.
Although this is a great preset that employs sophisticated and dynamic analog emulation, there are other presets that will work well here. The Tube and Mythical 3d are some additional great options.
Just be sure to make changes where needed.
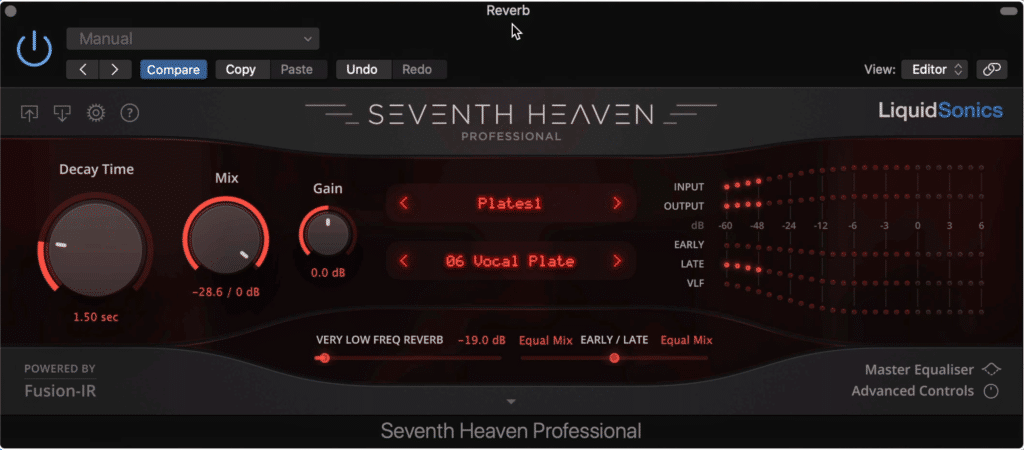
Insert 6: Seventh Heaven Pro, Room Emulation
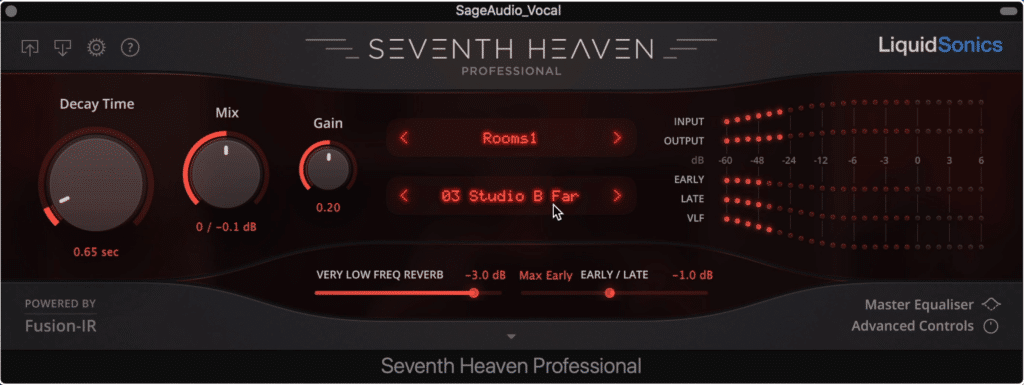
A room studio sound, subtly blended in with the vocal, gives it a more realistic sound.
Although I wouldn’t typically insert reverb this early on or use it on the main signal chain as opposed to a send, this reverb is going to be used to emulate the sound of a recording studio.
Essentially, what I want this reverb to accomplish is to create a realistic room sound, as if the microphone had subtly picked up the room reflections of the studio in which the vocal was recorded.
I’ll reduce the mix to make this effect subtle as well.
Notice that it's mixed in at a low level.
Furthermore, I’ll cycle through the different room types to find one that I think compliments the vocal nicely. Ideally, this effect will thicken the vocal and provide a realistic-sounding effect.
This plugin n particular is great for this, but other impulse response or convolution reverbs will work well.
Insert 7: Oxford Inflator, Compression
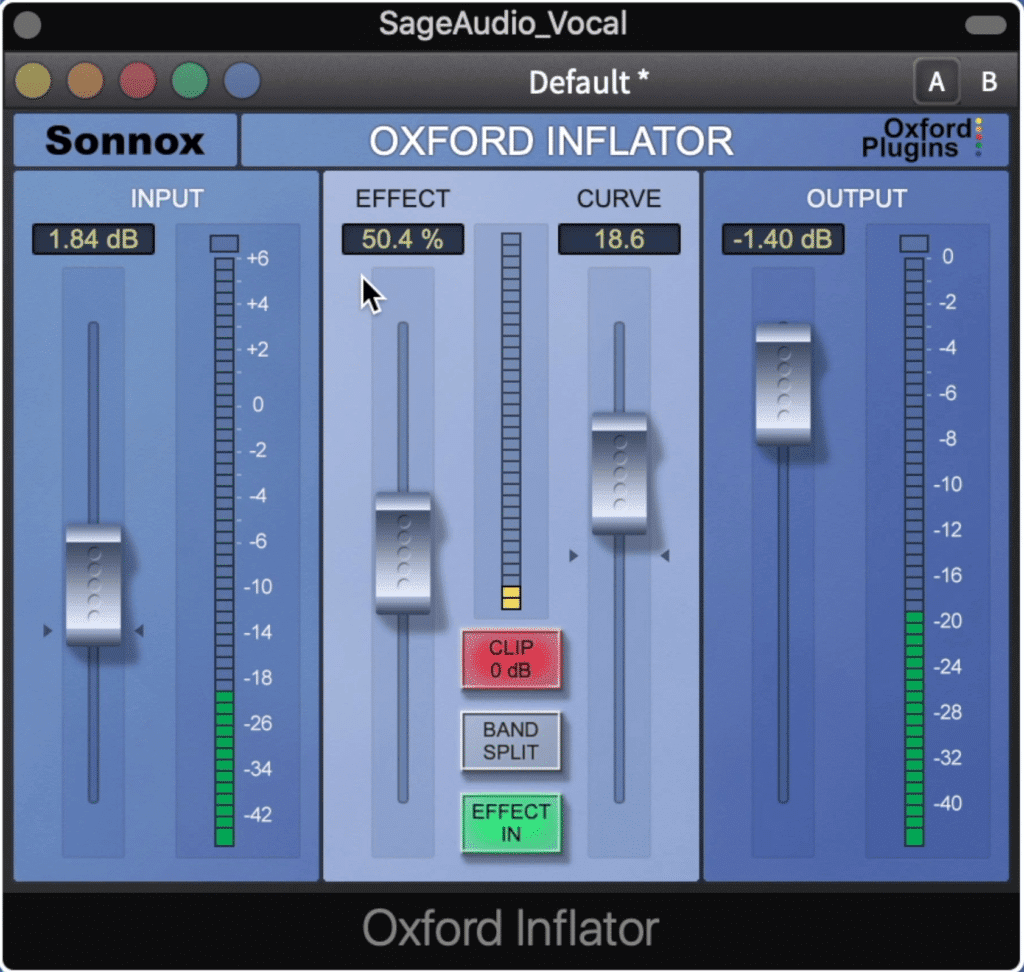
The inflator seems to compress further, but also adds a lot of body to the vocal.
It’s rare that a plugin is somewhat ineffable - typically I can break down what a plugin is doing, and even recreate the effect with multiple stock plugins.
But the Oxford Inflator is special. I can’t exactly put my finger on what it’s doing exactly - but I know that more times than not, it has an incredibly positive effect on the sound.
In this instance, I’ll use a fair amount of the effect, as well as increase the input and decrease the output.
Furthermore, I’ll utilize the curve function to add more body to the vocal.
How much of the effect that you use will depend on a lot of factors and your personal preference, but I thoroughly enjoy the sound that this plugin imparts on to a vocal.
Send 1: Seventh Heaven Pro, Reverb
This reverb send will be used to achieve more significant reverb.
With our primary vocal chain complete, it’s time to start using sends and auxiliary channels. The first channel I want to create is more reverb.
Although we used reverb earlier, this one will be more stylistic - it’ll also most likely be larger sounding and play a more significant role in affecting the vocal.
I choose the vocal plate setting on the Seventh Heaven Professional and enjoyed the sound. Furthermore, I followed the reverb with an equalizer that’s capable of mid-side processing.
With it, I attenuated some of the side image near the vocal’s more prominent frequencies. I also amplified this same range on the mid image.
Place a mid-side equalizer after it to shape the reverb a bit more.
This focused the vocal’s reverb a bit more, but this is more personal preference than anything else.
Lastly, I cut out some of the unneeded lows and blended the effect in with the original vocal using the auxiliary channel’s fader.
If you want to learn more about processing vocals, here’s another video we made on the topic:
Send 2: Arturia Memory Brigade, Delay
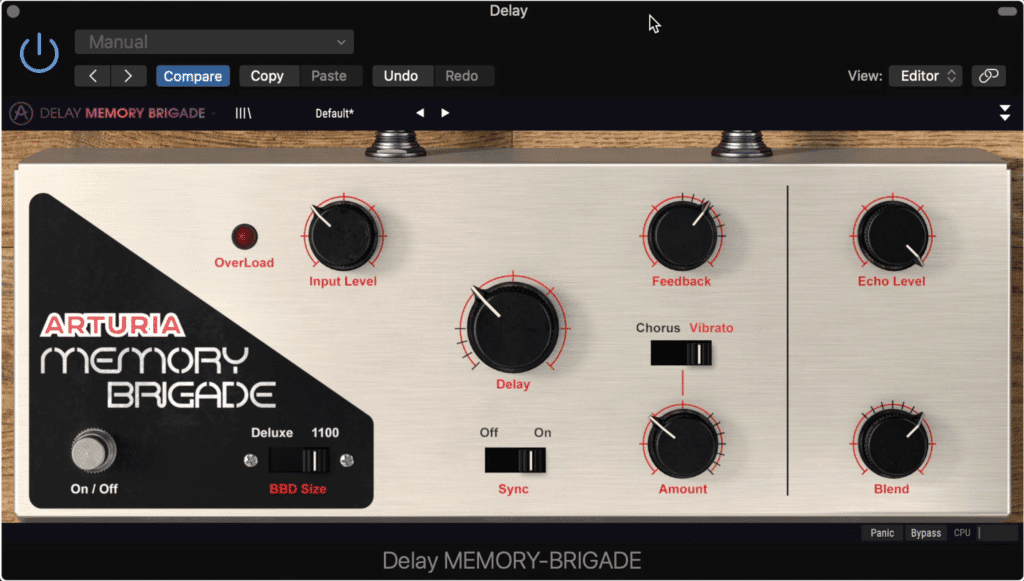
Delay helps as a creative effect, and to thicken the vocal.
Another temporal or time-based effect, Delay from Arturia’s Memory Brigade gave the vocal a classic and complex tone and presence.
The delay has an analog sound and can be altered between two timbres - I choose the 1100 setting.
I synced the delay to the BPM and introduce a good deal of feedback. Keeping an eye on the overload indicator I dialed in the input level to right before peaking.
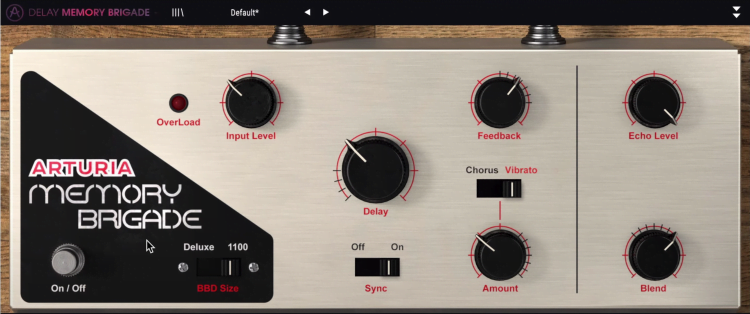
I monitored the input level to ensure that clipping didn't occur.
I also maximized the echo effect and dialed in some vibrato to give the vocal a fuller sound.
Lastly, I blended the effect in and made it somewhat subtle, using the auxiliary channel fader to adjust its level.
Send 3: Antares Auto-tune, Vocal Tuning
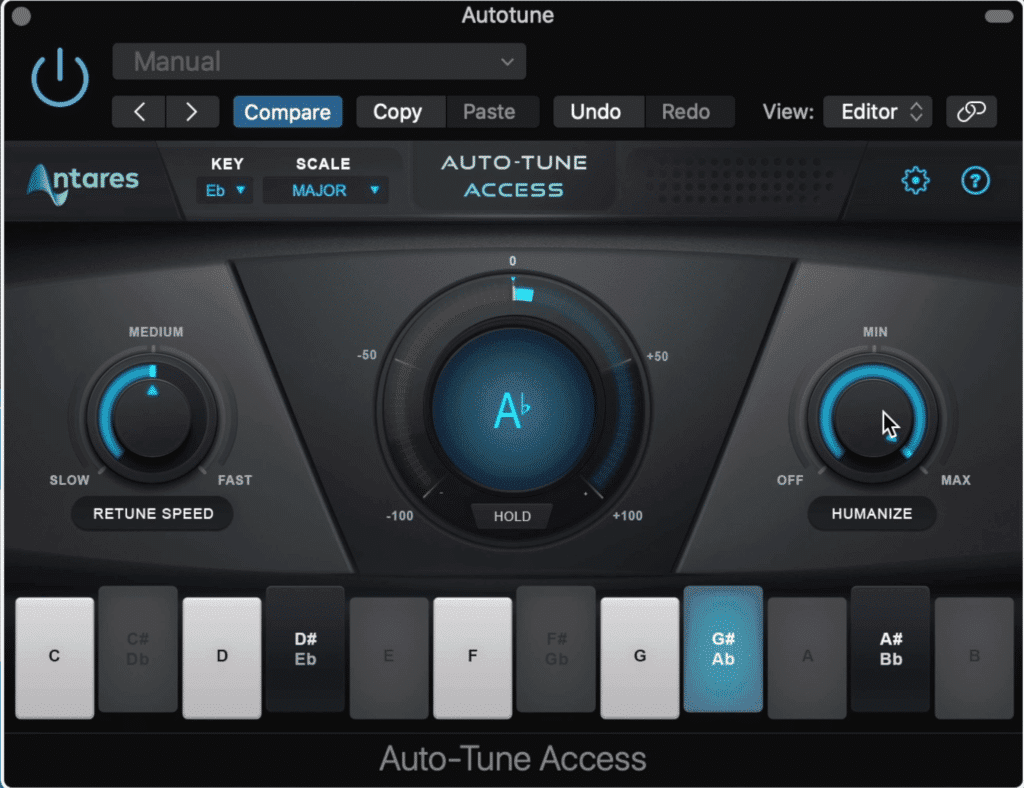
Vocal tuning can be a great way to make a vocal sound more professional. I blend mine in using a send.
Although this autotune may not be the most comprehensive in Antare’s line of tuning plugins, it’ll work well here. That said, if you have a version that you like better or one that gives you more to work with, go with that one.
What using tuning as a parallel effect allows me to do is keep the effect as subtle as I want. Furthermore, I can send just the tuned signal to my other 2 sends, the reverb, and delay, to blend it in further.
As a result, the tuning is present, but can’t be picked out of a recording. If you want more obvious tuning then this isn’t the best way to go about it, but for subtle tuning, it’s a great option.
Conclusion
There’s a lot going on in our vocal signal chain - some of it, you may not enjoy as much as I did. If you find this to be the case, definitely omit some of the steps or use different plugins that you like better.
It’s difficult to find the absolute best vocal chain - probably because it doesn’t exist. But, this vocal chain gives you a lot to think about and hopefully opened up the door to some new possibilities.
If you have a setting in your vocal signal chain that you love, let us know about it in the comment section of the video embedded at the top of the post.
If you’re working on a mix, and you’d like to hear how it would sound mastered, send it to us here:
We’ll master it for you and send you a sample to review.


