Top 3 Mastering Plugins You Need to Know In 2021
- Punctuate Transient Shaper - Newfangled Audio
- Satin Tape Machine Emulation - U-he
- Parallel Aggressor - Baby Audio
Claiming that ‘there are a lot of plugins’ is an understatement. When trying to find the perfect mastering chain, the options can be overwhelming.
With that in mind, we sought to showcase some fantastic plugins that you can use in 2021 to get a better sounding master.
We’ll discuss each plugin and its functionality, talk about when they should be used during mastering, and then listen to examples of each on a stereo mix.
If you’re an engineer or artist and you have a mix that you’d like to hear mastered by us, send it to us here:
We’ll master it for you and send you a free sample for you to review.
Punctuate Transient Shaper - Newfangled Audio
Transient shaper allows you to either expand or compress transients.
Punctuate is perhaps the best transient shaper currently available. Having used others in the past, I was incredibly impressed by what this plugin can accomplish.
The plugin breaks the signal up into 26 bands and performs expansion to each individual band - but let’s explore the plugin’s functionality in depth.
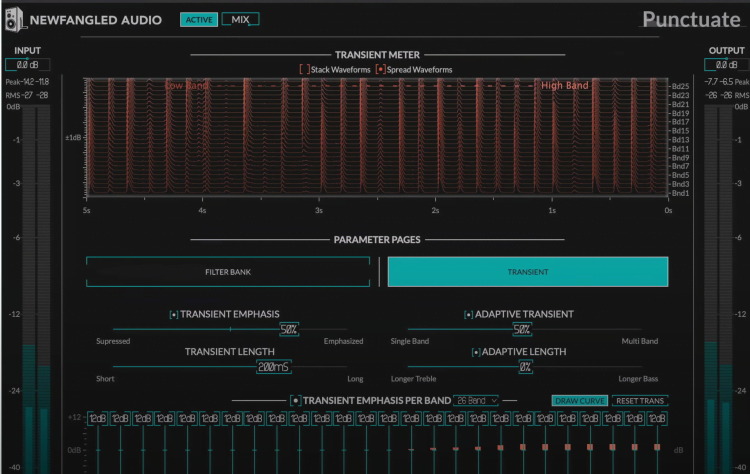
On the left side is your input which can be altered at the top, and on the right is the output which can also be altered.
Up top, in the middle, you can bypass the plugin and adjust the wet/dry.
The main page is broken up into a transient parameter and a filter bank.
There are 2 main parameter pages - the first is a filter bank and the second is the transient alteration window.
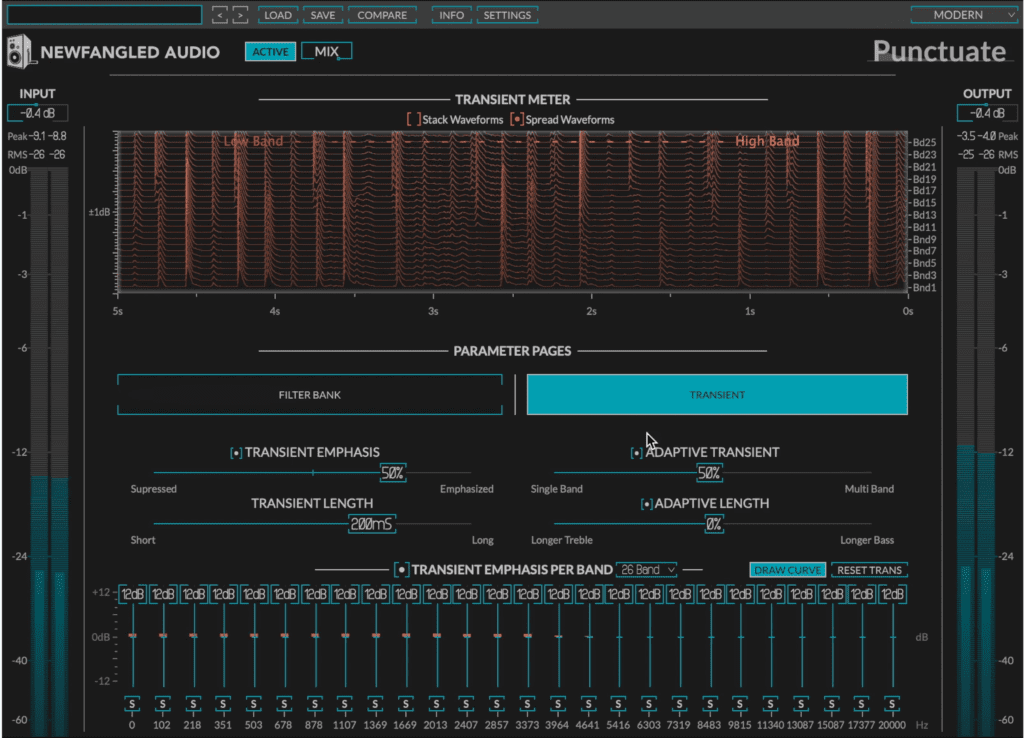
Starting in the Transient pace we can adjust the Transient Emphasis which will either expand or compress transients. By increasing the Adaptive Transient option we make each band independent or processed and performed collectively.
The duration of the expansion or compression can be adjusted with the Transient Length slide. And the timber of the compression or expansion can be altered with the Adaptive Length which focuses the processing in the low or high range of the frequency spectrum.
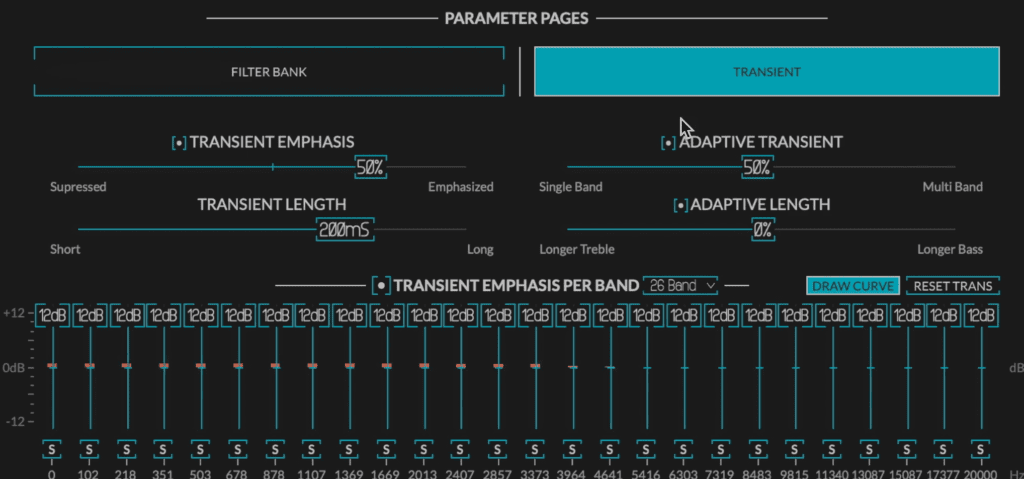
The transient parameter page allows you to control how much compression or expansion occurs, adjust how transients are measured, and affect individual bands.
At the bottom, we can further control which bands get expanded and which get compressed. We can solo a band to listen in, or adjust the number of bands for more simplistic or complex transient shaping.
Next, let’s look at the Filter Bank page. Here we can adjust the number of bands as well, solo bands, and most importantly adjust the frequency of each band.
By clicking and dragging the frequency we can adjust where the transient shaping occurs.
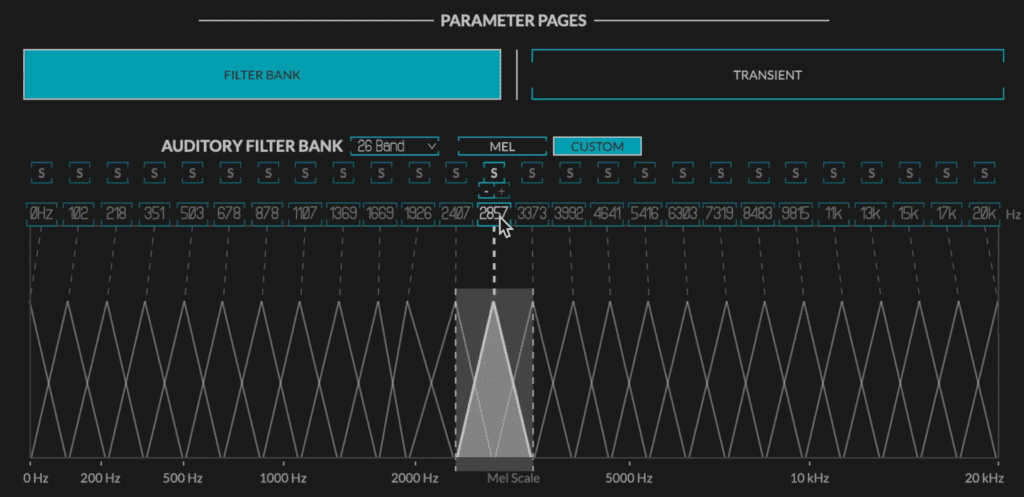
In the filter bank you can adjust the individual bands and the number of bands.
So if you know the key of your song or the chord structure, you could move these bands to the exact notes of the track you’re working on, which is pretty amazing.
Lastly up top, we have our Transient Meter which shows what’s being expanded or compressed , how much it's being expanded or compressed, and the signal over time.
All-in-all this is the best transient shaper I’ve come across is can be incredibly useful if you’re working on a track that’s too compressed or too dynamic.
Satin Tape Machine Emulation - U-he
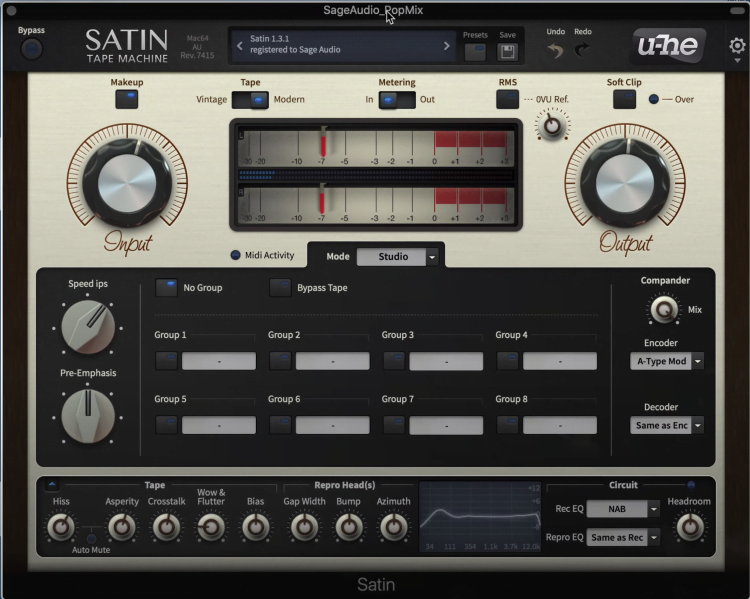
Satin is a complex tape machine emulation plugin.
Up next is perhaps the most comprehensive tape machine and tape medium emulation plugin that I’ve used.
It utilizes different tape speeds, bias, wow and flutter, and other parameters you’d typically see in a tape plugin.
However, it also emulates encoding and decoding, noise, asperity noise, crosstalk for stereo expansion, and a lot more.
Let’s look at the plugin on a deeper level.
The first thing to note is that although the plugin also has delay and flanging modes, we’ll stick to covering just the Studio mode since this is what you’ve used when mastering.
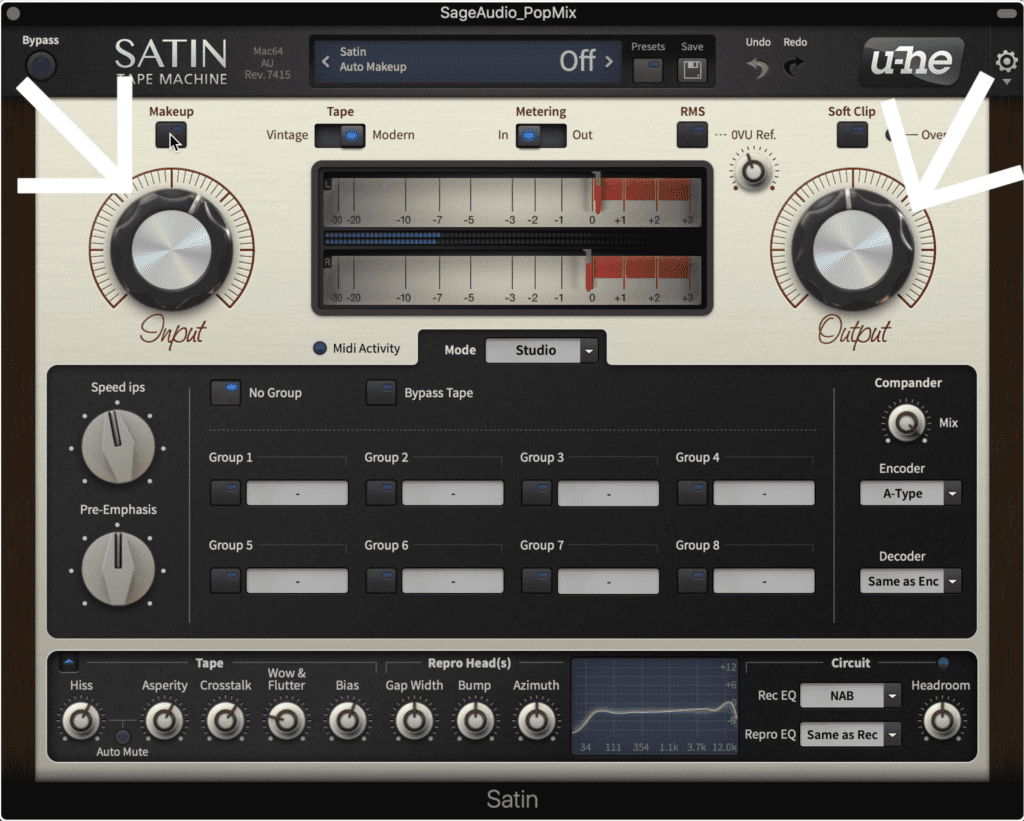
The input and output are up top and can have their gain compensated.
Up top, we have our input and output dials, which can be altered with the makeup button to compensate for any gain changes.
The tape type can be switched,and we can measure our input and output as well as enable soft-clipping.
In the middle window, we can alter our tape speed which adjusts the frequency range of the signal with higher speeds resulting in an emphasis on higher frequencies and vice versa.
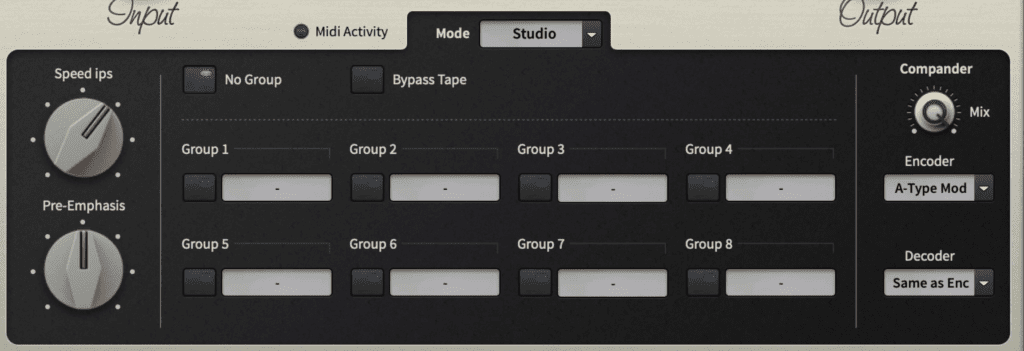
In the middle of the plugin you can alter the tape speed and pre-emphasis - both of which shapes the frequency response. An encoded and decoder are available on the right but will rarely be used when mastering.
Pre-emphasis compensates for frequency attenuation that can occur due to the distance between the reproduction tape heads.
In the middle, we can create up to 8 instances of the plugin, but will most likely only need 1 when mastering.
To the right is an encoder and decoder which is used to emphasize high frequencies in a signal to mask tape noise, and then de-emphasize them to balance the response.
This won’t be needed when mastering.

At the bottom of the plugin is where you can control the majority of the plugin's parameters.
In the bottom section titled the service section, we can control hiss or general noise, and asperity which is imperfections in the surface of the tape resulting in a blurring effect and mild noise as well.
Crosstalk blends the right signal into the left and left into the right, resulting in mild to significant phase cancellation and potential stereo widening.
Wow and flutter is used to modulate frequencies similar to how tape does when the speed of the tape is inconsistent. Keep this off or at a low level when mastering.
Bias lets you adjust the frequency spectrum. A lower bias results in more distortion but with a balanced high range, higher bias does the opposite, resulting in low distortion but fewer highs. Some engineers use a higher bias to achieve a slightly warmed sound.
By adjusting the Gap Width you essentially create a tilt filter that can be used to emphasize either the low or high frequencies, as well as introduce mild to significant resonance filters.
Bump increases or decreases the slope and significance of a resonance filter in the low frequencies.
Azimuth emulates the phase cancellation that occurs when tape heads aren’t properly aligned or angled.
You’ve probably noticed the analyzer to the right which lets you know how the settings you choose affect the frequency response.
Lastly in the circuit section, you can adjust the record and reproduction eq curves, which greatly impact the shape of your frequency response.
Typically it’s best to match these but you can get creative if the master calls for it.
The headroom dial adjusts the potential dynamic range and should be kept at a medium to a higher level when mastering.
Although tape emulation can’t fully encompass the sound and complexity of a tape machine, this one does a great job at coming as close as currently possible in digital audio.
If you'd like to learn more about tape machine plugins, check out this video:
Parallel Aggressor - Baby Audio
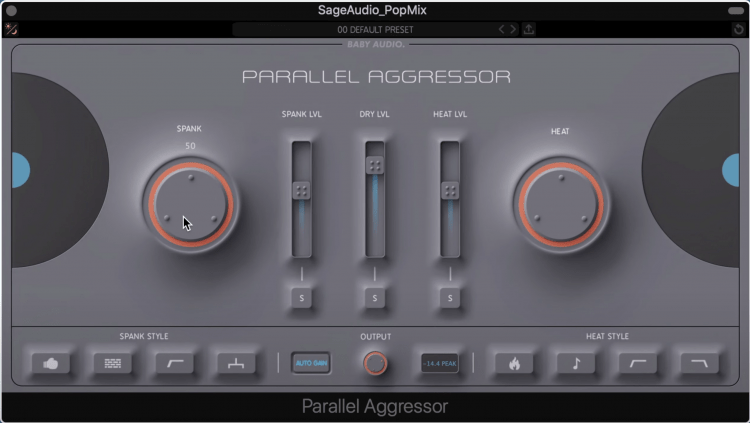
The Parallel Aggressor is designed to create noticeable compression and saturation changes to a signal.
Parallel Aggressor is a fantastic and simplistic way to add a lot of character to a mix or master quickly. It can also be used on instrument stems and busses for some extra compression and saturation.
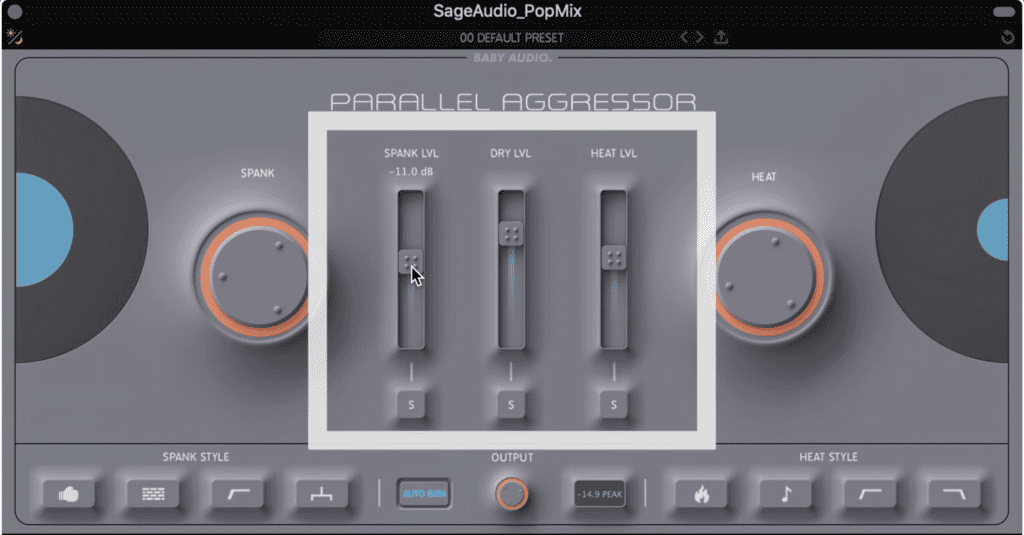
In the middle you can blend the 3 levels.
The signal is broken up into 3 signals, dry or your original signal, Spank which is a compressed signal, and Heat which is a saturated signal.
The levels of the signals can be blended in the middle with the sliders and the amount of each effect and be adjusted with the dials on the left and right side of the plugin.
To the left we have the spank channel which has its transient detail increased, a brick wall ceiling put into place, its low-frequency range remains unaffected and can be summed to mono.
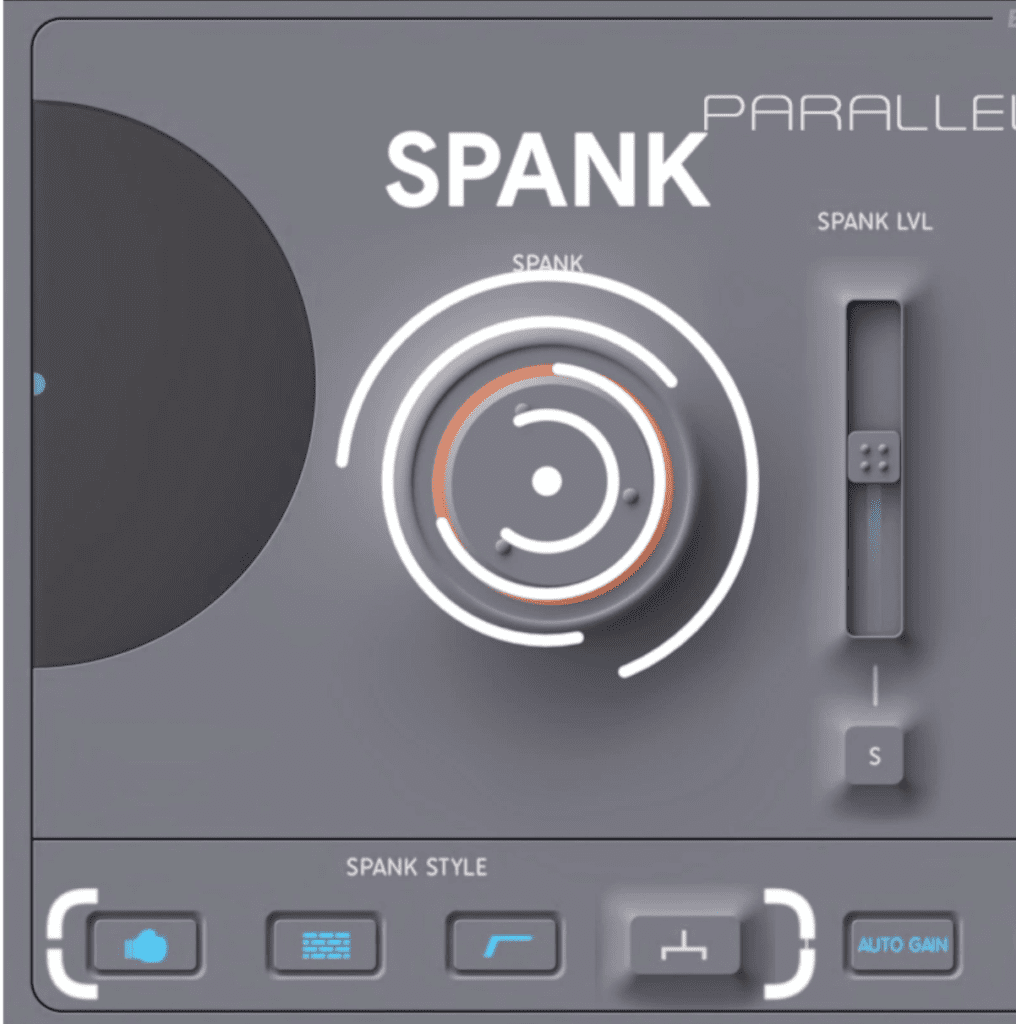
Spank increases compression and includes some mild transient shaping.
On the right is the Heat channel which has additional harmonics introduced, and the timbre or order and amplitude of the harmonics adjusted.
Low and high-pass filters can be engaged to alter what gets saturated.
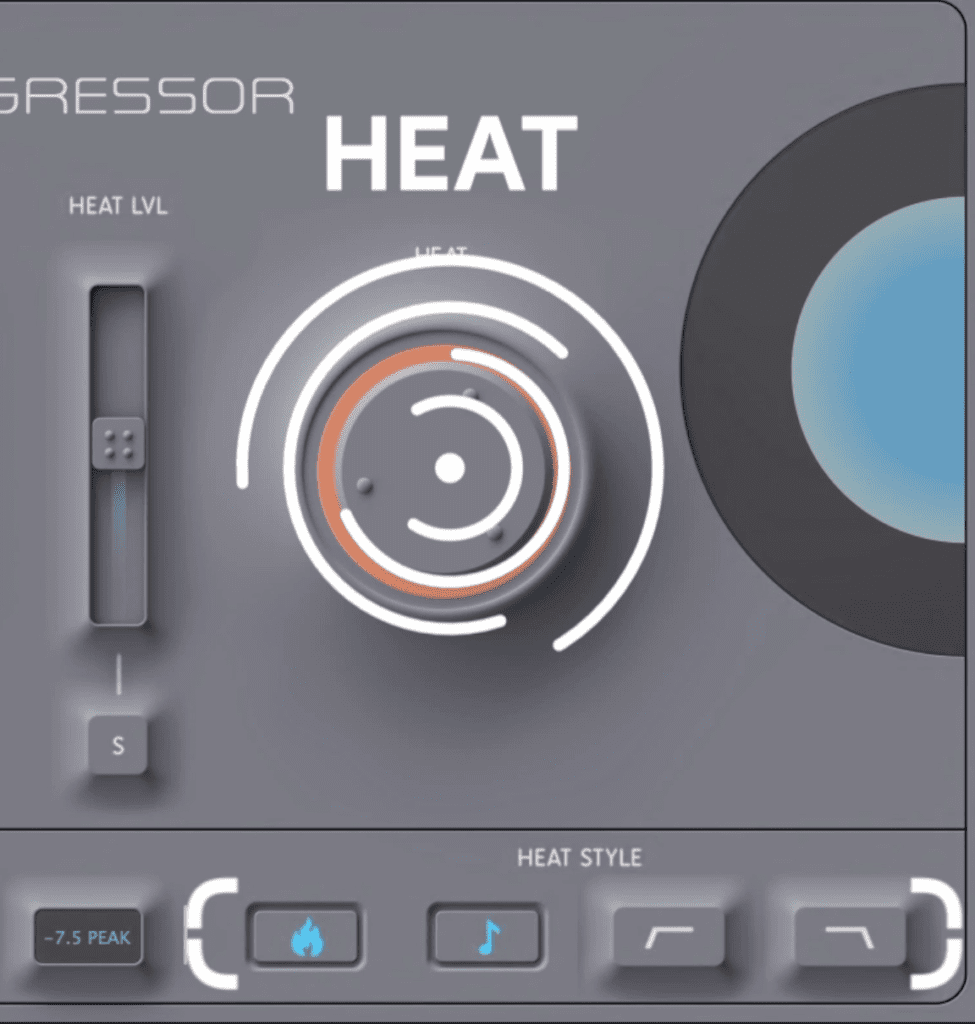
Heat introduces saturation and mild to moderate distortion.
Lastly, in the middle of the plugin, we can introduce automatic gain compensation, trim the output, and monitor either the peak level or RMS.
It’s important to note that this plugin seems to have a built-in safety-limiter at the end of the signal path to avoid an aggressively loud and potential monitor and ear damaging output - so that’s appreciated.
For more info on parallel compression, check out our video:
Conclusion
If you’re looking for some new mastering plugins, or you’re just curious about what’s out there - the plugins we covered here are great to know.
They’re some of the best plugins in their respective fields and can be used to both subtly and greatly affect the sound of your masters.
Try the demos of these plugins and see if they fit into your chain well. If in doubt about what they do or a function, in particular, manuals are available, or you could always review the descriptions here.
If you’re an engineer or artist and you have a mix that you’d like to hear mastered by us, send it to us here:
We’ll master it for you and send you a free sample for you to review.


