What is this New Free Plugin by Tokyo Dawn Labs!?
Quick Answer
The TDR Molotok was released in Oct. 2020 and is a vintage emulation of multiple soviet-era audio compressors. The sound that this plugin creates is unique due to the alpha-beta-sigma variable weighting and the subtle distortion it imparts onto the signal when using a quicker attack.
The Tokyo Dawn Labs Molotok in Detail
Modeled off of a more complex compressor by Tokyo Dawn Labs - the Molot GE - the Molotok is a perfectly simple and straightforward compressor with a lot of character.
The Molotok is a new free plugin from Tokyo Dawn Labs
In this blog post and video, we’re going to take an in-depth look at its functionality and design, discuss some of its more unique functions, and measure how it affects and distorts the signal.
Additionally, we’re going to take a listen to this plugin on various instruments (in the video embedded above).
If you’d like to hear how your mix would sound mastered with all analog equipment, send it to us here:
We’ll master it for you and send you a free sample to review.
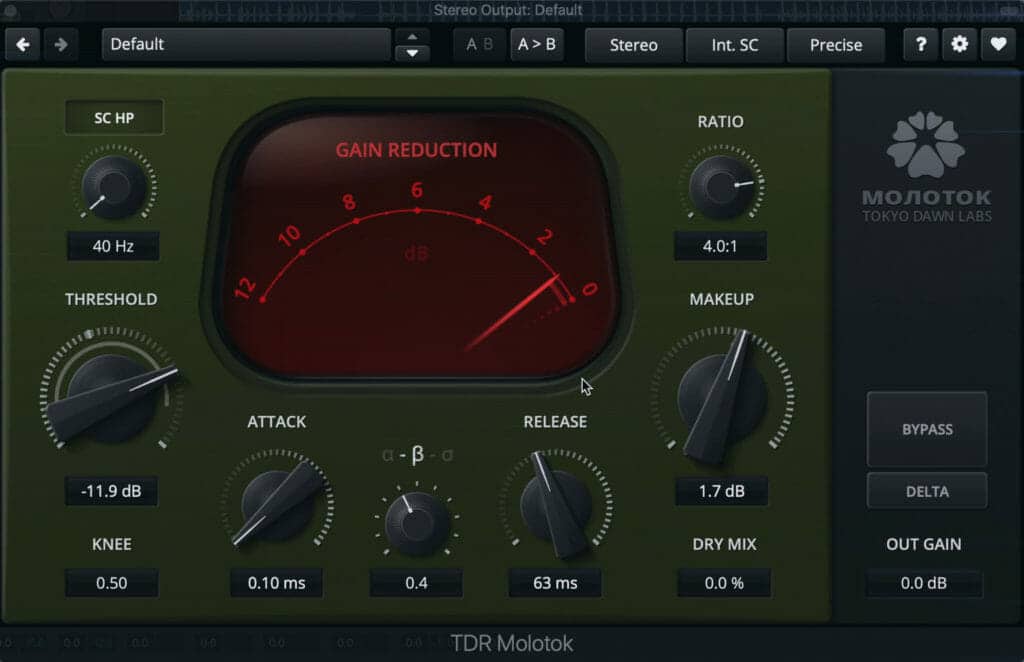
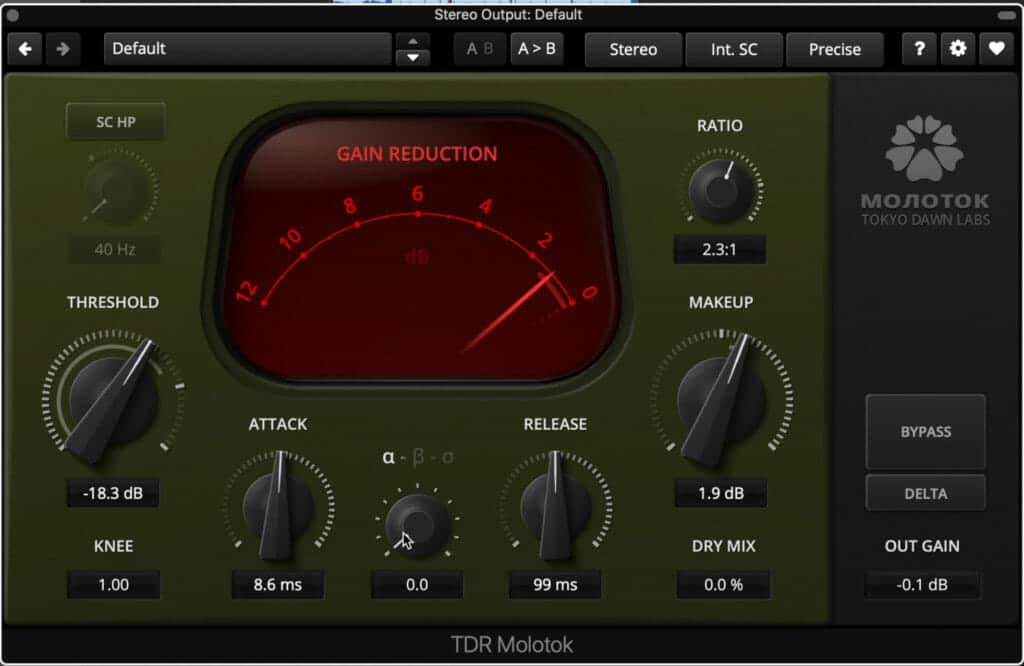
The Functionality of the TDR Molotok
On the top left of the plugin, we have a Side-chain high-pass filter, which can be used to reduce compression applied to low frequencies. This ranges from 40Hz to 260Hz.
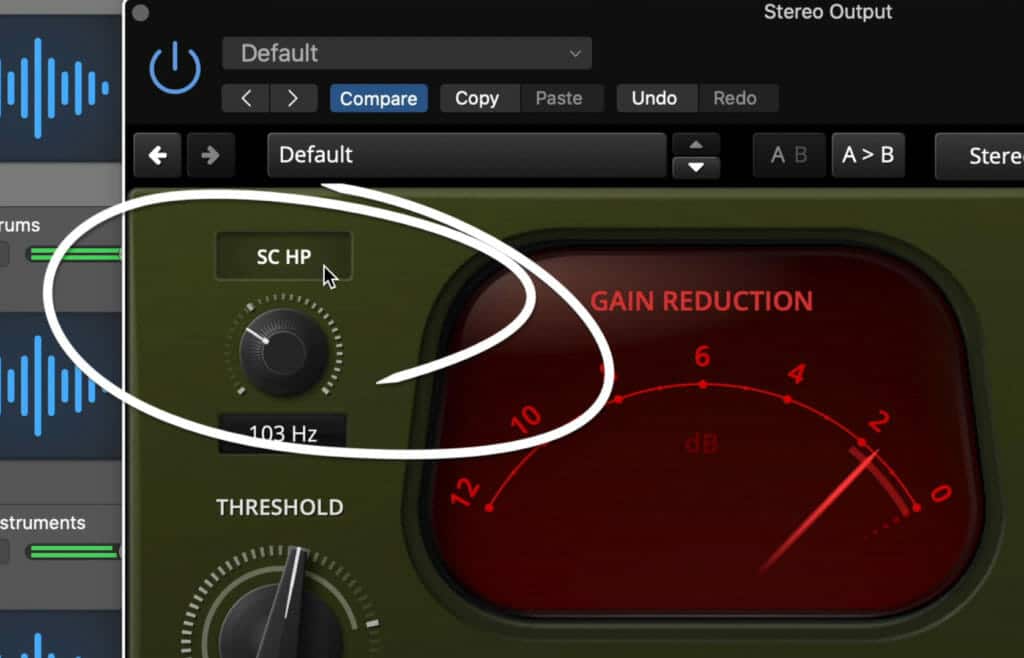
The Side Chain high-pass filter allows you to avoid compressing low frequencies
Below it is your threshold which goes as low as -48dB. The knee of the threshold ratio intersection can be made soft with the knee function.
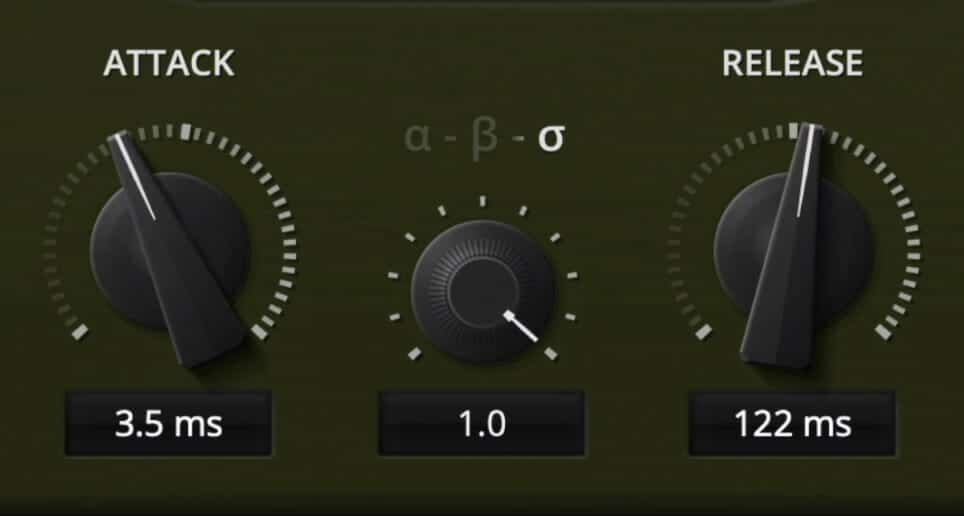
The attack ranges from an incredibly quick 0.1ms to 600ms. At lower settings, the attack will cause noticeable and stylized distortion. This is particularly true for lower frequencies.
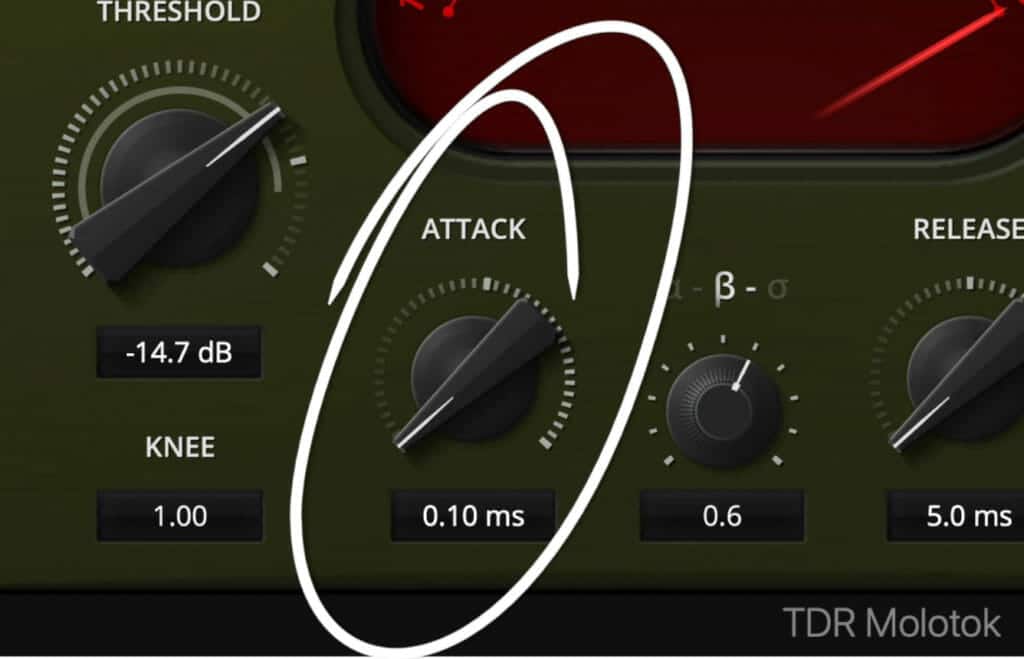
The attack can be set to 0.1ms, which causes stylized distortion.
The release ranges from 5ms to 2 seconds, and will also distort the signal at lower settings.
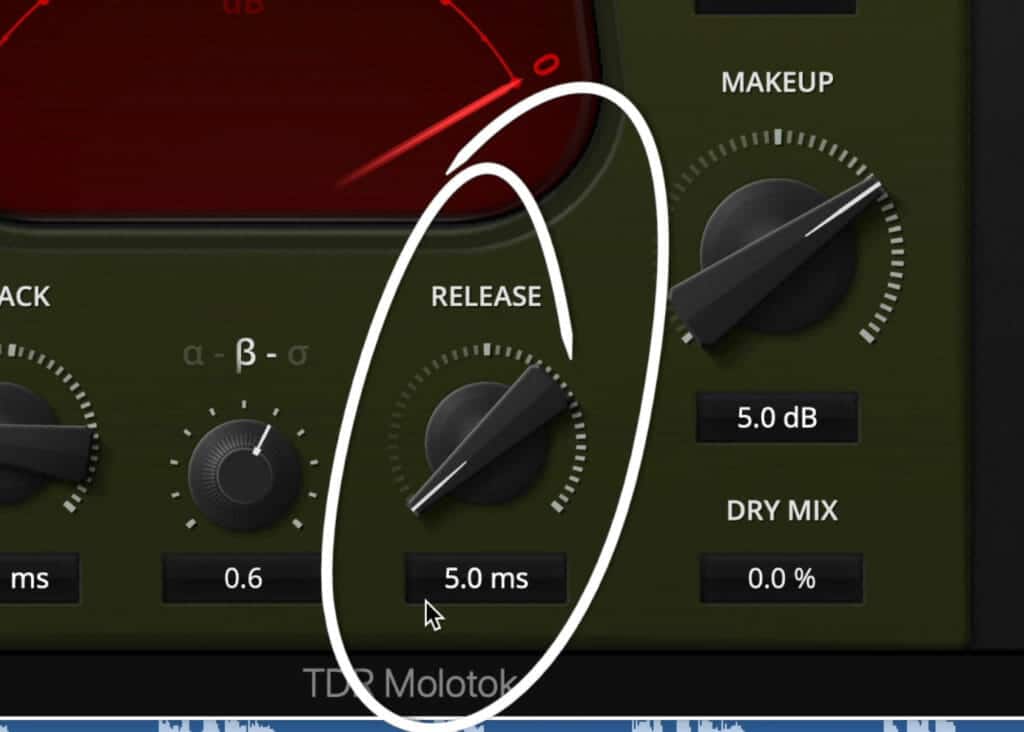
The release can be as short as 5ms, which can add some good sounding low order harmonic distortion.
Perhaps the most unique aspect of this plugin is the weighting, which drastically changes how the ADSR of the compression, in turn changing the amount of compression and its timbre.
Alpha and sigma are best suited for individual instruments, while Beta is well-suited for bus compression.
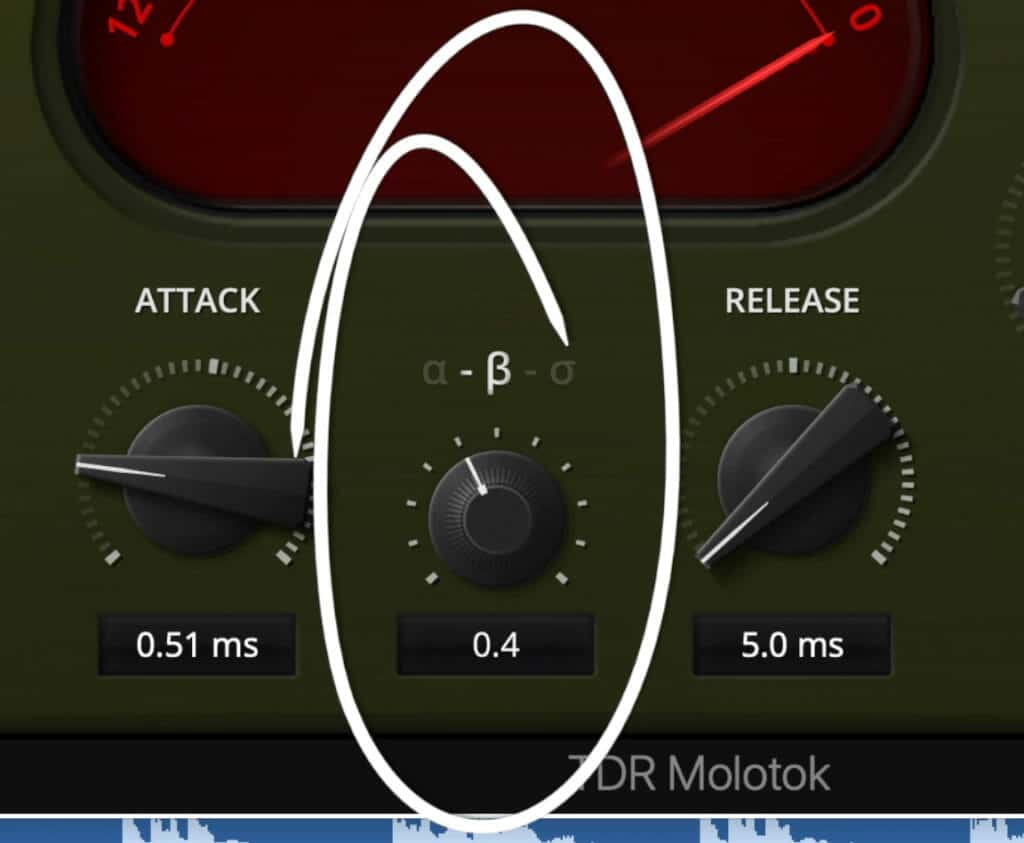
The weighting section changes the ADSR and timbre of the compression.
The ratio can be 1:1 or a unique 10.9:1.
Make-up gain is available and displays a line indicating how much attenuation is occurring. Y centering this line with 0dB you more or less normalize any gain changes.
This plugin can also be used as a parallel compressor by introducing more of the dry mix into the output.
On the right, you have a bypass button, a delta button which lets you monitor just the compression, and an output gain function.

Precise mode enables 64-bit processing.
To get the best sound out of this plugin, I’d recommend using the precise mode which enables 64-bit processing, and going into the settings to enable ‘Highest Quality Rendering.’
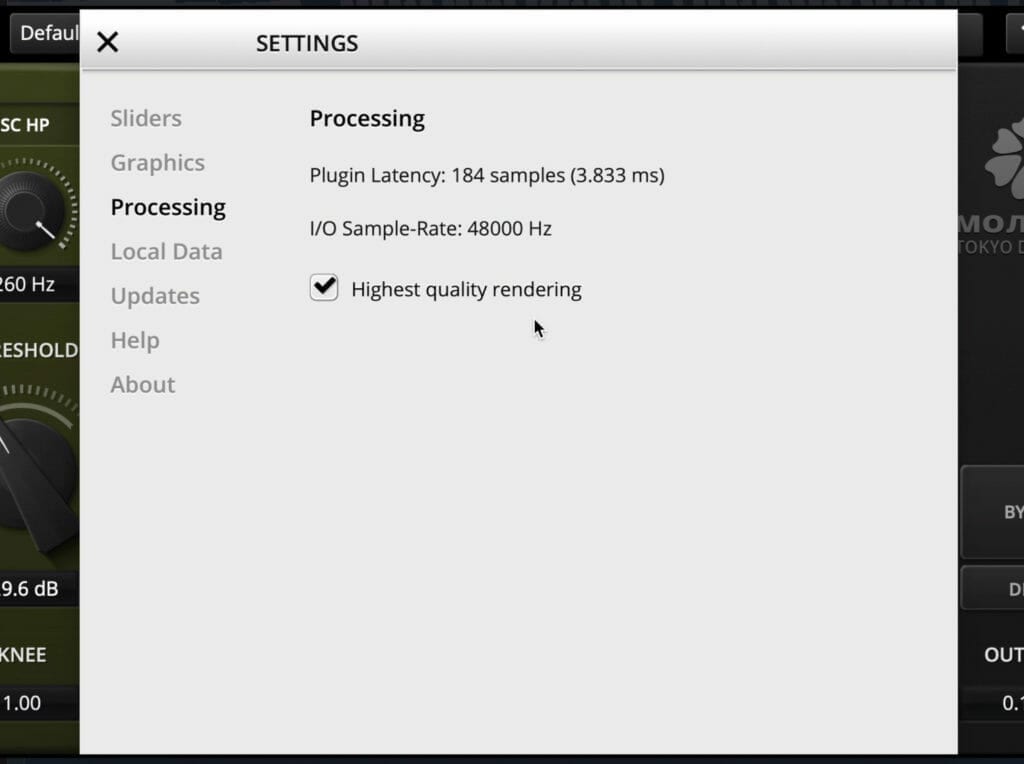
Enable 'Highest Quality Rendering' in the setting section.
In this section, you can also change the size and frame rate of the plugin.
Right-click the Gain reduction meter to change the meter from relative to absolute, and change the range of attenuation.
Lastly, if you want the full effect of the plugin you can change its language to Russian. Just make sure you remember which function is which.
Want more free plugins, check out this video showcasing 10 more:
How does the Molotok Introduce Distortion?
Let’s use a sine wave to measure if this plugin distorts the signal in any way. We’ll use an 80Hz wave and then observe a frequency analyzer to see if harmonics form.

We'll use an 80Hz sine wave to see how the plugin distorts the signal.
We notice that by reducing the attack to 0.1ms we get some even and odd harmonics, which are made more prevalent by reducing the release.
The amplitude of these harmonies varies based on the weighting. The sigma setting seems to have the lowest amount of distortion, which halfway between Alpha and Beta shows the most aggressive distortion.
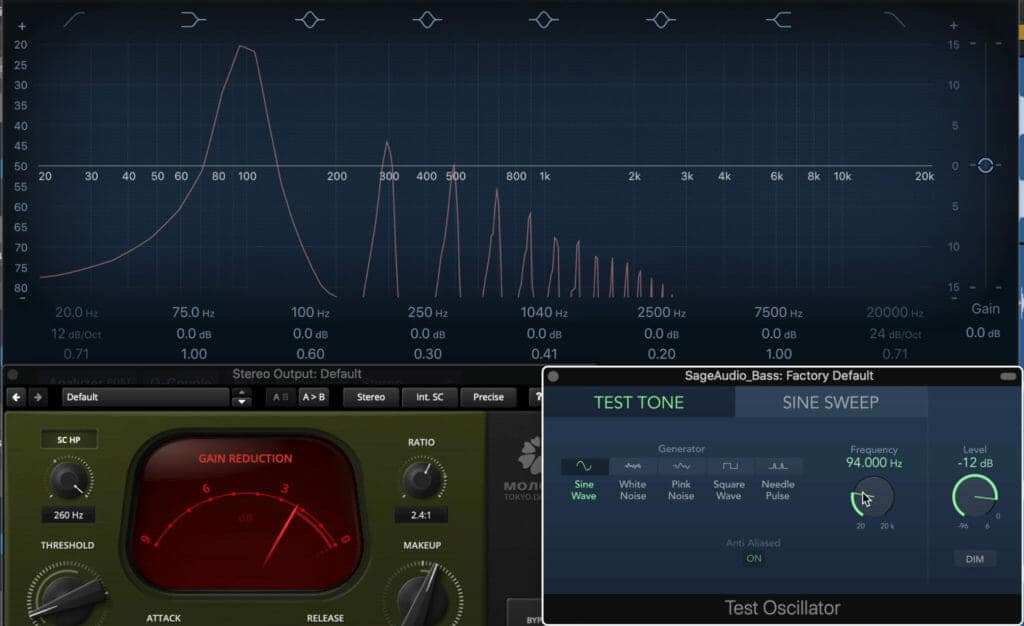
Halfway between alpha and beta causes the most aggressive distortion.
This may be due to the sine wave we’re using, but it looks like similar frequencies have just about the same results.
How this distortion looks and sounds are going to be different based on the source material, especially when the key of the track changes - but this gives us a good indication as to what the plugin does.
Want more free plugins? Check out this video showcasing 10 more:
How Does the Molotok Perform of Various Instruments and Tracks?
Let’s listen to the Tokyo Dawn Lab’s Molotok plugin on a Bass track, Drum Bus, Instrument Bus, and Melody bus track to get a better understanding of what the plugin does.
Additionally, we’ll listen to the plugin in the context of a full mix to see how it would work in a mastering situation.
TDR Molotok on Bass
When compressing a bass, the Molotok can create a full and impressive sound. By compressing and increasing the make-up gain, we can establish a stronger sound.
This is especially true when we reduce the release to 5ms since subtle distortion fills out the sound .
Additionally, if we reduce the attack to 5ms, we can achieve some very cool stylized distortion that might work as an effect.
Also, the alpha, beta, and sigma modes all worked well and can help blend the bass in or help it stand out, depending on the mix.
TDR Molotok on Drums
The Molotok works surprisingly well on drums and can provide various characteristics. For example, the alpha and sigma modes would be great for parallel compression, since they blend the sound together and create a cohesive drum tone.
I really enjoyed the sigma mode, as it increased the transient of the snare, and almost made the track sound more dynamic. This makes it a great setting to use on individual drums or on the drum bus.
The sigma setting sounded great on drums.
Again, you can create some distortion with shorter attack and release settings, but this is probably best kept to parallel compression.
TDR Molotok on an Instrument Bus
This is the one instrument where I didn’t really like the Molotok. I couldn’t hear a significant difference when ABing the effect.
I think the plugin could work well as a parallel compressor; however, I didn’t like how lifeless it made the track feel.
The compression, no matter the alpha, beta, or sigma setting seemed to hold onto the sound for too long, regardless of the release.
TDR Molotok on a Melody Bus
The Molotok worked in kind of a strange way here. Although I wasn’t able to get a sound I liked from traditional compression, once I introduced the high-pass side chain, I was able to get some good tones.

The side chain helped the melody bus by brightening the signal and enhancing the reverb via compression.
By cutting out some of the low-end being compressed , I was able to let the transients and punch come through the compressor while compressing the bus’s reverb and then amplifying it.
This made for an aggressive sound that could cut through a mix and allowed the reverb to come more to the forefront of the sound.
TDR Molotok on a Full Mix
I found that very subtle compression worked well on the full mix. The Beta mode was probably the best suited for a full mix, as it glued the sound together in a pleasant way.
I used a subtle ratio and only about 1 to 2dB of attenuation, then some make-up gain.
I only used about 2dB of attenuation on the full mix, and set it to beta (not shown in the photo).
Slightly longer attack and release times were also best since it reduced distortion.
I probably wouldn’t use this plugin when mastering, but it’s not a bad choice at all.
Conclusion
This plugin works well for individual instruments. Its controls are simple but the sound is comprehensive enough to use on various tracks.
The alpha-beta-sigma function is at the heart of the plugin’s versatility, as it affects both the timbre of the compression, and the amount and character of the distortion.
All-in-all I’d recommend trying this plugin out for yourself, it’s completely free and definitely worth your time.
If you’d like to hear how your mix would sound mastered with all analog equipment, send it to us here:
We’ll master it for you and send you a free sample to review.


