Before You Start Mastering a Song Watch This!…
Quick Answer
Before you begin to master a song you need to check that you have enough headroom, and if not, use clip gain to attenuate the signal. Additionally, it helps to check the side image for low frequencies that could make the signal difficult to replicate on most playback systems.
Before You Start Mastering a Song Watch This!…in Detail
Often we talk about the actual mastering process but rarely do we discuss the steps prior to mastering that needs to be considered.
These steps and precautions are incredibly helpful and have the potential to save a mastering session from unwanted distortion, muddiness, and other unwanted artifacts.
Here, we’ll cover headroom , how much of it you need to master, and the best way to get more headroom if the mix doesn’t have enough.
We’ll also discuss how to monitor the side image of a master, and what to do if the side image has too much low-end.
Lastly, we’ll talk about signal flow in general, but focus particularly on how to gain stage between plugins once you do begin adding processing.
So, if you’re having some trouble setting up your mastering session, or you think that it can be improved, take a look at the video above or read on.
If you’re an artist or an engineer, and you’d like to hear your mix mastered, send it to us here:
We’ll master it for you and send you a free mastered sample to review.
Understanding Headroom Before Beginning to Master
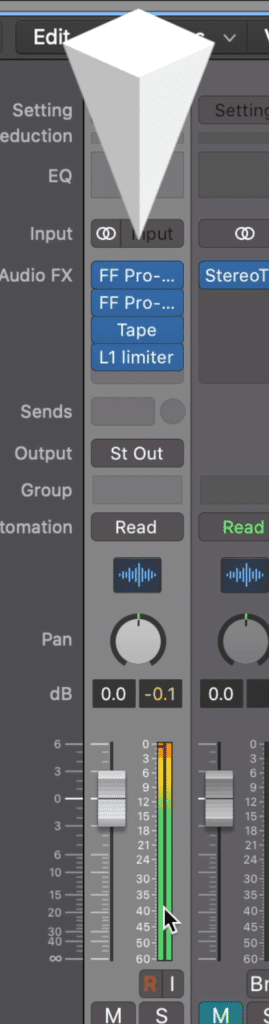
Understanding headroom before you begin to master really means knowing how much you’ll need, and the best way to get more headroom if you need it. If you plan on adding processing to a signal, it’s best to have at least 3dB of headroom beforehand.
Having enough headroom is crucial to establishing a distortion free master.
If we begin to master a signal without headroom we’ll definitely begin to distort our signal.
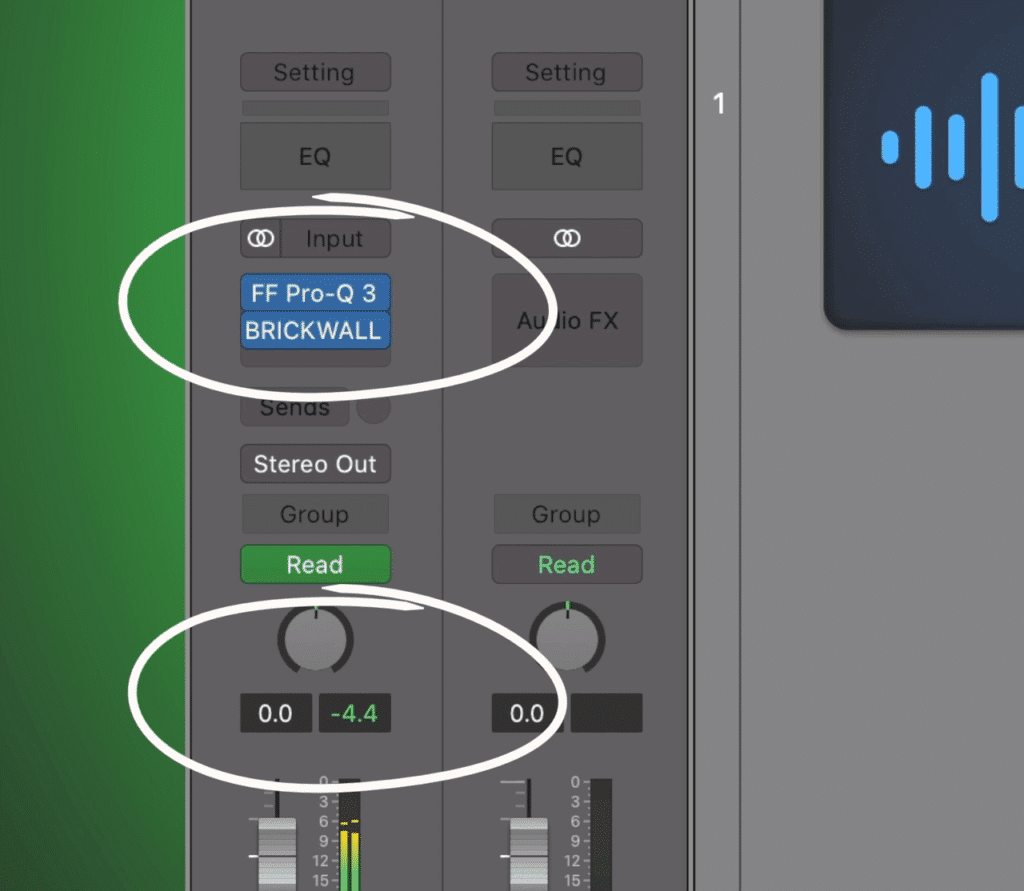
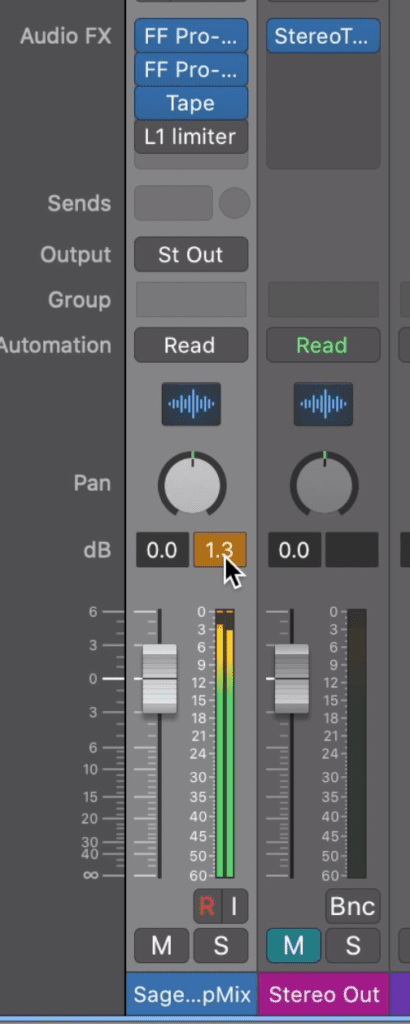
If you don’t have this headroom, the best way to get more is with clip gain.
Because clip gain affects the actual clip, this attenuation occurs prior to any processing.

Clip gain is the best way to get more headroom if needed.
Alternatively, if I was to use the channel fader to try and achieve more headroom, this wouldn’t work, since the signal is still routed into the plugins at too high of a level. In other words, distortion would still occur. The same could be said about automation or ways of attenuating the signal - the routing occurs too late to avoid distortion.
Automation and other similar method won't work due to when this form of processing attenuates the signal in the signal chain.
Now there is one downside to having to use clip gain. By reducing the gain of a signal, you in turn use less of the available bits in a digital system, but this is still better than the alternative. That said, only use clip gain when needed.
If you want a more in-depth look at headroom, take a look at this video here:
Understanding the Stereo Image Prior to Mastering
Sometimes, low-frequency information will leak into the side image.
The stereo image, in particular low-frequency information on the side image, needs to be kept in mind and addressed before establishing a mastering chain. If you ignore these frequencies and continue to master, your master may sound muddy and unfocused by the end of your chain.
It's a good idea to monitor and attenuate these frequencies when needed.
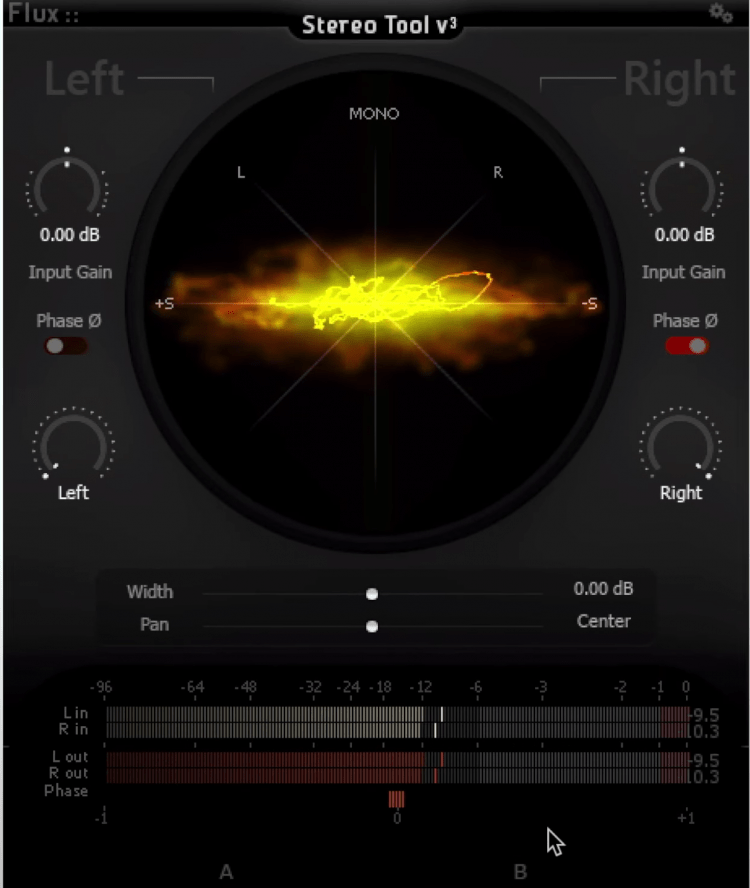
Although there are multiple ways to monitor the side image, I prefer to use a mid-side equalizer and, if possible with the plugin begin used, monitoring solely the side image.
Furthermore, you can, again if the plugin allows for it, attenuate the low frequencies of the side image and monitor what has been attenuated.
This will let you know what was on that side image, how loud it is, and of what frequencies it consists.
From there you can determine if these frequencies should permanently be attenuated. Whether or not you do so depends on the genre, the strength or amplitude of these frequencies, and other creative variables.
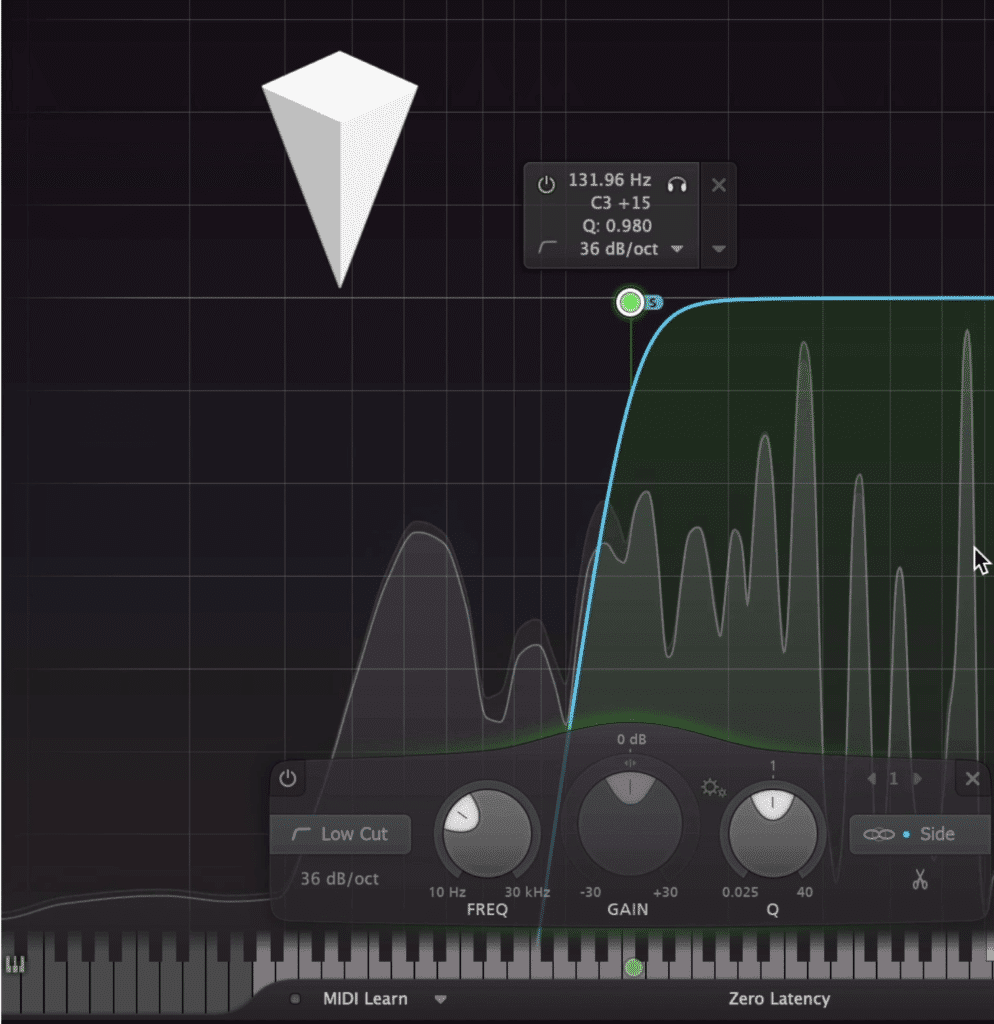
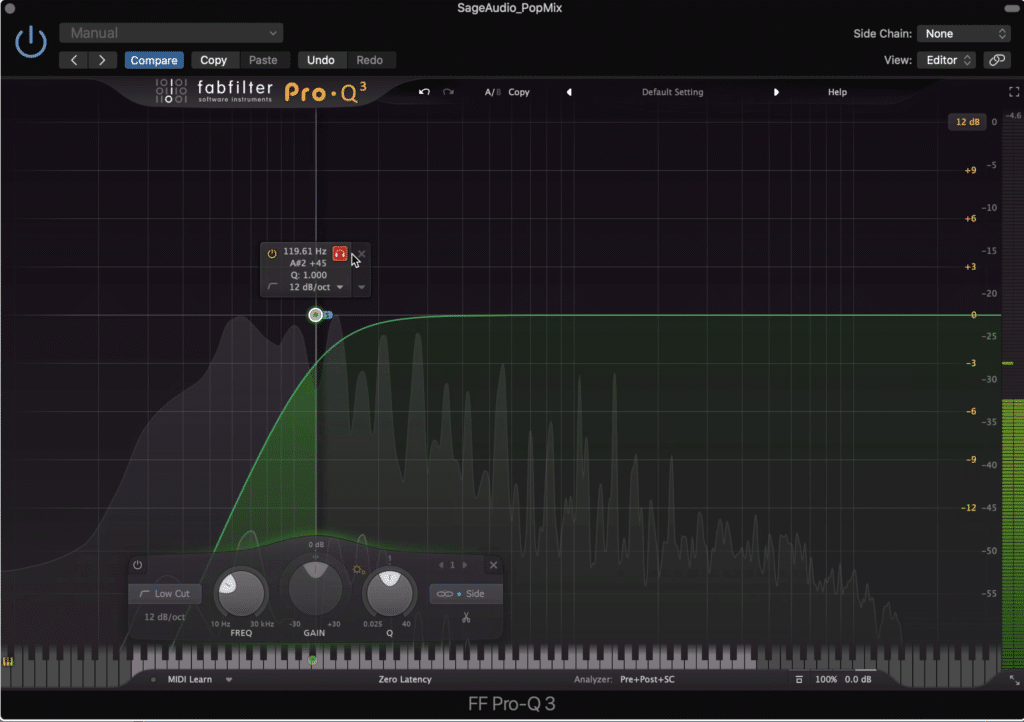
These frequencies typically include kick and bass, and cause the low-frequency range to sound unfocused and muddy.
Typically, I use a high-pass filter to attenuate these frequencies up to about 130Hz. This ensures that the low-frequency range remains mono - resulting in a focused and driving low frequency range free from unwanted stereo phase cancellation.
So the kick, bass, and whatever other instrumentation is present will remain in the mid or center of the stereo image.
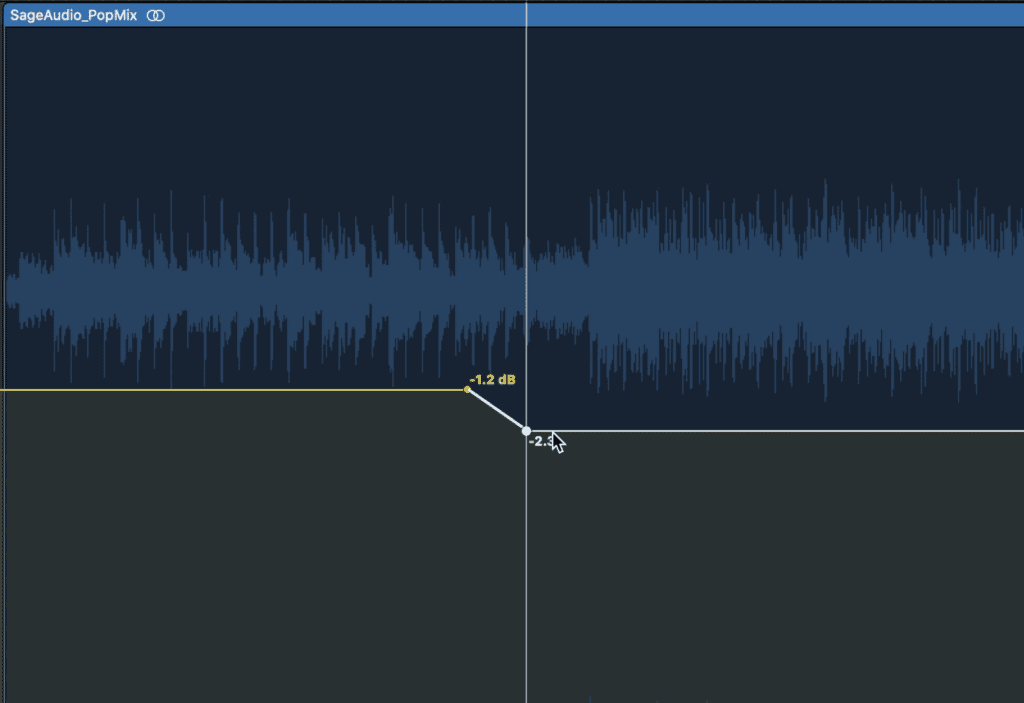
One more, somewhat similar thing you can do while working in this equalizer is to attenuate very low frequencies on the mid image. By attenuating up to about 20Hz, you achieve more headroom and reduce the possibility of clipping without having to sacrifice any of the audible signal.
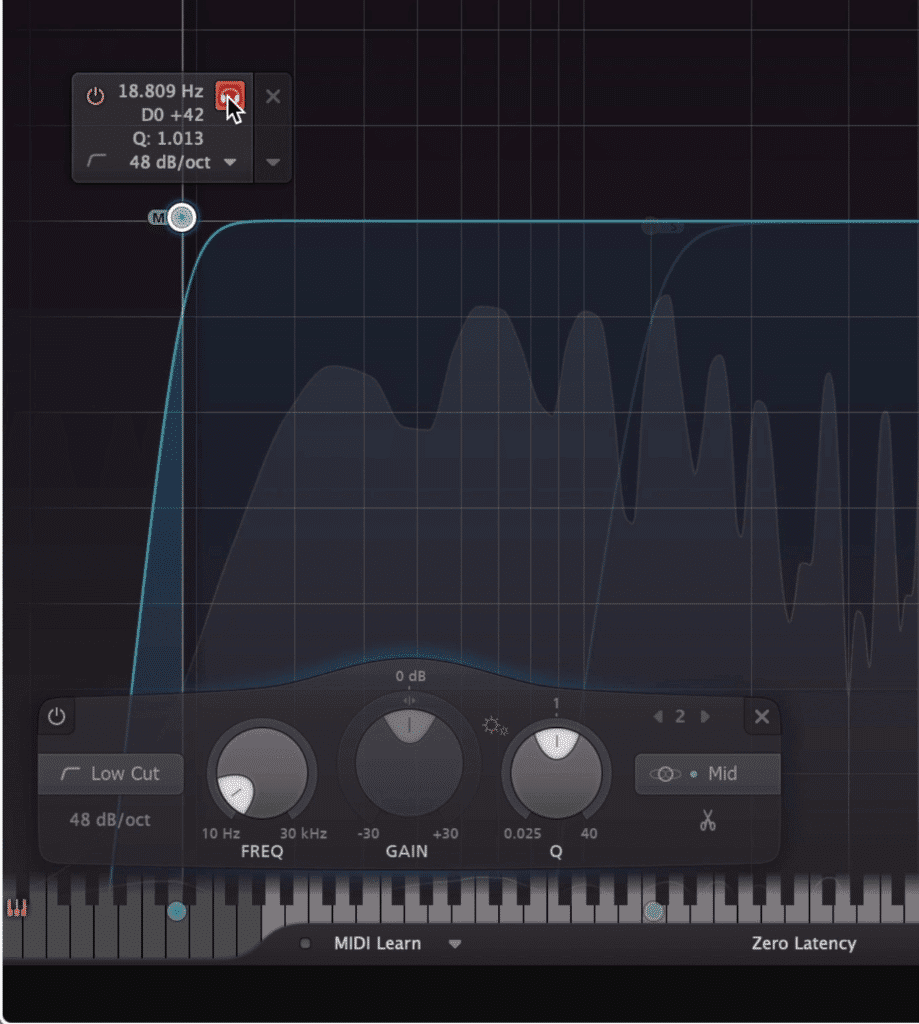
You can also attenuate the mid channel up to 20Hz to achieve more headroom.
If you want more information on these techniques used on the stereo image or more information on the stereo image in general, check out this video:
Understanding Signal Flow and Gain Staging
Signal flow and general gain staging between plugins are one of the most commonly overlooked aspects of mastering music. Understanding signal flow, and in particular how the signal travels from one plugin to another, is crucial to establishing a master that avoids unwanted distortion and retains quality.
Understanding how the signal flows from one plugin to another is important.
Before you begin to master a song, it’s important to understand the basics of signal flow in the DAW with which you’re working.
The track or clip is first in the signal chain.
For example, in Logic Pro X, and most popular DAWs, the clip or track itself is the beginning of the signal. The signal then travels top-down through the channel strip, starting with the plugins in the order that they’re inserted, then the sends, and then to the output.
The signal works top down, and goes through the inserts one by one.
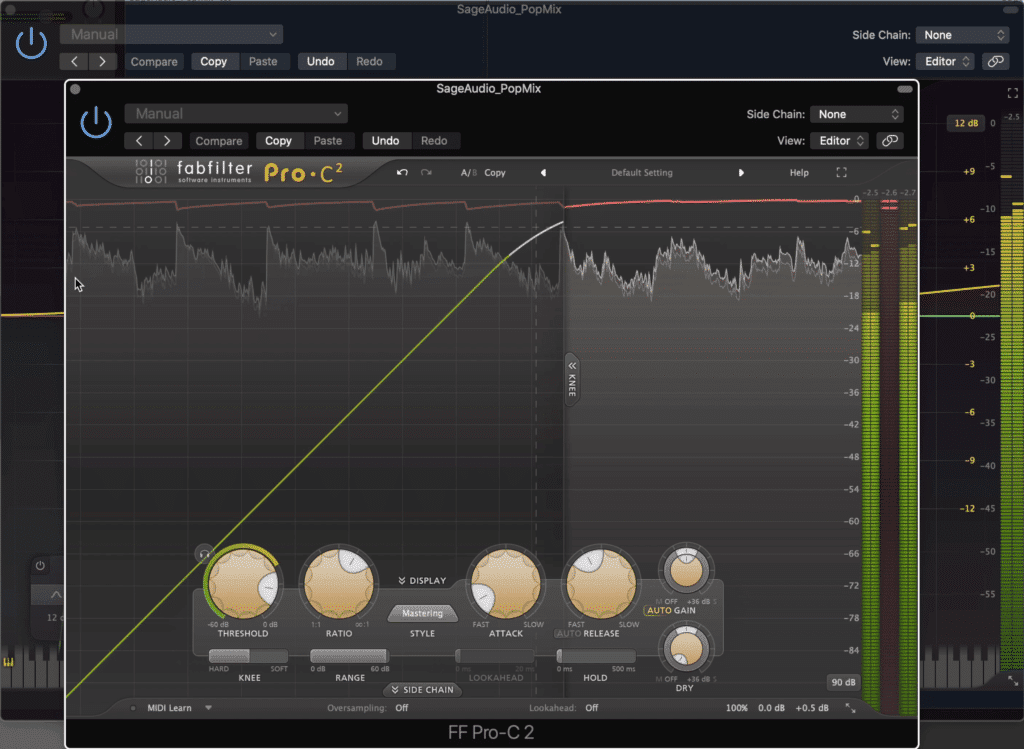
When we think about clipping distortion, we often think about our channel strip meters, but these only show one instance of potential many in which distortion can occur.
To get an accurate idea of what distortion might occur, we need to look at the output and subsequent input of each plugin.
Notice that when I disable the limiter, I can see that distortion and clipping are occurring.
For example, let's say that a signal has 3dB of headroom, but our equalizer adds 2dB, our compressor with makeup gain adds 0.5dB, and saturator adds another 1dB, we know that there’s going to be peaking.
If we place a limiter after this saturator, we may not see this peaking on our channel’s metering or on the stereo output, but the distortion is occurring nonetheless.
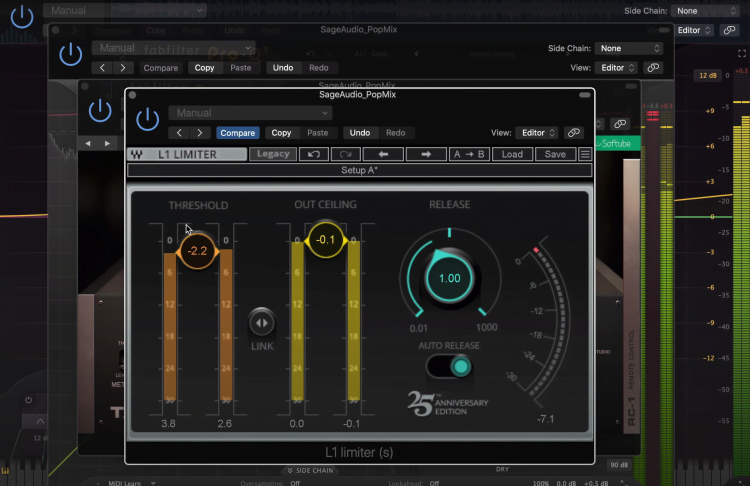
Although it isn't easy to see, distortion is occurring between these plugins.
So, if you need more headroom, go back to your original clip and adjust the clip gain - then, watch the signal as it passes from one form of processing to another. If you see any clipping on your plugins meters, then you need to reassess your gain staging.
Conclusion
Understanding what to do before mastering, or at the very beginning of your chain is just as important as the mastering chain itself.
We can use all of the processing and hardware that we like, but, if we don’t understand the fundamentals of headroom, the stereo image, and signal flow, odds are we’ll make easily avoidable mistakes along the way.
With that in mind, always ensure that you have enough headroom and if you don’t use clip gain to remedy that.
Then, assess your stereo image and the low frequency information on the side image. If you have frequencies that will cause stereo phase cancellation with the kick and bass, it’s best to attenuate these.
Lastly, understand how the signal is going to flow from one plugin to the next. Just because you don’t see clipping on your channel or output meters doesn’t mean that it isn’t happening.
If you’re an artist or an engineer, and you’d like to hear your mix mastered, send it to us here:
We’ll master it for you and send you a free mastered sample to review.


