How To Clean Up A Muddy Master
Quick Answer
If you master or mix is sounding muddy, it’s best to use a few forms of processing to attenuate the low-frequency range of your master. Some of the best tools for this are a mid-side equalizer, a multi-band compressor, and possibly, a tape machine emulation plugin.
How to Clean Up a Muddy Master in Detail
A muddy master is always a challenge for an engineer. Controlling bass frequencies when you can only affect the stereo signal means you’ll have to use some techniques to isolate and attenuate problem frequencies.

Cleaning up a muddy sounding master is a challenge for a lot of engineers.
Fortunately, digital processing and processing in general has become a lot more accommodating for these types of issues. Using various forms of processing we can isolate and attenuate these frequencies.
Let’s keep things simple and break this up into 3 parts, as we cover 3 different forms of processing you can use to clean up a muddy master:
- Mid-Side Equalization
- Multi-band Compression & Expansion
- High ISP Tape Machine Emulation
We’ll show you how to use the plugins for this purpose, address some of the technical aspects that you need to know, and then listen to a before and effect of each effect (in the video embedded above).
Also, if you’d like to hear your mix mastered professionally, send it to us here:
** We’ll master it for you and send you a free sample for you to review.**
How to Use Mid-Side Equalization to Clean Up a Muddy Master
Using mid-side equalization to clean up your master is fairly simple - enable mid-side equalization and create a high-pass filter on the sideband. Then increase the frequency of this band to about 130Hz, this will attenuate any bass frequencies on the side image.
If you’ve checked out our blog posts or videos before, then you know that I talk about this technique a fair amount - but it really is one of the quickest and best ways to clean up a master.
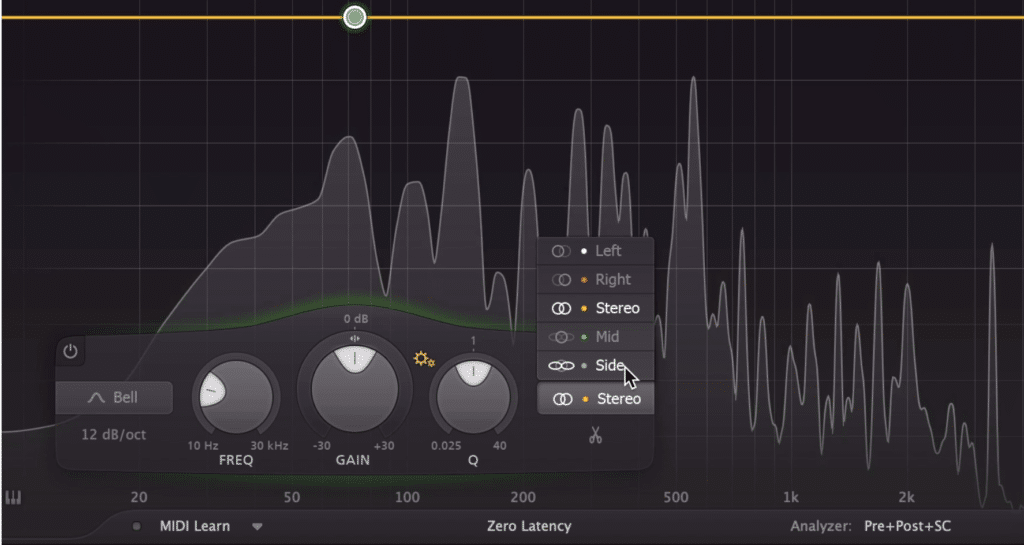
Ensure that the band is on the side image.
By attenuating the side image’s low-frequency range, you make this low range mono. This means that the kick and bass will stay centered in the mid image.
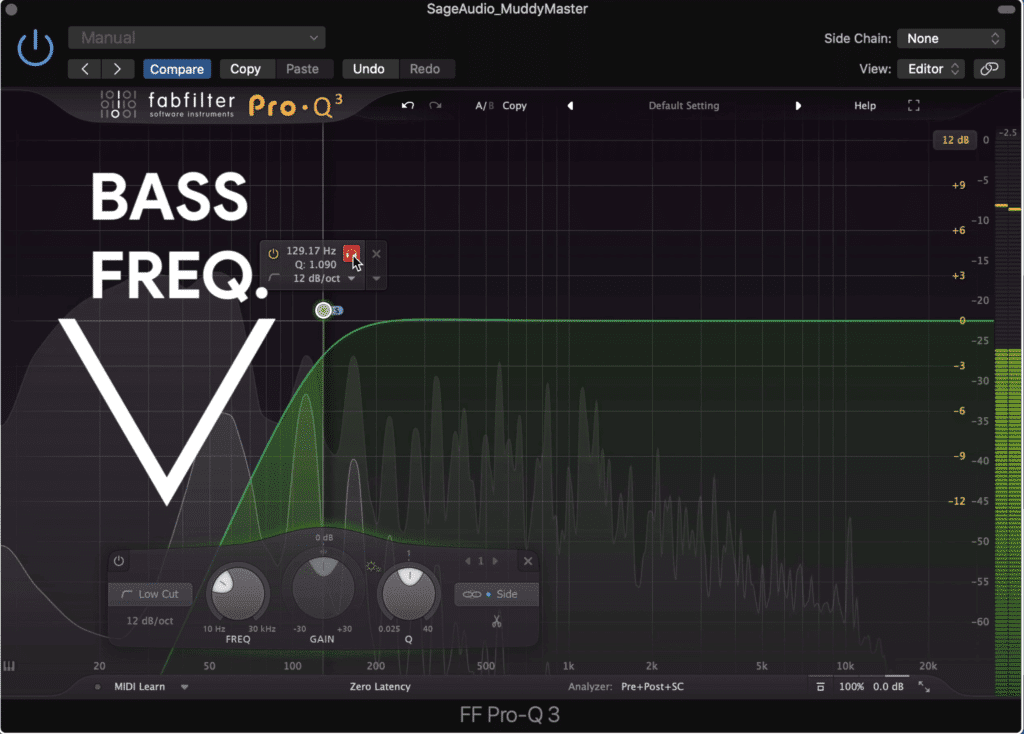
Using a high-pass filter, attenuate up to about 130Hz.
Bass frequencies in the side image can work for some genres, but more often than not, they cause a sense of muddiness and a lack of focus.

You can also use a stock plugin for this if it allows for mid-side processing.
The FabFilter Pro Q 3 is a great option for this technique, but if you’re using Logic Pro X, you can enable mid-side processing on their stock plugin.
Let’s take a listen to the effect (in the video embedded above).
Also, if you’d like more information on some equalization techniques, check out our video on the topic.
It showcases how you can achieve a great sound by utilizing some lesser talked about plugin functions.
How to Use Multi-band Compression & Expansion to Clean Up a Muddy Master
A multi-band compressor can be used to both compress and expansion the low-frequency range - meaning you cab attenuate what’s making the master sound muddy and amplify what adds to the master’s clarity. The exact frequencies you affect will depend on the master that you’re engineering.
However, typically speaking, muddiness comes about by having a less than distinct kick, and heavy bass. Additionally, these two instruments will blend together causing an undefined or muddy sound.
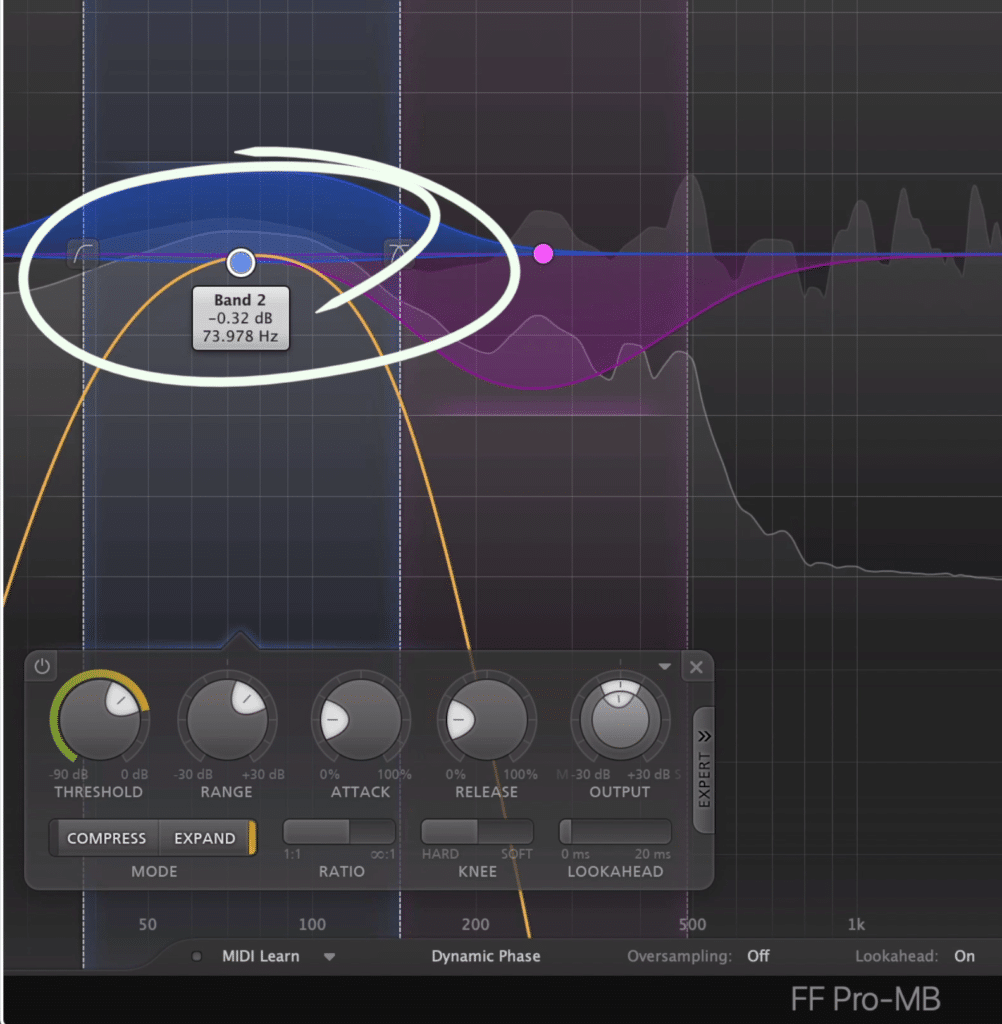
With that in mind, use the multi-band compressor, in this case, the FabFilter Pro MB, to find the most prominent kick frequencies. If the bass doesn’t overlap with these too much, you can simply expand the kick.
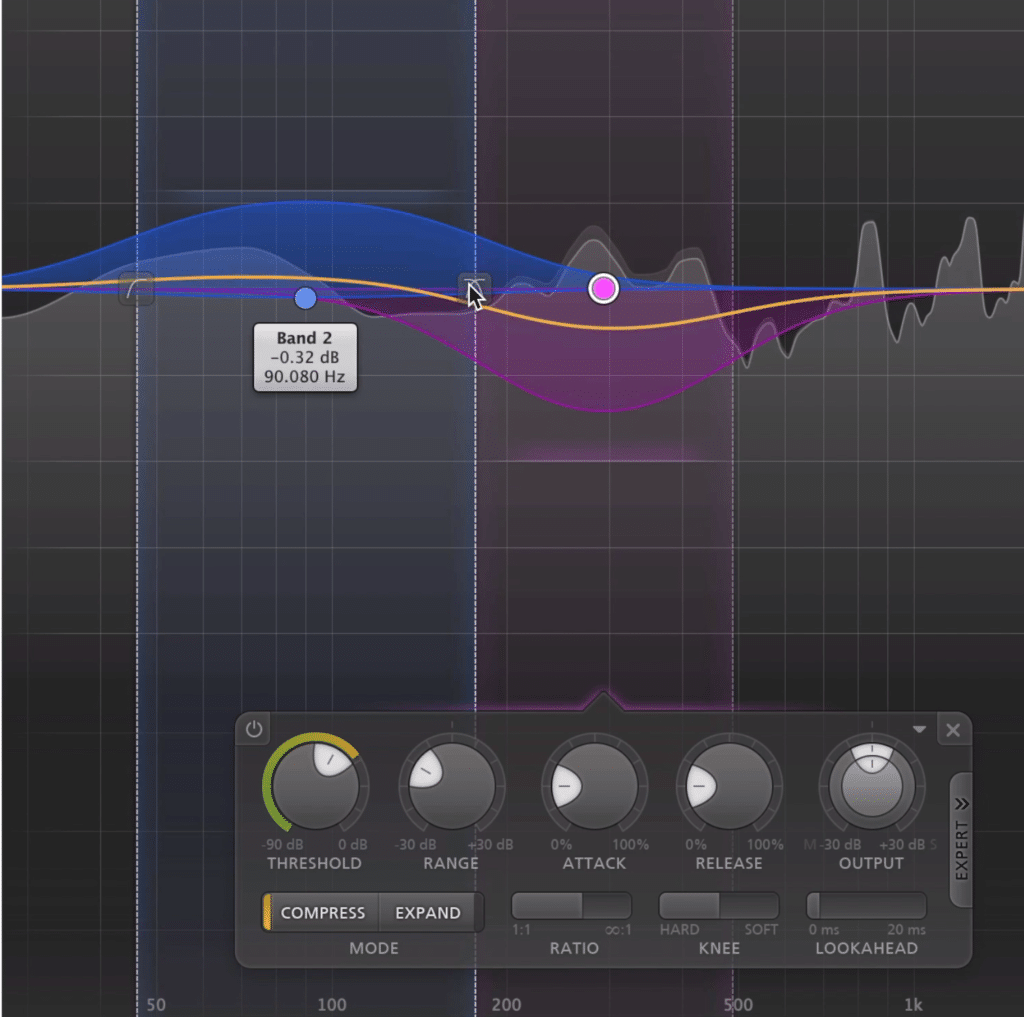
In this instance, I expanded the kick frequencies, while compressing the bass.
But, if you find that the kick and bass blur together then expanding will only exacerbate this issue.
When this is the case, lower the amplitude of the kick frequencies and then introduce expansion that only occurs when the kick hits. This will make for a more dynamic master and help separate the kick from the bass.
Expanding the kick will make your master more dynamic, which will help alleviate muddiness.
Lastly, find where the most aggressive bass frequencies are, and attenuate them. By attenuating these frequencies, not only will you clear up some muddiness, you’ll further augment your dynamic range.
Although finding the exact frequencies for expanding and attenuate may take some time, once you get the hang of using multi-band expanders it does become a lot easier. Typically, you can isolate the frequency band to help you get a better understanding of what frequencies are causing the problem.
How to Use Tape Machine Emulation to Clean Up a Muddy Master
Although it isn’t common to see tape emulation used to clean up a muddy master, it can significantly increase the clarity of a master. By attenuating low frequencies while mildly distorting higher ones, tape machine emulation has the ability to clean up a master and make it less muddy.
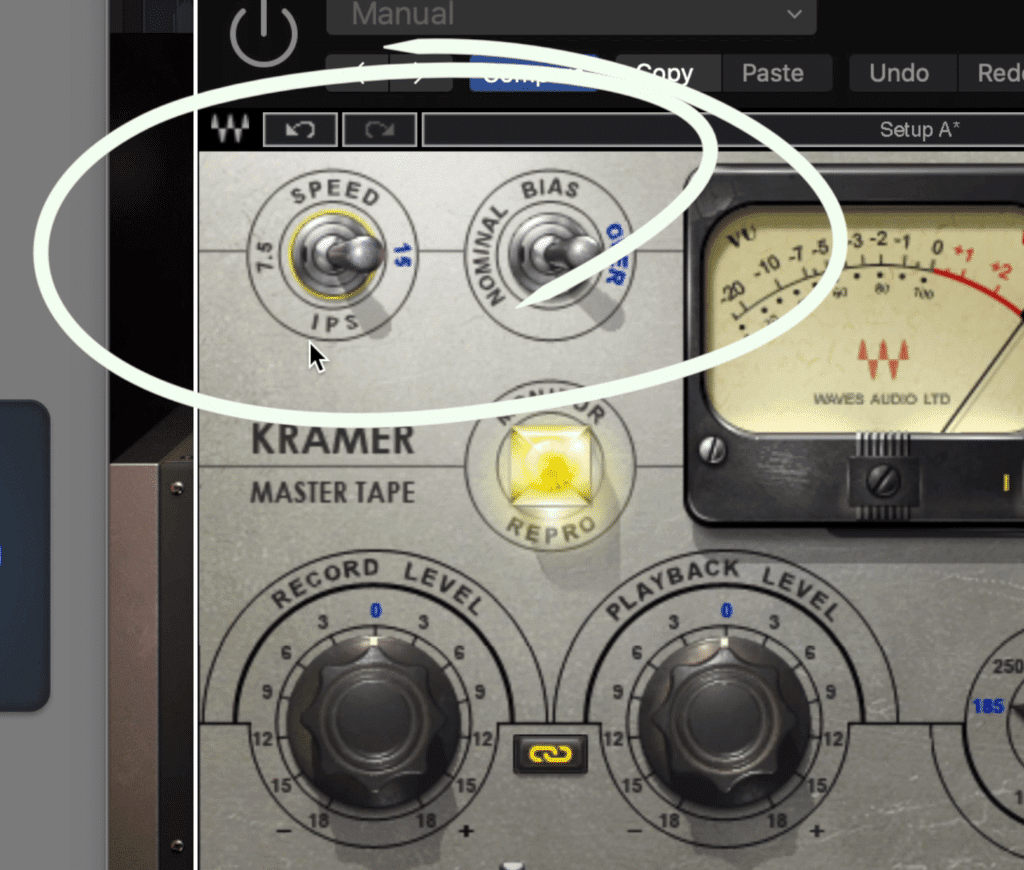
It should be noted that this only works when using a higher tape speed - ideally 30 inches per second.
If you use a tape plugin that only allows for 15 inches per second emulation, you most likely won’t notice a huge effect.
Furthermore, if you use a low tape speed like 7.5 inches per second or lower, this will have the opposite effect and cause your master to become even muddier, so be careful not to do this.
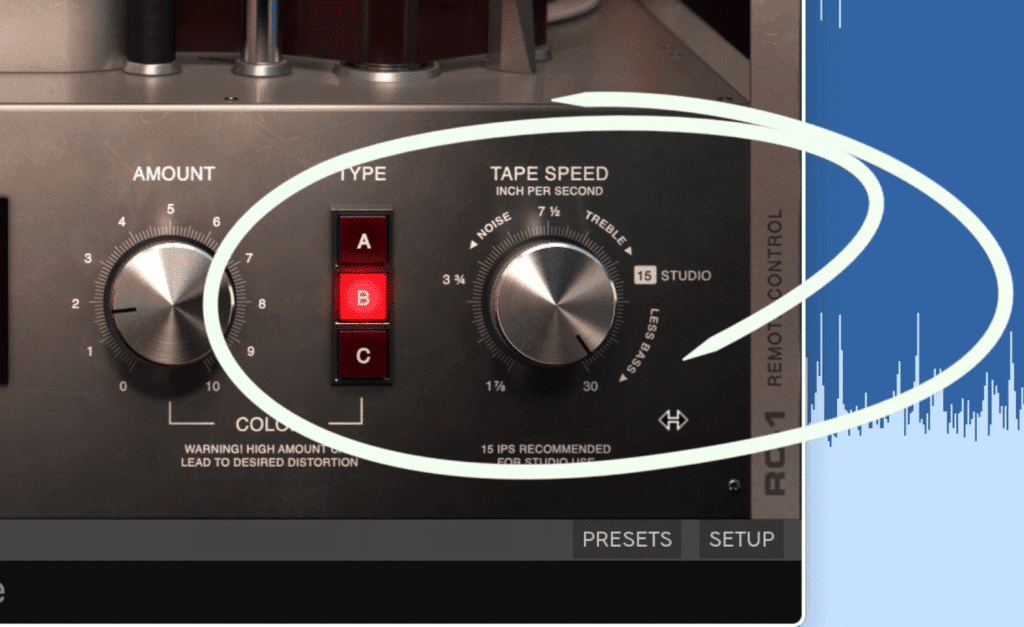
The tape machine plugin that you use will need to offer 30 inches per second tape speed emulation.
To explain, by raising the speed of the tape, it’s more difficult for a tape machine to replicate or reproduce low frequencies - somewhat similar to if you sped up a vinyl record.
When recorded at 30 inches per second, you’ll attenuate the low-frequency range of your master. Furthermore, you’ll mildly distort high frequencies which will make them easier to perceive - in turn adding to the clarity of your master.
If you use a plugin with a lower tape speed, you won't notice much of a difference.
A couple of plugins you can use to achieve this are Softube’s Tape plugin and Toneboosters Reelbus Plugin.
Additionally, if you do use this technique, try to minimize crosstalk, as this will lead to stereo widening, which will make the effect worse if you already have a muddy master.
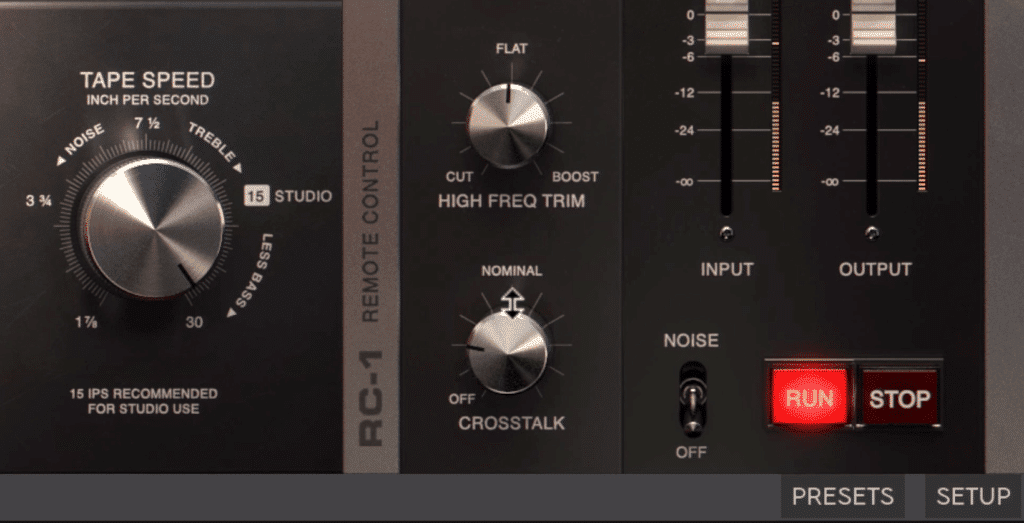
Be sure to avoid crosstalk if your master sounds muddy. This may make the issue worse.
If you’re a fan of analog emulation plugins, and you’d like to find some free ones you can use for mastering, take a look at our video on the topic:
Conclusion
Mid-side equalization, multiband compression and expansion, and tape machine emulation can all be used to clean up a muddy master. If you’re having trouble cleaning up your master, try any combination of these 3 effects to attenuate low frequencies, and separate your kick and bass.
When using mid-side equalization, cut the side image up to 130Hz using a high-pass filter.
When using multi-band compression and expansion, expand the kick and attenuate the bass.
And when using tape machine emulation, ensure that you use a 30 inches per second setting, and keep any crosstalk option to a minimum.
Although here effects can’t save all masters from sounding muddy, they do have a positive effect are times than not. If you have a technique to clean up a master which wasn’t discussed here, let us know in the comment section of the video.
Also, if you’d like to hear your mix mastered professionally, send it to us here:
** We’ll master it for you and send you a free sample for you to review.**
Have you tried any of these techniques before?


