How to Create Clarity in Your Master
Quick Answer
To create clarity in your master, there are various frequencies that you can attenuate and amplify. The easiest and quickest way to create clarity in your master is by using an equalizer to attenuate 200Hz using a bell filter and amplify 3kHz using a bell filter.
How to Create Clarity in Your Master in Detail
If your master is lacking clarity, it can be difficult for it to translate well on consumer-grade speakers. On your monitoring system, you may be able to hear some of the finer details, but when played back on less sensitive equipment, a lot can be lost.
With that in mind, there are some simple and slightly more advanced techniques that you can use to create clarity.
We’ll cover these various techniques, and discuss what processing to use and how to use it, and then listen to examples of each (in the video embedded above) to better understand how they affect the timbre of a master.
If you’d like to hear how your music would sound mastered with clarity in mind, send it to us here:
We’ll master it for you and send you a free sample for you to review.
The Simplest Way to Create Clarity in a Master
Attenuating low frequencies can add clarity to a master.
The simplest way to create clarity in a master is by using attenuating low frequencies and accentuating or amplifying higher frequencies. Although it may seem too simple at first, using subtractive and additive equalization is one of if not the most powerful thing you can do to a master.
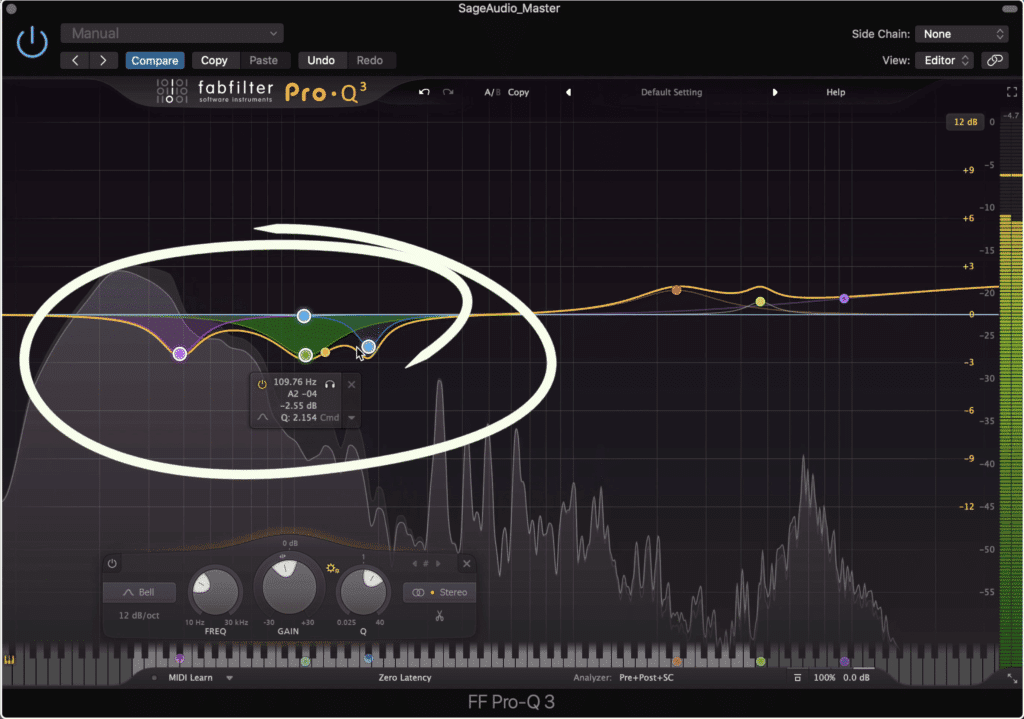
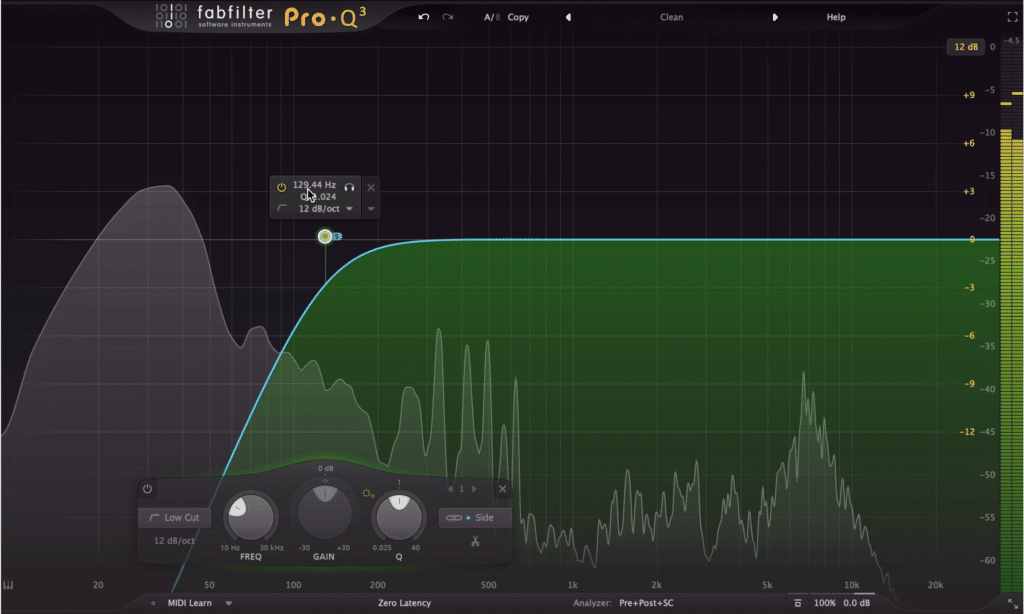
If you’re finding that your master lack clarity, use a bell filter around 200Hz and attenuate those frequencies by up to 3dB. Keep in mind that if you attenuate the signal more than this, you may negatively impact the quality of your master.
Amplifying hight frequencies adds clarity.
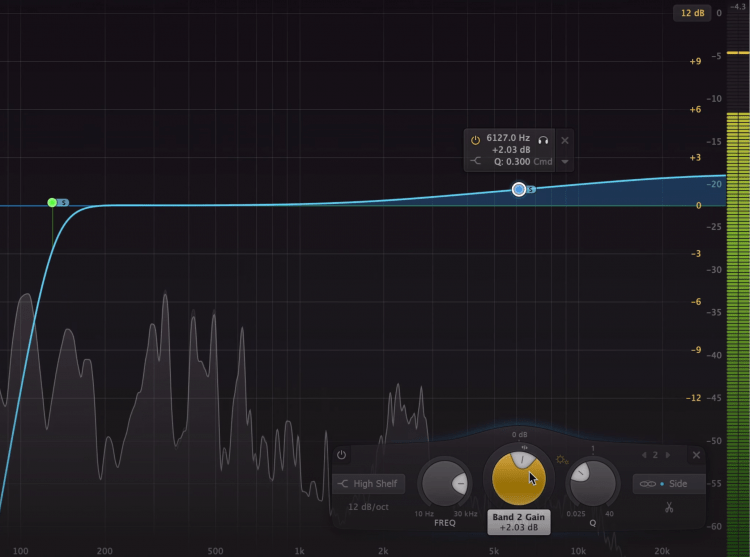
Similarly, if you listen intently to the high frequencies, around 3kHz, you’ll find the best frequencies to amplify.
A bell or shelf filter will work well here - again only amplify up to 3dB, otherwise, you may make too drastic or obvious of a change.
If you’re finding that this process isn’t accurate enough, there is a way to quickly identify the problem frequencies in the lower range.
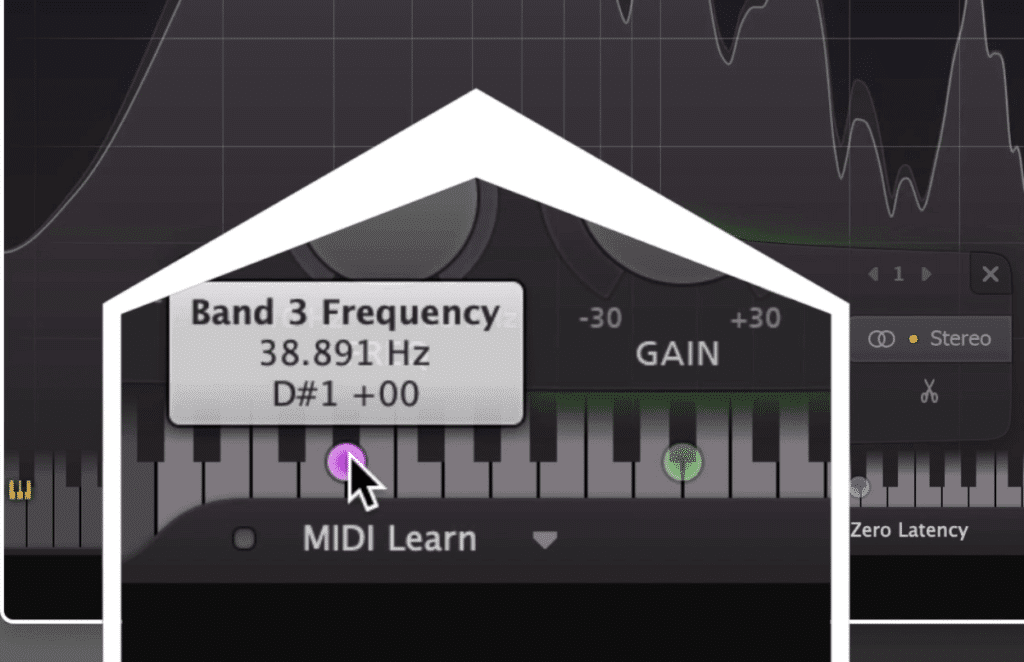
If you know the key of the song, for example, say the song is in the key of D Major, then you can find the exact frequencies of the bass’s performance.
In this example, the most prominent bass frequencies will most likely be 37Hz, 73Hz, and 146Hz. If you attenuate these exact frequencies you’ll be able to attenuate the bass overall.
Bands can be made dynamic or a multi-band compressor can be used for this effect.
If you know the chord structure of the song, in this case, it’ll most likely include an F# and A, this will give you even more information on the bass frequencies being used.
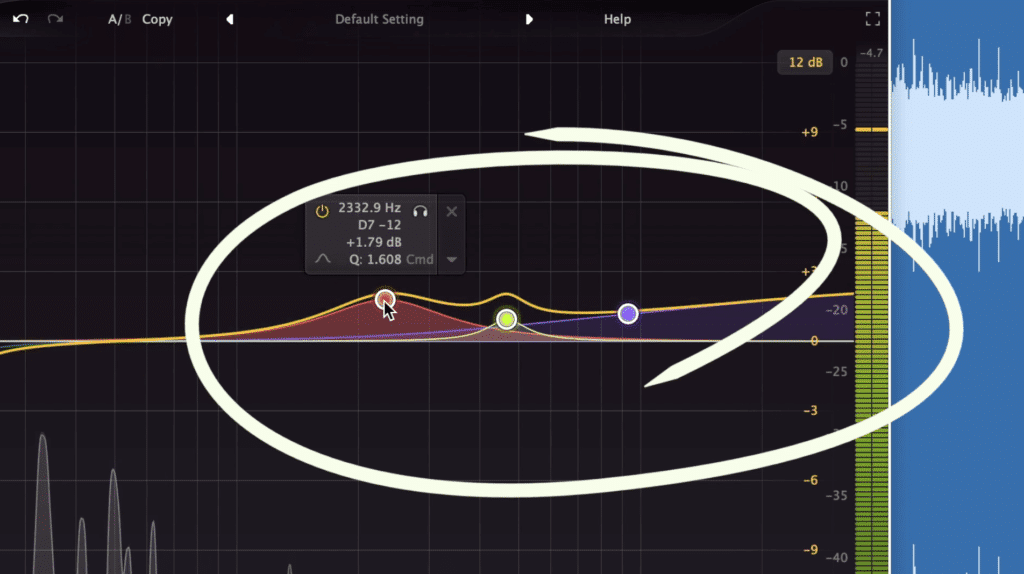
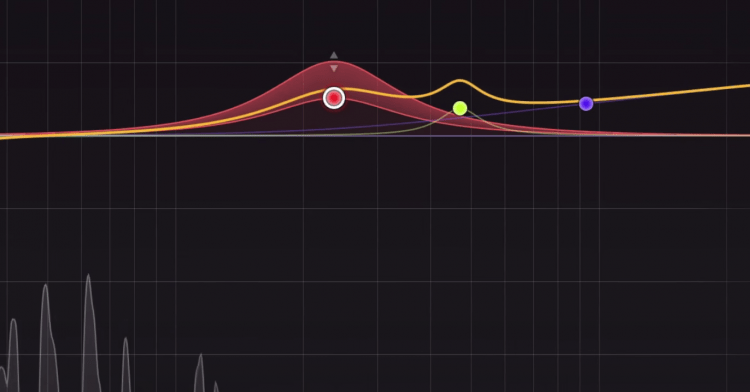
Similarly, and again if our song was in the key of D Major, you could amplify 2350Hz, 4.7kHz, and 9.4kHz to add some clarity.
If you know the key of the song you can affect the exact frequencies that are present.
If you’d prefer to make this processing more dynamic, you can use a multi-band compressor to attenuate and expand the low and high frequencies respectively.
Furthermore, some equalizers allow for dynamic equalization, which will have a similar effect.
If you’d like to learn more about an equalizer with all of these capabilities, check out our video about the FabFilter Pro-Q 3:
Adding Clarity to a Master Using Mid-Side Processing
Using a high-pass filter on the side image can create a clear master.
When a master sounds muddy, odds are there are some low frequencies that have made their way into the side image - fortunately, this is an easy fix. You can add clarity to your master with mid-side processing by attenuating low-frequencies on the side image of your master.
One of the quickest ways to do this is with a mid-side equalizer. With a mid-side equalizer, use a high-pass filter on the side image and cut out up to about 130Hz.
In turn, all frequencies below this point will be mono, making them sound focused and driving.
Amplifying a shelf filter on the side image can subtly increase clarity.
Similarly, you can add shelf filters to the side image in the high frequencies range. Not only will this add some clarity to your master, but it’ll also widen your stereo image which can have a pleasant effect.
If you’re using other mid-side plugins, like a mid-side saturator, make the saturation only happen on the mid image in the lower frequencies.
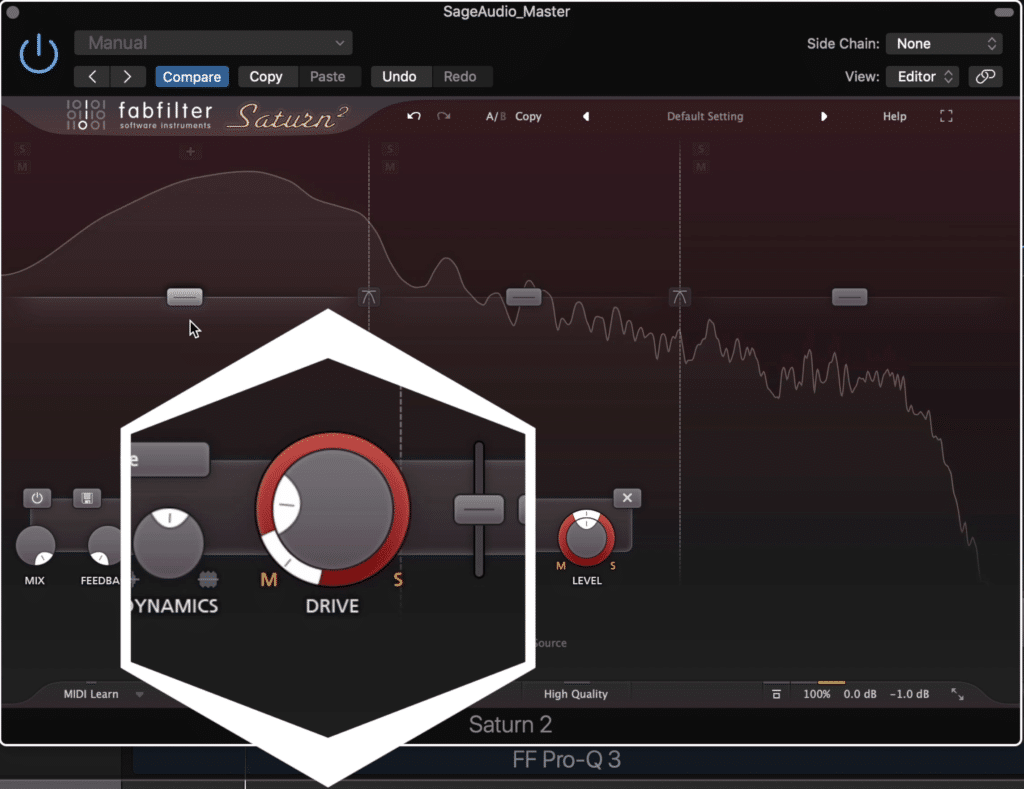
If you're using mid-side saturation, ensure that the distortion is panned to the mid-image.
This way, any low frequencies on the side image won’t be amplified or made more easily perceived by the saturation.
Furthermore, if you add some more harmonic distortion or saturation to the high-frequency range, this will increase the perceivability of these frequencies, in turn causing your master to sound clear.
Adding Clarity to a Master Using Parallel Low-Level Compression
Using parallel low-level compression on the high frequencies adds clarity quickly.
This last method is a little unorthodox but can produce great results. If you use a low-level compressor, but only on the high frequencies, you can significantly increase the clarity of a master.
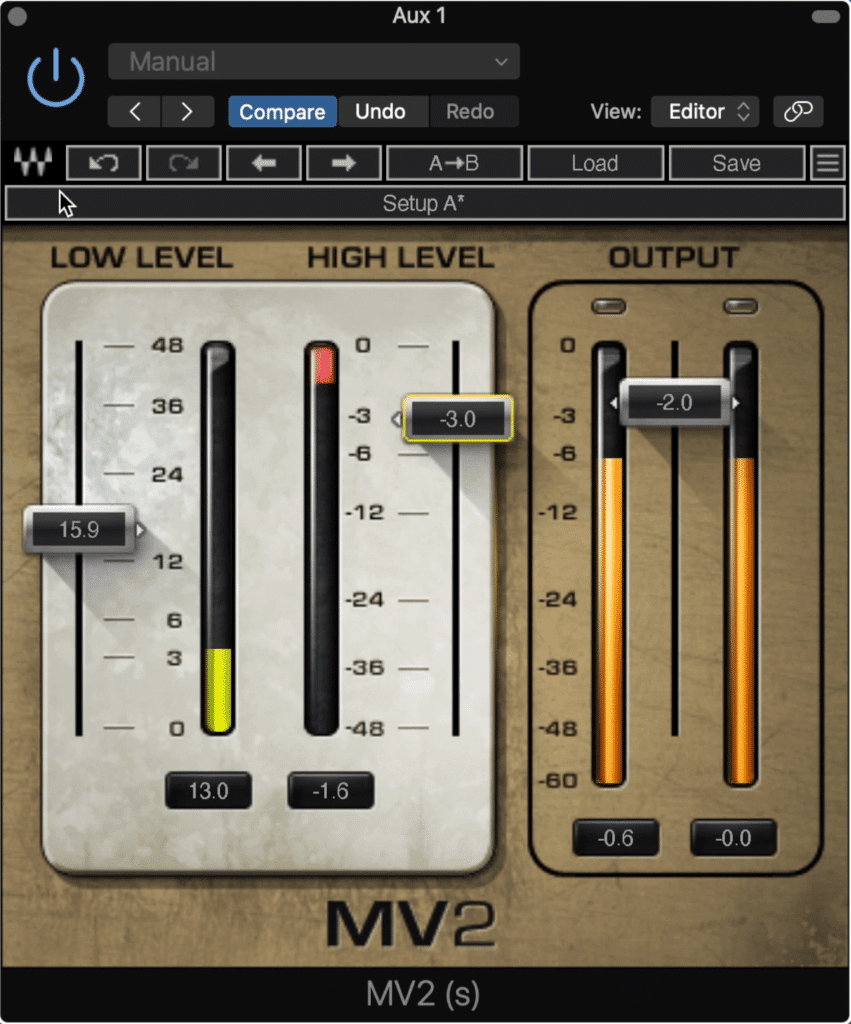
To accomplish this, set up an auxiliary track using a bus send, and then set the send to unity. On this auxiliary track, first, insert an equalizer and attenuate the low-frequency range up to about 1500Hz - but what you choose will depend on the track you’re working on.
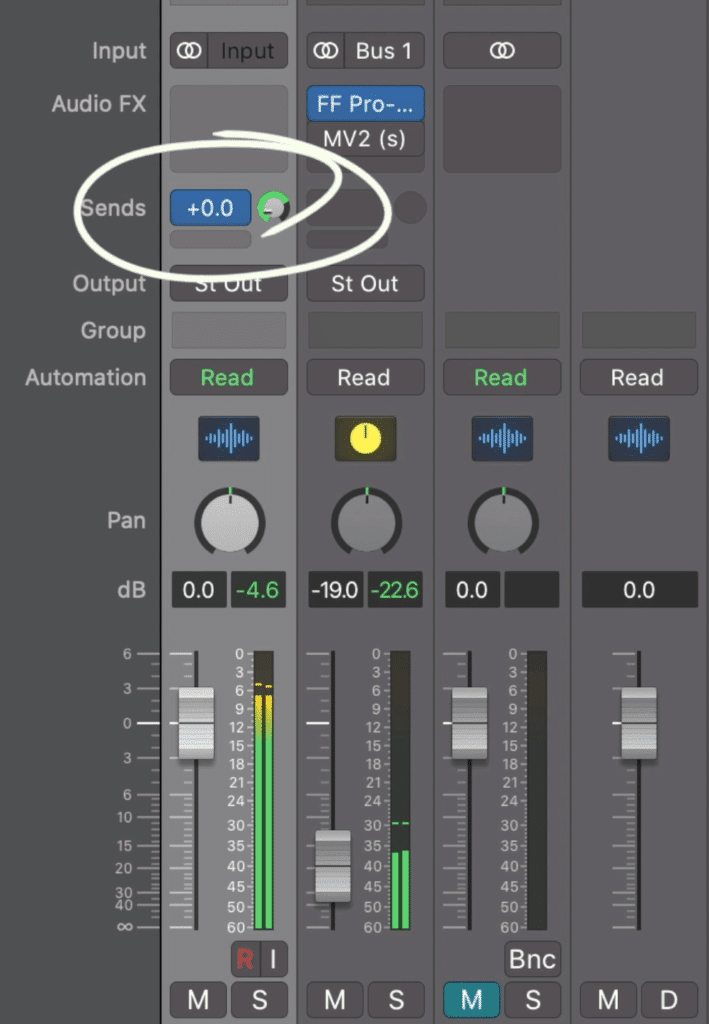
Set the send to unity or 0dB.
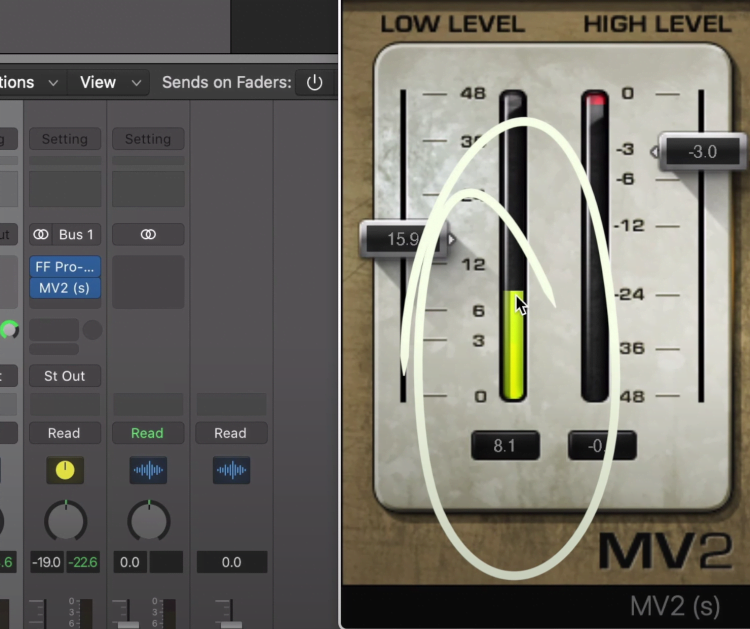
Next, insert your low-level compressor.
This compressor will find aspects of the signal that fall below our ability to perceive them, compress them, and then amplify them.
Because this compressor is parallel to the original signal and can be blended in, compress the signal somewhat heavily. Then, blend the compressed high-frequency signal back in with the original signal path by using the auxiliary track’s channel fader.
Notice that the MV2 is used after the equalizer.
This way you can create an incredibly clear sound and dial it into your master. Keep in mind that if you use this method but exclude the equalizer you’ll compress both the low and high frequencies, potentially making your master even muddier.
With that said, using an equalizer with a high-pass filter is an important aspect of this technique.
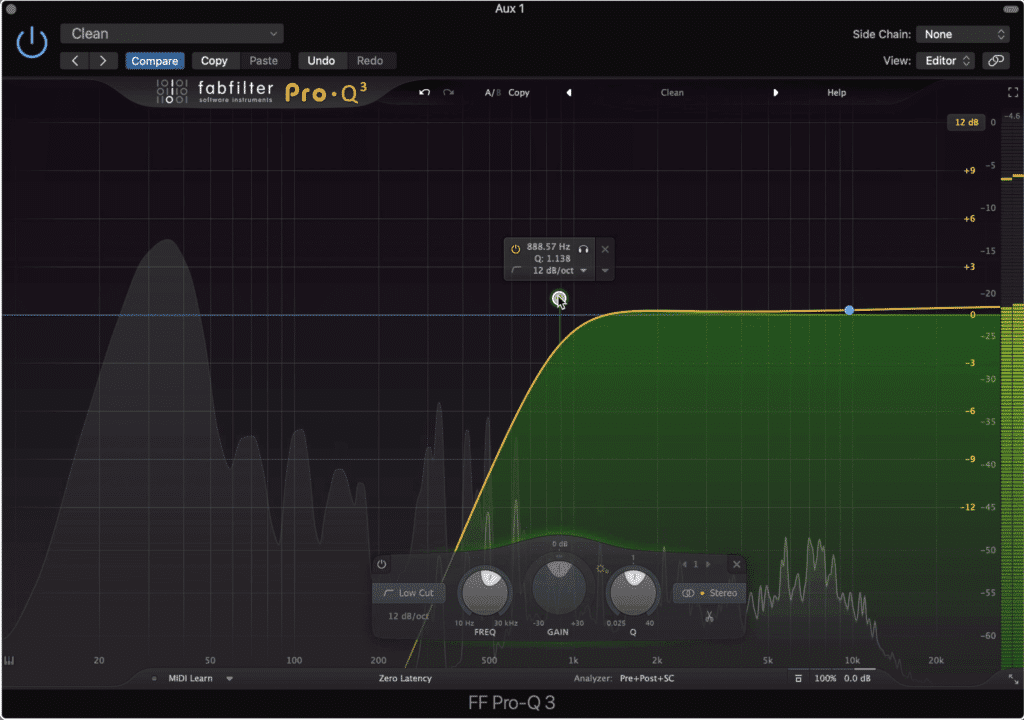
The high-pass filter needs to be introduced before low-level compression.
Lastly, if you want to add even more clarity you can create a shelf filter on this equalizer that amplifies the high-frequency range. This will emphasize the high-frequency range prior to the signal hitting the low-level compressor.
If you’d like to learn more about low-level compression, check out our video on the MV2 compressor.
Conclusion
Having a clear master is crucial for having your master translate well to consumer-grade equipment. Fortunately, there are some easy to use techniques to create this clarity quickly.
- Attenuate low frequencies and amplify high ones. This can be done using an equalizer, a dynamic equalizer, or a multi-band compressor. Keep the key of the song in mind to find the exact bass frequencies to attenuate and high frequencies to amplify.
- Attenuate low frequencies on the side image to make the low frequencies mono. This can be accomplished with a mid-side equalizer. Similarly, you can amplify the high side- frequencies with a shelf filter, or with saturation.
- Using a low-level compressor as a parallel send, compress, and amplify the high frequencies of a master. To do this, insert an equalizer before the low-level compressor to cut out low frequencies before compression.
If you’d like to hear how your music would sound mastered with clarity in mind, send it to us here:
We’ll master it for you and send you a free sample for you to review.


