How to Create Punchy Sub Bass in Your Master
Quick Answer
To create punchy sub-bass in your master you can use a resonance filter with a high-pass filter around 20Hz, utilize harmonic distortion, try a sub-frequency generator, or compress and amplify the harmonics directly above your sub-frequencies. These techniques will work well but in different circumstances.
How to Create Punchy Sub Bass in Your Master in Detail
Sub-bass frequencies can be understood as the low-frequencies between roughly 20Hz and 60Hz. These frequencies are borderline imperceivable but can still add a significant amount of power to a master.
In some genres, these frequencies are absolutely crucial, and if they're missing or lackluster, fans of that genre won’t be happy.
That’s why it’s so important to understand sub-frequencies, how to amplify and adjust them, and how you can use some unique effects to make them more easily perceivable.
We’ll cover 4 ways that you can create punchy sub-bass, and organize these techniques from the most simplistic to the most complex; however, each is pretty easy to achieve.
If you’re an artist or an engineer, and you’d like to hear your music mastered professionally, send it to us here:
We’ll master it for you and send you a free sample to review.
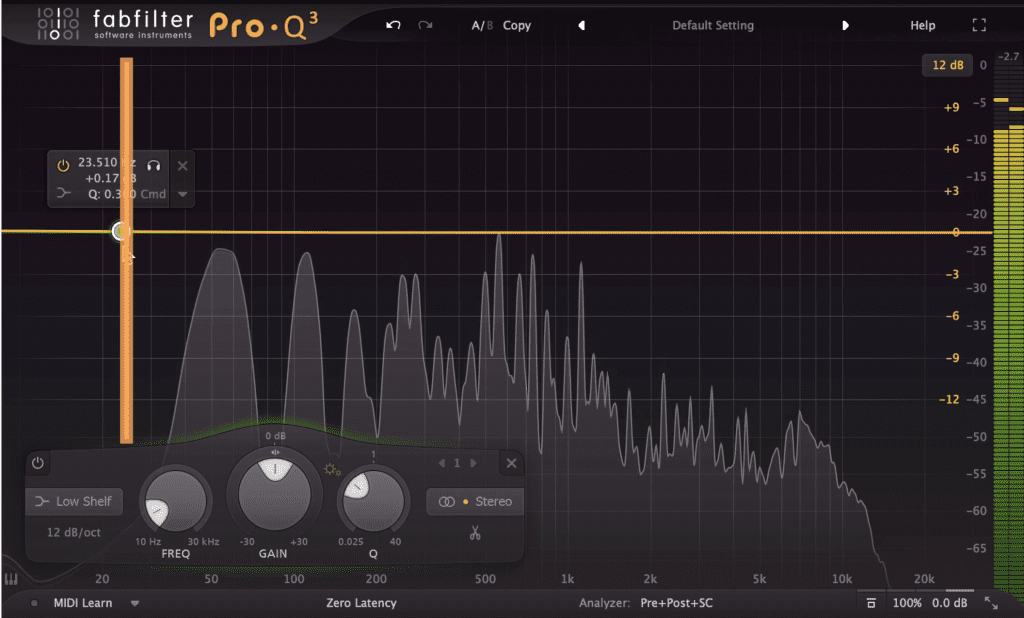
How to Amplify Sub-Bass Frequencies with an Equalizer
The sub-frequencies of a master exist between 20Hz to 60Hz - so to amplify the sub-bass you need to amplify these frequencies.
This can be done in a few ways, including using an equalizer specifically designed to amplify sub-bass frequencies. BX Subfilter is a good free option if you’d prefer to use an EQ designed for this purpose.
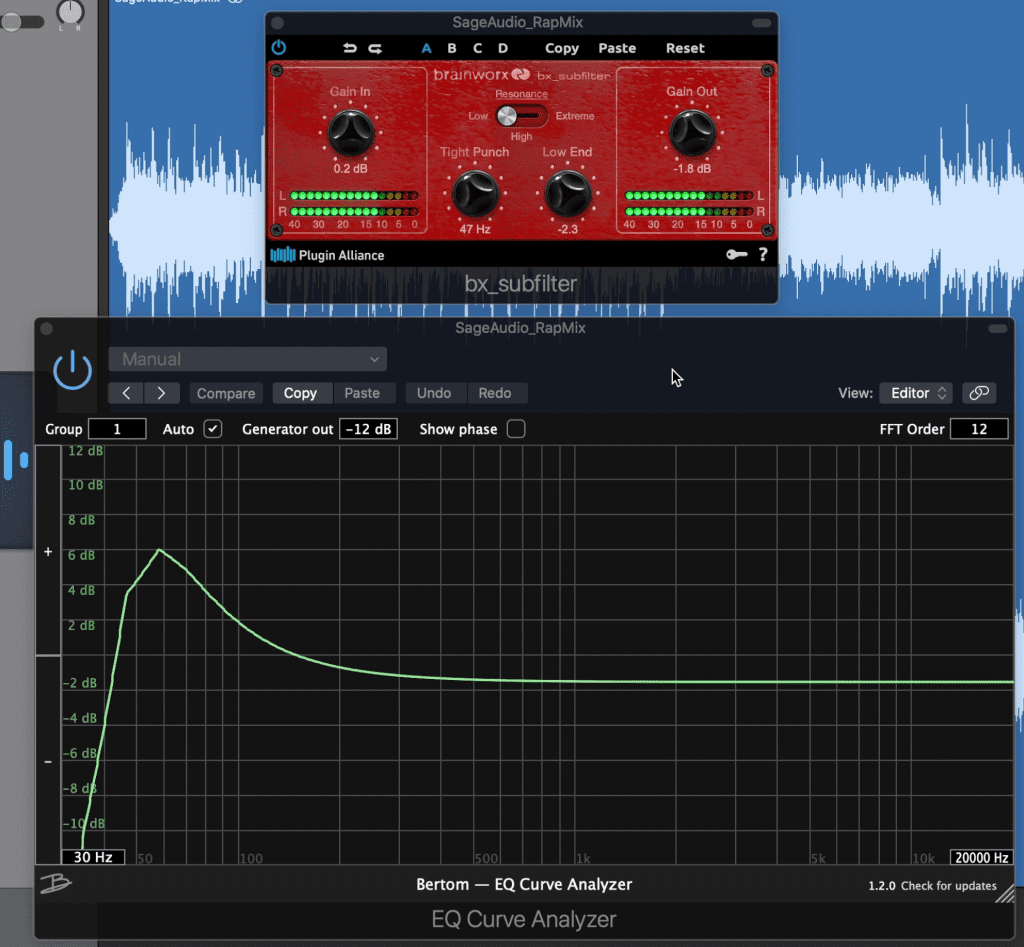
Shown here is the bx Subfilter, and the curve it creates.
If we use the Bertom Frequency Analyzer, we can get a better understanding of how this plugin work. We see that a resonance filter is used to amplify the sub-frequencies, and can be altered using the resonance option.
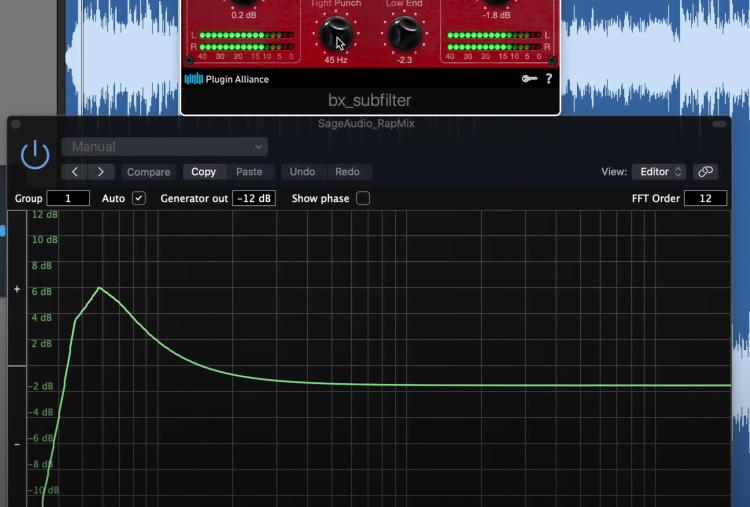
Notice how the resonance filter changes with the alteration of the tight punch dial.
If you’d prefer not to use a plugin like this, use a regular equalizer in linear-phase mode. This way the equalization is accurate and doesn’t introduce any phase cancellation.
Then amplify this 20-60Hz range. Additionally, you can attenuate up to 20Hz using a high-pass filter to reduce phase cancellation.
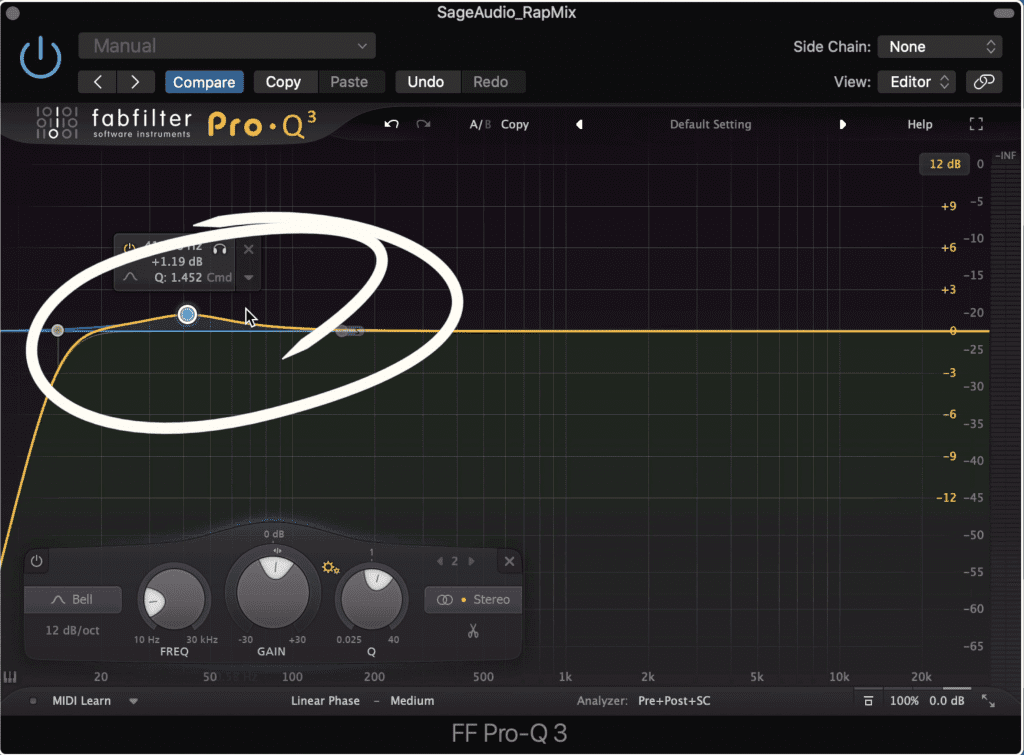
You can also simply amplify these frequencies with an EQ
Lastly, you have the option of converting your signal into mid and side. If you do this, take a listen to the low-frequency range of the side image and see if any of the signal has spilled over. If it has, cut up to 70Hz on the side image to keep the sub-frequencies mono.
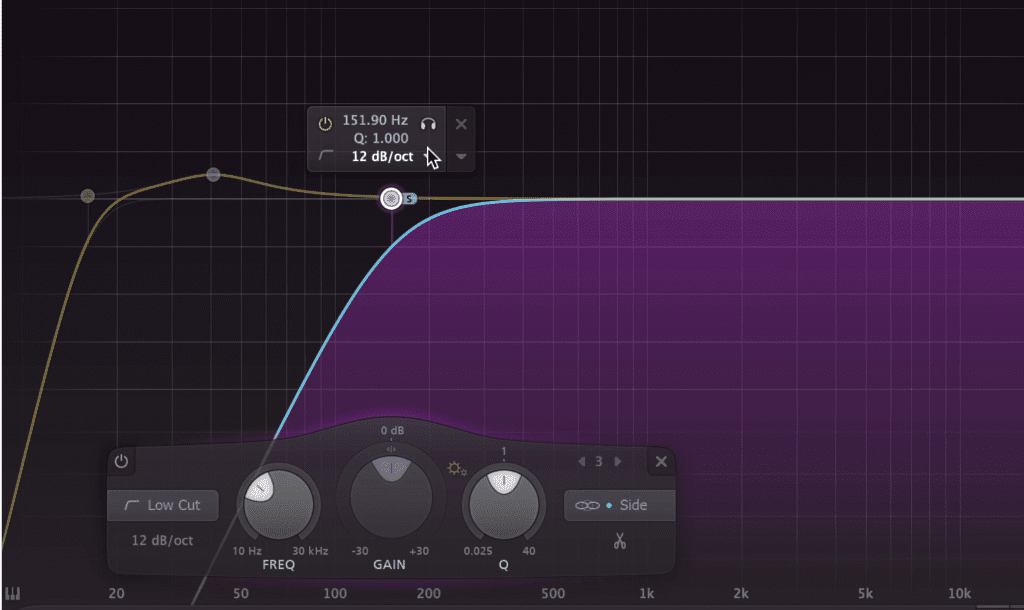
A cut to the side image can help as well.
Otherwise, you’ll have phase cancellation that can really lessen the impact of your sub-frequencies.
Also, since this is a mastering session you can use linear phase to make your equalization more accurate.
If you want more mastering techniques, check out this video:
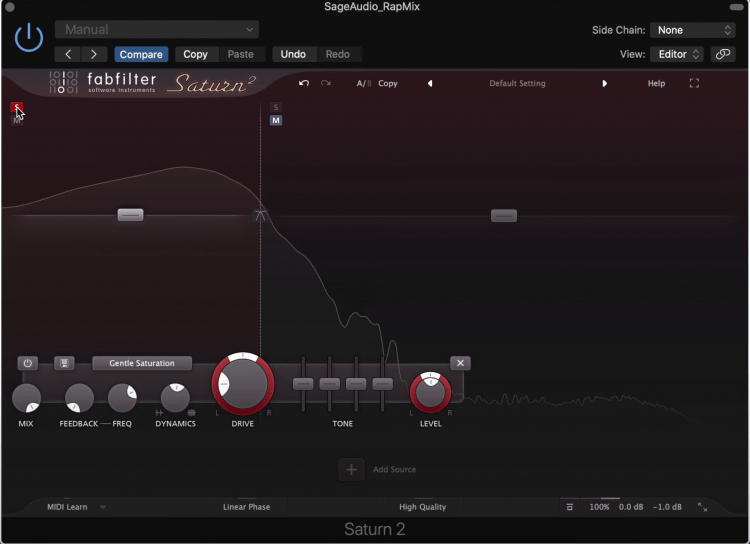
How to Use Saturation on Sub-Frequencies
When saturating low frequencies, it’s ideal to be able to separate the saturation just to the low-frequency range. If you have to saturate the entirety of the frequency spectrum, it’ll still help, but not to the same extent as if you were able to isolate the saturation.
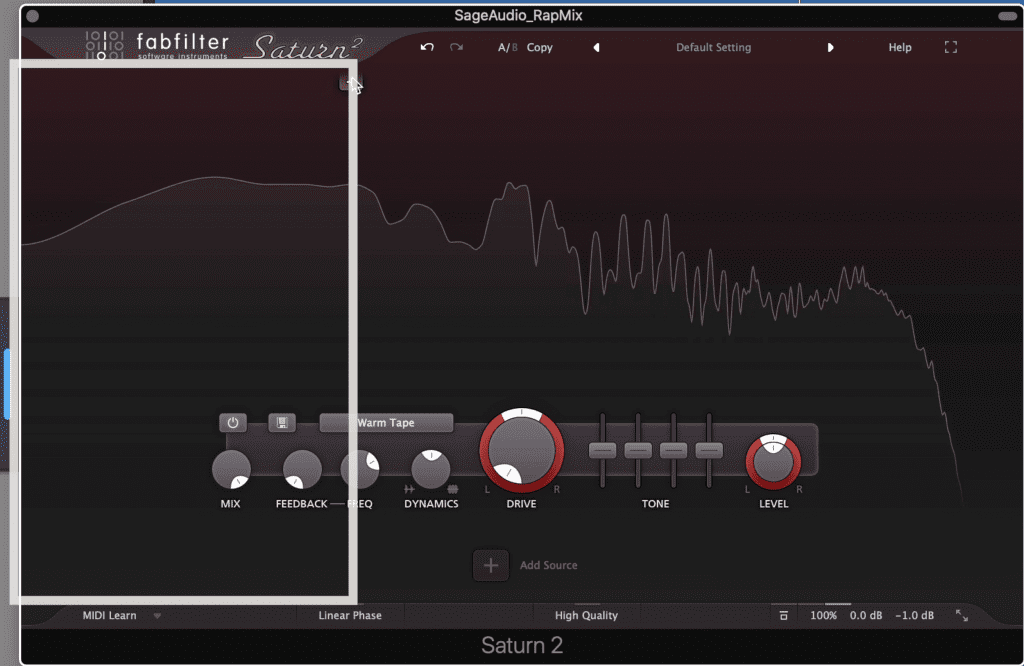
Ideally, saturation can be isolated to just this range.
For our example, I’ll use the FabFilter Saturn 2 to create a band just on the lower frequencies , and then change the saturation type to Gentle Saturation.
If you're using this plugin, gentle saturation is a good starting point.
Then I’ll very gradually introduce some harmonic distortion. By doing this we create harmonics that make the fundamental easier to hear.
So say our sub-frequency is 30Hz, and we saturate the signal, if we get a second and third-order harmonic, this means we’ll also amplify 60Hz and 90Hz.

It'll generate harmonics above the fundamental, show here as 30Hz.
Having these harmonics that relate to the fundamental causes a psychoacoustic effect in which our mind generates the fundamental frequency, in turn making it easier to hear or at least, easier to perceive to hear.
Try different saturation types to see which one works the best, and again, if you can isolate this saturation to the low frequencies you should.
How to Use a Sub-Frequency Generator
On occasion, the mix you’re mastering will completely lack sub-frequencies. When this happens, it won’t matter how much you amplify 20Hz to 60Hz, since there won’t be much that you can bring forward.
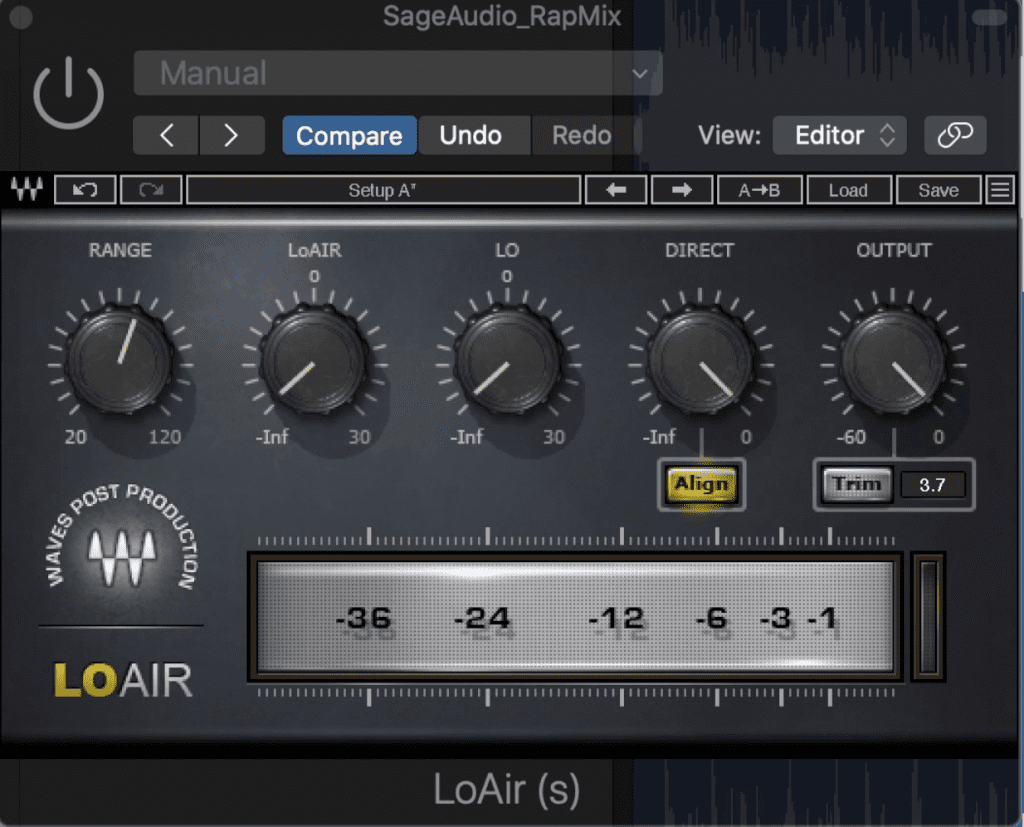
LoAir generates a sub-harmonic frequency
If you find yourself in this situation, you can use a sub-frequency generator. Whereas typical distortion and saturation plugins amplify and create harmonics above a fundamental, a sub-frequency generate will create a frequency below the fundamental.
It does this by measuring the signal, finding the fundamental, and then generating a pitch-shifted version of it further down the spectrum.
You’ll notice that this newly generated frequency will be 1/2 the frequency of your original fundamental.
This frequency will be 1 half of the fundamental in frequency.
LoAir by Waves Audio is a great plugin for this but should be used very carefully and sparingly. If you were to use this plugin for this purpose, I’d keep the settings to nearly off, and enable the Align function to avoid phase cancellation.
Additionally, keep the range lower so that you’re only affecting the sub-frequencies.
Another plugin that you can use for this is Lovend by Analog Obsession. I typically find that this plugin has too strong of an effect for mastering , but, maybe you can try using it on a parallel auxiliary send and blend in the effect.
For more information on harmonics, check out this video
How to Compress and Amplify Frequencies Above Your Sub-Frequencies
Somewhat similar to our previous example, there are plugins designed specifically for compressing and amplifying harmonics directly above your sub-frequencies.
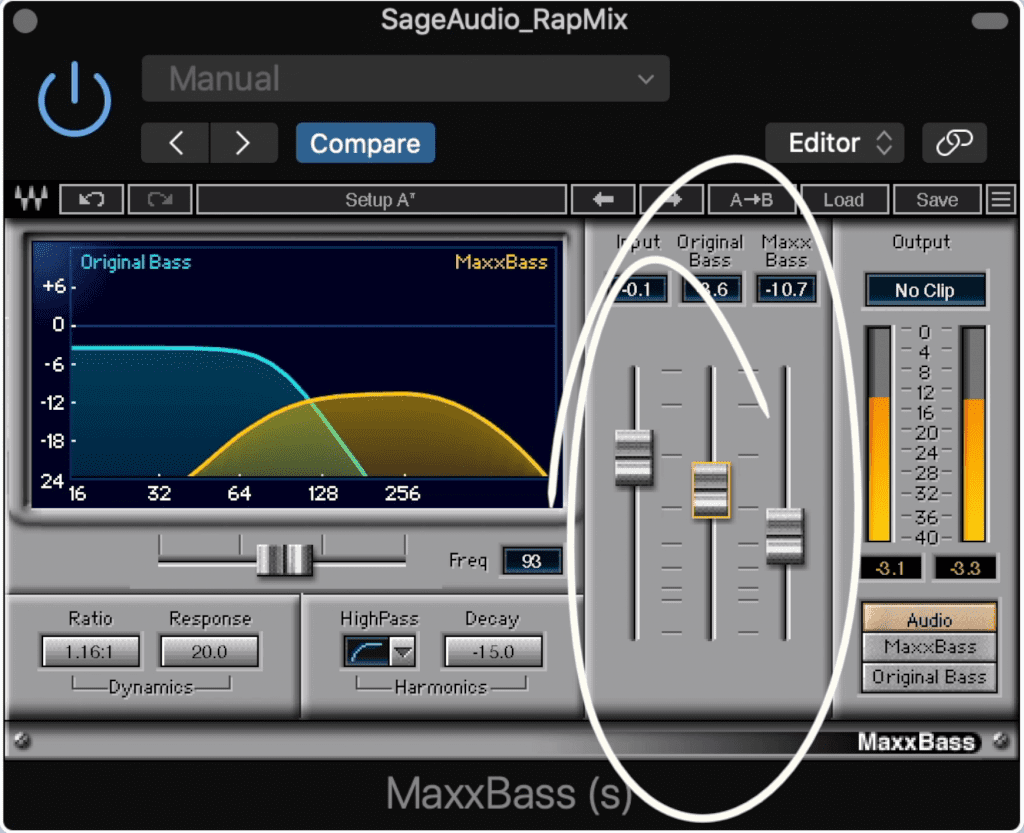
With MaxxBass you can control the original signal and the generated harmonic signal.
Instead of generating sub-frequencies, these plugins generate harmonics to the sub-frequencies, similar to a saturator but in a more uniform and purposeful way.
The MaxxBass is a good example of one of these plugins.
With it, you can compress, amplify, and generate harmonics that make the fundamental sub-frequencies more easily perceived. You can also blend the amplitude of these generated frequencies with the original signal and monitor both individually to understand how it’s affecting the signal.
Aside from making the sub-frequencies easier to hear, this plugin is useful if your master will be played back over speakers with a truncated low-frequency range.
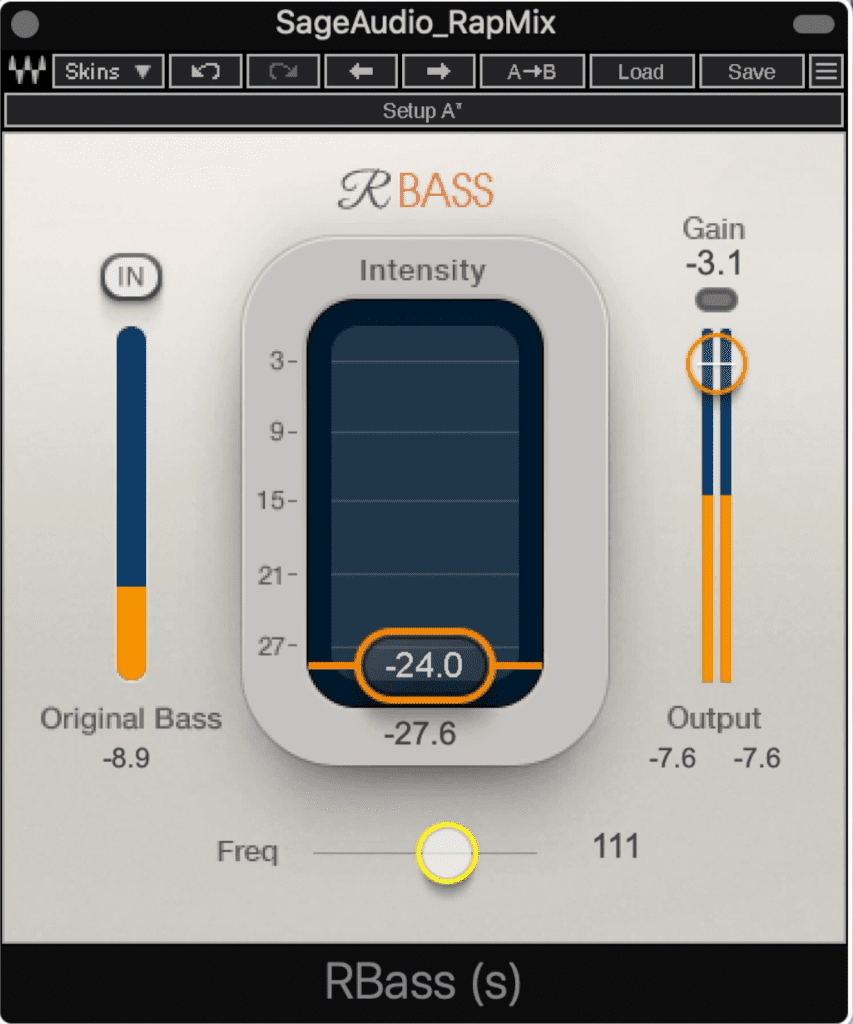
RBass is probably not best for mastering, but it does a similar job.
Due to the psycho-acoustic effect that we discussed earlier, the mind generates the fundamental if harmonics are present even if that fundamental isn’t present. So if you anticipate your music being played over these speakers and you want to sub to translate, you should use this plugin or a similar one.
Like the LoAir plugin, it’s best to be careful when using MaxxBass as it’s pretty easy to overdo it.
Another plugin you could use is RBass which doesn’t something similar but without the dynamics section and additional functionality.
Like Lovend, this plugin may be a little too aggressive for mastering, so use your better judgment and listen critically if you choose to use it.
If there are any additional plugins that you use for this purpose let us know - we’d love to learn about some more low-frequency harmonic exciters and dynamics processors.
Conclusion
Although the majority of the work needed for a punchy sub will happen during mixing, there are some techniques that you can introduce when mastering.
It really comes down to either equalizing or distorting and exciting low-frequencies. No matter which technique you choose to use, listen intently as it isn’t difficult to over or under process your low-frequency range.
If you’re an artist or an engineer, and you’d like to hear your music mastered professionally, send it to us here:
We’ll master it for you and send you a free sample to review.


