How to Master Pop Music with Logic’s Stock Plugins
Step 1: Subtractive Side Image Equalization with ‘Channel EQ’
Step 2: Subtle Compression and Distortion with ‘Compressor’
Step 3: Additive Stereo Equalization and Distortion with ‘Tube EQ’
Step 4: (Optional) Subtle Harmonic Excitement (<1%) with ‘Exciter’
Step 5: Additive Side Image Equalization with ‘Channel EQ’
Step 6: Brick-wall Limiting using True Peak Detection with ‘Limiter’
Step 7: Loudness and Level metering with Logic’s Meters
Mastering Pop Music with Logic’s Stock Plugins in Detail
Mastering music can definitely be challenging - especially when you only have stock plugins. Fortunately, modern DAWs give you more than enough flexibility to create some great sounding masters without the need to purchase additional software.
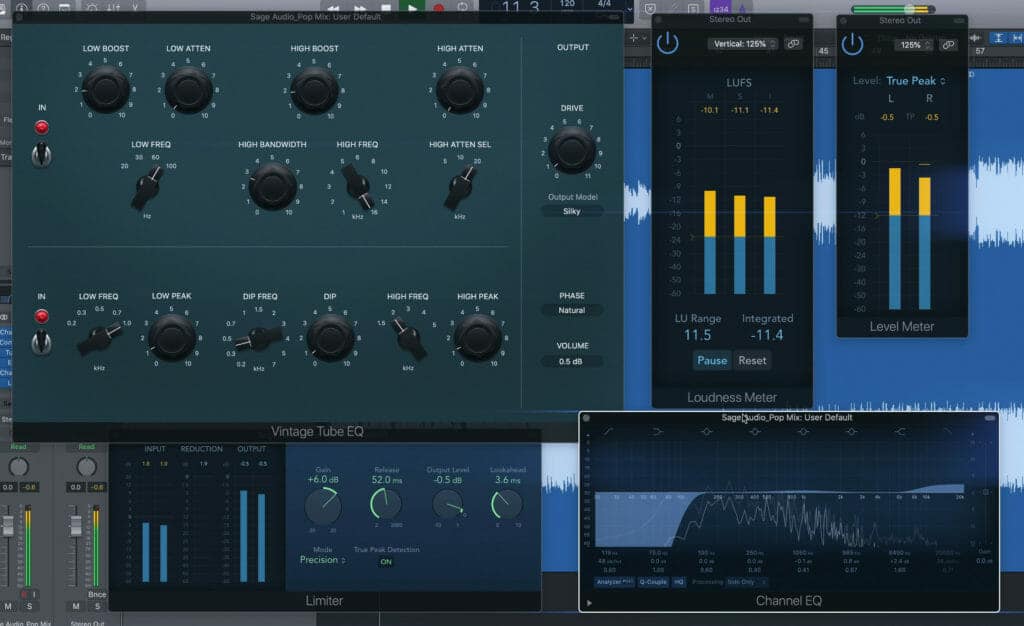
Logic offers many great plugins for mixing and mastering.
If you’re using Logic, and you want to try and master your music, here’s a quick guide that can help you throughout the process. We’ll be using 6 different processing steps as well as measuring the signal with some of Logic’s stock meters.
As the name of this post suggests, each of the plugins we’ll be using is Logic’s stock plugins.
If you’re an artist or engineer and you have a mix that you need mastered, send it to us here:
We’ll master it for you and send you a free sample for you to review.
Step 1: Subtractive Side Image Equalization with ‘Channel EQ’
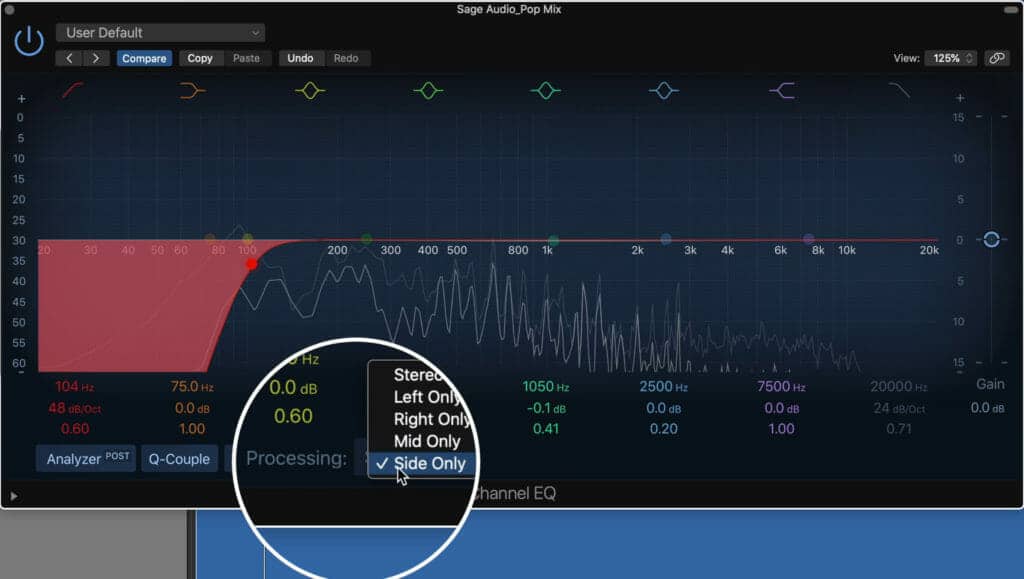
In the processing section, you can select which channel you want to affect.
Logic’s ‘Channel EQ’ is fortunately capable of mid-side processing. Although it only allows you to control either the mid or the side, it’s helpful nonetheless.
The first thing we want to do to a mix is attenuate the low frequencies on the side image. This will keep the low end focused and clear, in turn, keeping the master driving and centered.
To do this, find the ‘Processing’ tab at the bottom of the plugin and select ‘Side Only.’ Using a high-pass filter, attenuate the side-image up to 130Hz.
How much you cut out will depend on the genre and particular track that you’re working on.
If you want to subtract some more frequencies from the Mid or Stereo image, you’ll need to use another equalizer to accomplish this.
Step 2: Subtle Compression and Distortion with ‘Compressor’
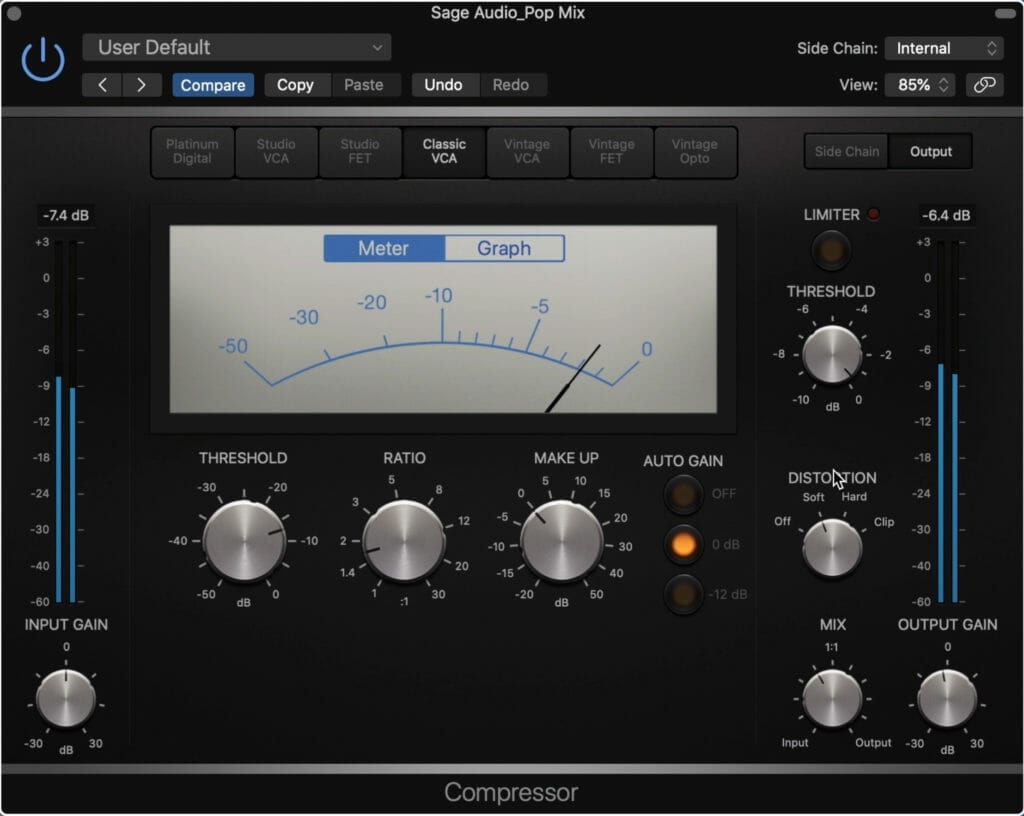
The compressor lets you choose between 7 different compressor styles.
A little bit of compression can tie loose sounds and instruments together as well as help you achieve a greater loudness.
Logic’s stock compressor is great in that it gives you a lot of options for your compression - these can be clean and highly transparent, or a bit smoother and slower.
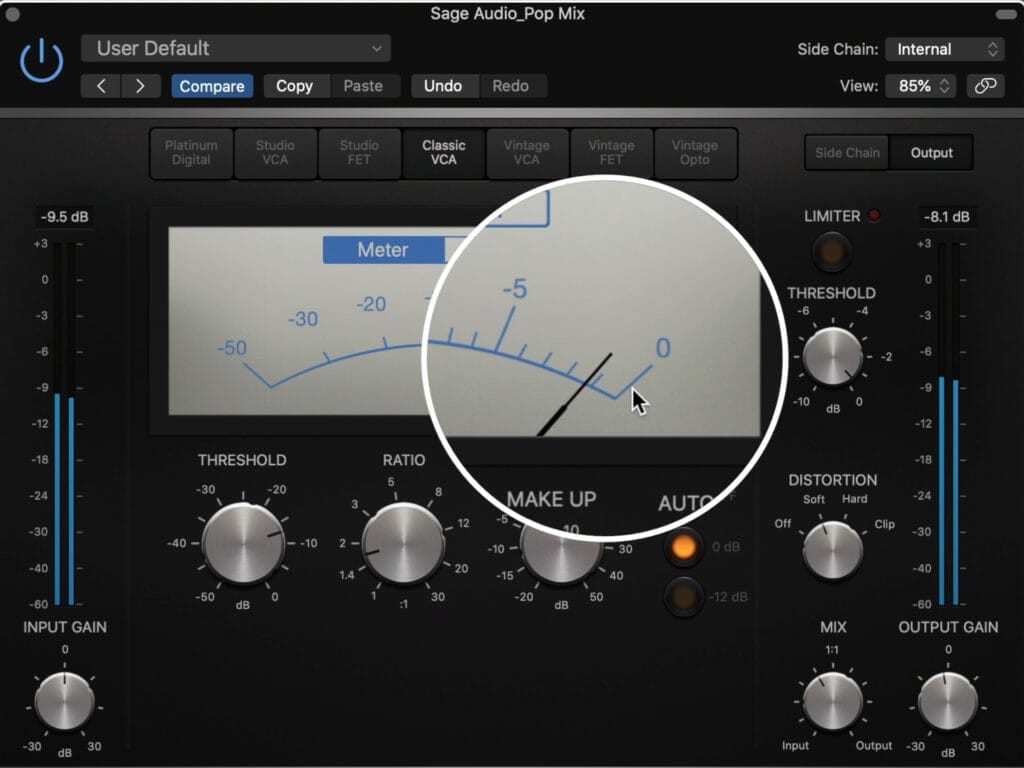
I kept my gain reduction to only 1 - 2dB.
I chose to use the Classic VCA and attenuate the signal only 1 to 2dB. To accomplish this I used a low ratio and carefully set my threshold.
Additionally, I used the auto-gain option at 0dB and introduced some subtle soft-clipping distortion.
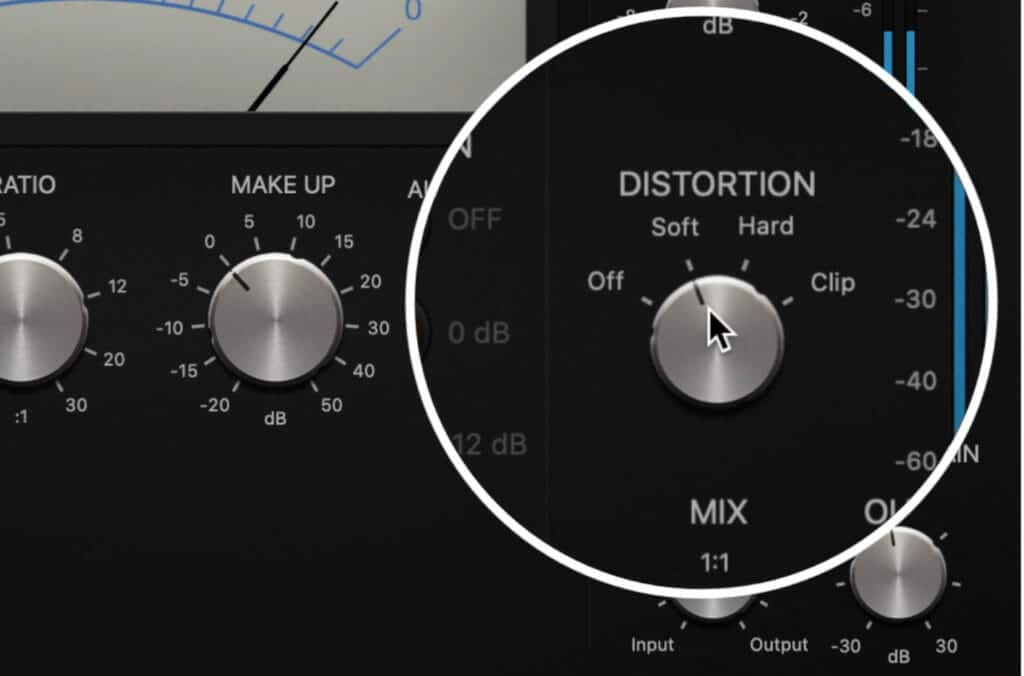
I used soft clipping distortion to add a greater perceived loudness.
Furthermore, I avoided using the limiter since I felt it wasn’t needed at this stage of the master.
Lastly, I reduced the output gain by 2dB and blended the effect into the signal with the Mix dial. I opted for about 40% of the effect to come through.
Depending on the pop mix you’re working on, you may want more or less compression.
If you want to learn more about compressors, check out this blog post and video on the topic:
Step 3: Additive Stereo Equalization and Distortion with ‘Tube EQ’
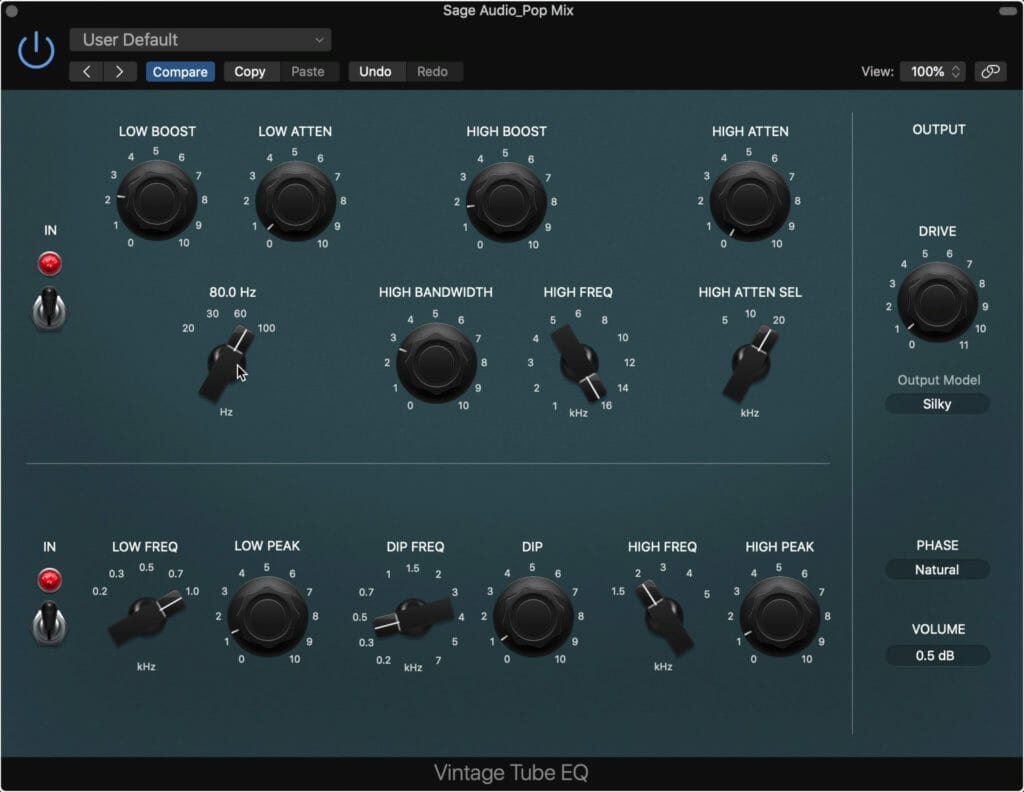
The Tube EQ is modeled on classic Pultec EQs.
It was really great to see that Logic provides a Pultec EQ emulation, perfectly suited for mastering with all frequency ranges available for adjusting.
Instead of stepped rotaries like with the actual hardware or other emulations, Logic’s plugin allows for a fluid transition and full range for each function.
I boosted and attenuated the low frequency to achieve a particular shelf-curve, as well as boosted some of the high-frequency range to add some air to the track.
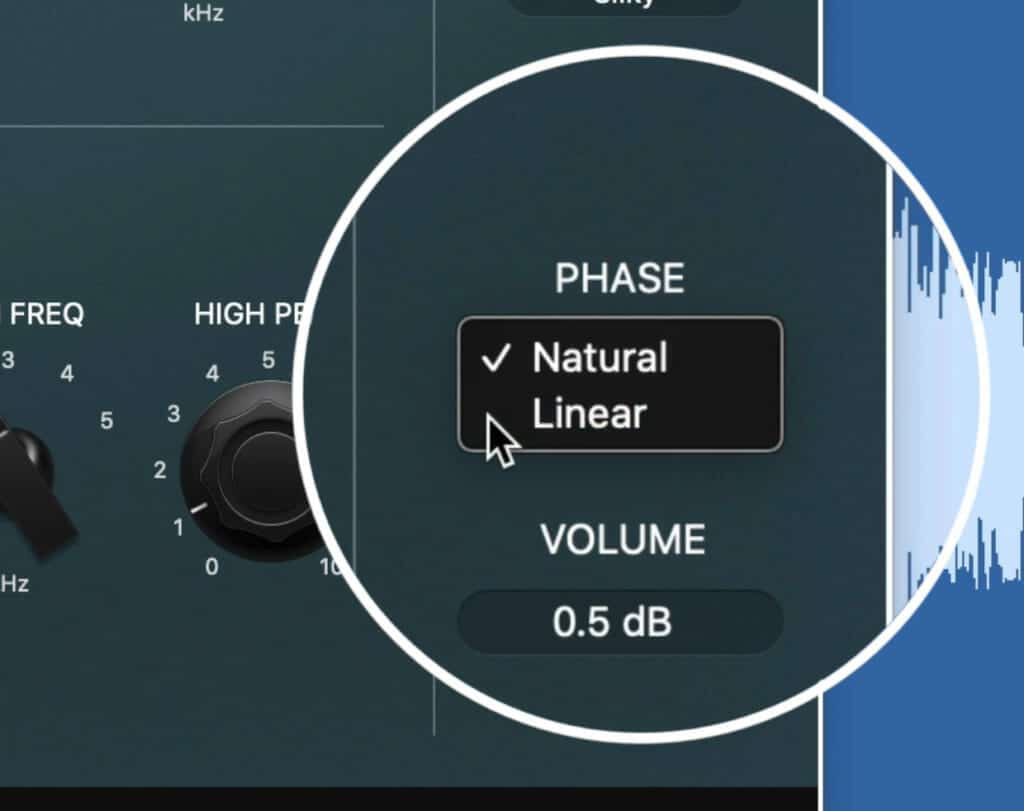
The plugin gives you the option between natural and linear phase.
I also boosted 1kHz, attenuated 400Hz, and boosted 2kHz - but what you choose to affect will depend on the mix that you’re working with.
For the phase I chose natural, but linear works well too if you want a truly clean sound. Lastly, I introduced a small amount of tube distortion to make the signal sound fuller and more pronounced.
Step 4: (Optional) Subtle Harmonic Excitement (<1%) with ‘Exciter’
Harmonic excitement is option, and can create a fuller sound
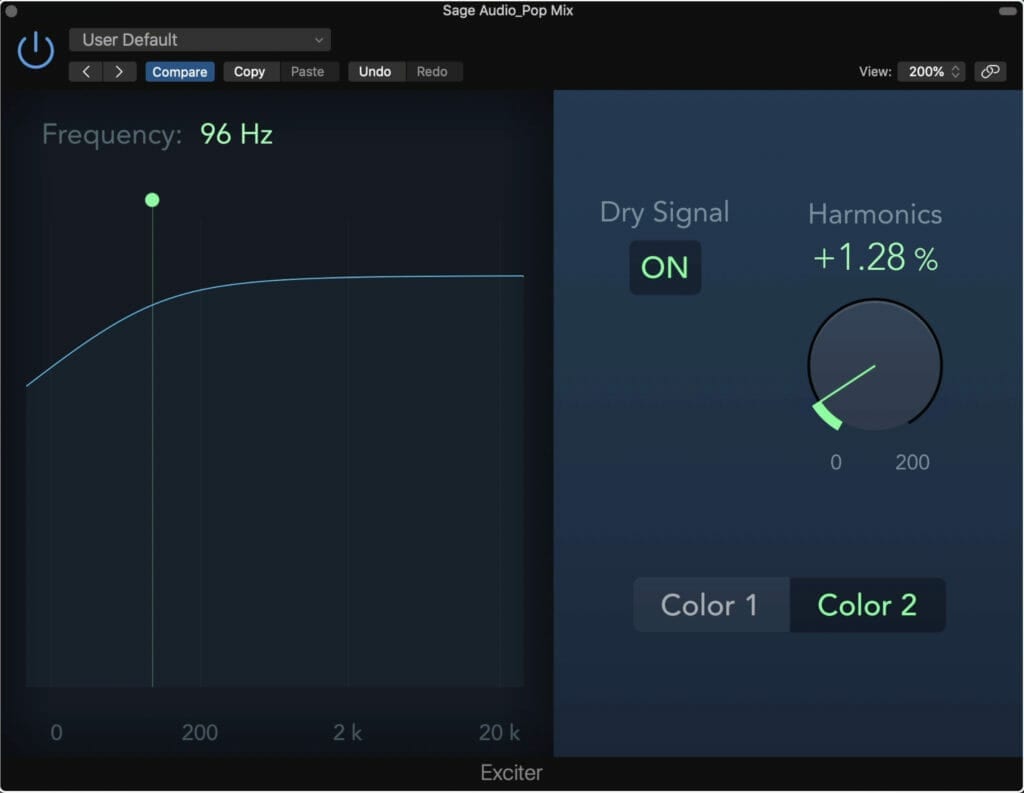
The Exciter plugin has a very simple layout but is incredibly powerful so use this plugin carefully. Additionally, if you feel that your mix is already distorted enough, it’s best not to use this plugin.
This plugin works by capturing the harmonics of a signal and then amplifying them. This is why I chose to add some harmonic distortion in prior to this plugin so that I could amplify and bring it forward with this plugin.
In the left window is a high-pass filter which determines which frequencies you’ll affect. I set mine pretty low around 100Hz to avoid exciting sub-frequencies.
The Dry Signal can be switched On and Off, which means you can easily monitor how you’re affecting the signal. When the Dry signal is on, the effect is blended in with the signal, when it’s Off, you are only hearing the effect that this plugin has.
I keep the harmonic excitement percentage to about 0.5%, which will be more than enough for a master . Also, I chose color 2 since it sounded less distorted.
Because pop music is louder typically, this extra distortion can help achieve that perceived loudness.
Step 5: Additive Side Image Equalization with ‘Channel EQ’
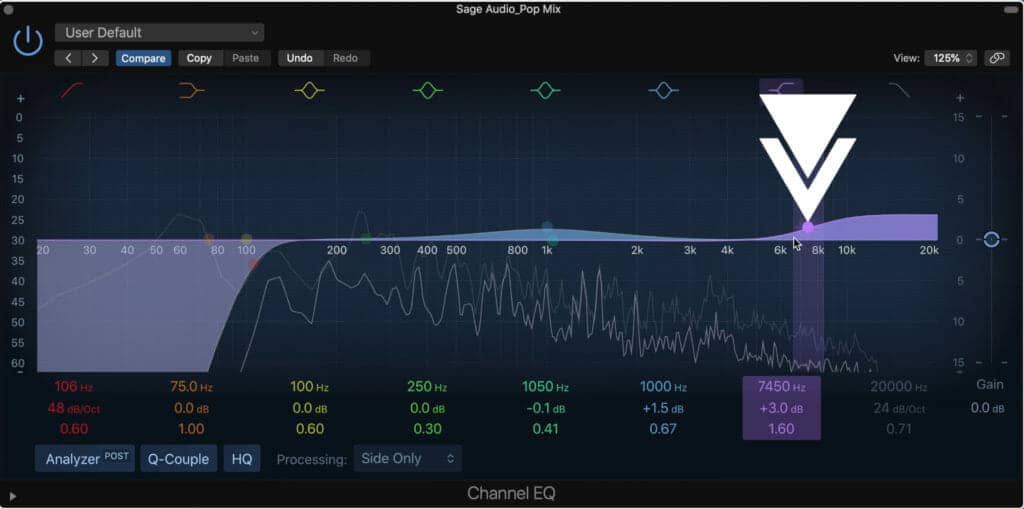
I like to boost the high frequency range on the side image to add width to the high-frequencies.
To add some width to the stereo image, we can use the same Channel EQ as before, but instead of attenuate the signal, amplify it.
Because we’re using this plugin on the Side image, anything that we amplify is going to increase the amplitude of the side image, in turn, widening the stereo image.
I like to increase the high-frequency range with a shelf filter to widen these frequencies and add some high end without the harshness that’s often associated with the high-frequencies of the mid-channel.
Additionally, I’ll bump a bit of the mid-range to add some width to it.
I also chose to cut out the low-frequencies of the side image again, just in case any of our processing widened the low-frequencies into the side image.
Step 6: Brick-wall Limiting using True Peak Detection with ‘Limiter’
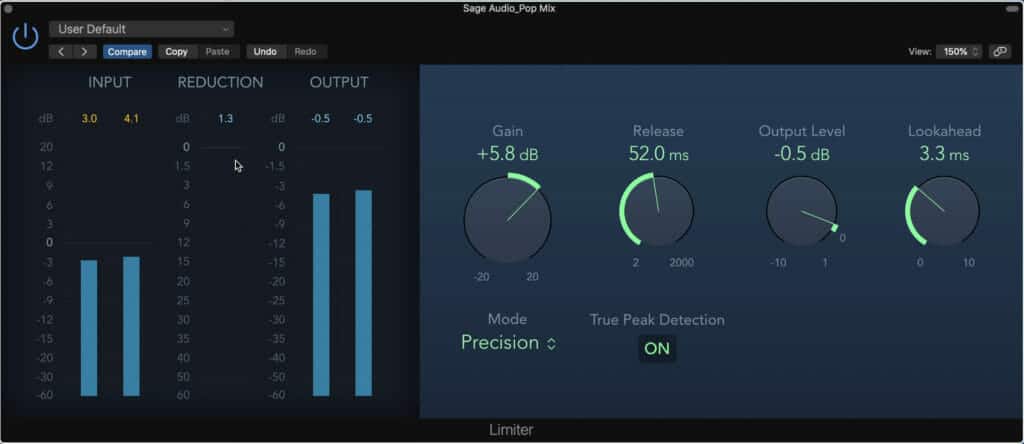
This limiter was set with more subtle settings, but use more aggressive ones if needed.
Pop music is often mastered louder than usual - this makes your limiting stage pretty important.
For this mix I used 6dB of gain, resulting in about 3dB of gain reduction at certain points - but of pop, this is reserved and you can go louder if you need.
I used the precision mode because I liked the transparency of it , but try both functions to see which one works best for your mix.
Additionally, I enable true-peak detection. This will ensure that clipping distortion doesn’t occur. Furthermore, I used a shorter but not too short release time.
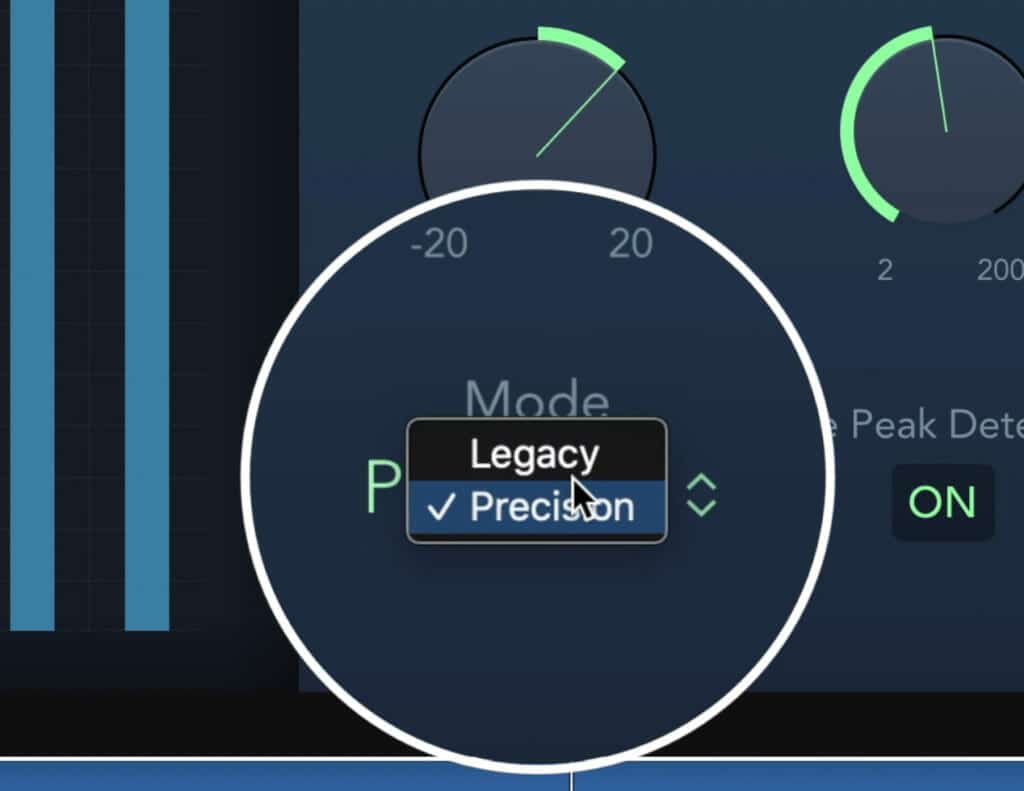
Precision mode was great for achieve a transparent sound.
If you set your release time lower than roughly 30ms, the low frequencies of your master will begin to distort - so keep this in mind when you’re limiting.
I used a medium lookahead to avoid additional distortion, but this will reduce your loudness.
Lastly, I set the output level to -0.5dB to ensure that subsequent encoding, say when the track is uploaded to YouTube or Soundcloud, doesn’t cause distortion by changing the track’s level.
Logic’s stock limiter not working for you? Try out some of these great free mastering limiters:
Step 7: Loudness and Level metering with Logic’s Meters
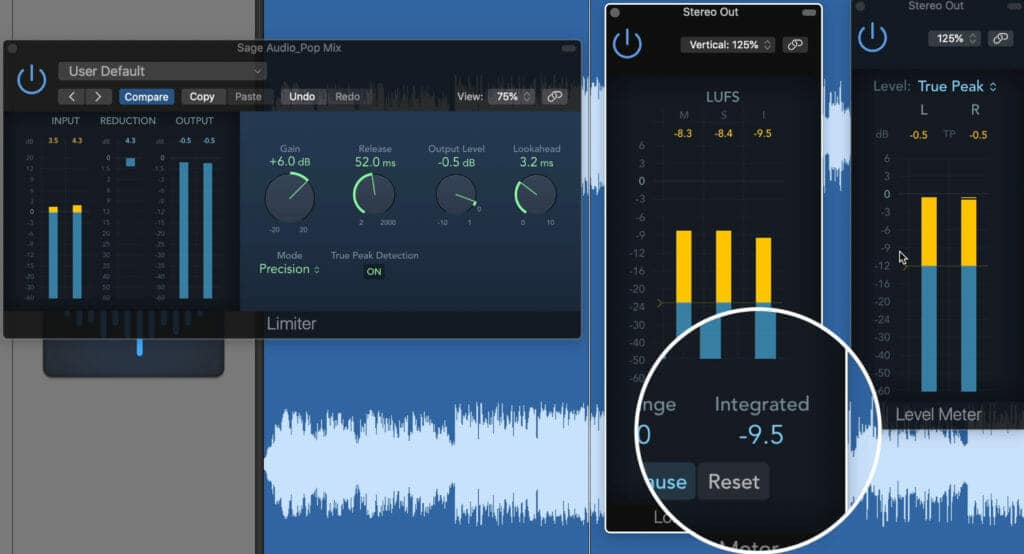
Keep an eye on your LUFS and True Peak levels throughout your mastering process. Logic provides these meters.
Logic offers both a Loudness meter with which you can measure the integrated LUFS and a True Peak meter with which you can measure the signal’s true peak.
I’d recommend using both of these to measure your signal. For this master, I set things a little quieter than you typically would for a Pop master -so feel free to increase the limiter’s gain as needed.
My integrated LUFS is around -10, but you may want this at -9 or -8. Also, be sure that you don’t see any clipping on your true-peak meter. Based on our settings, this should be a problem.
Conclusion
So this is how you master a pop track using Logic’s stock plugins. Again, the steps you’ll need to use are as follows:
Step 1: Subtractive Side Image Equalization with ‘Channel EQ’
Step 2: Subtle Compression and Distortion with ‘Compressor’
Step 3: Additive Stereo Equalization and Distortion with ‘Tube EQ’
Step 4: (Optional) Subtle Harmonic Excitement (<1%) with ‘Exciter’
Step 5: Additive Side Image Equalization with ‘Channel EQ’
Step 6: Brick-wall Limiting using True Peak Detection with ‘Limiter’
Step 7: Loudness and Level metering with Logic’s Meters
Your mix and master will definitely vary, but the general signal chain, as well as some of the techniques detailed above, are very useful regardless of the track.
Try this out for yourself and share your results with us!
Also, if you’re an artist or engineer and you have a mix that you need mastered, send it to us here:
We’ll master it for you and send you a free sample for you to review.
Have you mastered music using only stick plugins?


