Mastering for Reggae Music
Quick Answer
Mastering for Reggae Music is the process of preparing a Reggae track or album for distribution while maintaining a high fidelity, clear and present transients, and a clear yet powerful low-frequency range. Mastering for Reggae music includes creating a transparent and clean, yet cohesive sound.
Mastering for Reggae Music in Detail
For the past nearly 60 years, Reggae has been a genre synonymous with relaxation and a laid-back world view, just as much as its related to notions of revolution and social progress.
In that regard, it is no doubt a genre that can cover a lot of ground, and one that can simultaneously project two seemingly incompatible ideologies.
Somehow, Reggae music can showcase these differing prospectives and still feel like a cohesive and uniform sound.

Reggae music is both sonically relaxed and aggressive
This same idea carries over to Reggae’s production , especially during mastering. Reggae needs to sound mellow, relaxed, and smooth, yet maintain a punch and transient response.
The reason being, the 4/4 structure of Reggae is almost always accented by a strong guitar upstroke , and followed by a punchy and resonant snare. In turn, the subdued sound is suddenly met with a spike of aggression - one that serves to ground the sound and form the groove.
With that said, it’s pivotal that mastering Reggae music entails support both for a smooth sound and for the aggressively transient snare and percussive guitar upstroke.
When mastering the genre, there are various forms of processing that should be introduced in a specific manner to achieve this goal. Whether its equalization, compression, saturation and distortion, stereo imaging, or limiting, this relationship needs to be kept in mind.
Let’s cover these forms of processing and discuss how they would be used in the context of mastering Reggae music. Additionally, let’s listen to them as they’re applied (in the video embedded above) to get a better understanding of how they affect the sound of a Reggae master.
If you have any additional questions regarding this process feel free to leave them in the comment section of the video, or, reach out to us via email:
Additionally, if you have a Reggae mix that you’d like to hear professionally mastered (for free) send it to us here:
We’ll master it for you and send you a free sample for you to review.
How to Equalize a Reggae Master
Equalizing a Reggae Master comes down to creating or maintaining a clean sound - one that maximizes the power of the bass guitar while retaining clarity and high-frequency detail. Although reggae music doesn’t need to have an incredibly crisp high-end, the high range detail should be noticeable.
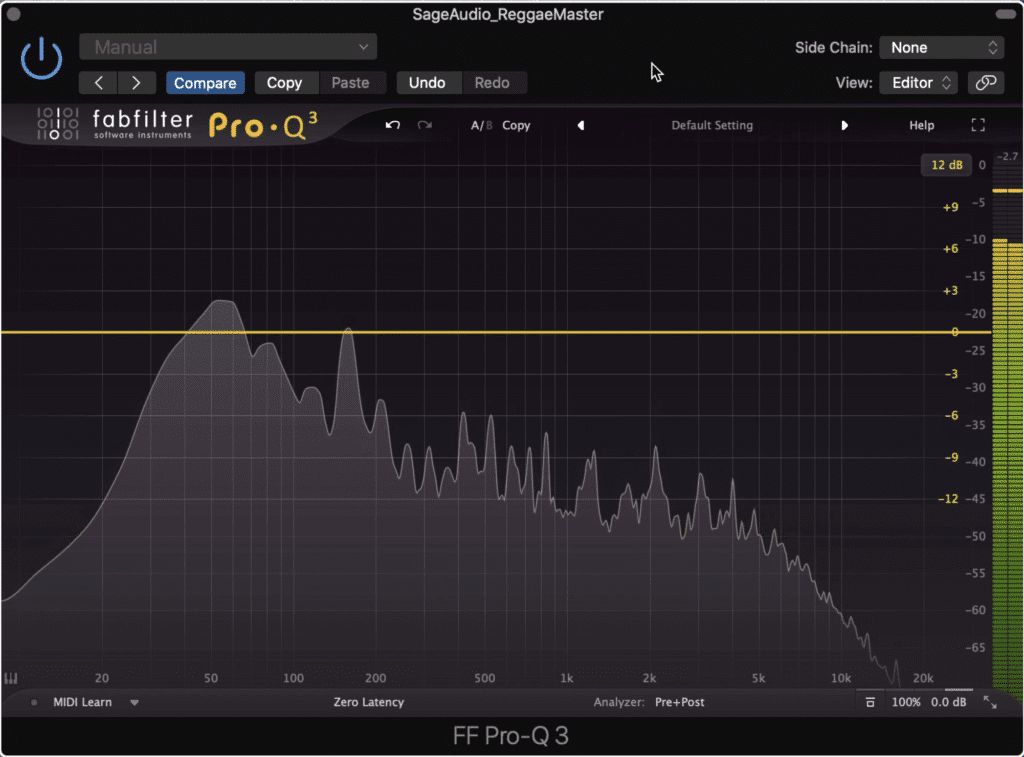
Subtractive equalization is the first step in mastering Reggae Music
So how do you create a clean sound using equalization?
The primary way to accomplish this is by using subtractive equalization as the first form of processing in your signal chain.
The goal of subtractive equalization is to remove any aspect of the frequency response that you don’t find enjoyable, or in the case of Reggae, any aspect that does not increase the intelligibility and power of the mix.
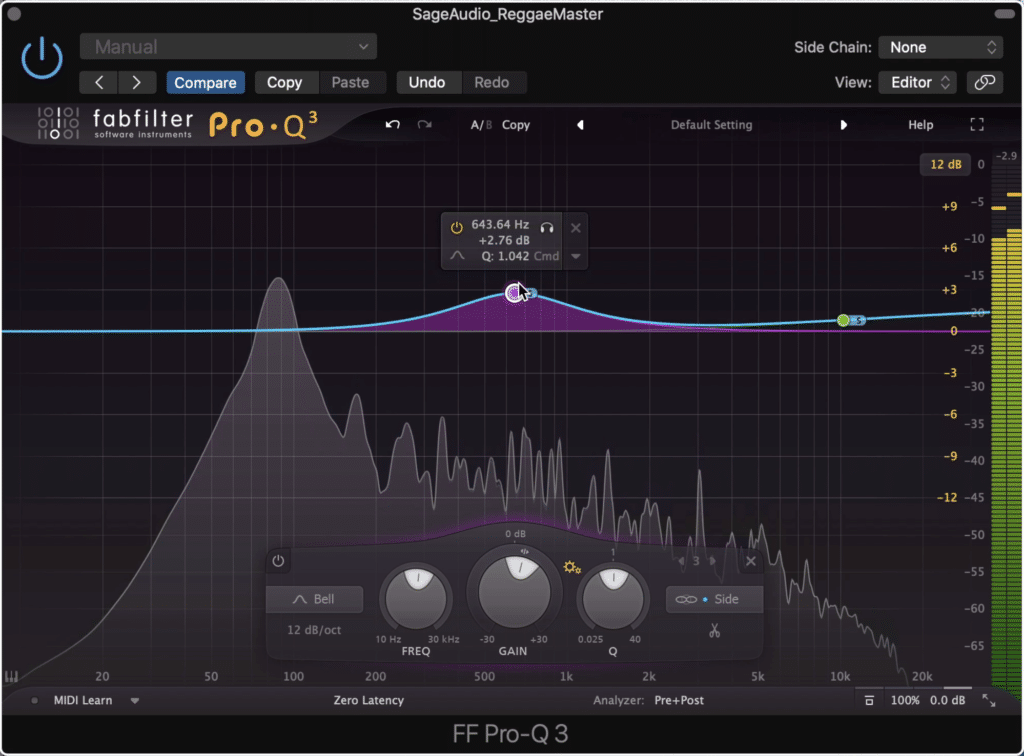
So for example, say that 125Hz is being occupied by both the bass guitar and kick drum in an excessive way , in turn making the master sound boomy. This issue will need to be resolved prior to amplifying the signal, or it will be made worse/exacerbated.
That said, we’ll need to remove or at least tame these frequencies prior to adding any distortion, additive equalization, stereo imaging, and limiting.
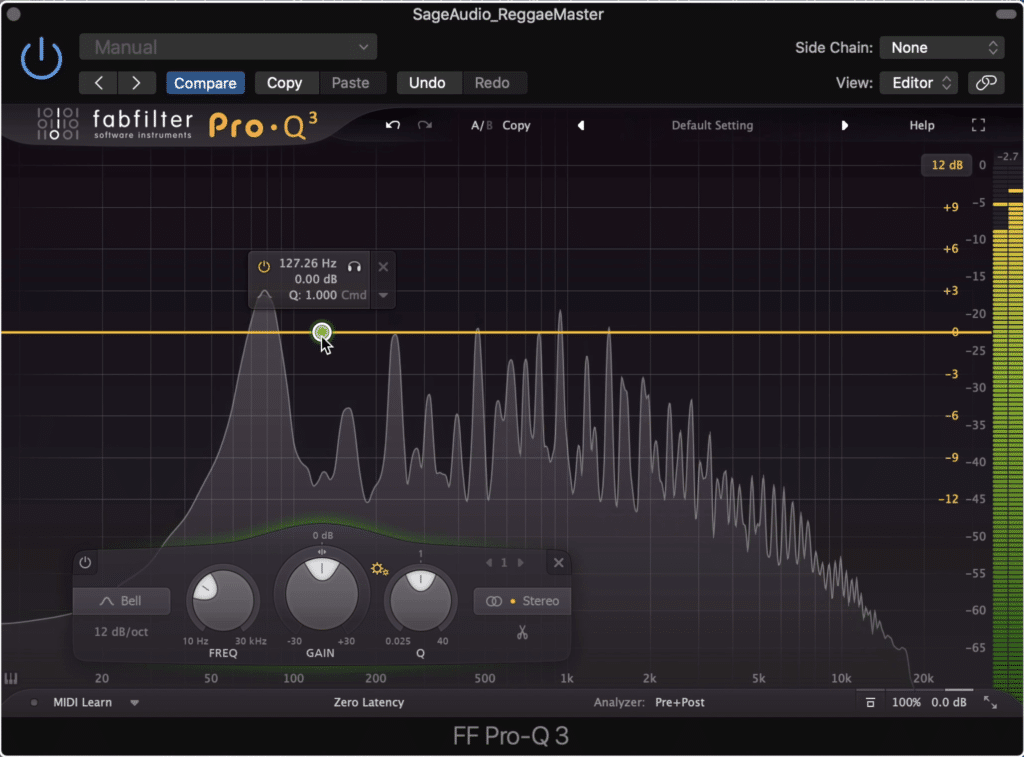
If 125Hz is too excessive, these frequencies can be attenuated
With that in mind, we’d attenuate 125Hz using a stereo bell filter.
Other frequencies may need to be attenuated as well. This will depend on your mix
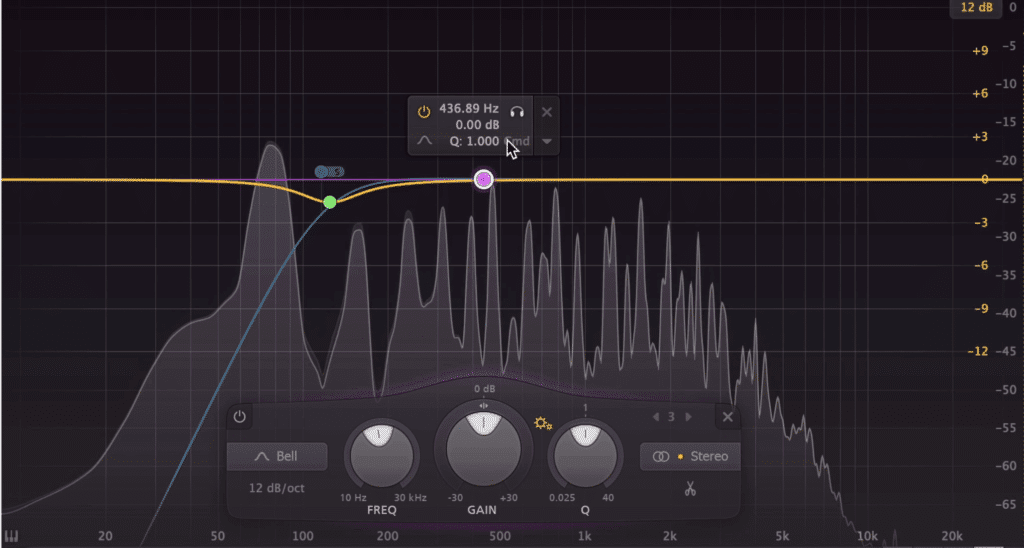
We could also check to see if these frequencies have been expanded into the stereo image by using a mid-side equalizer. If they have, it may be best to remove them from the side image by using a high-pass filter on the side image.
Following this line of thinking, check other frequencies in the mix to see if they’re excessive , or if more clarity could be evoked by attenuating any other frequencies. This will take a critical ear and truly depends on the mix you have.
That said, there are no universal frequencies that should always be attenuated or amplified - only frequencies that play a specific role within any given mix.
Once you’ve completed your subtractive equalization, continue with other forms of processing such as:
- Compression
- Distortion and Saturation
- Additive Equalization
- Stereo Imaging
- Limiting
While we’re on the top of equalization, let’s discuss additive equalization.
Although this form of processing should occur later in your signal chain, it can also occur before your compression or distortion (although if used before compression, it should only be done so sparingly).
Additive equalization is the process of amplifying aspects of the signal that you enjoy or that help serves to augment the mix or master.
For example, if you felt that the kick and bass were lacking , you could use a bell or shelf filter to amplify these frequencies from 1dB to 2dB.

If the low frequencies are lacking, they could be amplified with additive equalization later on in your signal chain.
Or, if you’d like more of the high-end present, you could perform the same amplification to the higher frequencies.
Again, what you choose to augment depends on the mix.
If you’re looking to equalize your mix or master, but don’t want to use your stock plugins, check out our video and blog post that showcases free EQ plugins:
In it, we detail the functions of each plugin, as well as listen to an example of each.
How to Compress a Reggae Master
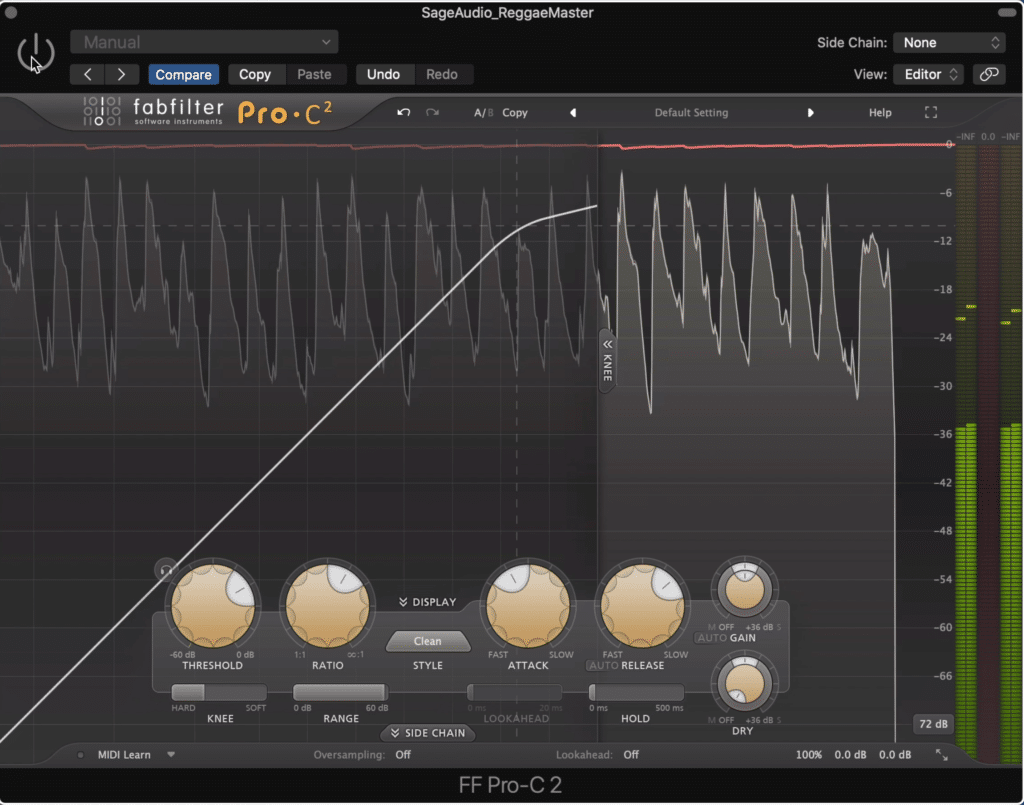
Compression is one of the most crucial steps in mastering a Reggae mix, as it has the ability to change the timbre and transient retention of your mix. As we discussed, transient retention is an important aspect of reggae music, so compression needs to be applied carefully when mastering.
Before compressing, seriously consider if compression is needed at all.
The first thing to consider when applying compression to a Reggae master is if that compression is needed at all.
A fair amount of time, compression has already been heavily applied during the mixing stage. This means that additional compression will only serve to truncate dynamics and lead to a less impressive sound.
Furthermore, although Reggae music doesn’t place the most importance of spatial relationships like reverb or delay, the natural sound of a studio plays an important part in the production process.
If you compress to drastically, you’ll push certain low-level signals into the forefront, which in turn, makes this studio sound less natural.
So again, seriously consider whether or not you even need compression in your reggae mastering session.
But let’s talk about what to do when do you need compression - what settings should you use and how drastically should you compress?
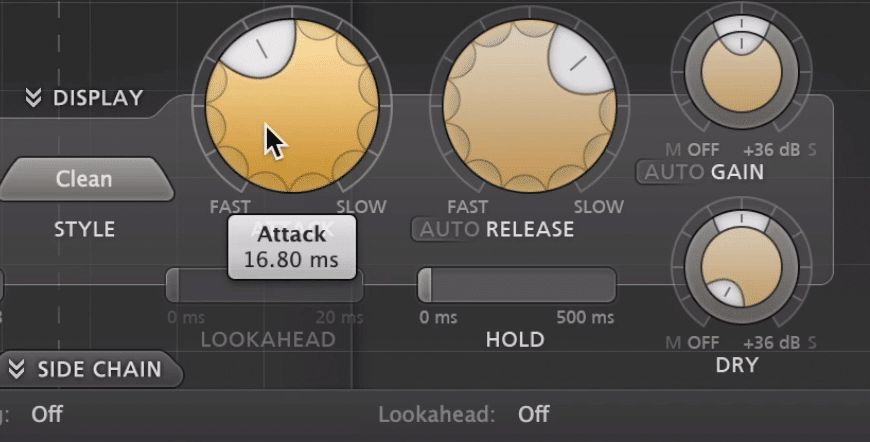
Set medium attack and medium release times.
When compressing a Reggae mix, use medium attack and medium release times. This will accomplish a couple of things:
- The transients of the snare drum and guitar will be able to pass through the compressor unaffected, but other aspects of the signal will be compressed.
- The compressor will hold onto the signal for a little bit longer, in turn smoothing out the sound of any aspects of the signal that aren’t the initial snare of guitar transients.

This will allow transients to pass through the compressor unaffected.
So when the signal passes through the compressor, the longer attack time allows short signals like a guitar scrape or snare drum to pass through without any compression applied.

Other aspects of the mix will be compressed, like the bass's sustain.
Then, the compressor will kick in and attenuate any aspect of the signal that crosses the threshold - but again, this only occurs after the transients have passed through.
Once the compression begins, the compressor holds onto the signal for long enough to create a smooth and cohesive sound , but, the compressor lets go before the next major transient occurs.

The compressor holds onto the signal until the next major transient occurs.
As a result, you achieve a smooth sound in between your transients, and a transparent sound when the transients occur.
It may also help to set your release time to be in time with the tempo of your track so that you can properly time how long the compressor will hold onto the signal.
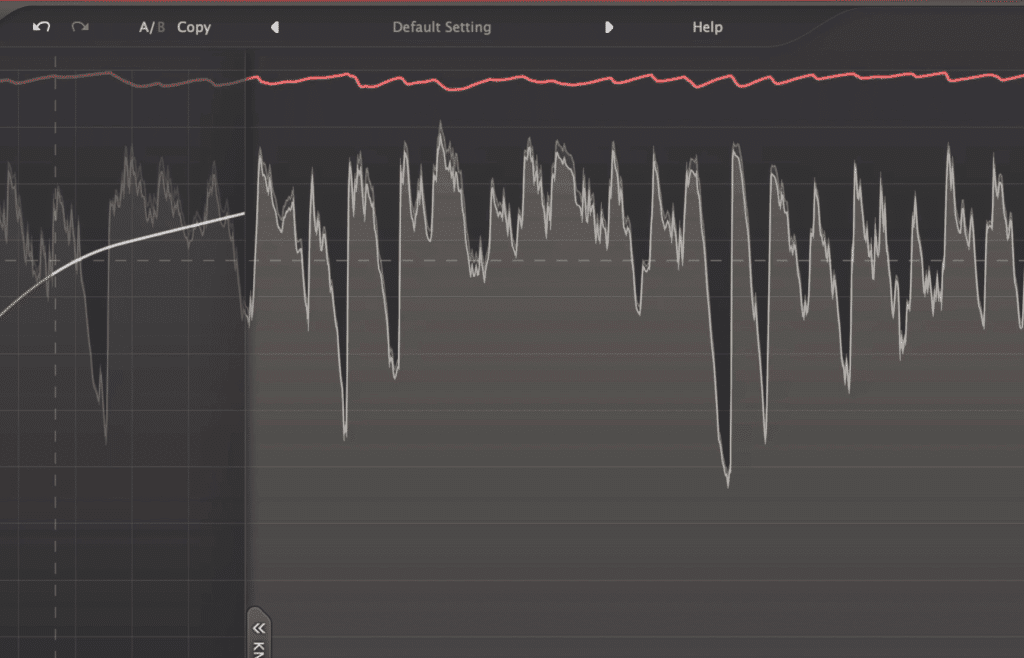
The compression essentially occurs between the transients
Additionally, this will help to create more musical compression by making the attenuation of the signal almost percussive in nature.
If you’d like to learn more about compression, check out our blog post and video on the topic:
It’s full of great information on compression and how it can be applied in a unique way.
What Do I Do if I Get an Overly Compressed Reggae Mix?
If the mix you receive is too compressed there may be a way to remedy it with frequency-specific expansion and transient shaping. Although this won’t work for completely squashed signals, you can use multi-band expanders to amplify the signal in the same manner a compressor would attenuate it.
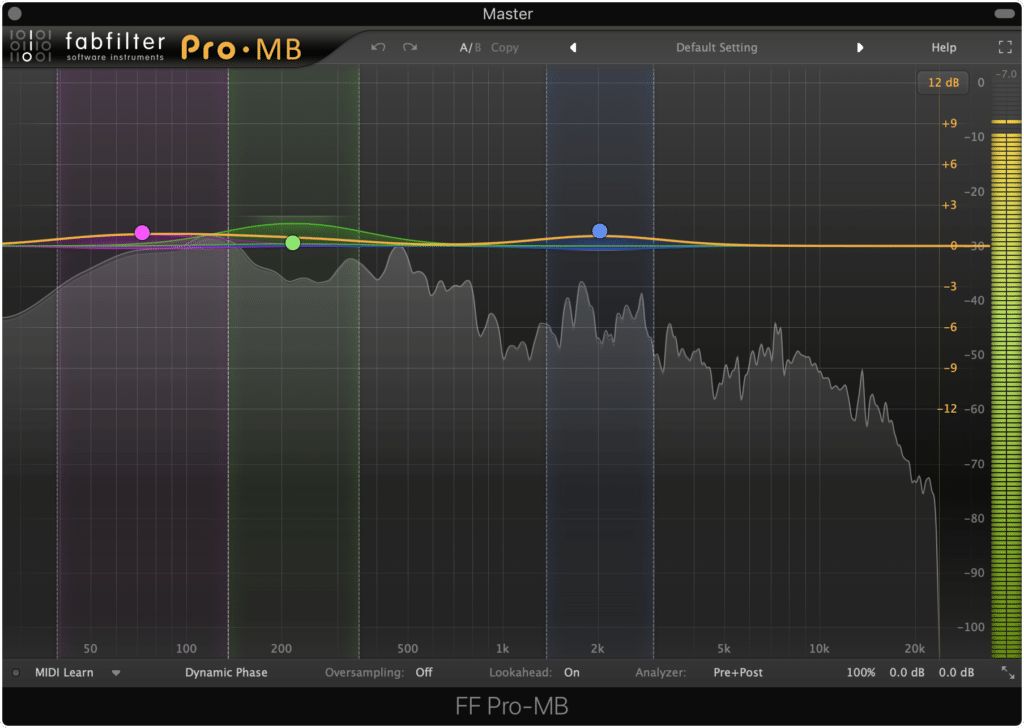
Use multi-band expansion on an overly compressed mix
In other words, use a multi-band compressor with expansion capabilities , like the FabFilter MB.
Then, you can create bands of frequencies that are briefly amplified whenever a dynamic passage occurs, like a kick drum or snare hit.
Additionally, transient shapers can be used to accent this new dynamic even more by reforming some of the transients lost during heavy compression.
Although this method isn’t as helpful as a revised mix, it can be useful if no other options are available.
How to Add Saturation and Distortion to a Reggae Master
Saturation and distortion can be used carefully to make a more detailed and sonically impressive Reggae master. Saturation and distortion add harmonics to the frequency spectrum of a mix, as well as compress the mix, in turn filling gaps and making for a “full” and complex sound.
Saturation and distortion need to be used carefully
That said, this form of processing needs to be introduced carefully, especially in the context of a Reggae master.
As we’ve stated before, Reggae music is transparent and sports a clean, hi-fi sound. Too much distortion and saturation can easily ruin any transparency or high fidelity.
Try to maintain the hi-fi sound of Reggae music
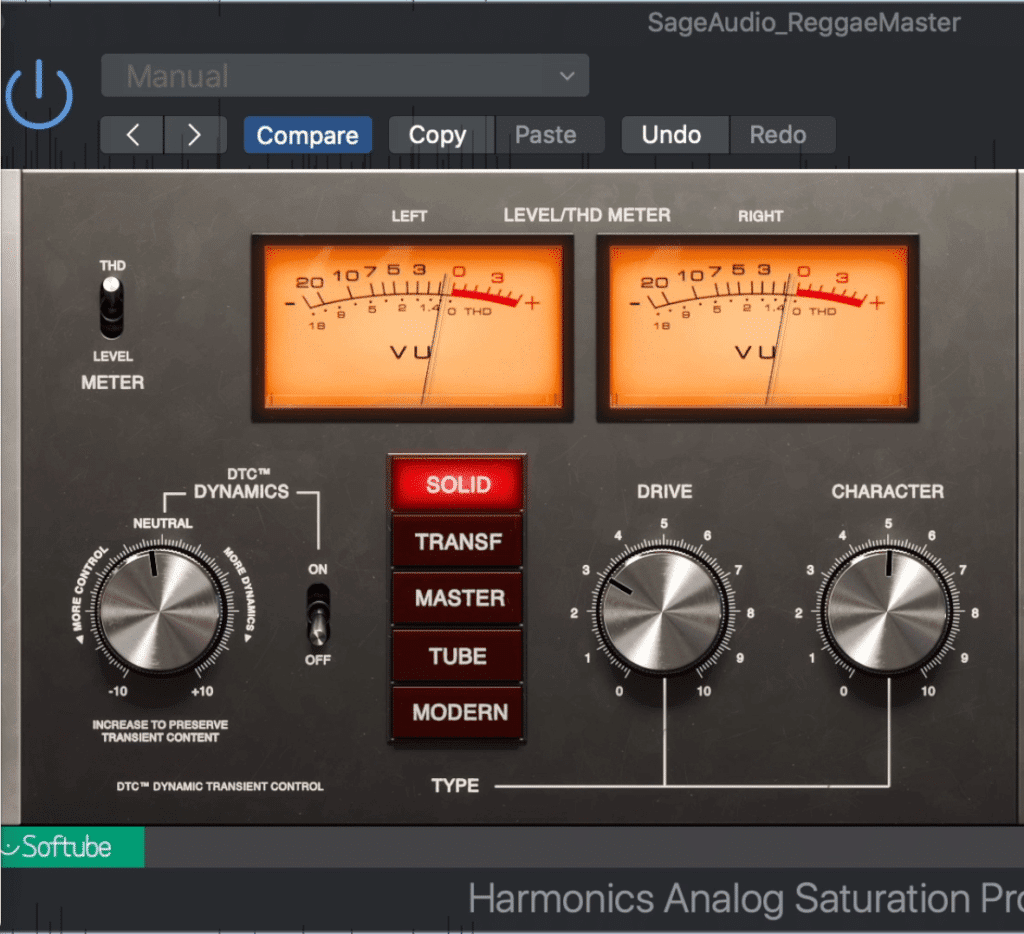
It’s best to keep THD or total harmonic distortion under 1% if possible. Although most saturation and distortion plugins won’t have this type of metering available (although it would be very useful) perhaps find one that does when using it for mastering.
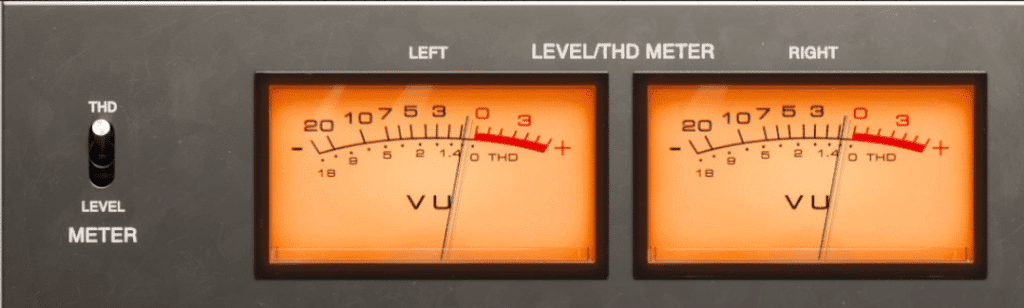
Use a THD meter when available.
Furthermore, you may want to use a distortion plugin instead of a saturation plugin. The reason being, saturation is a combination of harmonic generation and soft-knee compression, whereas regular distortion only utilizes the latter.
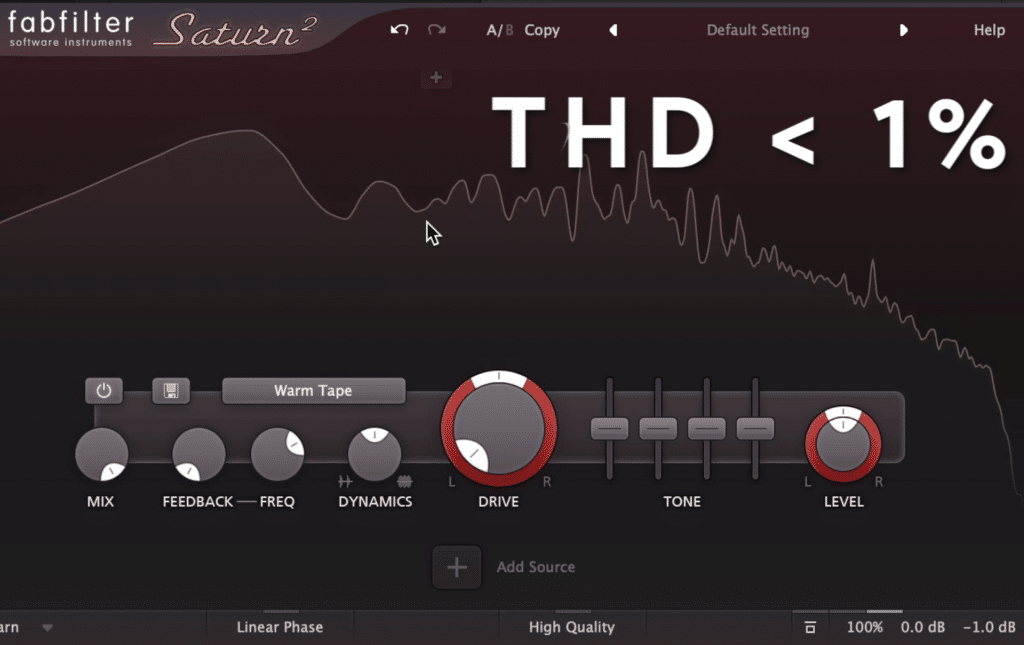
Keep THD lower than 1% to maintain a clean sounding master
So if you’re trying to keep compression to a minimum, or you’ve already used compression on your mix, you’ll need to keep in mind that saturation will introduce more compression.
Regardless of how much you’ve already compressed, or if you want to add compression at all, saturation, as well as distortion, should be used sparingly.
This isn’t to say that they shouldn’t be used, as they do help to create a more forward and impressive sound, but, they can easily cause issues in your master.
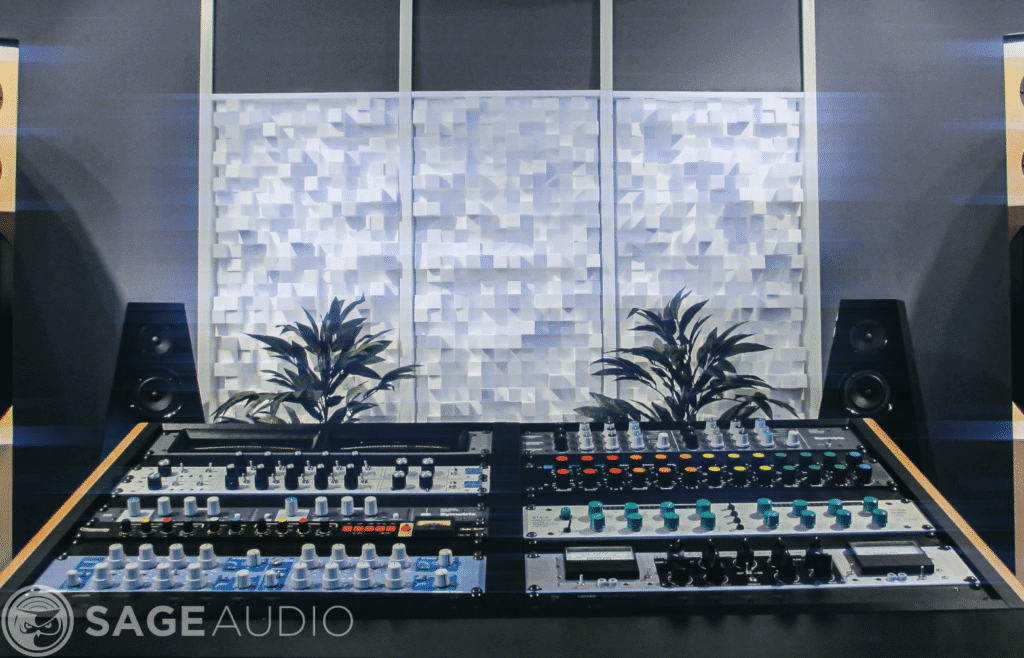
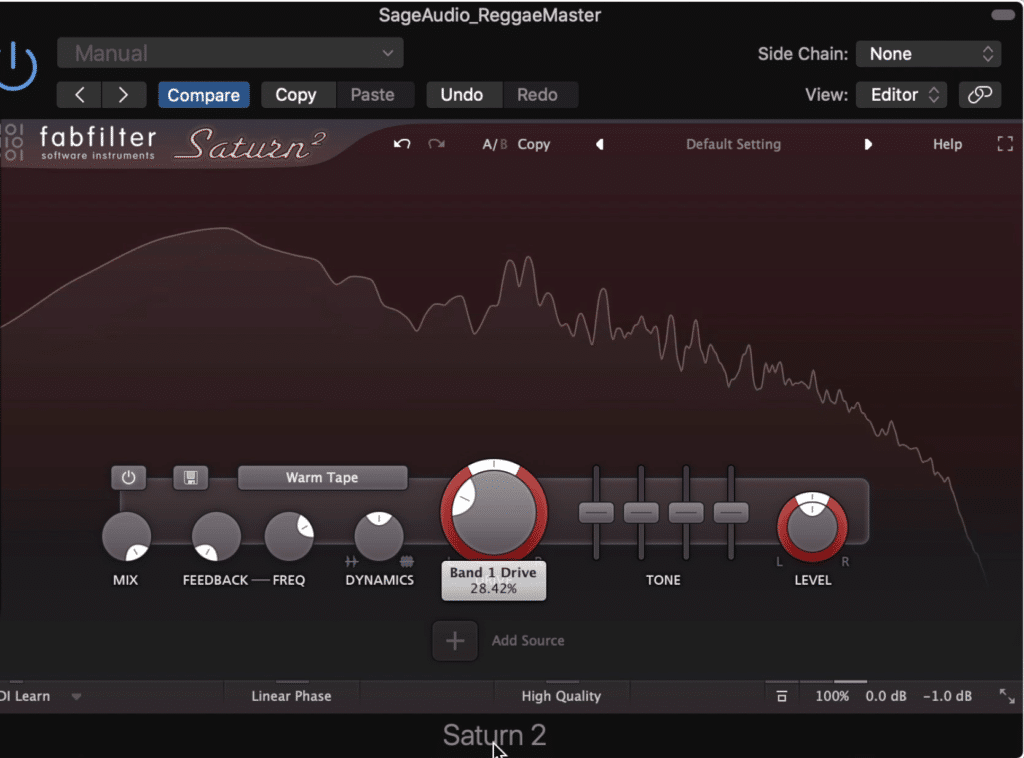
Analog processing is the best way to add harmonics to a master.
That said, if you want to add some distortion to your master, a little tube saturation will go a long way.
Additionally, it may be best just to leave this form of distortion up to analog processing. Analog processing introduces the most complex yet nonabrasive forms of harmonics.
This way you achieve a full sound without creating an unwanted change to the timbre and characteristics of your Reggae mix.
If you’d like to hear how your Reggae mix would sound mastered with analog equipment, send it to us here:
We’ll master it for you and send you a free mastered sample for you to review.
How to Adjust the Stereo Image of a Reggae Master
The stereo image of a Reggae master shouldn’t be made to be excessively wide, nor should the low-frequency range be widened. To achieve an impressive stereo image during a Reggae mastering session, use mid-side equalization instead of any delay-based form of stereo widening.
Use mid-side equalization to create stereo width.
That said, creating an impressive stereo image can be accomplished during the additive equalization stage of your mastering session . Many engineers use delay-based imaging techniques to create a wide image, and this may work in some genres.
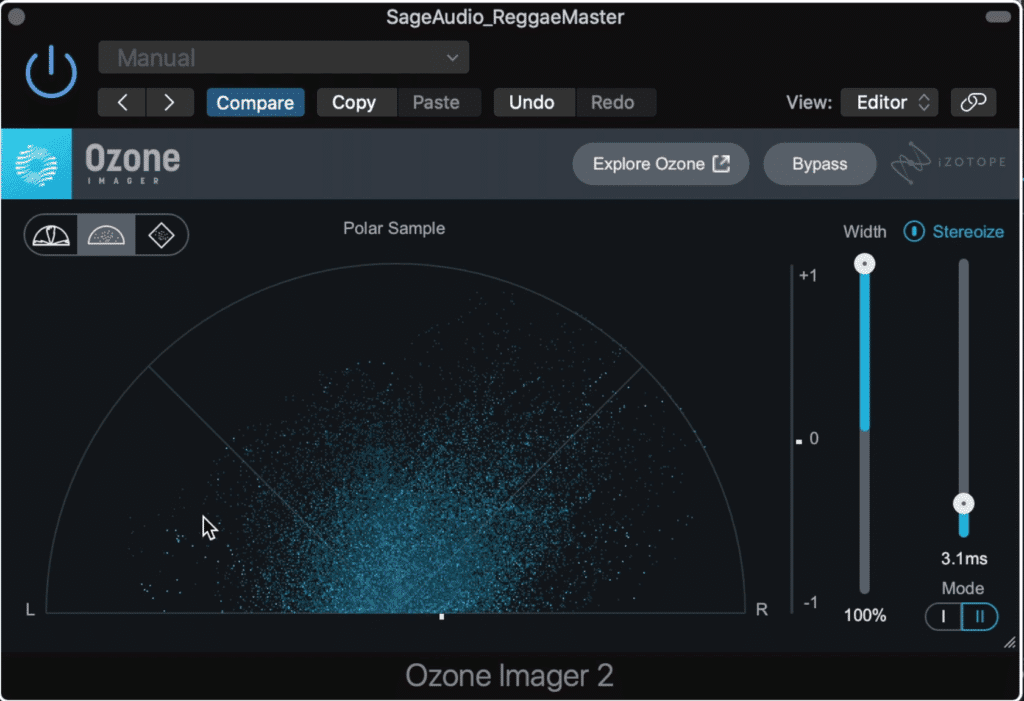
Don't use delay-based stereo imaging
However, this will inevitably lead to phase issues in your master, which in turn will cause an unfocused and weak sounding master.

Notice how spread out the image is - this indicates a very dispersed stereo image
When it comes to Reggae music, it’s best to keep a fair amount of energy in the middle or center of the image. The reason being, spreading this energy outward is the same as dispersing it.
Spread or dispersing the energy of your master will cause it to occupy more areas of the stereo image, but results in it being weaker in all parts of that image.
Simply put, if you do choose to widen the stereo image during your mastering session, it’s best not to do it excessively , or to widen the most powerful aspects of the mix.
When possible, the kick and bass, as well as the vocal, should stay relatively mono.
If you’re interested in stereo imaging, check out our video and blog post about free stereo imaging plugins:
In it, we detail the functionality and listen to examples of each.
How to Apply Limiting to a Reggae Master
When using limiting on a Reggae master, it’s best to do so in a way that preserves transients and transparency. In other words, limiting should not be applied aggressively or in a way that severely truncates transients, dynamics, or drastically changes the timbre and sonic characteristics of a mix.
Try to keep you limiting as transparent as possible
The goal is to be as transparent as possible while pushing the signal into a more commercial level.
Ultimately,a good master should be able to be played back on consumer-grade equipment and sound good , but doesn’t sacrifice the detail and character of a mix to do so.

A good master can playback over consumer-grade equipment, but hasn't sacrificed quality in order to do so
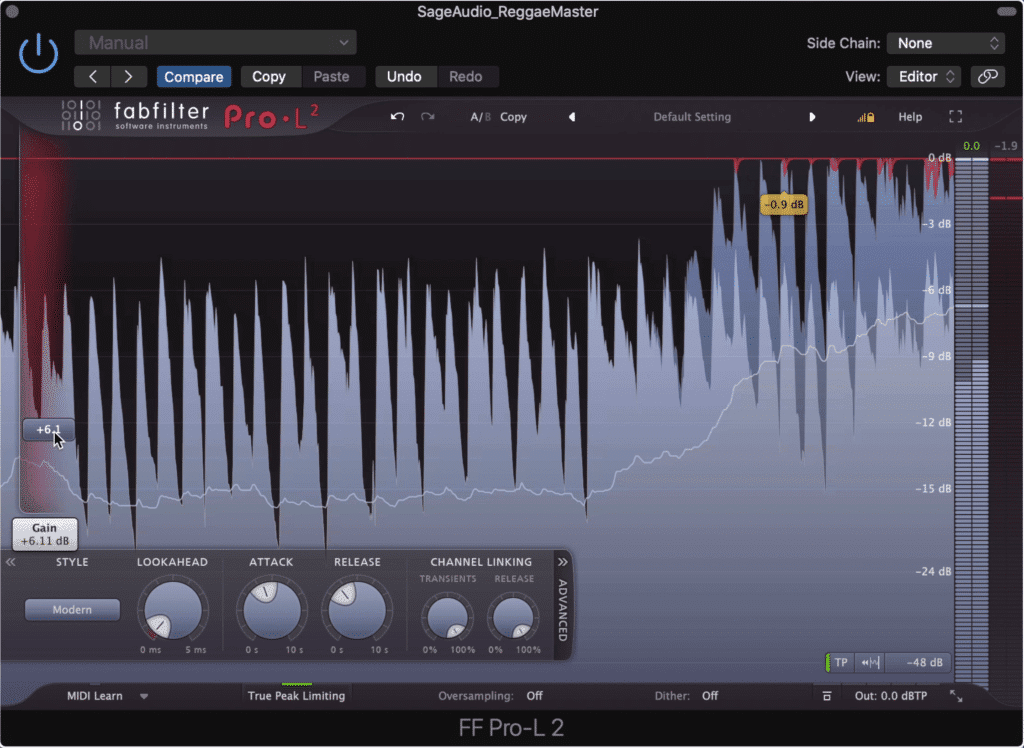
With that said, it’s best not to attenuate more than 3dB when limiting a reggae master. Additionally, use longer attack and medium release time to ensure that transients aren’t affected by the limiter.
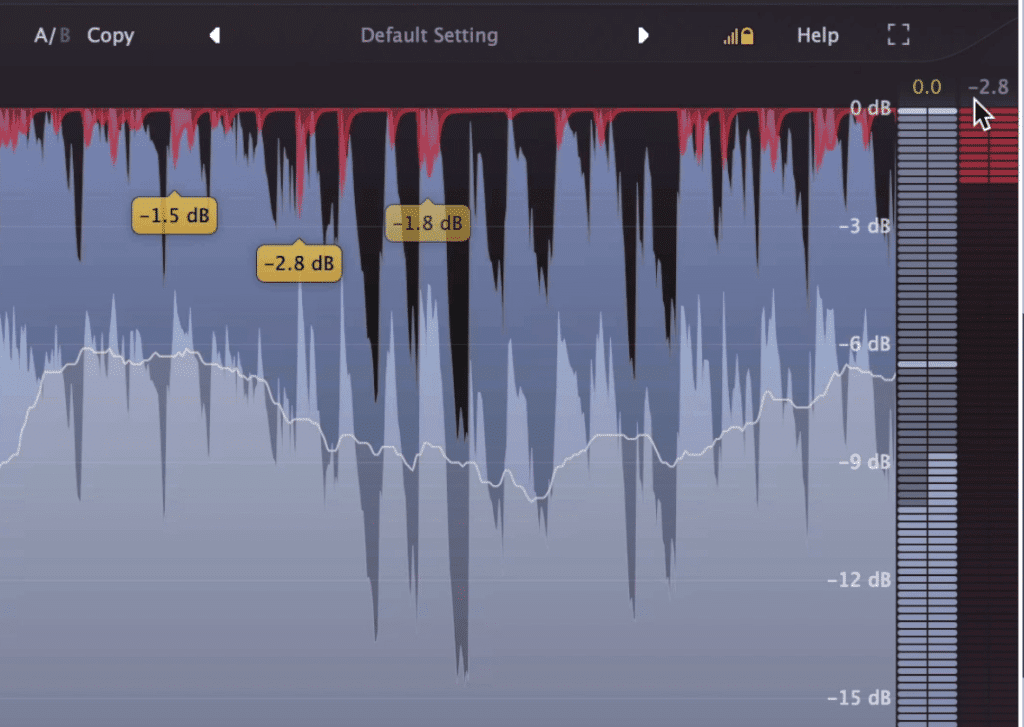
Try not to attenuate your signal by more than 3dB
Granted, you won’t be able to completely preserve your transients, however, setting the appropriate attack and release times is a good start.
Lastly, if you have a limiter that offers algorithmic settings like the FabFilter L2, then its best to stick with the transparent settings. These will result in the clearest and most natural-sounding limiting.

When available, use a clean or transparent compression algorithm
If available, a dynamic or punchy algorithm may also work well, as these will accentuate the dynamics and lead to a more dynamic and transient heavy overall master.
Conclusion
When mastering Reggae music, it can be difficult to retain transients and dynamics while keeping a smooth sound.
However,if you follow some of the techniques above, especially the instructions in the compression section, you can create a master that preserves dynamics and transients while having the rest of the mix sound smooth.

Reggae masters should be transient yet smooth in between transients. They should retain their dynamic range, and be suitable for playback on consumer equipment.
Whether you’re applying equalization, compression, distortion, stereo imaging, or limiting, keep the foundations of Reggae music in mind. It needs to sound dynamic, detailed, and natural, yet cohesive.
If you have a Reggae mix that you’d like to hear professionally mastered (for free) send it to us here:
We’ll master it for you and send you a free sample for you to review.


