Mastering Sauce! | 3 Secrets You Need to Know…
Secret 1: Harmonic Distortion Can be Considered a Form of Equalization
Secret 2: Knowing the Key of What You’re Mastering is Crucial
Secret 3: When Mastering for a Client, Use Additive Equalization Before the Limiter
Mastering Sauce! | 3 Secrets You Need to Know…in Detail
Mastering is a complex process. No matter how long you’ve been mastering music, there’s always something new to learn or improve upon.
The 3 secrets we’re discussing here may be things you already know, but they’re certainly lesser known or rarely discussed parts of mastering.
Regardless, they are definitely valuable and can help you create better-sounding masters.
We’ll discuss 3 rarely covered mastering topics, explain them in detail, and listen to examples of how they affect a stereo mix to better understand their role in mastering.
If you’re an artist or engineer, and you have a mix that you need mastered, send it to us here:
We’ll master it for you and send you a free sample for you to review.
Secret 1: Harmonic Distortion Can be Considered a Form of Additive Equalization
Notice that harmonics are forming after the fundamental.
This is something that I’ve wanted to cover for a while now, but, I figured it would seem strange or counterintuitive. After all, when we think about distortion and equalization, we think about them as 2 very separate and distinct forms of processing.
Perhaps surprisingly, they’re a lot more alike than we think.
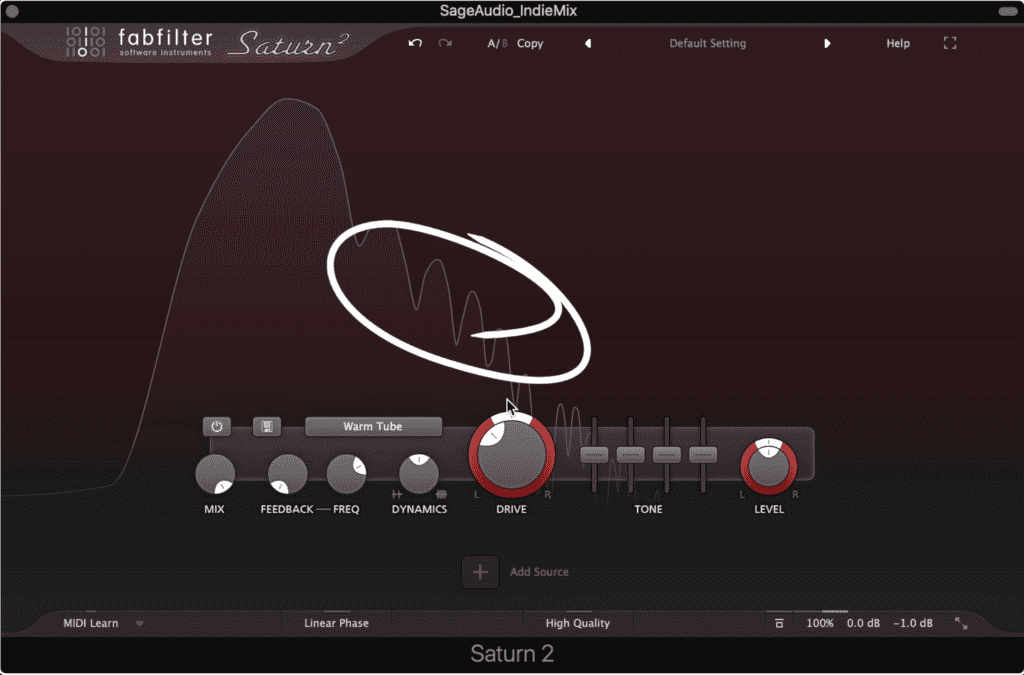
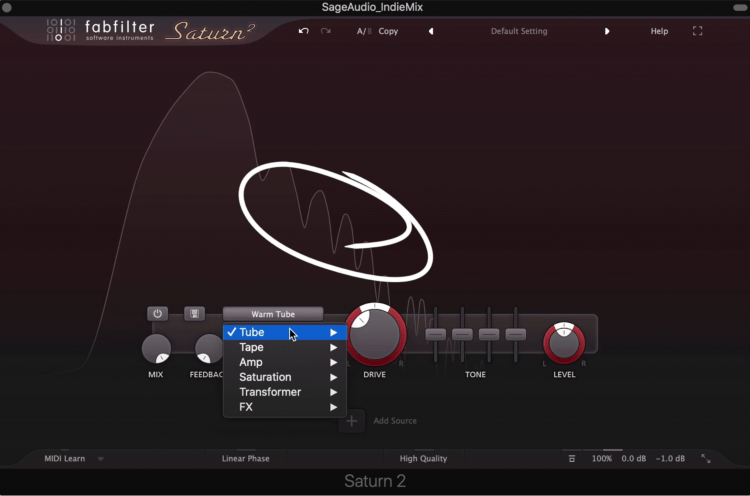
Typically when we use a distortion plugin, what we’re trying to achieve is harmonic distortion. It helps to know that different distortion and saturation types result in various and unique harmonics.
This shows low order harmonics, near the fundamental.
Harmonics closer to the fundamental frequency are the 2nd, 3rd, and 4th order harmonics, and it continues up the frequency spectrum from there. So lower order harmonics are lower in pitch and frequency, and higher-ordered harmonics are higher in pitch and frequency.
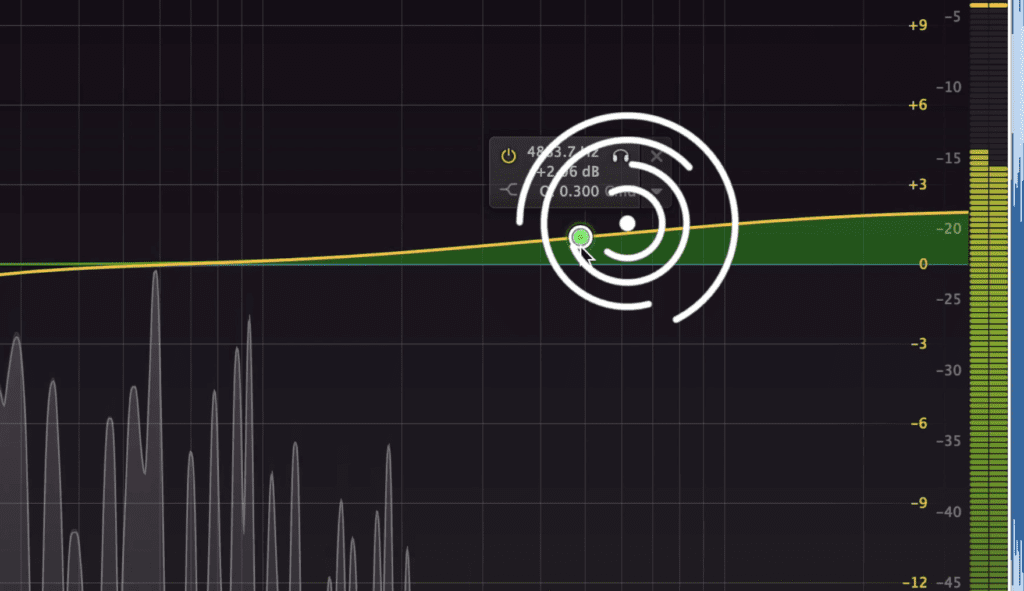
But what does this have to do with equalization? We’ll if we were to create a bell filter at say 200Hz, and amplify 3dB, we would be increasing the amplitude of that frequency and the frequencies around it.
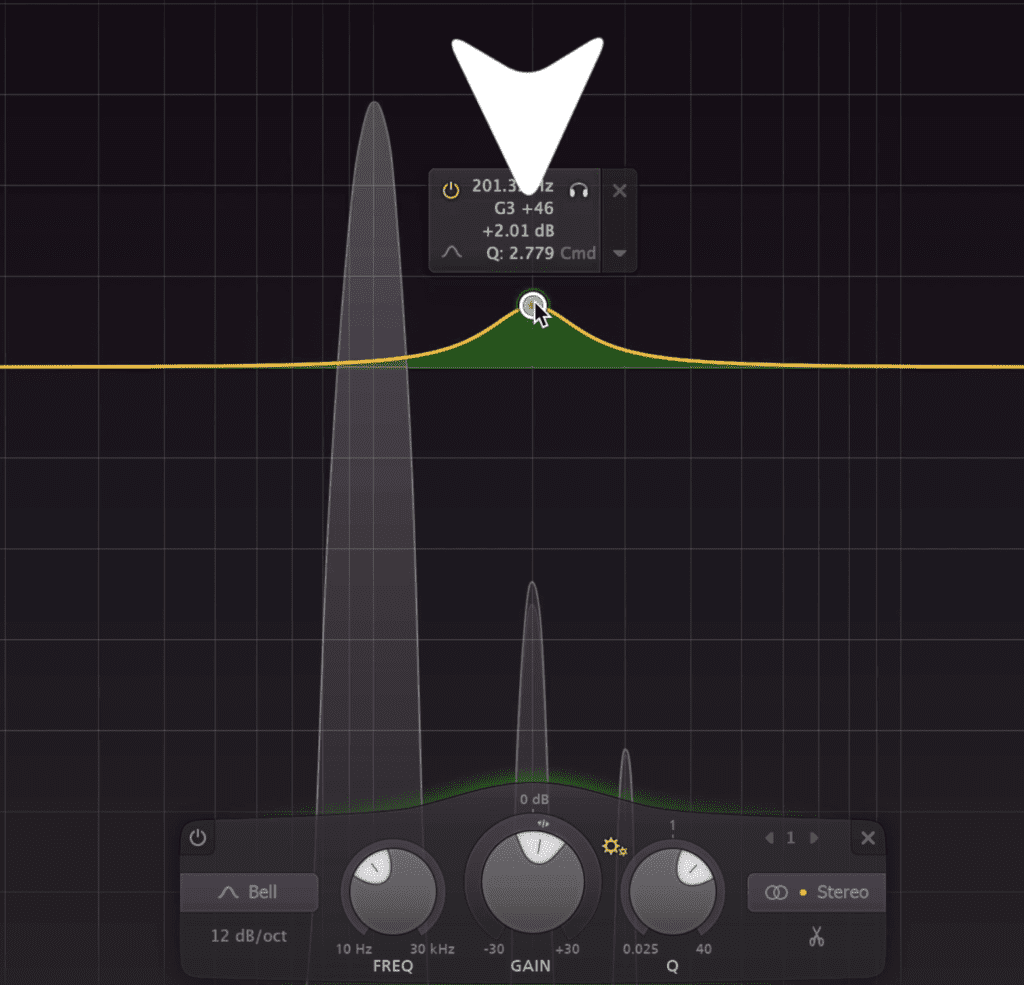
Using a bell filter, we can amplify 200Hz.
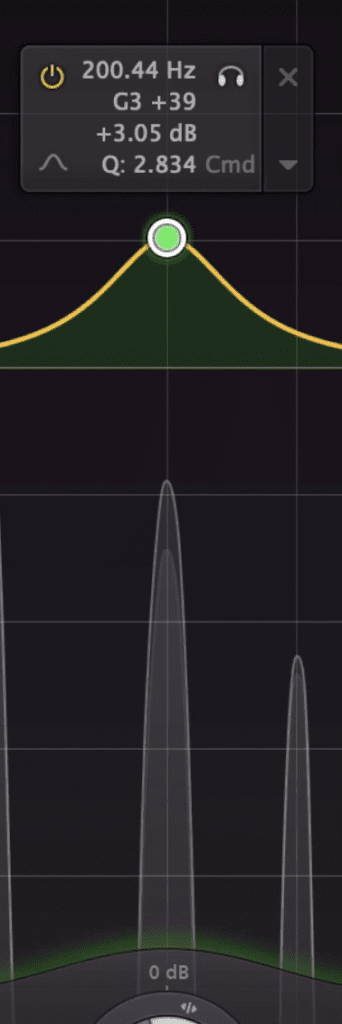
Something very similar could be said about harmonic distortion. If I was to achieve a 2nd order harmonic by using tube saturation, and the fundamental was at 100Hz, this 2nd order harmonic would be at 200Hz.
Just like with the bell filter we created a moment ago, this harmonic will amplify 200Hz. With that said, harmonic distortion can have a very similar effect to additive equalization. Granted, when the fundamental changes so will the harmonic, but, when the fundamental returns to 100Hz, the 2nd order harmonic will return to 200Hz.
Alternatively, a harmonic can be used to amplify that frequency.
The similarities between distortion and equalization don’t stop here. Equalizers themselves are created by controlling phase cancellation in a very specific and purposeful way.
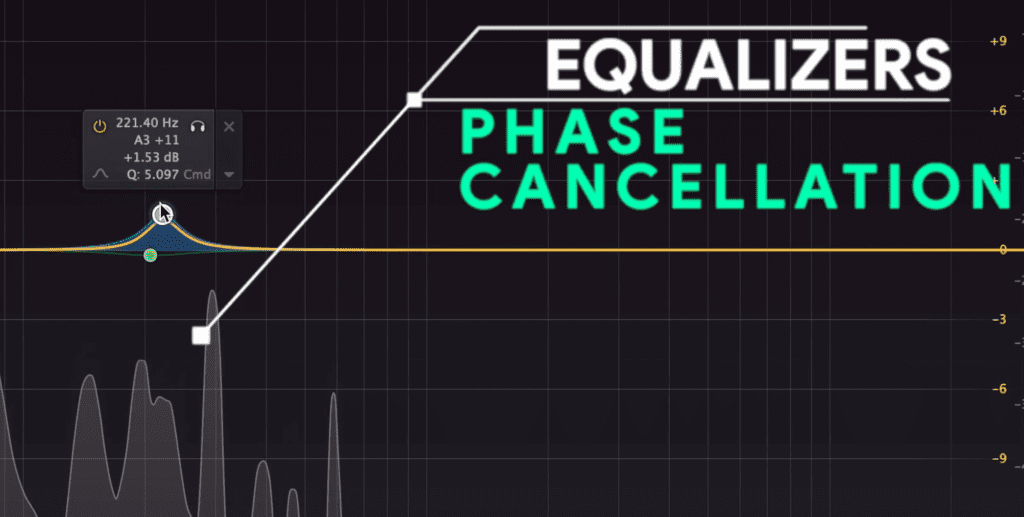
Equalization is really a purposeful phase cancellation.
Another example of two seemingly separate effects is how saturation is a combination of harmonic distortion and soft-knee compression.
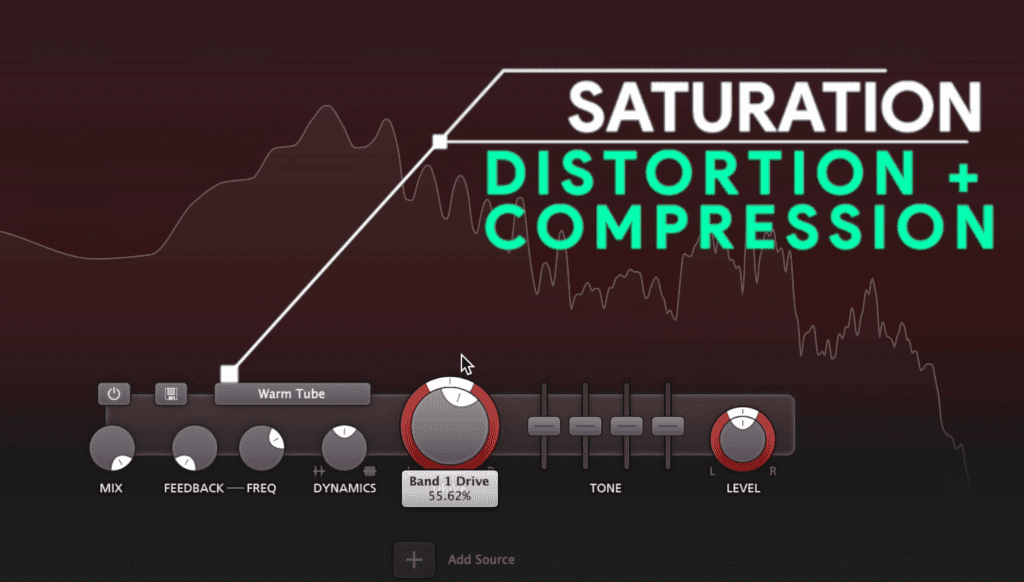
Saturation is distortion and soft-knee compression.
All this to say, that the more you know about the interconnectivity of all of these effects, the better you can understand what you’re doing and how you’re affecting the signal. So maybe next time you’re mastering, instead of amplifying 200Hz and increasing compression, you’ll increase the drive of your saturator instead, or vice versa.
If you want to learn more about mastering in general, and how the effects flow from one to the next, check out our video on the topic:
Secret 2: Knowing the Key of What You’re Mastering is Crucial
Usually, when we talk about mastering we discuss things like compression, limiting, clipping, and so on. Rarely do we cover music theory or how it directly relates to mastering, but it’s an incredibly important topic.
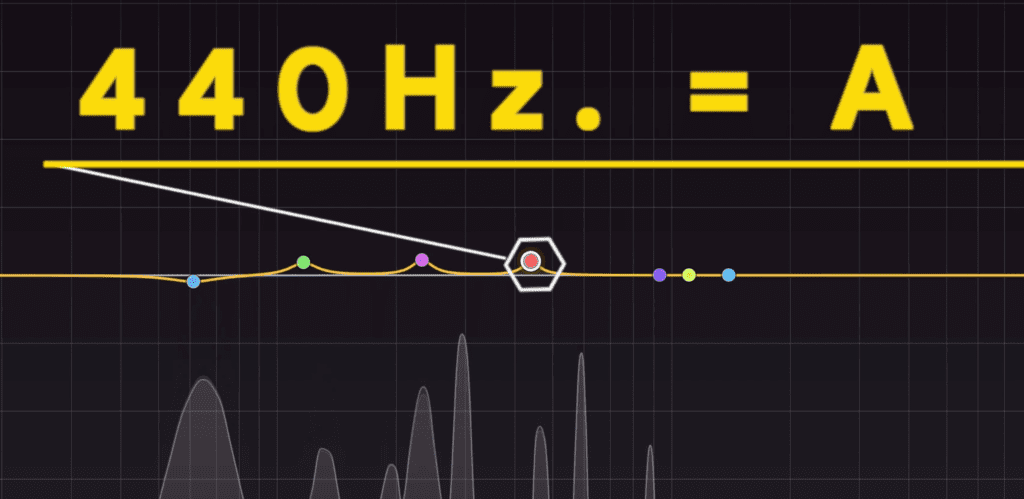
Because we’re working within the frequency spectrum, we are no doubt working with specific notes. For example, 440Hz is A above middle C on piano.
Each note has a frequency. If you know the key of the song, you know the most dominant frequencies in the track.
Each note in our western music scale, and in the Eastern musical scale, is comprised of a specific frequency.
The key and the chord structure of a song is important when you’re mastering because it shows you what frequencies the song will be made of.
So let’s say we’re working on a track that’s in the key of A# Major. Maybe we don’t know this first, but, we can use a key detector online to figure it out pretty quickly.
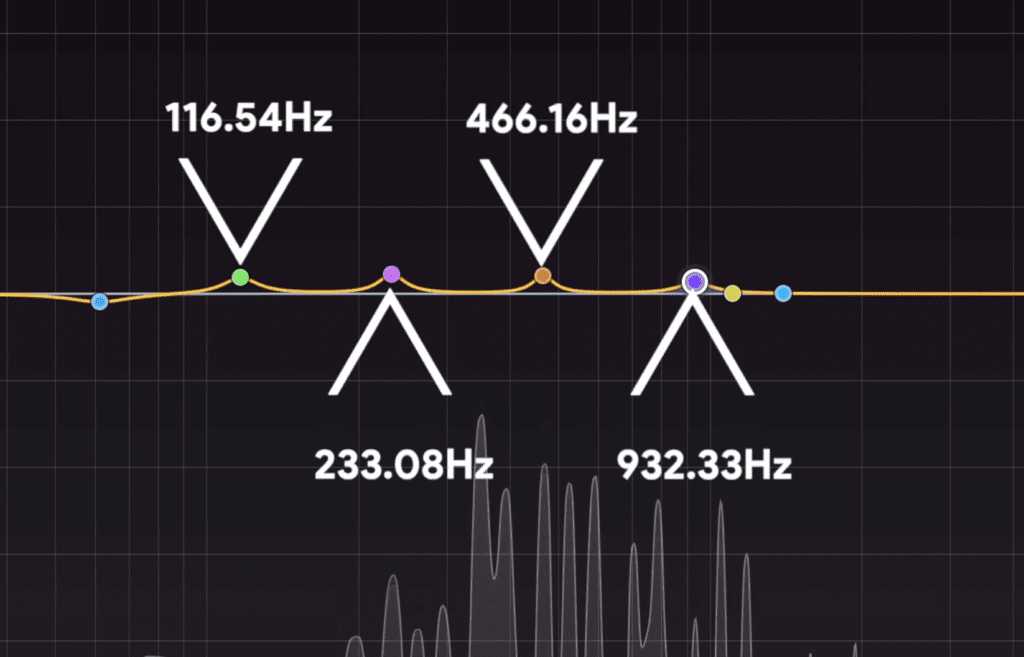
Anyway, with this information, we know what our fundamental note is, A#. This means that the frequencies 116.54Hz, 233.08Hz, 466.16Hz, 932.33Hz, and so on will play a role in our track - the reason being they’re all A# notes.
The notes here are in the chord structure of the song.
If the chord structure of the song includes A#, C#, and F, then we can find those relevant frequencies as well.
This information is incredibly helpful in a lot of ways. Say we want to amplify a kick frequency, but we don’t know where to center our band.
We now know that 43Hz and 86Hz will work well since they’re both F notes. However, something like 61Hz wouldn’t sound as good, since it’s a B which is out of our A# Major key.
Now, I’m definitely no expert on music theory, but with a little research and help from online sources I was able to find a lot of information I needed for this example, and then convert it back into something I did understand, like frequencies and equalization.
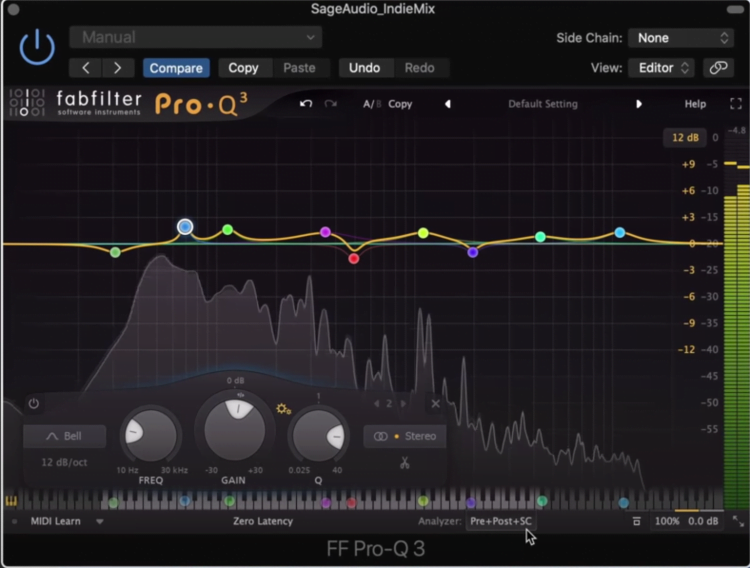
If you need an equalizer that’s capable of telling you the note that you’re equalizing, check out the FabFilter Pro-Q 3. We cover it in a lot of detail in the video embedded below:
Secret 3: When Mastering for a Client, Use Additive Equalization Before the Limiter
When both mastering and listening to music, our ears can pick up on certain things really easily, but not so much on other things.
Our ears are more sensitive to changes in the high frequency range, than to compression or other forms of processing.
For example, if I was to boost 5kHz and up by 3dB using a shelf filter, it would be easier to notice than if I was to compress the signal by 3dB. The reason being, our ears are a lot more sensitive to changes in the high-frequency spectrum than to a reduction in the dynamic range of a sound source.
We can use this info to save ourselves a lot of time when mastering for a client.

Attack and Release times, although important, probably won't be on your client's radar.
If we perform our subtractive equalization, compression, and saturation, odds are a client isn’t going to say something along the lines of, “hey I don’t like the attack and release times you used for your compression.”
But they might say something like, “I wish the high end had more air.” By placing your additive equalizer near the end of your chain, you can add more of the needed frequencies without having to consider how it’s going to affect the rest of your chain.
This way, you can quickly make a revision that’ll address the issue your client is concerned about, and, it’ll take you less time.
Granted, if there are issues with your compression, saturation, or the other effects that you used, you should definitely address that and make the best master you possibly can.
But, if the master is sounding great, however, the client’s preference is for one set of frequencies to be accented more so than another set, then this is a great solution.
Conclusion
As we said earlier, mastering is a complex topic.
Whether your compressing, equalizing, or distorting the signal, there’s always something new to consider or try to understand.
The 3 secrets we covered above are rarely discussed , but, they can improve both the quality of your master and your session workflow.
Try them out and let us know if they improved your master!
If you’re an artist or engineer, and you have a mix that you need mastered, send it to us here:
We’ll master it for you and send you a free sample for you to review.


