Top 10 Audio Engineering Words
Have you ever found yourself wondering what people are talking about when describing the qualities of audio? Many adjectives that get used to describe audio make little sense when thinking of them in their literal definitions.
Even still, engineers everywhere use words like these every day to help describe the sounds they want when tracking, mixing, and mastering audio. This list hopes to help clarify what some of the most popular audio adjectives mean and turn these head-scratchers into effective tools of communication for anybody making music.
Warm

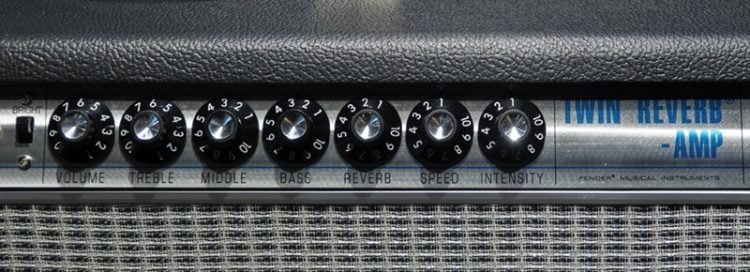
Tubes create even, low order harmonics and accentuate low frequencies. This results in a warm sound.
The audio term "Warm," is often used to describe a pleasant, full-bodied sound - often with an attenuated high-frequency response, and a slightly amplified low-mid range between 120Hz and 300Hz. The “Warm” sound is characterized by many classic recordings, that were benefited by slightly miscalibrated tape machines.
On a cold day, there is usually one thing people want to be...warm. In audio, there are many reasons that engineers want their sounds to be warm as well. Typically, “warm” is used to describe sounds that favor the low-end and low middle frequencies of a source and shy away from the high end. Warmth is achieved through many avenues, whether it be the mic, preamp, console, or EQ that you use.
Each piece of gear you add to your signal has its own sonic character, and many vintage pieces of gear tend to be on the warmer side of the spectrum due to design choices. Take the classic Teletronix LA-2A for example. Part of the reason it adds so much warmth to a vocal is because of its tube output stage where actual warmth is creating the sound based on how hard you drive the circuit. Additional gear like the Manley Vari-Mu Compressor has gained recognition for their ability to add warm coloration to mixes while also adding glue for a finalized sound.
Why is it that we like warmth on certain sounds? It boils down to the fact that a lot of the high-end frequencies that our ears are the most sensitive to are not accentuated. When these frequencies are accentuated in a vocal or a sharp transient such as a snare drum, they can appear to be louder and sometimes unnatural. The focus on lows and low-mids allows engineers to bring back some of the content that is not as apparent in a vocal, giving the track a natural, more complete sound.
Using warmth on mixes and masters can also provide a great way to even out any high-end balance issues as well. Bus compressors, console summing, and tape saturation are great ways to apply warm sounds to finalize your tracks and give them some analog vibe in the process.
Bright
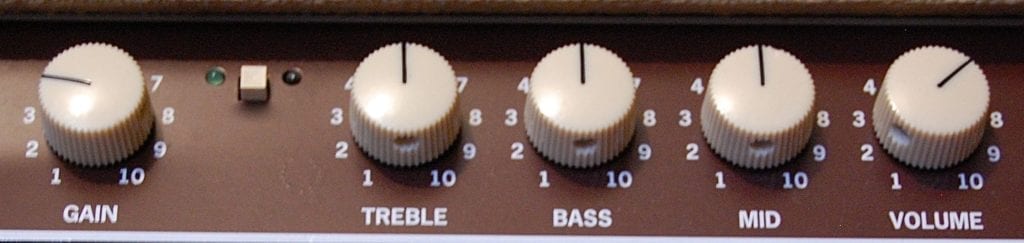
Certain amplifiers augment the high end, resulting in a high-end or "bright" sound.
Opposite to “Warm, the term “Bright” in audio refers to a sound with a slightly attenuated low-frequency range, and a boosted high-frequency range. “Bright” sounds are often characterized by their detail and clear transient response and can be accomplished with an equalizer, or a harmonic exciter.
In most cases when we talk about brightness, we are referring to what we see. When talking audio, we can link the two uses through coloration. You see a mustard yellow and compare it to a neon yellow. Which one is brighter?
Coloration in audio is similar in some ways. A bright signal is usually referring to sounds that favor the high-end and high middle information over the lows and low mids. Refer to the picture above and note the EQ settings. We will call this our neon yellow. If you wanted to turn it into a mustard yellow, you could roll back the treble knob and turn up the bass.
Bright sounds are useful when dealing with tracks that have too much low end or that need to have an increased amount of clarity or “air” added to them. The increase of clarity when adding treble happens due to the fact that our ears are most sensitive to frequencies between 2 and 5 kHz.
Certain gear can help get this type of sound from the tracking stage such as the Telefunken C12 or ELAM 251. These microphones use tubes which to some may mean warmth, but in reality, the balance of the tube color with the detailed high-end response makes them great choices for those looking for a brighter sound during tracking.
Many equalizers have also implemented great ways to add brightness without fear of your tracks becoming too sibilant. The Maag EQ4M’s Air Band has become a popular choice for engineers looking to balance their mixes and add high-end detail. Brightness, like anything in audio, must be used sparingly and when the time is right. Too much becomes very noticeable, but used correctly, it can be an invaluable tool for adding clarity to your tracks.
Dynamic
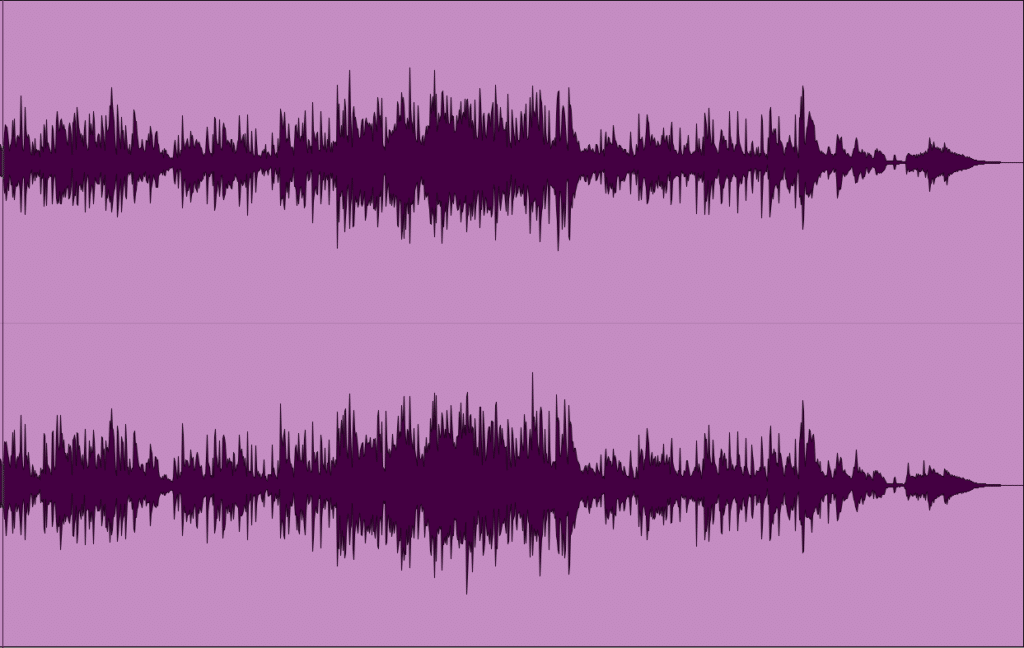
Dynamics relate to the relative volume of different sections of a song, or track.
The term “Dynamic” in audio closely matches its definition, but often refers to the relationship between the relative volumes of multiple points in a signal. Typically, a signal that is “Dynamic” has a pleasing sound, in which space exists between the various instruments, allowing these instrument groups to be discernible.
Dynamic is defined as “characterized by constant change, activity, or progress.” Fortunately, this word is used similarly in audio as it pertains to how the levels change throughout a recording. In music, dynamics refer to how a part should be played. The quietest sections are marked with “pp” and the loudest ones are marked with “ff” to let performers know at what volume or intensity to play.
When tracking, mixing, or mastering, dynamics can become a touchy subject when utilizing common tools such as compressors, expanders, and limiters. These pieces of gear are designed to help control dynamics for a more consistent response throughout the duration of a song. If used incorrectly though, the resulting audio could lose its dynamic response and begin to sound squashed and sometimes unnatural for the listener.
During the mixing and mastering stages, it is important to pay close attention to how your tracks are reacting to dynamic control. If there is no perceivable change in the volume of instruments in your mixes, you may be using too much. Most listeners like to have a realistic sound when listening to vocals and instruments and with that comes dynamics.
In many cases, dynamics are often the hardest part of mixing and mastering. Choices in gear are very important when trying to tame dynamics since there are so many types of compression circuits. When it comes to keeping your song’s dynamics intact, it may be a good idea to speak with a professional mastering engineer. Using specialized gear and possessing great ears allows them to make the correct changes while keeping your audio as dynamic as possible.
Wide
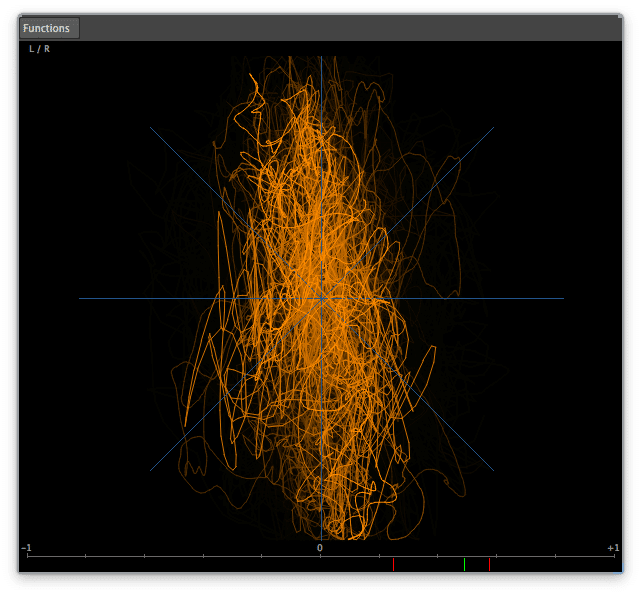
A stereo image that's within the 90 to 180-degree range is significantly "wide."
The term “Wide” when talking audio refers to how a signal occupies a stereo field of 90 - 180 degrees, and the extent to which it occupies this field. If a signal occupies the 90 - 180-degree field, that signal is considered “Wide” - whereas a mono signal is the opposite.
Unlike many of the terms on this list, the definition of wide makes quite a bit of sense even when applied literally. When engineers use the term wide they are referring to how much of the stereo image a signal is or isn’t taking up.
With the advent of stereo recording in the 1950s engineers began experimenting with different ways to make their recordings more lifelike. Many artists tried things like panning all of the drums to one side or the other to make use of the technology, but as time went on the aspect of realism in recorded audio began to take over. Generally speaking, most tracks now use stereo to provide localization of instruments like left and right drum overheads or stereo piano.
Using these techniques can provide your tracks with the ability to suck listeners into a simulated space. To do so, mic techniques such as X/Y and mid/side are used to give width to tracks that if recorded in mono would be confined to a single space in the mix. Wide sounds typically take advantage of as much of the stereo space as possible. Great examples include stereo reverbs, delays, and synthesizers.
Aiming for wide sounds in your tracks can help to provide the listener with a more natural experience since we live our lives with a stereo pair of mics attached to the sides of our heads. Applying width in a mix can truly help bring your music to life.
Clean
A lack of distortion and an accurate input to output relationship characterizes a clean signal.
In audio discourse the term “Clean” is often associated with a signal’s lack of distortion - be it harmonic generation, or general waveform distortion. To achieve a “Clean” signal, it’s best to avoid using analog emulation, harmonic generators, saturators, or any type of distortion that can alter the signal.
What does it mean to have a clean sound versus a dirty one? It certainly isn’t comparable to the difference between a clean floor and a dirty one. It refers to a signal’s purity.
One group of people you will hear this term used the most with is guitar players. Most amplifiers have a clean channel and a dirty channel so that multiple sounds can be used. The clean side gets called clean because it often lacks any distortion in the preamp section of the tone stack. There is still a certain tone that comes from using a Fender amp versus a Marshall amp, but in both cases, the guitar is plugged in, given some gain, equalized, and then sent out to a speaker. Without any distortion coloring the sound, the tone of the guitar gets to be mostly unaffected, resulting in a clean sound.
Even gear in the professional audio world can be considered clean. There are many times that engineers will pick a certain piece of gear for how it affects the sound. A clean sounding compressor will leave the incoming signal alone in terms of tone, acting only on the transients, but a compressor like the LA-2A will color the sound whether or not it is acting upon transient material.
Harsh

Harsh sounds include excessive sibilance and untamed cymbals.
“Harshness” in audio is closely associated with an excessive high-frequency range response, typically that of vocal sibilance, loud cymbals, or high harmonic order distortion types. Some common tools that alleviate the causes of “Harshness” are de-essers, frequency-specific compressors, and in a unique but valuable way, dither.
Our ears are very sensitive to frequencies ranging from 2 to 5 kHz. Lots of the sounds in the human voice exist within this range so it should be no surprise that the piercing sound of an infant’s cry is centered around 3.5 kHz. These two facts help explain what a harsh sound consists of.
Harsh is defined as “unpleasantly rough or jarring to the senses.” In audio, harsh sounds exist most often in the high middle and high frequencies. Sibilance in vocal and cymbal tracks can illustrate how high frequencies can tax the listener over time. Tools such as de-essers can help ease the impact of this form of harshness and give a more natural and smooth sound to your tracks.
To further combat a harsh sound, focus your attention on the high mids. Since our ears are sensitive to this information, it can be easy to spot when there is too much in your mix. De-essers, EQ, and compression can be helpful in taming a harsh sounding track. Since engineers aim to please the end listening easing the sound of your mixes may make your listeners more apt to listen again.
Boomy

A boomy sound is heavy in the low-end and lacks definition.
A “Boomy” sound is recognized as an excessively loud, resonant, and sometimes reverberated low-end frequency. To avoid a “Boomy” sound, make sure your low-end instrumentation, be it kick, 808, and sub-bass are carefully controlled regarding their integrated volumes, dynamics, and temporal processing.
“Making a loud, deep, resonant sound,” is how Oxford defines boomy. This definition hits the nail on the head when describing what engineers are talking about in their audio.
When something is boomy it often contains lots of low frequencies. These frequencies become resonant when their octaves are also very present in your tracks and can often become overwhelming if not treated correctly. Sources such as concert bass drums, kick drums, and bass are great examples of instruments that can become boomy fairly easily.
To correct these types of issues, EQ can be applied to the problem spots to reduce the resonance that is associated with boomy tracks. Another way to tackle this issue without removing the frequencies entirely is to try multiband compression. Applying compression based around only the frequencies that are creating the boomy sounds can help tame their overwhelming nature while allowing the natural resonances to still come through.
Muddy

Mud is typically associated with an excess of 180Hz to 300Hz. If you have a muddy mix, start by attenuating these frequencies.
The audio term “Mud” can be thought of as an excessive version of “Warm.” This occurs when the same frequencies that are associated with a warm signal, roughly 120Hz to 300Hz, are accentuated to the extent that they overpower and mask the frequencies directly above them.
What do you get when you mix dirt and water? Mud. Mud is a thick substance that our parents are always telling us not to track into the house. It stains and makes things dirty in a very unpleasant way.
The same applies to a muddy sound in audio. It is often thought of as a muffled sound that is lacking any clarity. The muffled sound comes from an abundance of low mid and low-frequency content in many cases. Since these sounds are less directional than higher frequencies, they often clutter the entirety of a mix rendering it muddy.
Sometimes a muddy sound can be used as an effect when creating low or mid-fi music, but most engineers do not aim to create these sounds. One of the easiest ways to combat muddiness in your tracks is to use a high pass filter. If an instrument’s main frequency range sits in the high mids, it can be useful to apply a high pass filter to eliminate extra rumble and mud. When left in, these frequencies combine with low-frequency instruments and appear louder.
With an EQ, cleaning up muddy sounds is relatively simple. Whether you high pass or cut at 350 Hz, you can add clarity to any track that is adding too much clutter to your mix.
Flat
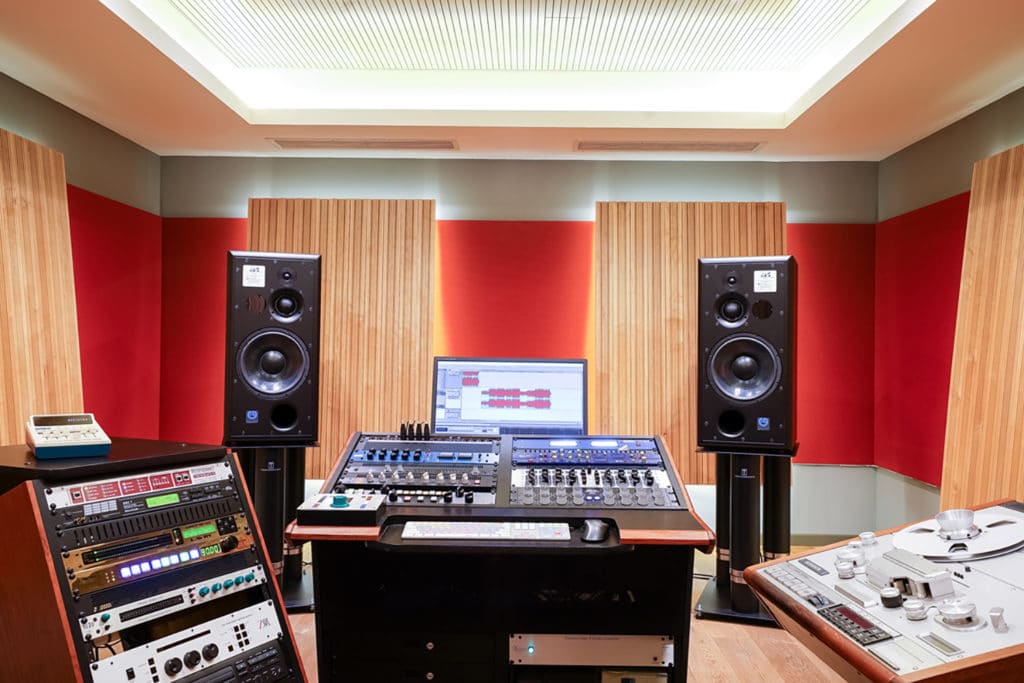
Most studios have "flat" rooms, meaning they represent the sound in a balanced and unbiased manner.
“Flat” in audio discourse means that either a listening room, or the signal itself, is free of antinodes, or overpowering frequency groups which render the signal’s frequency response inaccurate. If a listening room is “Flat” then you are hearing an accurate representation of that signal.
Flat is defined as “smooth and even; without marked lumps or indentations.” For some, it may be hard to understand how we could use this to describe audio, but there are many uses for the word.
If you imagine the EQ response of a microphone, speakers, or headphones as a straight line, the line would represent a flat response. This means that there is no boost to any frequencies across the gear. In contrast, some pieces of gear have audible changes being made to color or enhance the sound quality.
While lots of consumer-grade audio gear aims to give the best listening experience to the end-user, there are good reasons to look into flat gear when tracking, mixing, and mastering. To make informed decisions on your audio, you have to know that what you are hearing is as accurate as possible.
When using flat response gear, you do not have to worry about overcompensating for frequencies. If you have ever tried mixing or mastering your tracks on a system that has hyped bass or a very specific curve, you may end up making poor decisions. Listening on a system with boosted bass could cause you to include less low-end in your mix to compensate for the frequency response of the speakers.
Deep
In audio, deep refers to both an extended frequency response or a complex reverberation.
The term “Deep” in audio means two things; first it means the frequency response of a signal extends to 20Hz - second it refers to the perceived depth of a signal in the stereo field. Achieving a “Deep “ image in the second sense of the word often requires psychoacoustic effects.
Deep is a multifaceted word in the world of audio engineering. In the literal sense, it means “extending far down from the top or surface,” which works for one of the uses of the term.
The first common use often refers to the low frequencies in a signal.
A deep bass response may indicate that a piece of gear has the ability to accurately reproduce signals near or at 20 Hz. This is important because that is the bottom end of the human hearing range and can help influence how we perceive the rest of our low-end information. For engineers working in genres like EDM and hip hop, a deep response is essential since low end makes up a good portion of how those songs impact their listeners.
Another use of the word is found when describing reverbs. A shallow reverb could be found if you shouted in a small room, but if you shouted in a concert hall the reverb would be much longer due to the size of the space. When mixing, it may be desirable to use deep reverbs to sit certain tracks further back in your mix which can create a three-dimensional space for your audio.
Conclusion: Explaining certain things in life can be difficult when you feel as though you don’t have the right words. Sound is one of those things that becomes hard to elaborate on since we often use words that don’t completely make sense. Whenever you are discussing audio with another engineer, look out for words found on this list and refer back to it if you need it. It never hurts to ask what somebody means if you don’t understand, but this list should help you on your journey to having productive conversations with audio professionals everywhere.
If you want to hear what professional engineers can do to add warmth and detail to your mixes, follow the link here for a free mastered sample of your song: https://www.sageaudio.com/register.php


