Top 7 Quick Mastering Tips
- Use 2 limiters and split the processing between them
- Use a High pass filter on your side-image
- Sandwich a Multi-band Expander Between 2 limiters
- Try EQ Matching Your Master to Another to Compare
- Use Parallel Compression with Low-Level Compression
- Set a Quicker Limiter Release for A Transparent Sound
- Listen to Your Master with Multiple Devices
Mastering can be a lengthy process - but some quick tips can help speed it up. Take a look at these 7 tips and let us know if any improve your masters.

Having some mastering tips to use can be very helpful.
First, if you’re an artist or engineer and you have a mix you’d like to hear mastered, send it to us here:
We’ll master it for you and send you a sample to review.
7. Use 2 limiters and Split the Processing Between Them
Typically, engineers stick to 1 limiter; however, using 2 limiters in a series can help alleviate the pressure on 1 of them.

By splitting limiting amongst 2 limiters we can avoid or better control changing the timbre of a master.
If you find that you’re using heavy limiting, and notice that the timbre of your master is changing drastically because of it, try 2 limiters back-to-back.
By splitting the limiting across the 2 of them, you’ll notice less of a timbre change and less distortion than if you used just 1. This is a great technique even if you aren’t using significant limiting.
If you use different limiters with unique timbres, you can achieve tones that you otherwise wouldn’t have been able to.
For example, I like to combine the Weiss DS 1 MK3 with the FabFilter Pro L2 to achieve a distinctive sound.
If you want to try some free mastering limiters, take a look at this video here:
6. Use a High Pass Filter on your Side Image
This is one technique I use a lot and introduce into about every master and tutorial I make. It may not be for everybody, and it definitely has its limitations, but making the side image’s low-frequency range mono is almost always a good idea.
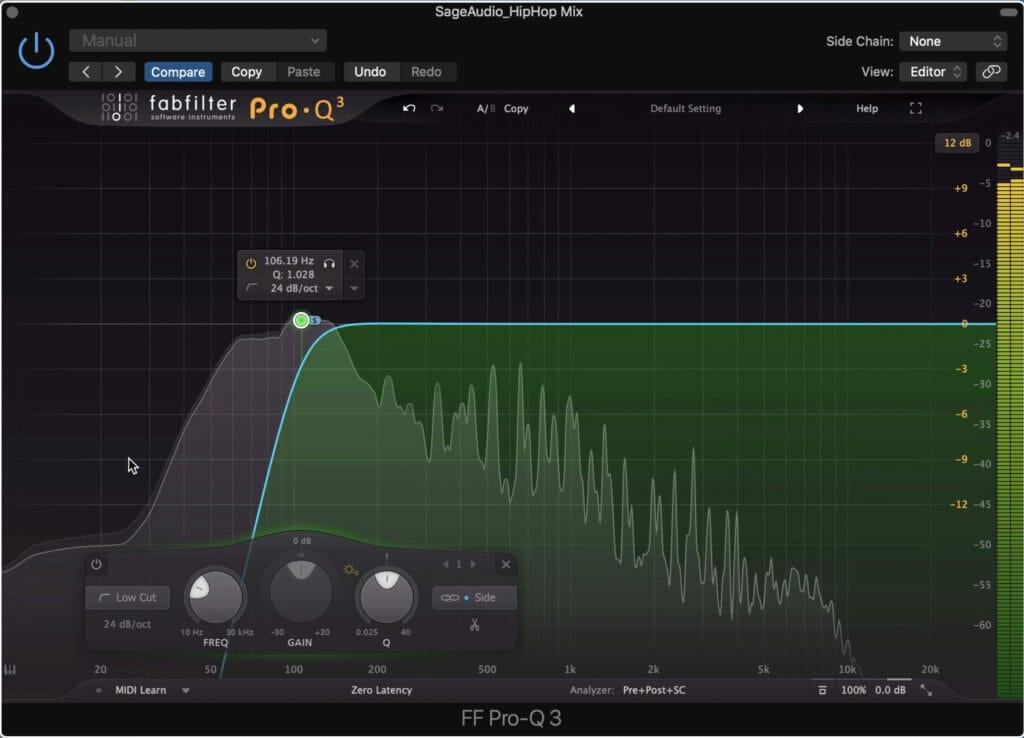
A high-pass filter on the side image makes the low frequency range mono.
Doing this is simple. Use an equalizer with mid-side capabilities. On the side-image use a high-pass filter and cut out up to roughly 130Hz.
This means that all frequencies below 130Hz are now mono. So your bass and kick are now primarily money, meaning your master will sound driving and focused.
Additionally, if you’re finding that your master is sounding a little muddy, this is a great first step to take.
Try this out for yourself and let us know if it makes a difference on one of your mixes or masters.
5. Sandwich a Multi-band Expander Between 2 limiters
This is a new technique I’ve been trying, and kind of came about after a friend asked me to remaster an already mastered track.
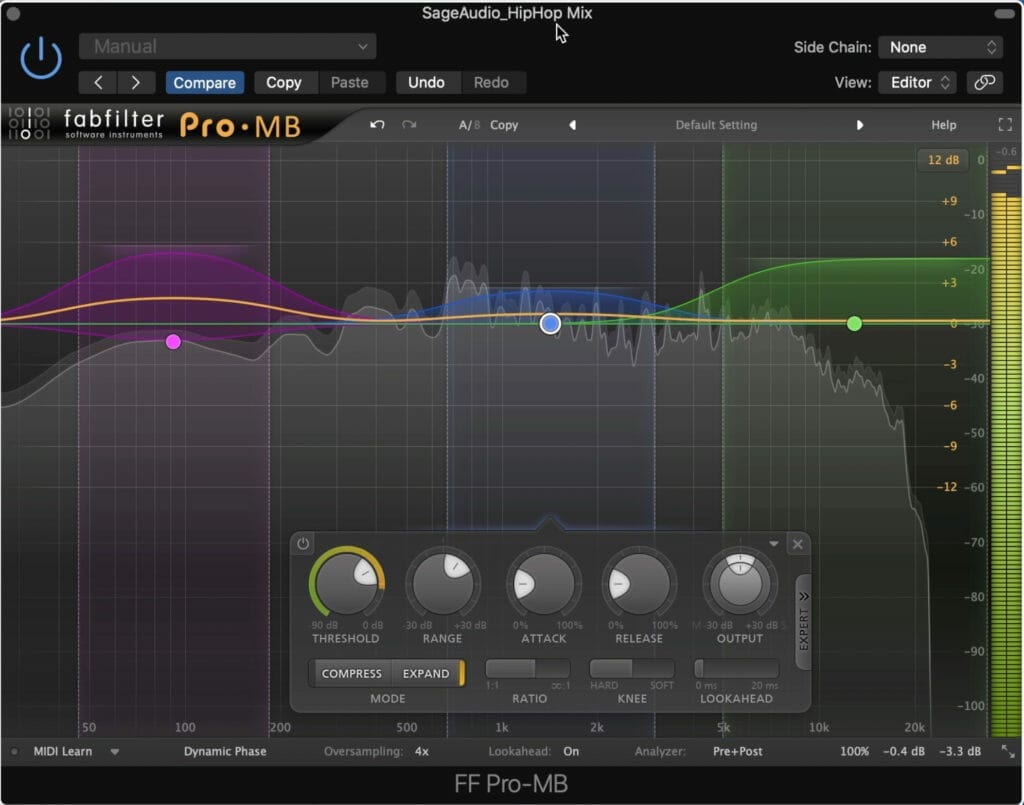
Expanding the signal with a multi-band expander, and the limiting it can create an aggressive but dynamic sound.
I noticed that if I expanded the already limited master (while compensating for gain changes to avoid clipping) and then followed it with another limiter, I could achieve a very aggressive and pop-centric sound.
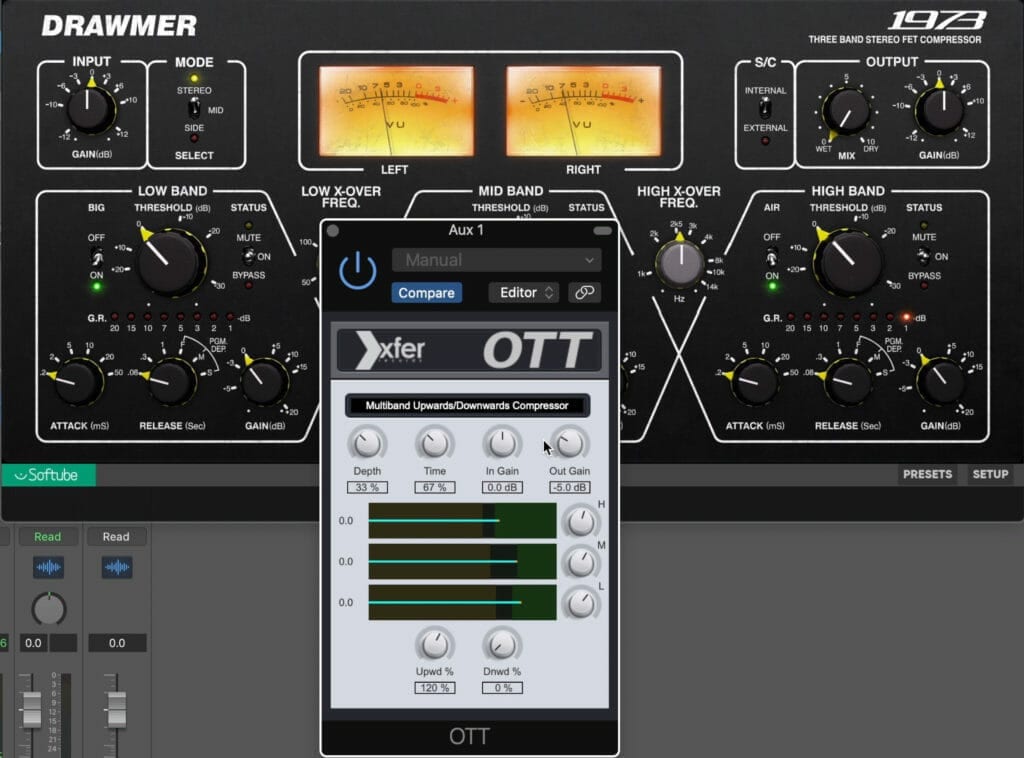
To translate this to a typical mastering session, I use 1 limiter to control some of the dynamics and increase the volume. Then I follow that limiter with a multi-band expander and boost the kick, mid-range vocal, and some of the high frequencies.
After I compensate for any overs or clipping by adjusting the outputs of these plugins, I follow the multi-band expander with another limiter and very subtly increase the gain.
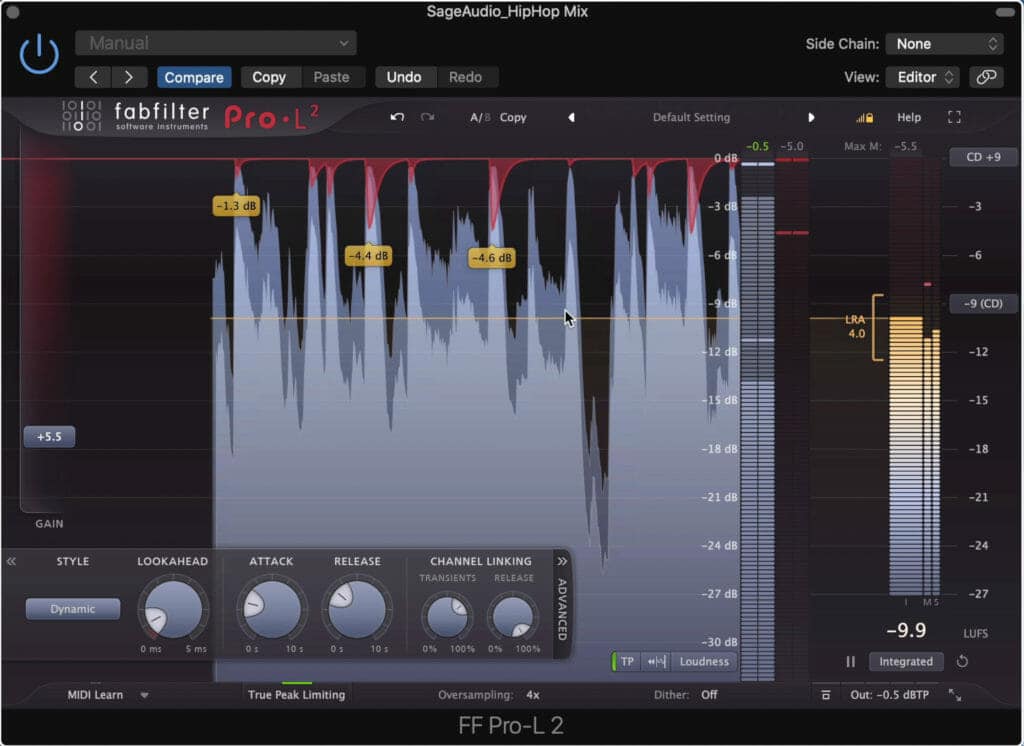
After expansion, I used the L2 to increase the level.
What this does is heavily compress the signal, then make what’s compressed more dynamic, and then adds just a little more loudness with the last limiter.
This technique is a little unorthodox, and definitely doesn't work for every genre - but if you’re trying to achieve a very aggressive sound that maintains its dynamics, try it out.
4. Try EQ Matching Your Master to Another to Compare
We’ve all heard of using a reference track, but we can take this 1 step further by matching our master’s EQ to that of another great sounding master.
Reference tracks are common when mastering.
Granted, this effect may be too extreme to keep, but it’ll help us understand what’s different about our masters and the ones that we thoroughly enjoy.
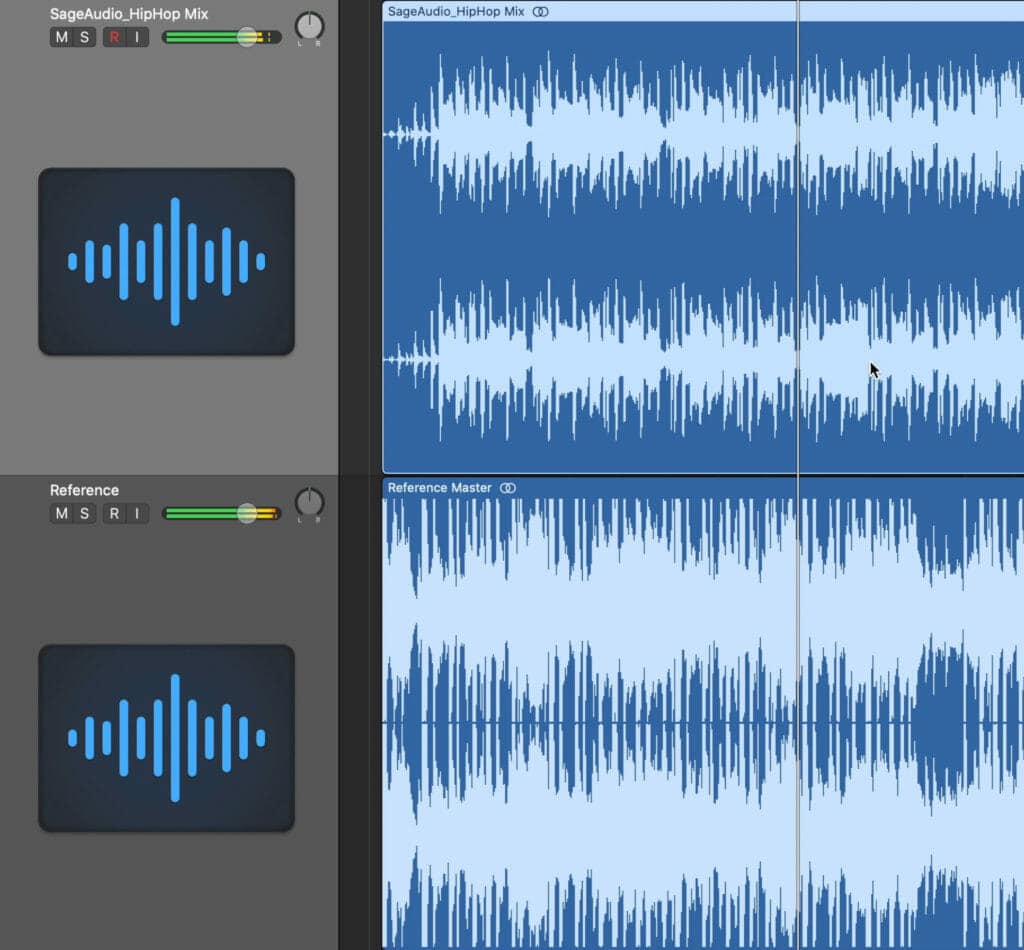
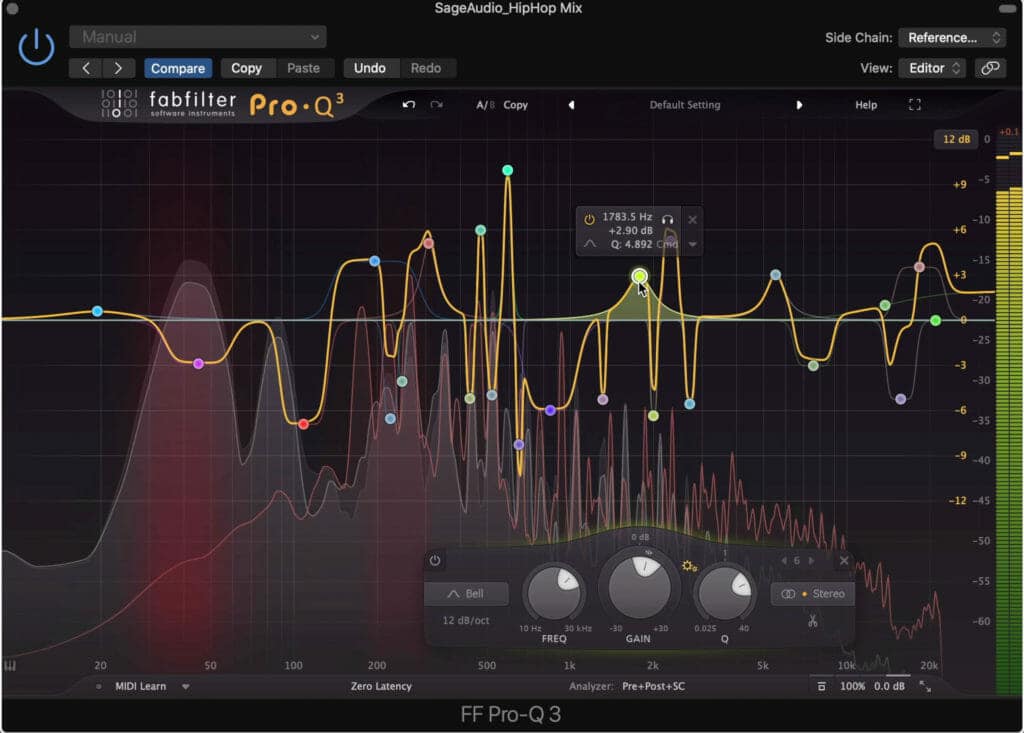
A great plugin for this is the FabFilter Pro Q 3, which allows us to match the frequency response of 2 tracks using some side-chaining and the EQ match function.
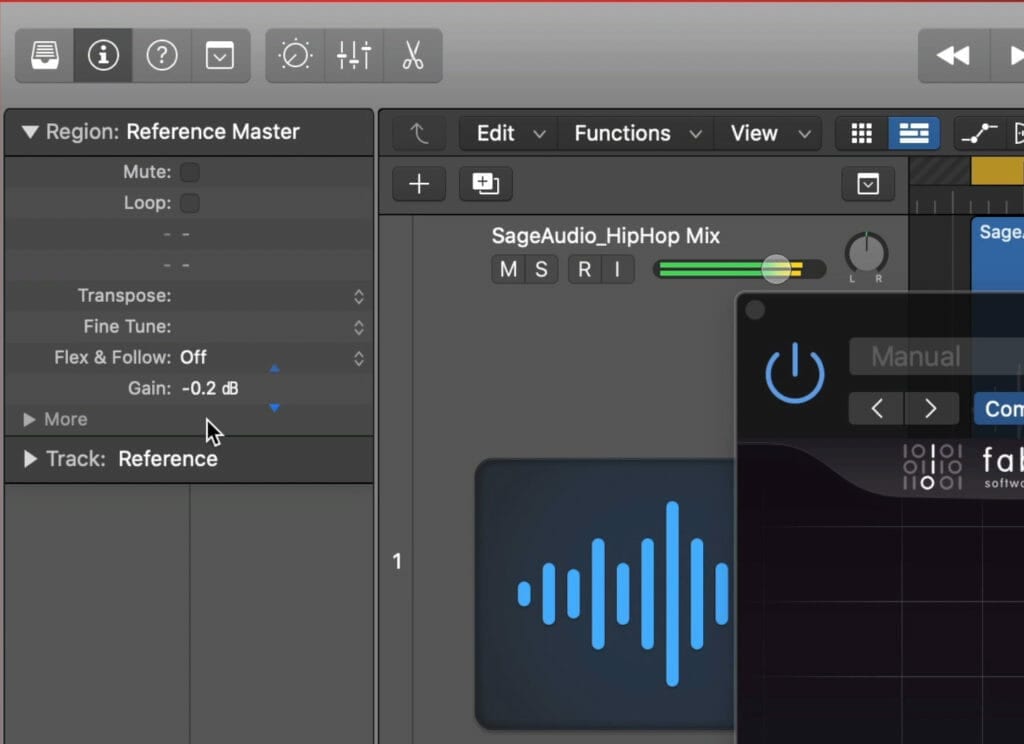
Adjust the reference track with clip agin to match their volumes.
First, try to make the gain of the two masters relatively the same. You’ll most likely use clip gain to reduce the gain of your reference master.
Then find a section of the reference that is very similar to a section of your master. Then match the two segments.
After you delete or tame some of the more extreme bands, take a listen to your master and see how it compares. Did the sound improve? Did it not?
Don't keep the effect, but consider what's different between your master and the reference.
If it improved significantly, it may be best to go back and address some issues in the mix or with your mastering chain.
3. Use Parallel Compression with Low-Level Compression
Parallel compression is great - but what’s better is parallel compression followed by low-level compression. In short, you use an auxiliary send to separate your signal into 2.
A low-level compressor after a parallel compressor can bring out that signal's character.
Then you heavily compress the auxiliary send and lower the channel fader to blend the effect in with your original signal.
If we add a low-level compressor on the auxiliary channel, we increase the details and nuance of the already compressed signal.
By doing this, and then subtly blending the effect back in with our original signal, we can create a truly impressive and full sound. Keep in mind that only a little bit of the parallel compressed signal should be reintroduced into your master.
Watch a video on how this technique is accomplished
2. Set a Quicker Limiter Release Time for A Transparent Sound
The release time of a limiter is one of its most important functions. It has the ability to both drastically improve or degrade the quality of your master.
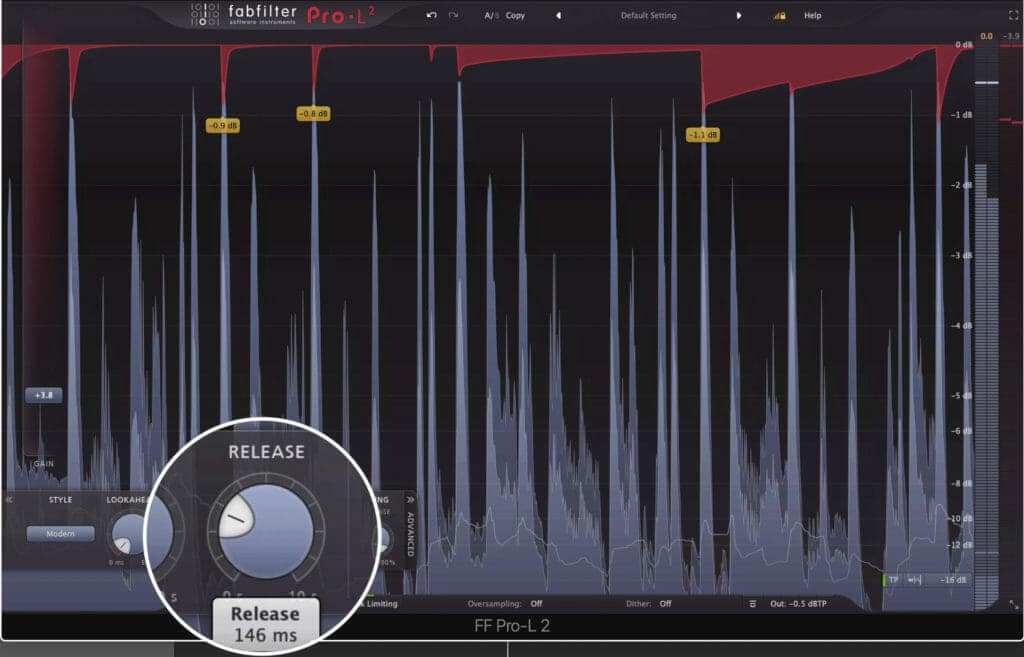
The release time can greatly affect the timbre of a master.
Set a quicker release time if you want a more transparent master. Set a slower release time if you want a smoother, more relaxed sound.
A quicker release is best for pop and rap, whereas a slower is good for funk and soul.
Keep in mind that since you’re affecting the entire stereo signal what you do has a huge impact on the timbre. Additionally, don’t make your release tie quicker than 30ms, since this will cause noticeable and unpleasant distortion.
1. Listen to Your Master with Multiple Devices
It never hurts to monitor your master on multiple sources. This is why studios have multiple pairs of speakers set up.
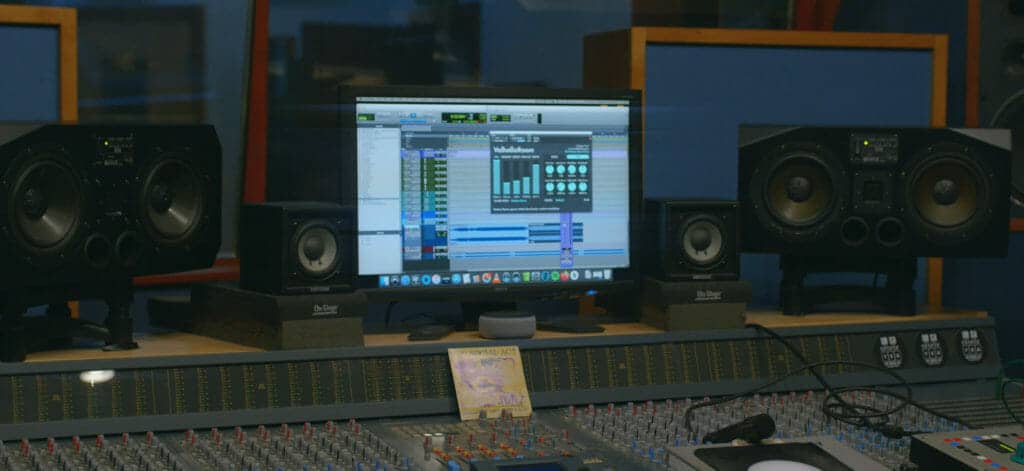
Listening on multiple speakers gives you a better idea of how your master will sound to consumers.
You want to understand how your music sounds on multiple playback systems before sending it out into the world - this means making compromises.
You’ll need to find a balance between what sounds good on your monitors, what sounds good in a car, what sounds good over earbuds, and so on.
Ideally, we could make masters for each set of speakers, but this is nearly impossible. With that said, try to monitor your master on multiple speakers and create the best sound possible.
Conclusion
Some small tips can really make a big difference with your mastering. What seems like a simple change may completely shift how you approach this stage of audio production.
Let us know if you try any of these tips, and if you do, let us know how it went.
If you’re an artist or engineer and you have a mix you’d like to hear mastered, send it to us here:
We’ll master it for you and send you a sample to review.


