What is Bus Compression?
Quick Answer
Bus Compression is the act of using a compressor on the master output to create a uniform sound for the entirety of a mix or master. Bus compression is often used in mixes and masters to create a cohesive and overarching timbre for the recording.
What is Bus Compression in Detail
Bus compression has become a more common form of compression in the age of digital processing.
Although this processing has been an option for decades, the ease with which it can be accomplished in the digital realm has made it an important and widely used effect.
Bus compression is a popular form of processing - one that has become more popular with digital processing.
Although bus compression uses a compressor, the effect is often used in a different manner than regular compression. This is due to the ease with which bus compression can be perceived, given the amount of signal it is processing.
Typically, when using compression on an individual instrument or track, more aggressive settings can be utilized; however, when using bus compression, very subtle settings should be implemented to avoid noticeable compression and artifacts.
Bus compression is introduced very subtly to avoid the sound heavy compression creates.
In addition to controlling dynamics, bus compression, especially in tandem with parallel compression, provides the opportunity to increase low-level signals and make details of a mix or master become more easily perceived.
These low-level signals are everything that is being masked by louder signals - they are the nuanced details of a recording that when increased, provide complexity to a mix or master.
With that said, it's incredibly beneficial for an engineer to understand how to introduce bus compression and how it can be combined with parallel compression.
Let’s cover the basics of bus compression and its general purpose, as well as compare and contrast it with other commonly used forms of compression to garner a better understanding of what it truly is.
We’ll then discuss how the settings you choose for your bus compression will greatly impact how your mix or master is affected, as we discuss concepts like attack and release, as well as the ASDR of a signal.
If you’d like to hear you mix master with analog bus compression used, send it to us here:
We'll master it for you and send you a free sample for you to review.
What’s the Difference Between Bus and Parallel Compression?
Bus compression and parallel compression differ in how the signal is routed and the general purpose of the compression - whereas bus compression refers to a group of signals collectively being compressed, parallel compression can be one or more signals collectively compressed and involves both the processed and unprocessed signal.
In other words, bus compression happens on the stereo output or a sub-output (a stereo collection of all signals that exists prior to being routed to the master output).
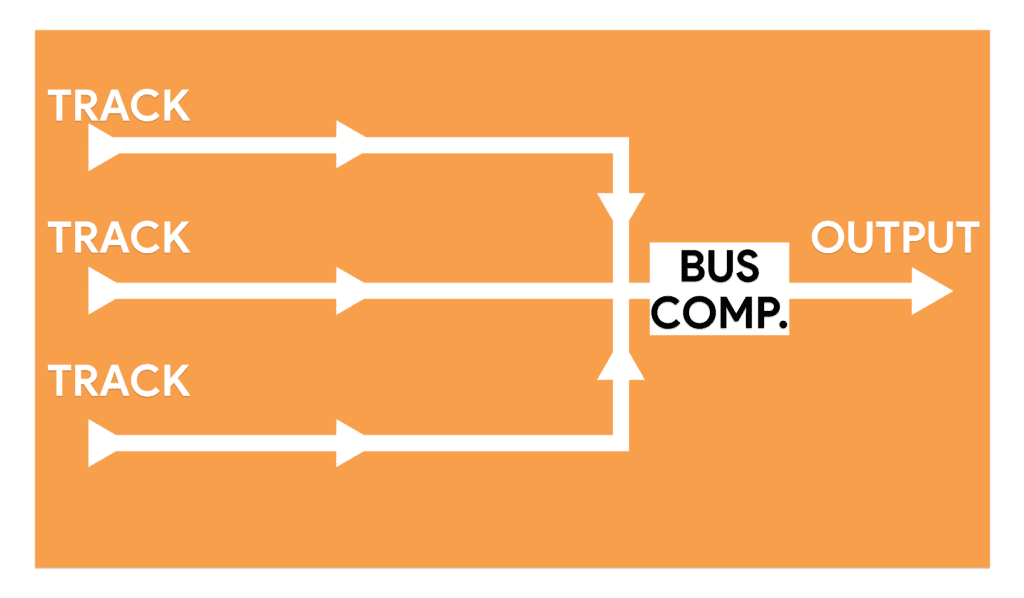
Bus compression processes multiple tracks simultaneously.
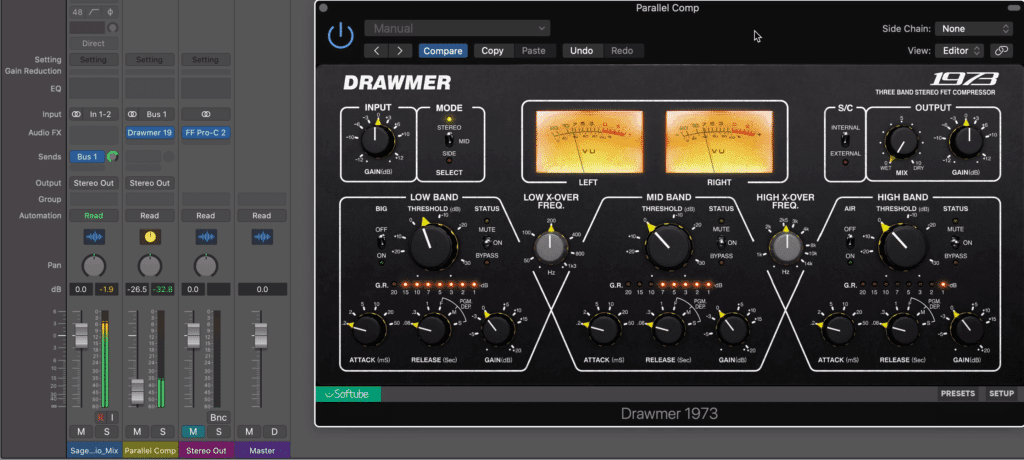
But parallel compression occurs on an auxiliary track - one that is blended in with the original or source signal.
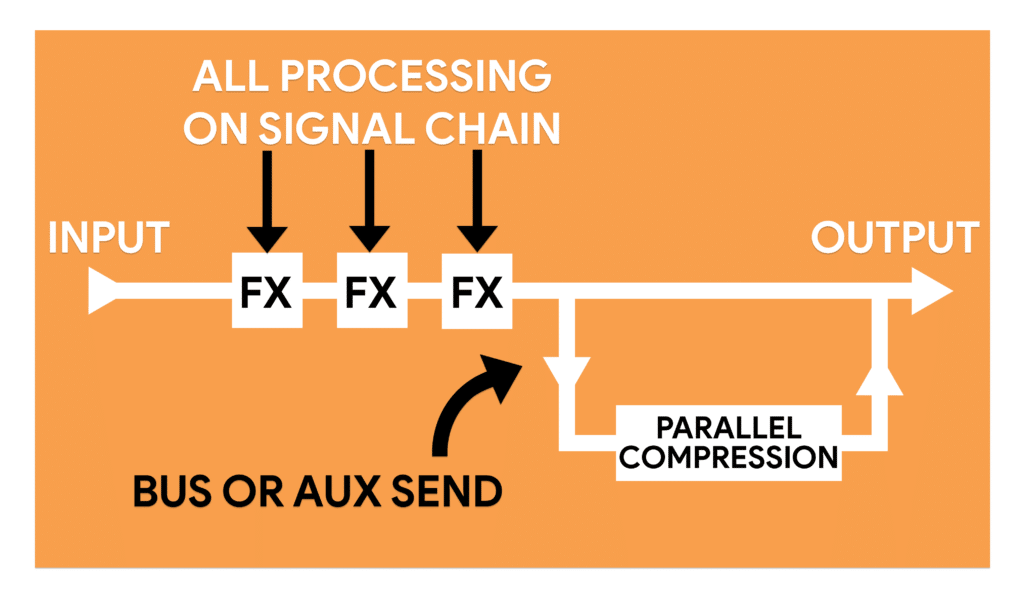
Parallel compression is applied via an auxiliary send that is then combined in with the original source signal.
Although it may seem like the distinction between bus and parallel compression is an exploration into frivolous semantics, it’s an important separation to make nonetheless and one that’s better to make sooner rather than later.

Understanding the difference between parallel compression and bus compression is important.
The main reason it’s important to understand the difference between the two is due to their differing purposes:
- Bus Compression is used to create a cohesive sound and timbre, as well as control dynamics.
- Parallel Compression is used to increase low-level signals, making these signals more easily perceived.
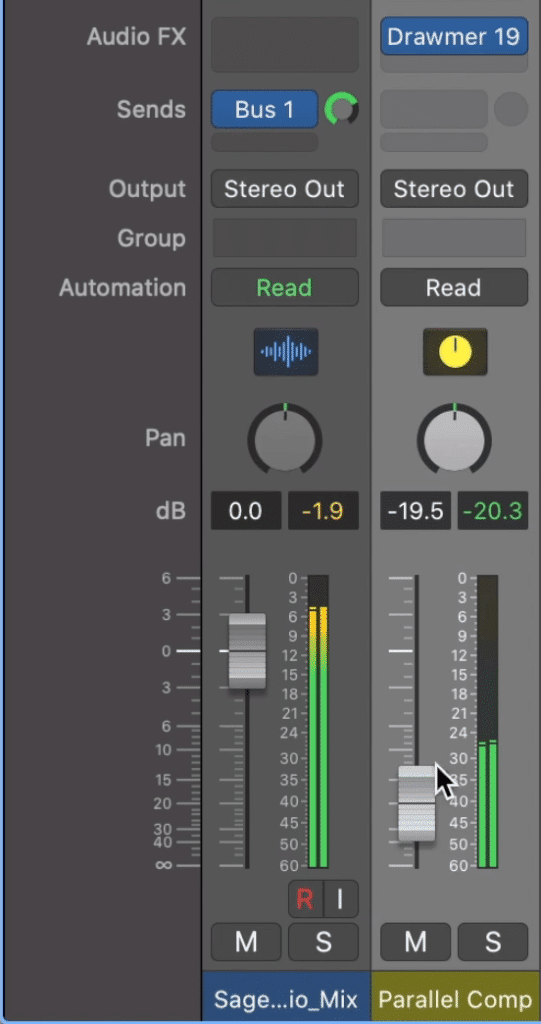
Notice how parallel compression is blended back in with the original signal.
Due to the unique intentions of each, the way the compression is applied is incredibly different.
Notice how parallel compression includes significant attenuation.
For example, if you were to use parallel compression on an entire mix then you’d compress heavily, and then subtly blend the heavily compressed signal back in with your mix.
By doing so you’d take the quietest aspects of the mix, make them more present (by attenuating the louder parts of the signal ) and then amplify this low-level information by gently introducing this heavily compressed signal into the mix.
Doing so would result in a track that retains its dynamics via the original unprocessed signal, and introduces low-level detail via the processed and compressed signal.

Notice how little bus compression attenuates the signal.
But if you were to use bus compression on a full mix, you’d compress gently and intentionally to create a uniform sound - one in which all instruments are being affected by identical compression settings.
By performing bus compression in this example, you’d effectively shape the timbre and tone of your mix. Because bus compression affects an entire mix, or at the very least a group of instruments, using bus compression in the same way you’d use parallel compression would result in a heavily processed and unpleasant sound.
So, due to the differing intentions of parallel compression and bus compression, it’s important to know the differences between the two.
If you’d like to learn more about parallel compression, check out one of our blog posts and videos on the topic:
It showcases a technique that maximizes the sound of parallel compression and improves the general tonality of the processing.
How is Bus Compression Different than Regular Compression?
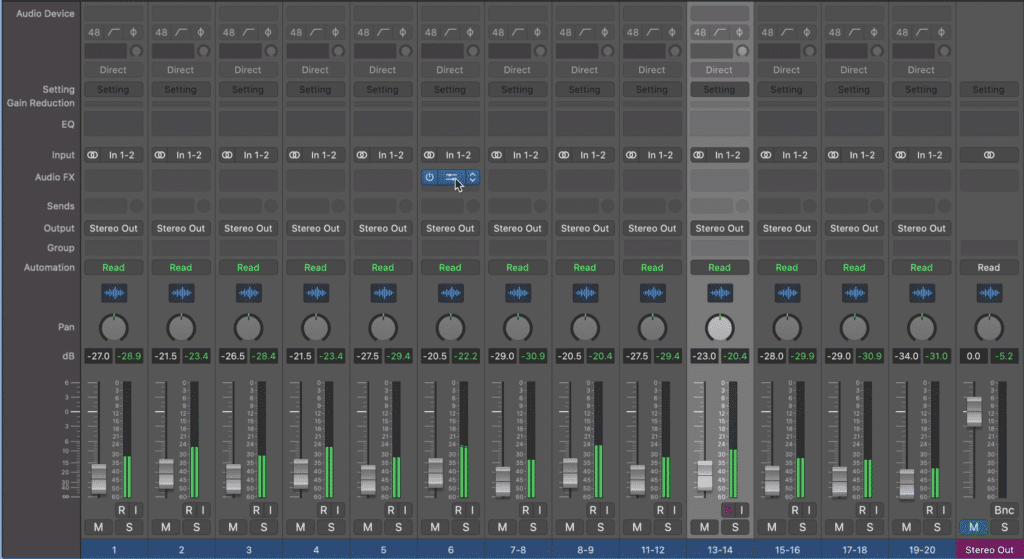
Bus compression occurs on the master output or a sub-output, to which multiple tracks have been routed. Although the general purpose of bus compression and typical compression is similar, the extent to which compression is introduced varies greatly, as does the impact the compression has on a mix’s sound.

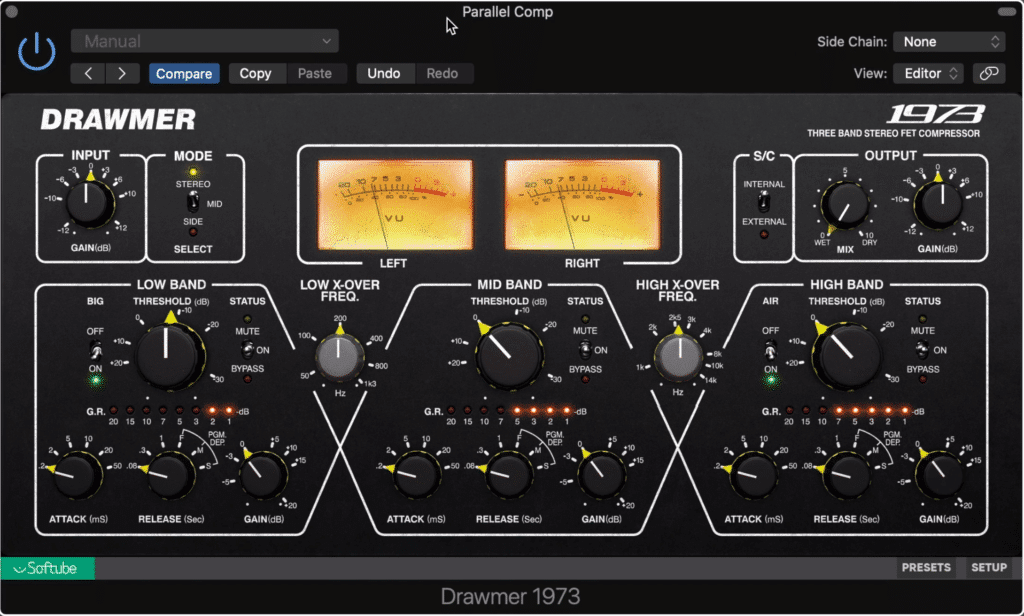
Although the compressors may look the same, where they're placed in the signal chain determines how they should be used.
Let’s say you have a mix with 20 instruments, each playing a unique role in a recording’s composition, timbre, and frequency response. If you were to compress just one of these tracks, the effect it would have on the overall mix would be relatively small.
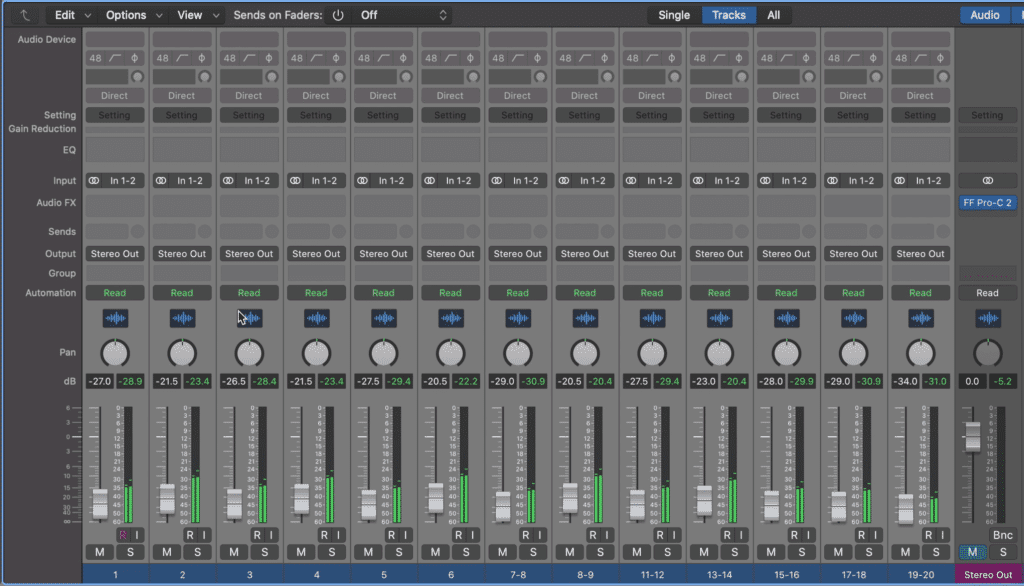
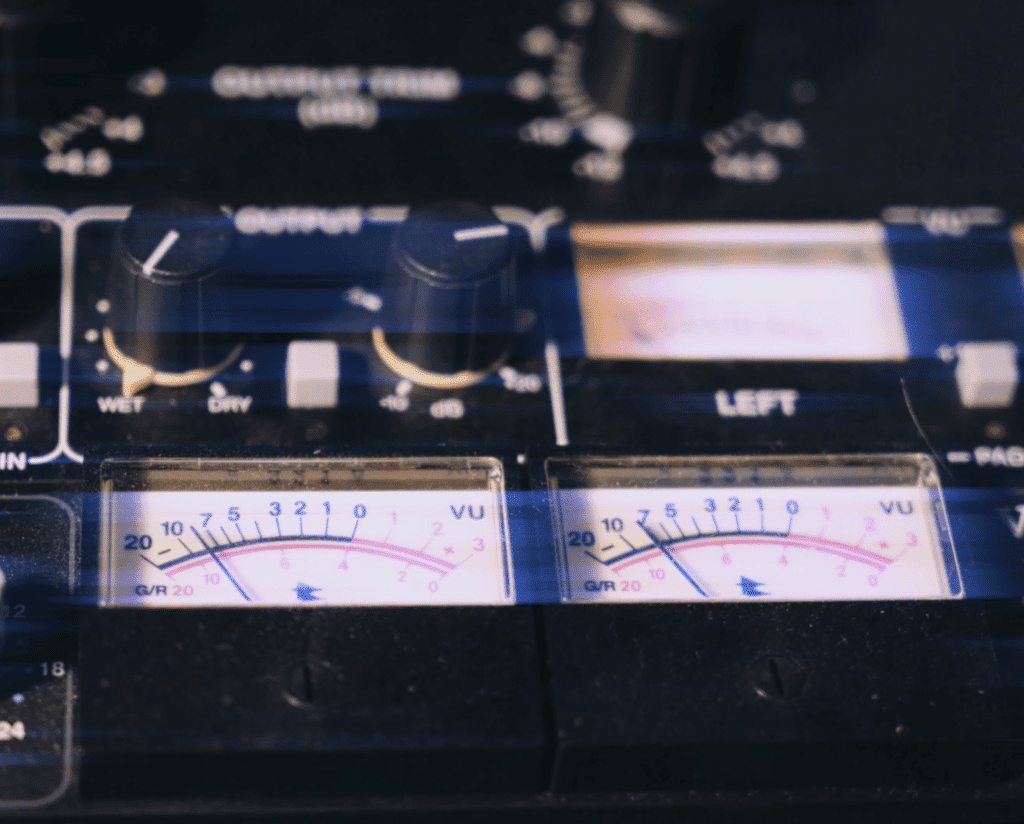
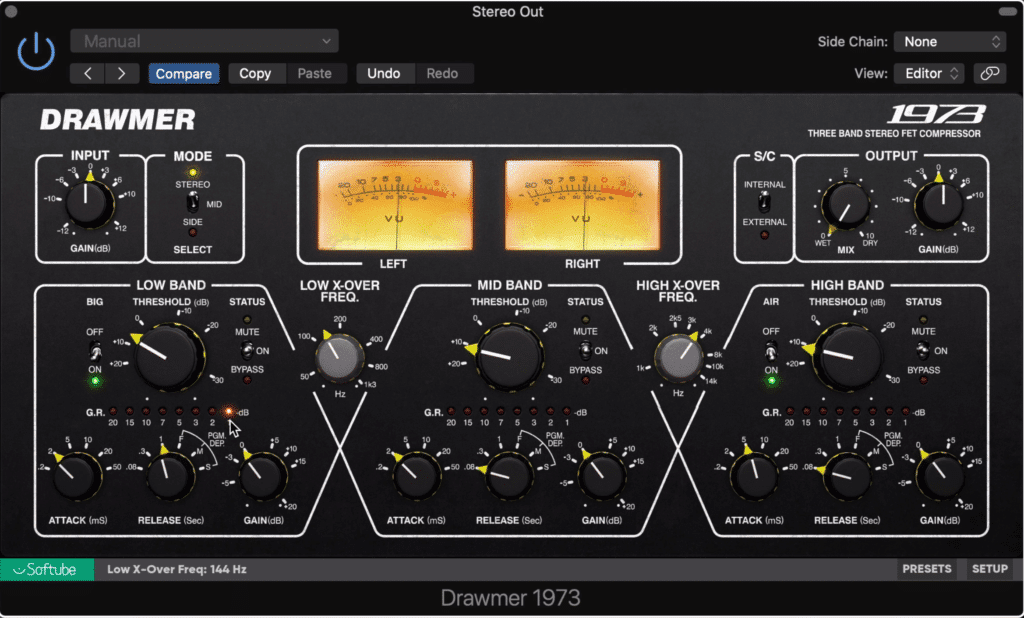
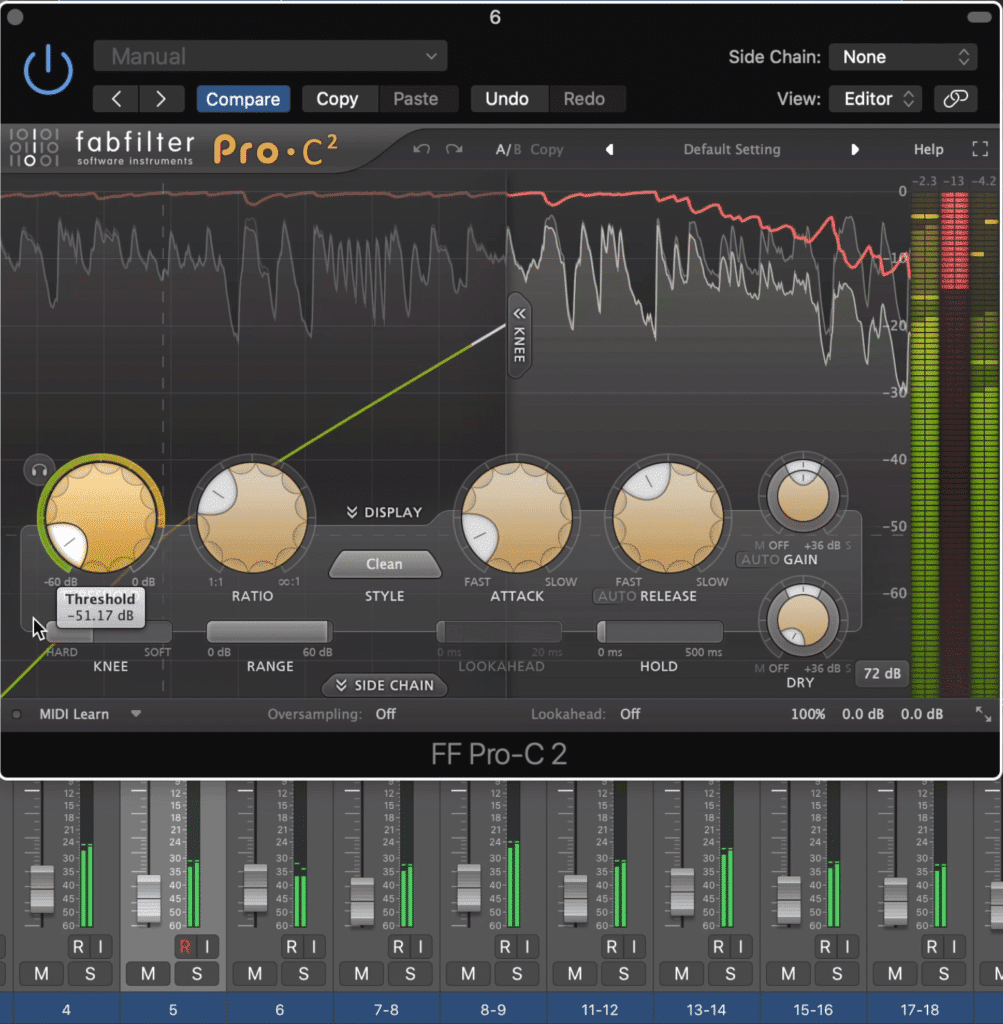
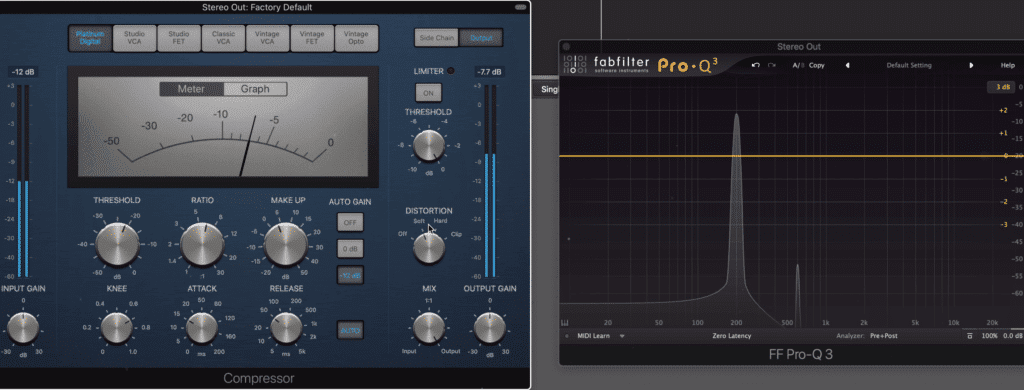
Notice the compressor on the stereo output. All 20 of these tracks will be routed through this bus compressor.
Granted, if you applied extreme compression it would be noticeable, but in most cases, it would be difficult to discern or recognize the changes that took place.
If a compressor is on only 1 of those 20 tracks, it would take extreme compression to become noticeable.
Now imagine that you’ve applied compression to the entire mix - considering that all 20 instruments are being run through this compressor, it wouldn’t take much for that compressor to affect the sound of the signal.
It can be said with certainty then that attenuating 3dB on 1 track out of 20 will affect the sound much differently than attenuating 3 dB on all 20 tracks simultaneously.
There's a huge difference between compression on one track and compression on a full mix. One has a small footprint, the other a large one.
But what if you put a compressor on each track, with each compressor attenuating 3dB - would that have the same effect as the previously detailed bus compression?
It might - but in most cases, there will still be a big difference.
The reason being, varying compression settings such as the attack, release, and the knee will change the tonality of the compression, even if the amount of attenuation is the same.
By running the totality of your mix through one compressor, you ensure that all signals are affected collectively by the compressor. In that regard, the tonality established by the signal bus compressor will much different than the tonality created by multiple compressors with differing settings.
Using Bus Compression to Affect the Tone and Timbre of a Recording
When attempting to create a specific tone with bus compression you need to consider 4 things - the amount of attenuation, attack and release settings, threshold knee settings, and if the compressor generates harmonics. All 4 of these elements will greatly impact the tonality and timbre of your mix or master.

These four elements determine how bus compression can affect the timbre of a mix or master.
Let’s start with the most obvious element - the amount of attenuation.
How the Amount of Attenuation Affects a Bus Compressor’s Sound
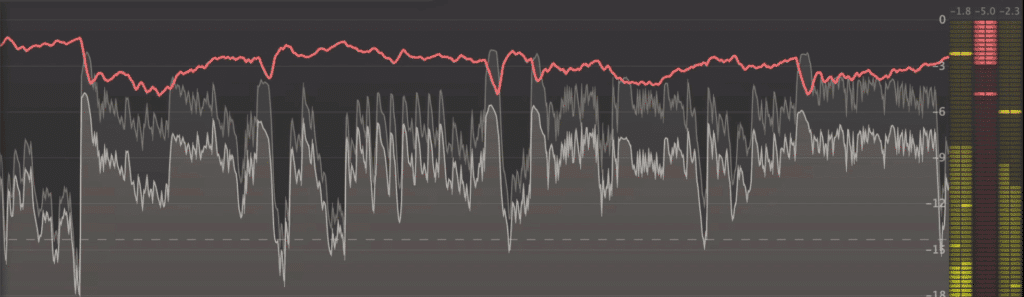
Although compression is difficult to hear, especially when used minimalistically or on just one instrument, bus compression is not. As we discussed briefly before, bus compression is the most easily perceived form of compression, as it greatly impacts the sound of a mix due to the scope of the compression.

Although typical compression is hard to hear, bus compression is much easier to hear.
With that in mind, how much you attenuate will greatly impact the sound of your mix or master, as it will determine whether or not this compression is perceivable.
As a rule of thumb, try not to compress more than 3dB when using bus compression on a full mix, and 6dB when using bus compression on a group of instruments.
If you want to accomplish a more pronounced tone from your compression, consider using parallel compression instead.
If you do attenuate too much when using bus compression, you’ll create a noticeable compressed sound - one that many listeners will find off-putting.
How the Attack and Release Affects a Bus Compressor’s Sound
The attack and release times of a compressor, especially a bus compressor, will affect the timbre of your mix or instrument group. The reason being, attack and release settings affect the Attack and Decay of your waveform.
To better understand this concept, let’s consider the ADSR of a waveform and examine the graphic below:
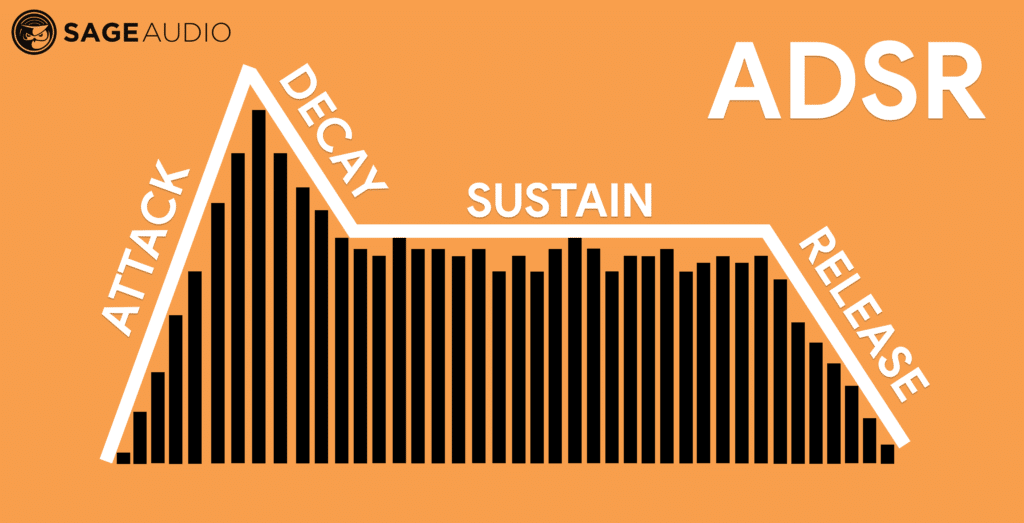
The AD of the ADSR determines the timbre of a sound.
First off, ADSR is an acronym for Attack, Decay, Sustain, and Release - which represents the 4 primary aspects of a waveform.
Although Sustain and Release affect the perception of a signal, Attack and Decay are the cause of a signal’s timbre and the means by which listeners identify the sound source.
For example, if you were to remove the attack and decay of a trumpet, and replace it with the attack and decay of another instrument, like say a piano, a listener would most likely identify the instrument as a piano.

All this to say, the Attack and Decay of the ADSR are incredibly important - but what does this have to do with a compressor’s settings?
Well, the attack setting of a compressor determines how quickly compression or attenuation will begin, and the release setting determines how long the compressor will hold onto the signal.
With that in mind, if the attack time of a compressor is short, and the release time is long, the Attack and Decay of a signal will be affected to a greater extent than if the attack was longer (since the compressor wouldn’t begin compression until after the AD of the ADSR ) and if the release was shorter (since the compressor wouldn’t hold onto the signal, in turn affecting other AD’s of the ADSR ).
That said, attack and release are the easiest ways to affect your mix’s or instrument group’s timbre:
- A short attack and long release results in more compression, and a notably smoother sound.
- A long attack and short release results in less compression, and a more punchy and detailed sound.
What you choose is up to you and will depend on the instrument group or mix you’re working on - but simply know that these settings are incredibly important and will greatly affect the timbre of your track.
Next let’s discuss a less known aspect of compressor tonality: hard and soft knee.
If you want to learn more about compression and how it can be used to affect your signal in very specific ways, check out our blog post and video here:
In it, you’ll find 5 very useful techniques that can augment your mixes and solve complex problems.
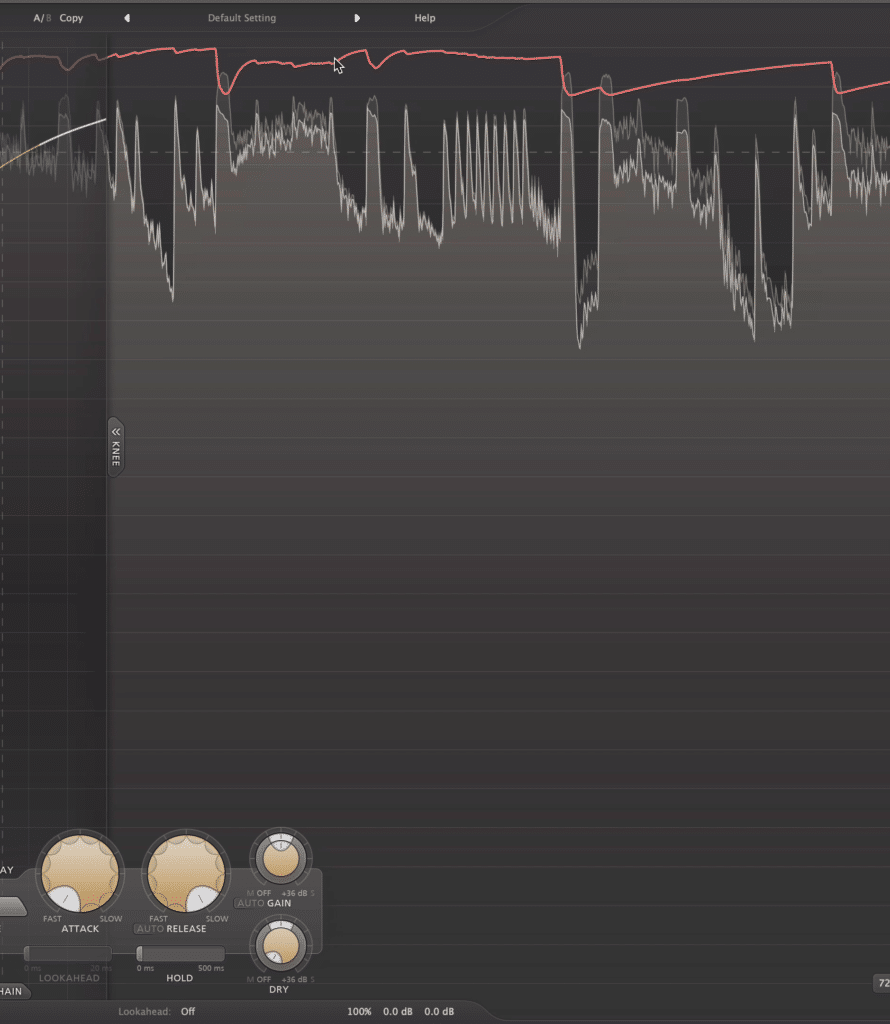
How the Knee Setting Affects a Bus Compressor’s Sound
Although knee settings aren’t often discussed, they do greatly affect the timbre of a mix or instrument group and can be used to evoke a sense of a classic or modern recording. Additionally, knee settings greatly impact the amount of attenuation, which in turn affects the sound of a recording.
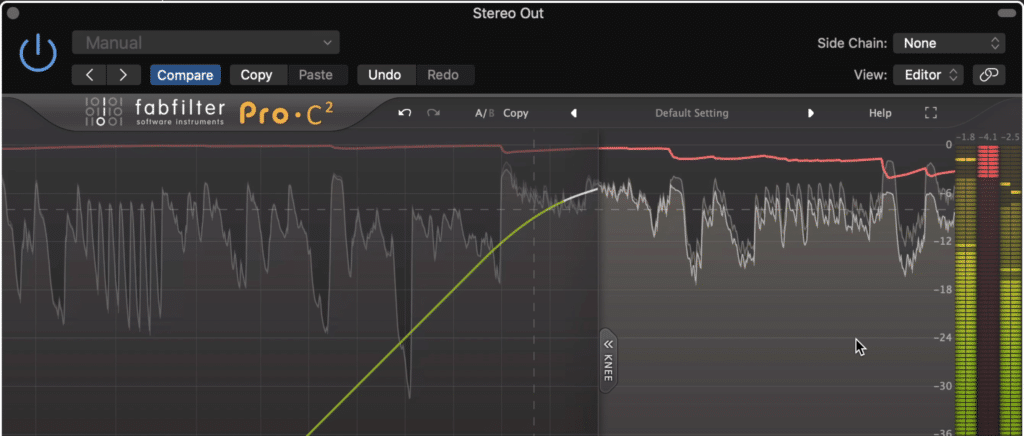
A knee setting can range from soft knee (which refers to a gradual slope in the threshold ) to a hard knee setting (which refers to a linear ratio and then significant non-linearity in the threshold ).
Pictures definitely help when trying to understand this concept, so here is a picture of a soft-knee setting:
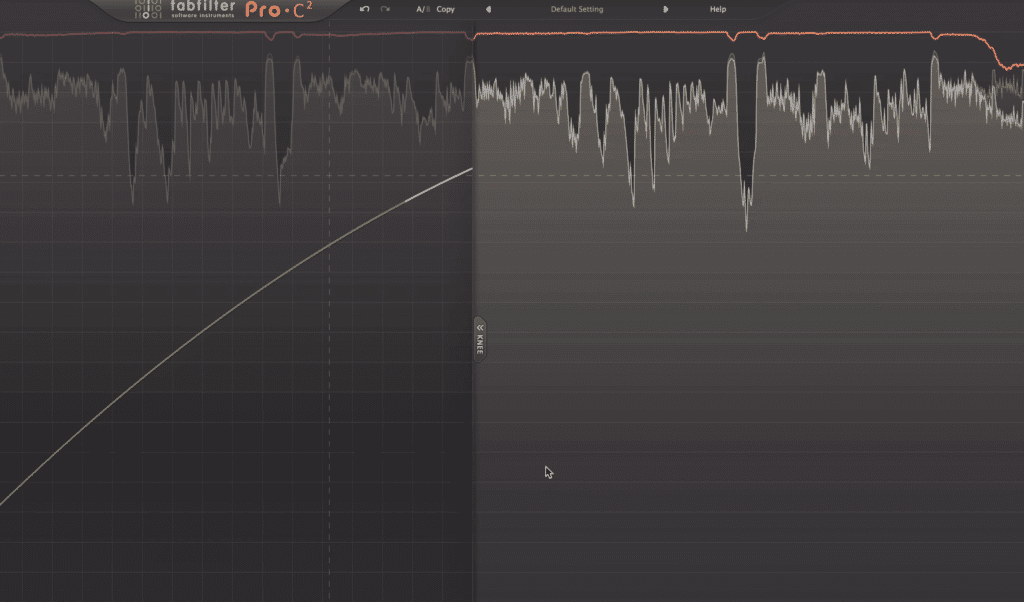
Soft-knee compression results in gradual compression, even at lower amplitudes.
Here is a picture of a hard-knee setting:
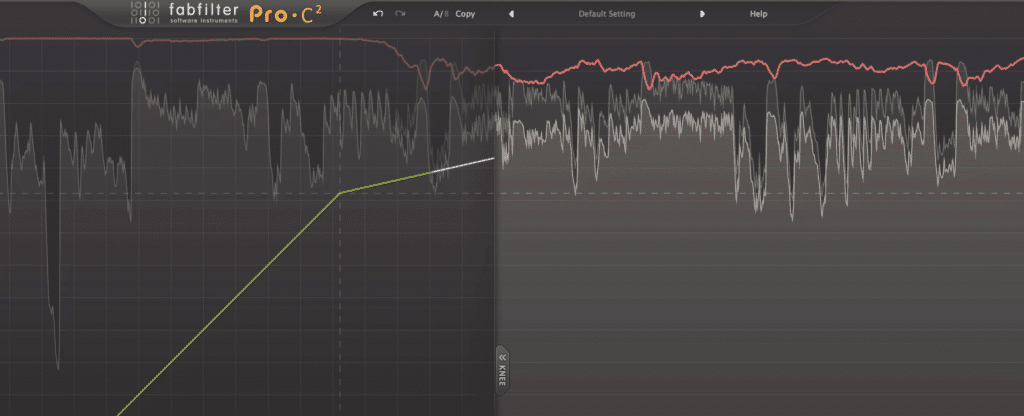
A hard-knee setting creates a hard barrier between compressed and not compressed.
You’ll notice that the soft-knee setting will result in compression at lower levels, whereas the hard knee setting only allows for compression when the threshold has been clearly crossed.
With that said, the compression rate or amount of attenuation of a soft knee setting somewhat exponential in that it becomes increasingly aggressive - whereas the compression rate of a hard knee setting is linear, as it is a static rate after the threshold is crossed.
The knee setting larger affects the amount of attenuation.
When using bus compression, you’ll need to keep the knee setting in mind, as a softer knee will result in more natural and gradual compression , but may result in too much attenuation.
A harder knee setting will be more precise; however, it may be more noticeable as the rate of attenuation is either in effect or it is not.
Soft-knee compression is very similar to the compression caused by the saturation of electric components and tape.
One more thing to consider is how these settings reflect different eras in compression history. Soft-knee compression is more indicative of early recordings in which tape, tube, and transistor saturation caused gradual compression.
Conversely, hard-knee compression is more indicative of modern recordings as true hard compression is a relatively newer addition to compression.
Lastly, let’s consider if the compressor used for bus compression generates harmonics.
If you’d like to learn about soft-knee compression and how it relates to saturation, here’s a great blog post and video on the topic
It goes into detail about different types of saturation, and how soft-knee compression relates to tape, tube, and transistor saturation.
How Harmonic Generation Affects a Bus Compressor’s Sound
Harmonics are an incredibly important aspect of audio production, as they fill in the frequency spectrum and result in a more complex and powerful sound. When using bus compression, if the compressor introduces these harmonics than this bus compression will result in a more complex and powerful sound.
Compression plugins that emulate analog equipment will introduce harmonics.
Additionally,there are many forms of harmonic generation , as some formations of harmonics result in a warm tonality and some result in a clearer and more present or forward tonality.
In short, if you want to create a more complex sound with your bus compression than consider using a plugin that models itself off of an analog piece of equipment, or perhaps, use analog hardware for the most nuanced and complex harmonic generation possible.
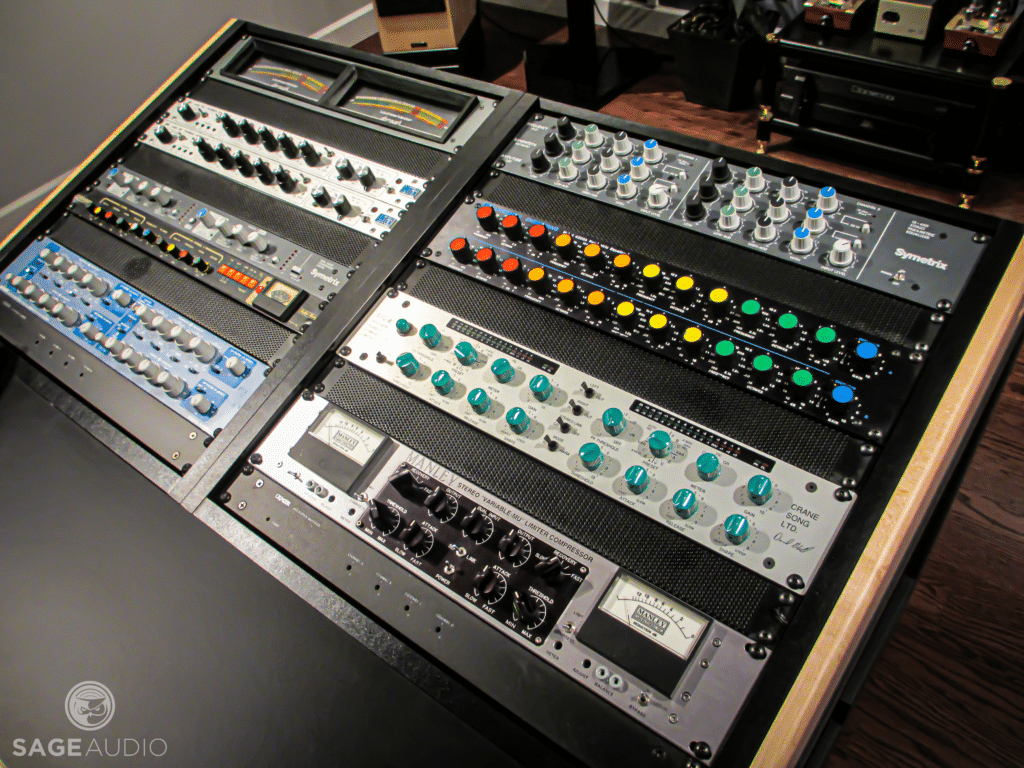
Harmonic distortion occurs naturally in an electrical analog set-up.
If you have a mix that you’d like to hear augmented with analog bus compression, send it to us here:
We’ll master it for you using solely analog equipment and send you a free mastered sample for you to review.
Conclusion
Bus compression is a seemingly simple topic - but when you consider how easy it is to greatly affect the sound of your mix with bus compression, you need to deeply understand it in order to implement correctly.
That’s why knowing the routing, the way to use it, and the different settings that affect it are not only beneficial but also needed to properly introduce bus compression.
If there’s one take-away that you should always remember when applying bus compression to your mix or master, its this:
Bus compression greatly affects your signal - much more so than parallel compression and traditional compression. Use bus compression sparingly and in a very intentional way.
If you use bus compression without fully understanding its strength, you run the risk of severely impacting your mix or master in a negative manner.
If you’d like to hear bus compression professionally applied to your mix for free, send it to us here:
We’ll master it for you and send you a free sample to review.
How do you introduce bus compression?


