What is Dynamic Mastering?
Quick Answer
Dynamic Mastering is the process of mastering a track in a manner to preserve transients and to retain the dynamic range of that recording. Typically, dynamic mastering is accomplished by emphasizing the dynamic range instead of loudness, all while reducing the use of compression and limiting techniques.
What is Dynamic Mastering in Detail?
Emphasis on dynamics is certainly welcome, especially after a long stretch of lacking them in professional mastering. For many listeners, this means expecting new and exciting sounds, as well as a return to the classic principles that made music enjoyable.

Dynamic masters are indicative of classic recordings.
For mastering engineers, it means having to relearn some of the most important and fundamental aspects of mastering. Preserving transients, and emphasizing the dynamic range of a recording requires a comprehensive understanding of how compressors and limiters work.
To master dynamically, you need to understand compressor settings.
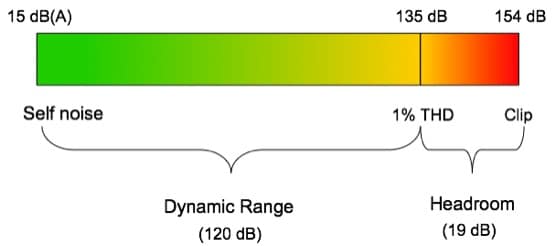
It also means knowing when the balance between a master that is loud enough to cover the noise-floor of amplification systems, all while not being so loud that transients are truncated and the dynamic range limited.
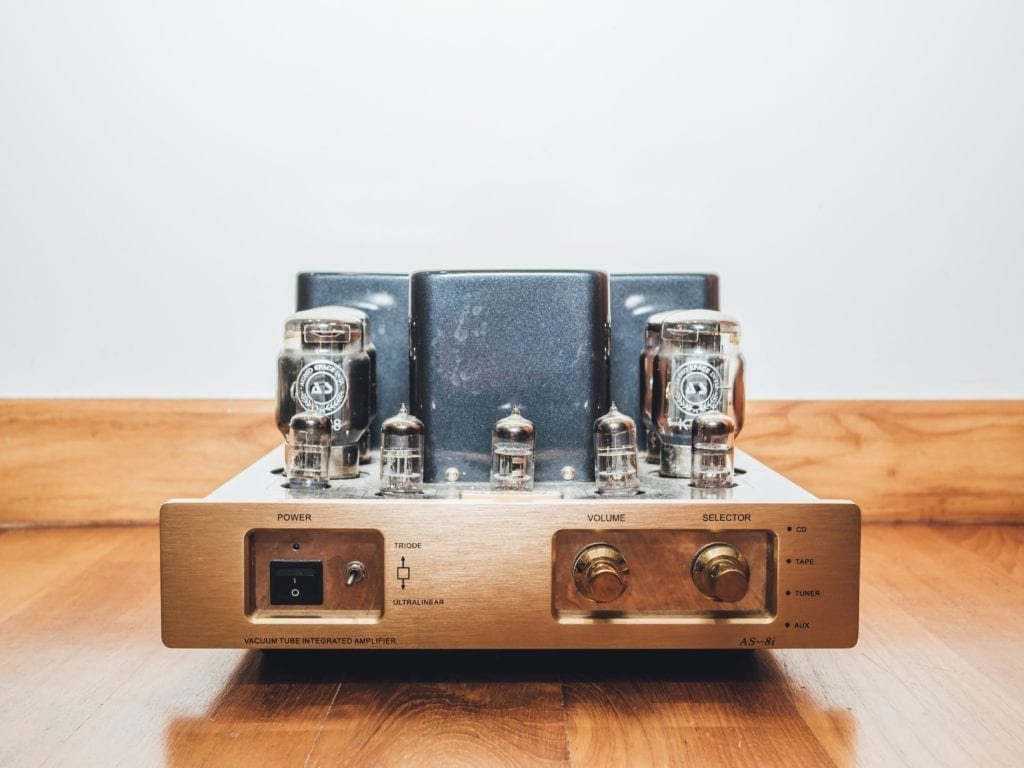
A master needs to be loud enough to cover any self-noise made by an amplifier.
That being said, implementing dynamic mastering into your repertoire takes some foresight and a desire to hear music in a new way. Ultimately, by mastering with an emphasis on dynamics, and not on loudness, both you and the artist are making a collective statement.

When mastering dynamically, both the artist and engineer need to agree that this is the direction they want to go.
The statement being, that the actual sound of the music is more important than having the master be “competitive” in the current market. When this statement is made, it shows that the artist is confident enough in their music, and the engineer is confident enough in the master, to ignore using loudness as a means of staying competitive.
Let’s look at how you can master dynamically, the settings you need to understand about compression and limiting, finding the right spot between quiet and loud, how the loudness normalization process used by streaming services is both in favor and not in favor of dynamic mastering, and the statement both engineers and artists make when they choose dynamics over loudness.
First, let’s cover a few definitions:
ADSR: All waveforms have an attack, decay, sustain, and release. These four elements combine to create the timbre of a sound. Each element can vary in amplitude and duration, creating a vast range of possibilities when considering timbre.
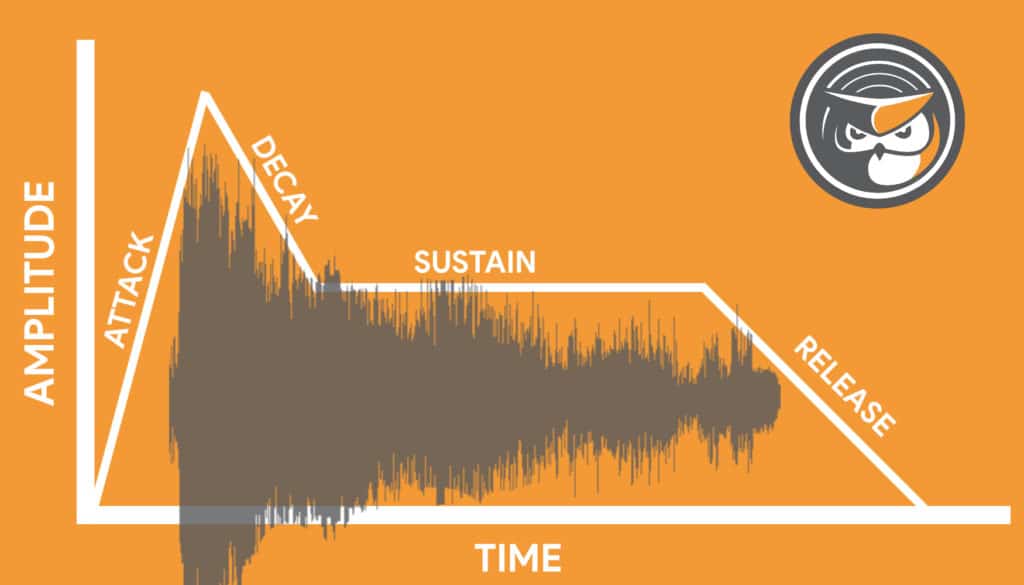
Take a look at an ADSR visual representation to see how waveforms fall into it.
Transients: Transients are the attack and decay aspect of the ADSR. One notable transient sound source is the snare drum, which has an aggressive attack and decay, but minimal sustain and release. The opposite of a transient sound source would be a smooth reverberated synth, that has a very gradual attack and decay.
A transient has a short attack and decay, with a quiet sustain and release.
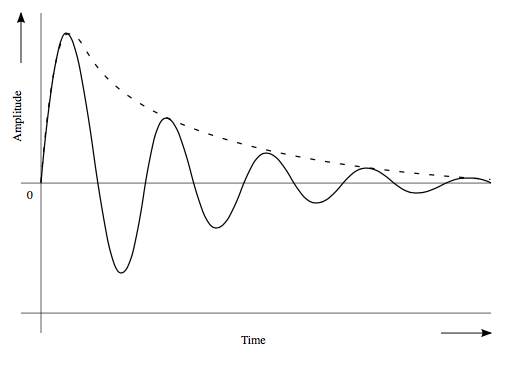
Dynamic Range: The Dynamic range is the distance or “Range” between the quietest parts and the loudest parts of a recording. Often the term dynamic range can be used to refer to an individual instrument or an entire mix.
The dynamic range is the area from the quietest parts of the recording to the loudest.
If you’d like to have your mix mastered using dynamic mastering techniques, send it to us here:
Simply leave a note in the note section of the upload page stating you’d prefer dynamics over loudness.We’ll master it for you, and send you a free mastered sample of it.
How to Master Dynamically
Ideally, when mastering a track dynamically, you wouldn’t truncate or compress your track to a significant extent. Sometimes when mastering, if a mix has already been compressed enough, compressing further simply isn’t needed.
Ideally, limiting is not needed during mastering.
Recognizing this means not always going to a go-to compressor when mastering. Instead, you’ll need to listen intently to the mix, and decide whether or not compression will actually be needed. That being said, if you wish to master something dynamically, odds are you can’t have a set routine.

When mastering dynamically, you can't have a go-to set up. you'll need to treat each mix uniquely.
The mixes you’ll be receiving will be compressed to various degrees, and will need to be addressed in a unique manner tailored toward that specific mix. Otherwise, you’ll likely create a heavily compressed or a somewhat compressed but lacking in dynamics master.
When receiving a heavily compressed mix, you'll either need to ask for a revision from the mixing engineer (if the artist supports that decision) or you’ll need to use expansion. Understanding expansion means to understand how the settings on a compressor or limiter affect the dynamic range and the processing of transients, so let’s take a look at those settings.

Understanding expansion means understanding compression. They are two sides of the same coin.
If you’d prefer to watch a video on this topic, here is one that shows how a compressor can be used to shape your frequency response:
It doesn’t go into great detail on the topic but it does show how you can practically use a compressor for this purpose.
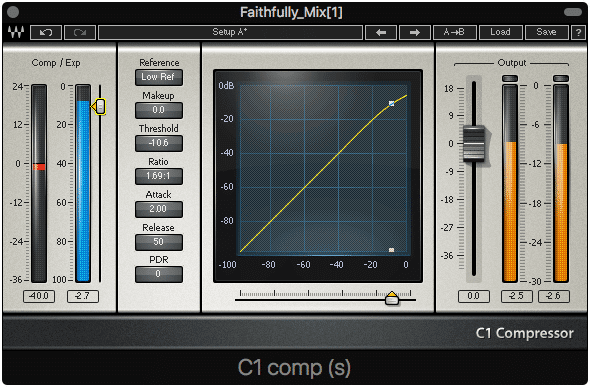
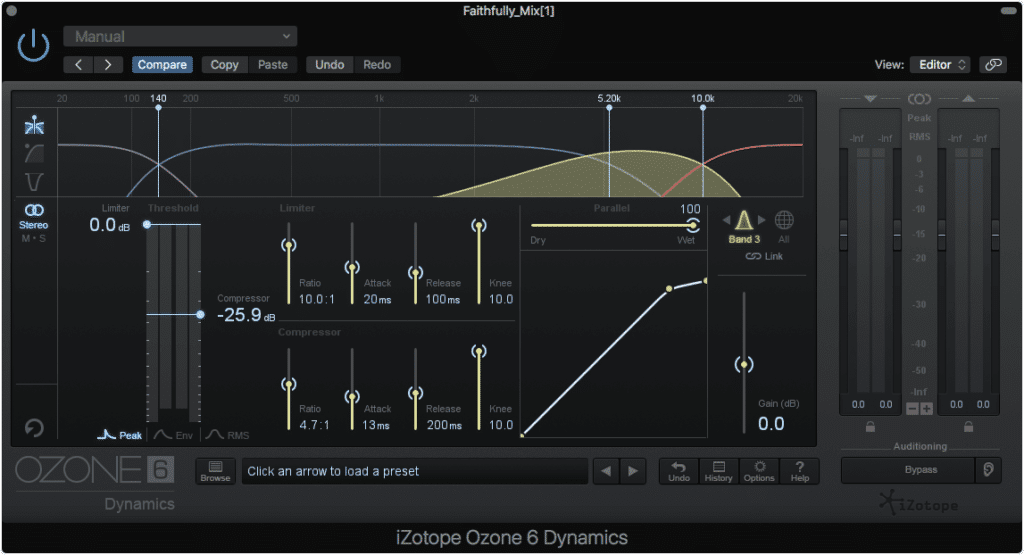
What You Need to Know About Compressors and Limiters
Mastering dynamically means understanding your compressors and limiters comprehensively. If you don’t have a deep understanding of your compressor or limiter’s full functionality, odds are you might be compressing more than you want to, or in a manner that attenuates transients significantly.
Know your compression settings before trying to create a dynamic master.
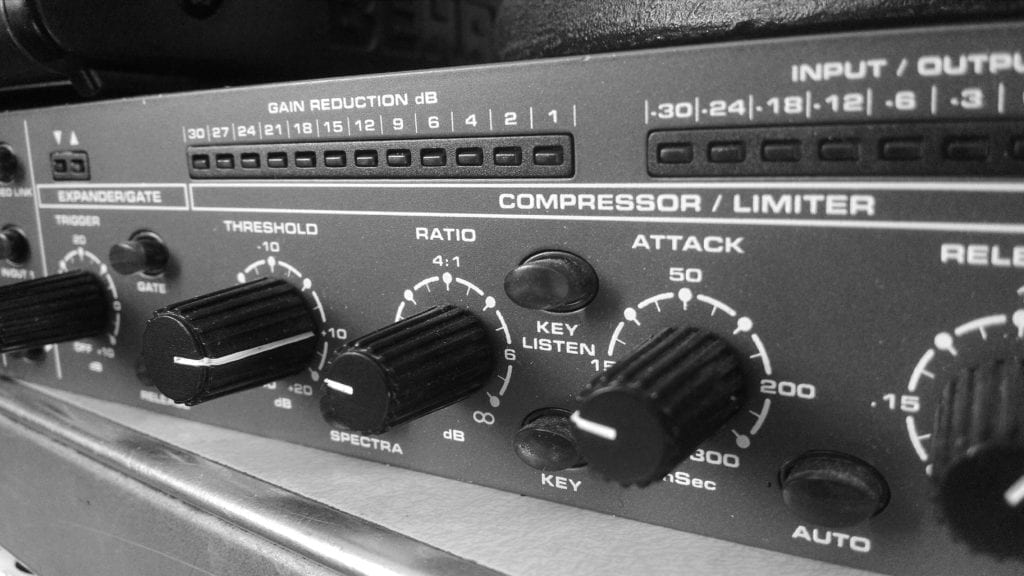
Let’s look at some of these functions and discuss how they affect both dynamic range and transients. Based on these settings, individual instruments, instrument groups, or the entirety of the mix can be affected, so understanding them is pivotal to mastering dynamically, and having full control of the equipment you use.
We won’t be delving into threshold and ratio, and will be focusing primarily on how attack and release affect transients and the dynamic range. Also, we’ll be talking about these functions in the context of compression; however, the same principles apply to limiting.
What is Attack Time on a Compressor?
Attack Time is the time it takes for a compressor to begin working once it has encountered a signal. A longer attack time will result in a greater amount of time before the compressor begins to compress, whereas a shorter attack time will result in a shorter amount of time before a compressor will compress.
The quicker the attack time, the sooner a compressor begins to work.
So how does the attack time affect the dynamics and the transient response of your master?
Put simply, making the compressor compress quicker means more signal will be compressed. So if you set the attack time to say 1ms, than any signal that goes above your threshold will be attenuated after 1ms.
So say you have a snare drum in your signal, and the attack and decay of the snare’s ADSR lasts for roughly 20ms. The initial strike of the snare, or at least 1ms of it, will not be compressed; however, the remaining 19ms of the attack and decay will be compressed.
So imagine your mastering an entire mix, and the snare peaks are louder than the rest of the instrumentation. Your compressor will definitely compress these peaks unless you adjust your attack, which of course presents a problem if it isn’t your intention.
To avoid compressing an instrument or transient, use an attack time longer than the duration of that transient.
To remedy this issue, you could increase the attack time of your compressor, in this instance, longer than 20ms. This means that the snare with a 20ms attack and decay ADSR will pass through the compressor unaffected, but all other instrumentation that cross the compressor’s threshold and are longer than 20ms will be compressed.

Almost every instrument has a transient. Compressing them during mastering causes intelligibility.
The above example is a great way to preserve the transients of your recording. When you consider the amount of attack and decay elements exist for guitars, drums, synths, pianos, vocals and so on, you’ll realize how much transient information can be compressed with a short attack time.
That being said, using a longer attack time will result in preserving your master’s transients.
What is Release Time on a Compressor?
Once a compressor has begun to compress a signal, the release time is the amount of time that compressor will continue to attenuate that signal. A longer release time will result in a greater amount of time the compressor will hold onto the signal; whereas a shorter release time will result in a shorter amount of time the compressor will hold onto the signal.
A shorter release time means the compressor will not hold onto the signal as long.
How does the attack time affect the dynamics and the transient response of your master?
The release time primary affects the dynamic range, but it can attenuate transients as well when mastering. For example, if you set and incredibly long release time on your limiter, say 5000ms, then the limiter will continue to attenuate the signal for that amount of time.
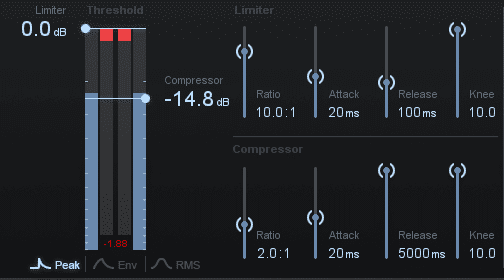
A release setting of 5000ms results in an almost constant compression.
As you can imagine, once the compressor starts attenuating the signal, if it holds onto it for an extended period of time, it can begin to affect other aspects of the mix. So if a snare triggers your compressor or limiter, and it has an extended-release time, other aspects of the mix can become attenuate as well if they too cross the threshold.
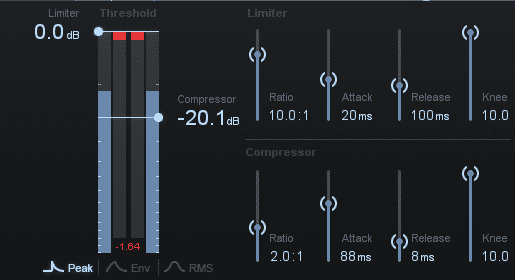
Needless to say, extended-release times can create an undefined signal, one that lacks in transients, and decreases the dynamic range of your master. To remedy this, simply set a quicker release time. Although, keep in mind that if you set too short of a release, this may result in waveform distortions, especially in lower frequencies.
So in Summary:
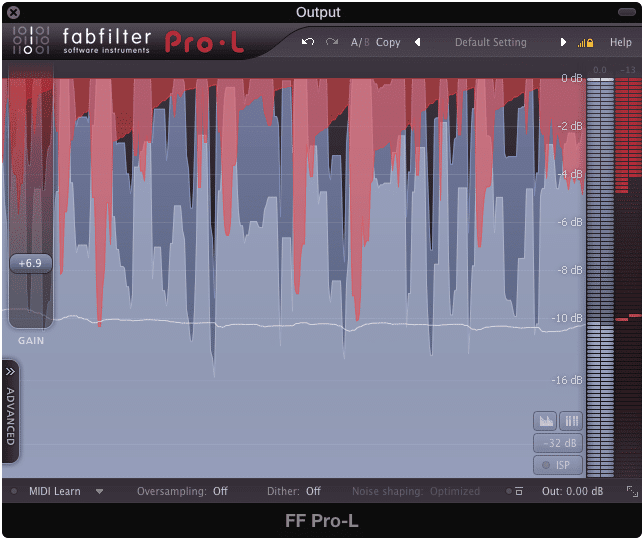
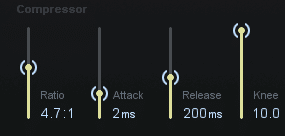
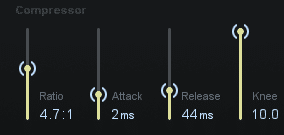
A longer attack and shorter release time when limiting and compressing will result in a more dynamic master that retains transients. Pay attention to your gain reduction meter to see if you’re compressing more than you want to.
A longer attack and shorter release setting results in less compression.
If you’d like to hear how your mix can be mastered with dynamic range and transient retention in mind, send it to us here:
We’ll master it for you and send you a free mastered sample of it.
Finding the Right Spot Between Quiet and Loud When Mastering
Creating too loud of a master means you have sacrificed your dynamic range to achieve that loudness, but creating too quiet of a master means any amplification system used by consumers will need to be turned up significantly to amplify the sound - this will result in distortion, a higher noise floor, and potential unwanted equalization.
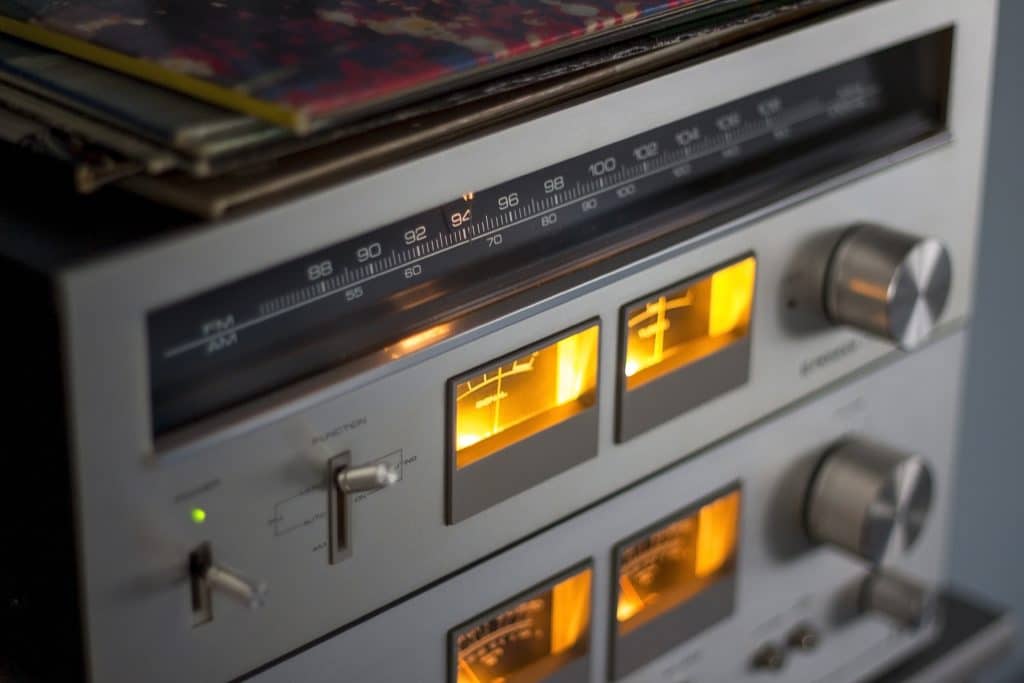
Louder masters can cover up the self-noise of amplification systems.
With that said, finding the balance between the two is important to creating a good sounding master. If your master is incredibly dynamic but so quiet that it creates noise when amplified, this isn’t ideal.
A good reference point is to master your music to an integrated -16 LUFS at the very least. This will ensure that you’re clear of activating a brick-wall limiter, and your master has enough power to avoid the need for excessive amplification. This way your master doesn’t require much compression or limiting to protect against distortion, and in turn, retains the dynamics and transients you’re trying to keep.
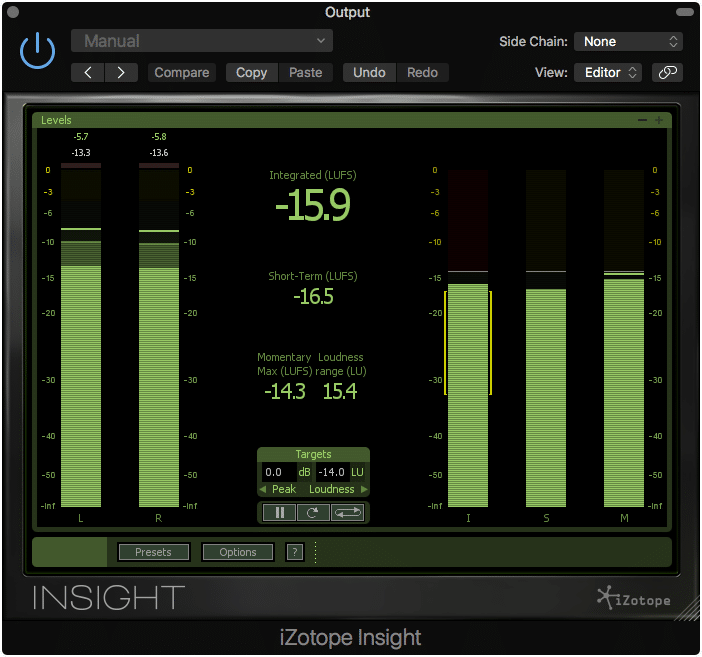
Mastering to roughly -16 LUFS is a great starting point for creating a dynamic master.
Of course, every mix is different, so some compression may be necessary if you wish to master to this loudness. This is to say, that some peaks may still be loud enough to cause clipping distortion if compression or limiting isn’t implemented.
Loudness Normalization and Dynamic Masters
The process of loudness normalization can both help and hinder dynamic masters, depending on the loudness of that master and the normalization setting being applied.
Streaming services use loudness normalization, which can both help and hinder dynamic masters.
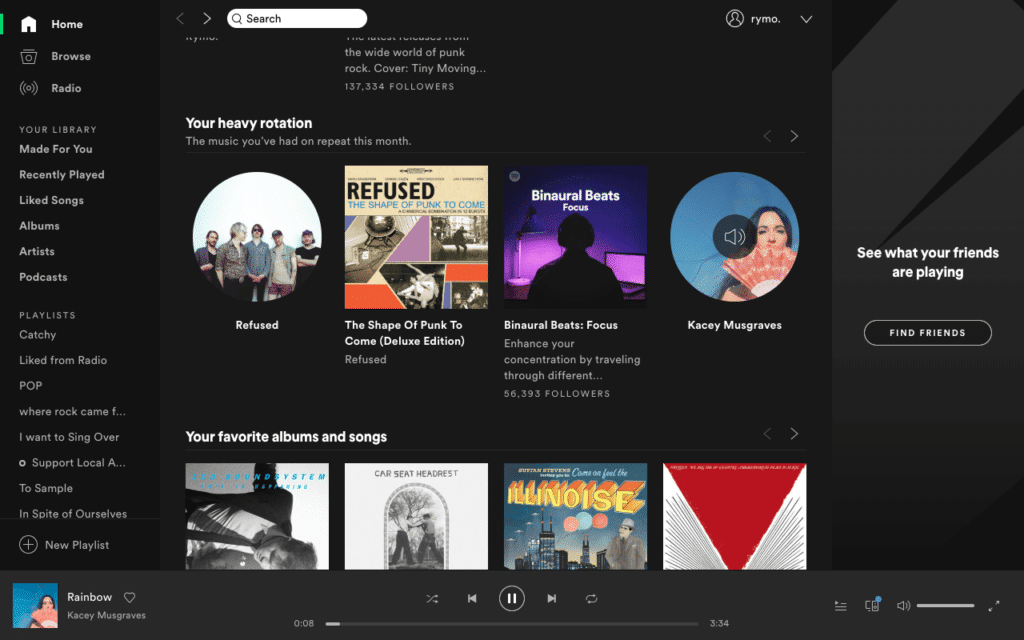
For example, Spotify normalizes all audio uploaded onto it to -14 LUFS.This means that all masters made louder than -14 LUFS will be turned down.
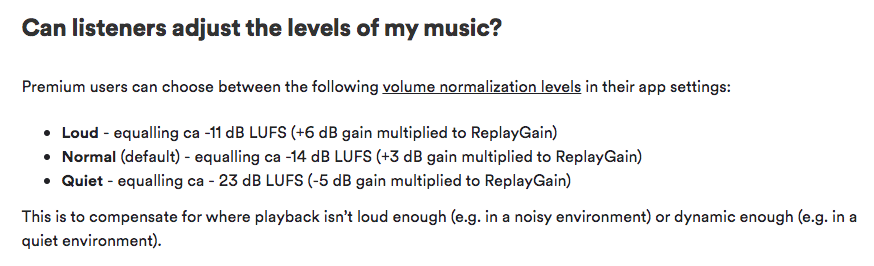
Loudness normalization can vary based on the user's choice. But the default is -14 LUFS.
As a result, this has encouraged many mastering engineers and artists alike to create quieter masters with the intent of having them turned down only slightly, turned up slightly, or remain relatively the same. Again, if a master is too loud, or louder than -14 LUFS, it will be turned down - meaning that any dynamics that were exchanged for this loudness were lost without any benefit.
This would suggest that loudness normalization helps encourage dynamic and transient laden masters; however, in some cases, it may cause problems.
If a master is too quiet and too dynamic, loudness normalization can cause distortion. For example, let’s say your master is -18 LUFS, and will be turned up to -14 LUFS.This means 4dB of gain will be applied.But, let’s also say this master has a peak at -1dB.
Considering the entire master will be turned up by 4dB, this peak will either clip significantly or need to be reduced by a limiter by 3dB. That being said, although loudness normalization has helped to encourage dynamic masters by discouraging excessively loud ones, there are still instances where loudness normalization can have a negative effect on a dynamic master.

Spotify will use a limiter on highly dynamic masters. Be sure to control your dynamics so they don't become truncated by brick wall limiting!
Keep loudness normalization in mind creating a dynamic master.
If you’d like to learn more about loudness normalization and how masters get turned down check out our blog post on this topic:
It goes into greater detail about loudness normalization and the term loudness penalty.
Making a Statement with Dynamic Mastering
A lot of engineers talk about retaining dynamics; however, many succumb to the pressure of creating a loud master. This often happens when an artist compares the master to others, and feels discouraged that theirs is not as loud.

Many artists compare the sound of their record to others. If other records are loud, they may want theirs to be loud as well.
When this occurs either the engineer will give in and make the master louder, or the artist will need to learn the value of creating a quieter, more dynamic master.
Ideally, both the artist and engineer will understand the value of dynamics, and feel confident enough in the music to do something individualistic. That being said creating a dynamic master is a statement that dynamics and transients are more important than loudness, and that you feel confident enough in the music and production to create something different.

Musicians will need to feel confident enough in their music, no to succumb to the fear of their music not being loud enough.
With that in mind, dynamic mastering is typically associated with Jazz or Classical music, as the listeners of these genres value dynamics and transients more than loudness - but perhaps one of the reasons why pop music listeners expect loudness is because it’s all they ever get to experience.

Listeners of classical music prefer dynamics over loudness. Perhaps a similar attitude can be adopted by pop music listeners.
Creating a dynamic pop record, one that doesn’t succumb to competitive loudness, would take some bravery on behalf of the artist, engineer, and anyone working to create the record. Although loudness normalization is making this more of a possibility, loud records are still much more numerous than quieter dynamic records.
If you're curious about how different genres lead to different mastering levels check out our blog post on the topic:
Conclusion
Creating a dynamic master can be a challenge - both in understanding the technical aspects of how to create one and having the courage to create something different. Fortunately, the same principles that apply to create a dynamic recording or mix, apply to create a dynamic master.
Using a longer attack time and a shorter release time will result in a more dynamic mastering. This is of course if compression or limiting is even needed. Assess how the mix was compressed and then determine if further processing is needed, instead of compressing without consideration.
Also, keep in mind that loudness normalization allows for more dynamic masters to be created, by discouraging excessively loud ones; however, too dynamic of a master will cause clipping distortion or heavy limiting in some loudness normalization settings. Be sure to know how your track will be affected by loudness normalization prior to mastering.
Lastly, know that it is respectable to value one aspect of music over another - in the case of dynamic mastering, it’s alright to value dynamics and transients over loudness. Although this may not be the most popular direction, if you’re confident in the music made, and the production style, why compromise? Create the master you want to create.
If you’d like to hear your mix mastered dynamically, send it to us here:
We’ll master it for you and send you a free mastered sample.
How do you master your mixes?


