10 Mixing Mistakes to Avoid
It can be difficult to take criticisms on a mix. After you have put in hours of work, having somebody tell you that there is too much of this or too little of that can become frustrating. As fun as making music can be, it has many challenges to overcome.
For musicians, learning notes, chords, and scales are the first steps. For engineers learning to mix, there is a similar set of skills to master, but beginning engineers often have to get through some hurdles that are entirely their own. Experience is the best way to combat many of the issues listed below, but this list will explore many of the common mistakes that many engineers will encounter at some point in their careers.
Mixing Too Loud

Mixing your mixes too loud can lead to mixing mistakes, or even worse, hearing damage.
When people listen to music, many like to crank up the volume. It gets the party started, it makes the listener feel like they are experiencing the full weight of a song, but it can also be a source of mistakes when you are the one mixing the song.
Many engineers who are starting-out like to experience music the same way that the listeners do. Cranking up the volume can give you the feeling of working more effectively since you can hear everything, but there are reasons why turning your monitors down can actually increase your productivity.
Different sound levels each come with their own timeframe that you should adhere to. According to the Occupational Safety and Health Administration (OSHA), the daily limit for hearing sounds at 85 dB is 16 hours. That is quite a bit of time, but consider that their recommendation at 90 dB drops to 8 hours before being considered dangerous. By the time 100 dB is reached, there are only 2 hours of safe listening.
When mixing at high levels, your ears can become fatigued. This not only can damage your hearing over time, but it will also make it easier to make mix decisions that hurt your mix. A great way to fight poor decisions at loud levels is to simply take a break. Try mixing for 45 minutes and then walking away for 10 minutes. Not only can you give your ears a break, but you can also distance yourself from your work to allow for a fresh perspective when you return.
Overcompensation
Too much of a good thing can be bad. Don't use any form of processing too much unless you are doing so only occasionally and intentionally.
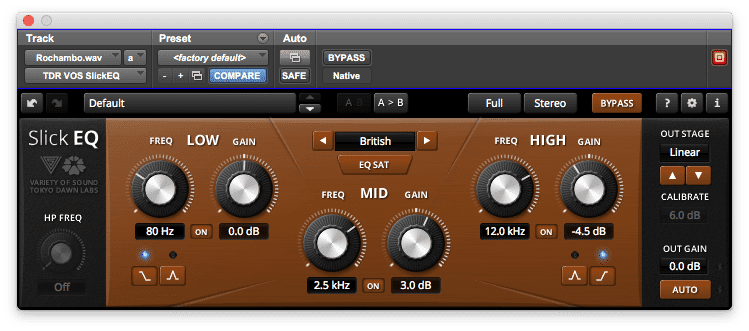
When creating mixes, engineers may use tools like EQ to try and shape their sounds. Inexperienced engineers may try to shape their mixes with too much equalization due to inaccuracies in their rooms or not enough practice with these tools.
There are many approaches to making good EQ moves. Lots of engineers try to capture a good sound at the source with mic placement. When a good sound is recorded it may be most effective to use subtractive equalization to even out any issues. Subtractive EQ works by removing problem frequencies rather than adding. If a recording has too much treble, you could add bass to it to offset the effects of the high-end, but since the original problem was never treated the treble still exists. Trying to reduce the amount of treble could create the same effect while treating the actual issue.
Another issue some engineers face is the room that they mix in. Trying to create an accurate mix requires that the room be treated to prevent reflections and even out problem frequencies. When working in an untreated room, it can be easy to overcompensate in your mixing. Most rooms have perpendicular corners that can accentuate the sound of low-end in your room. If you place your monitors near these areas, you may find that your mixes lack low-end material when you play them somewhere else due to overcompensation for the sound of the room.
To combat these mistakes, there are a couple of options you can try. When making EQ moves, start small. If you decide to cut 6 dB, try settling at 3 dB to prevent overdoing the cut. Sometimes subtle equalization is really all that you need to get your desired sound. If your room is causing the issue, try learning how it responds by listening. Playing some songs that you know inside and out can help you understand what is happening in certain areas of the spectrum and allows for better decisions during mixing.
Too Much Limiting
Loud isn't better. Avoid excessive limiting if you want a professional-sounding mix.
Another common issue found with mixes applies to how much compression and limiting is being applied. When beginning to mix, it can be tempting to use limiting as a means of making your mix as loud as what you hear on the radio.
It is important to understand that compression and limiting are useful tools for dynamic control. While they can indeed make things louder, they can also destroy the dynamics in a mix when used incorrectly. If you want to apply a compressor to an instrument in your mix, consider what your goals are. Do you want the coloration that comes with the compression? Do you want to control the dynamics? Both?
When using compression to add color to a track, you may not need to utilize any of the gain reduction it offers. If you want to control the dynamics, make sure you are using settings that react only to the parts you want to control. If you overdo it, you can create pumping effects or end up with tracks that have little dynamic at all.
Printing mixes that are quieter than a song on the radio is also a common thing in professional audio. Having a mix peak at -3 dB allows a mastering engineer to have ample room to apply any additional processing and most mastering engineers would prefer that you let them apply limiting at the end of their chain. This way, there are no worries about applying additional compression or limiting and the dynamics can stay intact.
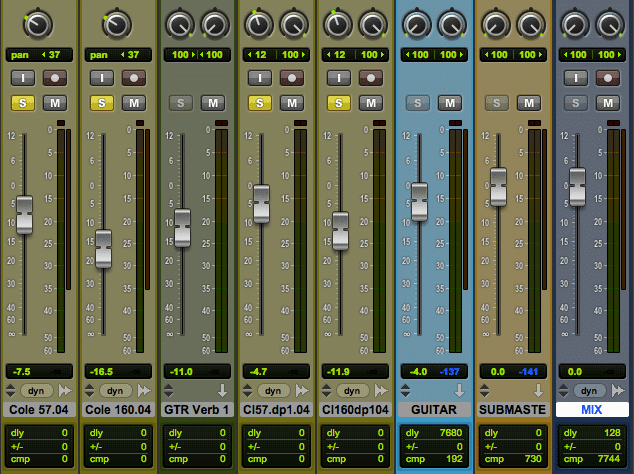
Lack of Automation
Automation offers an incredibly creative way to affect your mix. Don't ignore the possibility of making your mix unique.
Viewing a mix as an engineer’s chance to perform offers a fun way to look at the work they are doing. Much like a live performance, there are times where certain pieces need to be louder or quieter. A mix should be able to reflect that and refrain from being stagnant.
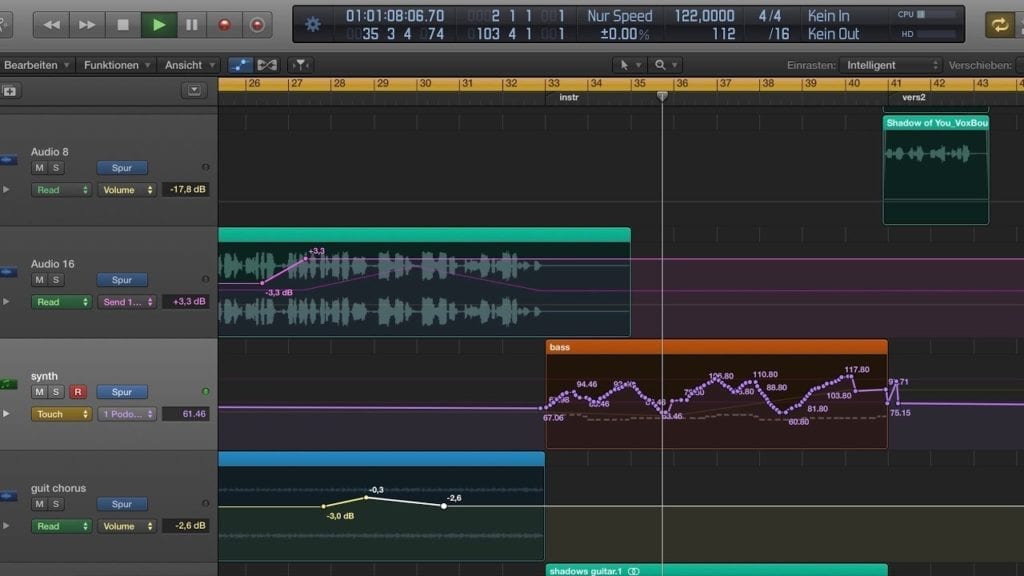
Automation has been providing mix engineers with great ways to create complex mixes with a lifelike amount of change for years. Although DAWs make many of these changes easier, console automation has existed since the 1970s. Automation allows you to write changes to almost any parameter of your mix that the DAW can then replicate upon the next playback.
Beginning engineers are tasked with learning the ins and outs of audio and on top of that, the ins and outs of their DAW’s capabilities. For this reason, it is common to see mixes where no automation is taking place. Experiment with this in your mixes. Try automating a pan knob to sweep from left to right, boosting the volume of a vocal in a chorus, or even making an EQ move for only one section of a song. Automation can add tons of life to your mixes and give listeners something just as dynamic as the music itself.
Phase Relationship Problems
Phase relations are possibly the most important aspect of recording, mixing and mastering. If your tracks are in phase, you have sound. If they're completely out of phase, you don't. Keep phase in mind during mixing, or any other aspect of audio production.
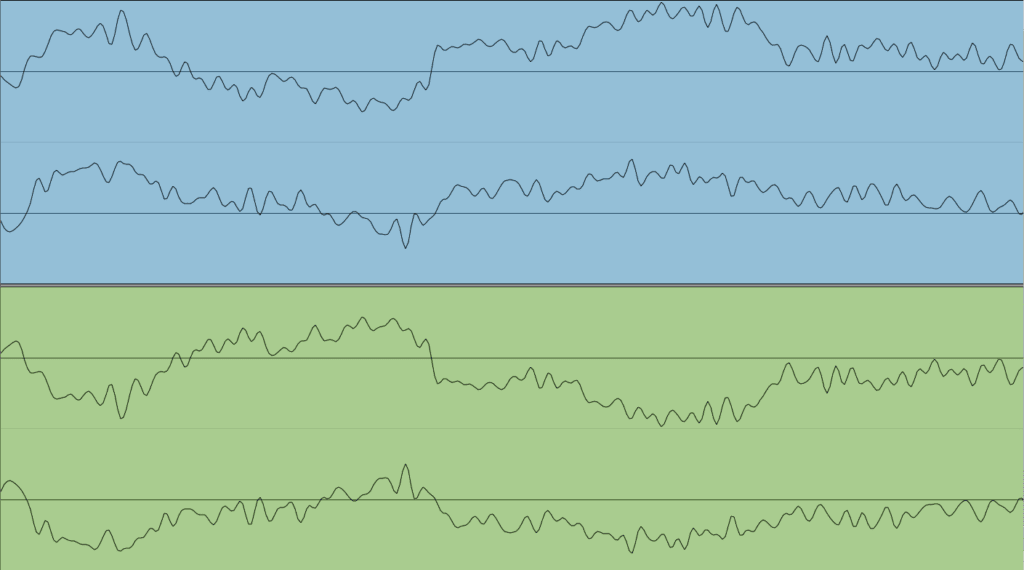
Phase and polarity are often confused in engineering, but both are very essential things to consider when recording, mixing, and mastering. Phase shifts occur when two signals are not in time with each other. The resulting combination of these two signals can give an empty or washy sound to audio.
This occurs because when summed together, frequencies can cancel each other out due to their place in time. The image above shows the same track with a 180-degree shift in phase. You may notice that the tracks are mirror images of each other. When combined, there is a significant loss in amplitude occurring due to the sounds canceling each other out. Since they are exactly 180 degrees out of phase, a polarity switch would flip one of the two to match the other precisely.
A good place to look for phase issues in your mixes is when miking drum kits. Before you commit to a drum sound, it is good to check the phase on your overhead mics. If you are getting a weak sound from your drum kit, try flipping the polarity on one of the tracks. If this results in a fuller, louder sound from your kit there may have been a phase issue.
Overuse of the Solo Button
Phase relationships alter how instruments sound when played together, as opposed to when they are played alone. A full mix should be played when altering even just one instrument.
One of the most useful tools available on a console or DAW is the solo button. It allows you to play tracks by themselves to help isolate issues within individual tracks, but it can also create its own set of issues.
Relying too heavily on the solo button can make it hard to mix effectively because you pull yourself out of the context of the song. Since mixing is about combining instruments and vocals into a complete product, the solo button can expose frequencies that sound incorrect when a track is soloed. In the big picture, however, the track may sit perfectly with the other instruments in your song.
This isn’t to say that using the solo button should be avoided entirely. Using it to diagnose problem spots in your tracks is essential in creating a great mix, but you must understand what it should be used for. If you spend too much time soloing tracks, you may grow to dislike the sound of tracks on their own. Remembering how that track adds to the bigger picture is key.
Getting Stuck in the Same Routine
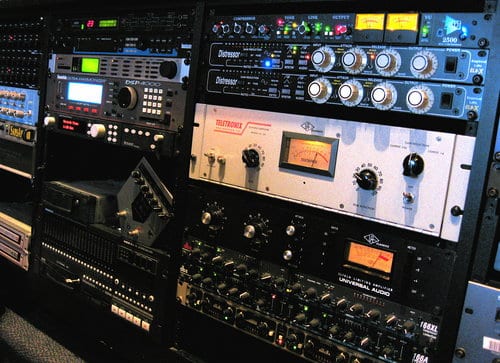
Experiment with unique effects, equipment, and techniques. This keeps your mixes fresh and keeps you growing as an engineer.
There are good reasons to have go-to techniques when mixing, but it is important to experiment too. Whether that means you change the type of gear you run your vocal through or change how you EQ a bass track, it is good to challenge yourself to find new and exciting sounds.
Without change, listeners would grow tired much more easily. When beginning as a mix engineer, it can be hard to break free of a workflow if you know that it will get you a decent result. Even if your results are making you happy, remember that you can learn a great deal about the gear you are using when you try new things.
A good way to break free of this habit is to start by reacting to what you are hearing rather than proactively affecting your tracks. Shy away from grabbing your favorite compressor until you know that your track needs it. You may discover that there is a better option in your arsenal if you wait and respond to what you are hearing in the unaffected signal.
Uncontrolled Low Frequencies
Cleaning up rumble in the low end can take a muddy mix and make it clean. Utilize this whenever you find your mix to be muddled.
An issue that many engineers struggle with is the low-end. So many songs that we hear today have large amounts of bass and emulating that sound is desirable. As with everything, there is a correct way to control how much bass you have in your mixes to make sure it is focused and tight while also being loud.
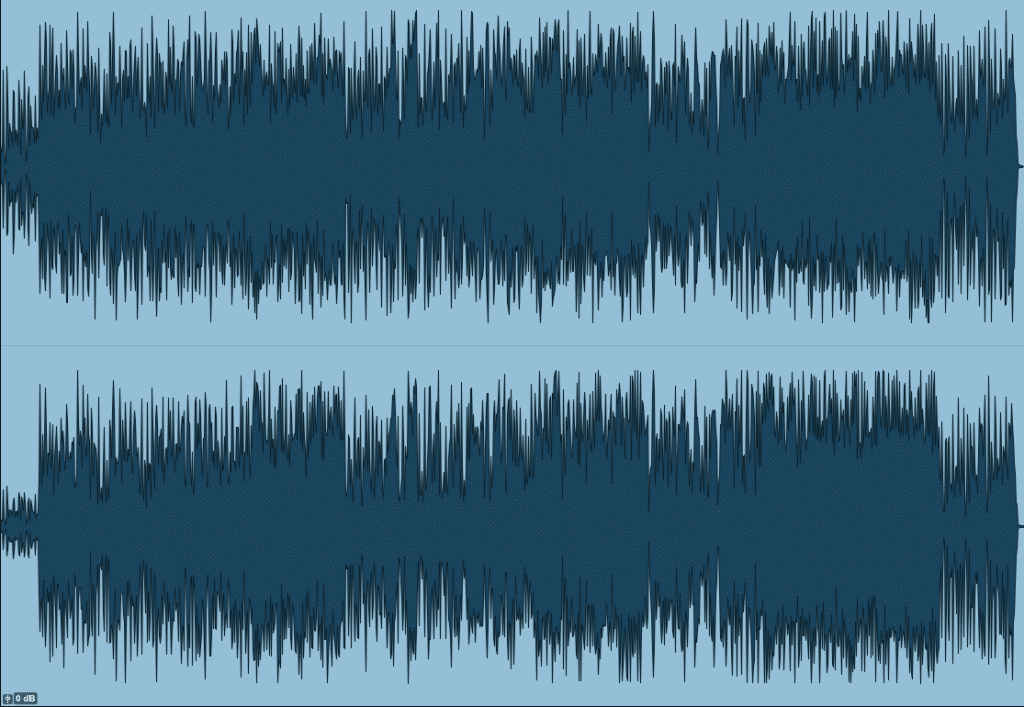
One thing you can do to correctly control your low frequencies is to eliminate them from instruments and vocals that do not need to have them. If your guitar tracks have some rumble around 100 Hz, those nonessential frequencies will stack with those in the bass track, the kick drum track and so on, creating unneeded low-end in your mixes.
You can apply a high-pass filter to tracks like guitar to eliminate extra mud from your mixes. This will allow for more clarity in your mix because now the bass instruments have more space in those frequencies. Soloing the guitar may cause you to think this is a bad idea, but listen in the context of the whole mix. You may find that your guitar sits better as well.
Excessive Reverb

Create realistic spaces with your reverb. Unless you're purposely over-processing for dramatic or creative effect, use reverb reasonably.
Hearing an instrument in a room isn’t something we often think about. The human ear combines the sound of the instrument with the space that it is being played in and gives us the ability to determine where it is coming from and roughly how far away it is. This is how we hear and naturally, this is how we expect things to sound.
Placing a microphone on an instrument eliminates part of the real world experience by capturing direct sound. With reverb, we can combine the direct sounds with those of plugins or hardware to give the listener the effect of hearing an instrument in a space. Various options allow for many ways to make your tracks sound more natural, but too much of a good thing can be a bad thing.
As great as reverb is for giving a mix some life, it is often overdone when engineers are new to mixing. Depending on what space you want your instruments to be combined with, you can end up with washed-out mixes if you don’t take care of what you are affecting.
Make sure that when you are starting, you avoid sending everything to a reverb. It sounds counterintuitive, but every track will probably not need it to be effective in the context of your mix. When using reverb, also consider applying an EQ after the reverb to help filter out unwanted frequencies that could clutter your mix. Doing so can add effective space to your recordings, without adding any new problems.
Mastering Your Own Mix

DIY is great. But sometimes it's best to leave mastering to those who've spent countless hours becoming as good as they possibly can at the craft.
Whether it be the do-it-yourself attitude or a lack of funding in a recording budget, many new engineers either choose to master their own projects or go without mastering entirely. Mastering is an important step in preparing your tracks for release and with it comes attention to detail and skill.
One of the main things you will hear when discussing mastering is that it is just for making your mixes loud enough to compete with other releases. While this is a consideration, it discredits engineers who have dedicated their careers to mastering. Mastering provides several benefits to a mix.
Hiring a mastering engineer will land you a polished track but it is good to know why that is. Mastering engineers have a skillset and a set of ears that even some of the best mixing engineers do not. They listen to every mix objectively which allows them to make critical decisions without any attachment to the projects they are working on.
This fresh perspective allows them to make EQ moves to correct any issues you may have missed during the mix, add compression for better dynamic response, and apply more specialized effects such as stereo width adjustment. The results are much more polished and give your mixes the radio-ready sound you were after from the start.
Conclusion: As with anything people try to be good at, the best know that these things take time and practice. These issues are common, but not unbeatable. If you are just starting out mixing, consider the points on this list and make any adjustments as needed. Learning from your mistakes is a great way to improve your work and may help you make the jump to bigger projects over time.
To hear what professional engineers can do to polish your mix, follow the link here for a free mastered sample of your song: https://www.sageaudio.com/register.php


