10 Steps to Getting the Perfect Mix Before Mastering
A great mix translates and accents the message of a song.
Sure, the music and lyrics send the strongest signals when people listen, but the mix will aid in creating vibe and accentuating particular elements for a song.
To have your mix sound its absolute best after mastering, you need to nail the mix so the mastering engineer can improve upon something that is already great.
This article will look at some tips and tricks to make sure your mix sounds great before it ever makes it to your mastering engineer.
High Pass Your Tracks
One of the easiest ways to improve your mix is to consider how much low end all of your instruments carry.
It is easy to forget how accurate most modern recordings are in reproducing low frequency. While this is very helpful in achieving high fidelity recordings, it can pose its own set of issues.
Imagine recording an acoustic guitar part.
We place mics to capture the sound and with that comes a range of sound from roughly 82 Hz all the way up to the pick on the strings in the 2-3 kHz range.
This may be exactly the sound you want, but in many cases, the acoustic guitar is part of a larger arrangement of instruments.
So, when trying to reduce some of this low-end to keep the overall mix balanced, you can use a high pass filter to roll out the lower frequencies of your guitar. This way the important frequencies are retained that make up the sound of the acoustic guitar, while reducing any mud that may be in low end.
Most EQ plugins have the ability to high pass. Another reason for this is to reduce the build up of low end noise in your mix.
Even though 20 Hz isn’t what our ears are most sensitive to, tracks without high pass filters will continue to make this low end noise grow.
Every time you stack the same frequencies on top of each other, there is a roughly 3 decibel (dB) increase in that sound. Just imagine if you weren’t addressing this on a song with 30 tracks.
Even with low frequency instruments, using this type of EQ can help out. A five string bass guitar’s lowest string produces frequencies at around 31 Hz. Using a high pass filter set at 6 dB per octave at 20 Hz would be a good setting to reduce noise while preserving the low B string’s fundamental frequency.
Give this a try. You might be surprised at the clarity that comes from cleaning up your low end with high pass filters.
Gate Your Drums

Another great way to achieve clarity in a mix is to look for ways to reduce unwanted noise.
This doesn’t necessarily mean that a noise is bad, but rather unneeded.
When mixing drums, there is often some bleed between kick and snare drums. Whether it is your kick drum mic getting a bit of snare transient in, or the snare drum mic picking up the kick, it is relatively simple to help eliminate this issue.
Since the snare mic is going to give a much stronger signal when the snare is hit versus when the kick bleeds into it, you can set the threshold of your gate based on the snare transient.
This way when the snare is hit, it will open the gate and allow signal to pass, but still keep the gate closed when the fainter kick bleed is heard.
This technique not only reduces noise, but applies a much better sense of isolation between close miked drums.
If you use any processing on an individual drum, you will no longer have to worry about how it may make the bleed sound.
While you may not hear major shifts in your drum tone when doing this, eliminating any potential issue is easier than trying to fix it later.
Panning

Because of stereo recording we are able to create huge soundscapes that convey space and positioning in recordings.
This gives us a lot of room to work in the stereo field. When mixing a track, panning is a simple tool you can use to make instruments have a position or spot in the mix.
Some engineers use LCR (left, center, right) method in which instruments are either panned hard left, dead center, or hard right. This type of mix makes for very wide stereo images in many cases, but there are instances where this technique may not work.
When applying panning outside of the LCR method, soft panning (panning between center and left or center and right) becomes a useful option.
When deciding on where you want your instruments to sit in a mix, it is a good idea to consider how that may affect the left and right stereo balance.
If you’re panning a loud guitar part towards the left and there is nothing to balance the difference in amplitude on the right side, your mix can sound lopsided and unbalanced.
This has the potential to skew your stereo image and decrease the chance of hitting the perfect mix.
Another consideration is what will be up the center of your mix. Something that is almost 100% standard is to have kick drums, snares, bass, and vocals panned to the center. Since these instruments are foundational to the beat and groove of the song, they need to be heard on any playback system.
Mono systems especially benefit from panning these instruments up the middle since there is no ability to convey a left and right side of a mix.
Panning these up the center also assures that you will have an equal amount of these instruments in the left and right channels.
These few panning tips can help your mix shine through careful placement of instruments and attention to balance.
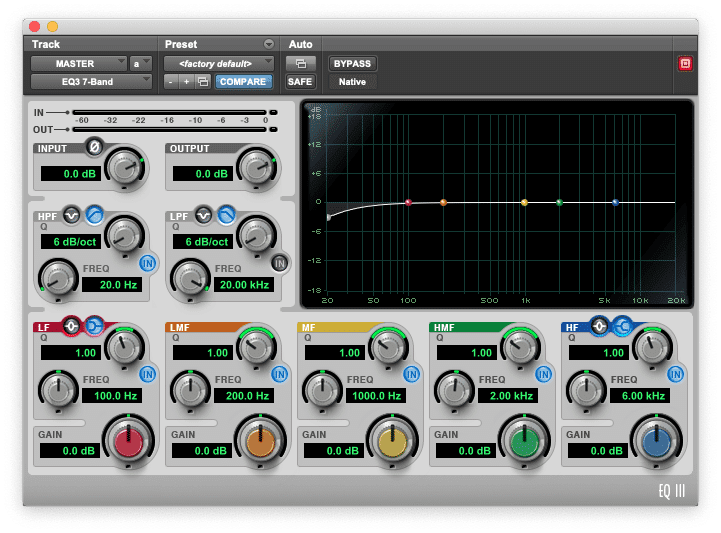
EQ
One of the most useful tools we have is EQ.
It can help bring out parts of a track that may be a bit lacking.
An example would be a vocal track. Maybe on its own, the vocal track sounds excellent, but when you bring it into the mix it seems like it gets lost.
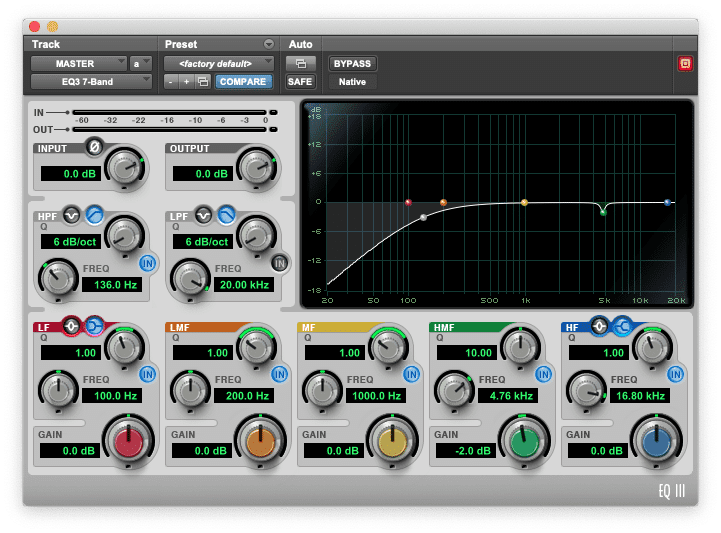
EQ can help bring out the high mids that our ears are the most sensitive to. Without any increase in volume, you may regain the edge that brings the vocal back into the forefront of the mix. With all great things, it can be easy to overuse or misuse however. Uncle Ben once said, “With great power come great responsibility,” and I think that applies to EQ.
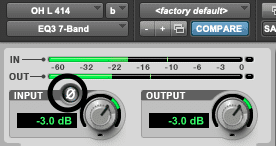
One of the common mistakes I see when using EQ is the use of very broad and sometimes drastic moves.
It is hard to rule out anything entirely in mixing, but a good way to start is to use small, corrective moves.
Using vocals as an example again, let’s say you have a track that has a bit too much low end for vocals.
There are a couple ways to alleviate this.
I’ve seen many engineers grab higher frequency bands and increase them to offset the large amount of low end. While this approach will give you the treble you’re looking for, the original problem of too much low end still exists.
This is where corrective EQ’ing comes into play.
Before you grab those higher frequency bands, you can attempt to find the problem frequencies towards the low end. Try locating these and notching them out.
This way you can hear a perceived increase in high end without introducing more treble than you need.
Using EQ with a corrective approach can be applied to any instrument in your mix and often yields better results than trying to offset a problem with more of something else.
Another good technique in EQ’ing your tracks is to make small adjustments.
Sometimes as little as a 1 dB change can be enough to correct and issue in an instrument.
A good way to start learning to use corrective EQ is by notching out problem frequencies to where you like them and then cutting your correction in half.
For example, if you want to cut 200 Hz in a vocal by 3 dB, try reducing it by 1.5 dB. Over time, these smaller adjustments will become more apparent to your ears resulting in a better ability to fine tune your mixes.
Compression
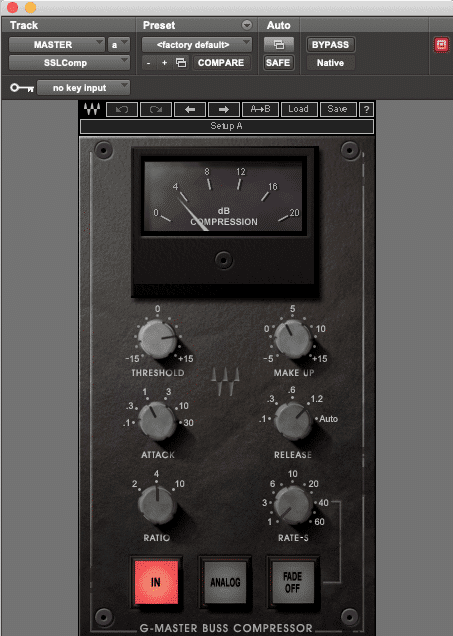
Compression is often a point of confusion when you’ve just started mixing.
Many talk about compressors as an essential tools, because they are.
It is important to know how to use compression in a mix and to avoid over compression to get the best results for your mix.
Put simply, a compressor’s main function is to reduce the dynamic range of a performance. This means your loudest parts will have gain reduction applied to reduce sharp transients, and your quietest parts will be brought up to a louder level.
This is very helpful in achieving consistent levels throughout a song. For vocals, compression will help keep the performance dynamic, but also at a level that keeps the vocal in the forefront of a mix.
There are different styles and compression designs that work differently from each other.
FET, optical, VCA, and variable mu are the main variants of compressors and they all have their place depending on what you are looking to compress.
Try experimenting with the different types of your tracks to see what kind of compression works best for your mix.
Compression can be used on individual tracks, but it is also a popular choice for mix bus processing.
Mix bus compression is when you send your entire mix to a stereo compressor. The use of mix bus compression can provide punch and “glue” to your mix.
Sometimes, this is what can help give a mix a polished and finished sound.
The best thing to remember with compression is that it is easy to overdo. If you are going to use a compressor, make sure you know exactly what you want it to accomplish.
Handing an overly compressed mix off to your mastering engineer leaves less room for the mastering processing. This often includes some type of additional compression as well as limiting, so squashing the dynamics out of every track should be avoided before mastering.
The vocals, snare drum, and bass are some commonly compressed tracks since these are often required to be consistent throughout a mix. Experiment with compressor types and various ways to apply compression in your mix.
A compressors ability to control dynamics and provide glue to your mix is an invaluable tool for achieving a perfect mix.
Effects Sends
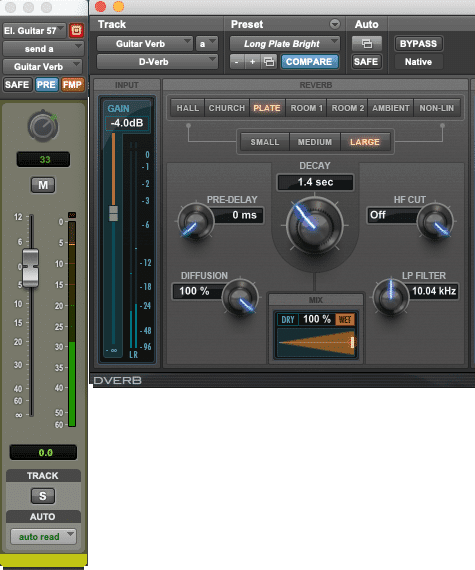
Effects can provide unique and interesting ways to give your mix a professional sound.
Tools such as reverb and delay can give your stereo field a greater sense of space.
One of the best ways to use these types of time based effects is to blend them in with the dry signal.
I have seen instances where a reverb or delay was put into the insert section of a track. Some plugins allow you to blend in dry signal within the plugin itself, but not all do.
Rather than insert time based effects on a track, try using a pre-fader auxiliary send.
This will send the dry signal to another track where you can insert the effect. Since it is being sent to another track pre-fader, it is unaffected by any of the volume changes you may make on the dry signal’s fader.
Doing this will allow you to blend the dry signal with the effect. In my own experience, I have found that this allows for a little more control of the blend between the two.
Specifically for reverb and delay, it is a good idea to use EQ as a part of your effect chain. Since these effects are there to imply space in a mix, you will often only require the most audible frequencies to convey that space.
Try Inserting an EQ on your auxiliary track after the effect and experiment with high and low pass filters to shape the sound of your effect.
Doing this can give your simulated spaces a little more realistic sound and move you closer to the perfect mix.
Try using aux sends to blend other effects as well. Maybe you need some fuzz on a vocal? Using this technique to blend the dry and wet signals will let you keep the clean articulation of the dry vocal while still reaping the rewards of applying the fuzz.
Automation
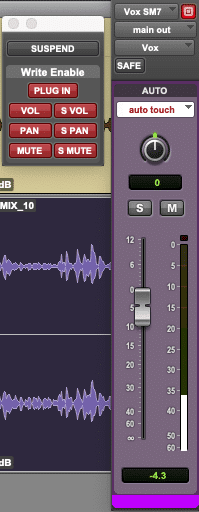
Automation can help make fine tuning tracks very easy.
Using most any DAW, you can write changes into your mix that your DAW will remember and perform for you.
Some of the parameters available to automate are volume, pan, mute, and generally any parameter of plugin.
One of the best ways to use automation in your mixes is on vocals.
There are certain moments in songs that can help deliver the message of the lyrics and automating the performance can help bring them out.
Try using automation to increase the volume of important vocal lines throughout the performance.
This additional emphasis on important lines can help draw in a listener and potentially help the artist give deeper meaning and/or understanding to their lyrics.
To start, try making small moves with automation. Sometimes half a decibel can make just enough difference between lines.
Automation can always be edited and/or rewritten, but as with any processing, starting small is usually the way to go.
* Check Your Phase
Checking the phase on some of your tracks is essential.
Often times, acoustic guitars, piano, and drums require multiple microphones.
This is where phase comes into play. Mic placement is an important step in reducing phase issues, but when mixing there isn’t much you can do about the mic placement.
Sound becomes out of phase when sound waves are not in time with each other. When completely out of phase (180º), pure sine waves will cancel each other out, resulting in silence.
Since we are dealing with more complex waveforms, silence is not likely to occur entirely, but there will be a noticeable hollow sound in your tracks.
One of the best examples of this is when using two snare mics. One is placed on the top and one is place on the bottom.
Assuming they are aimed almost directly at each other, their phase would be opposite of each other around 180º.
If the phase is not flipped on one of the two microphones, your snare drum will lose a lot of its volume and its fullness.
When the phase is flipped on one of the mics, you will notice that your snare sounds much better since you have eliminated any of the frequency cancellation that is occurring between the waveforms.
Checking that your mics have a good phase relationship can make the difference between hollow and full mixes.
Stereo Imaging
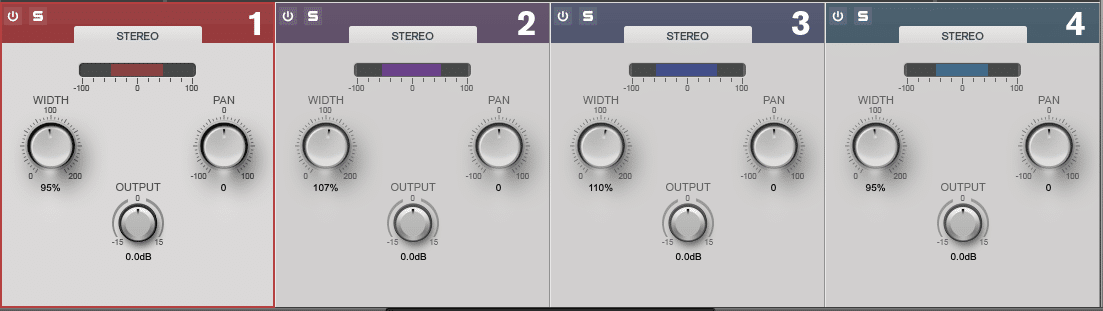
When dealing with lots of stereo information, it can become hard to keep a mix sounding full and still retain the clarity of individual tracks.
Depending on your mix, it may be a good idea to try stereo imaging tools.
This processing splits your audio into a few different bands, usually lows, low mids, high mids, and highs. They are split so that individual frequency bands of your mix can be widened or narrowed in the stereo field.
This can be useful for narrowing lower frequencies towards the center or widening high mids to accentuate reverbs and other directional stereo information.
Stereo imaging should be used sparingly as it’s very easy to overdo and can end up doing more bad than good if used incorrectly.
The key is small increments. The benefits of stereo image processing can be as simple as a wider stereo image or as magical as enhanced clarity throughout the stereo field.
If you’re unsure of how much stereo imaging to use, this is best left for your mastering engineer to apply during the mastering stage.
Printing Your Mix
It’s important to consider how you process your mix at the final stages of the mixing before handing off your mix to be mastered.
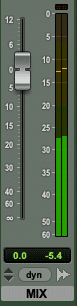
Mastering engineers need to have some headroom to apply additional processing to a mix so make sure you print your mix below 0dB.
Using your DAW’s meter, make sure your mix is printed with peaks no higher than -1dB. This allows ample room for mastering and ensures that your peaks will not go over the 0dB.
Doing this may make your mix appear quiet, but your must consider that is solely the mix.
If you compare your mix to already mastered tracks this may lead you to believe that your mix is too quiet, but resist the urge to throw a limiter on the master bus. This adds additional compression that makes it difficult for your mastering engineer to work and create a polished sound for you mix.
Finalizing your mix without a limiter or heavy master bus compression will retain your mix’s character and still allow for the additional processing needed during the mastering stage.
Conclusion
Mixing can be a simple task with minimal instrumentation or a huge feat when dealing with 30+ tracks. In both scenarios, applying these steps can help you get closer to the perfect mix.
Start small with all of these adjustments and increase them as necessary.
The minute changes can seem small, but they can also make huge improvements to your mix.
Consider your mastering engineer when you mix as well. He or she will worry about getting your mix as loud as it needs to be as well as tweak any minute issues that could be missed during mixing.
Focus on keeping your mix clear and don’t stress over the small stuff.


