Gain Staging: What You Are Missing
Gain Staging is seemingly simple enough.
Just watch your channel faders, and if their meters aren’t turning red, then you’re in the clear.
At the risk of being the bearer of bad news, this isn’t the full story. Your tracks may still be distorting, no matter how vigilantly you’ve watched your channel and master faders.
When a track begins to clip, what do we typically pull down? If you guessed the channel fader, then you’re correct. This is the go-to fix for a lot of engineers.
But, if your channel fader is at unity and it’s peaking, that means the track must be distorting before it reaches your channel fader. Therefore, pulling down the channel fader won’t fix your problem.
How Do I Know if My Unprocessed Signal is Too Loud?
Here’s a quick test that reveals if your signal is distorting before it reaches your channel fader.
Place a plugin on your track, and edit the parameters slightly. If the meter inside the plugin shows clipping, then your track must be clipping.
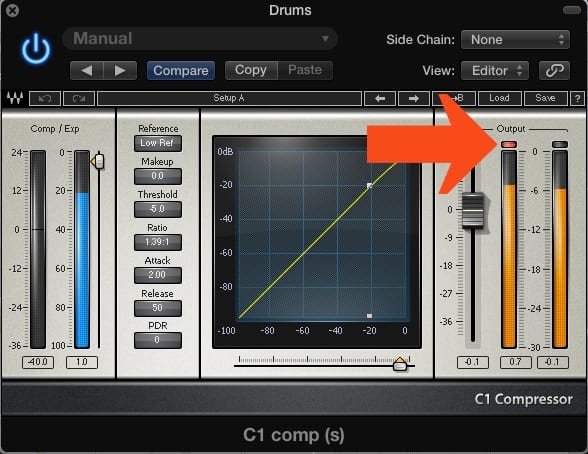
Even though the signal isn't being amplified by this plugin, the output is distorting. This indicates that the original signal is too loud.
That simple.
Regardless of how far down you pull your channel fader, your track is clipping, and you need a different solution.
Clip Gain:
The difference between your channel fader and clip gain are their respective places in the signal path.
Clip Gain is at the beginning; the channel fader is at the end.
This means that any clipping distortion occurring before the channel fader, cannot be controlled by the channel fader.
To control clipping distortion, attenuate the gain of your clip. By doing so, you’ve attenuated the volume of the signal before it hits your first plugin. Now, you can freely adjust the parameters of your plugin without clipping distortion.
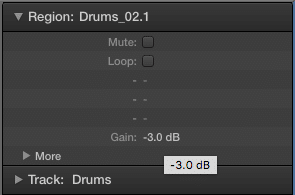
Decrease the gain of the clip using clip gain. Attenuate the signal until clipping no longer occurs.
Use the clip gain function any time you notice distortion within your first plugin or insert. Odds are your signal is too loud, and needs to be attenuated before being processed any further.
Distortion Between Inserts:
Even after attenuating your signal’s volume with clip gain, there still may be distortion between your plugins.
Any processing that increases the overall strength or volume of the signal, may push the signal into the red.
For example, if you bump a frequency using an EQ, you increase the volume of the overall signal. Increase this signal enough, and your signal will end up distorting.
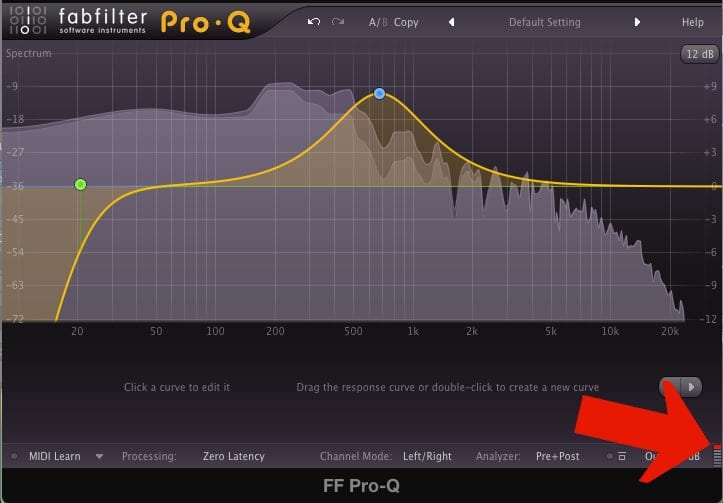
On this EQ, the mid-range has been amplified enough to cause clipping.
Just like before, you may not see this distortion in your channel fader, but it’s there, causing odd harmonic distortion and signal degradation.
Keep this in mind whenever changing the parameters of a plugin. You may be increasing your signal enough to distort it.
Conclusion:
As you can imagine, the more complex your processing becomes, the more intently you need to observe your plugin's meters. What may begin as a small problem earlier in your processing chain, can lead to a distorted mess by the end of it. Now that you know that gain staging involves more than just your channel faders, keep your signal path in mind, to identify and solve any problems clipping may cause in your mix.
How do you avoid clipping in your mixes?


