How to Process Vocals Like a Pro
Processing vocals like a pro consists of performing equalization, compression, distortion, as well as adding temporal processing such as reverb and delay. Processing vocal like a pro as incorporates properly recording and editing your vocal, so that further processing can be performed in an effective way.

Vocal processing includes multiple forms of intertwined or co-dependent processing
Vocal processing isn’t an easy feat - it combines multiple forms of processing, each depending on each other, and combining into some spectacular (if performed correctly).
Instead of trying to understand it from a macro-level, let's look at it from the micro-level as we break vocal processing down into steps and examine how it works.

Starting for the most fundamental aspects of vocal processing will help to understand it.
Also, let’s start from the beginning of vocal processing and learn the fundamentals, and then work our way to the more exciting parts of making a vocal sound great.
The steps we’ll be outlining are as follows:
- Record Your Vocal at the Proper Recording Level
- Use Clip Gain to Balance Out Excessive Dynamics
- Start your Signal Chain with Subtractive EQ
- Compress the Vocal and Perform the Correct Make-Up Gain
- Implement Harmonic Generation or Subtle Distortion
- Amplify Aspects of the Vocal that you Like with Additive EQ
- Use an Aux Send to Add Reverb to Your Vocal
- Use an Aux Send to Add Delay to Your Vocal
- Implement Volume and Plugin Automation
With that said let’s look at each of these steps in-depth!
If you have a mix that you’ve been working on and you’d like to hear what it would sound like mastered, send it to us here:
We’ll master it for you and send you a sample for you to review.
Step 1: Record Your Vocal at the Proper Recording Level

Recording your vocal at the right level will ensure the rest of the processing can be performed correctly.
The proper recording level can depend on your intentions for the vocal - for example, if you want a super clean sounding vocal, it's best to record your signal around -18dB.
But if you’d like to get some more coloration from your preamp, record closer to -3dB, using higher gain settings on your preamp to achieve this. With that said, a good range in which to record your vocals is -18dB to -3dB.

For a cleaner vocal record closer to -18dB, for a more colorful vocal, record closer to -3dB.
If you don’t record your vocal within this range, you’ll need to amplify the signal using digital processing. More importantly, your signal-to-noise ratio will lend itself to a noisier recording, meaning that any additional amplification you perform will, in turn, amplify that noise to a more perceivable level.
As you can imagine, if you want to add a fair amount of processing to your vocal, and have it sound professional, a low level of noise is crucial.
Step 2: Use Clip Gain to Balance Out Excessive Dynamics
Once your vocal is recorded to the proper level, you can begin to balance the dynamics of the recording.
Clip gain is a great next step, as it allows you to control the dynamics of your vocals without noticeable compression
Although many engineers typically reach for a compressor at this point, the better option is to use clip gain. The reason being, if there are any particularly loud dynamics, the compressor will be hit harder , resulting in more compression and making the compression more noticeable.
Additionally, more aggressive compression will be needed to create a balanced vocal performance, given the dynamic nature of most vocal performances.
With clip gain, more compression will be needed, in turn making it more noticeable.
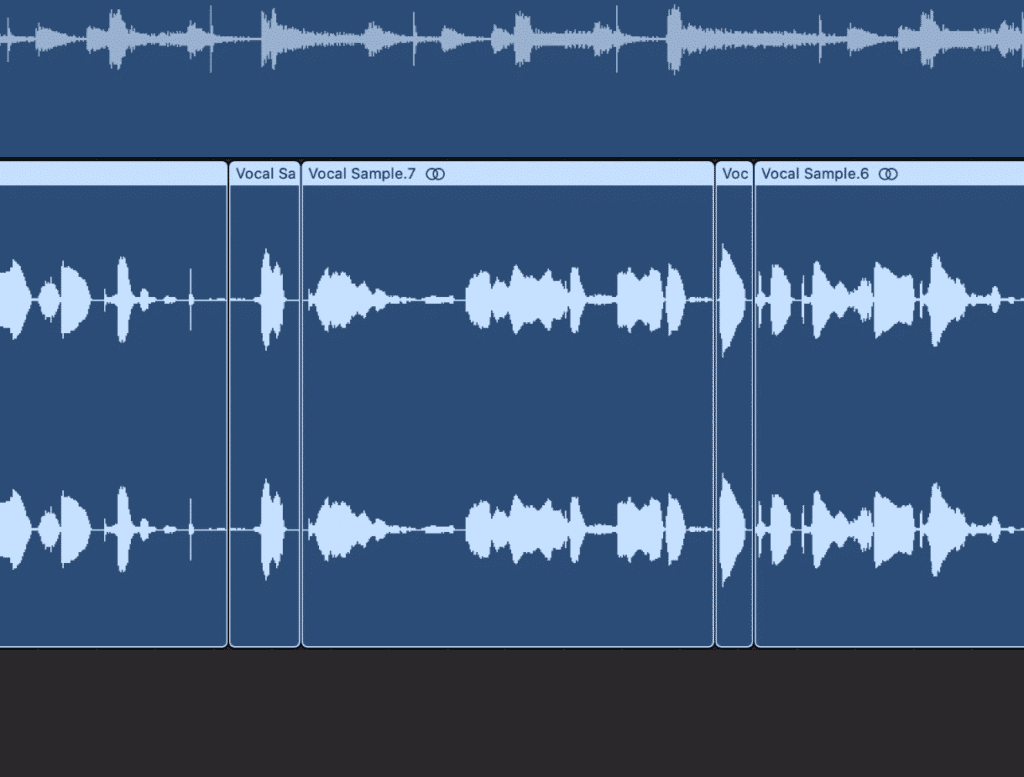
With that in mind, it's best to start with clip gain to attenuate and amplify specific sections of the performance. This is made easier by the waveform display which changes when increasing or decreasing the gain of a clip - this way you can visually determine if the volume of your clip is balanced.
Now, it’s important to note that automation will not result in the same effects as clip gain. In short, clip gain occurs prior to your signal chain, whereas volume automation affects the channel fader, which is after your signal chain.
Step 3: Start Your Signal Chain with Subtractive EQ
Subtractive equalization is a great next step when processing your vocals. By using subtractive equalization, you attenuate any and all aspects of the vocal’s frequency response that you don’t like.
Subtractive eq ensures you don't amplify unwanted aspects of the signal.
This ensures a clean vocal - one that can be further processed without worrying about accidentally amplifying undesirable frequencies. For example, any saturation or distortion will amplify various aspects of the frequency spectrum - if your vocal still has these undesirable frequencies, you might exacerbate their sound.
Although the specific frequencies to cut will depend on the recording, given the key, octave, and the timbre of the vocalist, some things can be cut out in just about every circumstance.
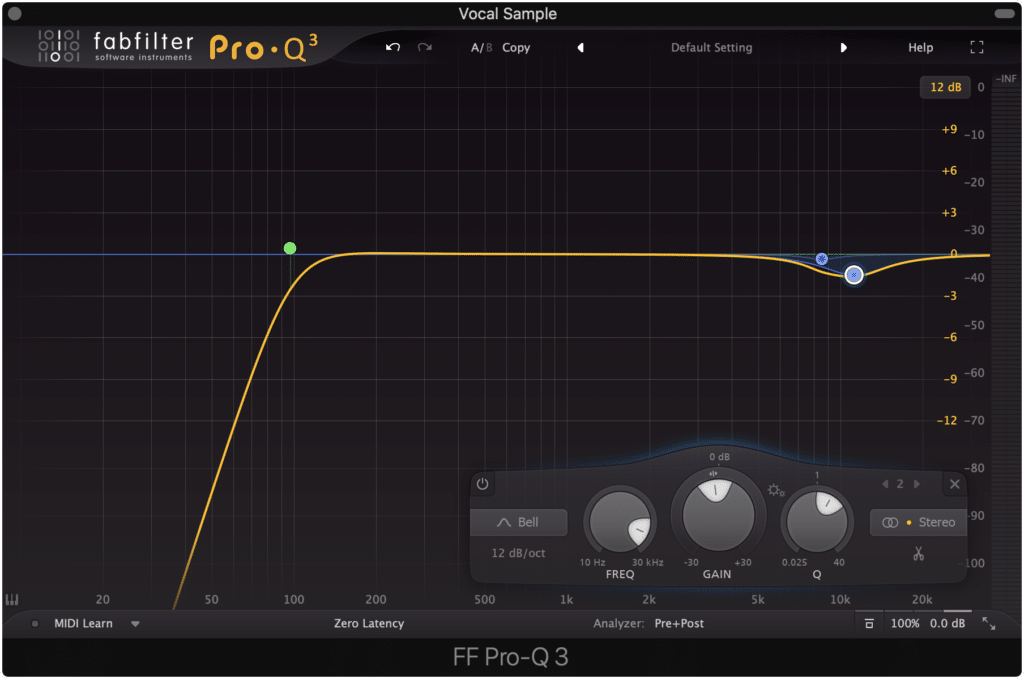
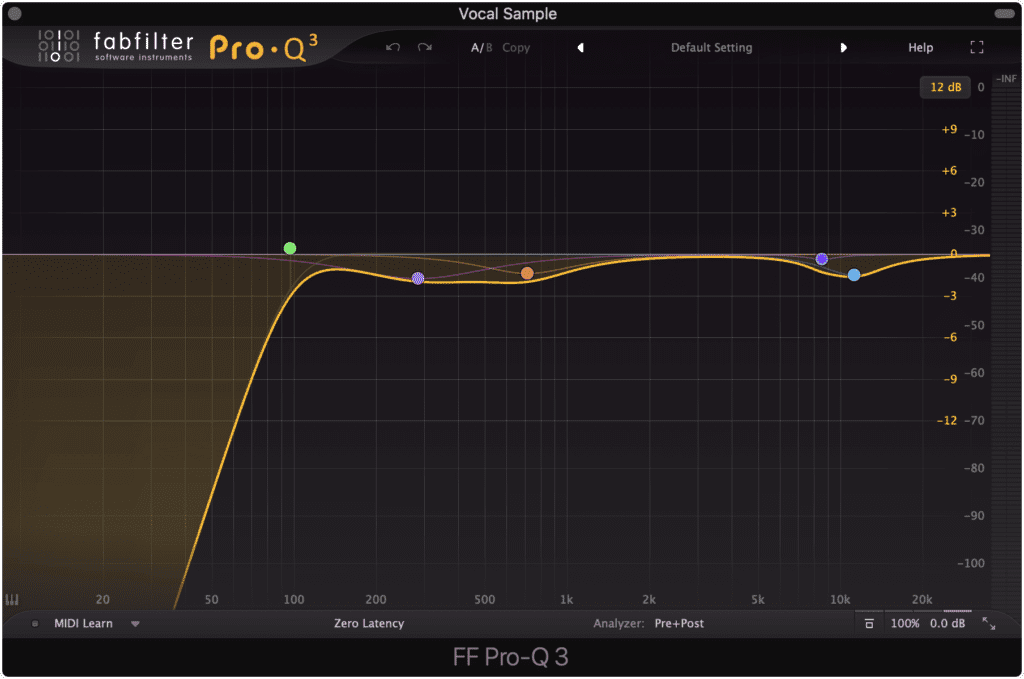
A good starting place is to attenuate the low end with a high-pass filter and to tame the sibilance with a bell filter.
A great start when performing subtractive equalization is to use a high-pass (low-cut) filter, up to roughly 80Hz with an 18dB/octave slope. This will help to attenuate plosives and any rumble or electrical hum that is occurring.
Additionally, attenuating the sibilance frequencies with subtractive can help to reduce the compression used when de-essing. These will range from 4kHz - 10kHz.
Your high-pass filter and sibilance attenuation will depend on your vocal, but these are good points to keep in mind when performing subtractive equalization.
Step 4: Compress the Vocal and Perform the Correct Make-Up Gain
Now that the dynamics of your vocal are balanced, and undesirable aspects have been attenuated, you can use compression and make-up gain to create a more distinct and upfront sound.
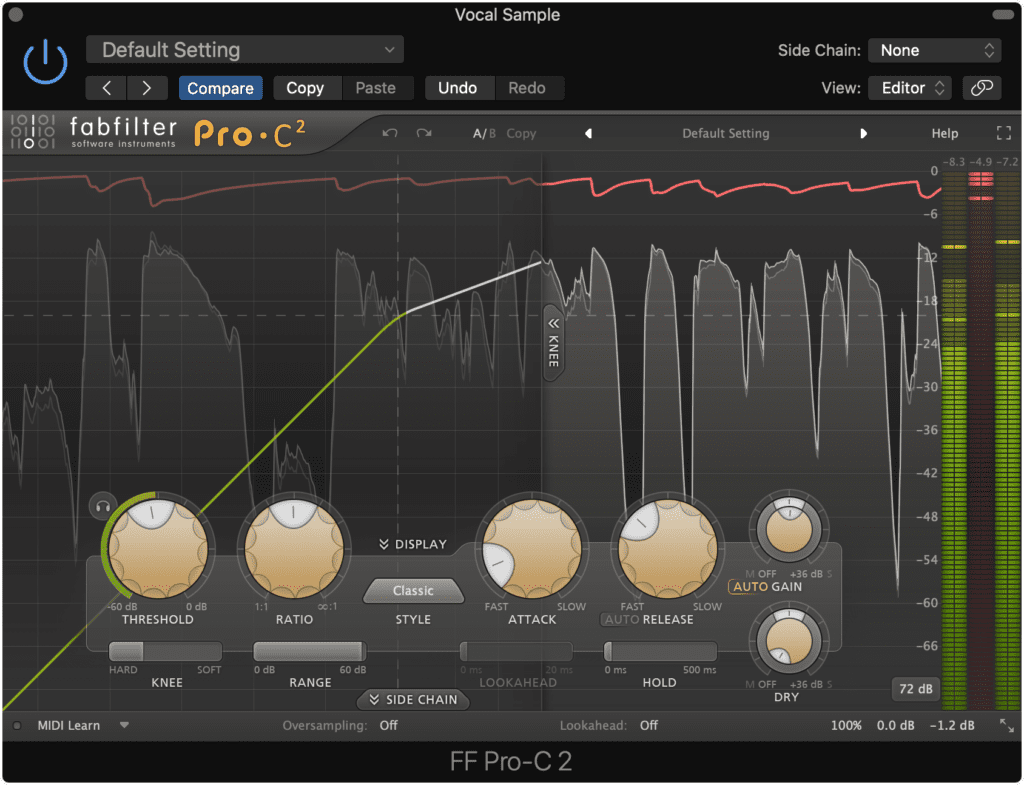
Compression with make-up gain will cause the quieter aspects of your vocal to become amplified.
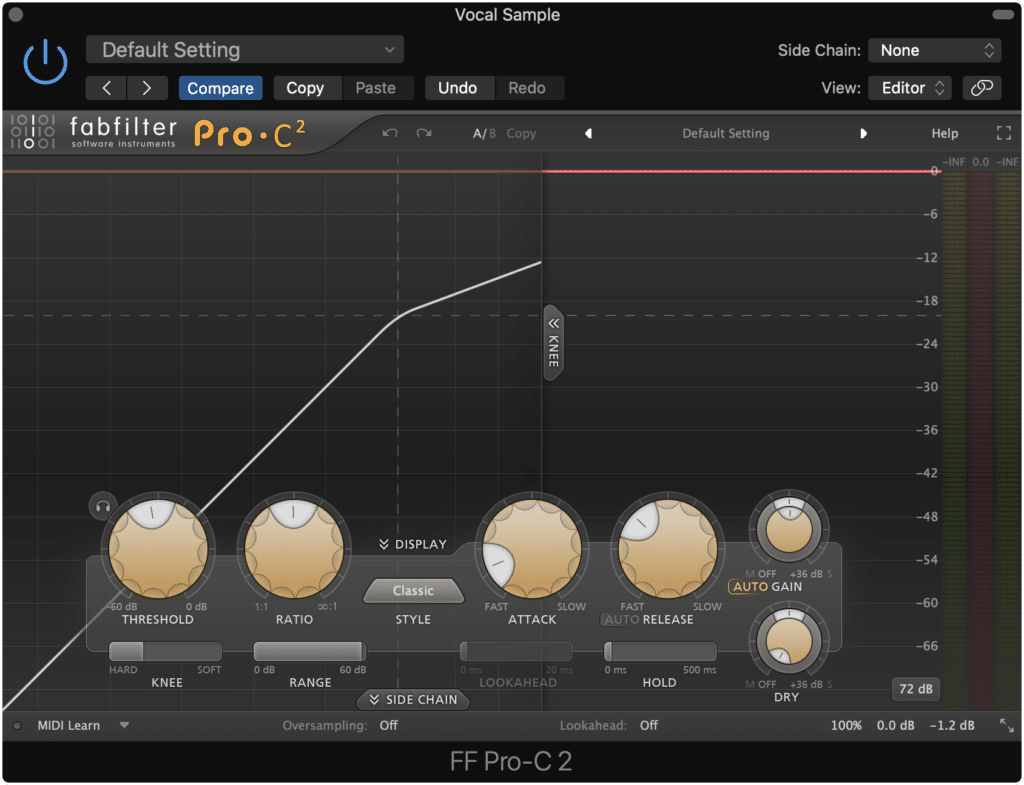
Compression settings greatly impact the timbre of a recording - this holds particularly true for a vocal recording, in which even minute changes can be noticeable.
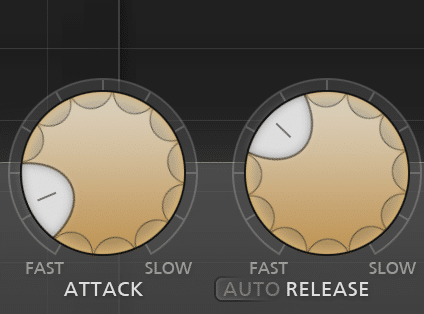
A fast attack and slow release will cause more compression, and smooth out the vocal.
A shorter attack will cause compression to occur sooner. If the attack is short enough, the transients of the signal will be attenuated, making the sound smooths and less intelligible . A longer attack allows for the transient to pass through unaffected.
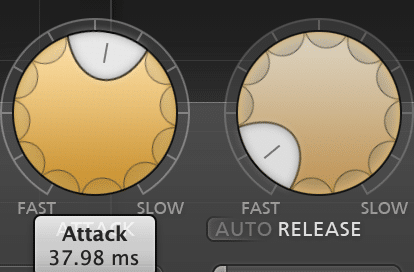
A longer attack and slower release will compress less, and allow the vocal to keep its timbre.
The opposite can be said for release times - a quick release will make the vocal sound clearer and more intelligible whereas a longer release will result in a smoother sound.
So if you want a punchy, upfront and highly intelligible vocal, use a longer attack and shorter release compression setting. This is good for pop and rap vocals.
If you want a smoother sound, one that sounds more laid-back, relaxing, or blended in with the surrounding instrumentation, use a quicker attack and longer release.

different compressor types cause different sounds - for example, Opto compression is a smoother sounding compression.
Some compressor plugins also employ Opto-based compression, which results in a smoother sound as well.
You might also be interested in using an analog-based compressor, one that employs harmonic generation. Some examples of these compressors are tube-based or transistor-based compression.
When compressing your vocals, 3dB - 5dB of attenuation is an appropriate amount. By compressing this much, and then using make-up gain, you amplify the quieter aspects of the vocal, making them more detailed and complex.
Step 5: Implement Harmonic Generation or Subtle Distortion
Of all the forms of processing, saturation is perhaps the most important when processing vocals. The harmonics it generates can take a vocal that is being lost in the mix, and push it forward enough to separate it from other instrumentation.
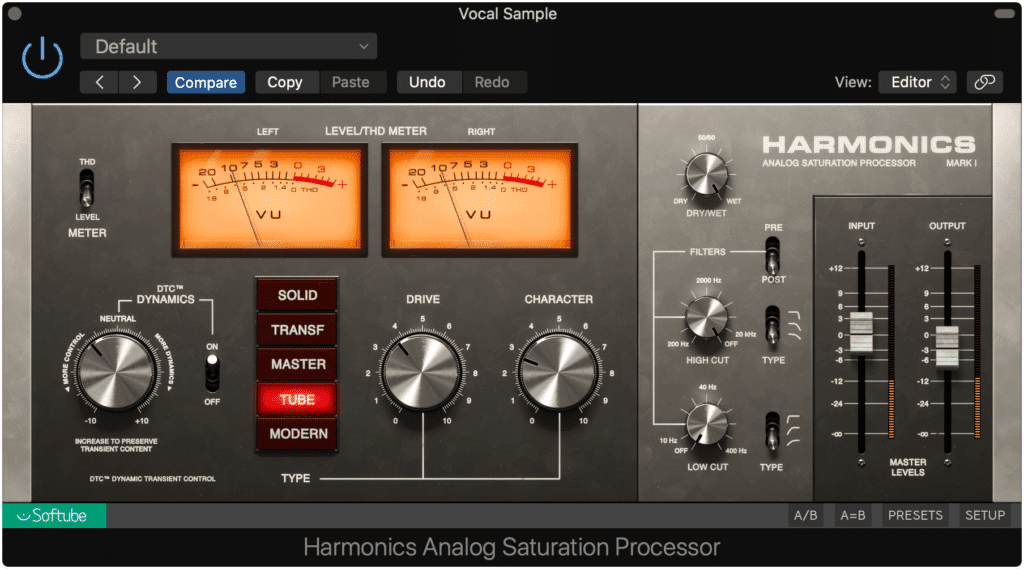
Saturation pushes your vocal into the forefront of a busy mix.
If you use saturation, you’re employing both upward compression and harmonic generation. These two things when combined increases the amplitude of your vocal by amplifying quieter aspects of the vocal , and adding new harmonics into your frequency response.
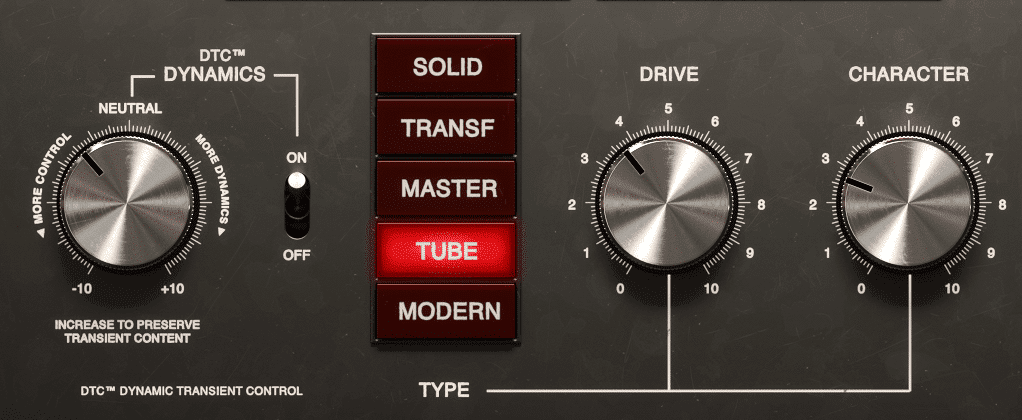
Saturation is both harmonic generation (the functions on the right) and compression (the function of the left).
Try mixing a couple of different forms of saturation and harmonic generation to create a full and complex-sounding vocal. If your mix is busy, as most pop mixes are, more saturation may be needed.
If your mix is simple, like a singer-songwriter mix, less saturation and harmonic distortion will be needed.
If you want to learn more about saturation, check out our blog post on the topic:
In it, you’ll find a lot more helpful information about saturation.
Also, if you’re interested in some free distortion and saturation plugins, take a look at our list for the Top 10 Free Distortion Plugins
You can also hear these plugins in action in the video attached to the blog.
When adding harmonic distortion and saturation there are no exact settings that should be used - it should be performed to personal preference. Of course, too much will sound distracting and abrasive, so use it somewhat sparingly or at least in a controlled way.
Step 6: Amplify Aspects of the Vocal that you Like with Additive EQ
You should now augment aspects of the frequency response that you like and want more of. At this point your signal should still be mono, so you won’t need to worry about mid-side equalization or left-right stereo equalization.
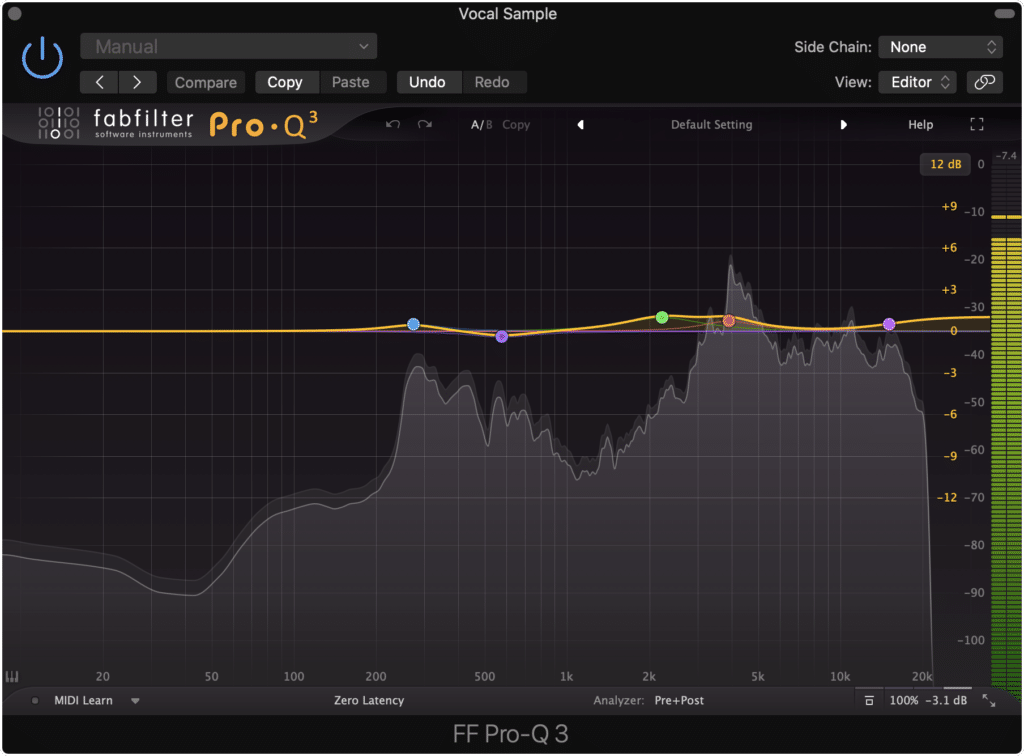
Now you can augment aspects of the vocal that you like with additive EQ.
Just like with subtractive equalization, what needs to be affected will vary on the performance, but there are some starting points that may be helpful.
- For a more airy vocal amplify a shelf filter at 15kHz.
- If you want your vocal to cut through your mix more, amplify a bell filter at 2kHz with a medium Q.
- For a full vocal amplify 150Hz to 200Hz with a bell filter.
- If you want a clear and crisp vocal, amplify a bell filter at 4kHz - 6kHz with a medium Q.
These “starting points” will definitely vary slightly, but with some critical listening, you can determine what is best for your vocal.
If you’d like to find some free eq plugins, check out pick for the top 10 free eq plugins
There’s also a video that showcases the plugins as well as provides examples .
Step 7:Use an Aux Send to Add Reverb to Your Vocal
Although its alright to add reverb directly to your signal chain, it’s better to use an auxiliary send for a couple of reasons.
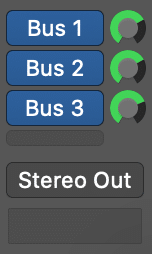
It's best to use an aux send to add reverb.
The first is that it allows you to create a wet/dry blend with your reverb , in turn giving you greater control over how much reverb is applied to your signal.
More importantly, it means that you can create additional auxiliary sends that can be unaffected by your reverb - this will be important later on.
When creating your reverb, you should have the reverb time or the “RT60” be in time with the tempo of your track. This way it contributes to a cohesive, in time sound.
Ensure that the time of your reverb is in-time with the tempo of your track.
Although some plugins can automatically sync to the tempo of your track, there is a way to calculate this timing.
If you divide 60000 by the BPM of your song , you will calculate the timing of quarter note . You can then multiply this number to create a half note or whole note, or you can divide it to create eighth notes, and so on.
Try a couple of different timings to determine which one causes your vocal to either stand out or blend in (depending on the sound you’re going for).
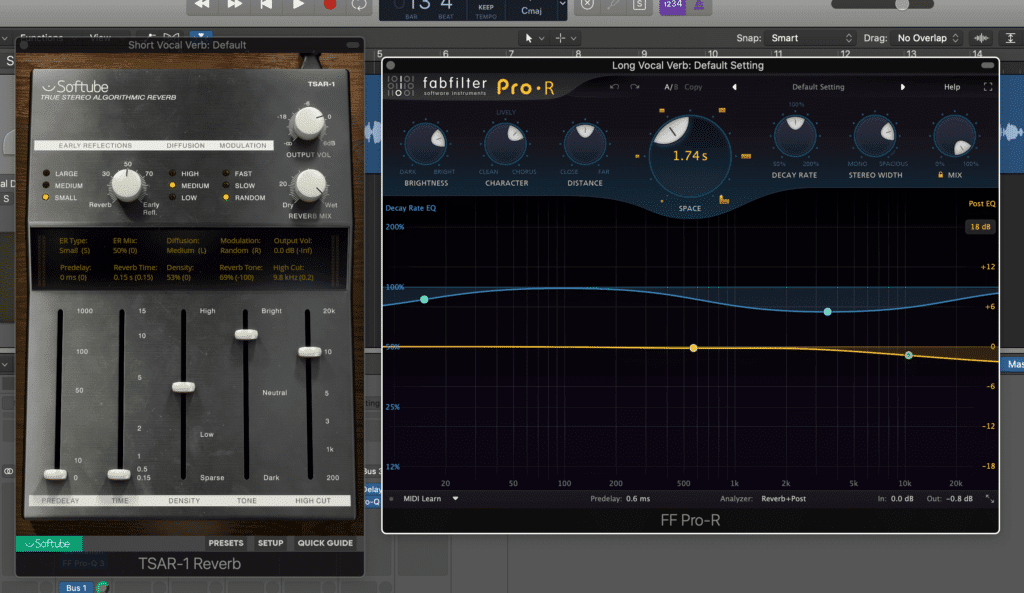
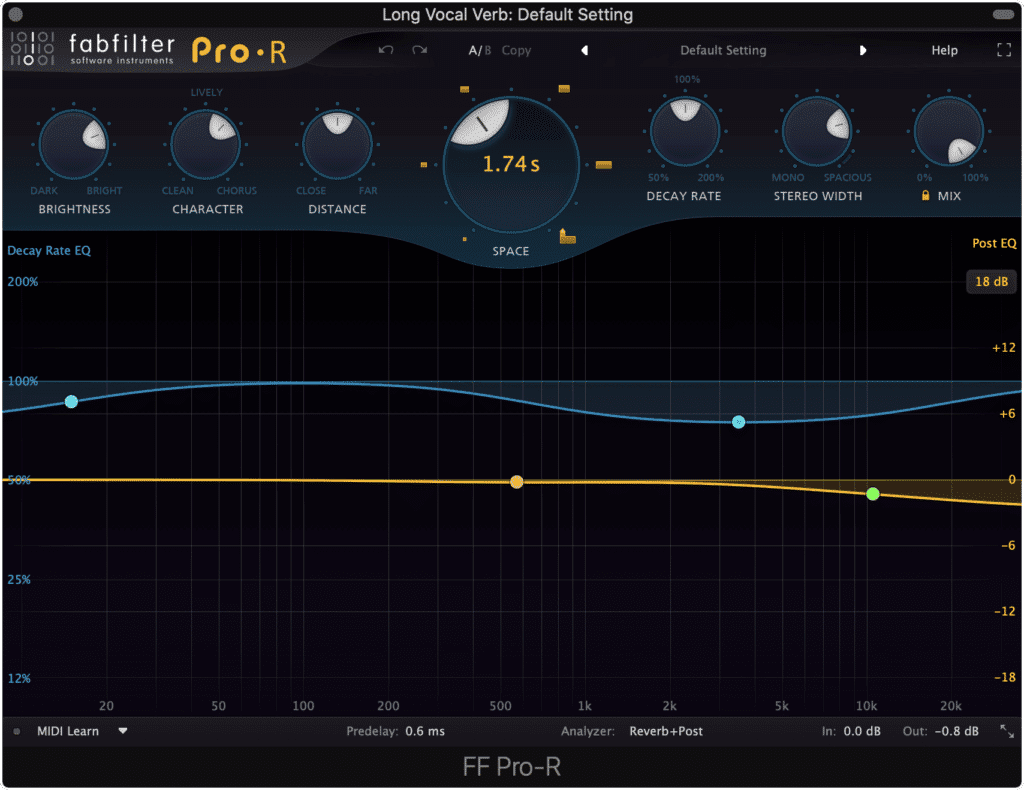
Two reverb sends are helpful - one short reverb for a doubling effect, and one longer reverb for a more stylized effect.
Additionally, it's important to create multiple reverb sends - one with a quick reverb time to create almost a doubling or thickening effect, and another for your more stylized or aesthetic-based reverb, or in other words, one that adds character to the vocal.
A good starting point for these reverb times would be a sixteenth note for the doubling or thickening reverb, and a half note for the longer, more stylized reverb.
If you want, you can also add equalization to your reverb aux send after your reverb. This way you can augment particular parts of the reverb, or attenuate aspects you don’t want.
Personally, I enjoy bright reverb so I’ll amplify a shelf filter on the higher frequencies of the longer reverb.
Step 8: Use an Aux Send to Add Delay to Your Vocal
Similar to your reverb aux send, you can add delay to your vocal via an auxiliary send. These delays can be long for a stylized delay, or shorter to thicken your vocal - this depends on your personal taste, the complexity of your mix, and the vocal performance.
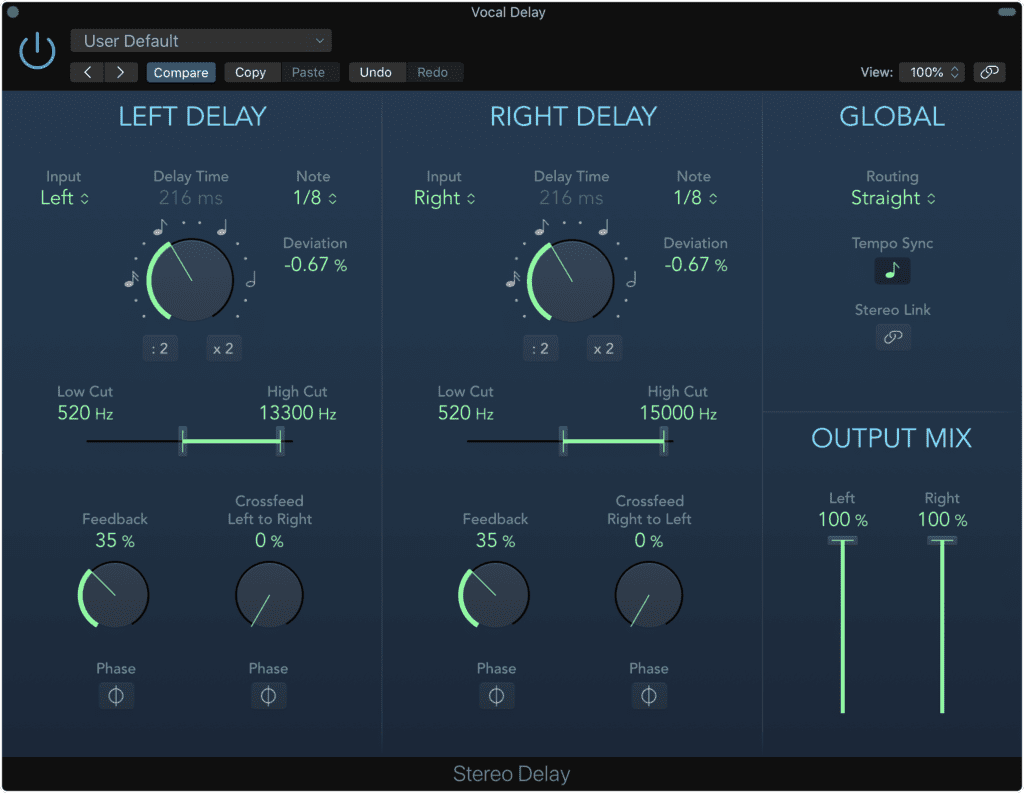
Use delay to add body to your vocal - a shorter delay thickens the vocal, a longer one is a more creative effect.
Because we created a separate auxiliary send for the reverb, the reverb will not be delayed. This separation is important for additional control of your signal.
However, if you do want your reverb to be delayed, create a send from your auxiliary reverb track to your delay auxiliary send.
Following the same calculation listed above, you can create an in-time delay - one that adds to the sense of timing in your track.

Attenuating the higher frequencies of your delay ensures that sibilance isn't amplified.
Although your delay aux send can be left as is, it does help to attenuate the high frequencies of your delay. This way, sibilance based frequencies aren’t amplified or made more prevalent.
Delay is a great way to add some body to your vocal and make it stronger in your mix.
If you have a mix you’re working on, and you’d like to hear how it would sound mastered, send it to us here:
We’ll master it for you and send you a free mastered sample to review.
Step 9: Implement Volume and Plugin Automation
With all of your processing complete, and your decisions made, you can not begin to create more dynamic processing - meaning, you can alter the amount of processing in particular regions of your vocal.
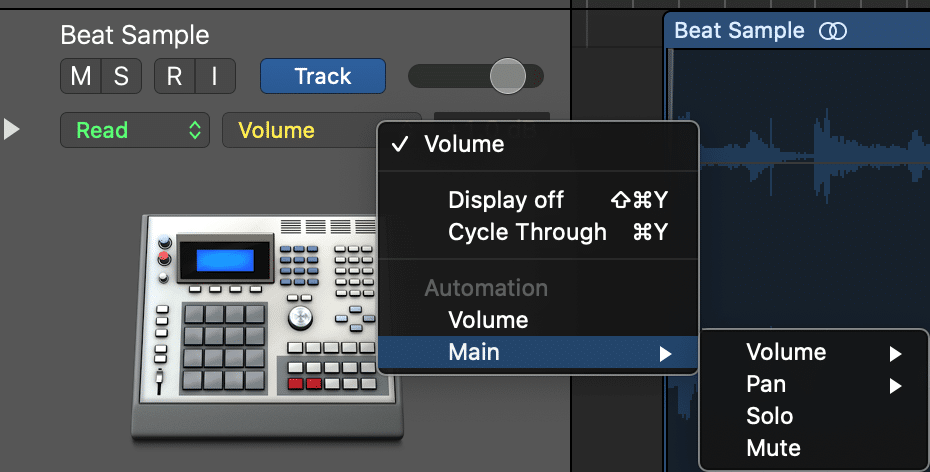
Just like volume automation, you can automate your sends and the value of your plugin's functions.
This is accomplished by using automation. In this particular situation, our automation will consist of volume, send, and plugin function automation.
For example, if you’d like your lead vocal to pop during a chorus, use automation to increase the saturation setting of a plugin, and maybe increase its volume by 0.5dB.
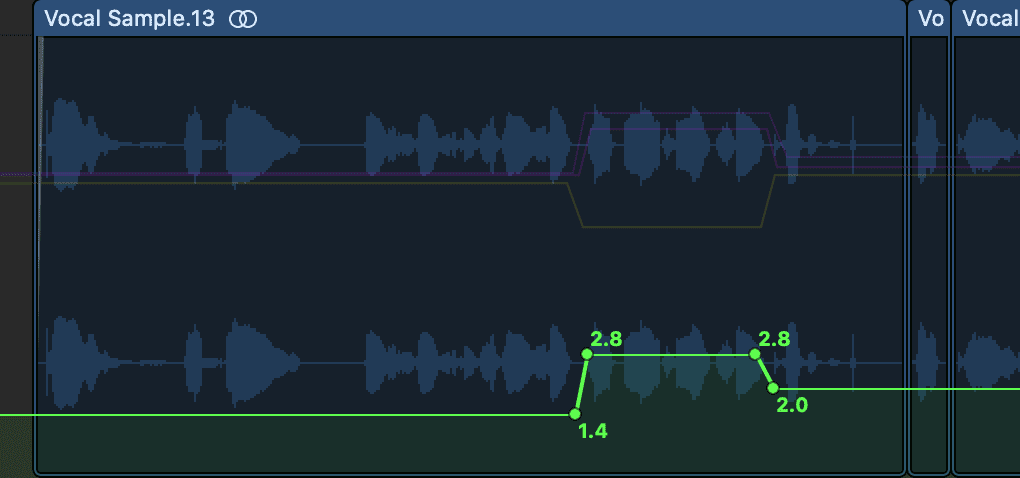
Above, the drive function of a saturation plugin is being increased during a particular section of the vocal.
Or, if you’d like to have your vocal part transition one section of your song to another you can increase your vocal’s reverb send right before this transition.
You can also create incredibly unique and creative effects by implementing aggressive plugin function automation for a short duration. One example is increasing the delay send to a significant amount for 2 or 3 seconds.
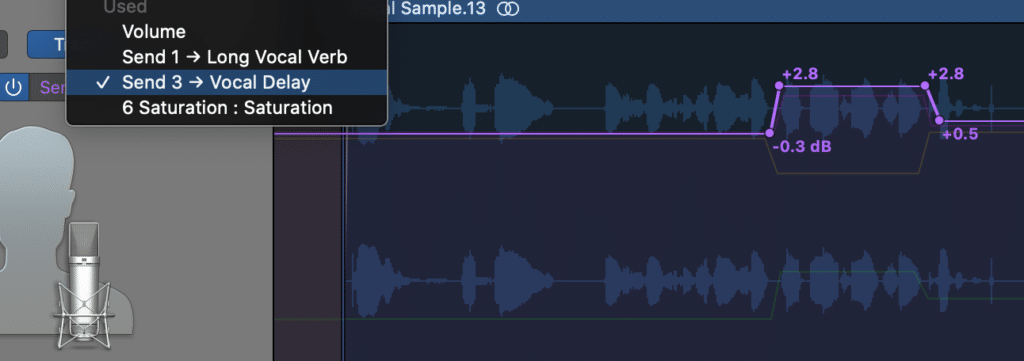
Delay sends or any send can also be increased or decrease at certain moments to create a cool effect.
What you create is entirely up to you. Your vocal can be as unique as you want.
However you choose to process your vocal, automation is the best way to add some creative effects. This is really the stage of vocal processing that will separate your vocal from vocals in other recordings.

Plugin and send automation go a long way in creating a unique experience for your listeners.
This small amount of extra effort goes a long way and can really impress your listeners with something they haven’t heard yet.
Conclusion
Vocal processing is highly subjective; however, there are certain fundamentals that should be implemented to create a distinctive and powerful vocal.

You can create a powerful and distinct vocal using multiple forms of processing. Experiment with the settings above and try to create something of your own.
If you want your vocals to sound professional and impressive follow these steps:
- Record Your Vocal at the Proper Recording Level
- Use Clip Gain to Balance Out Excessive Dynamics
- Start your Signal Chain with Subtractive EQ
- Compress the Vocal and Perform the Correct Make-up Gain
- Implement Harmonic Generation or Subtle Distortion
- Amplify Aspects of the Vocal that you Like with Additive EQ
- Use an Aux Send to Add Reverb to Your Vocal
- Use an Aux Send to Add Delay to Your Vocal
- Implement Volume and Plugin Automation
Each of these steps is incredibly important and depend on one another for the best possible sound.
If you follow these steps, share your results!
We’d love to hear your vocal!
If you have a mix you’re working on, send it to us here:
We’ll master it for you and send you a free sample for you to review.
How do you process your vocals?


