Make Your Vocal Sound Great Quickly
In a perfect world, a recorded vocal would sit perfectly in the mix, with no need to be processed further.
In reality, EQ only the first step in a myriad of actions needed to make a vocal fit, and sound great.
Although equalization may seem slightly mundane compared to more elaborate processing, having a solid foundation for your vocal’s processing is of the utmost importance.
Considering equalization is this foundation, it’s wise to use it with its importance in mind.
By implementing the bands below into your vocal chain, you’re well on your way to equalizing your vocal in a way that adds clarity and presence, all while allowing it to blend seamlessly into your mix.
Choosing the Right EQ Bands
Band 1: Use a high pass or low cut filter to cut undesired low frequencies. At their best, these frequencies are often rumbled and unintelligible. At their worst, they can interfere with not only your vocal’s intelligibility, but with the balance of your mix. Attenuating these frequencies is a well known, and effective start to equalizing your vocal.
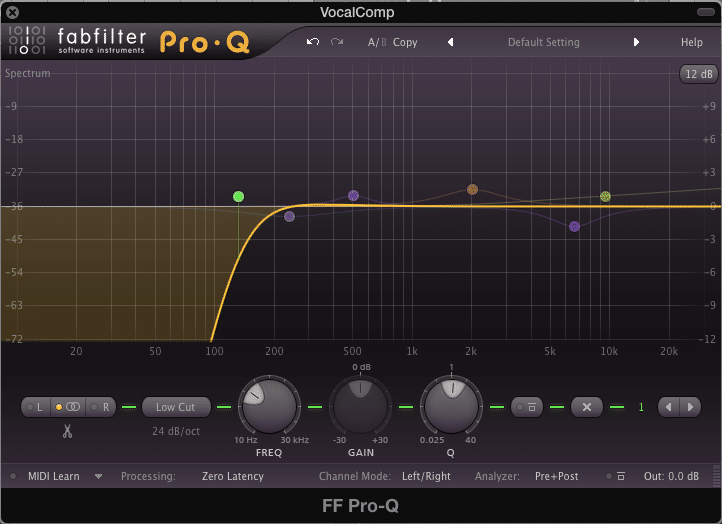
'Low Cut' filter attenuating up to 130Hz. with a slope of 24dB/Octave
Band 2: Although 200Hz is associated with warmth, if it’s too prevalent is can cause muddiness. Also, when you consider that multiple instruments are competing for this space, it’s a good idea to attenuate some of them in the vocal. Be careful not to cut excessively - pull too much out and your vocal may start to sound thin.
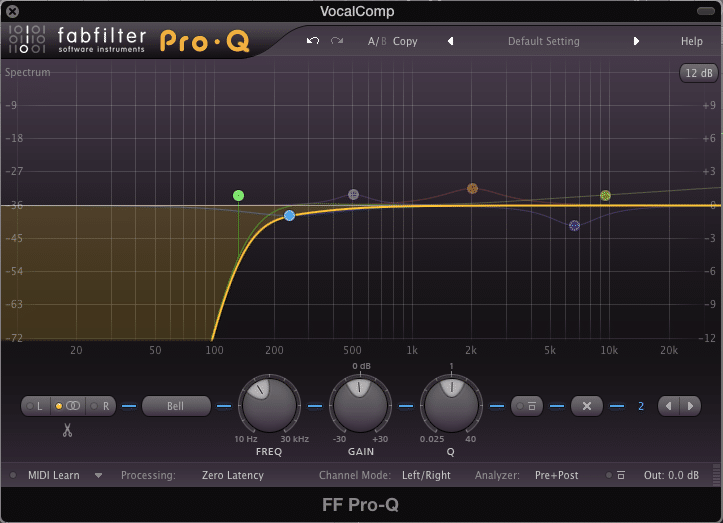
'Bell' filter attenuating roughly .5dB, at 230Hz.
Band 3: 500Hz isn’t a frequency that’s often talked about. In fact 300Hz to 700Hz rarely comes up in audio discussion. Despite this, 500Hz is approximately the area where vowels are formed during singing and speech. Boosting this frequency with a narrow band is a great way to increase vocal intelligibility. Again, do so sparingly - too much and your vocal will sound boxy.
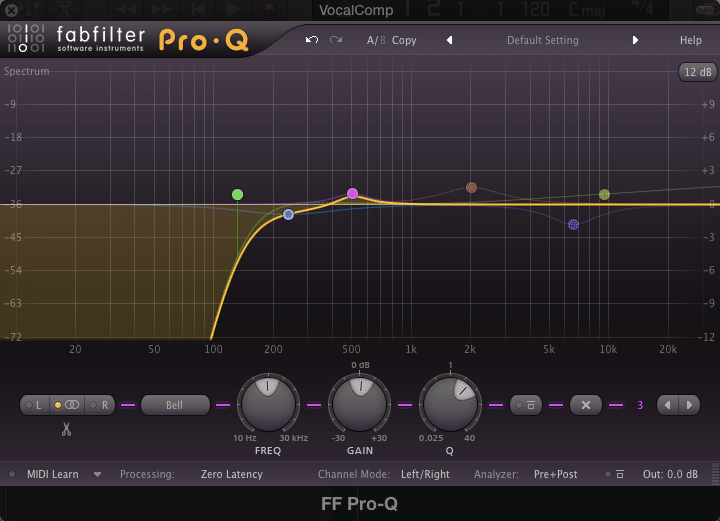
'Bell' filter amplifying 500Hz. A narrow Q is used.
Band 4: 2kHz is in the perfect spot between mid-range presence, and high-range clarity. Boosting it allows for both clarity and presence, without the harshness associated with higher vocal frequencies. Boost it with a wider Q to create a natural sounding amplification.
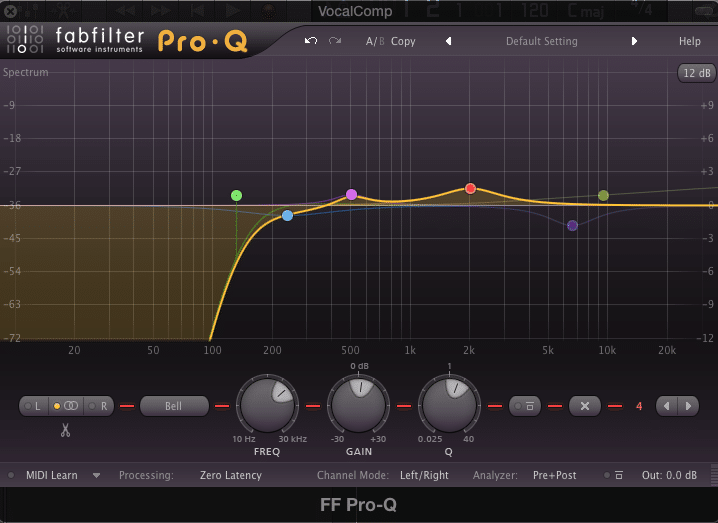
'Bell' filter used to amplify 2kHz, roughly 1.5dB.
Band 5: Speaking of harshness, few things are more unpleasant than untamed sibilance. Although a deesser should be used later on, attenuating the upper 5kHz, to lower 7kHz. area with your equalizer is a great first step in calming this range. Although sibilance is important, a little goes a long way. Keep this in mind while pulling back on this range.
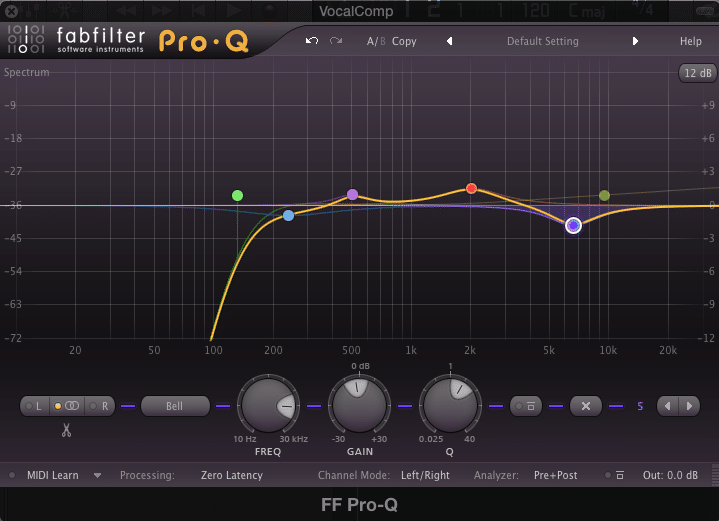
'Bell' filter attenuating 6kHz to 7kHz. and reducing perceived sibilance
Band 6: Above the sibilance is a range known for its ability to create ‘airiness.’ It may be difficult to explain, but when a well engineered airy vocal is heard, it’s instantly enjoyable. That’s why I recommend initiating your vocal’s airiness during equalization. Boost 9kHz and up using a high shelf.
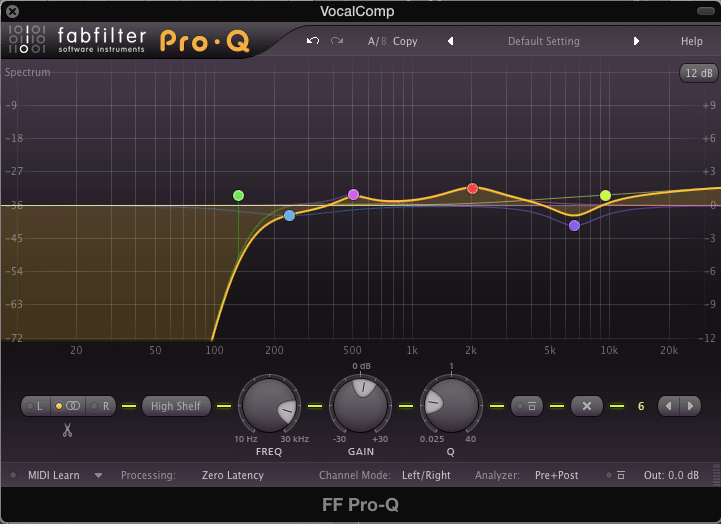
'High Shelf' filter used at 9kHz and upward. Wide Q used to create even amplitude across filter
Conclusion:
All vocals are different, and will need to be equalized with their specific characteristics in mind - but starting your equalization with these bands is certainly a great start to creating a balanced vocal.
Remember that the voice is arguable the most important instrument in a song. It is and always has been the most relatable and easily recognizable aspect of a song. Keep the listener in mind, and pay special attention to your vocal, using these equalization bands and their respective characteristics as the foundation for creating a great vocal.
How do you equalize your vocals?


