How Does Panning Affect Your Mix?
Quick Answer
Panning affects your mix by placing the energy of a signal within a different point or points in the 90 and 180-degree stereo field. By using various forms of processing, a signal’s stereo field location can be altered, which can increase mix clarity, or evoke a more creative mix.
How Does Panning Affect Your Mix in Detail
Since the stereophonic record’s inception engineers have sought to create both more realistic stereo images and creative stereo images with the help of panning.
Panning is at the core of creating impressive stereo images.
Panning, although typical thought of in the traditional pan pot sense, can mean many different things and refer to a multitude of tools. Some panning is the traditional bus-based panning, whereas some panning plugins use psychoacoustic effects to achieve their goal.
Whichever form of panning you choose to use,it helps to understand how these forms of panning affect a mix and how they can be utilized both in a pragmatic and creative sense.
There are many forms of panning, and each needs to be understood.
We’ll be detailing what panning is as we discuss the major forms of panning. Additionally, we’ll consider the effects panning has on a mix and whether the effect is primarily beneficial or harmful to the overall sonic quality of a mix.
We’ll also listen to the various forms of panning and discuss what applications they might be best suited for (in the video embedded above).
Additionally, one thing to note - although panning is a term synonymous with ‘panning potentiometer', and this term only refers to one form of panning, we’ll be defining panning a little more broadly for the sake of conversation.
Instead of panning meaning just ‘panning potentiometer,’ we’ll use the term to describe the intentional placement of a signal within the stereo field - for the sake of exploring the topic, whether or not panning is created by using a panning potentiometer is irrelevant.
With that said, we’ll first define panning potentiometer since it was one of the first forms of popularized panning.
If you have a mix that you’d like to hear mastered, send it to us here:
We’ll master it for you and send you a free sample for you to review.
What is a Panning Potentiometer?
A panning potentiometer is the most common form of panning and is often represented as a rotary in DAWs and as a physical rotary on consoles. It works by splitting the signal into a left and right bus and then allocating more or less signal to the left or right.
In an analog system, panning is created by allocating more electricity to one side or the other, and in a digital system, a greater number of bits to one side or the other.
Although the most common setting for panning is -3dB allocated to each channel, -4.5dB and -6dB are also options.
Despite the variance in the amount of signal sent to each side (be it -3dB, -4.5dB, or -6dB) , panning hard left or hard right will cause the signal to be on the far left or right side of the 90-degree stereo image.
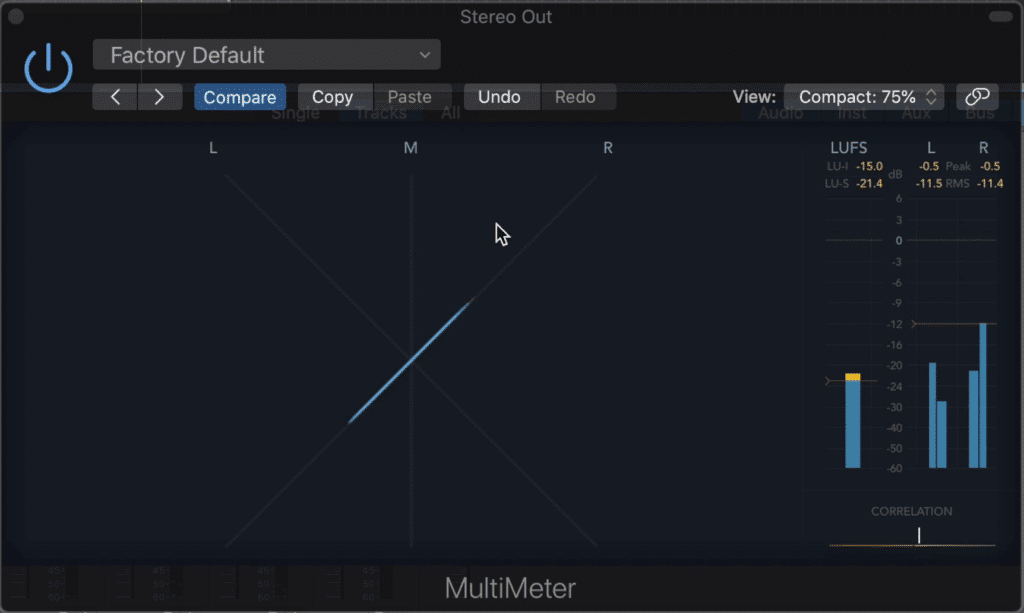
Level panning can move the image within the 90-degree stereo field.
In other words, the signal will be completely in the left speaker when panning hard left, or completely in the right speaker when panned hard right. Anything in between will be a mixture of the two speakers, depending on the position of the rotary.
How to Use Traditional Panning in a Mix
Traditional panning, or pan pot panning, is a great way to create an impressive stereo imaging; by carefully panning, engineers can place instruments within the 90-degree stereo field. To using traditional panning, it’s a simple as turning the rotary to the left or right.
These are 3 techniques that involve level or traditional panning.
Some common uses for traditional pan pot panning include:
- Panning doubled instruments hard left and right
- Panning a spaced pair microphone configuration hard left and right
- Making minuscule changes to the position of the kick and bass
Let’s look at these situations to better understand them.
Panning Doubled Instruments Hard Left and Right
When you’ve recorded a doubled instrument, such as a doubled vocal or acoustic guitar, you may notice that they don’t sound right stacked on top of each other. The reason being, phase cancellations and noticeable differences in timing make the effect sound unpleasant and somewhat chaotic.
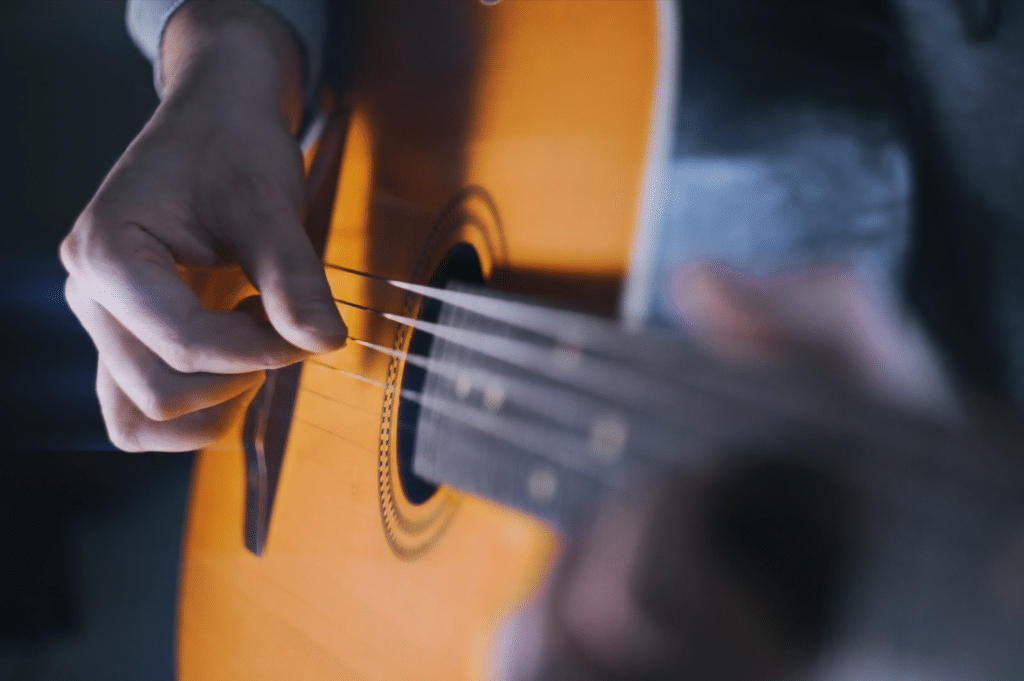
When doubling an instrument, it's best to pan one take hard level and the other hard right.
That’s why it helps to pan a doubled instrument hard left and right. When you do this, the small timing variations between the two will be less pronounced.
When doubled instruments are centered they sound chaotic.
Additionally, small amounts of phase cancellation will cause the image to spread into the 180-degree stereo field - in turn, making the instrument sound even wider.
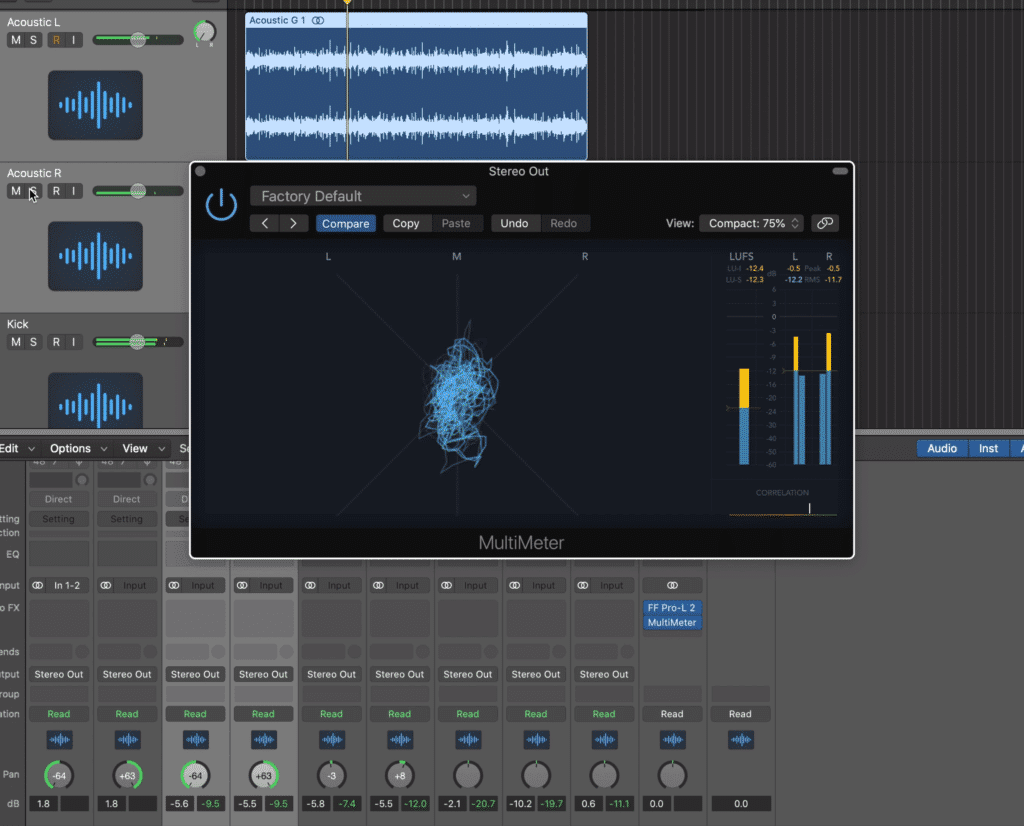
Notice that the image has moved into the 180-degree stereo field.
Panning a Spaced Pair Microphone Configuration Hard Left and Right
When recording an acoustic guitar or a drum set via overheads with a spaced pair microphone configuration, you’ll notice that the instrument doesn’t sound correct if the signals are centered. The reason being, to be spatially correct, they need to be panned to better represent the microphones’ placement.
Panning a spaced pair is necessary to achieve the correct effect.
Like the doubled pair previously mentioned, panning the spaced pair left and right will cause mild and beneficial phase cancellations due to variable delays between the two signals, which expand the image into the 180-degree stereo field.
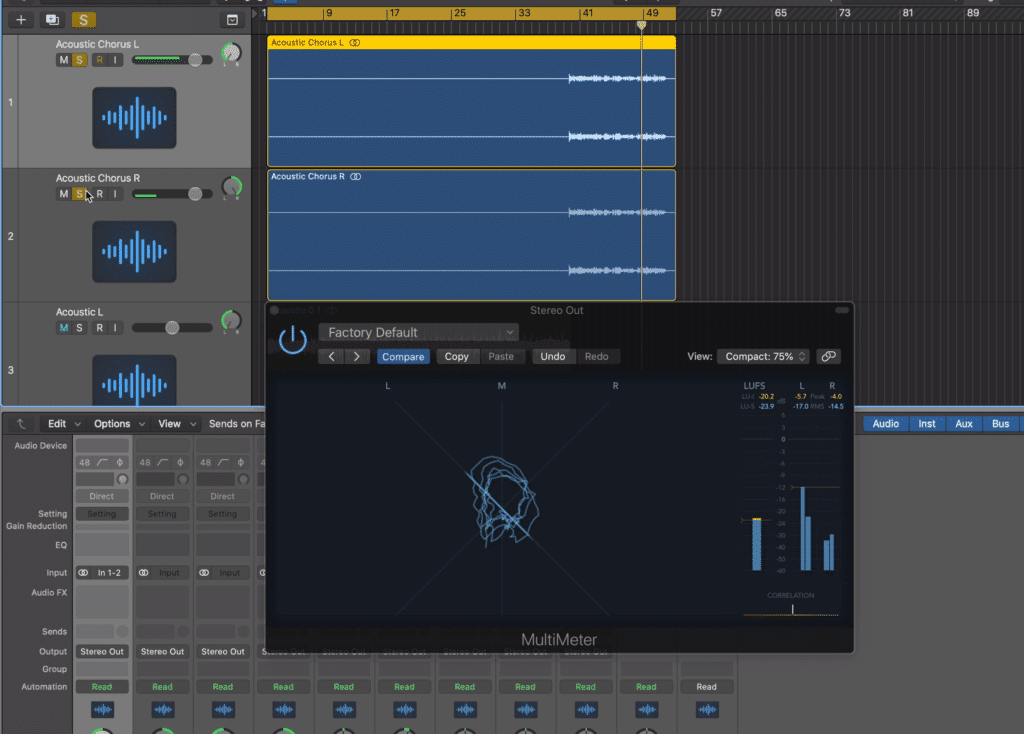
Notice that panning a spaced pair pushes the image into the 180-degree stereo field.
As a result, the image sounds wider and more impressive.
Making Minuscule Changes to the Position of the Kick and Bass
Another way to use traditional pan pot panning is to slightly separate the kick and bass by panning one slightly to one direction and the other in the opposite direction. Keep in mind that this shift should be done so carefully as too big or a shift will sound unnatural.
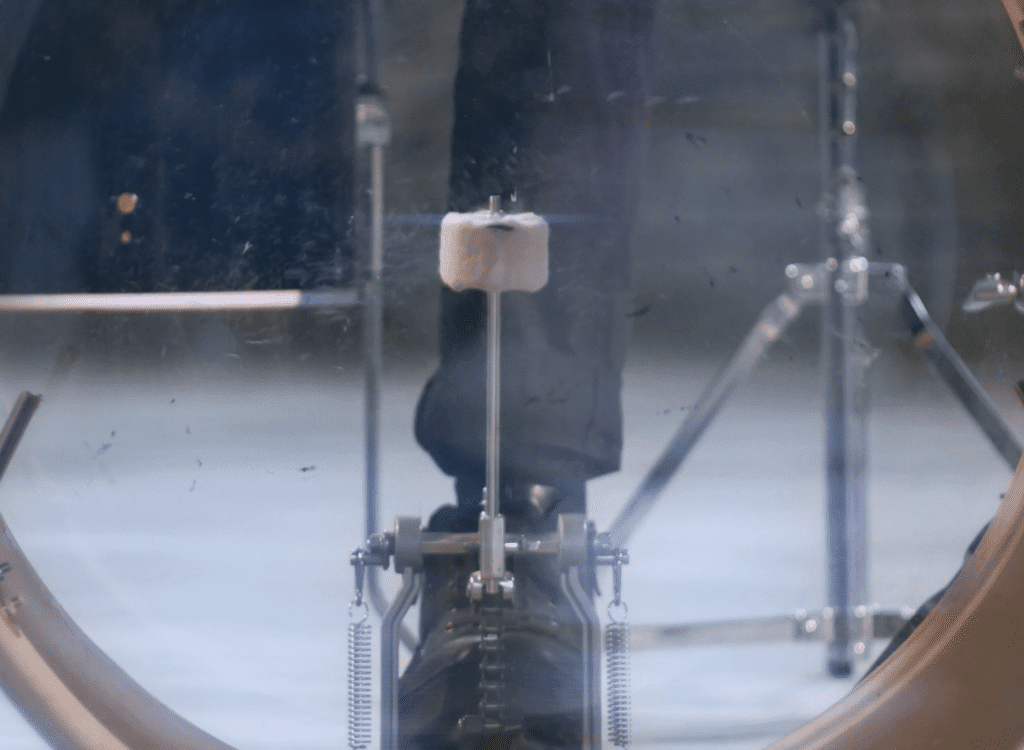
Sometimes the kick and bass can blend together too much. Making them less mono can help.
Typically when I use this technique, I pan the bass guitar or synth to the left 5 ticks and the kick to the right 5 ticks . This will spread the image of the low range frequencies slightly, but not so much that they cause muddiness.
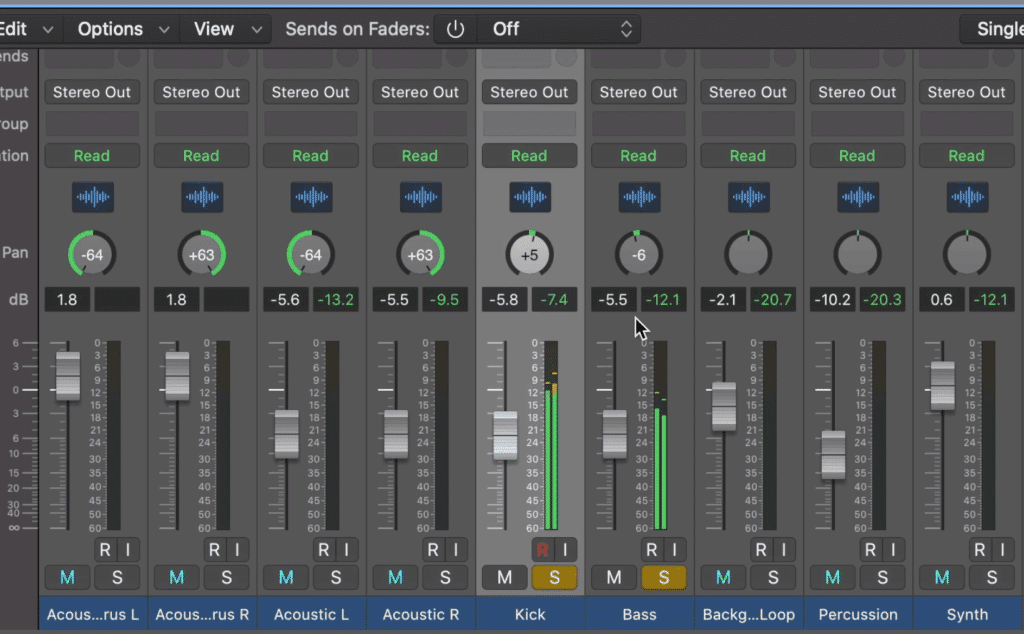
The kick has been panned slightly to the right and the bass has been panned slightly to the left.
Additionally, this panning allows each instrument to occupy a different space, in turn making them more easily discernible.
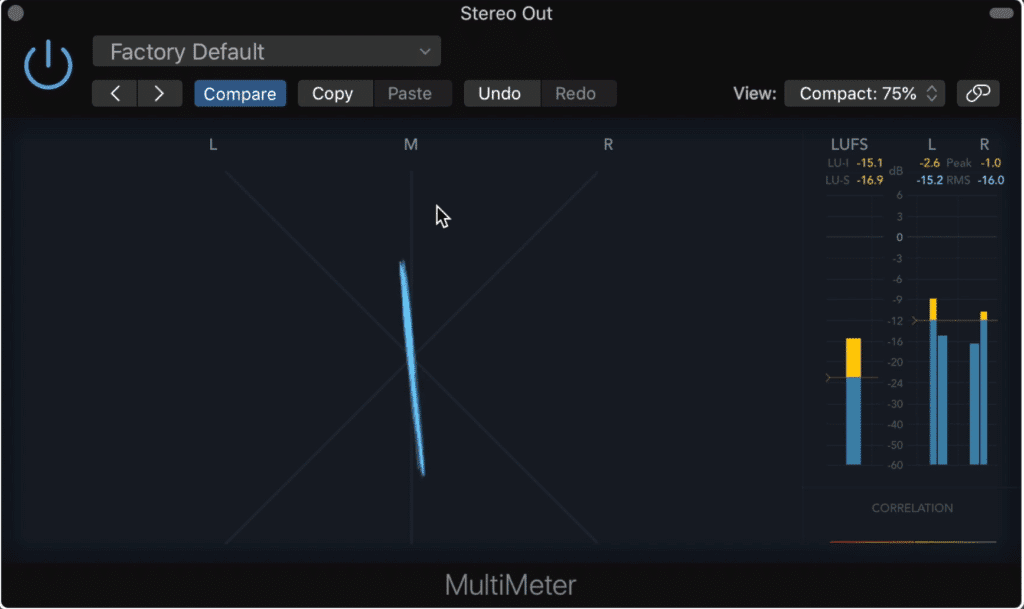
Notice that the image is still almost mono, but not exactly centered.
If you want to learn more about this technique, check out our video and blog post on this topic:
It shows this technique in practice and offers an audio example of it. Keep in mind that the effect is subtle.
Now that we’ve discussed some of the ways we can use traditional panning to affect a mix, let’s discuss some other forms of panning and how they can be implemented when mixing.
What is Psychoacoustic Panning?
Psychoacoustic panning is the use of psychoacoustic effects to reorient the signal in different aspects of the stereo field, or more commonly, to make the listen perceive the signal as coming for a specific direction. One common form of psychoacoustic panning is the Hass effect.
What’s great about making music in the 21st century is how many options we have. Whereas engineers of the past had one or two options for compression, equalization, or panning, we have a plethora of valuable techniques that can augment a typical mix into something truly special.

Psychoacoustic panning takes advantage of certain tricks to cause the sensation of a signal's location.
That’s exactly the case with psychoacoustic panning. Instead of limiting ourselves to traditional pan pots and the 90-degree stereo field, we can explore and expand the stereo image with unique tricks and methods.
Additionally, we can play with perception, in turn adding new dimensions to the stereo field.
With that in mind, let’s cover a few ways psychoacoustic effects can be used, as well as how they work.
Some psychoacoustic panning effects are:
- Spectral Panning
- Haas Effect or Delay Based Panning
- Phase-Based Panning
Let’s discuss these types in detail as well a discuss when they could be used.
How to Use Spectral Panning
Spectral panning is used to evoke a sense of a signal coming from the left or right side and is created by attenuating the high-frequency range of one of the channels. By attenuating the high-frequency range, the signal emulates how the shape of the head blocks sound.
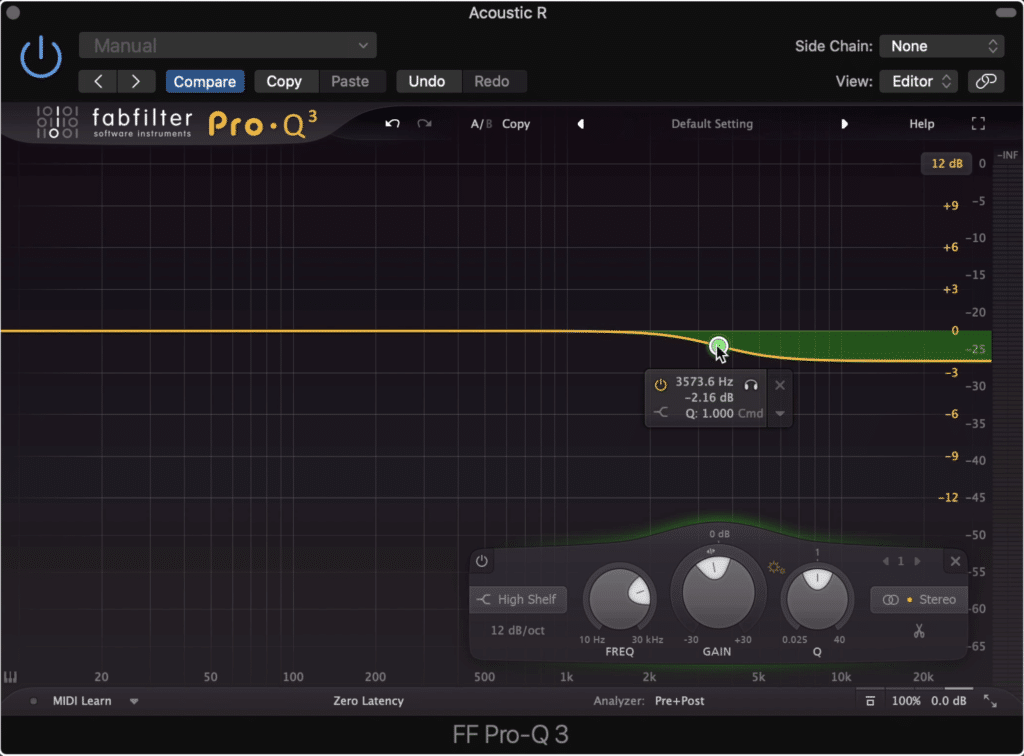
Spectral panning is created by attenuating the high range frequencies.
Essentially, when a sound source is placed on one side of the head, both ears will still hear the sound; however, one ear will hear it more clearly than the other.
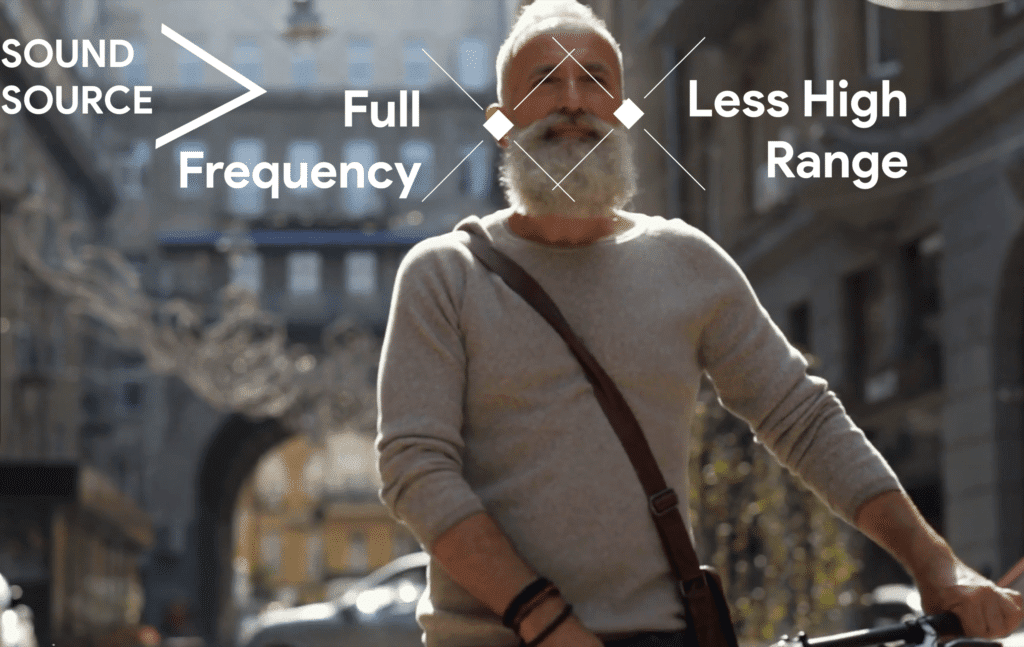
The ear closer to the sound source will hear it with all of its high range frequencies.
The ear closer to the sound source will hear it with its original frequency response, but the other ear will hear the sound with an attenuated high-frequency range. This can be emulated by attenuating the high-frequency range on one side , in turn making it seem like the signal is coming from the other side of the head.
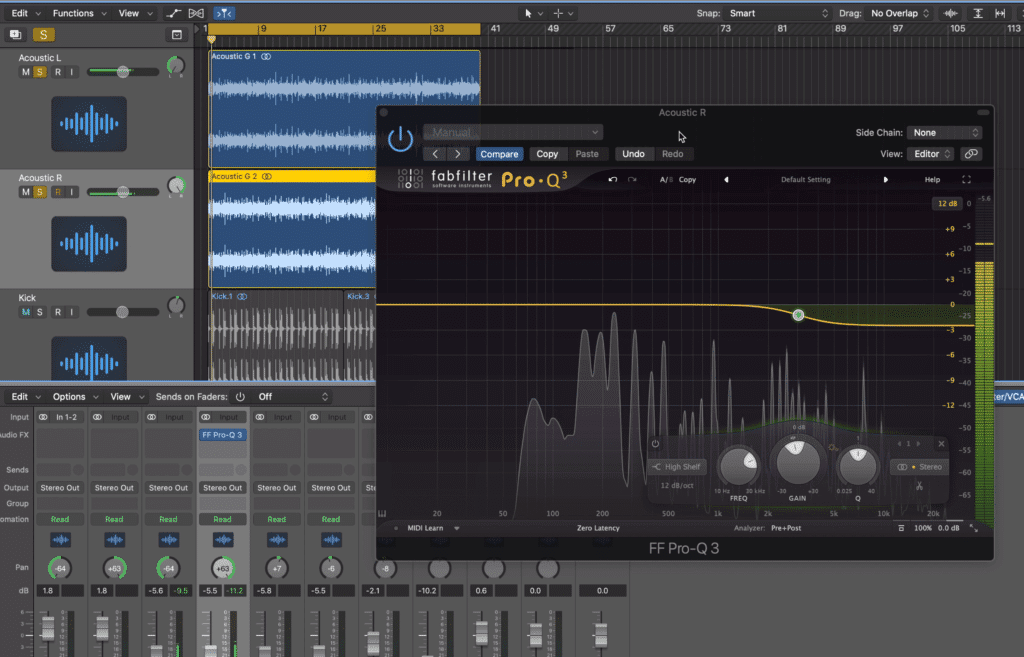
Notice that the signal panned to the right has its high range attenuated. This is to emulate the sensation that it is on the side of the head which is farther away from the sound source,
So if we wanted it to seem like the signal was coming from the left, then the right channels high-range frequency response could be attenuated slightly to mimic the head’s absorption and refraction effect on the sound.
If you are interested in stereo image processing, check out another blog post and video that covers this topic in great detail:
Creating Realistic Panning with Spectral, Level, and Delay Panning
Spectral panning can be combined with traditional panning to create a more realistic and believable effect.
Using these three forms of panning results in the most realistic panning.
Additionally, spectral panning can be combined with very subtle delay-based panning to make the effect even more realistic.
If we consider that the head has a specific diameter, and a distance exists between the ears, then it has to be said with certainty that a sound played on left ear side of the head will arrive at the left ear sooner than it arrives at the right ear (and vice versa).
If we know the speed of sound, and the size of the head or rather, the distance from one ear to the other, we can get an approximation of the delay that exists from one ear to the other.
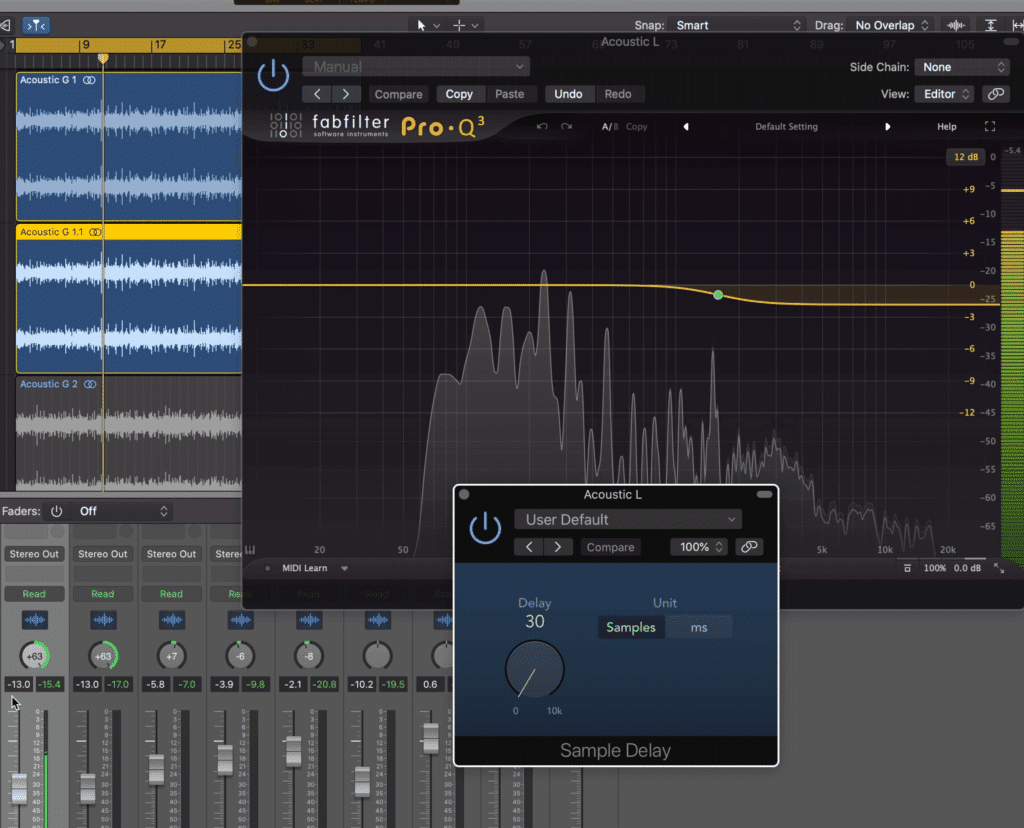
Combining sample delay and equalization works well
If this distance is 21.5cm , then the delay between the left and right ear is 625 microseconds, or 0.625 milliseconds (this will depend on the speed of sound, which changes with air temperature and other factors).
Although most delays don’t allow for times in microseconds, they do allow for delays on a sample by sample basis, meaning that if we found out how many samples were in a microsecond, we would know exactly how many samples to make our delay.
If we’re working in a session with a 48kHz sample rate , that means 48,000 samples are being played every second. By dividing 1 second by this number, we find what each sample takes up.
In a session with a 48kHz sampling rate, each sample is roughly 21 microseconds (more accurately 20.8333 microseconds).
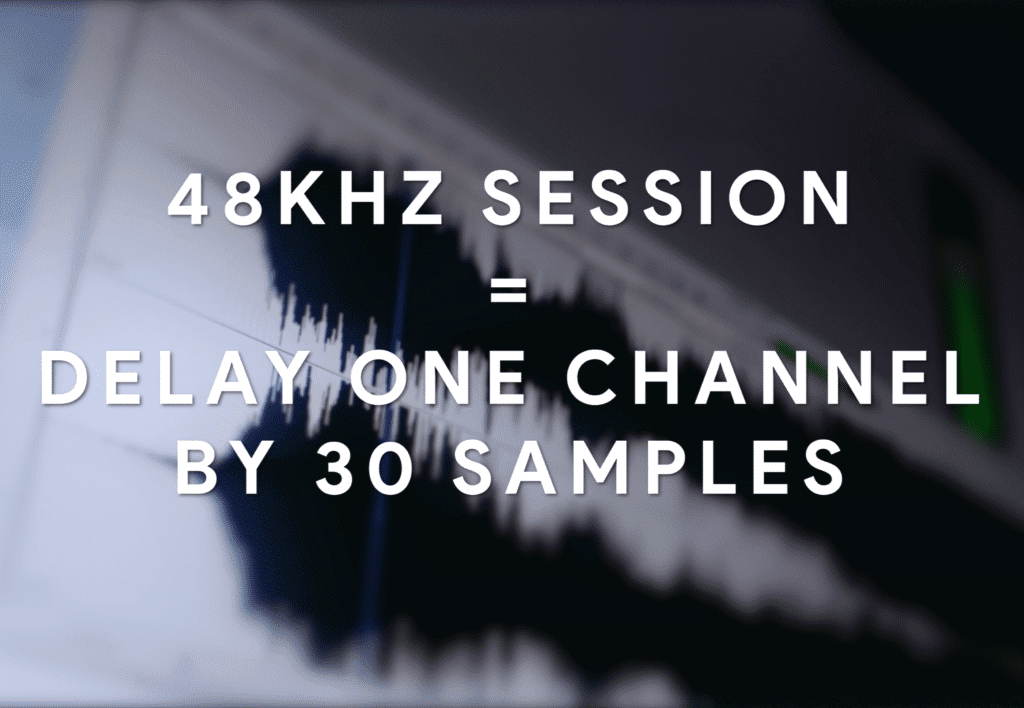
To emulate the delay between your ears, use 30 samples of delay.
This means that the delay between the left and right ear in our example could be emulated by delaying the right channel by roughly 30 samples.
Although this may sound convoluted or more complex than most other audio effects, I guarantee you that combining spectral and level panning, as well as delaying the corresponding channel by 30 samples (in a 48kHz sampling rate session) will lead to some amazing results.
Lastly, if your session is in a 96kHz sampling rate the delay in samples would be roughly 60 ; if your session is in a 44.1kHz sampling rate the delay in samples would be roughly 28.
If you want to learn more about psychoacoustic effects, check out our video and blog post on the topic:
It showcases some other, truly exciting effects that don’t relate to panning but can still make your mixes sound great.
How to Use Delay Panning
Delay panning can be used in a number of ways - from the precedence or Haas effect, to phase cancelation that expands the image into the 180-degree stereo field, delay panning is a versatile tool. To use delay panning, simply delay the left or right channel by a small amount.
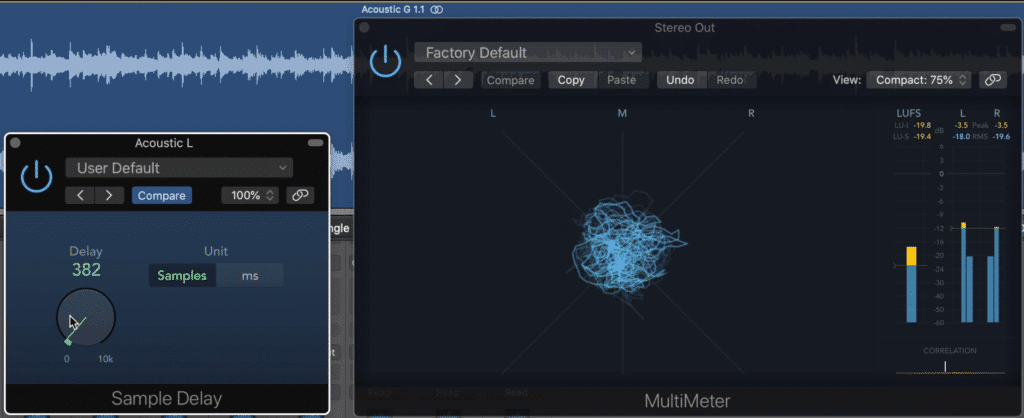
Delay panning allows for significant expansion of the image into the 180-degree stereo field.
You may have noticed that this is similar to what we just discussed with making spectral panning more realistic - and you’re right! The method described is just about the same.
But instead of delaying one channel only enough to emulate the distance between the ears, we can use more delay to create some truly useful phase cancellations and to create the Haas or precedence effect.
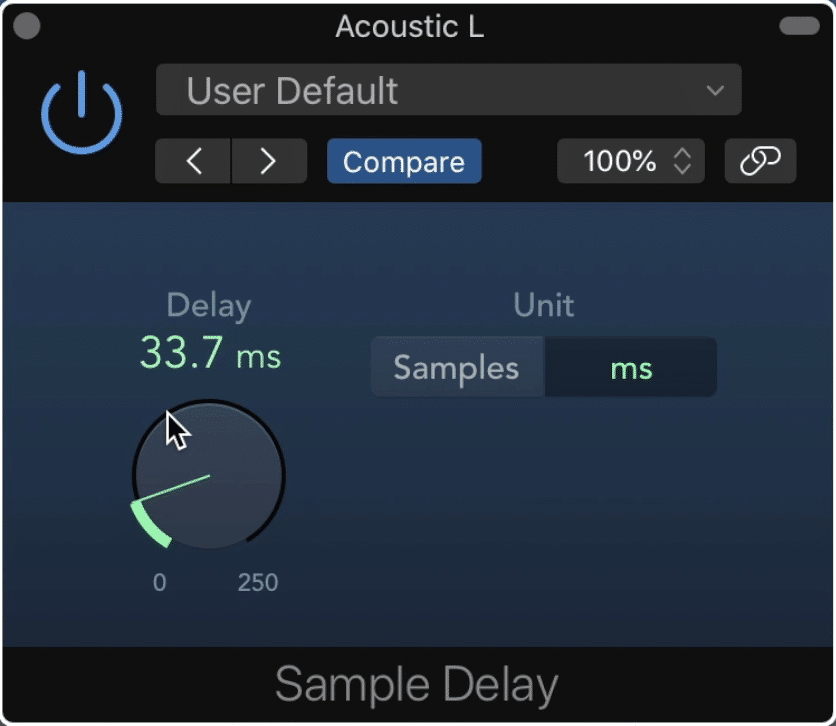
The Haas effect can include a delay up to roughly 35ms before the 2 signals are perceived as separate.
In short, small timing issues between two otherwise identical signals cause phase cancellation and interference. This interference results in a very unique form of panning, in which the signal is spread beyond the 90-degree stereo field, and into the 180-degree stereo field.
This means that to create a truly wide stereo image, using traditional panning isn't enough - you need to include delay panning.
But what is the Precedence or Haas Effect?
The Precedence or Haas Effect is the phenomenon in which two identical signals are played, with one delayed slightly. The two separate signals are perceived as one; however, the one that arrives at the ears first determines the perceived direction or location of the sound source.
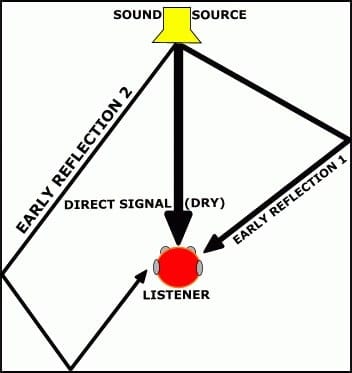
The Haas effect can be used creatively to create perceived sound source direction.
As you may have recognized, this is similar to our example with the shape of the head and the delay between the ears; however, the precedence effect doesn’t need to be a super short amount of time in order to work.
In fact, the delay between the two signals can be up to roughly 30 to 35ms before they’re perceived as separate. With that said, you can use the delay settings a little bit more loosely if you want to create this effect.
How to Use Phase-Based Panning
Phase based panning is very similar to delay based panning in that delay is used to cause phase cancellation and widen the image; however, signal settings cause the signal to spread more towards the left or right channel. Using phase panning needs to be done carefully and intentionally.
When using phase panning, you'll need to monitor it closely to determine if it's creating an image in the direction you want it to.
As we’ve discussed, using delay on two identical signals creates timing differences, and results in the expansion of the signal into the 180-degree field.
But, this expansion doesn’t exactly occur uniformly or evenly amongst the left and right channels.
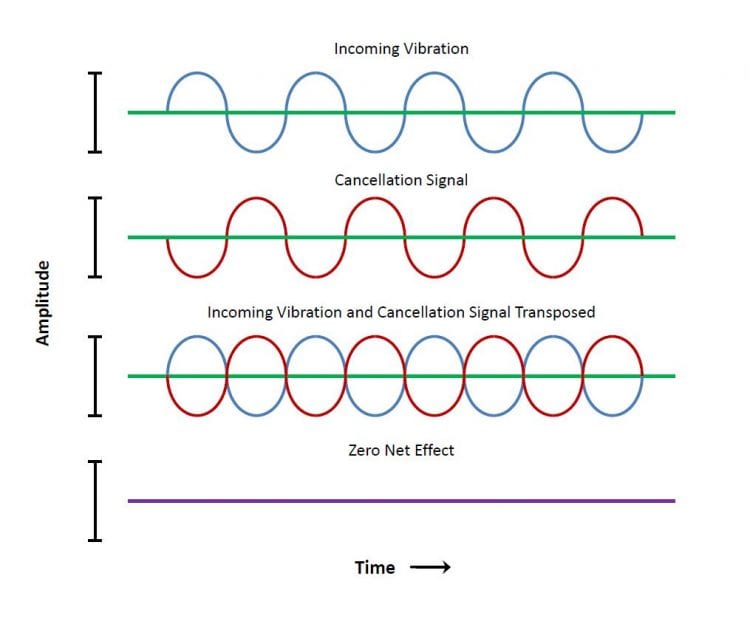
Phase relations between waveforms are constantly changing and result in complex spatial configurations.
As the delay between two identical signals increases, one might expect the signal to get wider and wider; however, the stereo width seems to jump between being oriented more towards the left, right, or center.
With that in mind, certain settings can be used to orient the signal more toward the left and right.
When performing phase panning, use a spectrograph to observe the direction the signal is leaning toward.
If you’re working on widening the stereo image of your mix, and you’d like to hear how mastering would affect it, send it to us here:
We’ll Master it for you and send you a free sample.
How to Use Psychoacoustic Panning in a Mix
Psychoacoustic effects can be used to both make panning sound more realistic, and to make signals sound outrageously unnatural and wide.
With that said, how psychoacoustic effects should be used when mixing truly depends on your intention. Do you want things to sound super-wide, or are you attempting to create a more natural sound?
How you introduce psychoacoustic panning depends on your intentions and the mix you're creating.
If you want to create a more natural sound, it’s best to combine spectral, delay, and level panning in a scientific manner.
But if you want to create something incredibly wide, you can use delay and phase panning to push the signal into the 180-degree stereo field.
Conclusion
Panning can affect a mix in a myriad of ways. If you’re using traditional panning or level panning, you’ll create a sound that’s familiar and easily controllable.
But, if you choose to delve into psychoacoustic panning, a lot more factors will need to be considered.
Whether it’s spectral, delay, phase, level, or a combination of all of these types of panning, a good understanding of spatial relations and some of the science behind it is needed to introduce these effects in a realistic, or at least purposeful way.
Hopefully, understanding of these effects and how they alter your signal will give you a better idea of how panning affects your mix.
If you want to hear you mix mastered professionally, send it to us here:
We’ll Master it for you and send you a free sample for you to review.
How do you use panning?


