Best Mastering Chain with FREE Plugins
Insert 1: MEqualizer - Melda Audio
Insert 2: Dynasaur- Analog Obsession
Insert 3: IVGI2 - Klanghelm
Insert 4: RareSE - Analog Obsession
Insert 5: LoudMax - Thomas Mundt
Insert 6: Limiter No. 6 - Vladislav Goncharov
Mastering is always a rewarding challenge. Sometimes it can take a little longer to accomplish than we hoped for, but it’s nevertheless a learning process.
The mastering chain that we’re showing here will hopefully help expedite your mastering process by providing you with a great chain of Free plugins that you can use.
Keep in mind that each mix is unique and deserves special attention ; however, the mastering chain we’re covering here should give you a good foundation for most mastering sessions.
Also, keep in mind that we’ll be mastering a commercial pop mix here, so we’ll be mastering to roughly an integrated -9 to -8 LUFS.
We’ll cover each plugin that we’re using, discuss why we’re using that plugin and what it does, and then listen to that plugin on the stereo mix to better understand its effect.
If you’re an engineer and you’re looking to have one of your mixes mastered, send it to us here:
We’ll master it for you and send you a free sample to review.
Insert 1: MEqualizer - Melda Audio
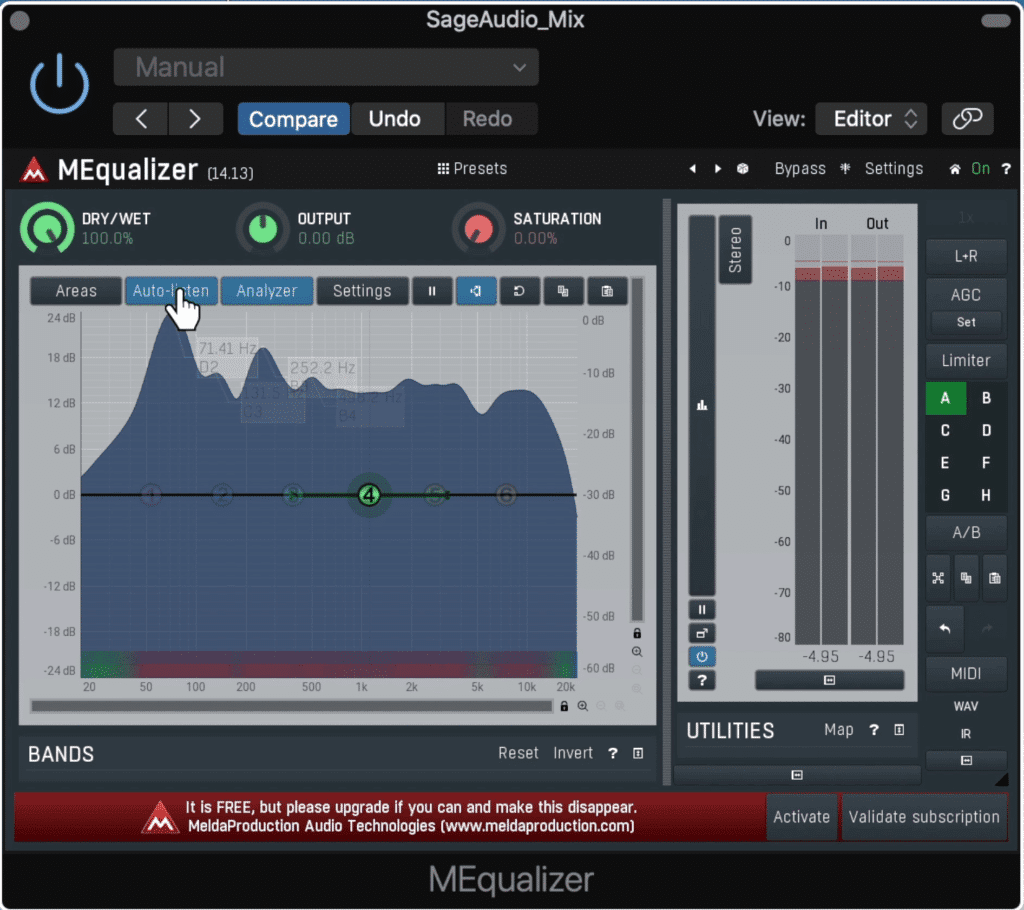
The MEqualizer gives you a surprising amount of freedom for being a free plugin.
Finding a mid-side equalizer when using only free ones is a little bit of a challenge. Fortunately, the MEqualizer is a great option.
What we want to do is use this EQ to attenuate any and all aspects of the signal that we don’t want to be amplified. It definitely helps, then, to be able to isolate the signal’s mid and side image.
We'll be using this equalizer for subtractive equalization.
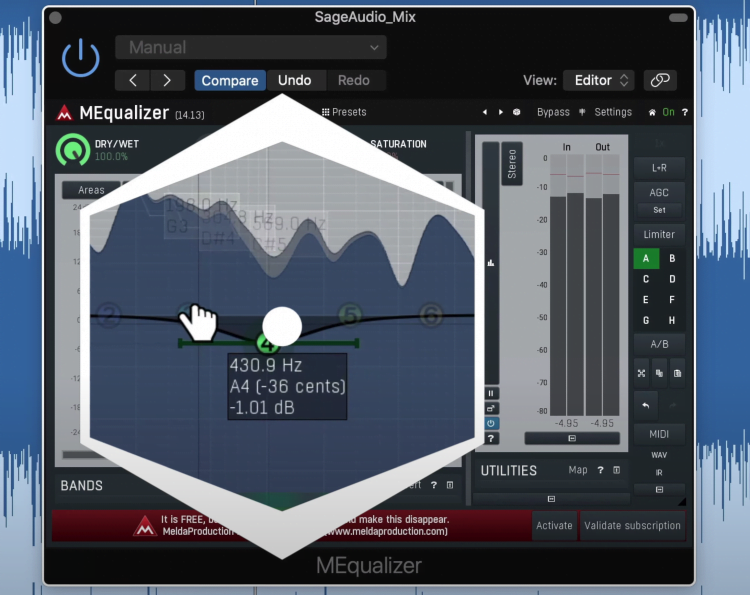
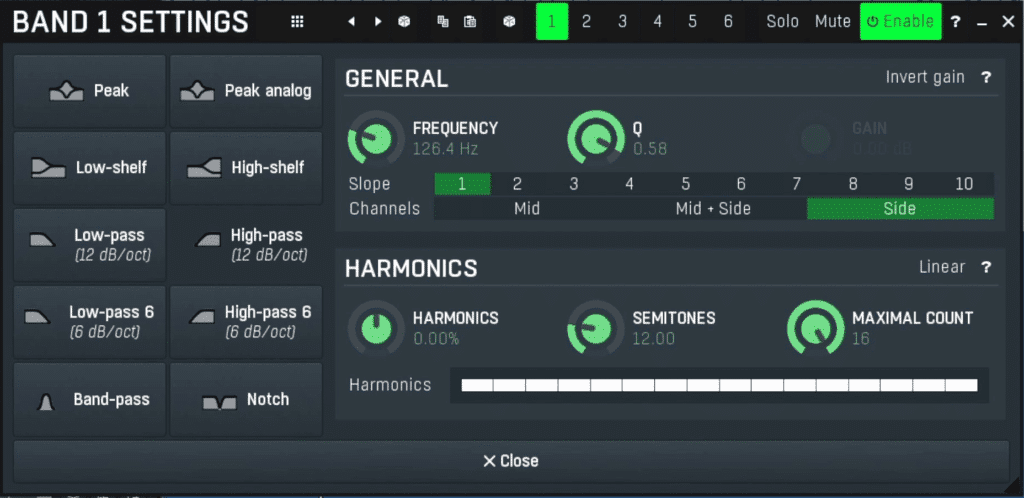
Before creating a filter, the first thing I want to do is go to the toolbar section of the plugin on the right and change its processing from left and right to mid and side. This will allow us to create mid-side filters.
Then, we can create a low pass filter by double-clicking on a filter to enable it, right-clicking, selecting high-pass, and then changing it’s routing to the side image.
In this section I create the high-pass filter and place the filter on the side image.
By doing so we’ve made all of the low frequencies mono, resulting in a more focused and clear low-frequency range. I might do something similar to 2kHz as well, but with a bell filter.
By attenuating 2kHz on the side image slightly, the mono vocal can come through more intensely.
For the best mastering chain with paid-for plugins, watch this video here:
Insert 2: Dynasaur- Analog Obsession
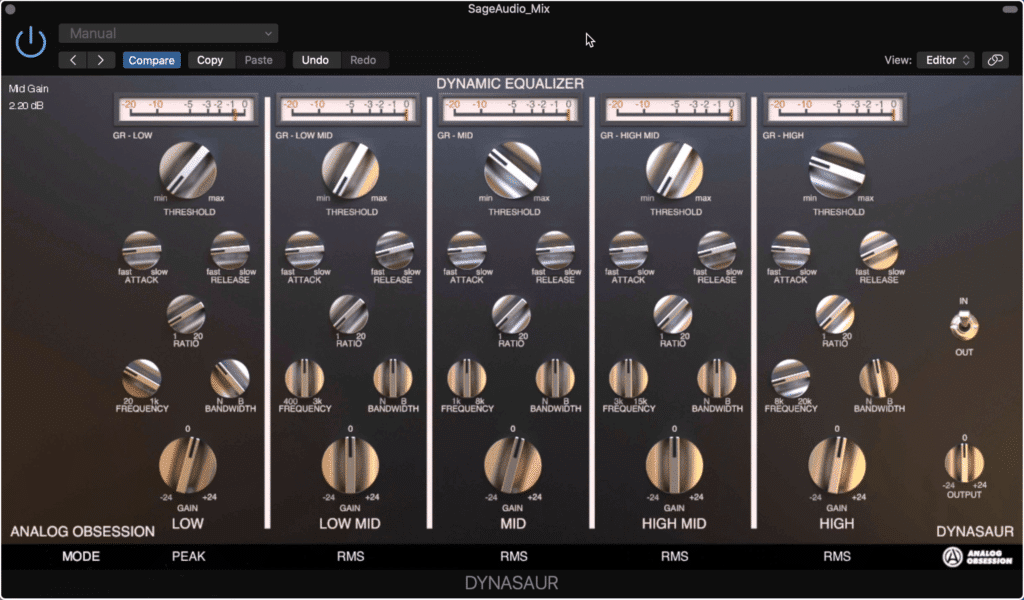
It's rare to find a multi-band compressor that's free. This one is great for mastering.
Analog Obsession makes some great plugins - but not all of them are suitable for mastering. Fortunately, the Dynasaur multi-band compressor is a great free addition to a mastering chain.
By using compression at this point in the signal chain, we’ll control the dynamics before causing any subsequent amplification. I always like to attenuate what I don’t like first to avoid having to try and attenuate it later , after it has been amplified and made more prominent.
I’m going to use this compressor to affect 3 areas of the frequency spectrum: the lows, mids, and highs.
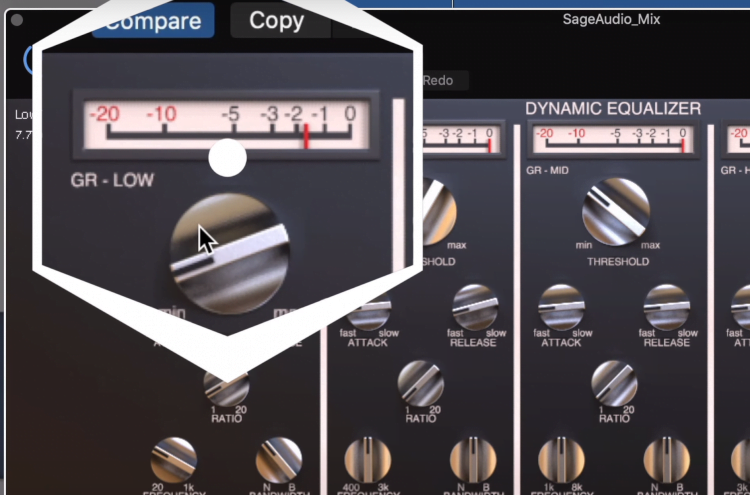
With it I compress the signal slightly, then amplify it with makeup gain.
Using peak detection (which can be alternated at the bottom of the plugin to RMS as well), I’ll very gently attenuate the low-frequency range.
I’ll also set my release time to be in tempo with the track’s BPM to make the compression a little more musical. Then I’ll compensate for the lack of gain by increasing the output gain of that band.
I do the same for the mid and high bands but use RMS detection instead of peak. I find that by doing so, and then amplifying the bands, I achieve a smoother, more glued together sound.
Insert 3: IVGI2 - Klanghelm
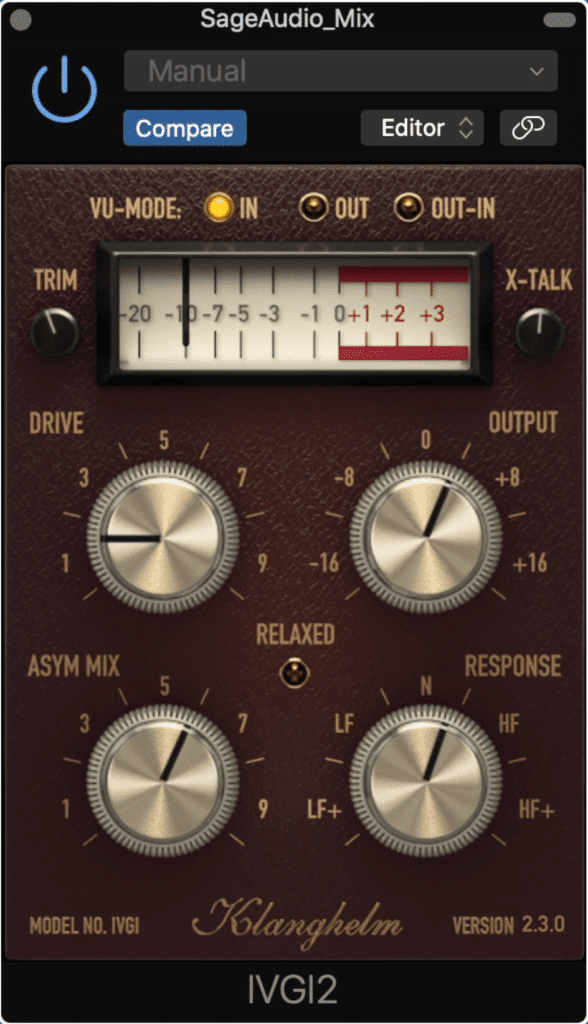
Although not designed for mastering, at low levels, the LGVI2 can be useful.
Finding a free saturator plugin that’s suitable for mastering was difficult, but the IVGI2 is a great option.
With it, I decreased the input slightly with the trim dial, while subtly increasing the crosstalk to widen the stereo image.
From there I increased the drive until the distortion made the track sound full but didn’t become easily perceivable.
I listened intently to how the asymmetrical mix and how the distortion affects the frequency range when altering the frequency response dial.
It’s easy to overuse an effect like this one, since it isn’t specifically designed with mastering in mind, so if you do use it, do so subtly.
Insert 4: RareSE - Analog Obsession
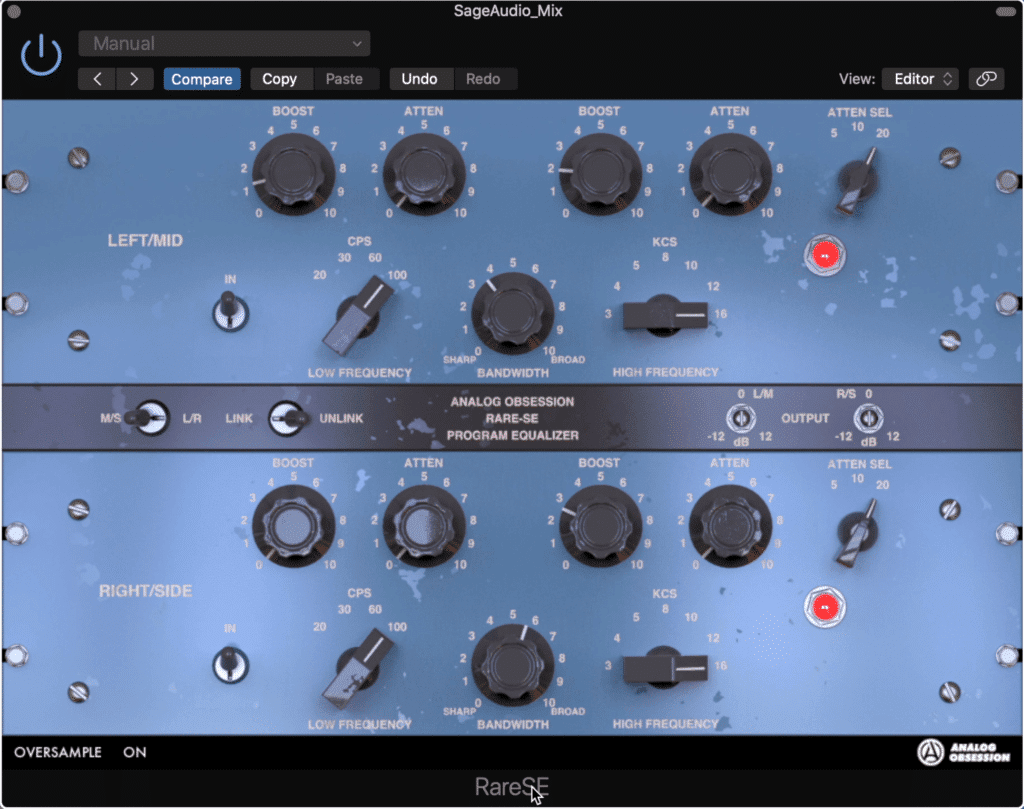
The RareSE is a great free Pultec emulation that utilizes mid-side processing.
Another plugin by Analog Obsession, RareSE is a great Pultec emulation. It’s even more useful considering the mid-side capability that’s been coded in.
The first thing I do is unlink the two channels, and switch the processing from left and right to mid and side.
Then, I boost 100Hz and 16kHz on the mid image. Subsequently, I reduce the bandwidth to a more narrow one to make this effect more precise.
On the side image, I use a more broad band to amplifying the side image somewhat significantly.
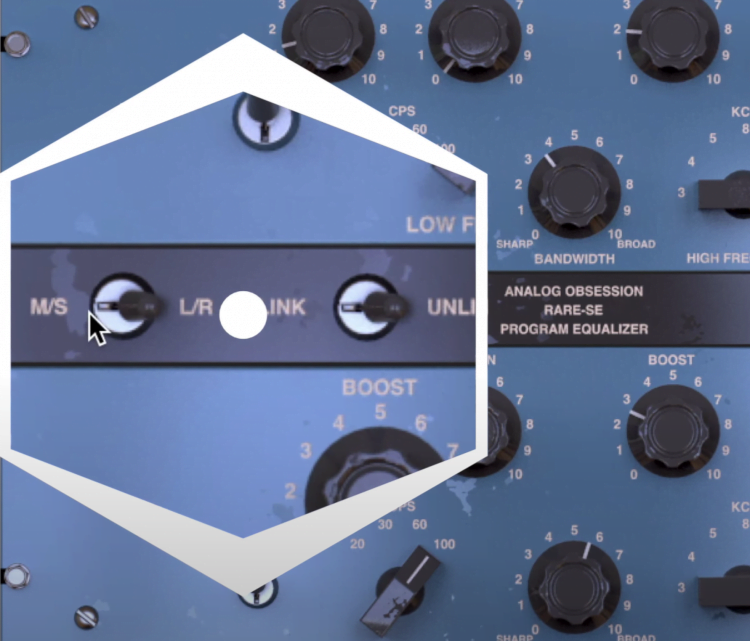
In this section you can change the routing from left/right to mid/side.
Although I didn’t use the overall output gain function, if you wanted, you could adjust the width of your stereo image by altering the gain of the mid and side image.
Lastly, I enabled oversampling, which is a good idea when mastering, since this reduces aliasing distortion.
For more free plugins, check out this video:
Insert 5: LoudMax - Thomas Mundt
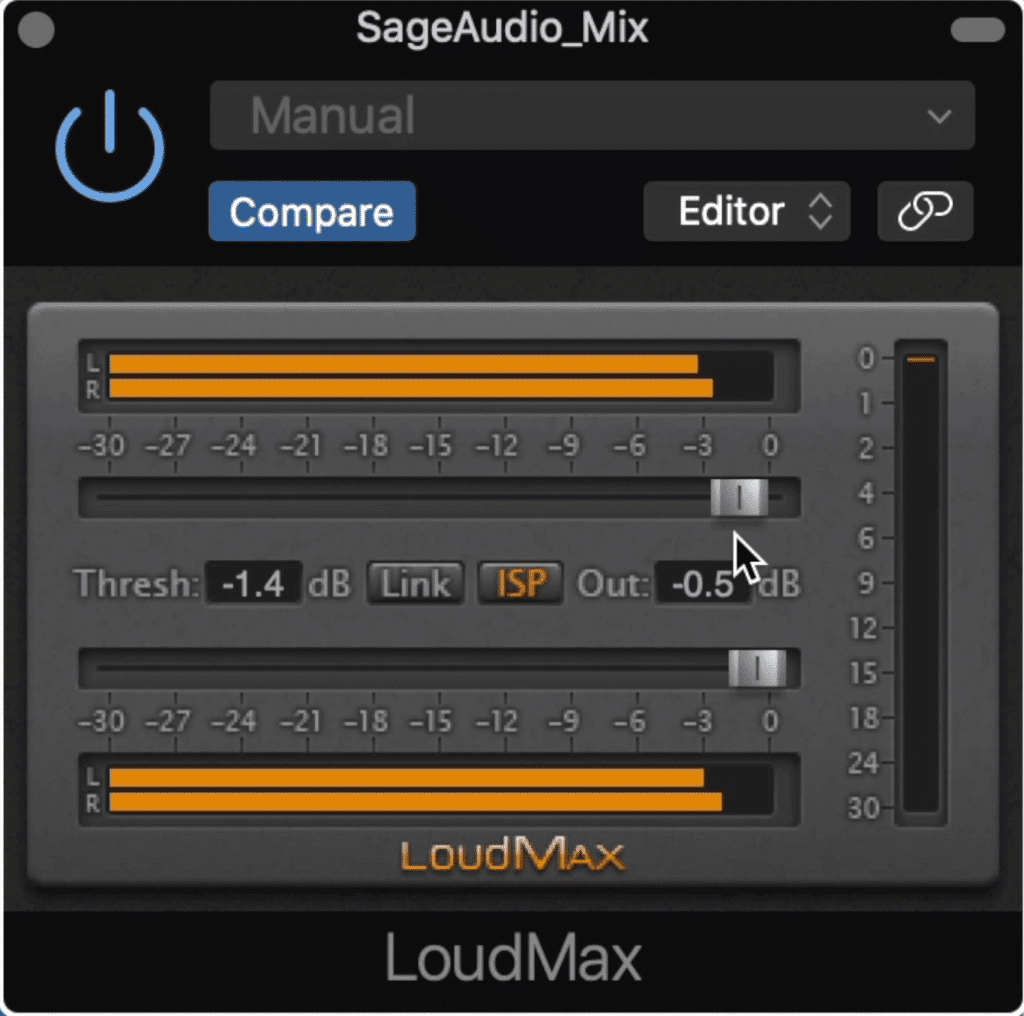
LoudMax is an incredibly clean sounding limiter that uses inter-sample peaking.
Originally, I was going to use a more colorful limiter here, but I found that LoudMax controlled the signal in a very enjoyable and clean way.
Furthermore, it’s inter-sample peak detection was more accurate than most plugins that I came across.
When reducing the plugin’s threshold, an automatic makeup gain function is enabled. This increases the more you reduce the threshold.
I reduced the threshold until I got a couple of dB of attenuation. Then I reduced the output slightly to ensure that no clipping occurred.
Although you could use this plugin as the last one in your chain, I decided to use it as a transition to one more processing stage.
Insert 6: Limiter No. 6 - Vladislav Goncharov
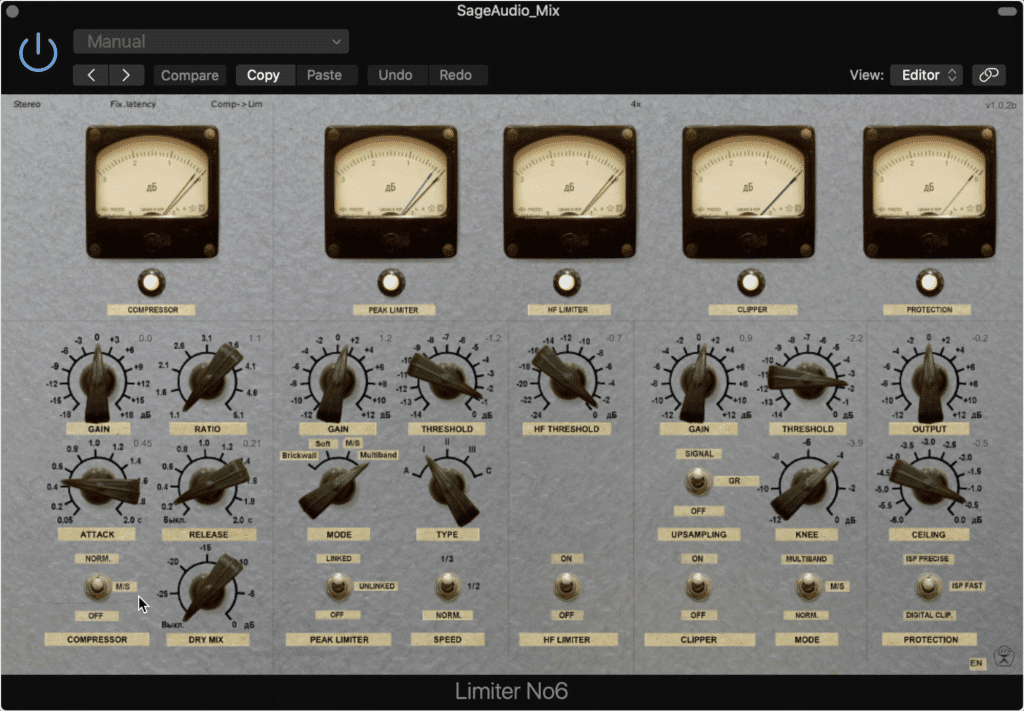
Limiter No.6 has a lot of functionality include a compressor, 2 limiters, a clipper, and an advanced output section.
This last plugin has a lot going on. On the left, I utilized a compressor to very gently attenuate the signal.
I also made this compressor mid-side so that the side image would sound a bit wider when compared to the mid-image.
For the peak limiter, I used the multi-band setting, linked the mid and side channel, and choose a limiter type based on the perceived loudness and amount of distortion.
I made sure to use about 1dB of attenuation so that the effect wasn’t too strong, and since I used a limiter before this stage.
I utilized a high-frequency limiter as well to get even more control over the signal.
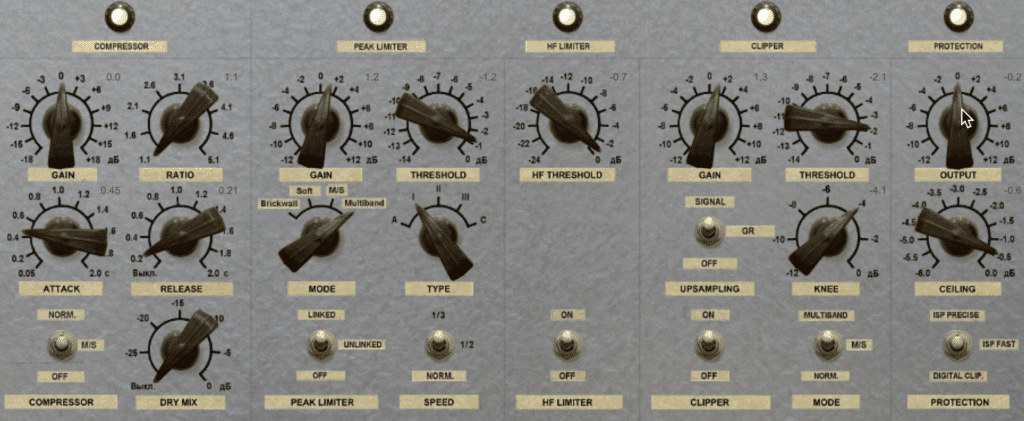
Here's a closer look at some of the processing you can control.
Last up, I decided to use a clipper, which works well on pop tracks. This will shape the waveform prior to it peaking - in turn helping you achieve transient retention.
I used upsampling, a multi-band setting, a relatively soft-knee, and increased the gain of the clipper to get a more aggressive sound.
In the protection section, I turned on inter-sample peaking detection, as well as reduced the ceiling and output slightly.
Lastly, I used 4x oversampling for this plugin, which can be found at the very top of the plugin.
Conclusion
The signal chain shown here isn’t perfect for every genre or mix - but, it does provide the groundwork for a great signal chain comprised of free plugins.
You may not always use every one of these steps, or you may decide to use different plugins,but the concepts shown here and the reasoning behind making certain decisions should help regardless of the setup.
Try this signal chain for yourself and let us know if it improved your master.
If you’re an engineer and you’re looking to have one of your mixes mastered, send it to us here:
We’ll master it for you and send you a free sample to review.


