10 Tips to Create Better Masters
- Know what Medium You’re Mastering For
- Become Familiar with the Genre You’re Mastering
- Start Your Signal Chain with Subtractive Equalization
- Do Not Add any Processing without Knowing What it Is
- Use Plugin Automation to Create a More Dynamic Master
- Low-Level Compression Creates the Sound of Heavy Limiting Without the Clipping Distortion
- Match the Loudness of Vocals When Mastering Multiple Tracks
- Split Limiting Across Two Limiters Instead of One
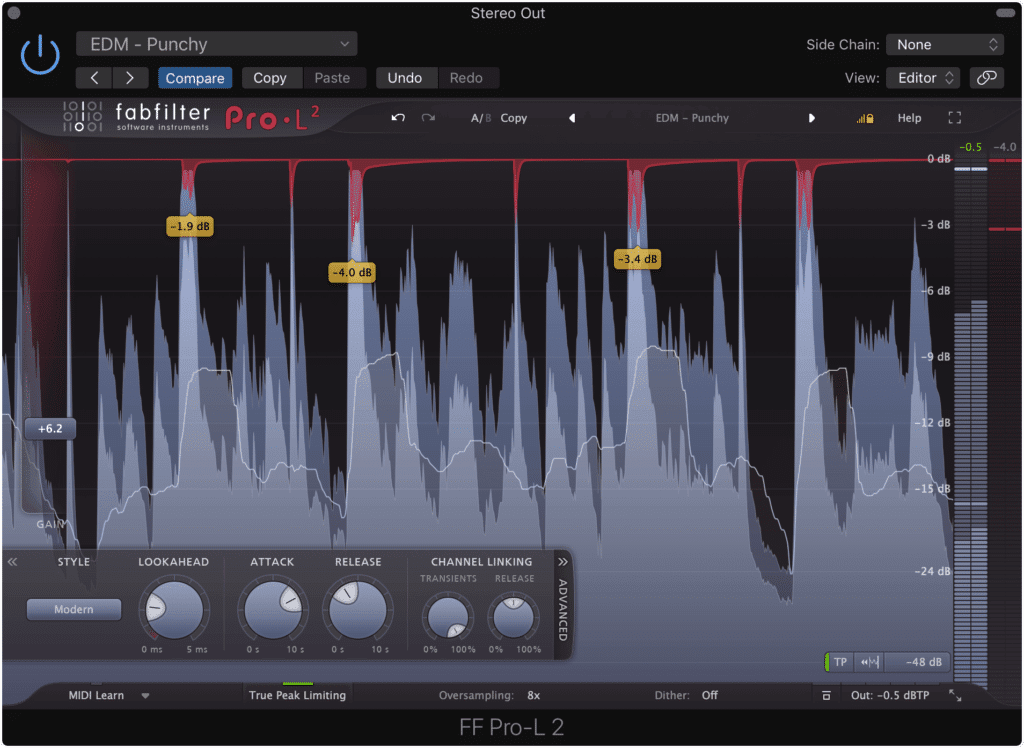
- Set the Output of Your Limiter to -0.5
- Reference Consumer-Grade Earbuds When Mastering
Know What Medium You’re Mastering For

The medium on which your music is distributed changes how the mastering process should be approached.
Although this is becoming less common, mastering for various mediums is still something to consider when you’re performing your mastering session. Are you mastering for vinyl? Maybe streaming? If so, which streaming service are you mastering for?
These are questions that need to be considered before you begin your mastering session. For example, if the artist for which you’re mastering wants to release the track or album on a Vinyl record , a very particular set of technical limitations will affect how you master that track or album.
Or say the artist wants to release the music on Spotify. It helps to know the loudness normalization settings of Spotify (or any streaming service) before you begin to master.

Even the streaming service used calls for specific technical choices to be made during mastering.
The reason being, the more you can tailor the sound of your master to the technical limitations and specifications of the medium it will be played on, the better that master will sound.
One specific example of this can be seen when mastering for Vinyl - if you plan to master an album for vinyl, excessive stereo widening can not be replicated on the medium. So say you used Mid-Side processing on your masters, and widened them a fair amount, the master will lose a good deal of its signal when imparted onto the record.

Vinyl has many technical limitations that need to be taken into consideration during mastering.
This is just one aspect of many that need to be considered when mastering for a particular medium.
If you want to know more about mastering for Vinyl, check out our blog post titled:
In it, you’ll find a step-by-step process for creating a master for vinyl.
Become Familiar with the Genre You’re Mastering

Each genre has unique instrumentation and production elements. This results in a need for a different type of mastering.
Although it seems like this goes without saying, mastering one genre as if its another genre is problematic and lessens the quality of your master. Each genre has specific characteristics that need to be both upheld and made better during mastering.
It’s true that mastering is usually thought of as a more technical endeavor; however, mastering can be and often is highly stylized. This style is often a direct response or inherently tied to the genre being mastered.

Hip-Hop is often mastered differently than most genres. Its exaggerated frequency response calls for different processing.
So for example, a Rap or Hip-Hop master will often include processing that maintains a louder low and high-frequency range. This processing may take the form of a subtle LFO, or it may mean using equalization to amplify the low-end on the Mid channel and the high-end on the side channel.
How this processing is approached truly depends on the track and the sub-genre, but the point is that genre, and what a listener expects to hear when listening to that genre, inevitably influences how a master is performed.
If you intend to master a song that is outside the realm of what you typically master, you should definitely listen to some references and think critically about what makes that genre unique. Doing so may mean the difference between creating a great master, or making something subpar.
If you’d like to learn more about mastering for Rap music (an often-times challenging genre to master), check out our blog post on the topic:
It’s full of great information on what makes the genre unique and how that affects the mastering process.
Start Your Signal Chain with Subtractive Equalization
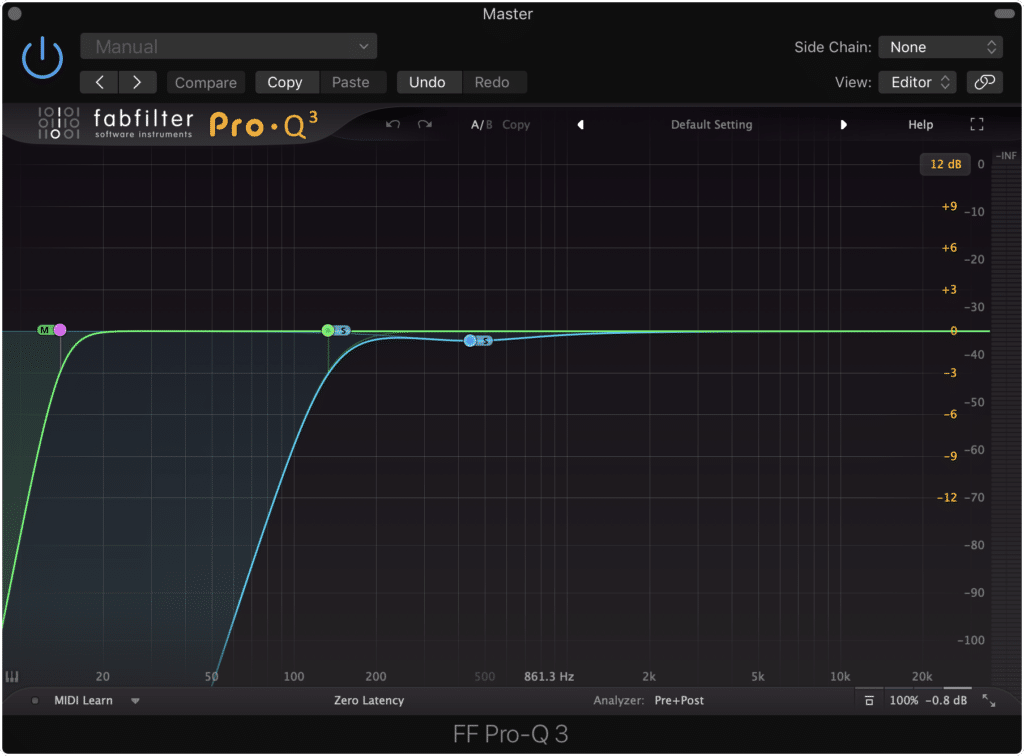
Subtractive EQ allows you to cut out frequencies you don't want prior to additional processing.
This tip may be a little controversial, as all mastering engineers have a unique way to initiate their processing; however, subtractive equalization is arguably one of the better options.
When you start your master with subtractive equalization, you give yourself the opportunity to attenuate aspects of the signal that you perceive shouldn’t be present. This way you can have a clean slate so to speak, and won’t amplify undesirable aspects of the mix.
Additive processing like distortion will cause unwanted aspects of the signal to be amplified.
If you don’t use subtractive equalization as your first step, any additive equalization, compression with make-up gain, distortion, or limiting will amplify undesired frequencies. This will make it more difficult to remove them later on and will necessitate more aggressive and noticeable processing later on.
Even if you begin your signal chain with another attenuation-based form of processing like compression, you’ll still be causing more processing than if you started with subtractive equalization.
The reason being, subtractive equalization reduces the amplitude of the signal, resulting in less signal being fed into the compressor, and subsequently, less compression. The same could not be said if you were to compress and then use subtractive equalization.
Now contrary to this idea, there are some benefits to using more processing or driving more signal into a compressor, distortion plugin, or something of that sort - but generally speaking, minimizing processing to only what is necessary is a good route to take when mastering.
Do Not Add any Processing without Knowing What That Processing Is
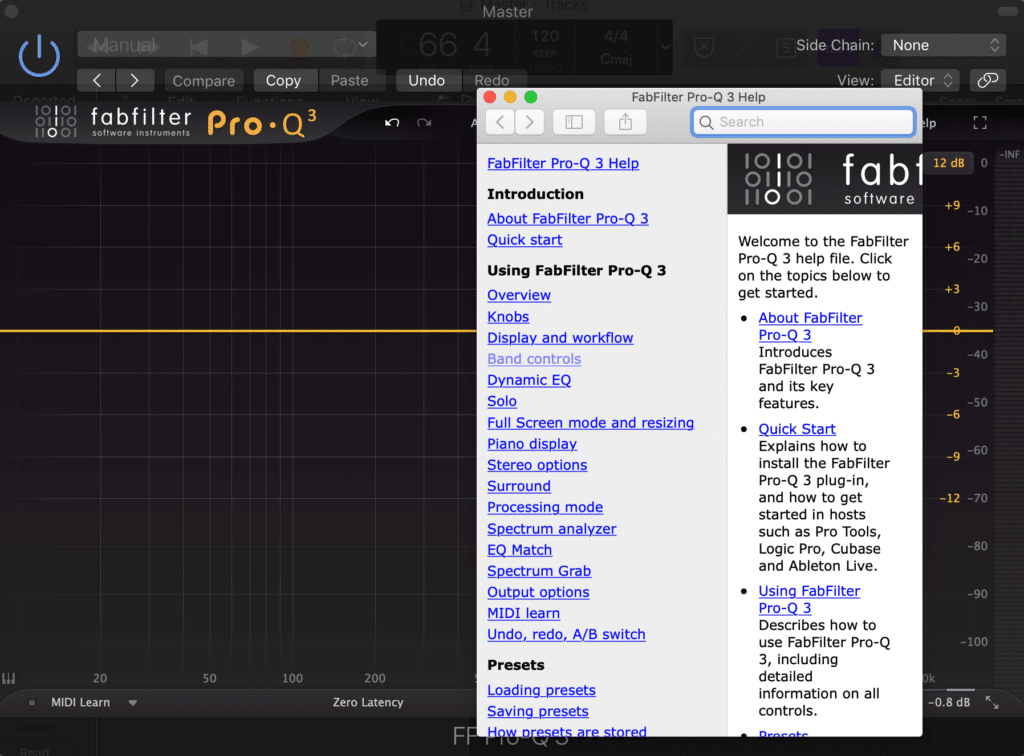
Always read the manual to determine what plugin functions are doing.
This one seems a bit obvious, but this is still something we’ve all done on occasion. Instead of knowing exactly what we’re doing to a signal, we speculate and make assumptions about what processing we’re performing.
Now, I’m certainly not advocating against experimentation - simply saying that mastering should be performed with a certain sense of intentionality. If you aren’t certain how you’re affecting your signal, then how intentional can your choices be?
Manuals are becoming increasingly easy to find online or in the plugin itself.
With that said, it never hurts to read the manual of your hardware or plugins. Fortunately,this is becoming increasingly easy , as most plugins offer in-depth manuals either in the plugins themselves or online.
If you’d like to learn how to access various manuals for your plugins, check out our blog post on the topic:
Although not the most attractive topic, researching plugin settings and functionality will no doubt make you a better engineer.
Also if you’d like to hear your mix mastered using solely analog equipment, send it to us here:
Use Plugin Automation to Create a More Exciting Master
Automating when mastering can add a lot of unique character to a master.
Automation and mastering aren’t often discussed in tandem, but implementing plugin automation, as well as volume automation into your masters can truly add some dynamics to what would be an otherwise static sound.
Using plugin automation is just as easy as using volume or pan automation. You access plugin automation in the same manner that you access volume automation.
Once you’ve enabled automation, you’ll notice a list of all the various functions you can affect using automation.
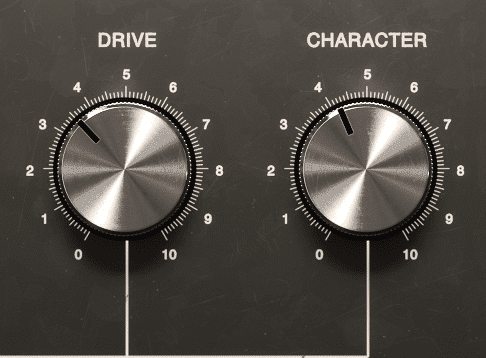
The Drive of a harmonics plugin is often a good function to automate during mastering
Some common functions that are automated are:
- The gain of a limiter
- The drive or saturation function of an analog emulator
By automating just these two functions, you can accomplish a lot.
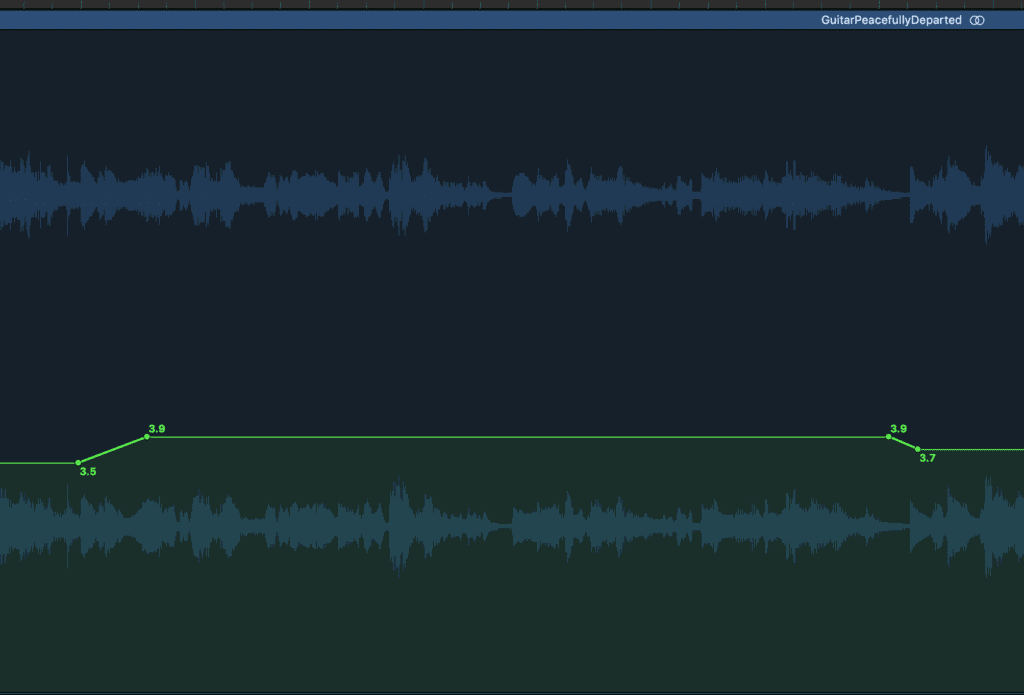
For example, if you want the last chorus of a song to stand out or have more impact, you could increase the gain of the limiter by 0.5dB. This will cause this section to stand out.
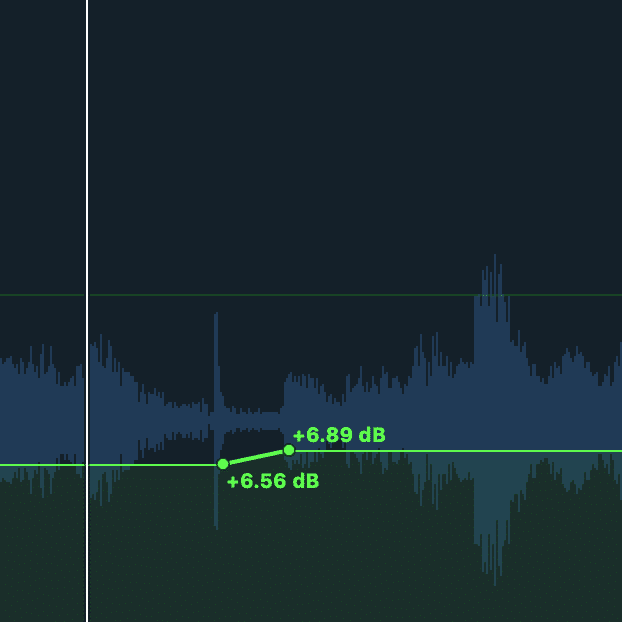
Increasing the gain of your limiter by a small amount during the last chorus can help that chorus stand out.
Or, say you’d like a quieter section to have a little more character - you could increase the amount of saturation, resulting in a fuller, more complex sound.
Now, these are just a couple of options for how you can affect your master using automation, but with a little imagination, you can create new and exciting forms of processing.
If you’d like to see a little more about how plugin automation is performed, check out our blog post that covers that topic:
Near the end of the video, you’ll see how plugin automation is performed.
Low-Level Compression Creates the Sound of Heavy Limiting Without the Clipping Distortion
Parallel compression allows for low-level compression.
Heavy limiting and its role in mastering have definitely been the cause of much discussion and consternation amongst artists, engineers, and audiophiles alike - but sometimes, it just sounds good.
The reason being, heavy compression causes low-level or practically imperceivable aspects of the instrument or mix to be pushed upward , and made almost as loud as the transients. As a result, the detail that would have otherwise been lost due to masking can now be distinguished and enjoyed.
Notice how pushing the gain function upward causes louder transients to be truncated, and quieter parts of the signal to become louder.
This isn't without some repercussions - the primary offense being clipping distortion that causes unwanted and unpleasant sounding high-order harmonic generation. But fortunately, there are a couple of ways to achieve this full and complex sound without resorting to heavy limiting.
The first and more common way to accomplish this sound (other than by using heavy limiting) is with parallel compression. When using parallel compression, you can employ heavy compression and make-up gain settings, and then slowly and gradually introduce the compressed signal to your original signal.
This parallel compression works by attenuating transients and then amplifying lower-level aspects of the signal with make-up gain. In short, it accomplishes low-level compression without clipping distortion.
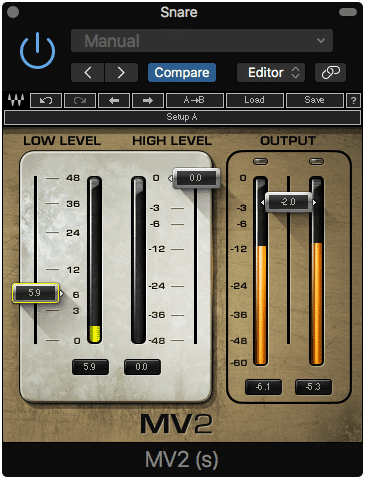
A low-level compressor plugin can have a similar effect to parallel compression.
The second way is by using a low-level compression plugin like the Waves MV2. This plugin, and others like it, work by identify low-level signals, compressing them, and then amplifying them.
The final sound of using a low-level compression plugin is similar to using parallel compression.
Match the Loudness of Vocals When Mastering Multiple Tracks

Match the loudness of the vocals amongst multiple masters. This creates a more balanced sound.
When mastering, loudness is typically thought of in terms of an integrated LUFS - but using the perceived loudness of the vocal to determine and establish loudness across multiple tracks is an incredibly helpful trick.
The reason this works so well is that listeners first identify with (and listen most intently to) the vocals. If the loudness of the vocals is balanced amongst multiple tracks in an EP or album, the overall loudness will sound balanced.

Listeners will often perceive a master with a louder vocal track as the louder track overall.
This means that if two tracks have the same integrated LUFS, but one has a quieter vocal and one a louder vocal, the track with the louder vocal will be perceived as louder overall.
Although this may complicate things slightly (as it would be easier to simply match the LUFS of multiple tracks) using the loudness of the vocal is your best bet for achieving a uniform perceived loudness across an EP, album, or double-track single release.
If you have a mix or mixes that need to be perceived at a consistent loudness, send it to us here:
We’ll master it for you and send you a sample for you to review.
Split Limiting Across Two Limiters Instead of One
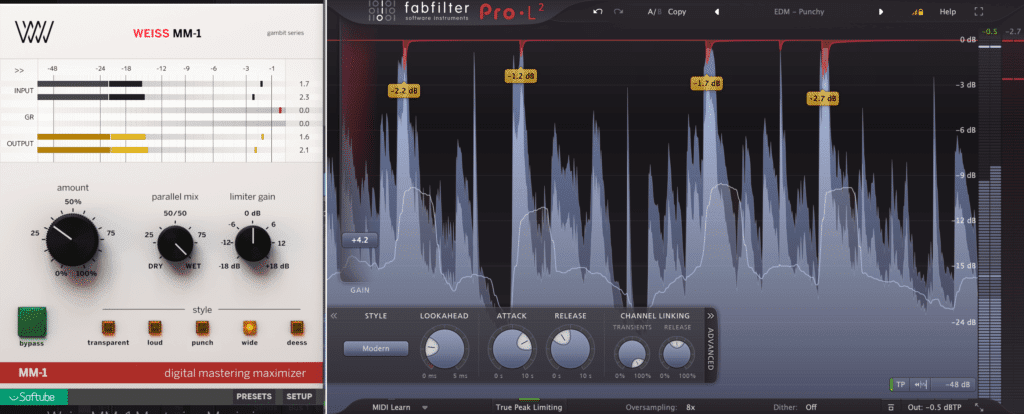
Using two limiters back-to-back helps lessen the load of the processing applied.
Splitting processing amongst multiple similar plugins or pieces or hardware is nothing new, but it isn’t often used when limiting. Despite this, using 2 limiters instead of one can maintain the quality of your master.
The reason being, if you use one limiter excessively, the processing will become noticeable - especially if that limiter employs any form of harmonic generation, or unexpected artifacts when pushed.
If you use only one limiter, excessive processing will push that limiter, and make it more easily perceived.
By splitting this processing across two limiters, you can accomplish the same amount of processing , but without driving one plugin to an excessive extent.
Try this technique for yourself and see if you notice a difference.
Furthermore, this same technique can be used for other forms of processing as well, especially traditional compression during mixing.
Set the Output of Your Limiter to -0.5dB
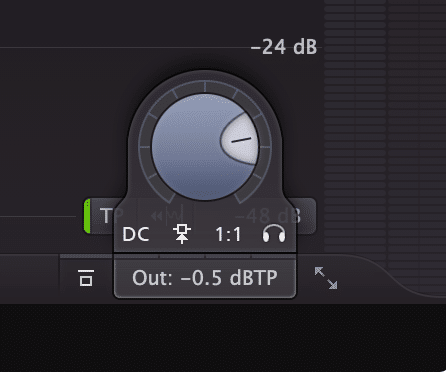
Find your limiter's output and set it to -.5dB
More times than not, the output of a limiter is left a 0dB. This is alright in some circumstances, but if the level of your signal is hitting your limiter’s ceiling, it’s best to lower the limiter’s output by a small amount.
If you don’t, you risk having inter-sample clipping distortion during playback , or clipping distortion after the encoding process.
With that said, setting the output of your limiter to roughly -0.5 is particularly important if you intend to have your music on a streaming service, or online in general. When you deliver your PCM file (WAV or AIFF file) for distribution, that file is converted to a lossy file (MP3, AAC, OGG file).

Your master will be encoded during the streaming process.
This process can cause small changes in the amplitude of the recording. So if you have a master that is peaking at 0dB, any positive amplitude change that occurs during encoding will cause clipping distortion.
If you want to learn some more ways you can check if your track is clipping during encoding, check out our blog post that details this process:
It showcases some of the tools Apple provides that allow you to determine and monitor your track for clipping.
But, if you’d prefer to not have to monitor your master for clipping, the best bet to avoid it is to simply reduce the output of your last limiter. This way, any minute changes that occur to the amplitude during encoding will push the signal into non-clipping territory.
Reference Consumer-Grade Earbuds When Mastering

Earbuds help you understand how consumers are listening to your music
We all have our favorite or go-to monitors. This is completely understandable, as its good to become accustomed to the sound of a particular speaker system.
But it definitely doesn’t hurt to add consumer-grade earbuds into the equation - the better you understand how your music is being listened to, the better you can make it sound.

Having a good set of reference monitors is great, but it helps to diversify
For example, sibilance often sounds more excessive on earphones than it does over a loudspeaker system. The reason being, room acoustics disperse and lessen the effect of sibilance - this process doesn’t play a role in music listened to with headphones or earphones.

Room acoustics help to disperse sibilance.
With that said, it’s wise to check how your master sounds on the most popular consumer-grade speaker system prior to sending it to the artist or to distribution.
Although listening to your master on multiple sets of speakers and headphones can be overwhelming (as each set will provide you with a unique and varied signal ) making a master sound great on all of them is a good indication your master is finished.
If you can make your master sound great on consumer-grade equipment - especially the most popular and commonly used equipment, then you’ve provided the majority of music listeners with a good listening experience.
Conclusion
The tips listed here are by no means the only things you need to consider when mastering - but they do provide some help to engineers that have been mastering for a little while.

The tips provided should help you make better-sounding masters
Each one of the tips provided has been gathered over the years, by observing various mastering engineers, listening to their perspective on mastering and watching their work.
Try combining some of these tips with your current mastering process and see if you notice a positive change in the quality of your masters.
If you’d like to hear a mix of yours mastered with analog equipment and with some of the tips listed here, send it to us here:
We’ll master it for you and send you a sample for you to review.
What mastering tips have you come across?


