Mastering for Bluegrass Music
Quick Answer
Mastering for Bluegrass music is all about balancing an impressive sound that plays back well on all listening devices, with maintaining a natural sound. When mastering for bluegrass music it’s imperative that certain processing is used to maintain a natural sound indicative of other bluegrass masters.
Mastering for Bluegrass Music in Detail
At first glance, mastering a bluegrass track or album may seem simple enough - the thought being ‘How hard is it to make something sound natural?’

Mastering bluegrass music is a difficult balance between making an impressive sound and keeping it sounding natural.
But in actuality accomplishing a natural sound that sounds present and impressive is a difficult balancing act that only experienced professionals can truly accomplish.
Granted, there are many talented engineers that have been mastering for a little while that can no doubt accomplish a great bluegrass master. With that in mind, let’s cover some different forms of processing and how they can be used when mastering bluegrass.
With this info, you can make your bluegrass master sound impressive yet natural.
The forms of processing we’ll be covering include equalization, compression, analog saturation via plugin emulations, mid-side stereo imaging, and limiting.
We’ll also consider things like ideal overall loudness for your bluegrass master. Lastly, we’ll listen to an example of a bluegrass mix being master (in the video above) so we can better understand how all of this processing ties together.
If you have a bluegrass mix that you’d like to hear mastered then send it to us here:
We’ll master it for you and send you a free mastered sample for you to review.
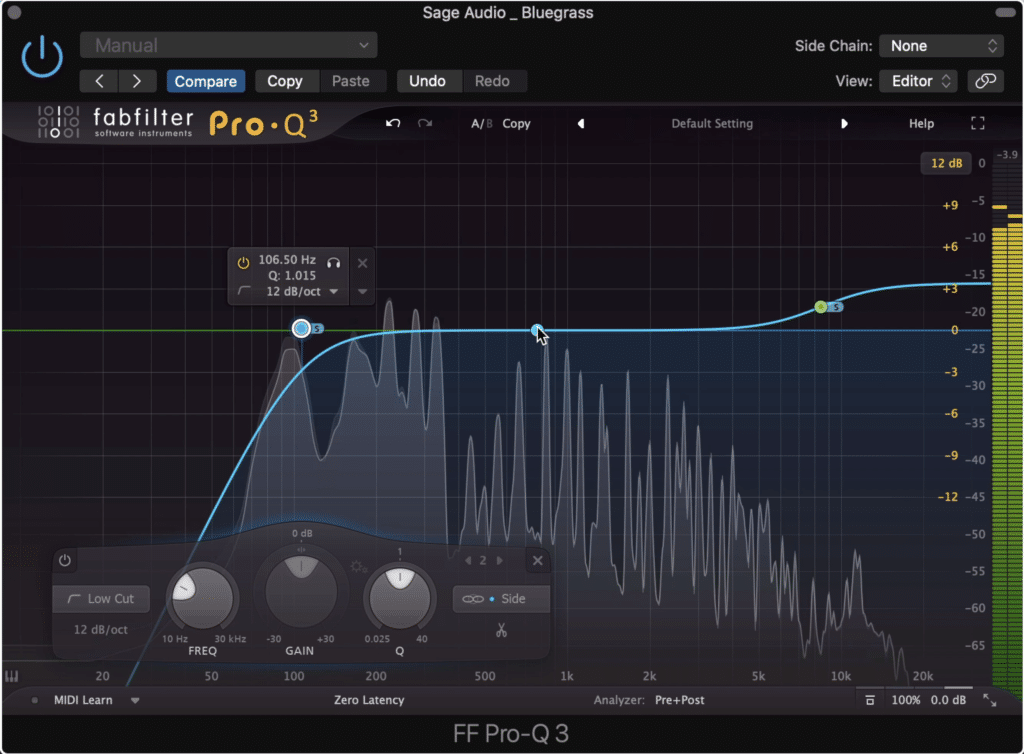
How to Equalize a Bluegrass Master
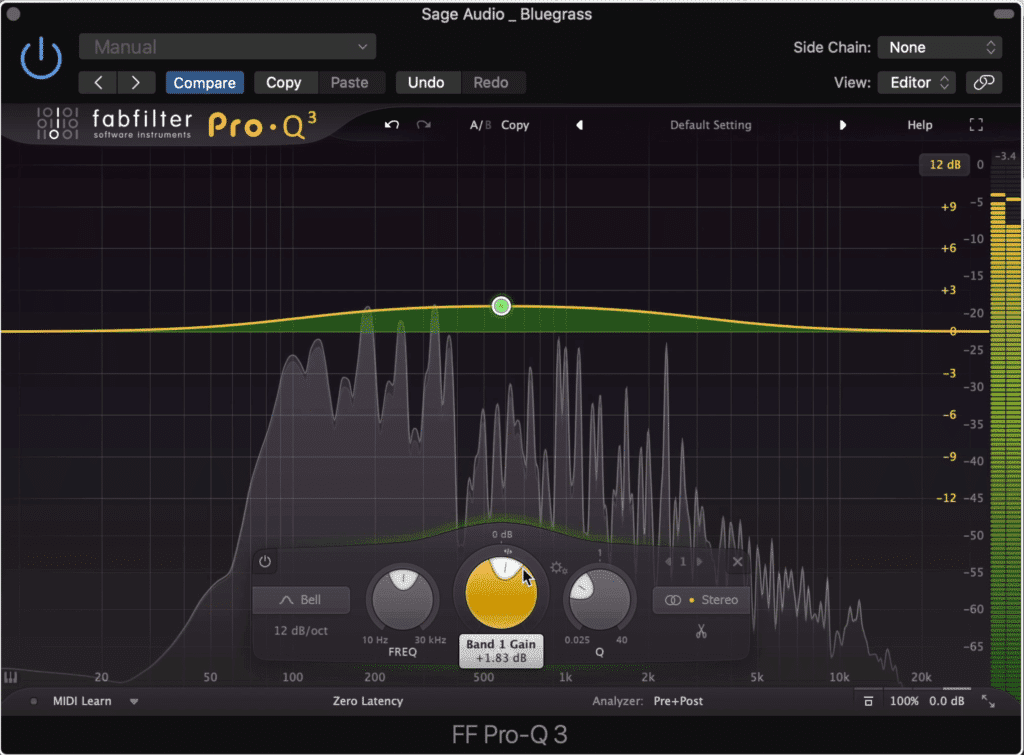
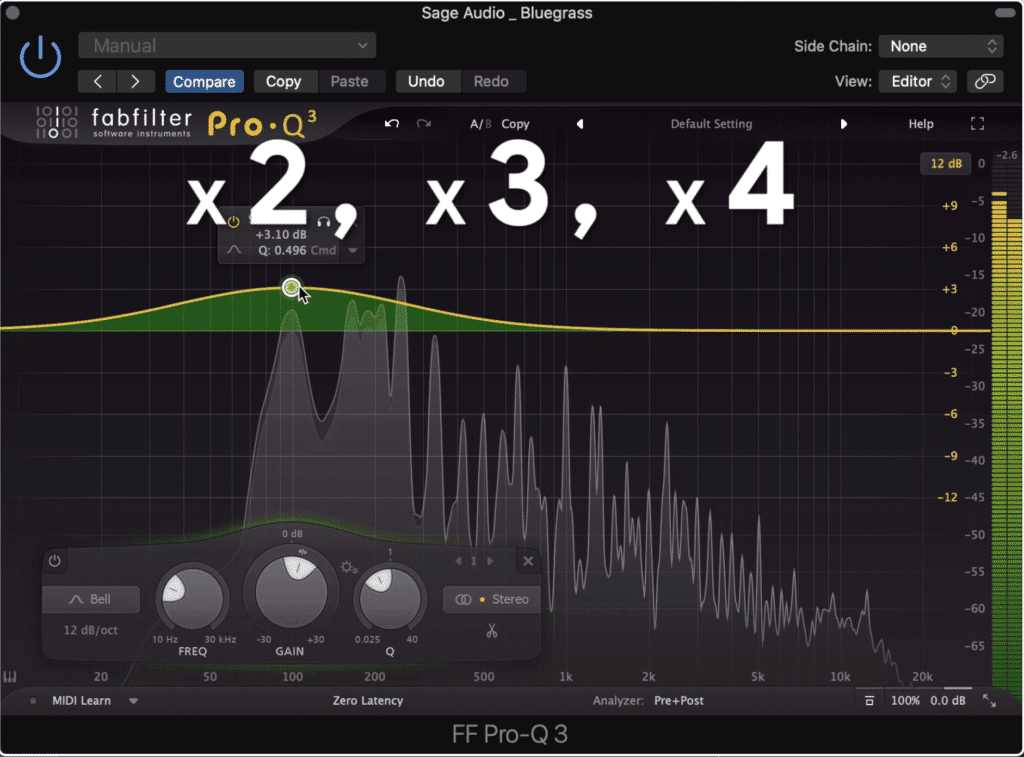
When equalizing a bluegrass master it’s important that any equalization you apply is done so sparingly, or at the very least, in a natural-sounding way. To accomplish natural-sounding equalization use more broad bandwidths or Q’s, and avoid changes to the frequency spectrum greater than 3dB.
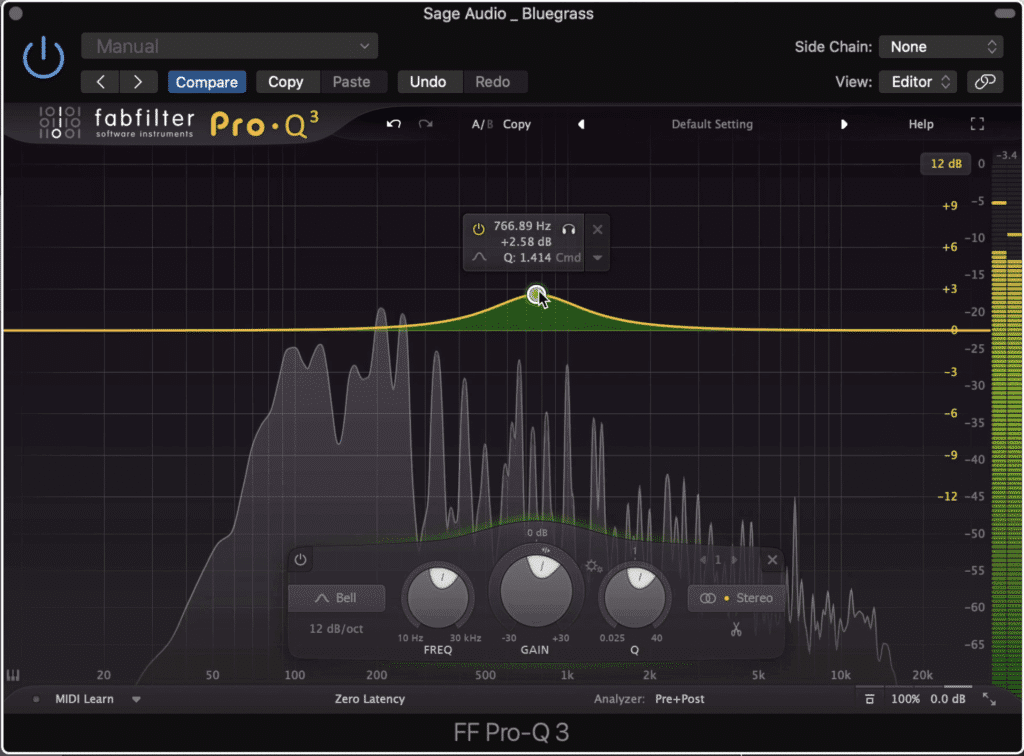
When equalizing a bluegrass master changes greater than 3dB shouldn't be made.
Only changing the frequency by 3dB is easy enough, but how do you accomplish natural-sounding equalization?
The simplest way, as mentioned above, is to just use a lower Q value/a larger bandwidth. Changes to the frequency spectrum made with a larger bandwidth sound more natural for a few reasons.
Why Larger Bandwidths Sound More Natural:
- Large or Wide Bandwidths more closely emulates eq shifts in human hearing
- EQ Changes with a Narrow Bandwidth create frequencies responses that don’t or rarely occur naturally
- Large or Wide Bandwidths don’t require aggressive phase cancellation to create
For these reasons and probably some more that I’m missing, larger or wider and relaxed bandwidths sound more natural.
Larger bandwidths sound more natural and can be utilized when mastering bluegrass music.
In other words, there is very little about an EQ shift performed with a large bandwidth that causes a listener to take notice or sense that something isn’t quite right.
But let’s take this a step farther and make our EQ sound even more natural.
By making setting our Q values to create bandwidths of an octave, 2 octaves, or any other octave-based interval, we can create a much more musical sounding EQ curve.
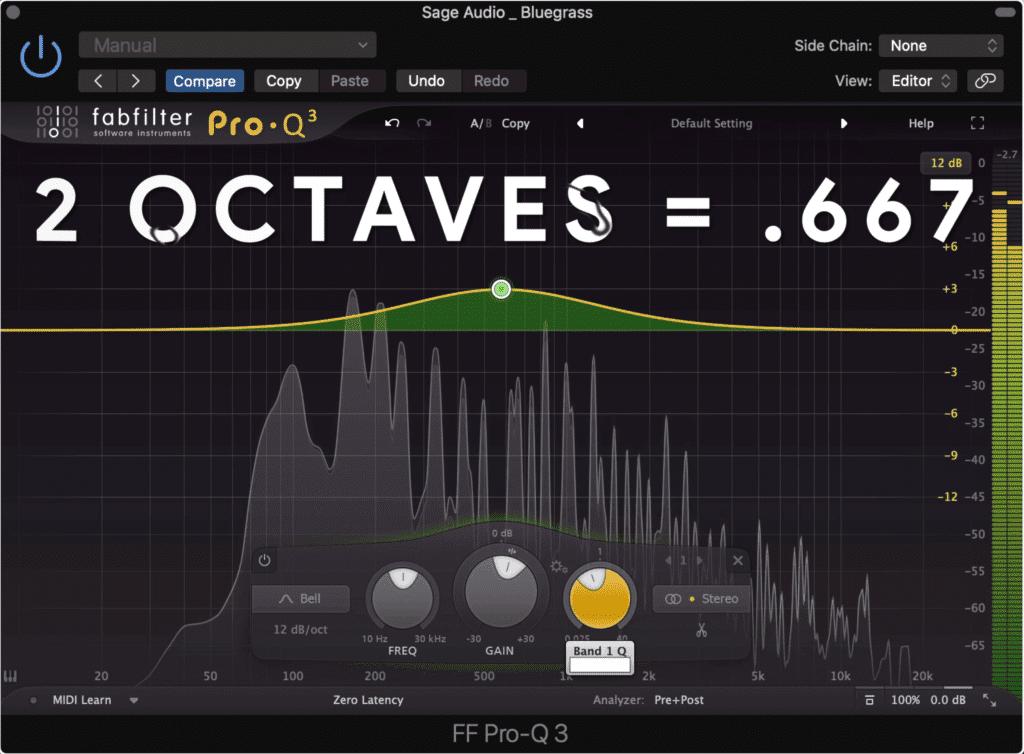
The bandwidth can be set to octave based settings.
Here’s a list of Octave-Based Q Settings:
- 2 Octaves - .667
- 1 Octave - 1.414
- 1/2 Octave - 2.971
- 1/3 Octave - 4.86
- 1/4 Octave - 5.76
- 1/8 Octave - 11.54
Again, using the larger bandwidth/lower Q value settings will result in more natural-sounding equalization.
Additionally, if you know the key of your master, you can set the center frequency of your bandwidth to harmonics of the fundamental frequency (when appropriate).
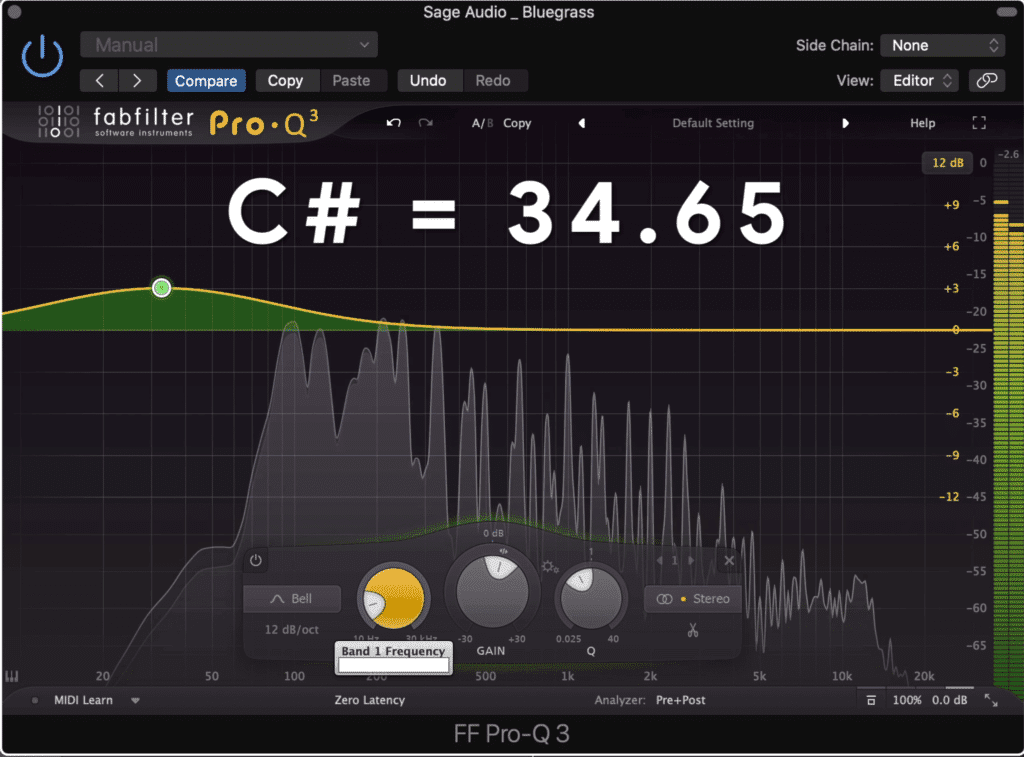
The frequency of the band can be set to the key of the song.
Here are the Fundamental Frequencies of a recording based on its Key:
- Key of C = 32.70Hz
- Key of C# = 34.65Hz
- Key of D = 36.71Hz
- Key of D# = 38.89Hz
- Key of E = 41.20Hz
- Key of F = 43.65Hz
- Key of F# = 46.25Hz
- Key of G = 49.00Hz
- Key of G# = 51.91Hz
- Key of A = 55.00Hz
- Key of A# = 58.27Hz
- Key of B = 61.74Hz
Harmonics are simply the multiples of these numbers so all you need to do to find the2nd, 3rd, 4th order harmonic or so on is multiply by 2, 3, 4, respectively.
Harmonics of the fundamental frequency can be found with whole-number multiples.
By centering your bandwidth on a harmonic of the fundamental frequency of the song, you’ll make your master sound more musical.
Try combining these two techniques to see if it makes your masters sound more natural and more indicative of other bluegrass masters.
How to Compress a Bluegrass Master
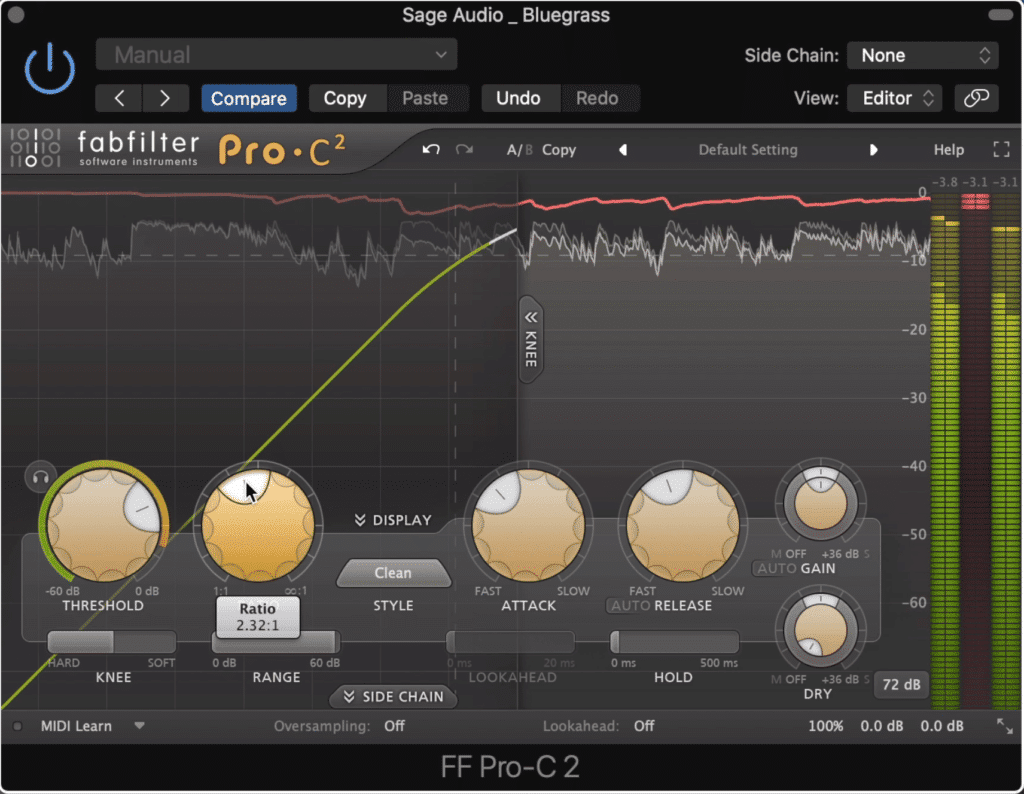
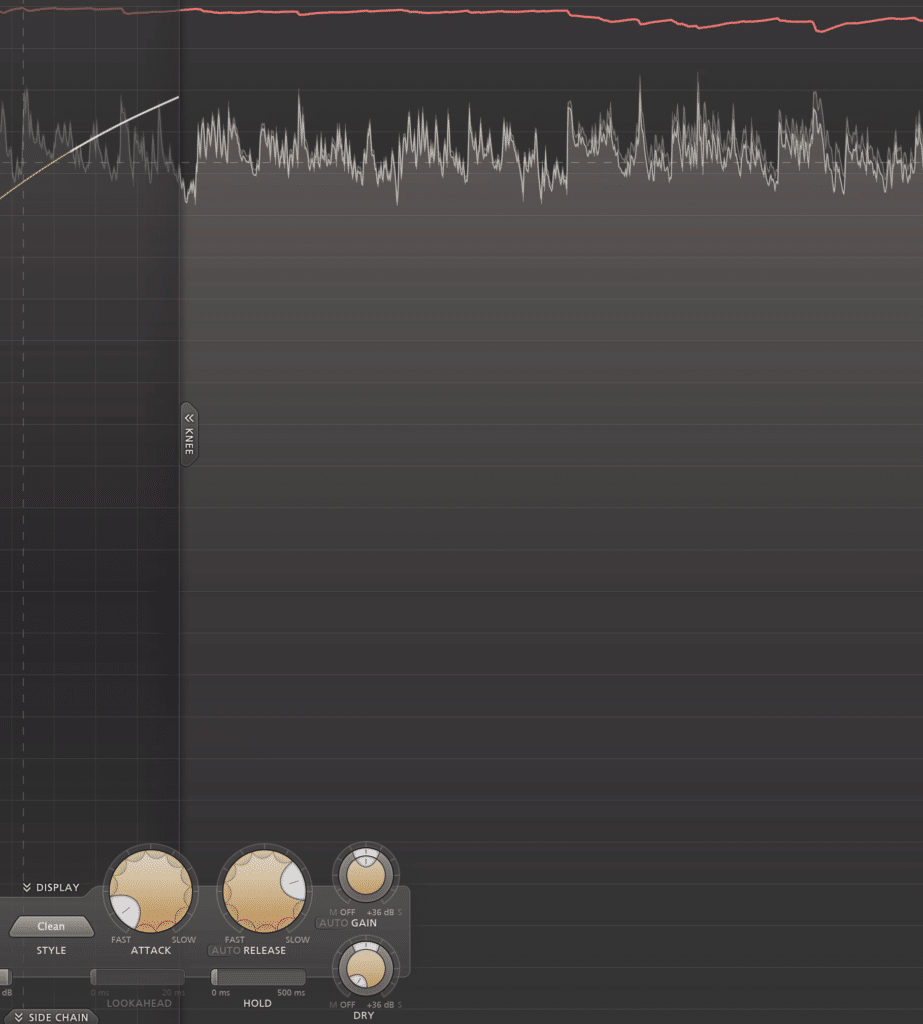
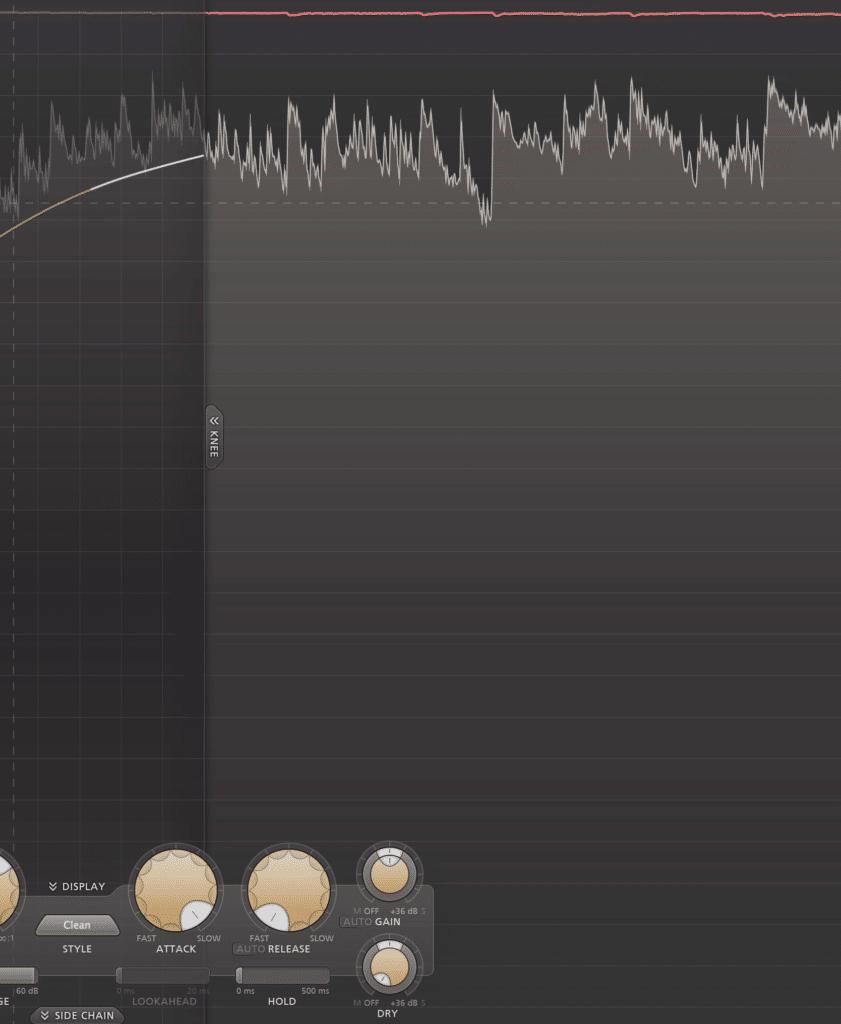
When using compression on a bluegrass master, it’s important to use particular settings that allow transients to pass through relatively unaffected. Additionally, the attack and release can be set in time with the tempo of your recording to make the compression sound more natural and musical.
Compression plays a huge role in establishing the tone of a master
First, let’s cover certain attack and release settings and consider what they mean for the timbre of the track. Additionally, we’ll consider a form of compression called optical compression and how that too affects the timbre of a master.
So how do attack and release affect a bluegrass master?
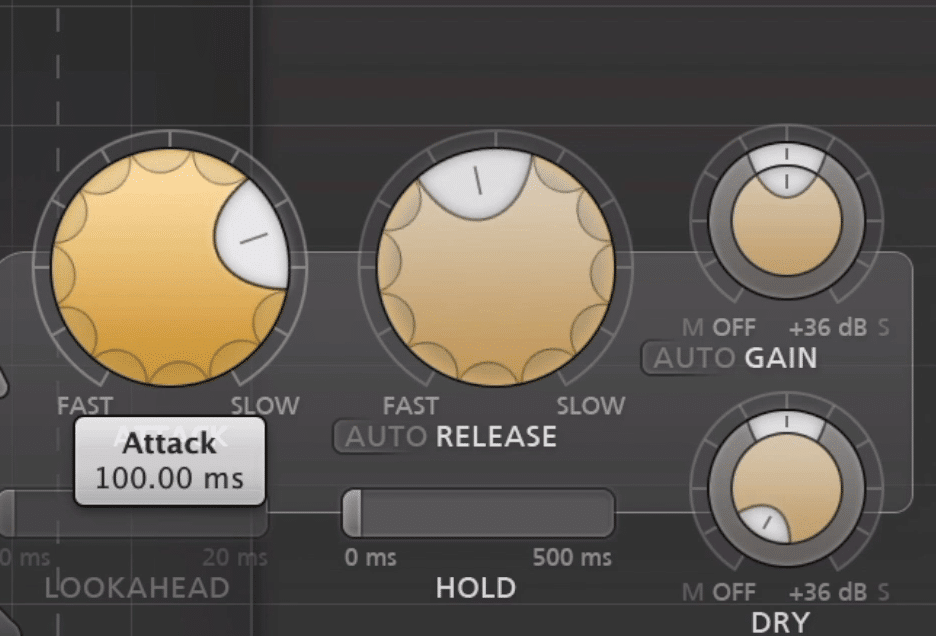
If the attack is 100ms, it takes 100ms before the compressor will begin to compress.
The attack function of a compressor determines how long it takes before the compressor begins to compress. So if the attack time is 100 milliseconds, then the compressor will not compress the signal until after 100 milliseconds have passed.
Similarly, the release function of a compressor determines how long the compressor compresses for. So if the release time is 100 milliseconds, then the compressor will continue to compress the signal for 100 milliseconds.
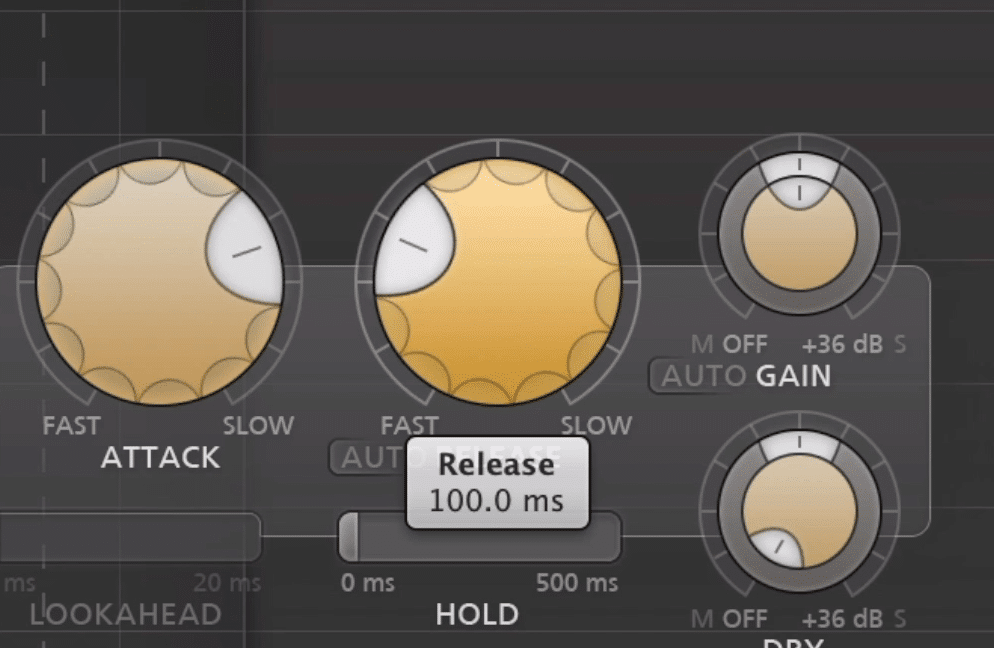
If the release is 100ms, it takes 100ms before the compressor will stop compressing the signal.
Of course, other functions like the threshold and ratio come into play.
When thinking about compressors affect the timbre of a recording, think about a waveform in terms of ADSR, or attack decay sustain and release.
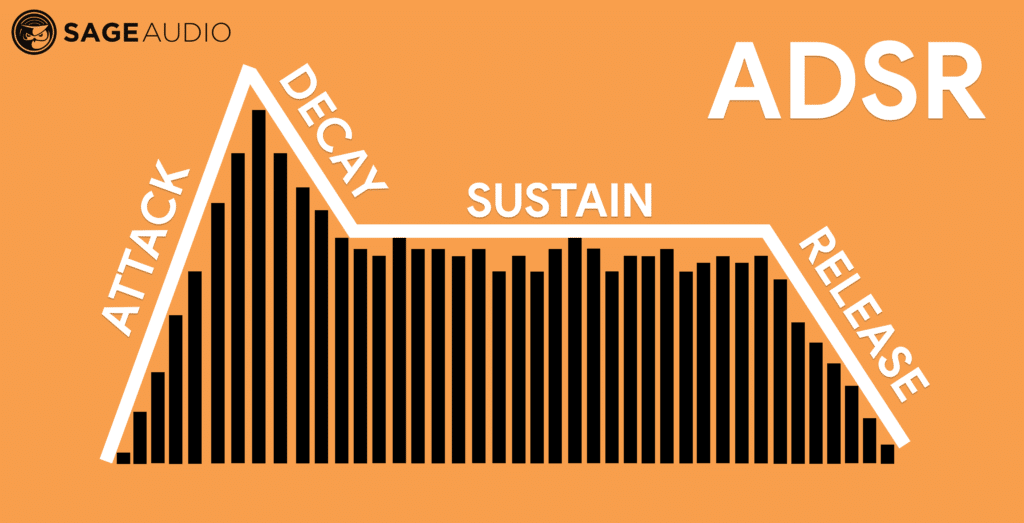
The AD of the ADSR determines the timbre of a sound.
The attack and decay are considered the signal’s transient - transients are the most identifying aspect of a signal. For example, the sound of a trumpet is identifiable because of the transient - and if you were to remove the transient it would be very difficult to determine what instrument was playing.
Back to attack and release, these two functions really affect these transients.
A shorter attack and longer release will result in a smooth sound - the reason being, the transient has been compressed due to the short attack, as has other transients in the signal due to the long release.
A quicker attack and longer release results in more compression and a smoother sound.
A longer attack and a shorter release will result in a more detailed sound - the reason being, the transient passes through the compressor unaffected due to the longer attack, and other transients aren’t affected due to the short release.
A longer attack and shorter release results in less compression and a more natural sound.
If you’d like to learn more about compression and compression techniques, check out this blog post and video detailing some advanced compression techniques:
In it you’ll find some instructions for performing some techniques you may not have tried yet.
Optical Compression and Bluegrass Music Mastering
When it comes to optical compression, this is a particular type of compression that utilizes multiple attack and release times depending on the incoming signal. Granted it’s a little more complex than that, but when optical compression is used on an entire track a certain “pattern” is created.
Because optical compression uses a light diode to determine the amount of compression, and the compression’s attack and release time is input dependent , the compressor will become affected in a manner that is specific to your song.
With that in mind, it can result in a very natural, and if not necessarily natural, a very sonically pleasing tonality.
Additionally, optical compressors are somewhat similar to classic compressors, meaning they evoke a sense of classic recordings for listeners. When this is paired with a more classic genre like bluegrass, it can be utilized to great effect.
How to Set Compressor Settings Musically
With all of this in mind setting your attack and release times is a very important part of mastering bluegrass music, and retaining or altering the timbre of a track. You can take this one step further by matching the time of your attack and release settings to the tempo.
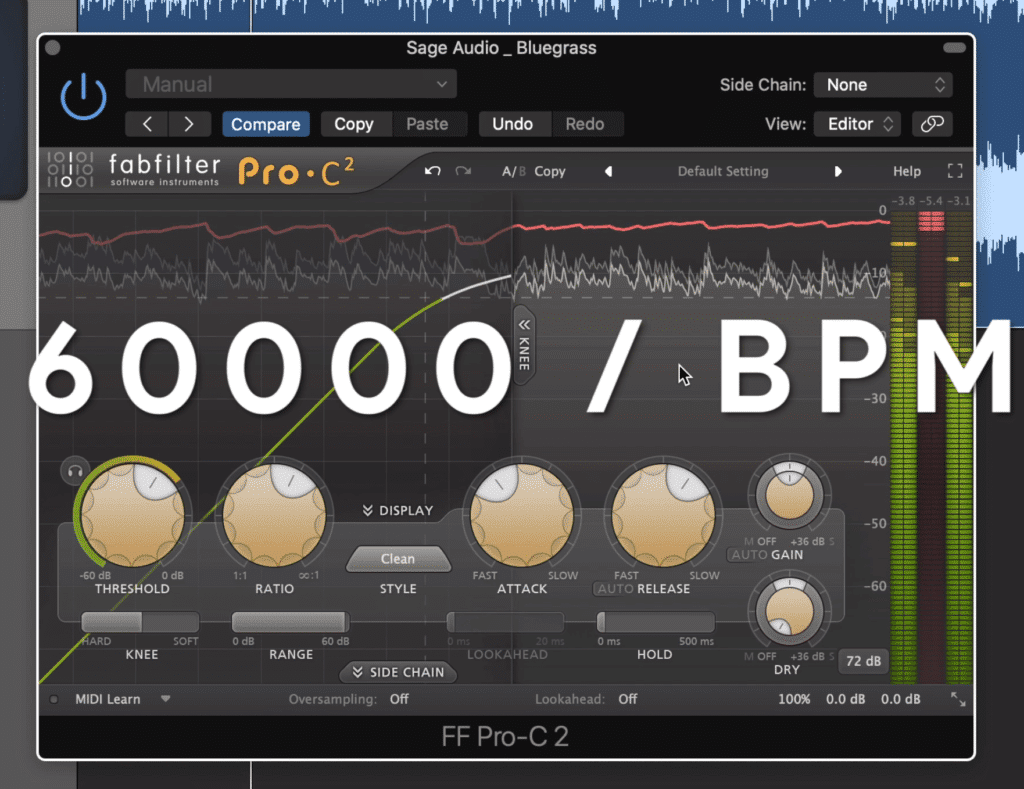
Divide 60000 by the BPM to get a quarter note in milliseconds.
To do this take the number 60000 and divide it by your BPM or beats per minute (the tempo of your master). This will give you the time of a quarter note.
For example 60000/120 = 500ms.
In this example the tempo is 120, and we end up with 500ms as the quarter note.
This time might be a bit too long for your liking so simply divide it (or multiple if you want a longer time) by an even number.

Compression that is timed to the tempo is less noticeable to listeners.
With this formula in mind, you can set the attack and release time of your compression or limiting to the tempo of any track. Doing so makes the compression less noticeable and sound more musical, as the attenuation coincides with the instrumentation in the recording.
If you’re working on a bluegrass mix and you’d like to hear it mastered using solely analog equipment, send it to us here:
We’ll master it for you and send you a free sample to review.
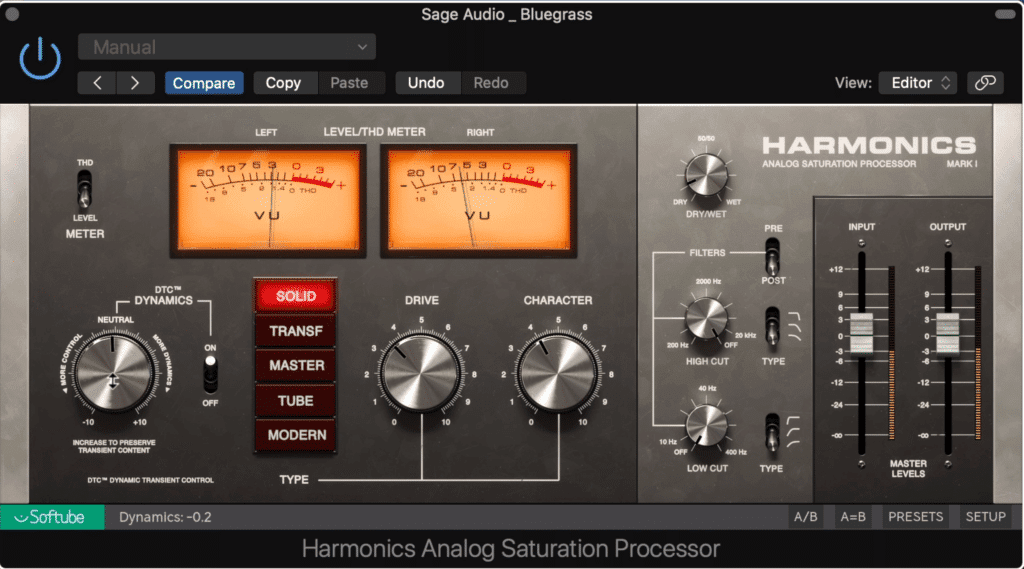
How to Use Analog Saturation on a Bluegrass Master
Analog saturation is often used to make a signal sound fuller and more cohesive - it does this by compressing the signal and adding harmonics simultaneously. Analog saturation is often emulated in audio plugins fairly accurately and can be created using both free ad purchasable plugins.
Saturation is used to make bluegrass music sound fuller.
When applying analog saturation it’s definitely easy to overdo it. But when it comes to mastering bluegrass music, saturation needs to be introduced carefully.
If it's used excessively it may become distracting for listeners and detract from the overall enjoyability of a master. Additionally, excessive saturation isn’t a natural sound, which contradicts a lot about what makes mastering for bluegrass music such a unique process.
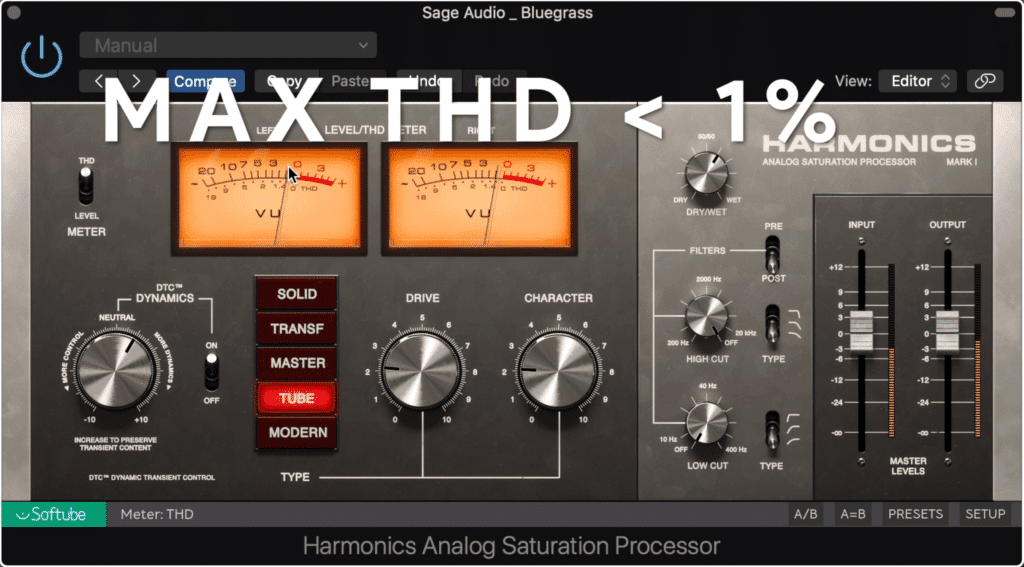
A THD of 1% should be the max for a bluegrass master.
If you have a plugin with a THD or total harmonic distortion meter, try to keep your distortion under 1%. This will be enough distortion to fill the sound and make it impressive without over-doing the effect.
If your saturation plugin or hardware doesn’t have this meter, use your ears and listen critically. If you’re in doubt, it’s best to simply keep your distortion or saturation settings lower.
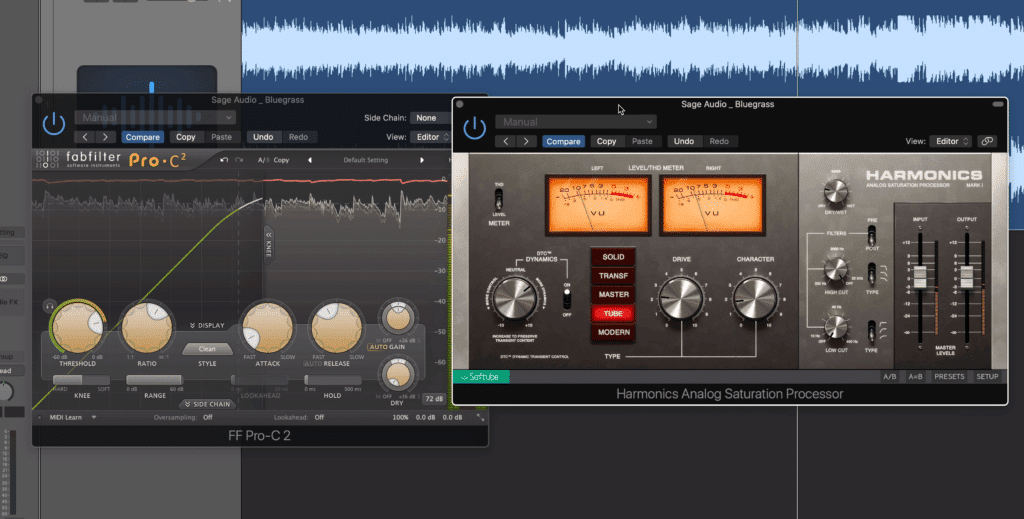
If you're using compression and saturation, use them both sparingly or use one instead of the other.
Keep in mind that saturation is a combination of both distortion and compression, meaning that if you’ve already compressed your master, saturation may result in too much dynamic control. With that said, try to minimize both compression and saturation if you’re using them both, or stick with one or the other.
If you want to use saturation on a mix or master, but you don’t have a saturation plugin, check out our list for some great free options:
Additionally, a video associated with the blog post goes into great detail about the plugins and showcases their sound.
How to Apply Stereo Imaging to a Bluegrass Master
Stereo imaging is an effect often utilized in other genres, but when it comes to bluegrass it to either keep stereo imaging to the tracking and mixing or to introduce it subtly with mid-side processing. With that said, don’t used delay-based stereo imaging on a bluegrass master.
Mid-side equalization can be used to widen the stereo image of a bluegrass master.
When I say keep the stereo imaging to the tracking and mixing, I’m mainly talking about the microphone techniques that are used during a bluegrass tracking session, and then are panning and affected during mixing.

Microphone techniques are used to create an impressive stereo image.
These microphone techniques cause particular phase cancellations which in turn widen the stereo image. This phase cancellation based delay is accentuated during mixing.

During mixing these techniques are put into practice by panning the signals.
That said, further widening the stereo image of a bluegrass master will most likely be unnecessary - but if you do choose to widen the stereo image, then it's best to use mid-side processing rather than delay-based stereo imaging.
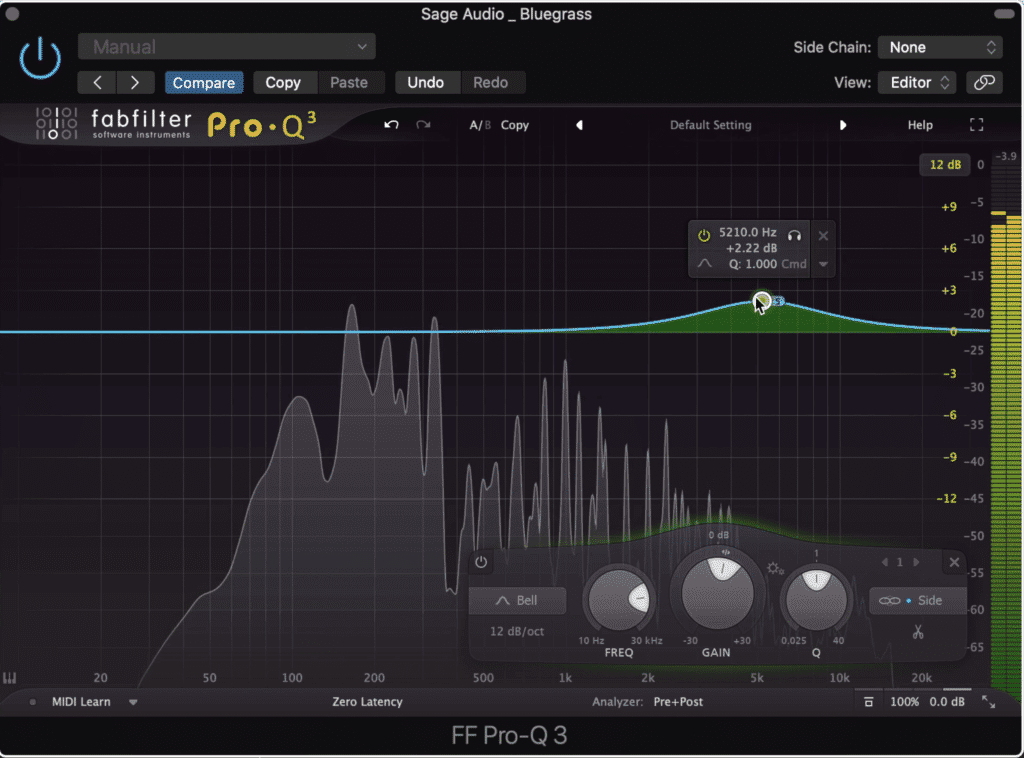
Mid-side processing for stereo imaging is best utilized via a mid-side equalizer, as it easily allows you to affect the width of your image based on the frequency.
For example, you can use a mid-side equalizer to widen 8kHz by amplifying 8kHz on the side image.
This equalization setting uses a low-pass filter on the side image and a shelf on the side image.
Or you could center the kick and bass by attenuating the side image up to 100Hz or a little more.
As you might imagine, amplifying the side image will increase the stereo width, while attenuating the side image will make the image more mono.
Whatever you choose to do, It truly depends on what you’re trying to accomplish.
If you want to learn some more about stereo imaging, check out our video and blog post on the topic:
In it you’ll find a lot of information about how stereo imaging works and what causes it.
How Loud Should a Bluegrass Master Be?
As you may have guessed, bluegrass masters shouldn’t be too loud - an integrated loudness of -18 to -16 LUFS is a good number to shoot for when mastering bluegrass. This depends on the instrumentation and style of the bluegrass music, but generally speaking, this is a good starting point.
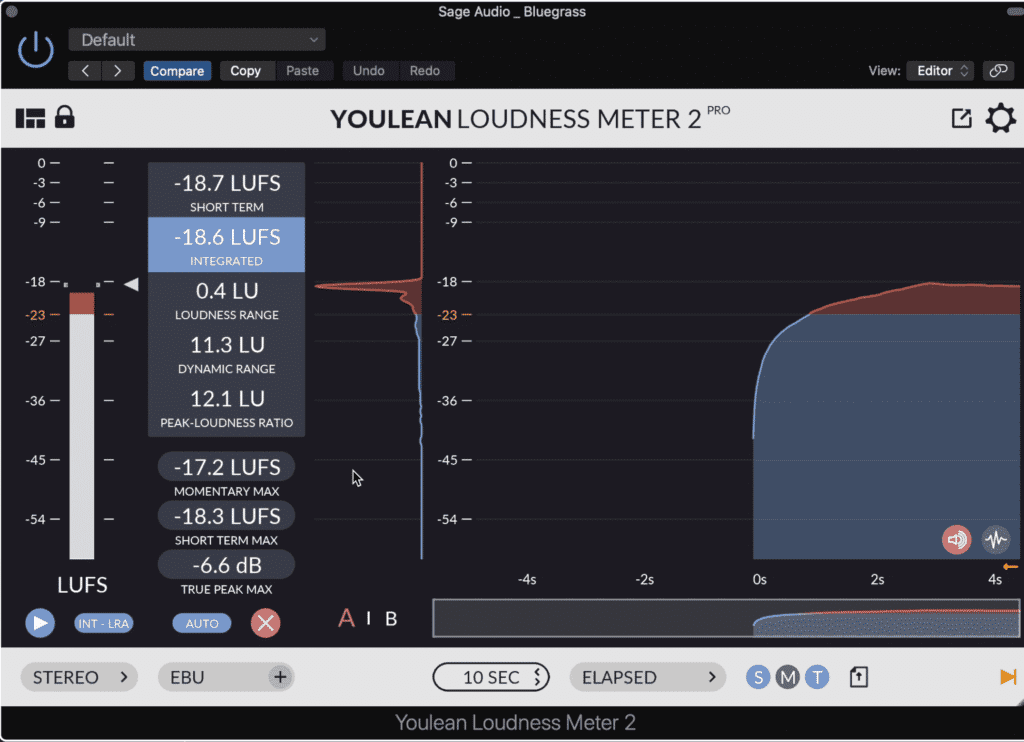
Use an LUFS meter like this one to find the loudness of your master.
Whether or not a kick and bass are included in your bluegrass mix will have a big effect on how loud you master it. If it does include these instruments, odds are you’ll end up with a louder integrated LUFS.

A kick and bass will affect your LUFS greatly.
The reason being, these instruments are the most powerful and require loud levels to be perceived - that said, they cause LUFS meters to read at higher levels, even if it doesn’t sound much louder.
With that said, a bluegrass master with a kick and bass should range from -16 LUFS to -14 LUFS. A bluegrass master without these aspects should be between -20 LUFS to -16 LUFS.

A bluegrass master without a kick should be between these figures.
When using a limiter to achieve this loudness, keep in mind that you’ll use this mildly. Any aggressive limiting and attenuation should certainly be avoided due to the effect it’ll have on the timbre of the master.
When applying limiting, it helps to use a limiter that offers algorithmic limiting choices to achieve the most natural sound. Additionally, a longer attack and shorter release time can help leave the transients of the signal unaffected - similar to the workings of a compressor.
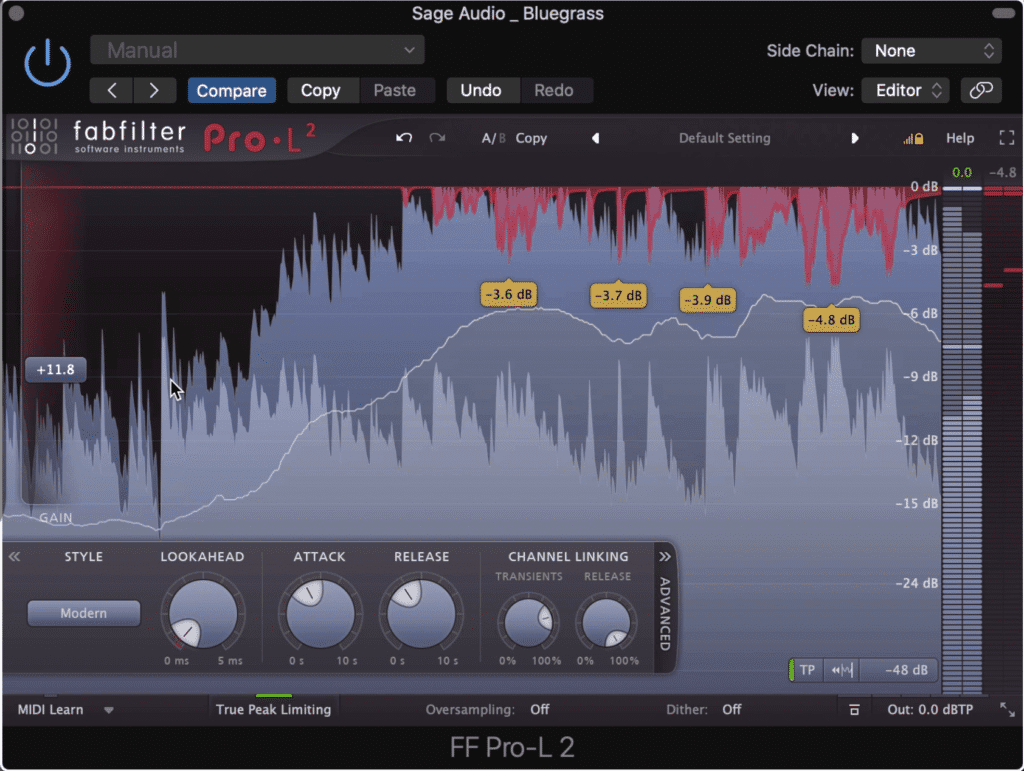
Always avoid excessive limiting, as it will greatly negatively impact your master.
Lastly, it’s important to keep listener expectation in mind when mastering your track. A lot of folk and bluegrass fans have come to expect a quieter and more dynamic sound.
This means of course that you’ll need to use less compression and less limiting, allowing listeners to utilize their amplification and speaker systems instead of making it loud for them. Otherwise, you may create a bluegrass album that doesn’t sound like a bluegrass album.
Conclusion
Mastering for bluegrass music can be a challenging process. It means balancing an impressive sound with a natural and realistic sound.
This can be achieved with musical-sounding equalization, thoughtful tempo-based compression, mild harmonic generation and saturation, mid-side stereo imaging, and limiting with dynamic retention in mind.
By following some of the directions listed above, and using your ear for critical listening, you can create a powerful and natural sounding bluegrass master.
If you have a bluegrass mix that you’d like to hear mastered, send it to us here:
We’ll master it for you and send you a sample to review.
Have you ever mastered a bluegrass mix before?


