Top 5 Compression Techniques
- Kick and Bass Ducking
- Full Mix and Vocal Ducking
- Parallel Compression
- Serial Compression
- Smooth Timbre & Transient Timbre Compression
Compression can be an incredibly useful effect - its uses span from the purely technical, to the creative.
Compression is both practical and creative - it can be used to make your music both balanced dynamically, and sonically unique.
Knowing how to use a compressor to its fullest potential means knowing some of the less obvious ways in which compression can be used.
Compression, although seemingly simple and straightforward enough, can become slightly more complex, and used in unexpected ways to better control or affect your signal.
With that said, let’s look into our pick for the top 5 compression techniques that you can use on your mixes and masters.
Compressors can be used in unexpected ways to create powerful effects.
We’ll be covering the specifics for each compression technique, when to use it, how it’s performed (the routing and technical aspects of it), and for some techniques, our personal opinion on its effectiveness.
We’ll also be creating some examples so you can get a sense of how it sounds.
If having a track or mix properly compressed is important to you, send us one of your mixes here:
We’ll master it for you using the optimum compression settings and purely analog processing.
Also, it's important to note that although this list is a “Top” list, these techniques aren’t listed in any particular order. The reason being, some of these techniques are better for particular genres, and some are intended to be more stylistic.

Some of these techniques will work better for certain genres and particular instruments.
That said, try these out for yourself to determine which is best for your mixes, your genre, or your personal taste.
Kick and Bass Ducking
Mixing kick and bass can be difficult. Their frequency responses can often overlap which can lead to unwanted masking and phase cancellation. The end result is a muddy and undefined sound.

The kick and bass frequencies often overlap, making them difficult to mix.
The desire for these two elements (the kick and bass) to be more defined resulted in this first compression technique.
But before we delve deeper into this technique, let’s define ducking:
Ducking is the intentional attenuation of a signal whenever another signal is present - this effect can be accomplished with a compressor or created manually with a fader or automation. The compressor used needs to have side-chain or key input functionality in order for this effect to work.
With this technique, we can reduce the amplitude of the kick whenever the bass is played, or the amplitude of the bass whenever the kick is hit. Either way, you’re creating some sonic space for the other instrument to occupy.

With this technique, you can attenuate the kick when the bass plays or vice versa.
You can also create this effect manually with clip gain or automation , but this will be a much more time-consuming process, and won’t allow for as much control over the attenuation.
So, let’s say we wanted the kick to be attenuated whenever a bass note was played.
Here is how to accomplish Kick and Bass Ducking for this particular situation:
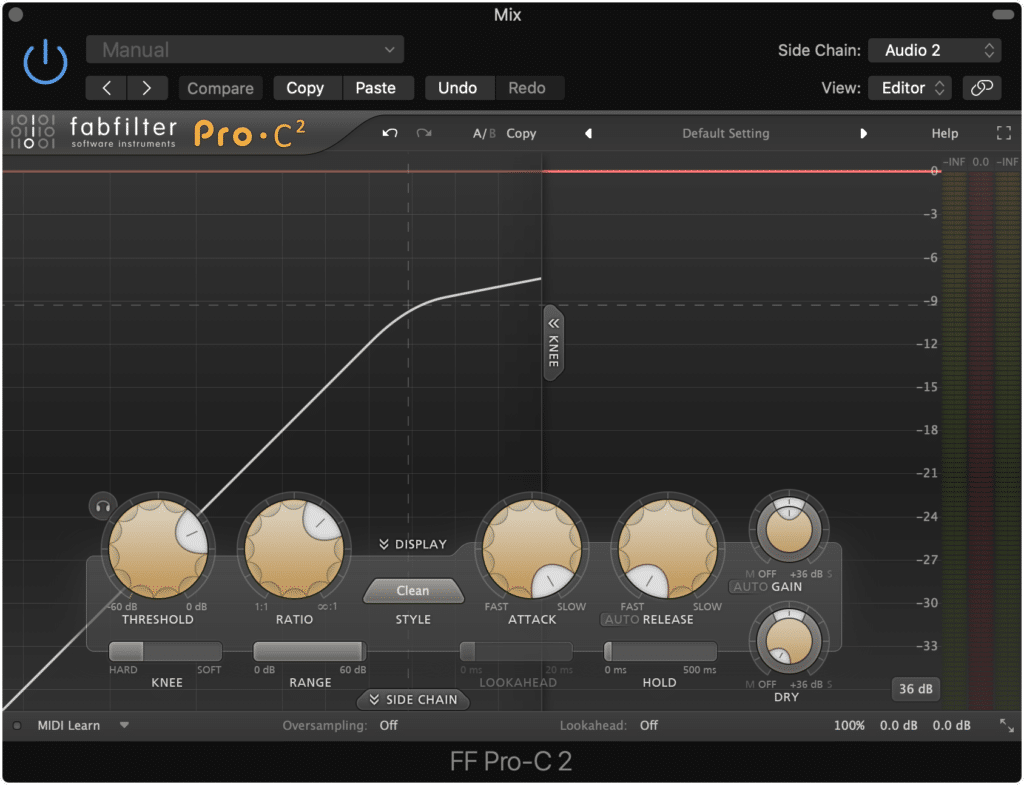
Step 1: Insert a Side-Chain compatible compressor on your Kick track.
The side-chain functionality is needed to perform this technique.
Step 2: Change the Side-Chain setting from ‘None’ to your Bass track. If you titled this track ‘Bass’ then it should show up as ‘Bass’ under this menu.
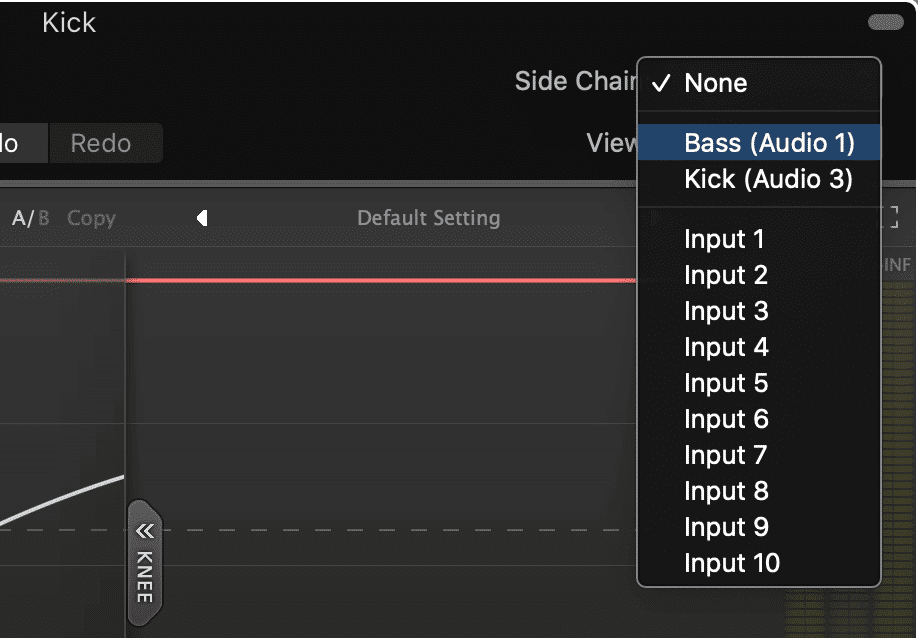
Set the side-chain input as the track you want to make more prevalent. In this example, we're selecting the bass guitar.
With some plugins, the side-chained bass guitar should already be triggering the compressor. If not, additional settings may need to be put into place.
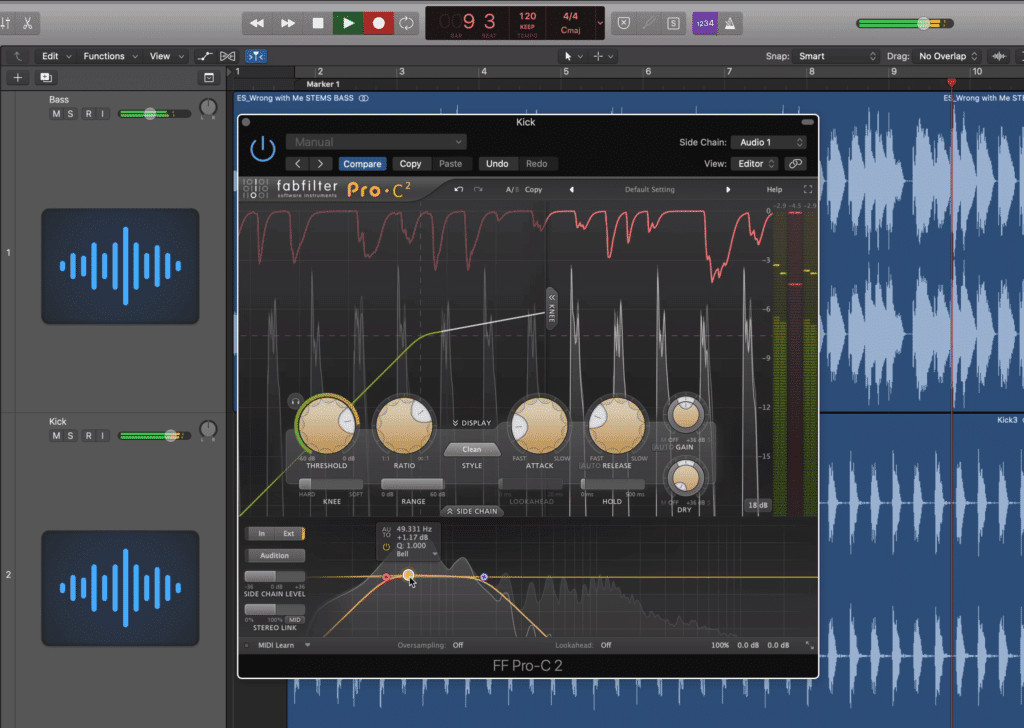
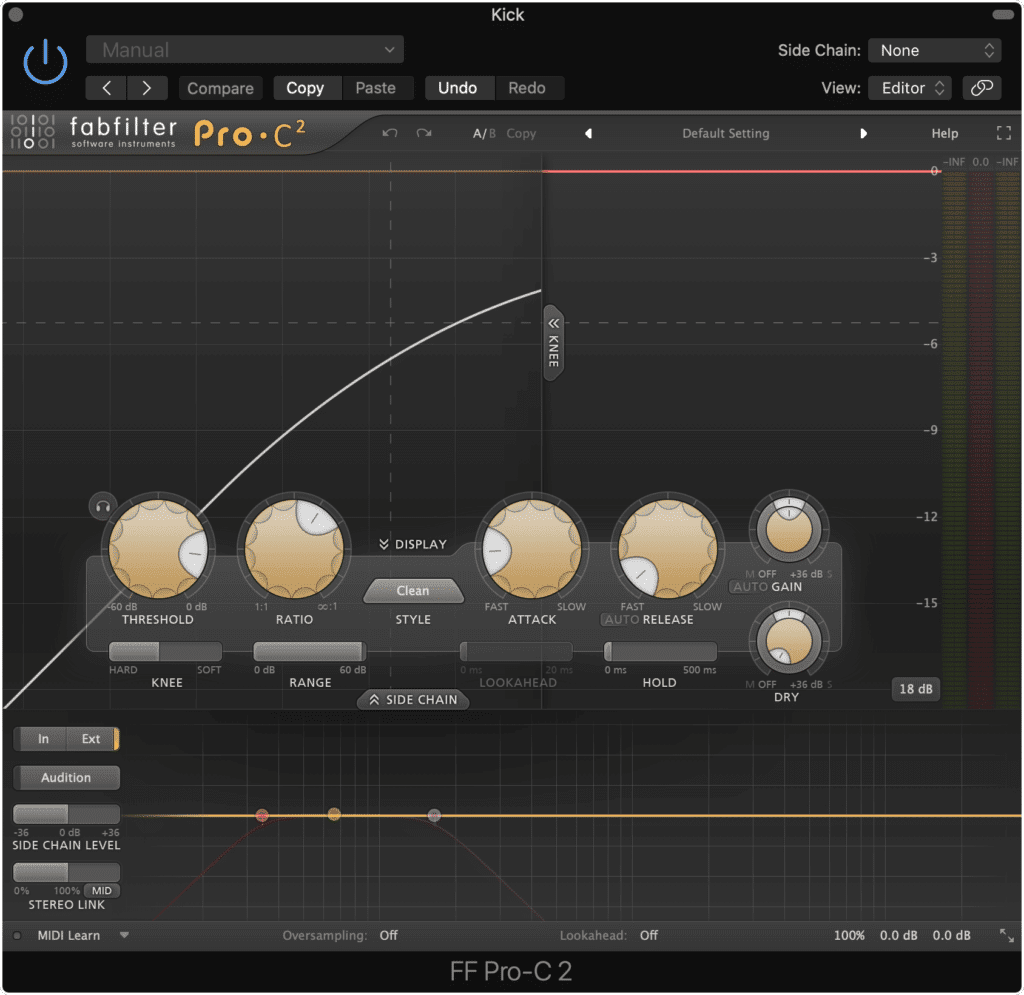
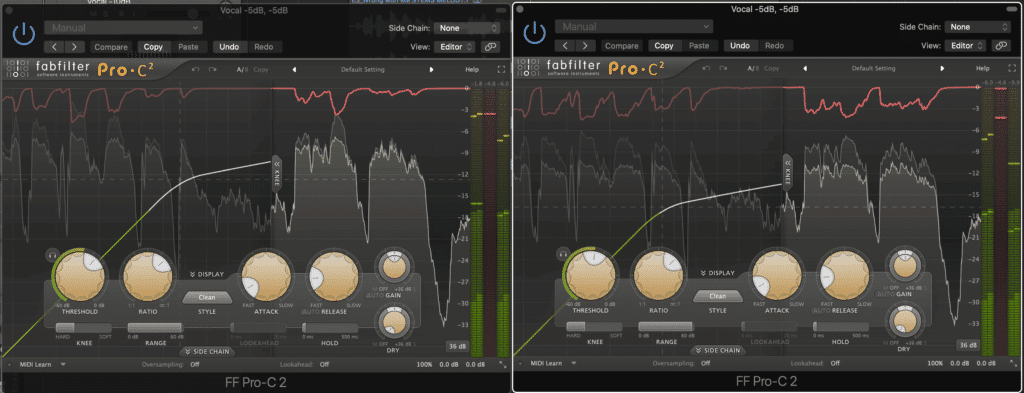
Step 3: If the compressor is not being triggered by the Bass’s signal, you’ll need to set the side-chain as the compressor's main input. This may mean selecting the side-chain as the ‘Key’ input , as is the case with the Pro Tools stock compressor. For the FabFilter Pro-C that we’re using for this example, it means selecting the ‘Side Chain’ tab and selecting ‘Ext’ or external triggering of the side-chain.
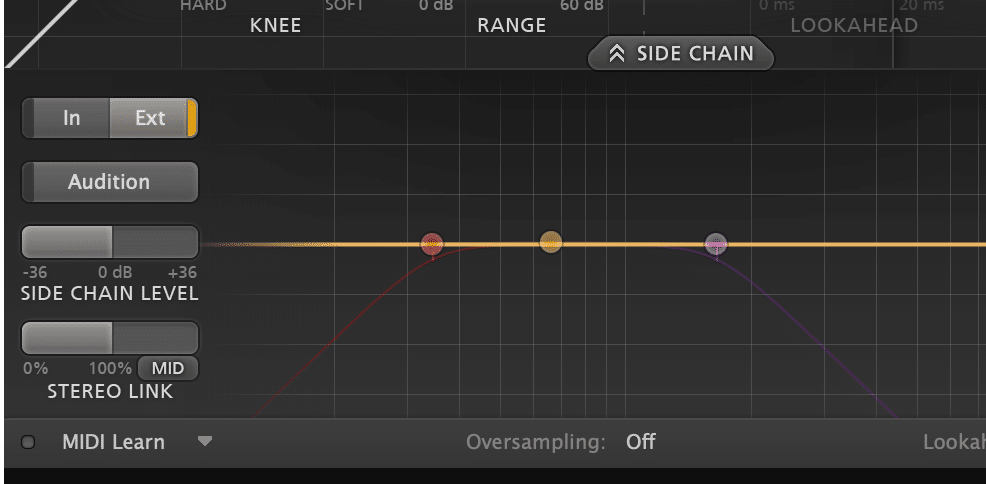
Each compressor plugin will interact with its side-chain a little differently. If this is working for you immediately, see if there's a way to make the side-chain the primary input.
Step 4: Adjust your compression settings. 1dB of attenuation is a good start. If more compression is desired, increase your ratio or lower your threshold until you find that the bass guitar is made more prominent in your mix.
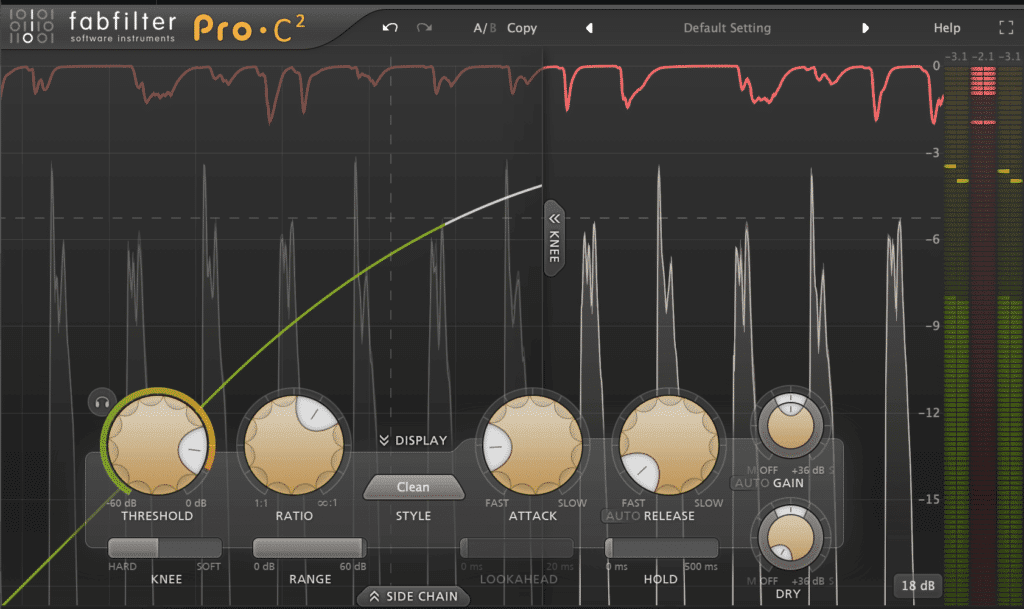
Use mild attenuation. Too much and this effect will become noticeable and distracting.
With the Bass triggering the kick drum's compressor, you can alter the compression settings to create the amount of attenuation that you want. Just like with a normal compression setup, you can alter your threshold, ratio, attack, release, and any additional functions to dial in the sound that you want.
Although personal preference does play a role, try not to make this effect too extreme (unless doing so for a creative purpose) since it’ll become noticeable and may become distracting to listeners.
Additionally, it should be noted that if you have a track in which a bass note is played whenever a kick hits for the entirety of the song, or in other words every bass note corresponds with every kick hit (which can be the case for certain genres) creating this ducking setup wouldn’t make much sense.
If this is the case, it might be better to simply turn down the kick.
If you’d like to learn more about separating your kick and bass, check out our blog post on the topic:
Full Mix and Vocal Ducking
Similar to how a kick can be attenuated with ducking whenever a bass note is played, an entire mix can be attenuated whenever the lead vocal is being sung.

The vocal track can be used to attenuate the full mix, in turn making the vocal stand out.
If you want your vocal to sit on top of your mix, you can use a compressor to attenuate the full mix whenever the vocal is being sung - this way, the vocal always has a slightly greater amplitude than the mix.
When creating this setup, it’s going to look very similar to how it was described in the previous ‘Bass and Kick Ducking’ section, but let’s look at it with step-by-step instructions.
Step 1: Export the entirety of your mix (minus the vocal ) as a stereo file, or, send the entirety of your mix (minus the vocal ) to one auxiliary track using a bus send. The idea being, you have a track that is just your instrumental mix.
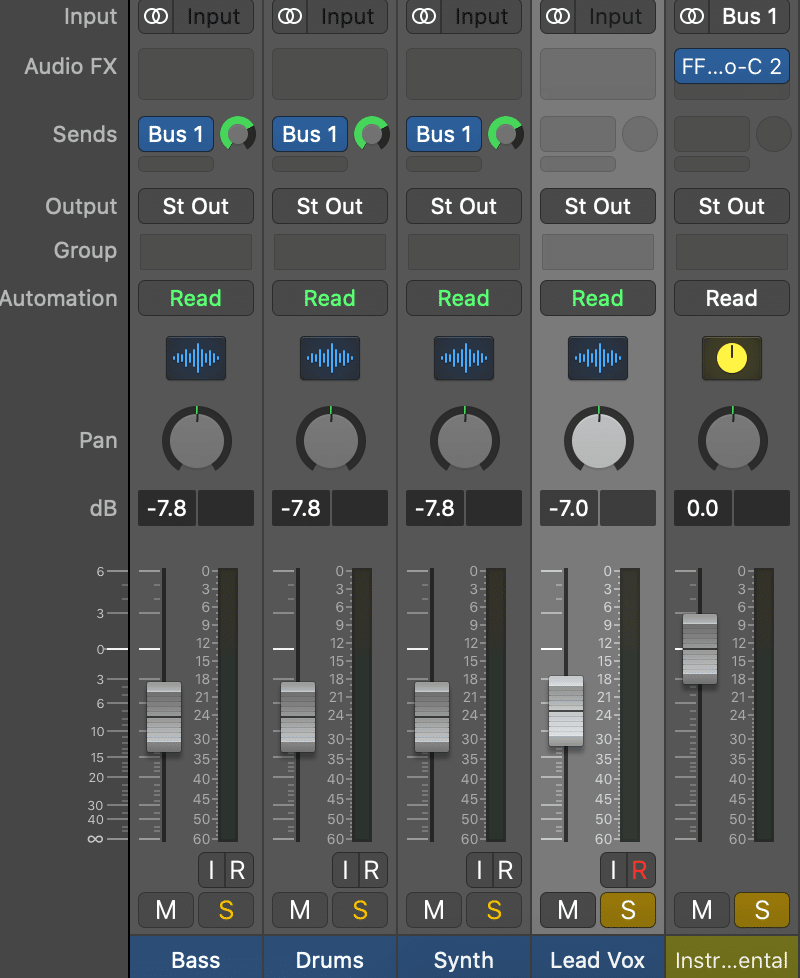
Here, we have the instrument stems routed to an auxiliary track. The vocal stem is not being sent. By soloing the vocal stem and the auxiliary track, we're monitoring the entirety of the mix.
Step 2: Insert a side-chain compatible compressor on your stereo mix track or the auxiliary track you just sent your mix to.

The compressor is used on the Aux track.
Step 3: Change the ‘Side Chain’ input from ‘None ’ to your lead vocal. For example, if you titled your vocal track ‘Lead Vox ’ select ‘Lead Vox’ in the SideChain menu.
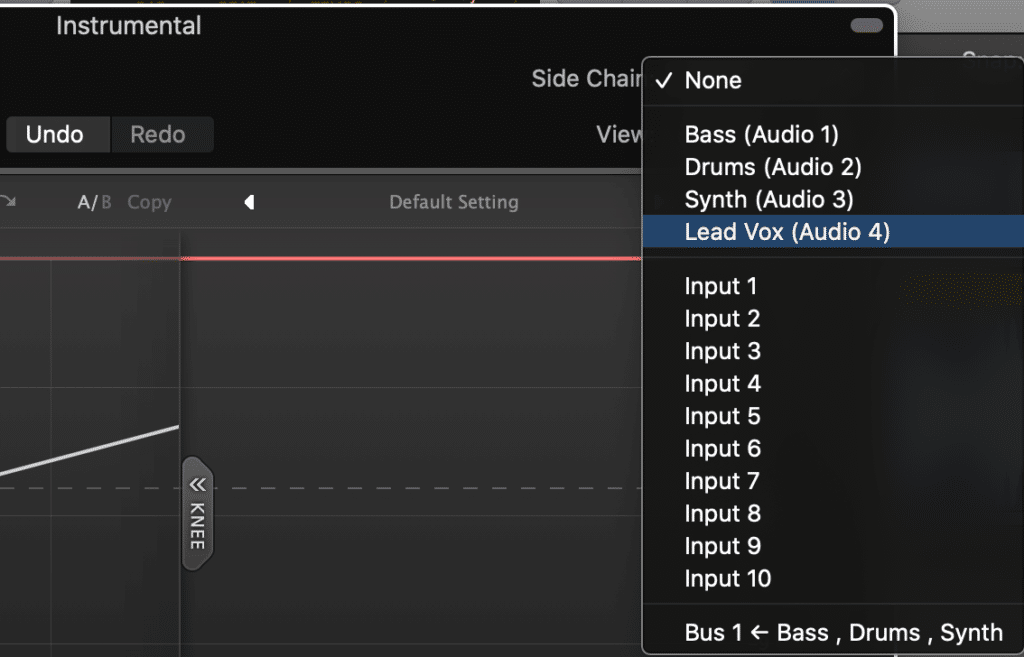
Change the input to the vocal, in turn making the vocal the compressor's input.
Step 4: If your compressor is not being triggered whenever your vocal is playing, additional settings may need to be adjusted. Review step 3 in the section titled ‘Bass and Kick Ducking’ for instructions.
Step 5: Adjust your compression settings as desired. Because you’re affecting the entirety of your mix, a little attenuation goes a long way. Start with roughly 0.3dB of attenuation and go from there.

This effect can become very noticeable very quickly. Be sure to use it sparingly.
Speaking out of personal opinion and preference, although this method does provide an easy way for your lead vocal to stand out, it isn’t ideal. This may be a great method for live performances, but for a recording, there are other methods that should be implemented.
For example, properly equalizing your vocal and the mix’s instruments individually should allow for everything to have space in the mix.
If you find that you haven’t performed the equalization needed, perhaps attempt to carve out space for your lead vocal with EQ before resorting to this compression method.
The reason being, this compression method can reduce the dynamics of your mix, and often sounds unnatural if the attenuation is greater than 0.5dB.
If you'd like to learn more about vocal processing, check out our blog post on the topic:
Parallel Compression
Parallel compression is an incredibly useful, and if performed correctly, sonically pleasing compression effect.
What’s great about parallel compression, is that it allows you to dramatically compress a signal, all while maintaining control over how much of that dramatic compression is being introduced into your original signal.

Parallel compression sounds great on many aspects of a mix, especially on drums.
Parallel compression sounds great on vocals, drums tracks, and entire mixes. Knowing how to perform parallel compression, and how to get the best sound out of the compressor as possible, can really improve the sound of your production.
Really what parallel compression is doing is a form of upward compression , in which dynamics and transients are severely attenuated, and low-level, or quieter aspects of the signal are being pushed upward - in turn making the quieter parts of the signal louder, and the louder parts of the signal quieter.
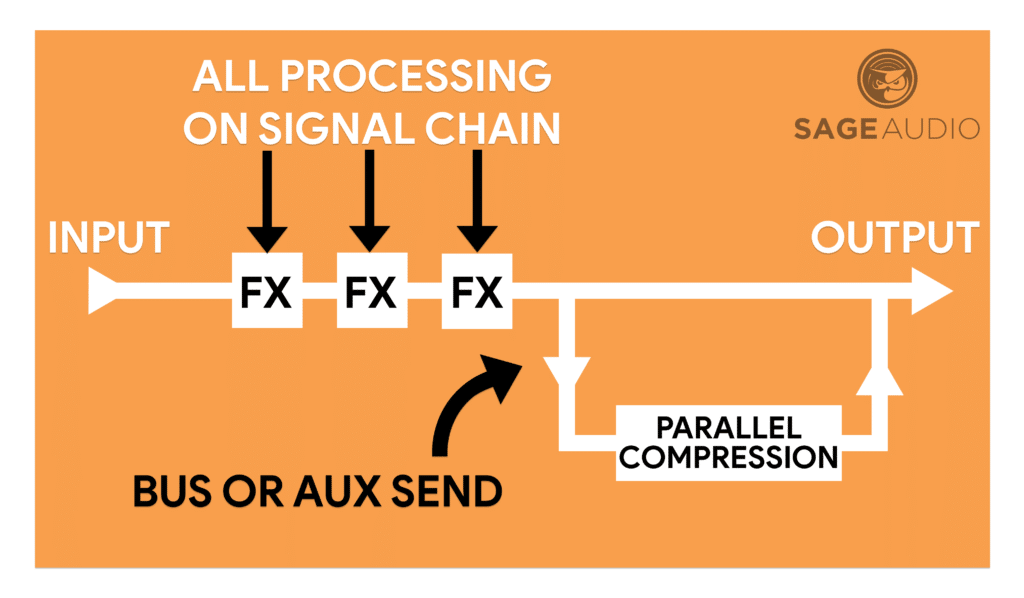
Shown is a diagram for parallel compression. Notice that the bus or aux send occurs after the signal chain's processing.
By creating this compression on an auxiliary send, you can blend it back into your signal via the aux track’s channel fader.
Let’s look at this step-by-step to see how it’s done.
Step 1: Create a bus or auxiliary send on the channel you want to affect. In Logic Pro X, this will automatically create a new auxiliary track. In Pro Tools or other DAWs, you may need to manually create this track.
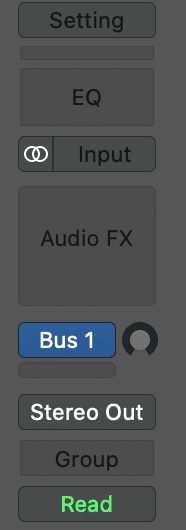
Set up your bus send.
Step 2: Set the send level to unity or0dB . This will make the signal on the auxiliary track equal in amplitude to the signal of your channel.

Set the send to unity by holding "Option" and then clicking the bus rotary.
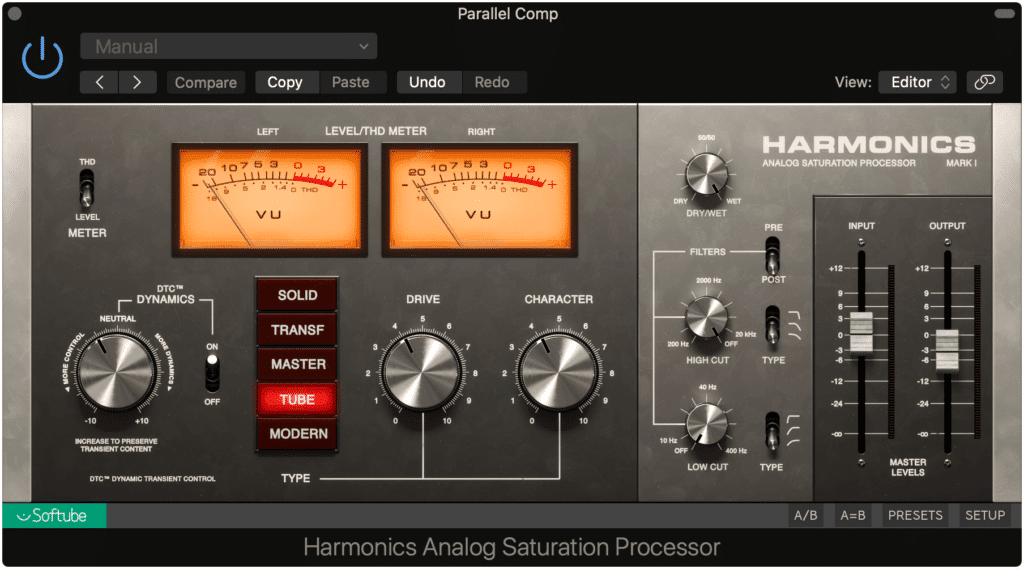
Step 3: Insert a compressor on the auxiliary track. Personally, I enjoy using a compressor with a lot of “character,” - one that adds harmonic generation or small distortions to the signal. Typically, a compressor that models itself off of analog equipment will do this.
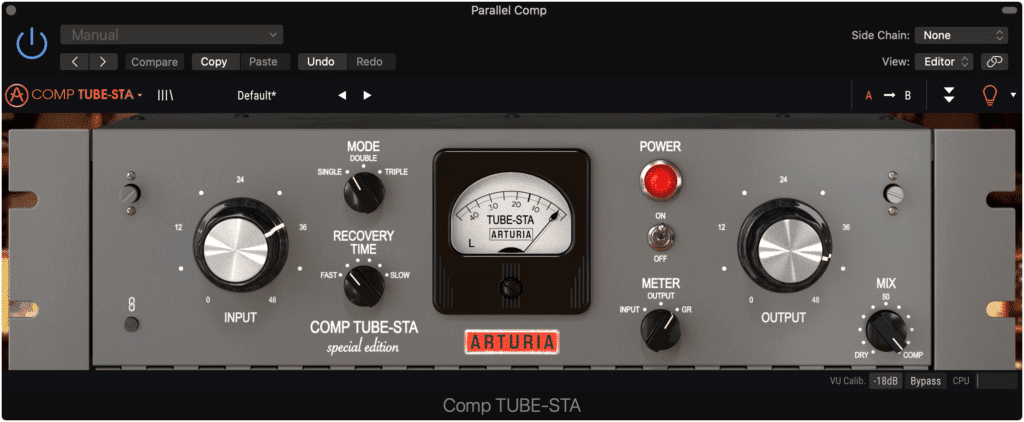
Insert a compressor that you enjoy the sound of.
Step 4: Using your compressor’s various functions, greatly compress the signal. I like to compress the signal roughly 10dB to 20dB. It's best to compress the signal significantly, otherwise, it won’t have the intended effect.
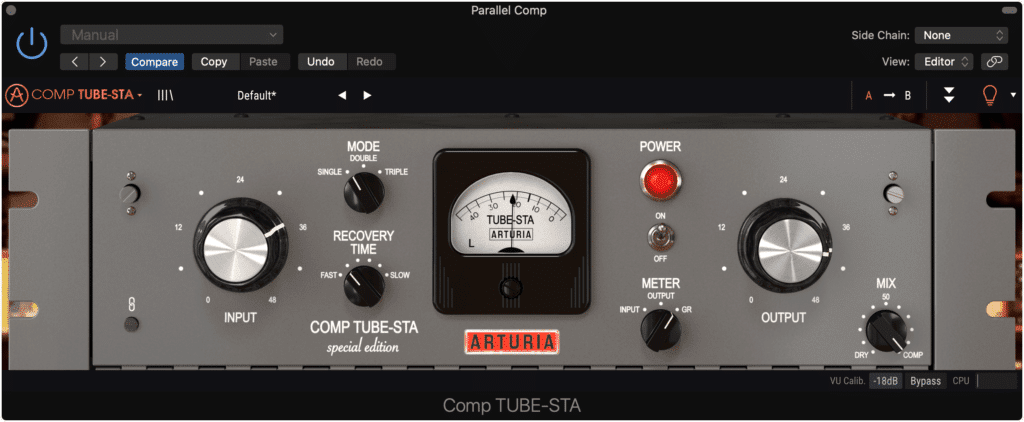
Significant compression is better when performing parallel compression. Remember you can always blend this effect back in with the uncompressed signal later on.
Step 5: Decrease the channel fader of your Parallel Compressed auxiliary track to a very low level, and then increase the output gain of your compressor to nearly its maximum or its maximum level. This will cause the sound of the compressor to come through.
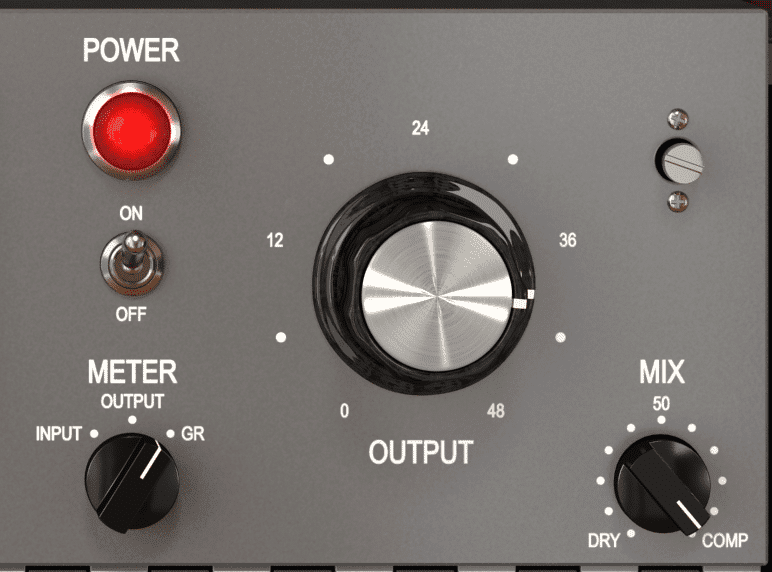
Significantly increasing your output imparts a lot of character onto your compression.
Step 6: Slowly increase the level of the auxiliary track’s channel fader until you’ve blended your parallel compressed signal and original signal to your liking.
If you’d like to augment the distortion caused by this compressor, even more, you can follow the compression with a harmonic exciter. This way the harmonics generated from an analog emulated compressor are amplified.
Furthermore, if you’d like to control any other aspects of your parallel compression, like the frequency response, the distortion level, or anything else, you can follow your parallel compression with another plugin on the auxiliary track.
A little distortion or harmonic generation on your parallel compressed auxiliary track can really bring out some enjoyable character from your parallel compression.
Follow your compression with some harmonic generation or saturation to make the effect even more prevalent.
What you choose to add to your parallel compression will depend on what you’re compressing.
For example, if you’re using parallel compression for your level vocal, it may be a good idea to follow the parallel compressor with an equalizer and then attenuate the higher frequencies of the compression.
The reason being, sibilance-based frequencies will be made much more apparent during the parallel compression process - so attenuating them with an equalizer will help to keep our vocal balanced.
If you’re compressing an entire mix, like you would be in a mastering session, you can follow your parallel compression with a mid-side equalizer, and maybe amplify the side-image in the higher-frequency range.
This way, you can make your side image more prevalent and perceivable, in turn increasing the width of your master.
If you have a mix you’ve used parallel compression on, and you’d like to hear it mastered, send it to us here:
We’ll master it for you and send you a free mastered sample for you to review.
If you’re using parallel compression on you master, check out more about mastering here:
Serial Compression
Serial compression isn’t discussed too often, nor is it a particularly popular compression technique - but, it does have some very practical uses that can greatly improve both mixes and masters.
Serial compression is a very simple concept - so much so that a step-by-step description isn’t even needed.
All you have to do to perform serial compression is follow one compressor with another, usually identical compressor.
Instead of using one compressor, use two and split the processing.
So if you’re compressing a vocal,your next insert on your vocal’s signal chain would be another compressor.
Using serial compression takes some of the burdens of compressing off of one compressor, and splits it between two compressors. Doing this makes your compression less noticeable , as particularly loud dynamics won’t hit either compressor hard enough to cause significant attenuation.
If performed with one compressor, the compression will sound more noticeable.
If you’ve ever compressed a signal significantly, you’ve definitely heard the sound of compression. By using two compressors back-to-back, you cause your compression to be less perceivable, in turn avoiding the “sound of compression.”
This same concept works well when performing a digital mastering session. If you using serial limiters, you can split the limiting process between two limiters.
This will cause any peak attenuation less noticeable should a louder transient occur. Try serial compression or limiting any time you want cleaner and less noticeable compression.
Smooth Timbre & Transient Timbre Compression
Compressors are a lot more powerful than they’re given credit for. We usually think of them as a strictly practical tool, one that controls dynamics so that other, more exciting or creative processing can occur.

Compressors, although very practical tools, can help create moods and other more creative or artistic effects.
However, compressor settings can greatly impact the timbre, and in turn, the mood of the sound you’re compressing. This is accomplished by utilizing the Attack and Release settings of a compressor.
Creating a "Mood" with your compression mainly comes down to your attack and release settings.
Additionally, the knee setting and the compression type, be it clean, optical, or another algorithmic-based compression setting will affect the timbre of your signal.
Before we delve into how a compressor can affect the timbre of a signal, let’s consider what creates timbre. It can be thought of in terms of ADSR or attack, decay, sustain and release.
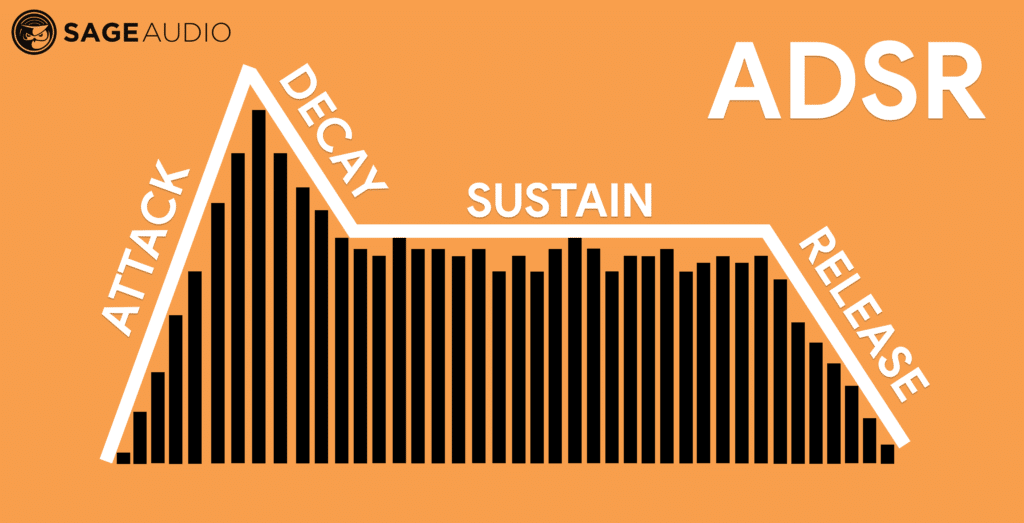
Every instrument and vocal has an ADSR.
The attack of a signal is its initial transient. The decay is how long that original transient lasts.
For example, a snare has a very loud and quick attack, with significant and quick decay.

Snares have a very prominent attack and decay.
The sustain of a sound is the tone that is held out after the initial transient. The release can be thought of as the decay of the sustain, or in other words, the decrease in amplitude of the sustain.
For example, when a guitar string is plucked, the initial pluck is the attack and decay, but the ring of that note and its gradual decrease in amplitude is the sustain and release.

Other instruments like the guitar, are known and appreciated for their sustain and release.
Compressors have the power to affect all aspects of the ADSR of a signal.
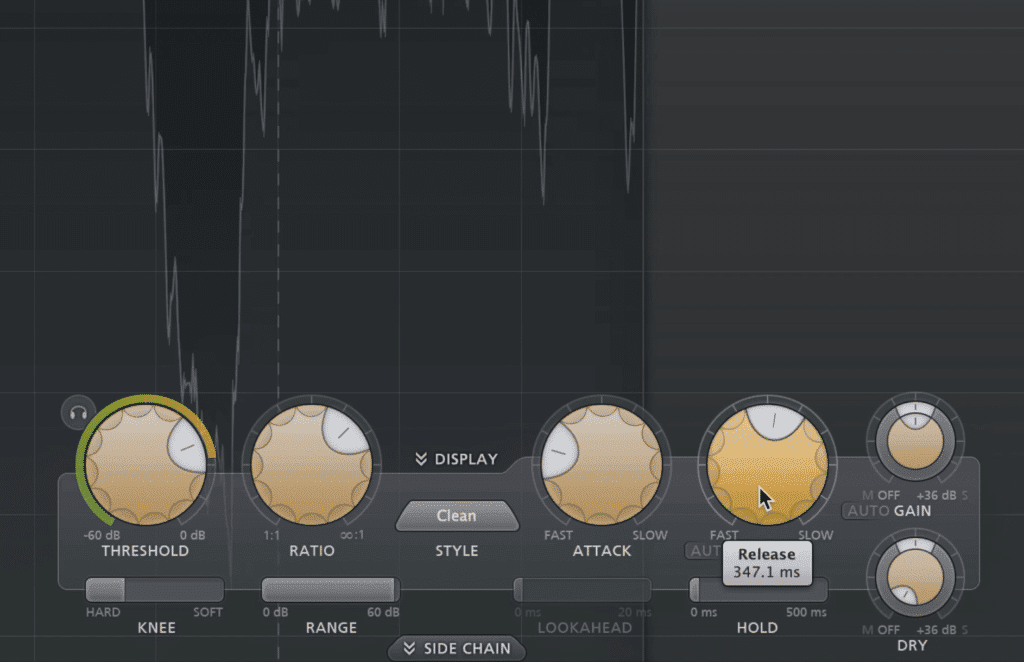
To understand how this is possible let's look at compressor Attack and Release settings.
'Attack' is the time it takes for the compressor to capture the signal and begin its compression. 'Release' is the duration the compressor will continue to attenuate the signal.
So, if we keep ADSR in mind, a very quick compressor attack time will make the compressor begin to compressor sooner, in turn attenuating the Attack and Decay of the signal’s transient.
If the attack of the compressor is quick enough, it can capture the majority of this transient. This will, in turn, attenuate the signal’s transient, making for a less dynamic and smoother overall sound.
If the release is longer, it will cause the compressor to hold onto the signal for longer, in turn attenuating aspects of the sustain and release. The longer the release, the more unrelated subsequent transients will be compressed, further establishing a smooth sound.
The opposite is true for a longer attack and shorter release - when these attack and release settings are chosen, the compressor will compress less and return to normal quicker when compressed.
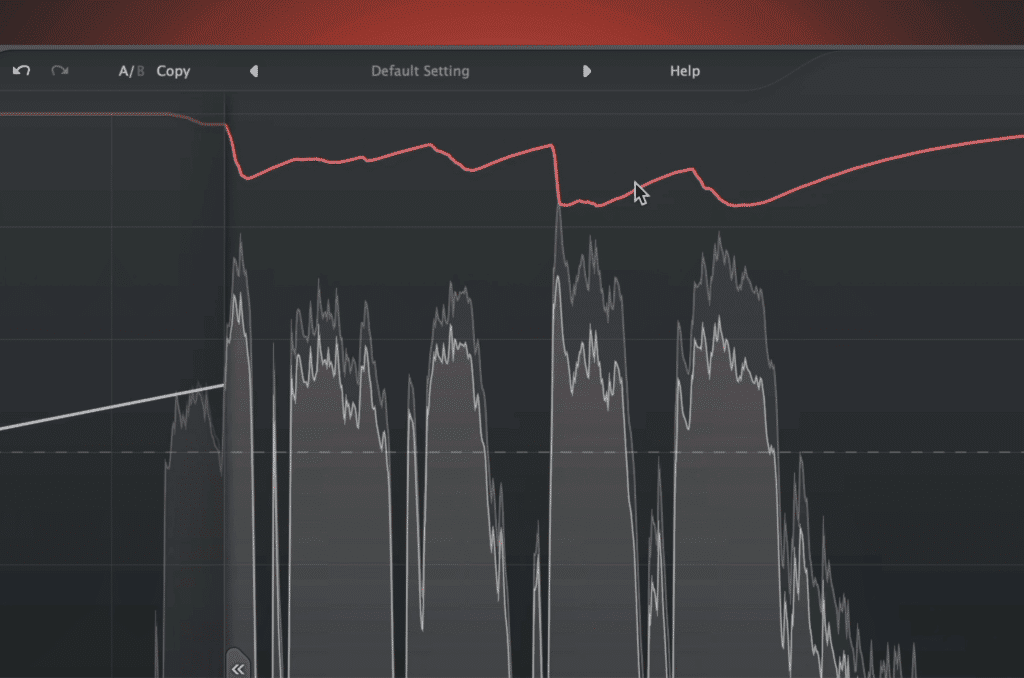
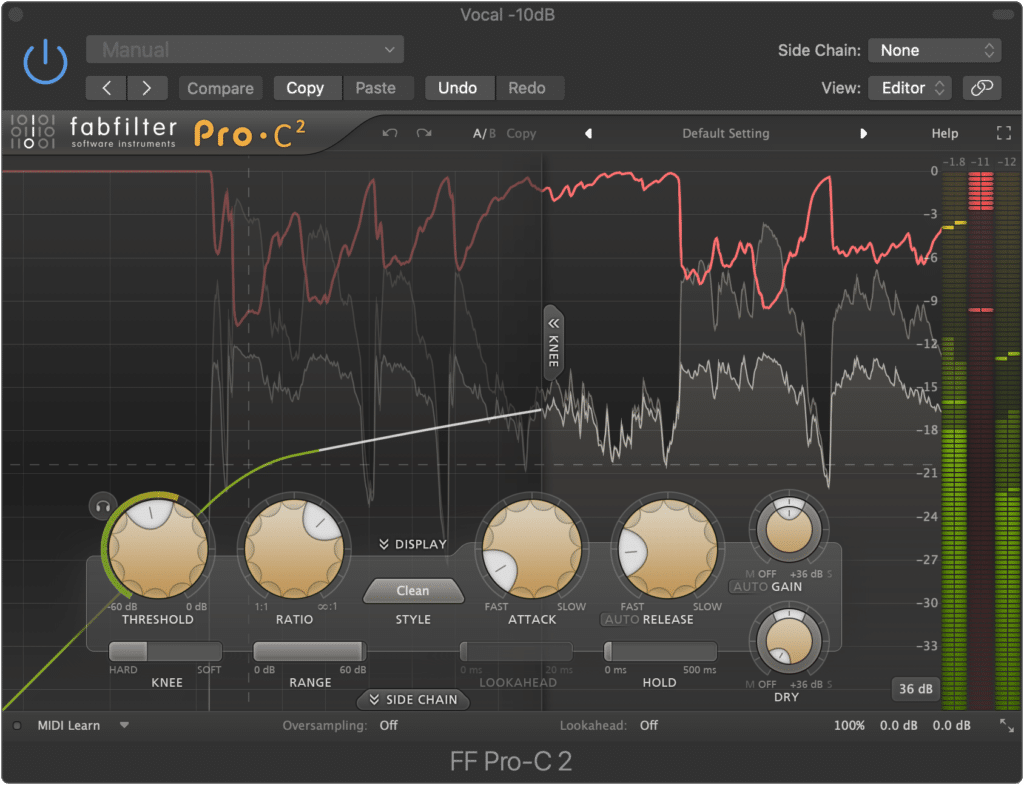
Shown here is a quick attack and long release setting. Notice how quickly the signal is attenuated and how long the signal is compressed.
This will result in more transients passing through the compressor unaffected, causing a more dynamic and intelligible sound.
If you want to accentuate these two opposites, you can also use either traditional compression or optical compression. Traditional or electro compression is great when paired with a longer attack and shorter release.
This will lead to a more transparent sound.
Optical compression is great when paired with a quicker attack and longer release - this will cause a smooth, more laid back sound.
The next time you want to change the timbre of your signal, consider how your compressor may already be affecting its tone.
Conclusion
These are just some of the compression techniques you can use to affect your signal and create more complex and balanced mixes. Try them out and share your results.
Again, the five we covered here are:
- Kick and Bass Ducking
- Full Mix and Vocal Ducking
- Parallel Compression
- Serial Compression
- Smooth Timbre & Transient Timbre Compression
Each compression technique has a different application and can be used individually or in tandem to create advanced compression-based processing.
If you have a mix, maybe one that you created using these techniques, and you’d like to hear it mastered, send it to us here:
We’ll master it for you and send you a free mastered sample for you to review.
Have you used any of these techniques?


