What is Digital Mastering?
Mastering is sometimes an elusive aspect of post-production. Although it’s certainly needed, what it means can be unclear.
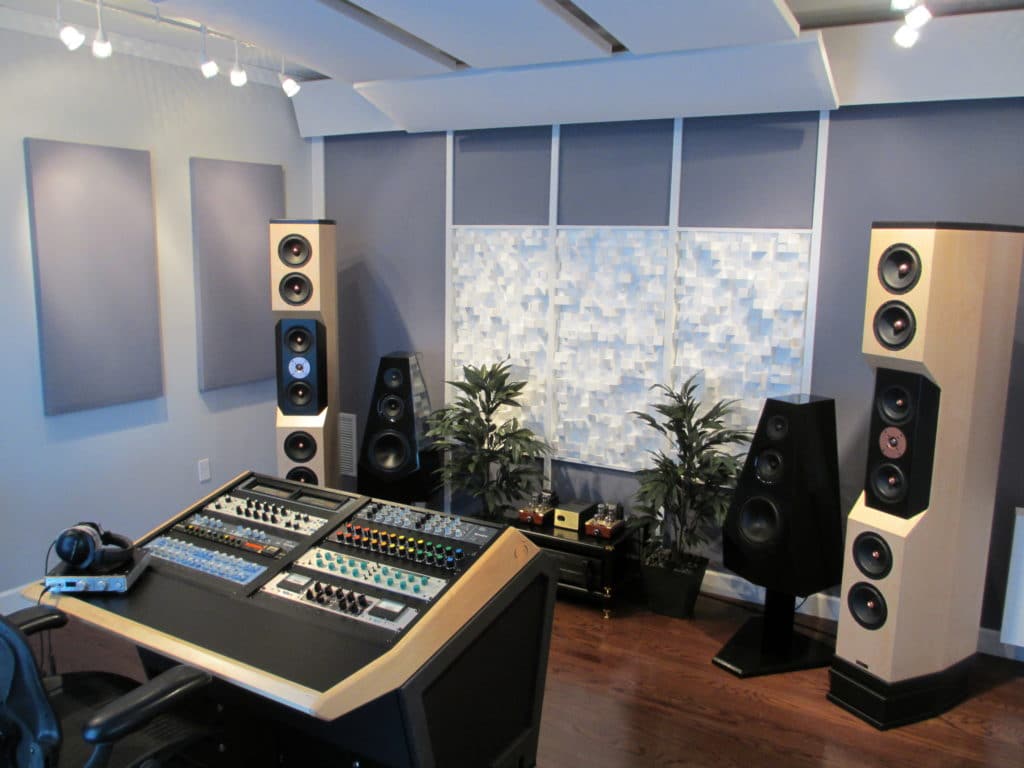
An example of an analog mastering setup.
It may be surprising then that mastering takes multiple forms, and can be categorized based on processing type, the medium the song will be distributed on, and even the genre or style of the production being made.
In all of this complexity, one category that could use some clarification is Digital Mastering.
Digital Mastering is the process of increasing the perceived loudness and clarity of a mix, all while using solely or primarily digital processing techniques. Like a regular master, a digital master prepares a song, EP, or album for release, but is distinguished by the sonic characteristics of digital processing.
If you’re curious how a digital master is accomplished, how it relates to analog mastering, and some of the benefits of digital mastering, read on for a comprehensive understanding of the process.
First, we will be taking a step-by-step look at how a digital master is accomplished. Keep in mind that although following these steps will lead to a great sounding digital master, it is certainly not the only way to route your signal.
How you route your signal is entirely up to you, and what the mix calls for.
Feel free to experiment with the digital mastering process to find a sound that you enjoy.
If at any point you’re curious how your mix would sound mastered by analog equipment and a professional mastering engineer, send it to us here, we’ll master it for you and send you a free mastered sample: https://www.sageaudio.com/register.php
Digital Mastering Occurs within a Digital Audio Workstation
The digital mastering process all starts within the DAW or digital audio workstation. For a stereo mastering session, the stereo track (or tracks if an EP or album is being mastered) is imported into the DAW.
Digital mastering occurs within a DAW or Digital Audio Workstation.
Ideally, this file will have a 96kHz. sampling rate and a 24 to 32 floating bit depth. These two specifications ensure that the full frequency spectrum is being accurately recreated, and the full dynamic range is available during playback.
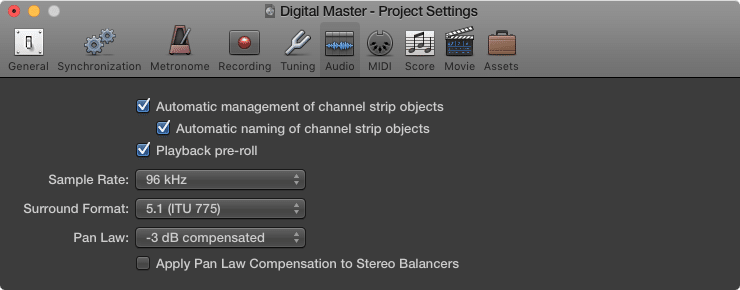
Be sure to import the session with the correct sampling rate and bit depth.
If you’re curious what these numbers mean or need a refresher, here are some quick equations:
Sampling Rate/2 = Range of Frequency Spectrum
ex. 96,000Hz./2 = a Frequency Range of 48 kHz.
Bit Depth x 6 = Dynamic Range in dB
ex. 24 bits x 6 = 144dB of Dynamic Range
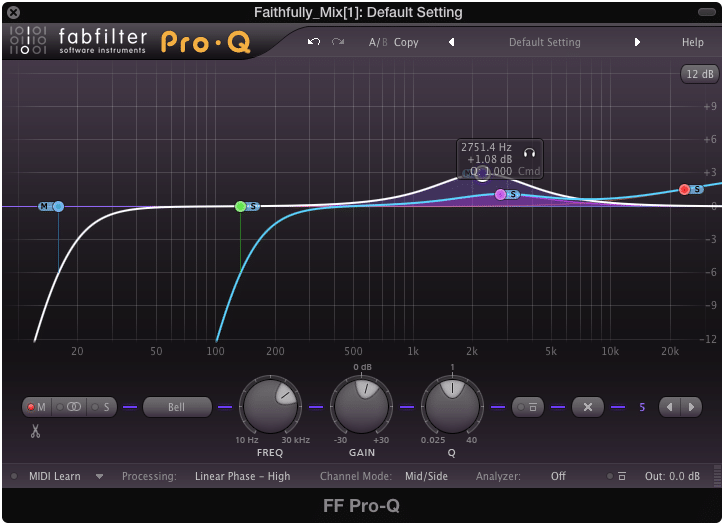
Step 1: Subtractive Equalization
Some engineers may begin their digital mastering process differently, but using subtractive equalization first ensures you attenuate the unpleasant aspects of your mix prior to any amplification.
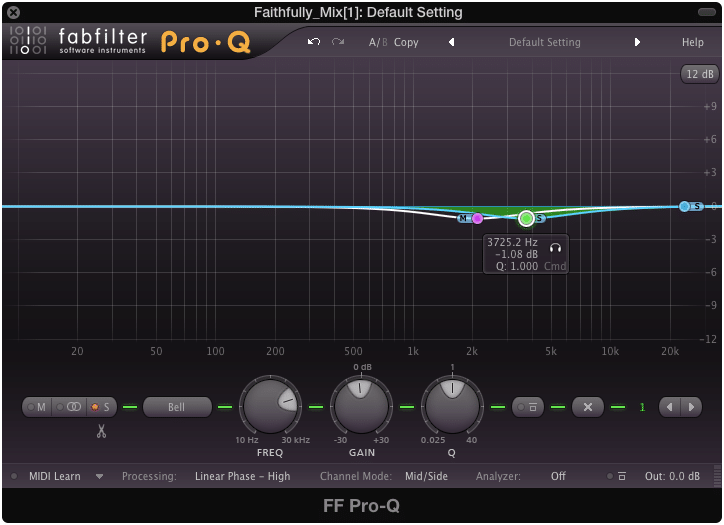
Subtractive equalization attenuates undesired frequencies before further processing
It only makes sense to cut out aspects you wish were gone first, instead of amplifying them and then attempting to cut them out later.
This is a great time to implement Mid-Side processing and attenuate the low-frequency response of the side image.

Cutting the side frequencies using a high-pass filter ensures a mono low end.
By doing so the low frequencies stay mono, leading to a focused bass and kick. This will help maintain your dynamic range as the overall levels are pushed.
After you’ve attenuated the frequencies you don’t find sonically pleasing or useful, it’s time to move on to the next step in the processing chain.
Step 2: Multi-band Compression
Take this instruction with a grain of salt. Although it may be a great idea to control some of the dynamics at this point, it may not be necessary.
If you’re mastering a track that needs it’s dynamics to be controlled, then using multi-band compression is the next logical step.
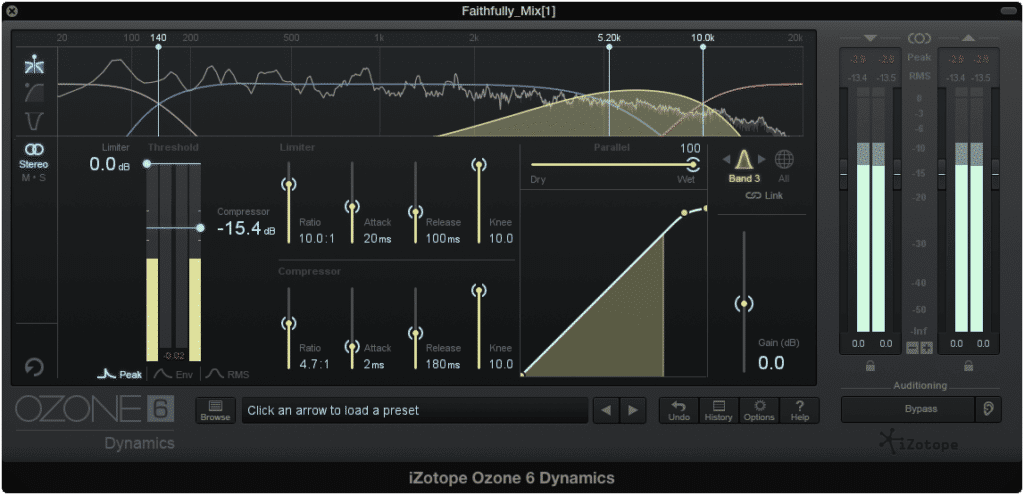
Multi-band compression attenuates undesired dynamics, prior to further amplification and processing.
If the track has already been compressed, and compressing further will degrade the quality of the track, then do not compress further.
This may be difficult to determine at first, so if you’re having difficulty you can always use a VU or a LUFS meter, to get a visual representation of the dynamic range.
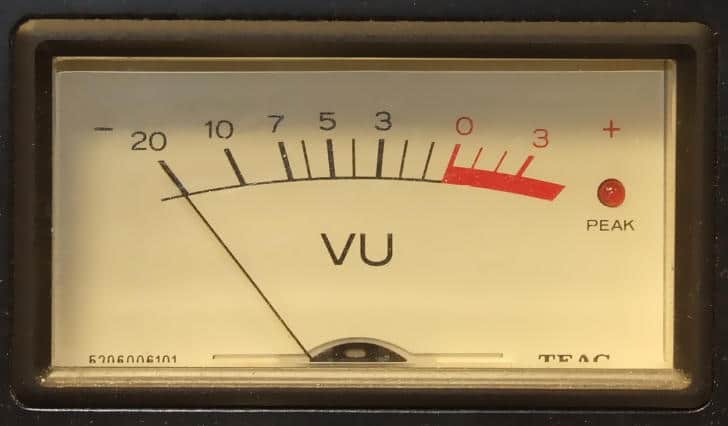
VU meters offer valuable information about your master's dynamics.
Of course, it’s best to use your ears, but when all else fails, metering offers a consistent, unbiased representation of your dynamic range.
Step 3: Gentle Distortion and Harmonic Generation
In a digital mastering setup, it isn’t uncommon for the master to lack a certain warmth or full sound. This is because analog equipment generally adds mild distortions and harmonics to a mix, making them fuller, warmer, and indicative of classic beloved recordings.
As a result, analog emulation has become incredibly popular in digital processing and audio software creation. Emulating the sonic variations analog equipment imparts on a signal is crucial to avoiding an all-too-clean digital master.
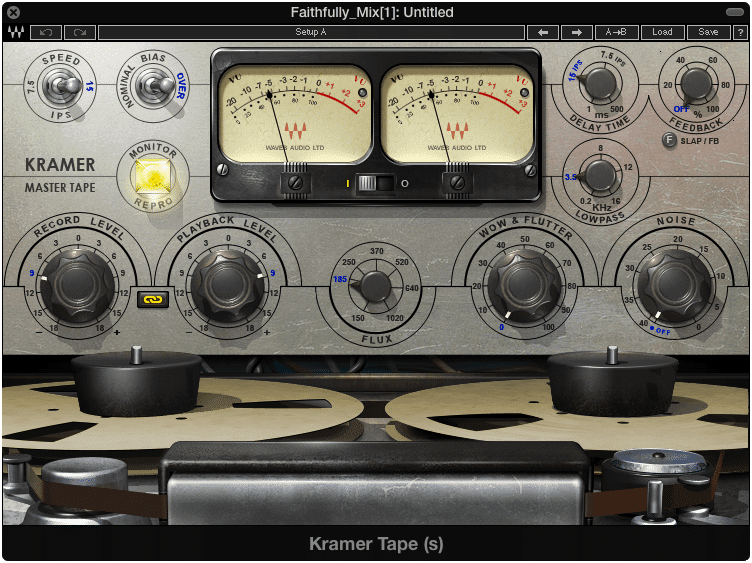
Tape saturation creates odd harmonic generation.
With your frequency response balanced, and your dynamics controlled, let’s add some character to the mix.
Keep in mind that when affecting an entire mix, a little distortion goes a long way.
Use analog emulation and tube emulation to achieve a full, warm, and classic sound.
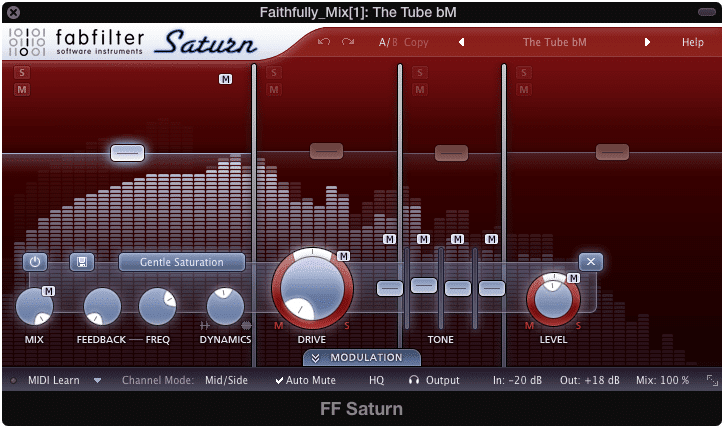
Tube distortion creates even harmonic generation
If you’re curious about analog mastering and want to know more about how analog equipment affects a mix, check it out here: https://www.sageaudio.com/register.php
If you want to know more about distortion in general, “What Distortion is Actually Doing to Your Mix,” would be a great source of information.
In short, analog emulation causes saturation. Saturation is gentle soft-knee compression, mild distortion, and harmonic generation. Each analog emulation will offer varying degrees and types of saturation, so blending them tastefully takes some knowledge of how they’re affecting the signal.
Although analog sounds great, it may not always be desired.
With all of this said, there may be times were a clean digital sound is desired. If you’re looking for a highly transparent, punchy sound, in which instrument groups are entirely distinct and separate from one another, consider mastering without analog distortion or emulation.
Also, if the mix has already been distorted enough, avoid using additional distortion.
Step 4: Low-Level Compression
While analog emulation adds character, low-level compression brings out the hidden details of the mix.
In any mix, louder aspects of the mix mask or cover up the quieter parts. As a result, the more nuanced details of both the recording and processing can become lost or imperceptible.
A low-level compressor separates the quietest aspects of the mix from the louder elements, compresses it, and then amplifies it.
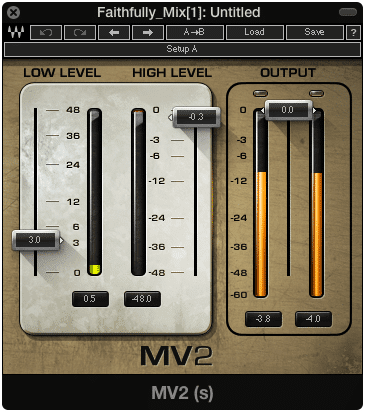
Low-level compression amplifies the quieter parts of a recording.
What this does is take the parts of the song that would have otherwise been lost, and make them loud enough to contribute to the overall tonality, clarity, and perceived loudness of your master.
By using it, the timbre of each instrument is accentuated, and the detail is brought to the forefront.

A finger-picked acoustic loses a lot of detail when instrumentation is added. Low-level compressors accentuate the timbre of any instrument.
Keep in mind that it will also increase the total harmonic distortion and the noise floor. Although this may be desirable in some cases, excessive low-level compression should be avoided.
In our case, the low-level compressor is being implemented after the gentle distortion and harmonic generation, meaning it will make the quieter aspects of these distortions more noticeable. Using this effect modestly works wonders on a mix, especially when placing it after any harmonic generation.
If you’re looking for a good low-level compressor, the Waves MV2 is a great option.
Step 5: Additional Equalization or Frequency Specific Expansion
Although equalization and expansion are certainly two different forms of processing, their purpose at this point in the signal chain is similar.
Use frequency-specific expansion if you want to increase the amplitude of certain frequencies and increase the dynamic range of these frequencies.
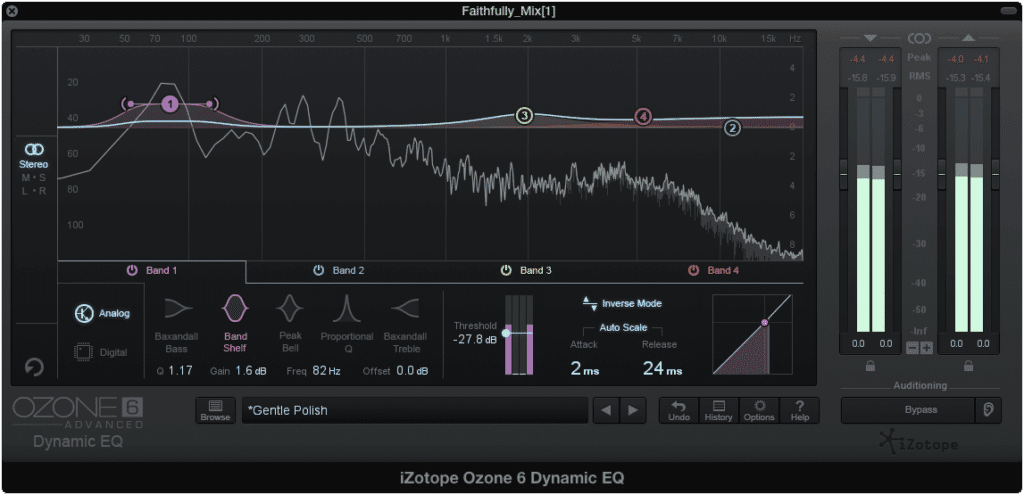
Dynamic Equalization allows for frequency-specific expansion
Use equalization if you want to increase the amplitude of certain frequencies, but do not want to increase the dynamic range of these frequencies.
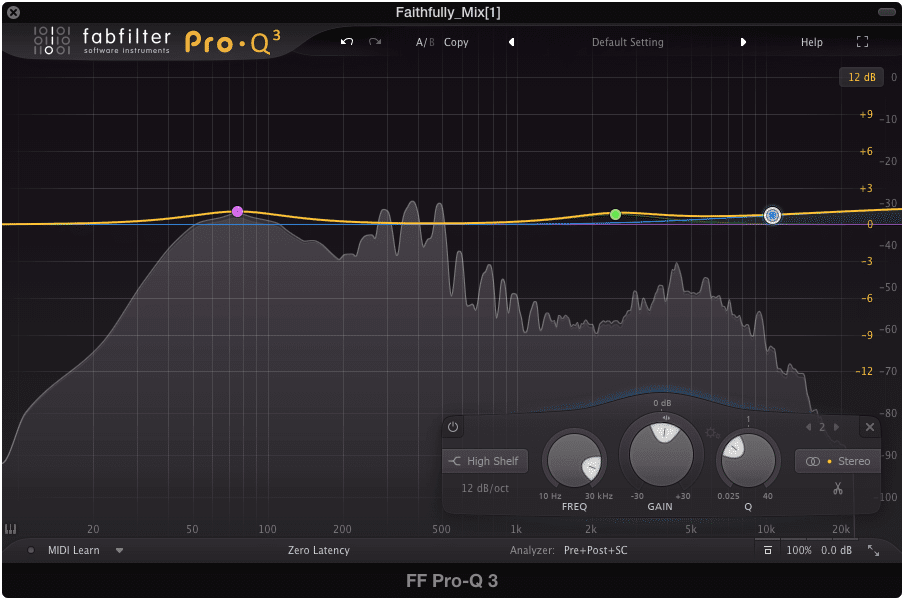
Gentle amplify frequencies at this stage in your digital mastering signal chain.
Using both allows for added flexibility.
Keep in mind that although you can use these plugins for attenuating or compressing certain frequencies, ideally this attenuation would have occurred during steps 1 and 2.
That said, there are certain creative reasons why you may want to attenuate the signal at this point in your signal chain, but most instances don’t call for this.
Just like before, use these effects sparingly, as equalizing or expanding an entire mix is much different than processing individual instruments. Any changes you make to the frequency response of an entire mix will drastically alter the sound of the song.
What may be a reasonable change to an individual instrument, may not work well during the mastering process.
Step 6: Stereo Imaging
Next, stereo imaging is a valuable step in creating a great sounding master.
This can take multiple forms, from the mid-side processing mentioned before to psychoacoustic effects that create perceived spatial complexity.
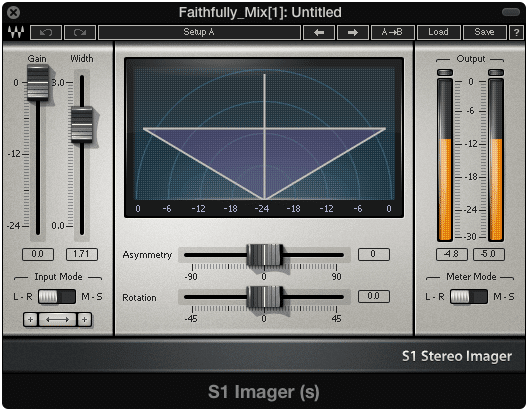
Affecting the entire stereo image should be done carefully.
As a general rule-of-thumb, keep the low frequencies up to roughly 130Hz. mono.
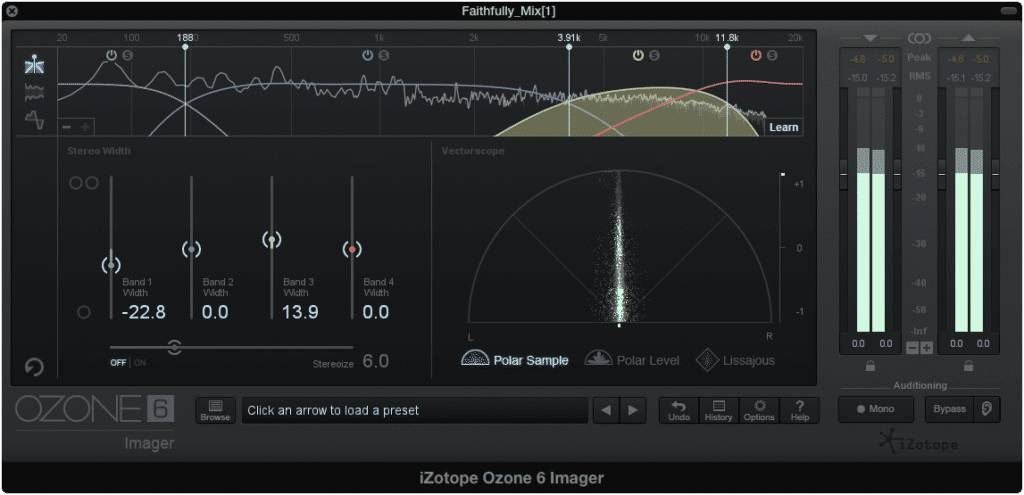
A mono low end ensures playability across multiple speaker systems.
The remaining frequencies can be affected based on personal preference. With that said keep in mind what speaker system you expect the eventual listeners will be using.
If the speaker system is mono, excessive stereo imaging will result in a weaker signal, with a lot of lost information.

Cutting the side image up to 130Hz. keeps your kick and bass mono.
Regardless of the speaker system being used, excessive expansion of the stereo image will result in an unfocused sound.
Keeping a strong centered presence in a master is crucial to having to translate well across multiple listening systems.
Step 7: Limiting and Metering
This is the part of digital mastering most engineers are familiar with. Unfortunately, some misinterpret the role of limiting to be the only part of mastering.
Although limiting is an important aspect of digital mastering and mastering in general, it’s role should be used minimally, unless a certain creative effect caused by its excessive use is desired.
Proper gain staging and dynamic control reduces the need for brick wall limiting
As we’ve already seen here, there are many steps in the mastering process. Furthermore, the list above is by no means comprehensive in terms of deeply understanding each form of processing it describes.
Each step can be subdivided into a multitude of important details, each contributing to the overall sound of a master.
All this to say that although limiting helps to easily create the loudness often associated with mastering, it is by no means the entirety of the mastering process.
Ideally, there is no need for limiting. If everything has proper gain staging, and the dynamics are controlled adequately, the levels can be pushed to right before peaking and still be perceived as a loud master.
This way the dynamics are preserved and brick-wall limiting isn’t necessary.
If you want to try this technique, watch Gain Staging: What You Are Missing. It’s full of helpful information you need if you want to master audio without a limiter.
Because this isn’t always a realistic option, a digital limiter may be needed. Keep a close eye on both the amount of signal being compressed, and the metering to ensure the signal is a reasonable volume, and peaking isn’t occurring.
For loudness, a good place to start with a VU meter is peaking at 0 VU, with the meter set to -10dB or VU.
When using a LUFS meter, an integrated LUFS of -14 is ideal.
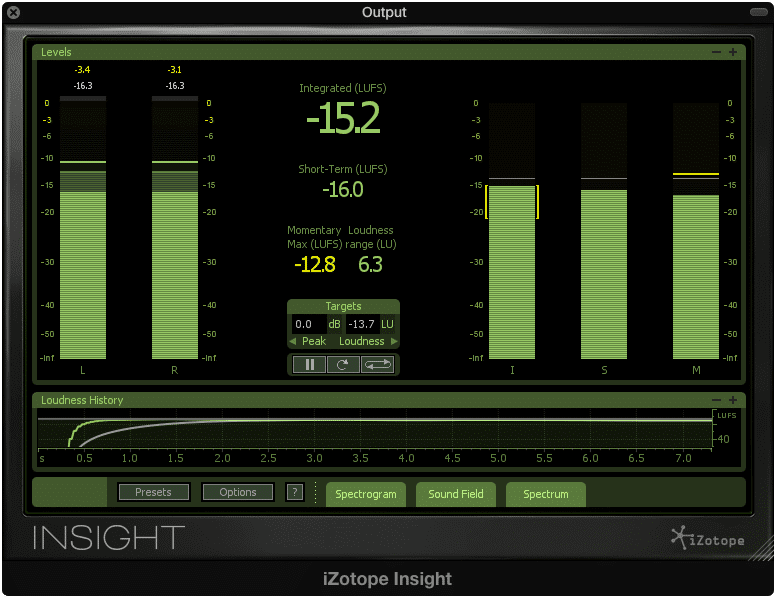
An Integrated LUFS of -14 is a good level for your master.
These standards may change based on the medium on which the song or album is being released. It may also change between streaming platforms, so keep their normalization specifications in mind.
If you need more information about normalization across platforms, check out our blog post titled: “How Loud Should my Mix Be?” It describes how the normalization process works and the implications it has on mixing and mastering.
For more information about how mastering changes with the different medium check out:
Or
What is Mastering for Cassette?
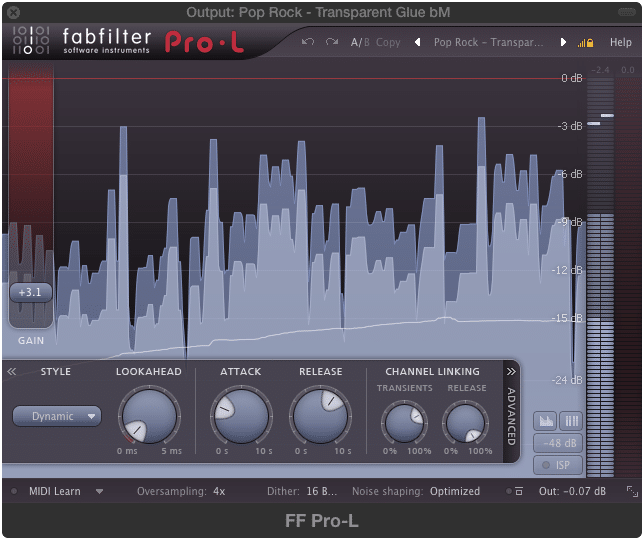
If you’re in need of a good digital limiter, one that can accommodate multiple genres the FabFilter Pro-L is a great option.

The FabFilter Pro-L offers versatile settings, making it a viable option for multiple genres.
Step 8: Dithering and Exporting
Once the master sounds how you want it to, and all of the specifications are correct, you’re ready to export.
This is when to use dithering. As you decrease your sampling rate and bit depth from 96kHz. and 24 bits respectively, to 44.1kHz and 16 bits, distortion occurs.
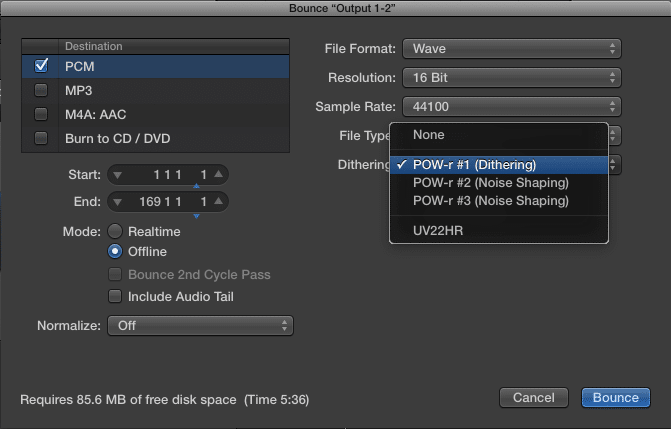
In most DAWs, dithering is an option when exporting the session.
This distortion is known as quantization distortion. It is characterized by high order harmonic generation, which is noticeable and unpleasant sounding.
Dithering is the process of using noise to mask these distortions. Similar to how louder sounds mask or cover up quieter sounds, dithering covers up the effects of quantization distortion.
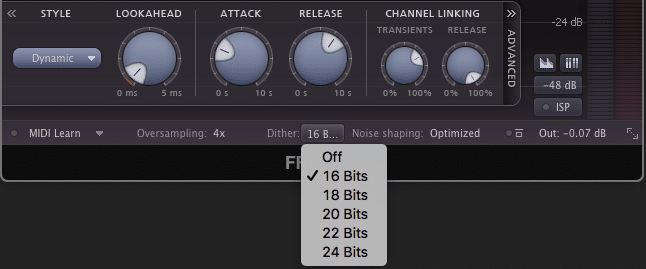
Some limiters also include dithering.
Be sure to use dithering whenever you’re decreasing the sampling rate and bit depth (especially the bit depth) of any recording.
As stated before, treat these steps as a general guideline that doesn’t need to be followed exactly.
Ultimately what determines how to master a mix is the mix itself. When mastering, have a flexible plan in mind - one that can be adjusted with any curveball the mix may throw at you.
How Does Digital Mastering Differ From Analog Mastering?
The primary difference between the two is the sonic characteristics created by their respective processing.
Digital mastering is typically very clean. The transients are preserved, and little to no harmonic generation occurs from the processing. Digital mastering works great for genres in which clarity and transient response are of utmost importance, such as EDM and Metal.

EDM and some electronic genres have a distinctly digital sound. Analog emulation might not be needed for these genres.
Analog mastering typically colors the sound in a pleasing way. The transients are slightly softened, the frequency response lends itself to a warmer overall tone, and harmonics are generated. Analog mastering works well for genres that require extra character, whose recordings are known for analog characteristics.
The other primary difference between the two is with session recall. A digital master can be easily recalled by simply opening its session file. An analog master needs to be manually recreated using the same hardware used for the original session.
If you’d like to hear the difference between digital mastering and analog mastering, master your mix using the steps above.Then send us your mix at https://www.sageaudio.com/register.php. We’ll master it for you, using solely analog equipment and send you a sample so you can compare the two.
Also if you’d like to learn more about analog mastering here is another blog, with a great deal of information on the topic: "What is Analog Mastering?"
Conclusion:
Digital mastering is a viable option for any independent artist or engineer looking to delve into mastering audio.
The expense of getting the software needed to master music is far less than what’s required for an analog mastering setup.
Even with stock plugins, you can equalize, compress, expand, widen or narrow, distort and limit your track.
This availability offers a great opportunity to learn more about the mastering process, and about audio in general.
The more you look into this topic, and each one of the steps above, the more you’ll recognize the complex nature of the mastering process. You’ll learn more about the specific functions of each type of processing, and be able to clearly notice any effect you make on your signal.
If you’re new to or unfamiliar with this process, try mastering some songs before offering to do so for others, or releasing any of your masters as finished works. This way you can hone your skills, and become proficient in digital mastering.
At any step in the process, if you need more information, techniques, or tips, feel free to look into our other blog posts on the topic:
And of course, if you’d like to hear your track mastered with analog equipment send it to us here for a free mastered sample: https://www.sageaudio.com/register.php
Have you ever digitally mastered a song?


