Free vs. Cheap vs. Expensive Plugins: Digital Compressors
The right plugin is always difficult to find. Regardless of whether you’re new to audio production or have been involved for some time, finding a great plugin you know, you’ll use for a while can be a challenge.
That’s why we wanted to explore some options and see which digital compressor plugin was worth its cost, and time to install.
We’ll be looking at 3 plugins, one of which is free, the other cheap, and the least expensive, to see how they compare.

We'll figure out which compressor is the best for your time and money.
The plugins we’ll look at are:
- Free: MCompressor by MeldaAudio
- Cheap: C1 Comp-Gate by Waves Audio
- Expensive: FF Pro-C 2 by FabFilter
We’ll discuss and explore their functionality, talk about their interface and design, as well as examine how their processing can affect a signal by measuring any changes.
We’ll also listen to some examples of each and alter their settings to hear how they affect a signal.
Furthermore, we’ll look at their GPU usage to see which one is best for mixing large projects for which a lot of processing will be needed.
Lastly, we’ll share which one we think is the best plugin given all of the factors we just discussed.
If you’re making music and have a mix that you want to hear professionally mastered, send it to us here:
We’ll master it for you and send you a sample for you to review.
Free: MCompressor by MeldaAudio
The MCompressor is free, and offers a lot of great options.
MCompressor by MeldaAudio is a great free plugin that offers a surprising amount of functionality. It comes in a bundle of roughly 30 or so other free plugins from Melda Audio and is definitely worth checking out.
Harmonic Distortion
The first thing I want to look at with this plugin is whether or not it distorts signals when using aggressive compression.
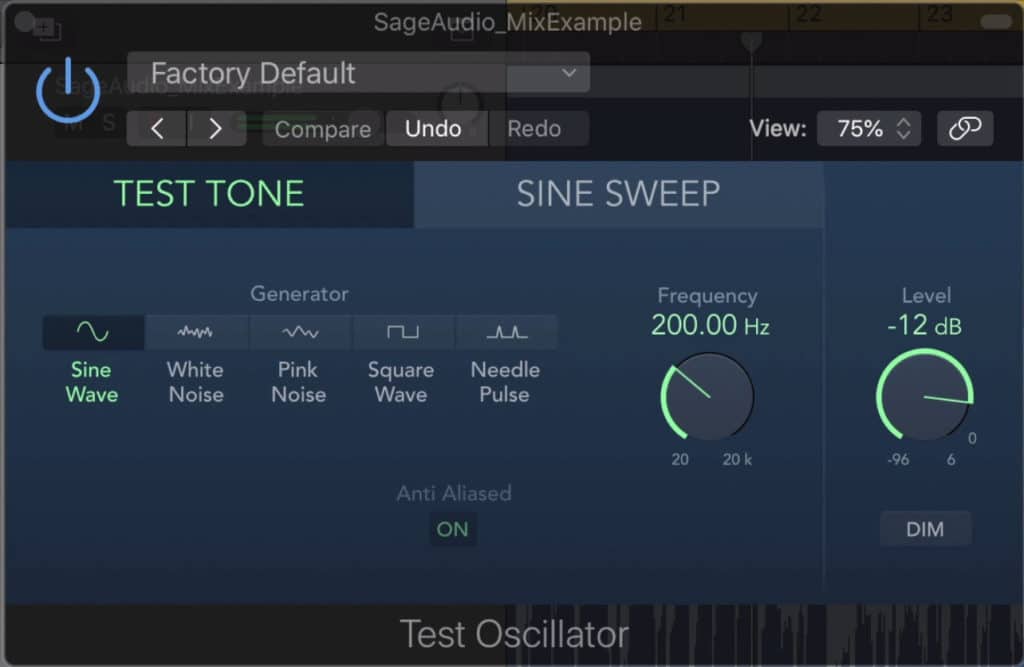
We tested this plugin by running a 200Hz sine wave through it, and heavily compressing it.
To test this, I’m going to use a 200Hz sine wave and compress the signal significantly, while observing the waveform in a frequency analyzer.
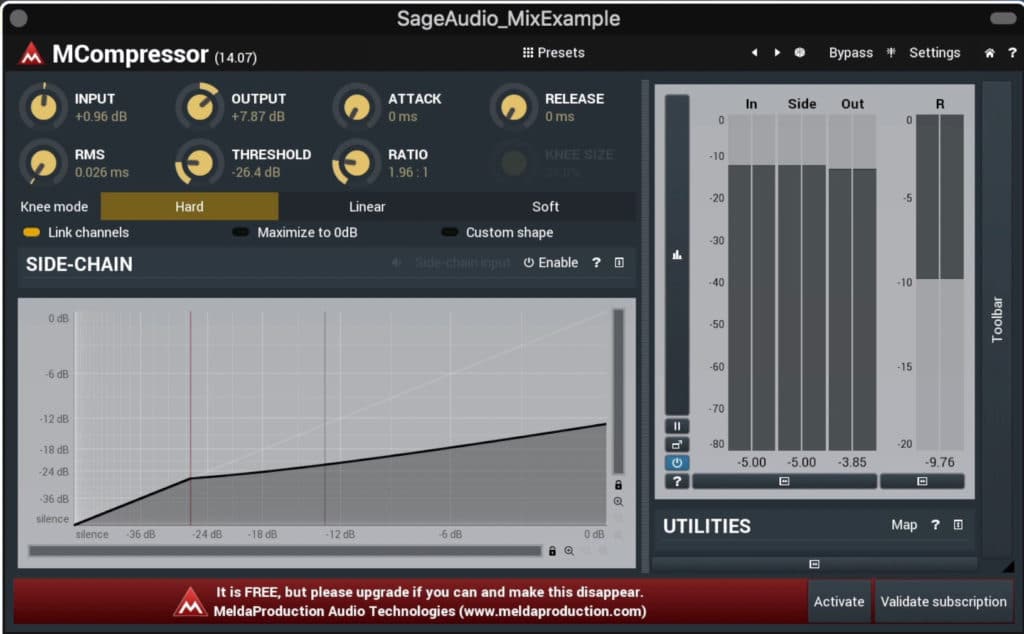
We performed about 10dB of gain reduction with a fast attack and release.
We can see that by compressing the signal, we only reduce the amplitude of the sine wave peak - but if we reduce attack and release settings to their quickest values, we begin to get distortion in the form of 3rd and 5th order harmonics.
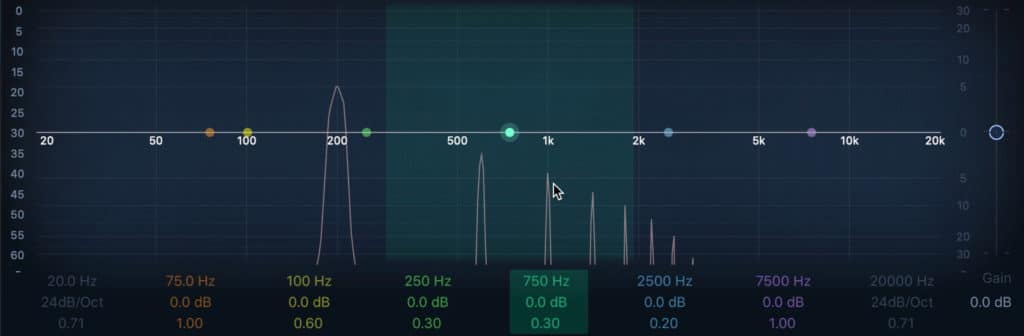
Notice that the compression caused significant harmonic distortion at these settings.
Although this doesn’t definitively prove that this compressor will cause distortion to all signals when it's used aggressively, we do know that distortion is possible with this plugin.
If you’d like to learn more harmonic distortion, and become more familiar with how it affects your mixes and masters, check out our blog post and video on the topic:
It’s full of great information on the topic, and the video includes listening examples.
Plugin Functionality
Next, let’s talk more about the plugin’s functionality and interface:
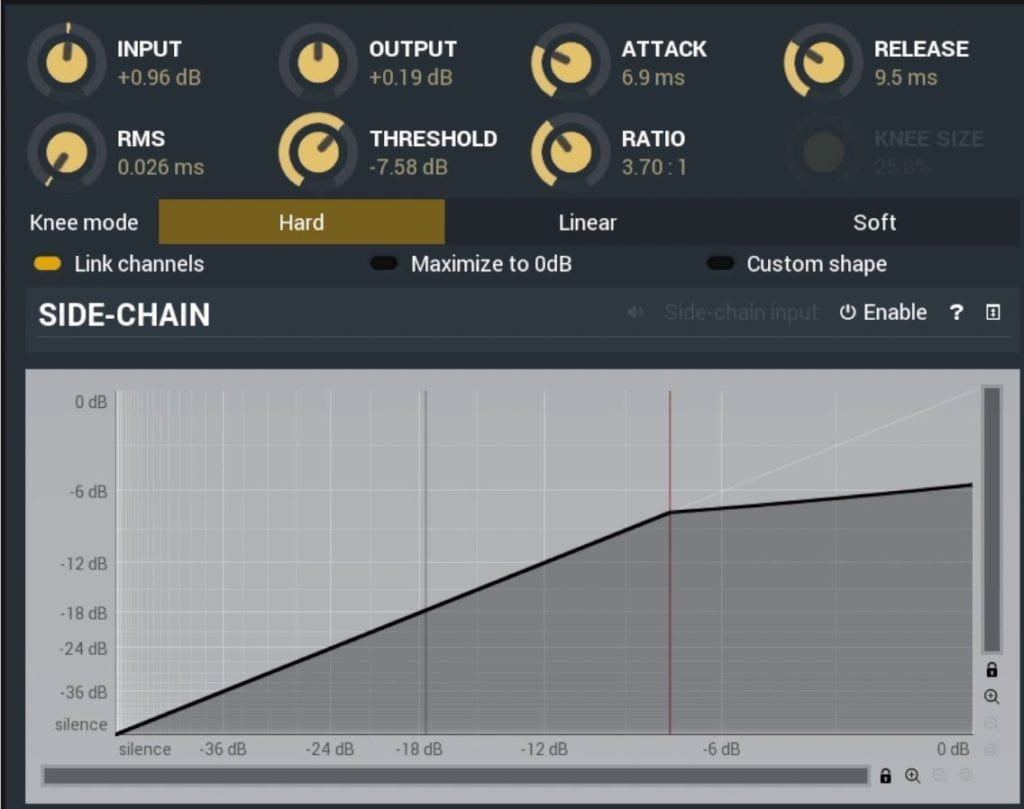
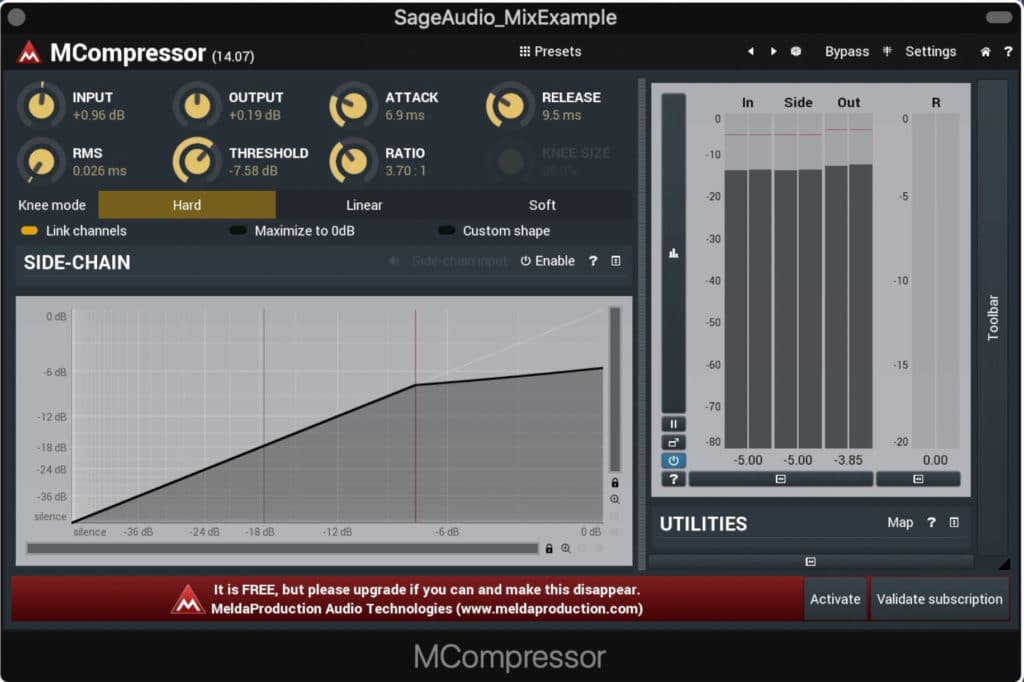
The majority of functions can be found in this first window.
Input: Alters the gain of the input with a range of 48dB
RMS: Determines how the compressor measures the input’s amplitude. In the full left position, the compressor measures the signal by its peak value, but as its value is increased, the RMS (measured in milliseconds) is used to measure the input.
A longer RMS setting will result in smoother sounding compression.
Output: Alters the gain of the output with a range of 48dB
Threshold: Determines the amplitude at which compression will occur
Attack: Determines how quickly compression occurs, ranges from 0ms to 1000ms
Ratio: Determines how aggressively compression occurs once the signal crosses the threshold. Ranges from 1:1 or no compression, to 20:1.
Release: Determines how long compression occurs for, ranges from 0ms to 1000ms
Knee-Size: Affects the slope of the ratio and threshold’s interception. This function only changes the amount of compression in a linear or soft-knee setting.
Knee modes allow you to alter the relationship between the threshold and the ratio.
In the knee mode section, you can switch between a hard-knee, linear-knee, and soft-knee setting. These affect both the ratio and threshold, in turn changing how much attenuation will occur.
A soft-knee setting is going to sound more natural and gradual.
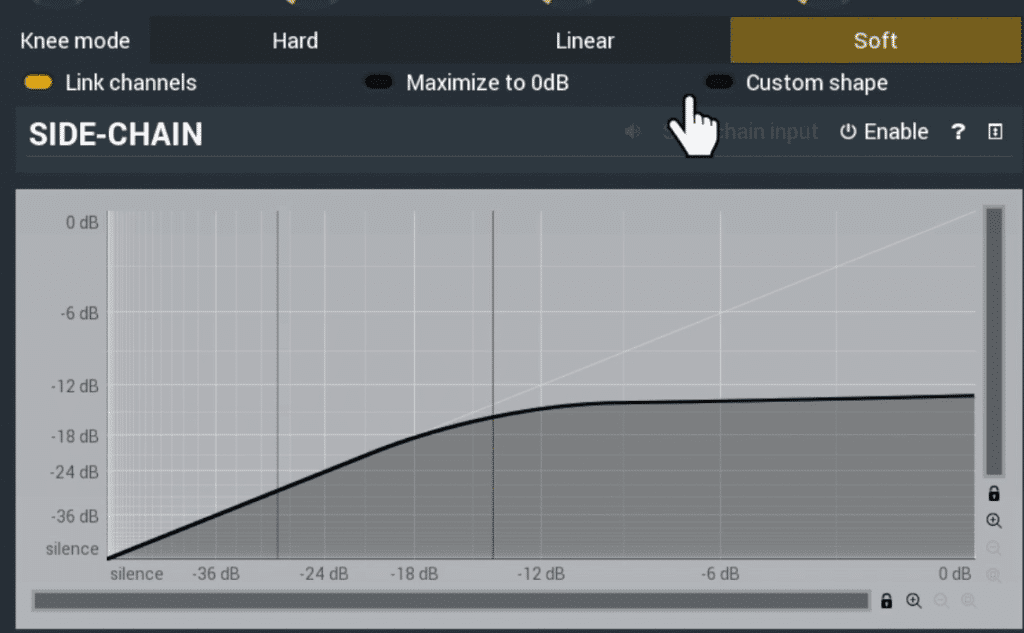
You can create a custom knee, which includes both compression and expansion.
Additionally, you can create a custom shape , as well as maximize the amplitude of the signal to 0dB. By linking the channels you affect the left and right channels collectively.
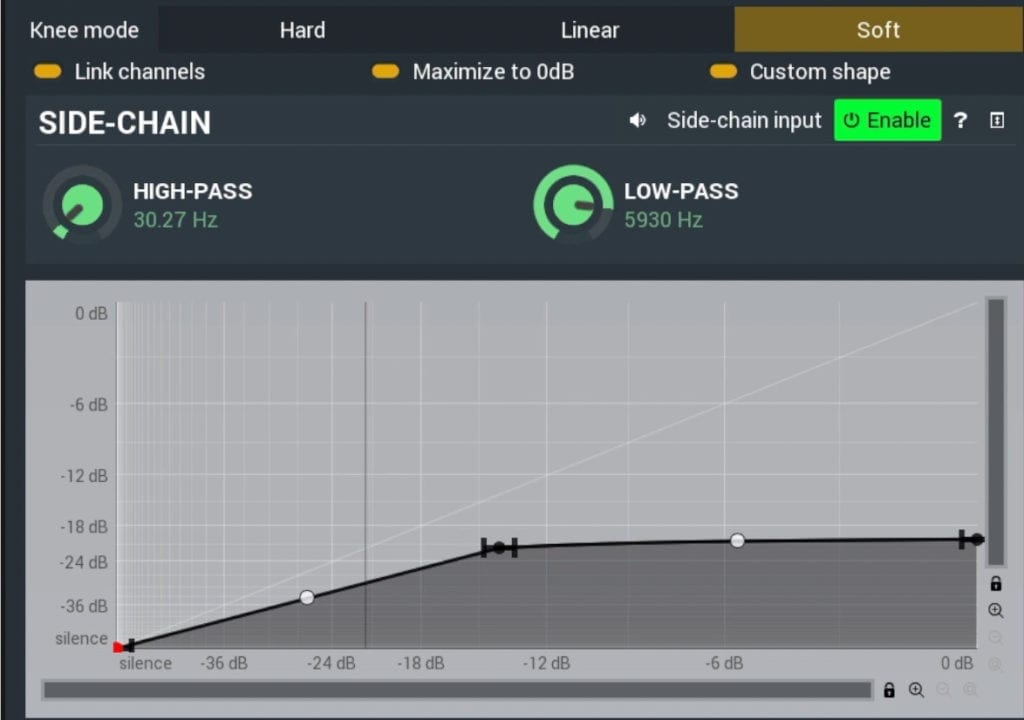
You can enable a Side Chain , as well as directly monitor the side-chain input. A High and Low pass filter for the side chain are also available.
In the Toolbar section, you can enable Automatic Gain Control which compensates the amount of attenuation that’s occurring with variable automatic make-up gain.
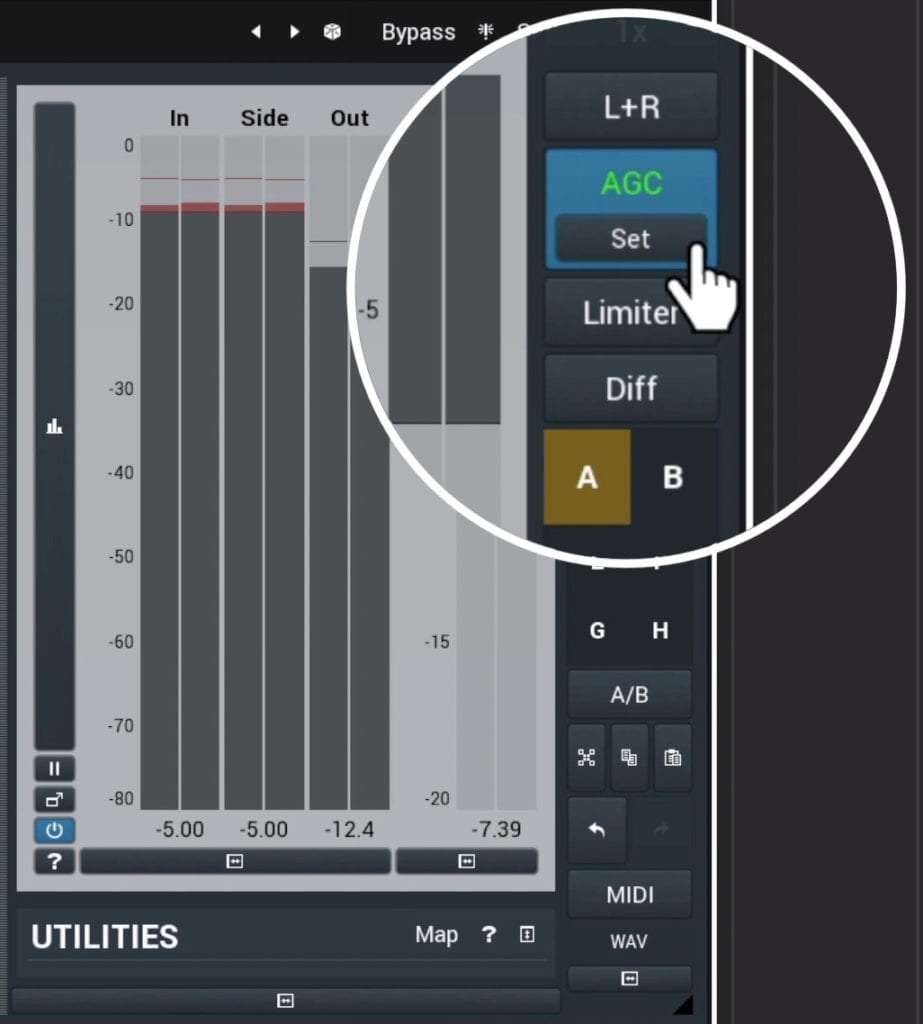
In the Utilities section you'll find makeup gain options, as well as a protective limiter.
You can also enable a limiter that protects the signal from peaking - this is best used to protect from overs and unexpected excessively loud signals, and should be disabled after the correct settings are dialed in.
Lastly, you can both switch the incoming signal between left and right, mid-side, and more - as well as monitor the difference between the input and output. This lets you hear how much compression is occurring and if this is causing any unwanted distortion.
The plugin has 26 presets to choose from , and a random button to help you switch between them.
Lastly, in the settings section, you can change the plugin’s appearance between preset displays, or randomize the display.
CPU Usage
Although these numbers will be relative to this particular computer, they’ll help to understand how taxing these plugins are when compared to one another.
Using just the MCompressor plugin with its default setting, the CPU usage was roughly 20% to 25%.
Cost
This plugin only costs the amount of time it takes the install it. You can pay for a version of this plugin, but this changes very little about the plugin.
If you’re looking for more free compressor plugins, ones that we’ve tested and enjoy, check out our picks for some of the best free compressor plugins available
In the video, we showcase each plugin, cover its respective functionality, and listen to some examples.
Cheap: C1 Comp by Waves Audio
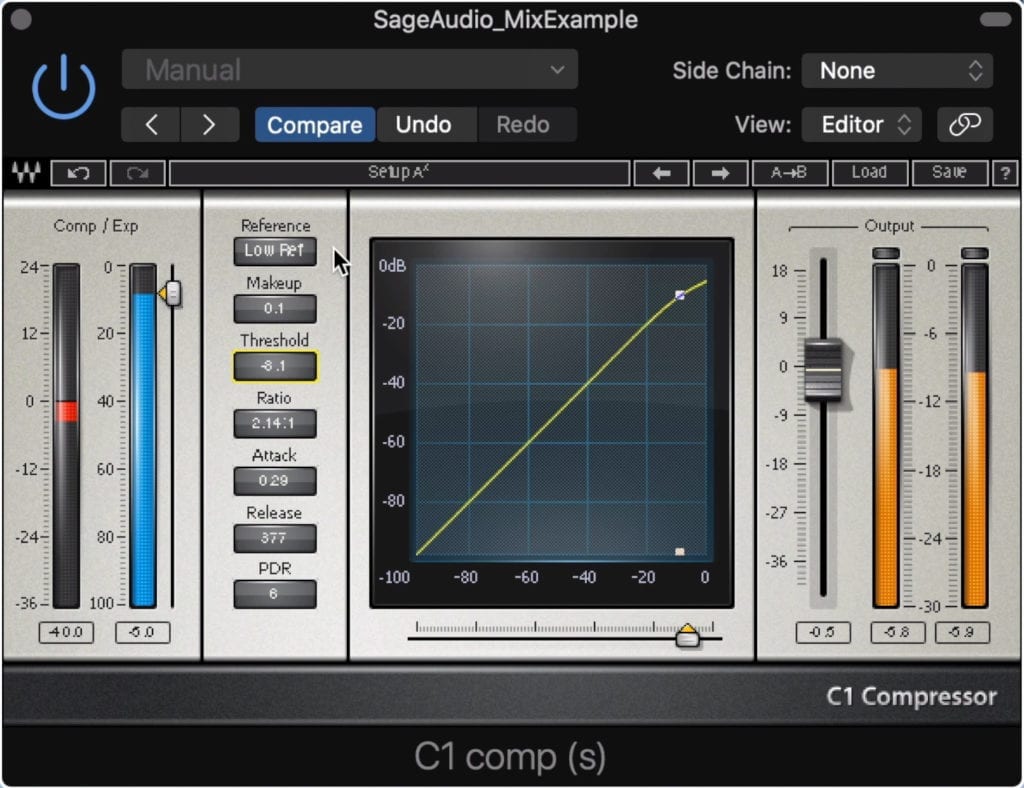
The C1 compressor is a popular option for a lot of engineers.
The Waves C1 has been a go-to compressor for producers for years. It’s simple design, yet versatile functionality make it a great option for both simple and complex compression tasks.
Harmonic Distortion
Like the MCompressor, the C1 Compressor introduces harmonic distortion when used aggressively. Performing the same test as before, we’ll notice that setting the attack and release times to the quickest settings and then severely attenuating the signal creates 3rd and 5th order harmonics.

When aggressively compressing the signal with a fast release setting, distortion occurs.
Additionally,a 7th order harmonic can be seen on occasion as well . Again, this doesn’t mean this plugin will distort your signal, but it might when using quicker attack and release settings.
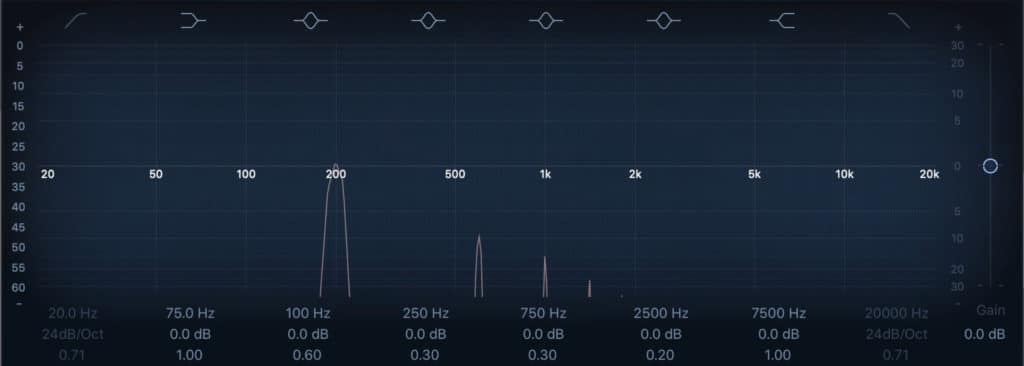
Notice that this plugin generates harmonics when compressing the signal aggressively.
Plugin Functionality
The majority of the plugin's functions can be found on the left side of the plugin.
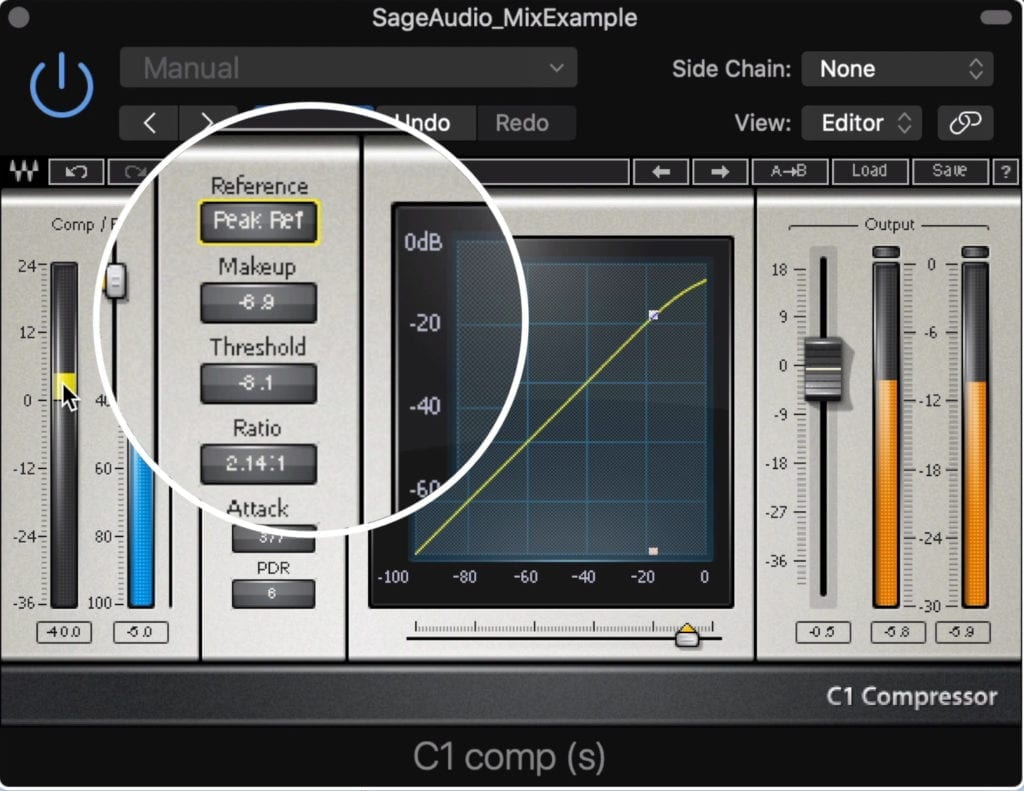
Reference: Affects the output level. When in Low Ref mode, the output decreases as more compression occurs. When in peak reference, the output is maintained with automatic gain when the signal is compressed.
Makeup: Allows you to increase the output level of the signal, after compression.
Threshold: Determines the amplitude at which compression will occur
Ratio: Determines how aggressively compression occurs once the signal crosses the threshold. Ranges from 0.5:1 or expansion, to 50:1.
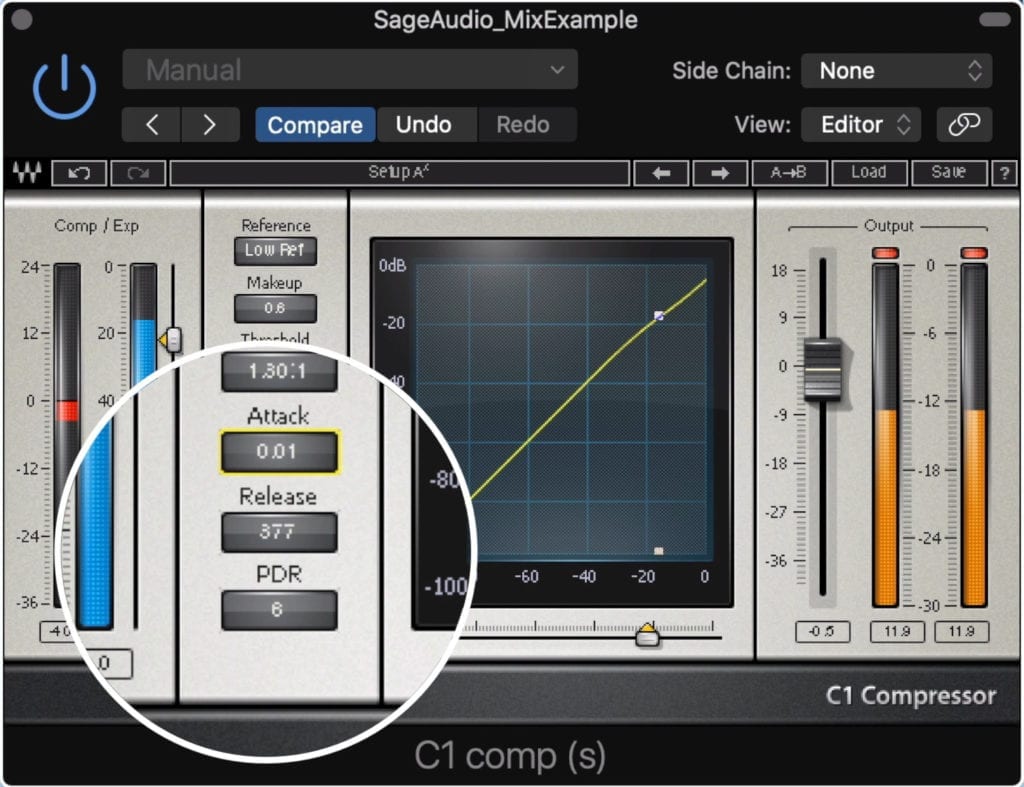
The attack offers a fast 0.01ms setting. Program dependent release is available as well.
Attack: Determines how quickly compression occurs, ranges from 0.01ms to 1000ms
Release: Determines how long compression occurs for, ranges from 1ms to 10000ms
PDR: Which introduces a program dependent release, meaning that the release time depends on the incoming signal.
Underneath the graph is another slider that can be used to lower the threshold. The same can be said about the slider on the left side of the plugin.
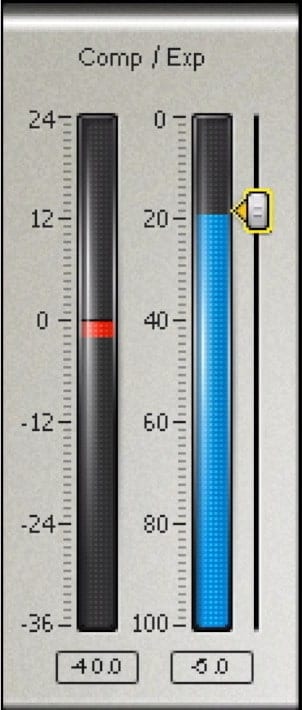
The slider shown here affects your threshold.
In the output section, you can increase or decrease your output by up to 18dB, and reduced as much as 40dB.
It should be noted that when purchasing this plugin, you’ll also receive the C1 Comp - Gate, and C1 Comp-SC or side chain.
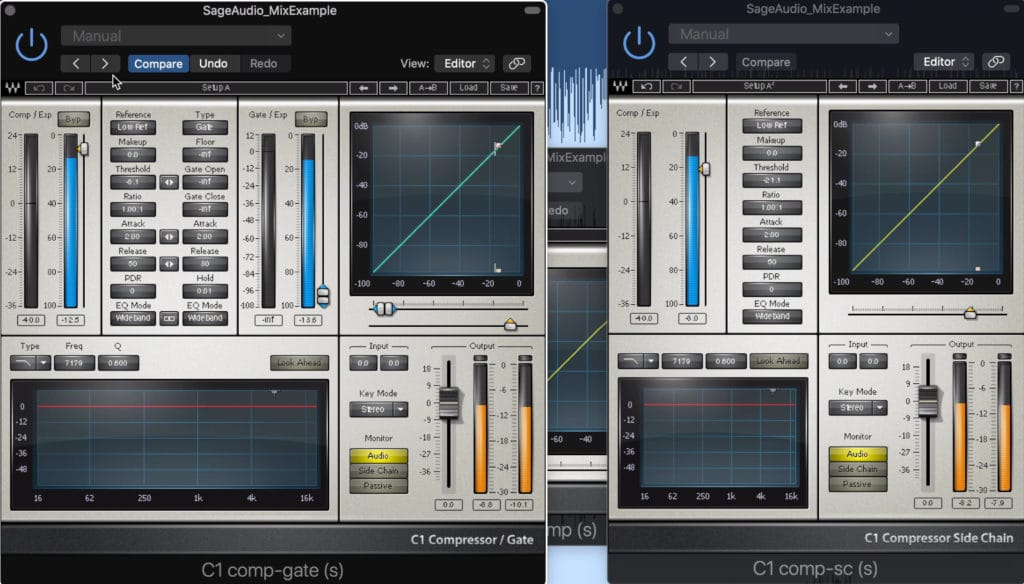
When you purchase this plugin, it also comes with variations of the compressor.
These offer the ability to add dual gating and expansion, to introduce internal sidechaining and equalization, enable lookahead, and more.
When it comes to the display, there’s little about it that can be altered or customized.
The plugin allows you to filter between previous changes, as well as AB your settings.
Lastly, this plugin comes with 6 distinct presets that are suitable for general mixing.
If you’re working on a mix that you’d like to hear mastered, send it to us here:
We’ll master it for you and send you a free sample of it for you to review.
CPU Usage
When using just the C1 Compressor, the CPU usage stays a little under 20%. This means it may be better for larger mixes in which a lot of unique compressor settings will be needed.
For versions of the compressor with gating and side-chain functionality, this percentage is a little higher.
Cost
The C1 plugin and the gate and side-chain options bundle costs roughly $40 but seems to go on sale pretty often for roughly $20-$25.
Expensive: FF Pro-C 2 by FabFilter
The FF Pro-C 2 is a fantastically designed and versatile plugin.
The FF Pro-C 2 is a fantastically designed, aesthetically pleasing, and highly versatile compressor. It allows engineers the ability to both cleanly and colorfully compress their recordings, as well as use complex side-chain techniques.
Harmonic Distortion
Using the same test as before, it appears the little to no distortion occurs when aggressive compressing the signal with the FF Pro-C 2.
This may be due to the slower release time (10ms); however, when setting the release of the other compressors to 10ms, harmonic distortion still occurred.
Notice that 1 harmonic of a lower amplitude is present.
That said, it’s likely that the FabFilter Pro-C 2 causes less distortion at aggressive levels than the C1 or the MCompressor.
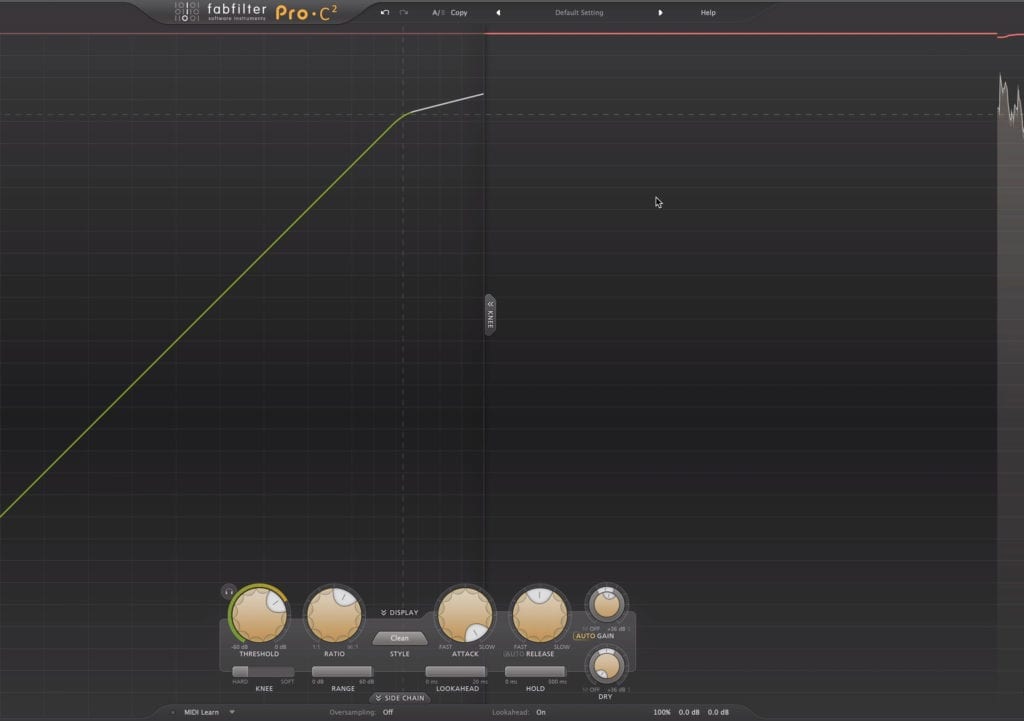
Plugin Functionality
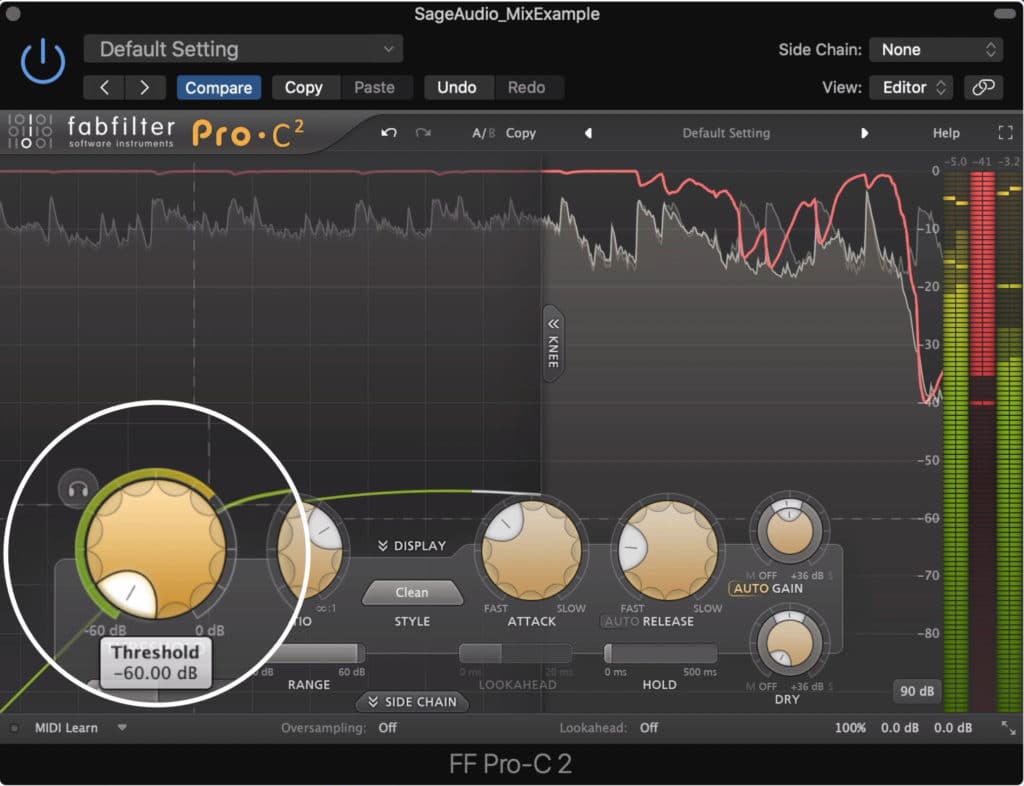
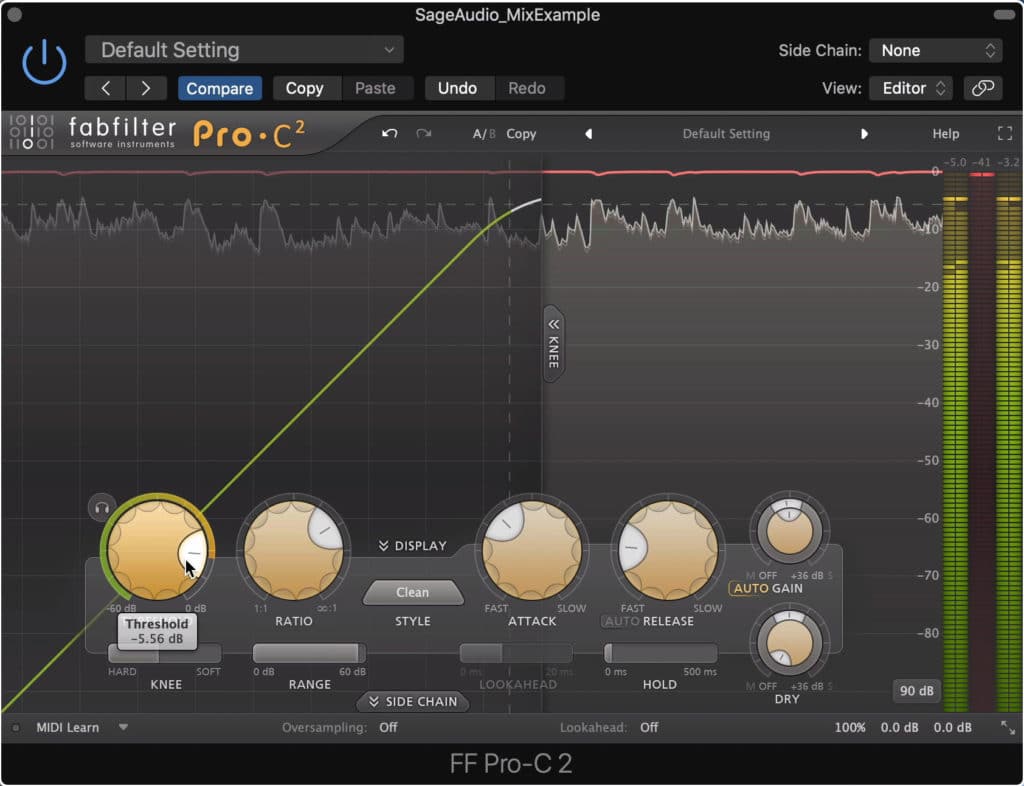
The threshold, and other settings are found at the bottom of the plugin.
Threshold: Range of 0dB to -60dB. O the Threshold rotary you’ll find an Audition button which allows you to hear the soloed compression that’s occurring.
Ratio: 1:1 to 100:1 limiting
Style: This function offers 7 different compression styles, each with unique program-dependent algorithms. These include:
Clean - which offers a clean and transparent, feedforward compressionClassic - which offers vintage, feedback, and program-dependent compressionOpto - which offers a slow compression with a soft kneeVocal - which is designed to bring Vocals to the forefrontMastering - which is designed to be transient with low distortionBus - which is great on drums or anything that needs gluePunch - which adds some dynamic and a classic analog tonalityPumping - which as the name suggests introduces pumping style compression
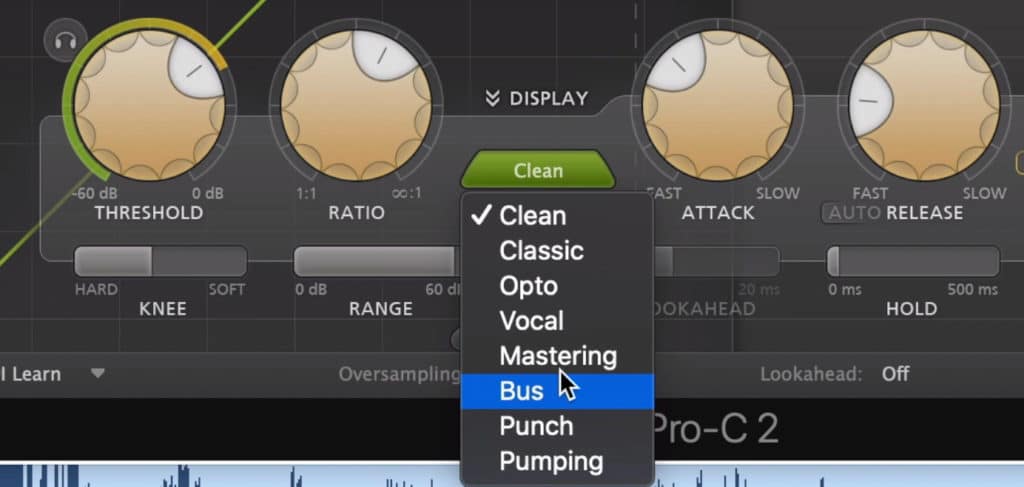
The compressor offers 7 different compression styles.
Attack ranges from 0.005ms to 250ms.
Release ranges from 10ms to 2500ms and can be made program-dependent with the Auto button underneath it.
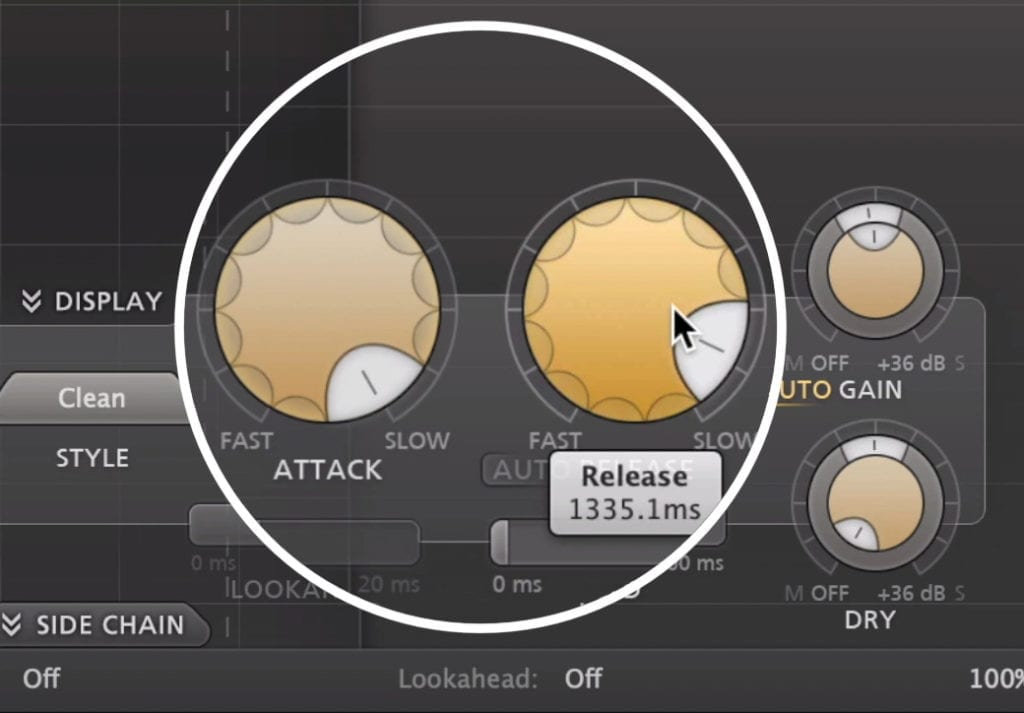
The attack ranges from 0.005ms to 250ms, and the release ranges from 10ms to 2500ms.
Dry and Wet rotaries can be used to increase or decrease the signals output, and blend the wet/dry signals. The panning on these rotaries is Mid and Side , meaning you can make your image wider or more narrow with this compressor.
Knee changes the knee from hard too soft, and anywhere in between.
The Range slider determines how much attenuation can take place, from 0dB to 60dB.
Lookahead can be enabled and made up to 20ms . This will result in a more transparent signal.
Hold is the amount of time that exists prior to the release time taking effect.
In other words, the hold will “Hold” onto the signal and keep the amount of gain reduction the same for a set amount of time - then, after the hold time is up, the release time kicks in, gradually or quickly returning the signal back to normal.
The Hold can be up to 500ms in this compressor.
You can affect your side chain in the side chain section.
At the very button of the plugin, you can turn on midi learning, oversampling, the lookahead function, and affect the input and output.
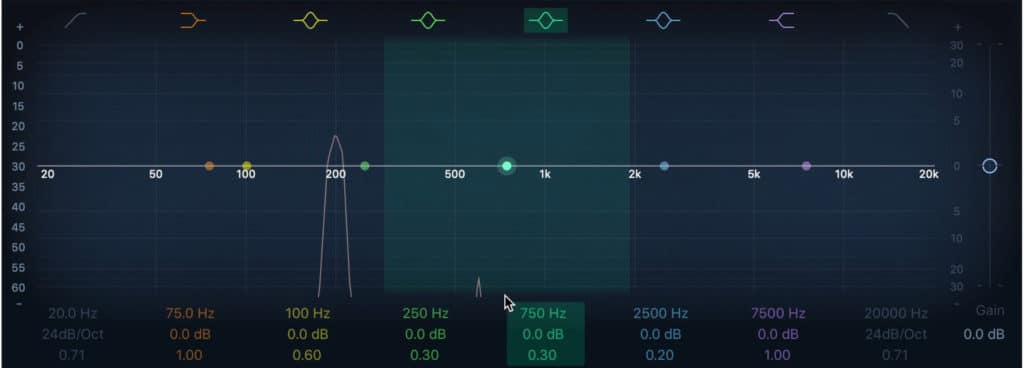
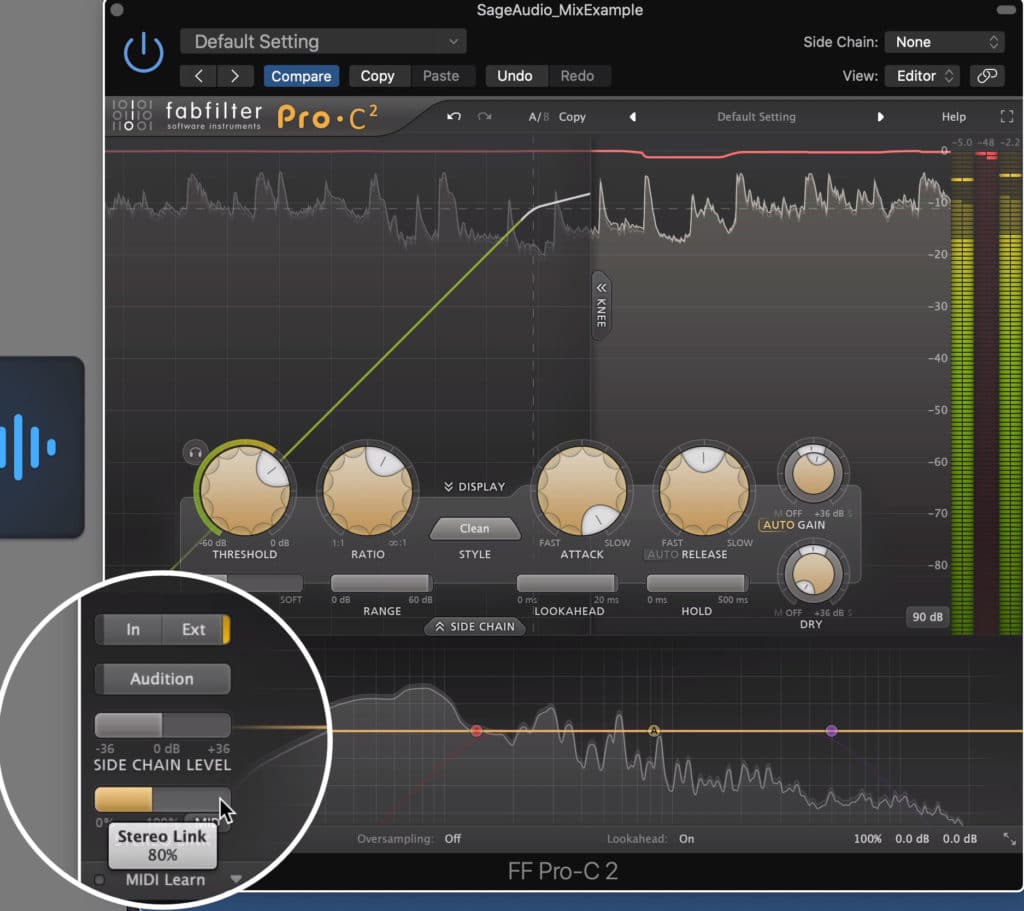
By clicking the Side Chain tab , you can affect the equalization of the compression, and introduce an external side chain for techniques like ducking.
You can also adjust your Side-Chain gain, and the Stereo Link to determine if the mid or side image of the side chain gets affected.
The plugin can be made full screen to get a better look at your settings.
When it comes to the display, although you can’t change the aesthetics, you can alter things like the plugin’s window size. Unlike most plugins, the window can be made full screen.
Additionally, you can alter the range of your metering from 9dB to 90dB - this way you can see your reduction up close if making minuscule changes, or on a larger scale for larger changes.
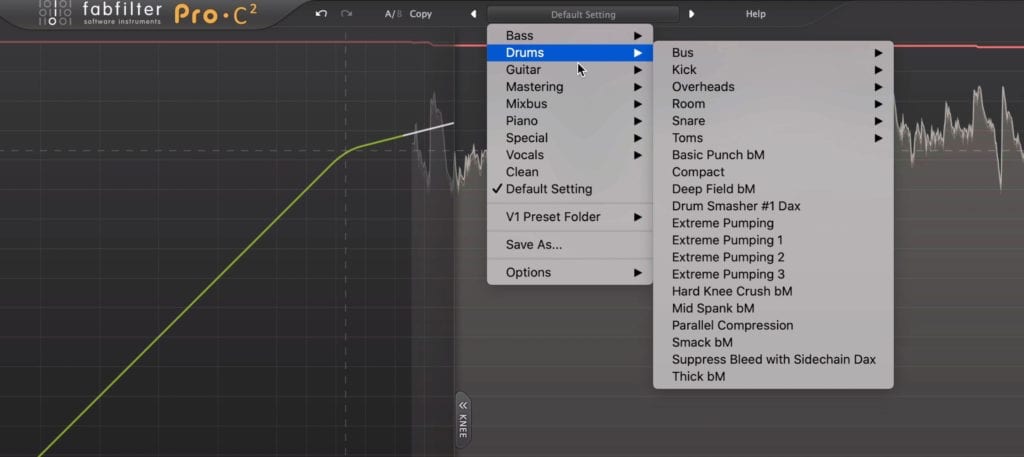
The plugin offers over 100 presets to get you started.
As for presets, this plugin has over 100, each categorized into instruments and processing type to make it each for you to make quick decisions.
If you want to see more of the FabFilter Pro C-2 and learn some of the techniques you can use to mix with it, check out our blog post and video on the topic:
We showcase some underused but incredibly helpful compression techniques that will improve your mixes.
CPU Usage
The CPU Usage for Pro-C 2 is surprisingly low, with it ranging from under 20% in our testing, to roughly 25% when more features were engaged.
This makes it a great compressor for both mixing and mastering.
Cost
The FF Pro-C 2 is expensive for a plugin. For the Compressor alone it’ll cost $179.
The Winner
MCompressor by MeldaAudio
The MCompressor offers a great deal of functionality for a free plugin, making it the best value of any of these plugins.
Although the Pro-C 2 is definitely better for complex and intricate compression, the MCompressor covers the majority of what you need a compressor to accomplish.
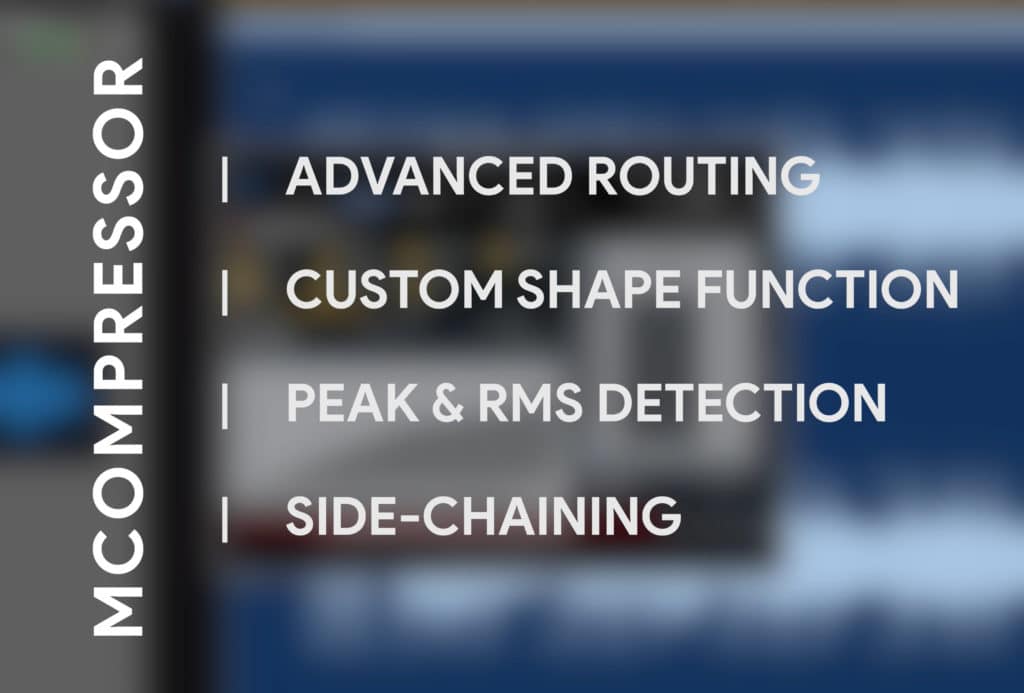
From advanced routing, the ability to expand the signal with the custom shape function, peak and RMS detection, side-chaining capabilities, and low CPU - the MCompressor is an amazingly useful plugin.
The MCompressor offers all of these functions for free.
Truth be told, there are even more functions that this plugin showcases that we didn’t cover here - so if you weren’t immediately impressed, try it out for yourself and let us know what you think.
Granted, if you’re comfortable to spend a fair amount of money on a plugin, the FabFilter Pro-C 2 is a great choice. Personally, I enjoy using this plugin for a lot of different tasks considering how flexible and great-sounding it is.
But if you’re looking for a gate/compressor combination, you can’t go wrong with the C1 bundle - especially considering its low cost.
These are just our thoughts on the topic, so let us know what you think in the comment section of the video. Do you agree with our pick, or maybe, is there another compressor that we didn’t cover here that you think should have taken the place of the MCompressor?
Let us know what you think and we’ll get back to you in the comment section of the embedded video.
If you have a mix that you’ve been working on, and you’re ready to hear it professionally mastered, send it to us here:
We’ll master it for you and send you a free sample for you to review.


