How to Master Music
First, start with a Stereo File Mix and then:
- Use Subtractive Equalization
- Determine if Compression is Needed
- If Compression is Needed, use Multi-band Compression
- Use Additive Equalization
- Optional: Introduce Harmonic Generation and Harmonic Excitement
- Optional: Widen the Stereo Image
- Use a Limiter if Needed
- Measure the Loudness with Distribution in Mind
- Export a 24-bit file
How to Master Music in Detail
It’s been said before, but mastering music is no easy task. It takes a lot of preparation, trial and error, frustration, studying, training and a slew of other habits and practices to become proficient in what can be considered by a science and an art.
Mastering is a complicated but rewarding endeavor.
That’s why if you’re just starting to master music, or if you’re stuck in a mastering rut, it may help to get some instruction. Provided is a step-by-step explanation detailing how to master your music.
Keep in mind that the signal chain detailed is not the only way an engineer can master a track and is merely a guide for anyone looking to know more about mastering. That being said, absolutely feel free to try this method, as well as experiment with it and change it how you see fit.
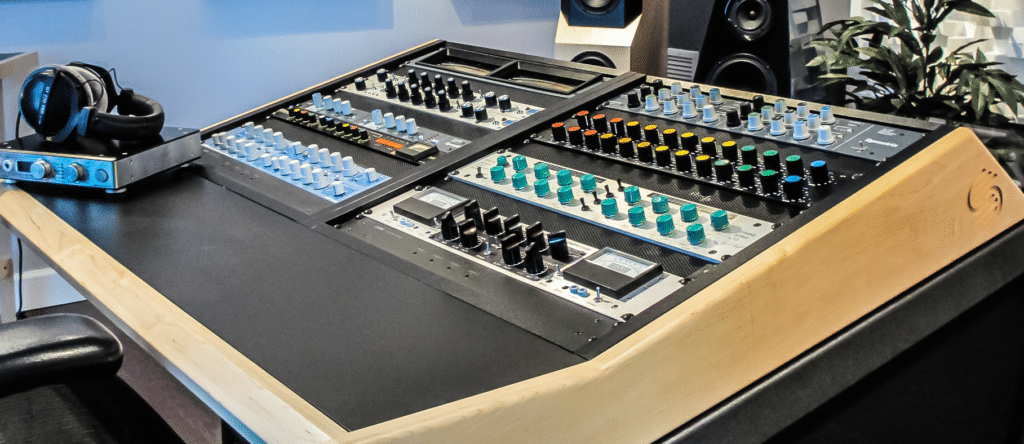
If you’d like to hear one your mixes mastered, using solely analog equipment, send it to us here:
We’ll master it for you and send you a free mastered sample of that mix. This way you could compare your master to the one we provide and see if there are things you enjoy more about our master or vice versa.
What is Subtractive Equalization?
Subtractive Equalization is using an equalizer solely for the attenuation of certain frequencies and is a good first step when mastering. This means that amplification does not occur, and any frequencies you no longer want to be part of your signal, are attenuated or turned down during the equalization process.
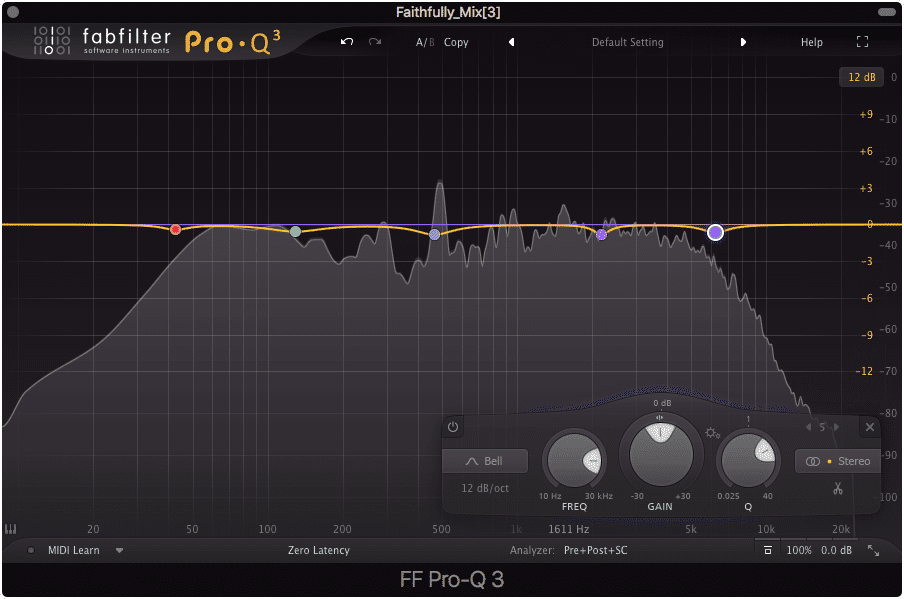
Subtractive equalization is used to cut out any frequencies you don't want in your signal.
Typically, equalization Q’s are set wider for a natural sound; however, when mastering using a more narrow Q will allow you to hone in on the exact frequencies you don’t want in your signal. The reason to use subtractive equalization first is to avoid amplifying unwanted frequencies or exacerbating issues in your master with further processing.
These cuts are typically small in both Q and amplitude.
For example, if 200Hz is 3dB too loud, and you compress your audio, amplify frequencies with additive equalization, and then accentuate frequencies using harmonic generation or excitement only to then try to address 200Hz, you’ll have a lot more to contest with.
By addressing these problem frequencies earlier on, you avoid potentially amplifying them, and causing issues later on in your signal chain.
Another reason for using subtractive equalization first as opposed to additive equalization is to avoiding accentuating any frequency prior to your signal hitting a compressor. Amplifying a signal before compression will most likely result in greater gain reduction.
Greater gain reduction will make the sound of your compression more apparent, so unless this is the desired effect, it’s best to use subtractive equalization as the first step in your mastering process.
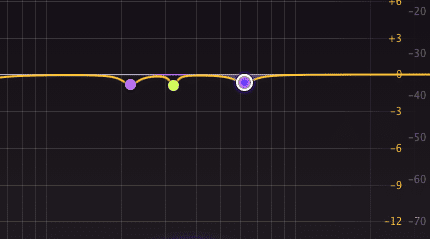
One very popular subtractive equalization technique is using mid-side processing to cut the side frequencies up to roughly 130Hz. This will ensure that the low frequencies stay mono, and remain tight and focused in your stereo image.
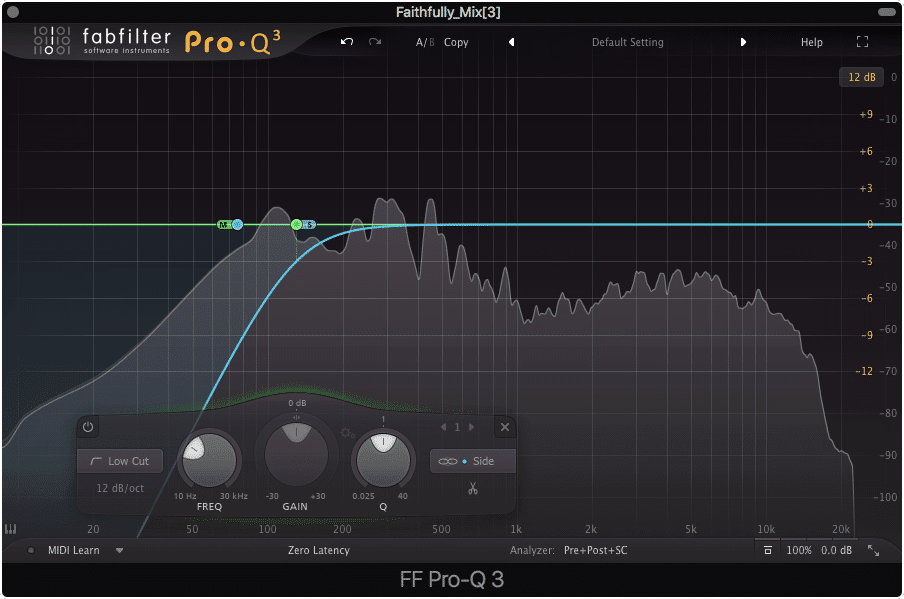
By using Mid-side processing, and cutting the side image, you can easily make your low-end mono.
How to Tell if Compression is Needed
Step 1: Listen intently to the mix in a balanced room or using reliable headphonesStep 2: After listening, use a dynamic range meter or an LU range meter to better understand the dynamic range.Step 3: If you’re still uncertain if compression is needed, increase the gain of the mix until its loudness is an integrated LUFS of -16. If you’re experiencing any clipping once the gain is adjusted, you will most likely need compression.Step 4: If compression is not needed, definitely do not compress further.
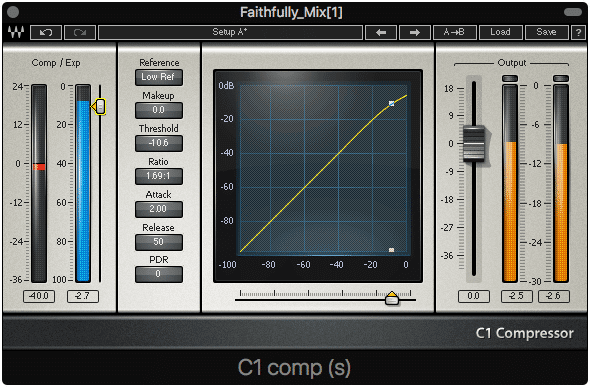
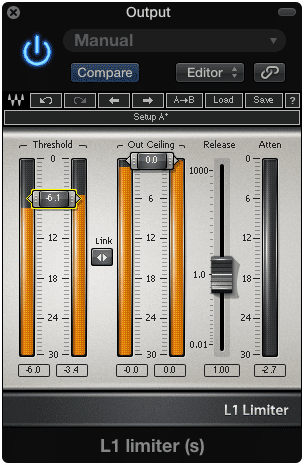
Compressing when compression is not needed is one of the easiest ways to ruin a master. Excessive compression can result in a claustrophobic feeling master, in which the relationships between instruments are negated by the lack of dynamics amongst them.
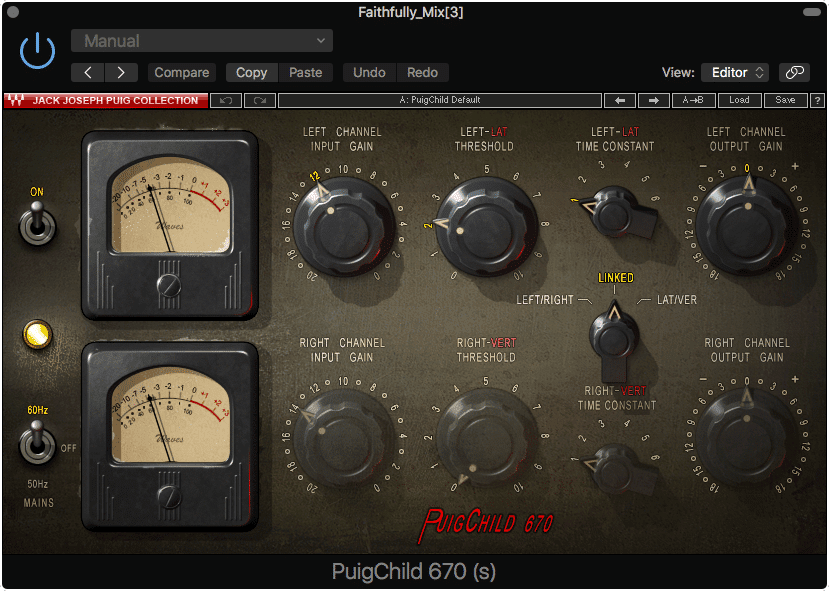
Avoid excessive compression. A good way to avoid this is to use multiband compression, not typical stereo compression like the plugin shown above.
A good master has some breathing room, and allows for or accentuates the dynamics between instrument groups. Before applying compression, seriously consider whether or not the mix actually needs it.
Often times, engineers create a routine for their mixes or masters without considering the ramifications of their processing. Be sure to listen intently and use the steps above to determine if compression is needed - if it isn’t, avoid using further compression.

You will need to listen intently to your mix when deciding if compression is needed. This may take some training as compression is more difficult to hear than other forms of processing.
A loudness meter can help to determine if there is an excessive or lacking dynamic range, and clipping distortion is a good indication that certain dynamics need to be controlled. With that said, the best indication if a track is too compressed is a well-trained ear. Again, listen to the mix you intend to master.
What’s the Best Compression for Mastering?

Multi-band compression provides much-needed flexibility.
Multi-band compression is typically the best type of compression to use during the mastering process, as it allows for frequency-specific processing and added flexibility. By using multi-band compression, and understanding how compressor settings affect the signal, a mastering engineer can compress particular instrument groups and frequencies.
Because multi-band compressors allow you to compress particular aspects of the frequency range, they can be used to compress the signal more accurately than a tradition compressor. For example, if you were to use a traditional compressor on an entire mix, the snare may trigger the compressor, when perhaps you only wanted to compress the low-frequency range.
When possible, do not use a traditional compressor on an entire stereo mix.
By allocating your compression to specific frequencies, you can more easily compress the aspects of your master that you want to compress.
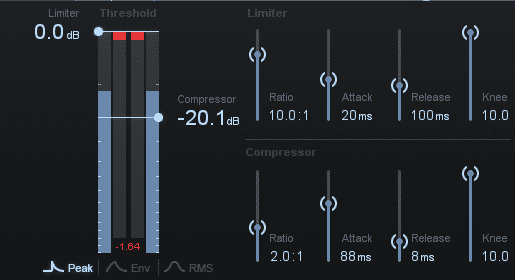
How to Compress the Right Frequencies:
Step 1: Create and isolate the correct bandwidth you wish to compress
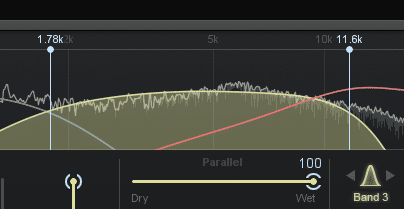
You can set your bandwidth using the controls shown above.
Step 2: Know which instrument you want to compress, and its ADSR time

If you want to compress your snare, know how long its signal lasts.
Step 3: Ask yourself, ‘what part of that ADSR do I want to compress?’
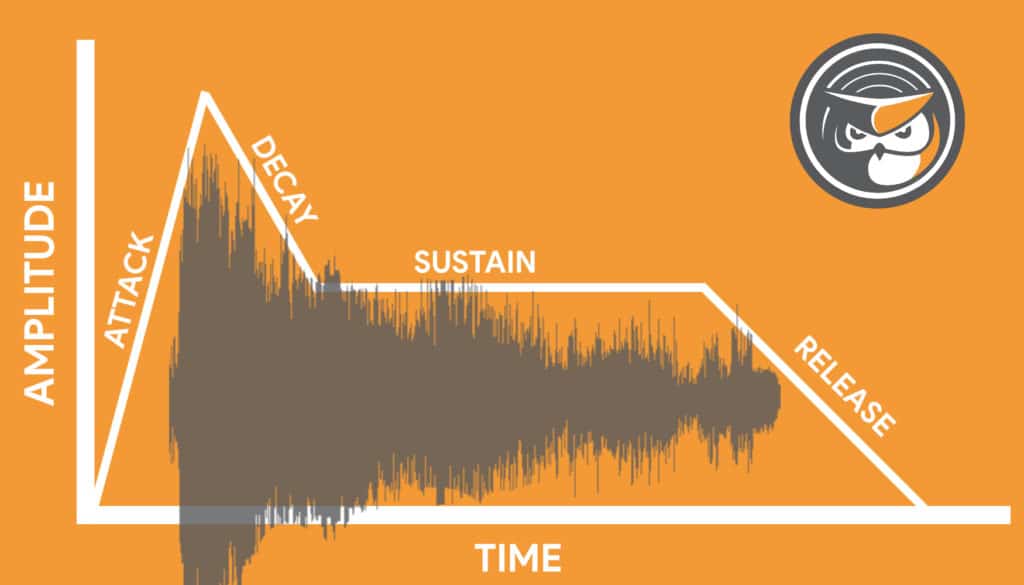
Take a look at an ADSR visual representation to see how waveforms fall into it.
Step 4: Adjust your attack time so that the compressor begins to work, right when that part of the signal plays.
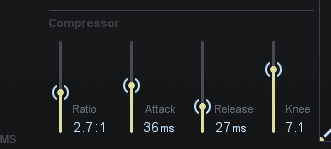
Adjust your attack and release times to best attenuate your intended signal.
This may be a little difficult to understand at first so let’s look at an example. Say you want to compress a vocal whenever it becomes too loud; however, in that same frequency range, there is a dynamic snare. You don’t want to compress the snare, and again, only wish to compress the vocal. How do you do this?
Well, once you’ve created and isolated the correct bandwidth, and you know what part you’re trying to compress, you can begin to adjust your attack time to ‘avoid’ the snare. So say the snare’s attack and decay in it’s ADSR are roughly 35ms.
If you were to set your compressor’s attack time to 17.5ms, or half the time of the snare’s attack and decay, you’d effectively apply compression to half of the snare’s attack and decay (given you had a low enough threshold and a ratio greater than 1:1). Similarly, if you were to increase your compressor’s attack time to greater than 35ms, or the entirety of the snare’s attack and decay time, you’d avoid compressing the snare altogether.
So, if you wanted to compress just the vocal, you could lengthen your compressor’s attack time to longer than the snare’s attack and decay time, to avoid compressing the snare. This will allow the compressor to begin working after the snare, and in turn, begin compression for all instrumentation the occurs after this 35ms time frame.

If you want to compress a vocal in a stereo mix, you'll most likely need to use a longer attack to avoid compressing any percussive instrumentation.
Of course, you’d have to find the right settings to only affect your vocals, but through this process, you’d be able to hone in on the instrument, or vocal, you’re attempting to compress.
If you’d like to learn more about how compression can be implemented into mastering, check out our blog post on the topic:
It shows how compressor settings greatly impact how a mix is mastered.
What is Additive Equalization?
Additive equalization is the use of an equalizer to amplify certain aspects of a signal’s frequency spectrum. When used appropriately, additive equalization accentuates the aspects of a mix that are desirable, while avoiding amplifying anything that does not create a desirable or balanced frequency response.
So, now that the frequencies you don’t want are attenuated, and the dynamics that needed to be controlled are compressed, you can begin to accentuate and amplify what you want more of. Additive equalization is a great way to add more high end to your mix, or perhaps, amplify the kick and bass frequencies if they’re lacking.
Additive equalization is used to amplify what you enjoy or want more of in your master.
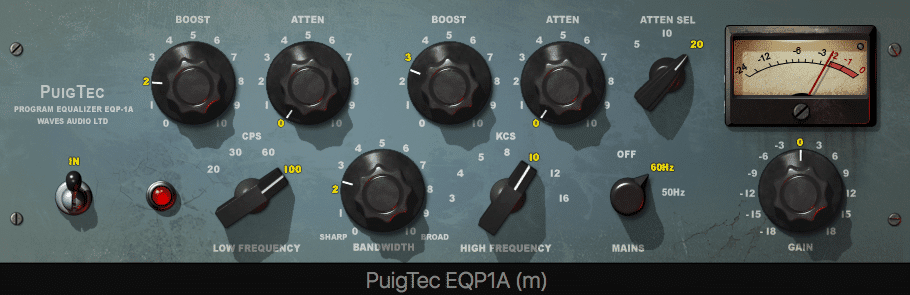
Additive equalization also presents the opportunity to use phase cancellation to your advantage. For example, say you had a frequency that you wanted to cut out; however, you didn’t want to use excessive subtractive equalization to do so.
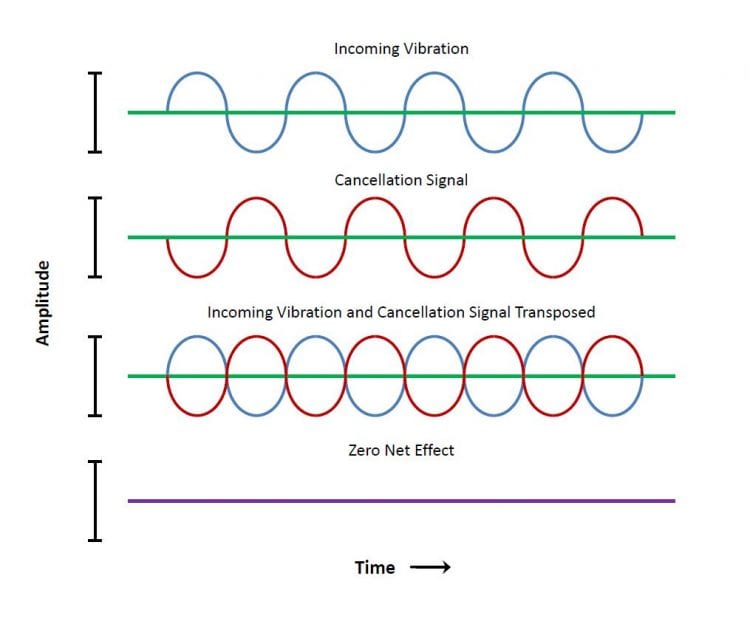
Phase cancellation includes using certain frequencies to nullify others. This can be accomplished with additive equalization.
By amplifying the frequencies right below that undesired frequency, you can in turn mask that unwanted frequency. This is a great technique to use during mastering, as excessive equalization will typically have a negative effect when used on an entire mix.
If you’d like to learn more about how excessive equalization can negatively affect a mix and master, check out our blog of the best mastering practices:
It’s full of great information that you can use in tandem with what you’ve learned here.
Optional: Introduce Harmonic Generation and Harmonic Excitement
With everything controlled and the frequency spectrum balanced, now’s a great time to add some harmonic generation from distortion. If you’re using analog equipment, the processing began to take place as soon as you started mastering.
Most analog emulation plugins will introduce harmonics generation.
But, if you’re using digital processing, now is a good time to use analog emulation plugins to create some of the harmonics associated with a full, warm, and sonically complex master.
Each emulator plugin will introduce unique low order harmonics, that when combined with your fundamental, fill in the gaps of your frequency response. Be sure not to use this excessively, or to add any high order harmonics to your master, since these practices will create unpleasant distortions.
After adding your distortion, you can use harmonic excitement to accentuate these harmonics even more. Harmonic excitement doesn’t generate new harmonics, but it will amplify existing harmonics. Just like distortion itself, be sure to use this processing tastefully.
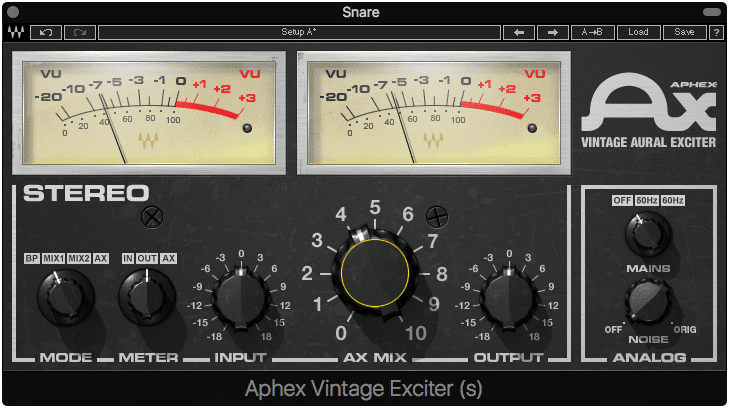
Harmonics exciters amplify these harmonics and are useful if inserted after harmonic generation.
If you’d like to learn more about distortion types, check out our blog post on the topic:
It shows what distortion does to your mix, and gives visual representations of distortion, to better understand which distortion types generate what harmonics.
Lastly, if you’d like to accentuate your harmonics even more, you can use a low-level compressor, after your harmonic generation and excitement. This way, any harmonics that are being masked or covered by louder frequencies, will have the opportunity to become perceivable.
Optional: Widen the Stereo Image
Widening the stereo image has become a popular part of mastering. It can be accomplished with mid-side equalization and then amplifying the side frequencies or signal. It can also be accomplished by using a dedicated stereo imaging plugin such as Isotope’s Imager.
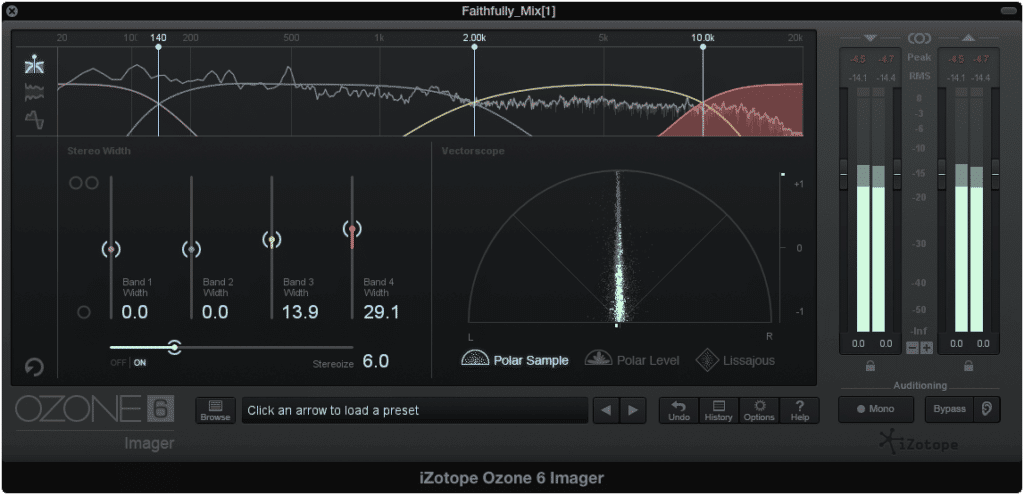
This IzoTope imager can create frequency-specific imaging.
Whatever you choose to use for stereo widening, simply be sure not to create an excessively wide signal. Keep in mind that many listening devices will not be able to accommodate an incredibly wide image, which will result in aspects of your master being lost.
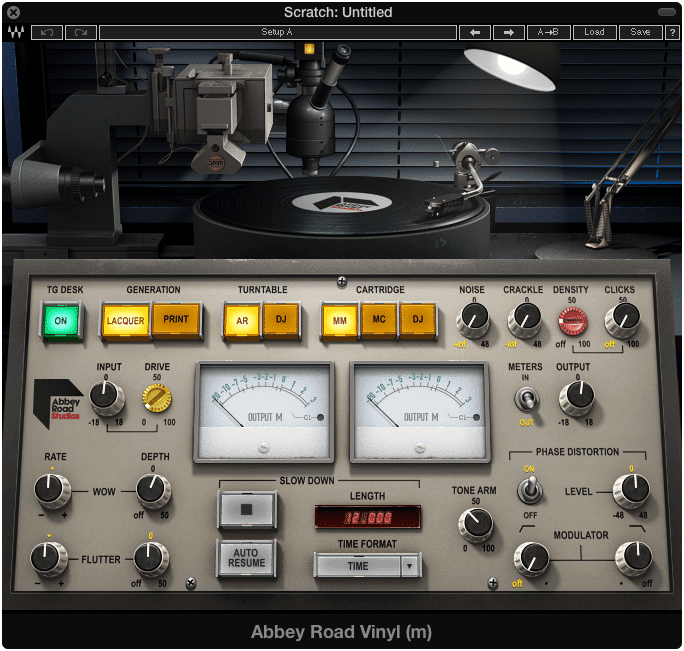
This is particularly true for physical mediums like vinyl and cassette, so be sure to keep your mix somewhat centered if you want it to playback adequately on the majority of playback systems.

Wide stereo images do not always translate well to physical mediums.
As stated, this is an optional part of mastering, and it up for personal preference; however, technical limitations of playback systems should influence your decisions when adjusting the stereo width of your master.
Use a Limiter if Needed
Often times limiters are a go-to for engineers, but, they may not always be needed. If your master is loud enough without one, you won't need limiting.
Limiters can destroy your dynamic range, so use them sparingly and tastefully.
Perhaps, you may be wondering about clipping, and how limiters protect against it. They do, however, if your mix is already clipping without a limiter, this means that your signal is clipping as it goes into the limiter.
So, whether the limiter is there or not, your signal is clipping. Furthermore, it can be argued that any need for brick wall limiting can be overcome by properly controlling your dynamics. This way you won’t need to introduce limiting at all.
Compressing properly and controlling your dynamics, will negate the need for any brick wall limiting.
Again, use limiting if you want to make your signal loud, but recognize that you’re doing so at the expense of your dynamics and maybe even your signal’s fidelity. Limiters only protect against clipping that isn’t already happening so be sure your signal has enough headroom before you introduce a limiter.
Measure the Loudness with Distribution in Mind
At the end of your signal chain, you should include a loudness meter of some kind. Preferably, the loudness meter will include an integrated LUFS meter.
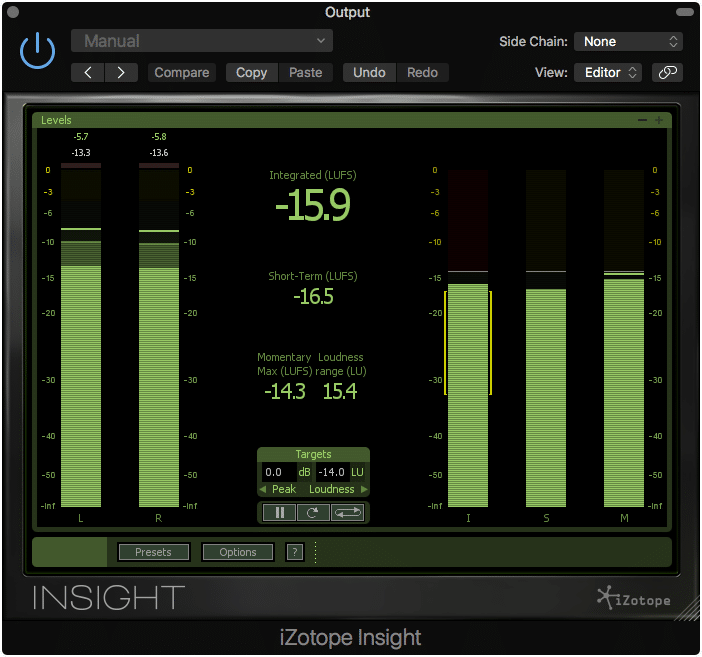
Establish your master's loudness with distribution in mind.
When considering loudness, and determining how loud you want your master, always keep the intended means of distribution in mind. For example, a vinyl record can only handle loudness to an extent before the lathe begins to distort.
Or if mastering for streaming, loudness normalization will affect how loud the master is played back to listeners. This means your loudness will be altered, which in certain cases may cause distortion.
If you’d like to learn more about mastering for streaming, check out our blog post on the topic:
In short, know what medium you’re mastering for, and create your master with those technical limitations in mind.They will no doubt affect how loud you make your master.
If you’re in doubt, or don’t exactly know how your master will be distributed, a good starting point is to master to an integrated LUFS of -16, with 2dBTP of headroom. This way your master is loud enough to cover the noise generated from consumer amplification systems, dynamic enough to sound enjoyable, and has the right metrics to be altered by loudness normalization without limiting or distortion.
Export a 24-bit File
When your master is complete, export a 24-bit file. You’ve most likely have been told to export to 44.1kHz and 16-bit; however, this was when the CD was the primary means of digital distribution.

CDs supported 16-bit 44.1kHz files, but digital uploading can support larger file sizes.
With the popularization of streaming services, and faster network speeds, online services support higher sampling rate and higher bit depth files. When uploading to these sites or services, leave the encoding process up them.
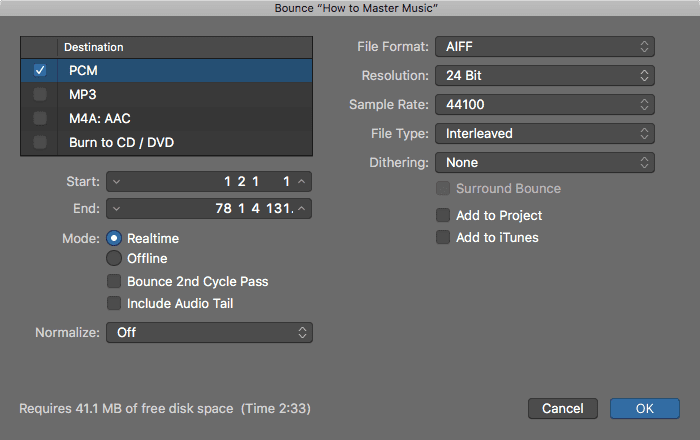
Be sure to bounce your master out as a 24-bit file.
That is to say, don’t try to convert the master to a lossy file, and then upload that lossy file. Upload your PCM file (WAV, AIFF), and allow the site or service to encode your file for you. This way, the file is optimized for playback on their system.
Conclusion
The steps detailed above are by no means the only way you can master music, but hopefully having this foundation, and knowing the rationale behind these steps can help you make mastering decisions.
When mastering, think about each form of processing logical, and understand what is happening at each step of the process.
Know that every mix is different, and every mastering process is different, but if you follow some simple principles, and put in the time and effort it takes to create a good master, you can soon create one for yourself.
If you’d like to hear your music professionally mastered, send us one of your mixes here:
We’ll master it for you and send you a free mastered sample of that mix.
How do you master your music?


