How to Match Your Mix's EQ to Your Favorite Mix
New software is constantly changing how we make music, and think about producing audio.
One of the most innovative technologies to emerge recently in the audio world is eq matching.
EQ matching plugins read, analyze and match the frequency response of your audio, with that of another audio source. Simply upload your song, and capture it using the software. Then capture the source you want to emulate, and the EQ matching software will do the rest for you.
If you’ve ever wished your mix could sound like one of your favorite songs, this is an incredibly effective way to make that happen.
Match the Volume of Your Two Tracks:
Step 1: Listen to both your audio track, and the audio you want your audio to sound like. In the future these will be referred to as the target audio (the audio you are trying to change) and the reference audio (the audio you are trying to emulate or reference).
Step 2: Take note of the loudness of each. Most likely, your reference audio will be louder, since it will probably be a mastered version of the song you wish to emulate.
Step 3: If your reference track is louder, reduce its gain until the volume is comparable with your target audio.
Step 4: To get the loudness spot on, use a LUFS meter and adjust the gain of your reference until the two two tracks are as close as possible.
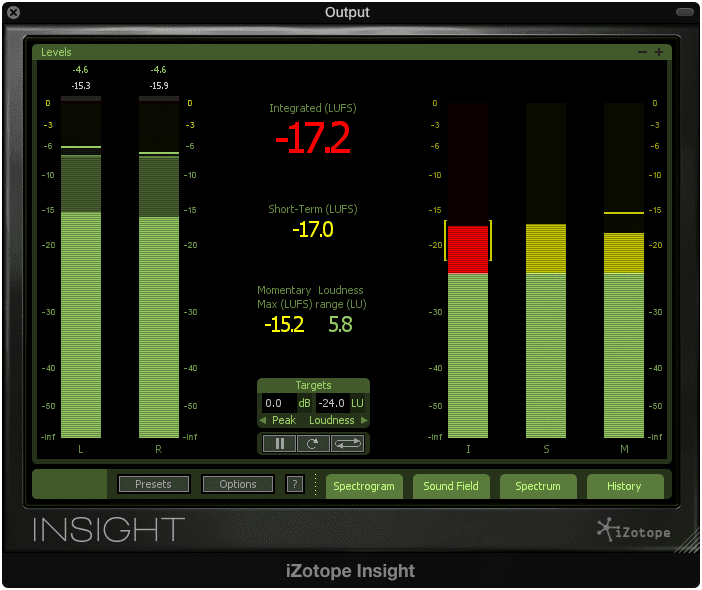
The Integrated LUFS should be almost identical between your two tracks
Capture your Audio:
Step 1: Place the matching EQ, in this instance the Ozone Equalizer on your output. Turn on the matching function.
Step 2: Solo the reference audio, click the ‘Capture’ button on the equalizer’s matching function, and click play. The equalizer will capture the audio and create a representation of its frequency response over time. Click stop when you’ve captured enough audio to create an accurate representation of its response.
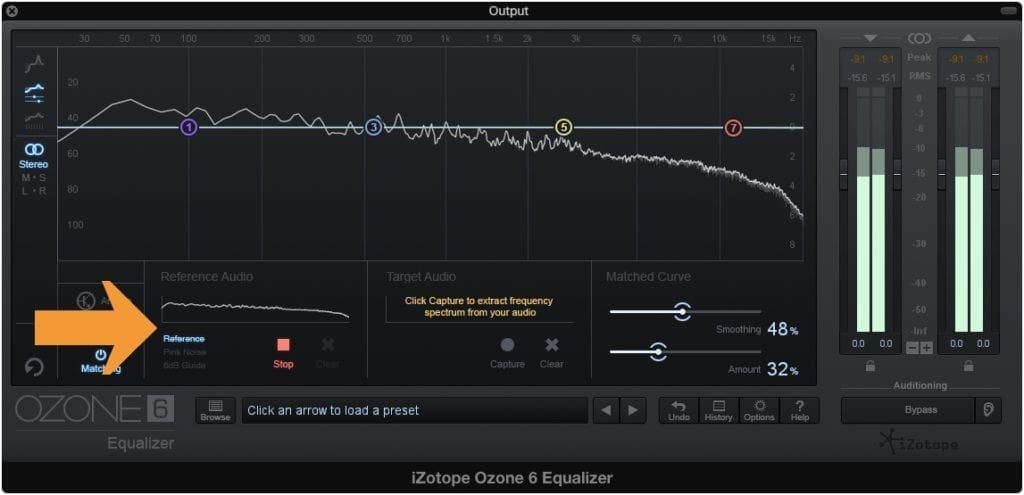
Allow the track to play for at least 10 seconds when capturing its frequency response.
Step 3: Solo the target audio, and click ‘Capture’ under the “Target Audio’ section. Then push play. The audio should be recorded in the same way it was for the reference audio. Click stop when you’ve captured enough audio to create an accurate representation of its response.
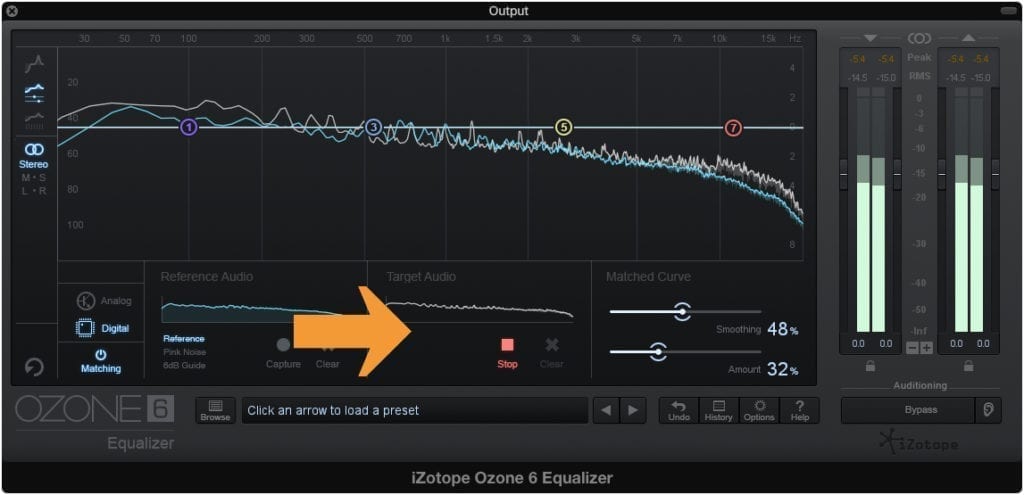
Click 'Stop' when you feel an accurate sample of your mix has been recorded.
The two tracks will now have their spectrums represented in the frequency analyzer. Here you can notice the difference between the two sources. If the matching function was turned on you should also notice an equalizer has been generated.
Step 4: Using the ‘Smoothing’ and ‘Amount’ functions, adjust until your target audio sounds like your reference audio.
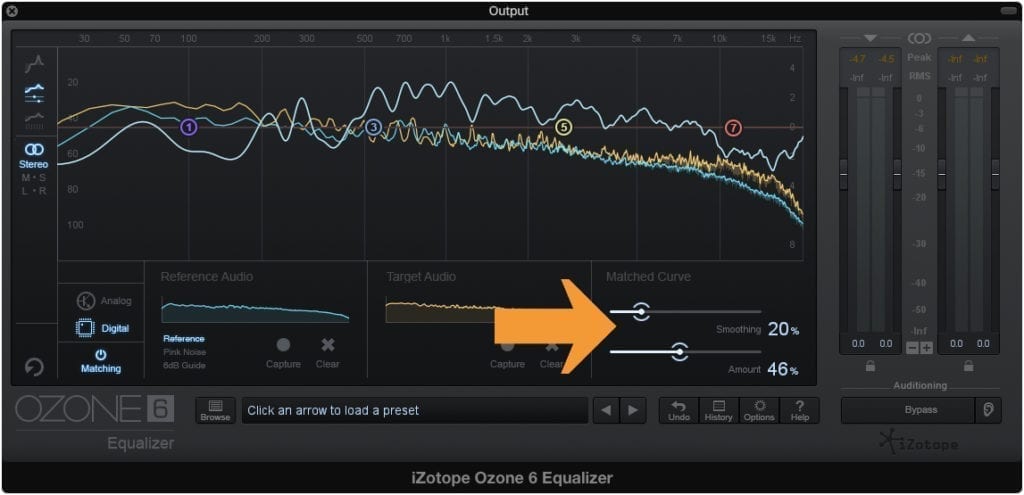
Setting your amount to 100% won't yield a more accurate emulation of the reference audio. Use your ears to determine the correct amount.
Conclusion:
Equalization may not be the only part of what makes a mix sound the way it does. Compression, distortion, and other effects certainly play a large role in creating a distinctive sound. With that in mind, matching the frequency response of your mix with one you truly admire, is a great first step to shaping your mix into the sound you want.
Keep an ear out for other effects that may make the mix you referenced so impressive. Try to emulate those effects as well, to make your mix sound even more like your reference.
Do you have a mix you wished yours sounded like?


