10 Things You Need to Know About the FabFilter Pro-L2
- The Plugin has a 4k Display and Can be Made Full Screen
- You can Decrease Distortion with the True Peak Limiting and Oversampling Options
- A DC Offset Filter is Available, but will Rarely Be Needed
- It’s Designed to Sound Great for Every Genre
- The Attack Does Not Behave Like a Compressor’s Attack
- It includes Comprehensive Loudness Metering
- Dithering and Noise Shaping is Included
- Midi Learning Lets You Link Midi Devices to the Pro L2
- Channel Linking Is Performed in 2 Stages
- A 30-day Free Trial of the L2 is Available
The FabFilter Pro-L2 is a comprehensive and sometimes complex limiter. As far as limiters go, this one seems to have the most functionality and flexibility of any that I’ve come across.
The Pro-L 2 is a complex and great sounding limiting plugin.
Considering it’s such a powerful and popular plugin, let’s look at 10 things you need to know about it.
Whether you’re looking to purchase the plugin, or maybe you’ve been using it and want to learn more about it, read on or watch the full video embedded above.
If you’re an artist or engineer, send us one of your mixes:
We’ll master your mix for you and send you a sample to review.
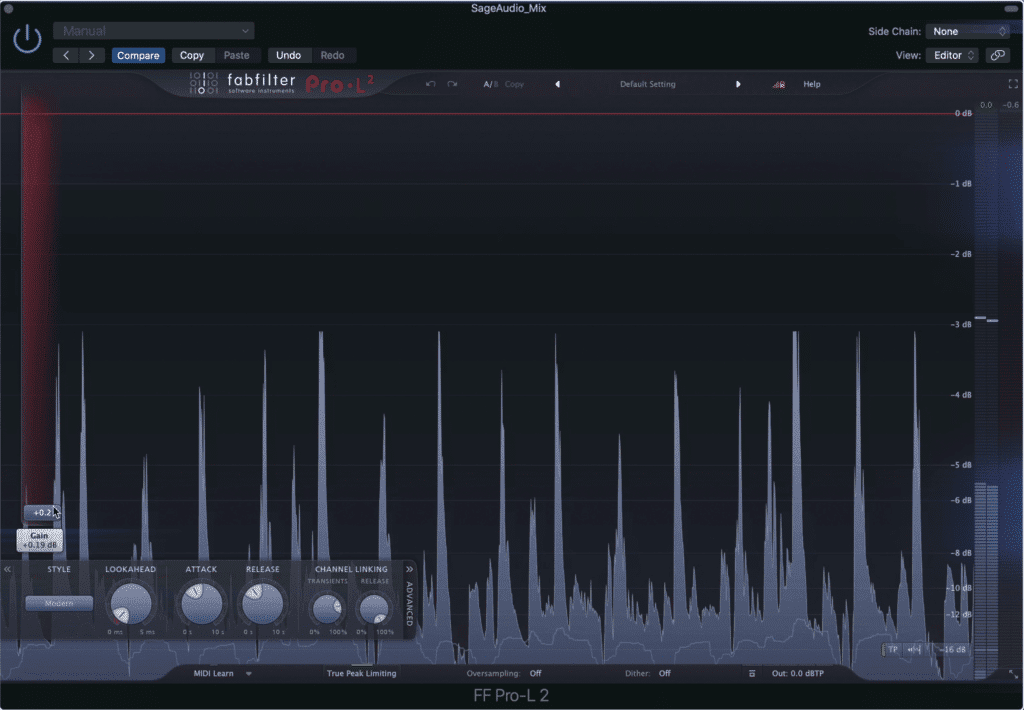
1. The Plugin has a 4k Display and Can be Made Full Screen
As you can see, this plugin is displayed in a fantastic looking 4k resolution. Furthermore, increasing the size of the plugin doesn’t reduce the resolution, as this scales accordingly.
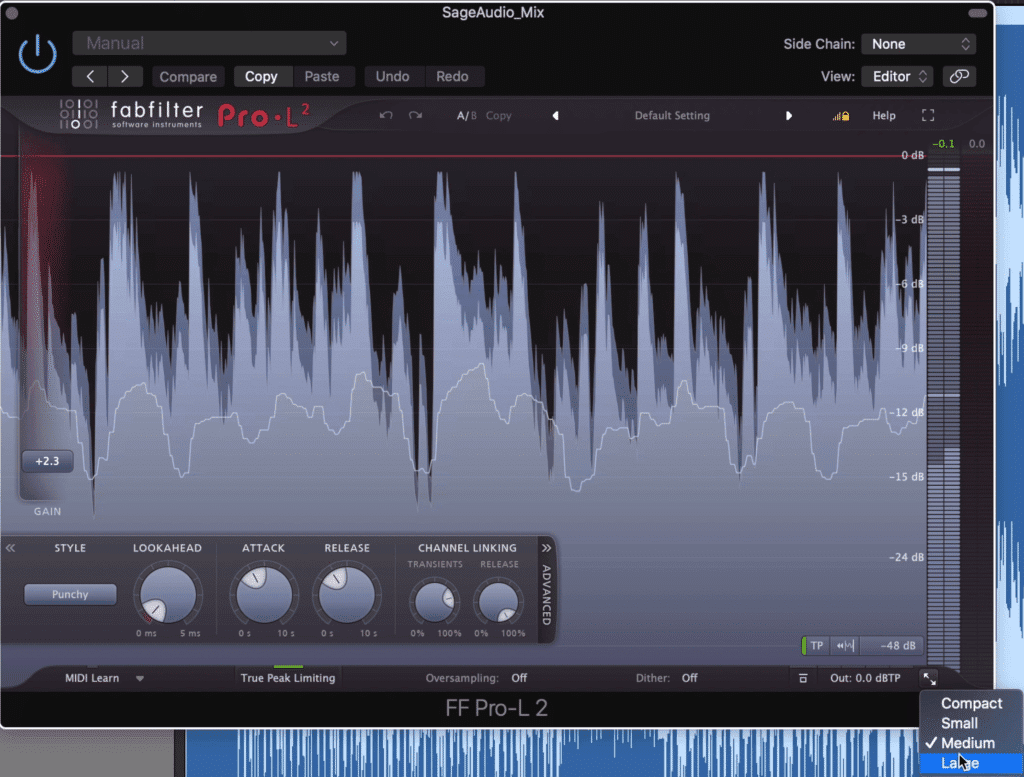
The display can easily be adjusted in the bottom right hand corner.
To change the size simply click the scale arrows in the button right-hand corner.
If you want to go full screen, click the box icon in the top right.
You’ll notice that even in a full-screen display the plugin is still 4k, making it a great option if the visual of your plugin is important to you.
2. You can Decrease Distortion with the True Peak Limiting and Oversampling Options
Distortion is a common occurrence when limiting. Fortunately, FabFilter has taken some steps to ensure that unwanted clipping distortion doesn’t occur.
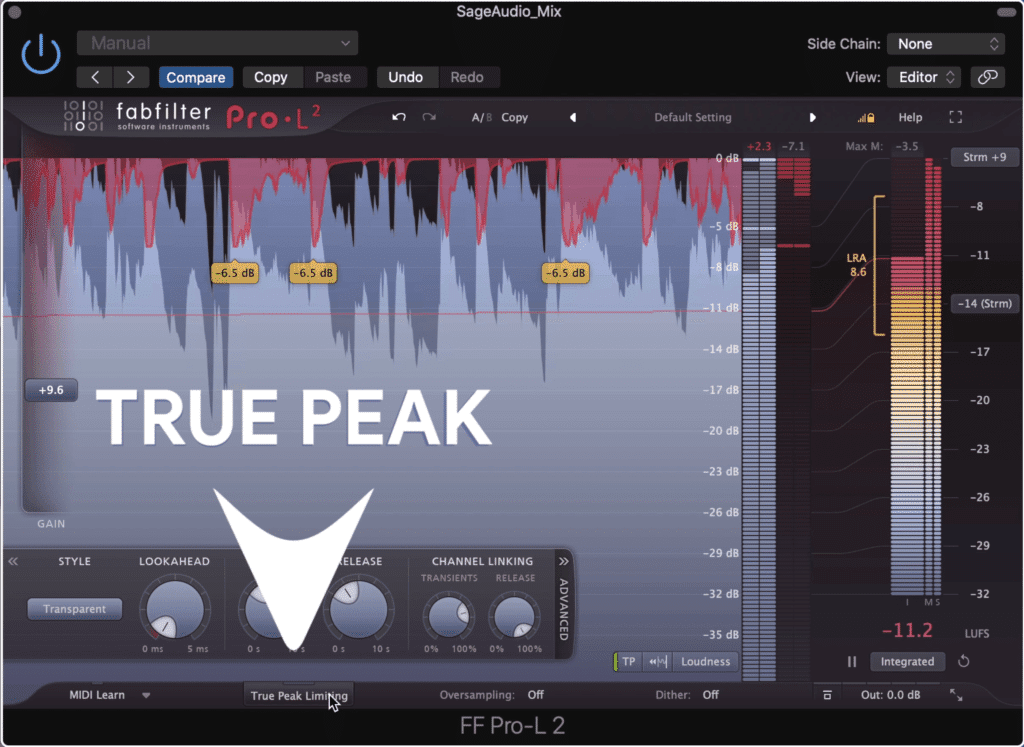
True peak limiting prevents clipping distortion.
The easiest way to avoid clipping and inter-sample peaking are by enabling the True Peak Limiting function. But even when mastering to -14 LUFS, inter-sample peaking is still possible.
That’s where oversampling comes in. By increasing the sampling rate and reducing aliasing distortion, you reduce the risk of clipping.
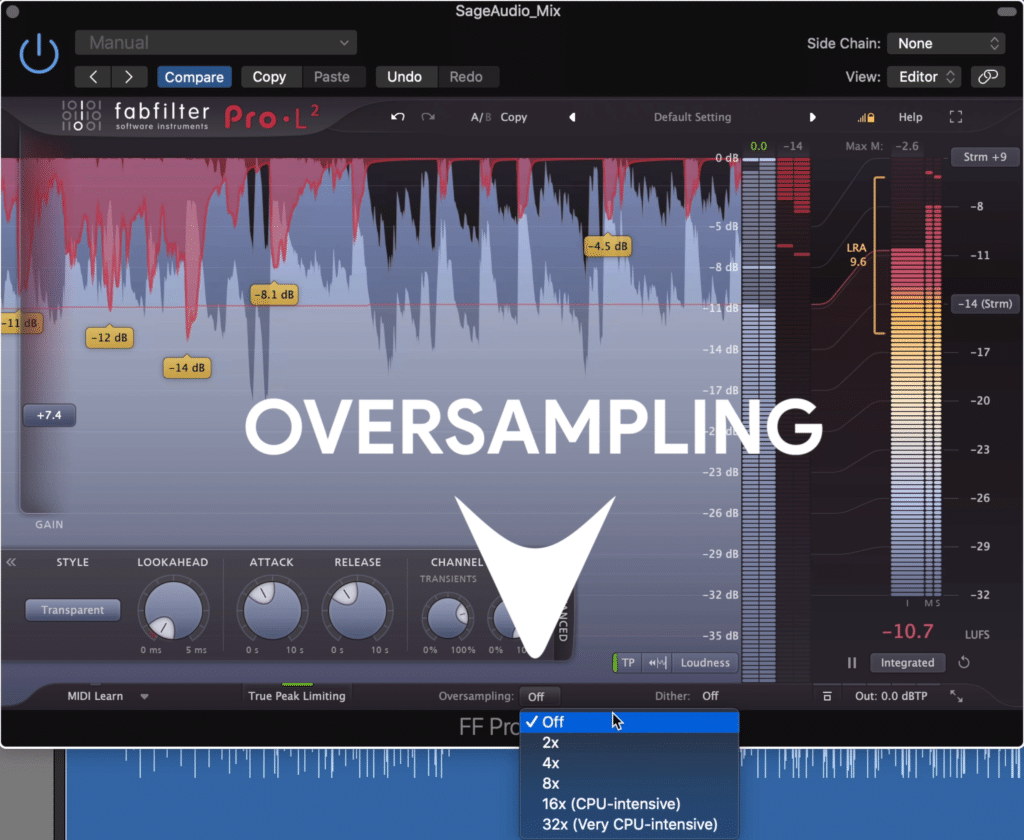
Oversampling prevents clipping and aliasing distortion.
It also helps to know that FabFilter has redesigned its oversampling to immediately compensate for any gain changes the function causes.
Lastly, if you’re still noticing inter-sampling clipping, try the lookahead function.
3. A DC Offset Filter is Available, but will Rarely Be Needed
A DC offset can occur when using particular faulty hardware, or when introducing saturation. In short, it reorients the null point or the center of your waveform away from an amplitude of 0.
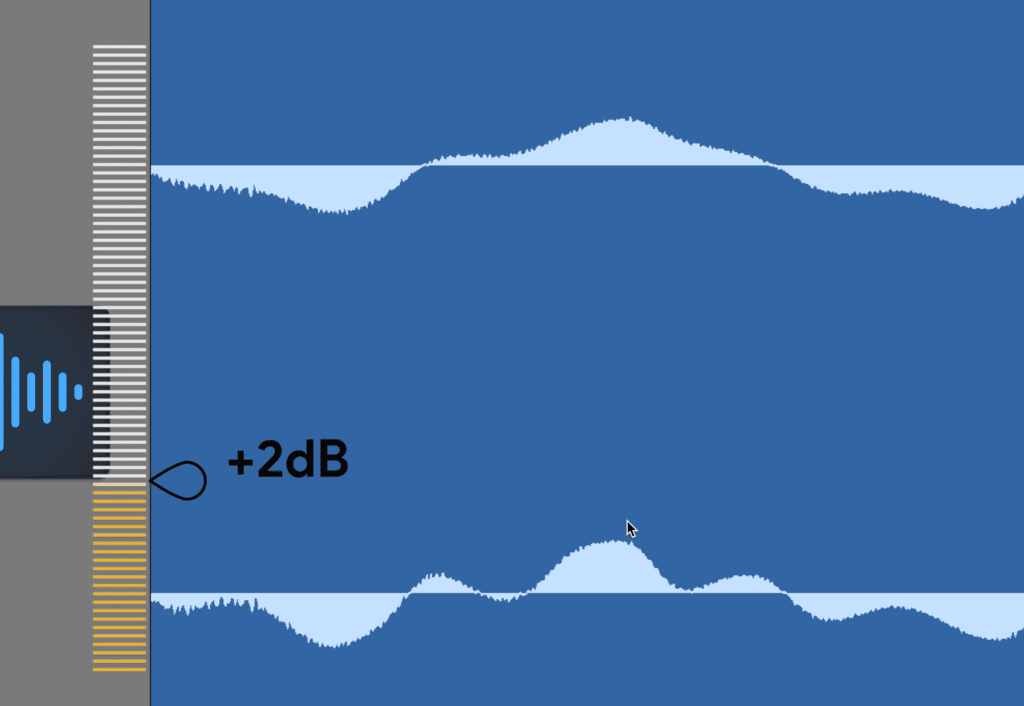
If the center of the waveform was at that 2dB mark, we'd say a DC offset occurred.
When we zoom in on a Waveform, this line becomes easier to conceptualize. If a DC offset was in place, the entire waveform would be centered not on an amplitude of 0, but on another amplitude. This will inevitable affect the peak and level values of a waveform.
As you can imagine, not having an accurate waveform makes processing like compression and limiting hard, since these plugins affect the signal based on that signal’s peak.
With the DC offset you can correct the waveform’s level prior to limiting.
4. It’s Designed to Sound Great for Every Genre
Whereas some plugins are known for sounding great for a particular genre, FabFilter’s 8 algorithms make it a good option for just about any session.
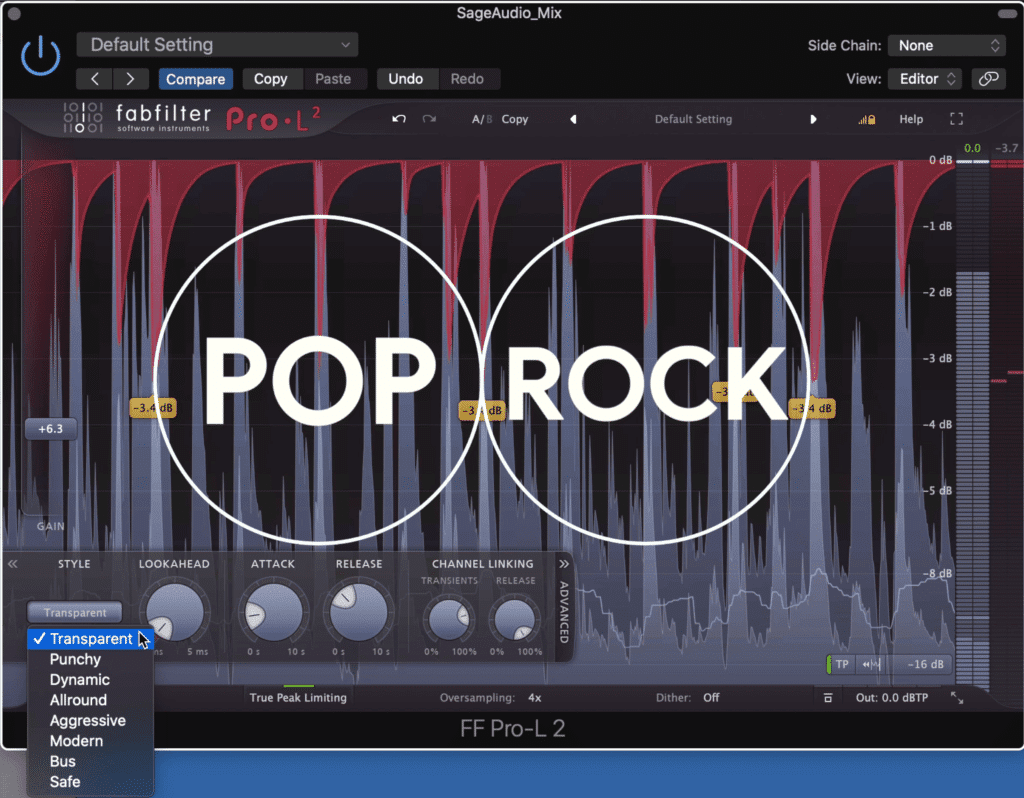
Multiple algorithms means all genres can be mastered with the Pro-L2
Transparent is clean limiting and works well for pop and rock music.
Punchy is more aggressive and works well on individual instruments and dance music.
Dynamic introduces transient shaping prior to limiting, making it great for highly dynamic genres.
Allround is loud and transparent, great for almost all genres
Aggressive is a near clipping algorithm that works well for aggressive mixes of metal and EDM.
Modern is the plugin’s default and is known for making music loud while retaining the track’s transparency.
Bus glues the sound together and is great for funk, as well as busses.
Safe is great for classical and jazz, as it will rarely if ever create distortion.
Want more plugins that are great for mastering? Check out our video on the 5 of the Best Mastering Plugins
5. The Attack Does Not Behave Like a Compressor’s Attack
Most of us have become familiar with how a compressor’s attack works, but the attack of a limiter is different.
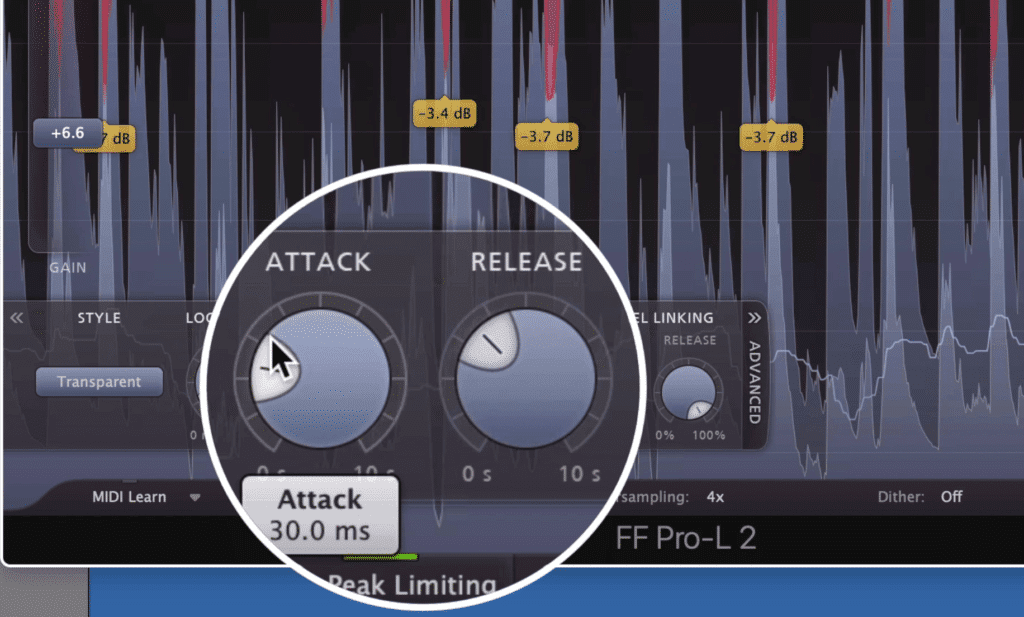
The attack determines how long before the release function begins.
The attack on the L2 determines how long it takes before the release begins. So for example, if the attack is 30ms and the release is 300ms, then it’ll take 30ms before the 300ms release begins.
A shorter release results in more compression and a quieter sound. A longer attack results in a louder master, but with possible distortion.
6. It Includes Comprehensive Loudness Metering
The default metering for the plugin is a level meter with 16dB of range. By clicking on this you can change this range, and also measure the loudness of the signal.
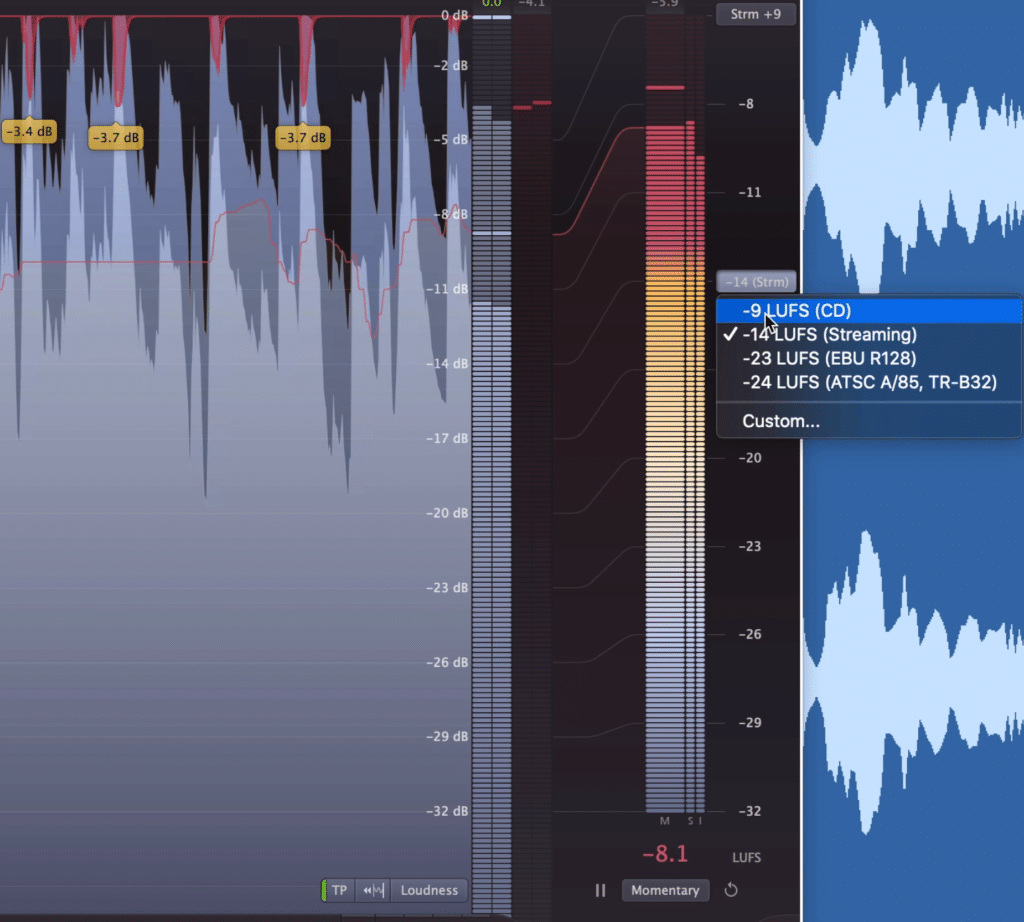
By clicking a tab at the bottom of the plugin, you can pull up different metering types.
The LUFS measurement can be switched between integrated, short-term, and momentary. Additionally, some set LUFS targets can be enabled such as CD and streaming.
Even when you’re observing the peak level of the signal, you’re still given these levels. The peak level can be seen as the most translucent bar, the RMS as the solid bar.
Lastly, K-metering is available as well.
7. Dithering and Noise Shaping is Included
All dithering probably won’t be needed unless you’re mastering for CD, the Pro-L 2 includes it.
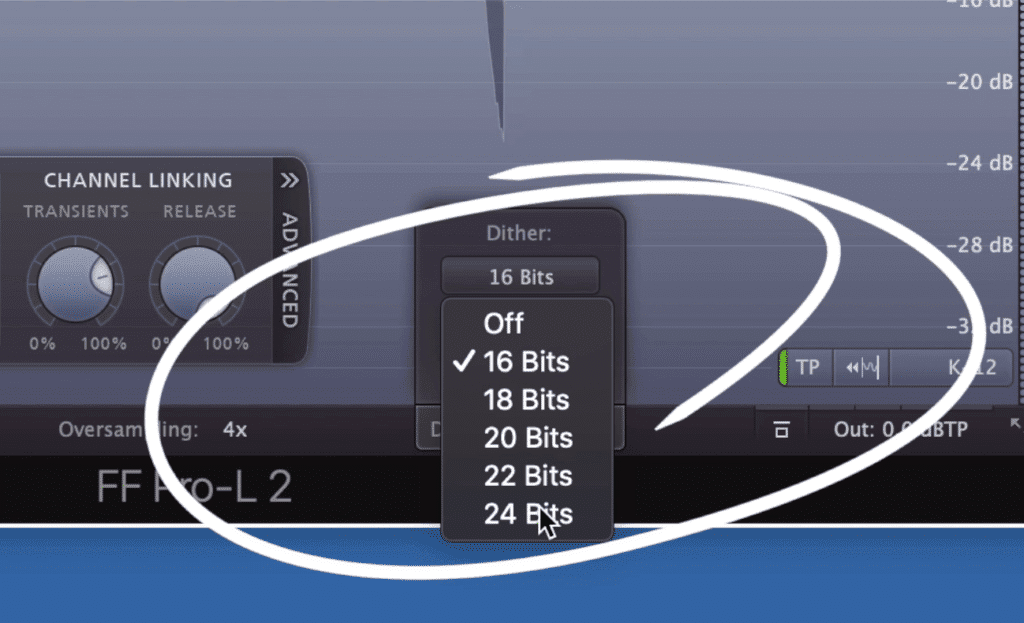
Dithering can be used we mastering for CD, but should otherwise rarely if ever be used.
You can switch your dithering from 16-bit to 24-bit with options in between. Also, 3 noise shaping options are available.
Keep in mind that if you do use dithering, the bit option you select depends on the bit-depth you’re converting to, not the bit-depth of the current file.
If you want to learn more about dithering, here's a video on the topic:
8. Midi Learning Lets You Link Midi Devices to the Pro L2
If you have a midi device like a keyboard or maybe a console strip emulation, you can use this plugin as a midi instrument and assign various midi keys to different functions.
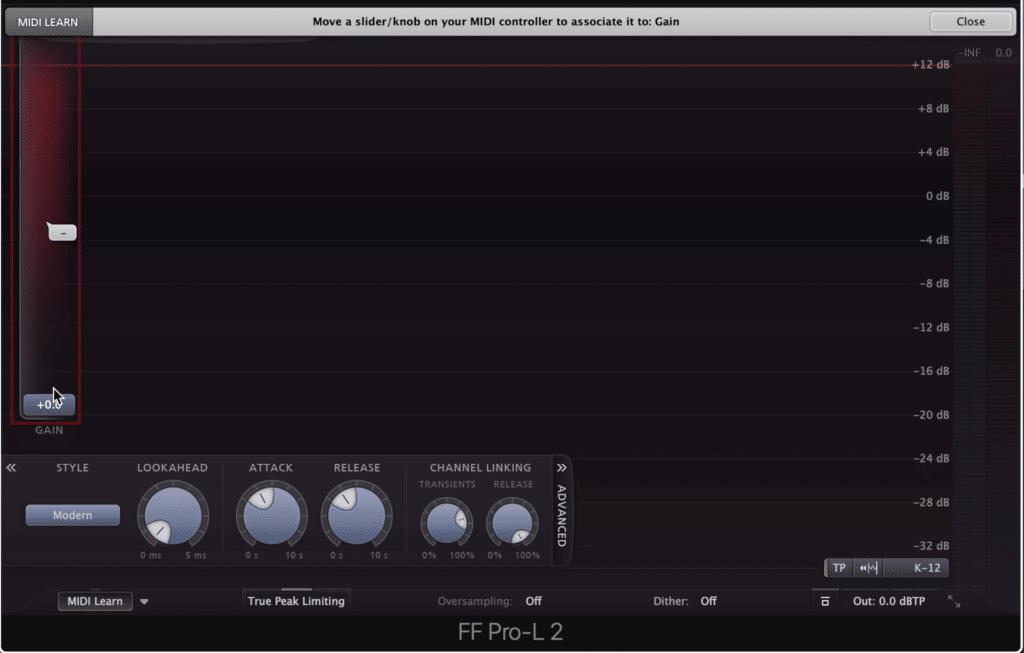
By clicking midi learn, selecting a function in the plugin, and then moving a slider or knob on the midi controller, you've associated the two.
To do this click Midi learn in the bottom left, highlight the function you want to affect, and then adjust the midi control to assign it to that function.
If you’re using Logic and you want to use the midi-learn function, you’ll need to use the plugin as a midi-controlled instrument on an instrument track, side chain the channel you want to affect, and then mute the original signal to avoid it playing back twice.
9. Channel Linking Is Performed in 2 Stages
You can link how the left and right channels are affected. They can either be processed collectively or independently.
At 100% the channels are completely linked, at 0% they’re completely separate and affected depending on their individual content.
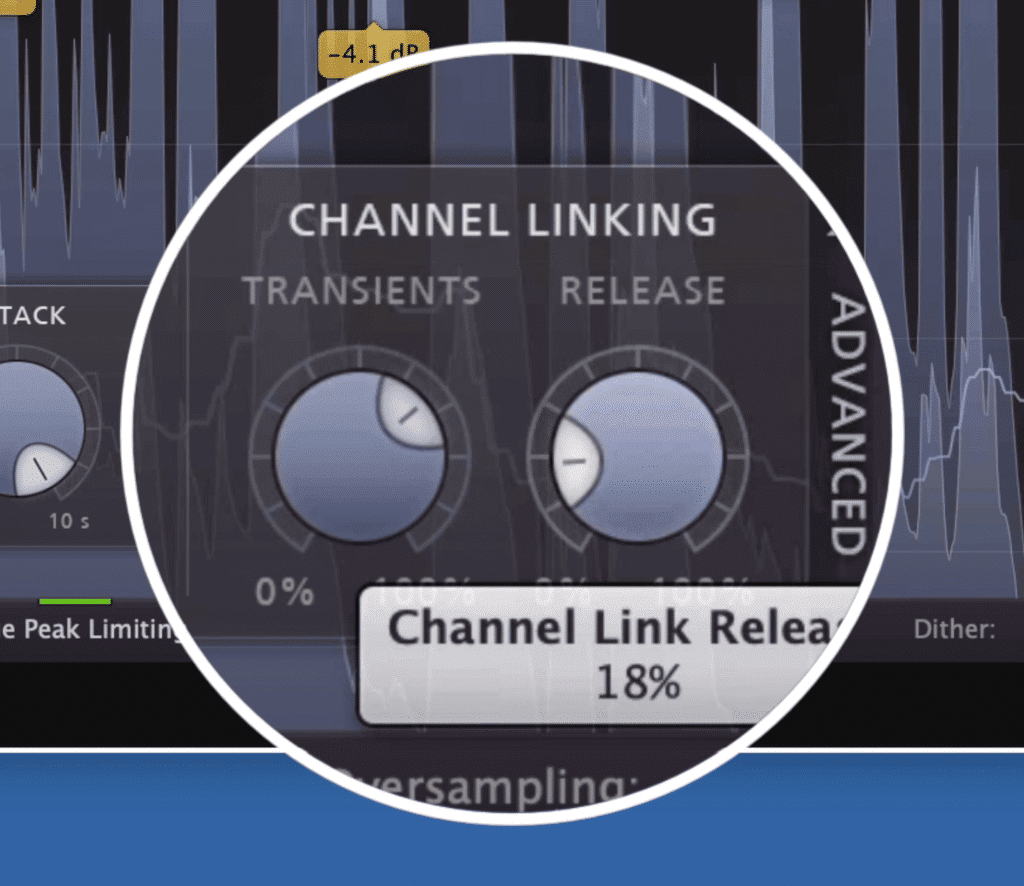
The transient controls the linking for the AD of the waveforms' ADSR, and the release controls the linking for the SR of the ADSR.
This linking is broken up into 2 sections, the Transient, or the initial attack or peak of the signal, and the release, or the sustain and trail of the signal.
You may want to link the release, but leave the transient a little more separated in case one channel has a loud peak, and you don’t want to pull down the entire stereo signal.
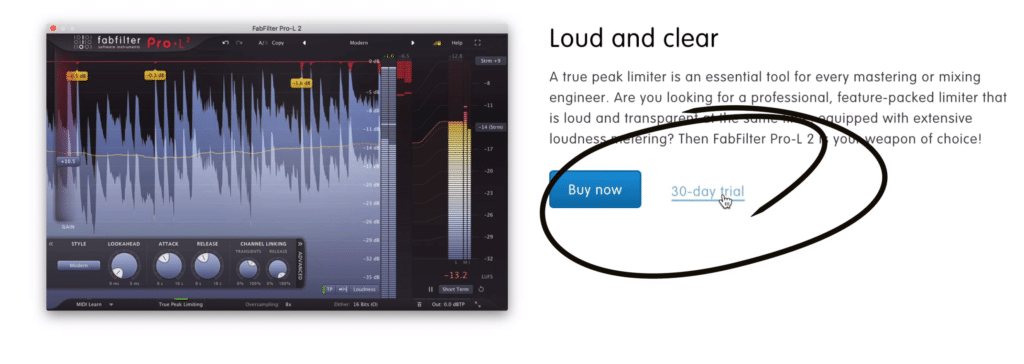
10. A 30-day Free Trial of the L2 is Available
If you want to try this plugin for yourself, you definitely should! There’s a free 30-day trial on the FabFilter website, which is pretty gracious since most demos only last for a week.
Try the plugin for yourself!
So, try the plugin out and let us know what you think of it.
If you’re an artist or engineer, send us one of your mixes:
We’ll master your mix for you and send you a sample to review.
Do you like the FabFilter Pro L2?


