Free vs. Cheap vs. Expensive Reverb Plugins
As more and more productions are moving away from established studios, and toward home studio production, artificial reverb has become increasingly important.
Reverb plugins are increasingly important as recording studios aren't being utilized as much.
In the past, entire buildings were designed with music in mind - whether it was a cathedral, a music hall, or a studio designed with drums in mind, music once reflected the place in which it was performed.
Today, as the technology to record is becoming more accessible and professional sounding, one thing that’s missing is the sound of a well-designed room. Fortunately, artificial reverberation is becoming both more complex and easily accessible - with both free and paid versions available.
Today, it’s possible to purchase the ability to emulate 100s, even 1000s of rooms around the world with convolution reverb. You can also create your own, potentially impossible to build rooms with algorithmic reverb plugins.
We'll look a free, an affordable, and an expensive plugin to see if there really is a big difference.
In short, it’s a great time to be producing music.
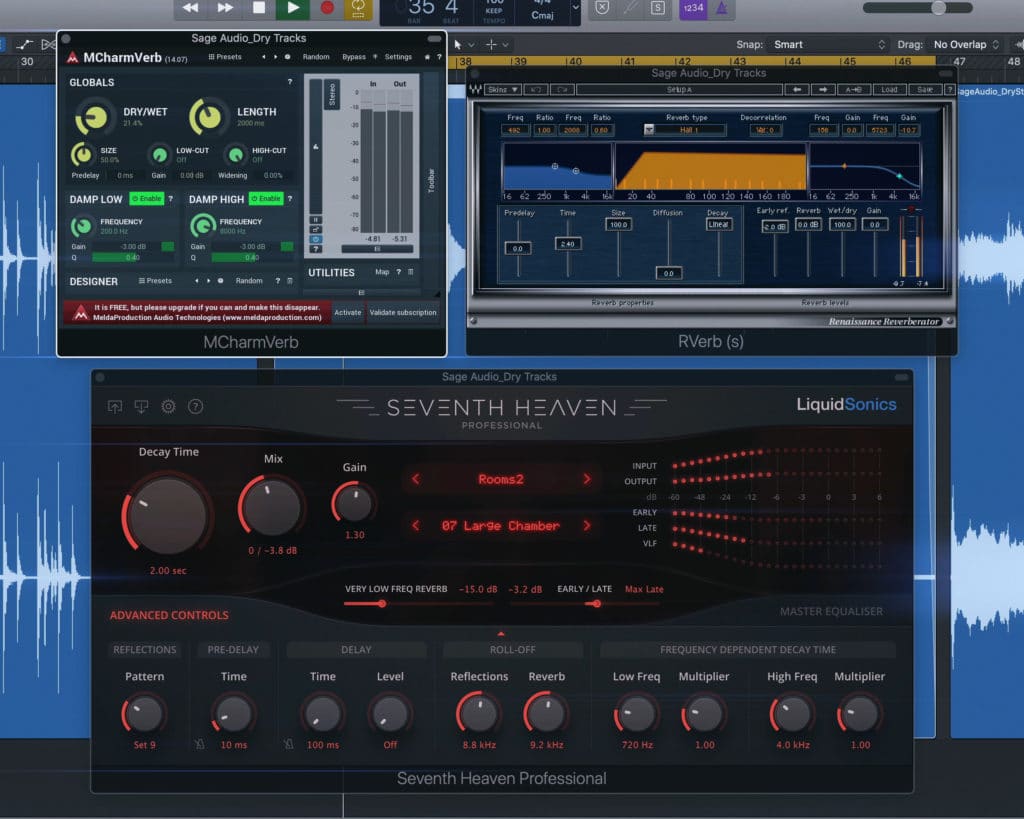
With that in mind, we wanted to compare and contrast 3 great reverb plugins. The plugins we’ll look at are:
- The Free MCharmVerb by Melda Audio Production
- The Cheap Renaissance Reverb by Waves Audio ($59.99)
- The Expensive Seventh Heaven Professional by Liquid Sonics ($299.99)
Before we start comparing these various reverbs, it’ll help to better understand the difference between algorithmic and convolution reverbs.
Also, if you’re looking to hear one of your mixes mastered, send it to us here:
We’ll master your song for you and send you a free sample for you to review.
What is Algorithmic Reverb?
Algorithmic reverb is often called digital reverb and is created using multiple delay loops to simulate the sound of a room.
Although this offers users a lot of options for customizing the sound, it doesn’t always result in the smoothest or more realistic sound. With less complex algorithmic reverbs, you may notice a chorusing effect.
Additionally, if modulation is being used it isn’t uncommon for algorithmic reverbs to cause unwanted pitch shifts and bends in longer instrumentation like synths or piano.
That said, there are still many great algorithmic reverbs that are useful and offer a unique sound. In fact, many music lovers have grown to enjoy some of the artificial sounds created by algorithmic reverb.
What is Convolution or IR Reverb?
Convolution reverb uses impulse responses to record and recreate the shape of rooms. There are many ways to create convolution reverb - the most basic ways are to use a transient or quick sharp sound, and then record and measure the room reflections.
More complex ways include ray-tracing, multiple impulses for one room, and other room measurement techniques to recreate a room in the most accurate way possible.
Convolution reverb is often considered a more realistic sound and can yield better results . Although convolution reverbs will vary in quality, they seem to offer the best way to recreate rooms and realistic reverberation.
If you’d like to check out some free reverb plugins, take a look at this video detailing the best 11 free reverb plugins we could find:
In this video we showcase each plugin as well as discuss their respective functionality.
The Free MCharmVerb by Melda Audio Production
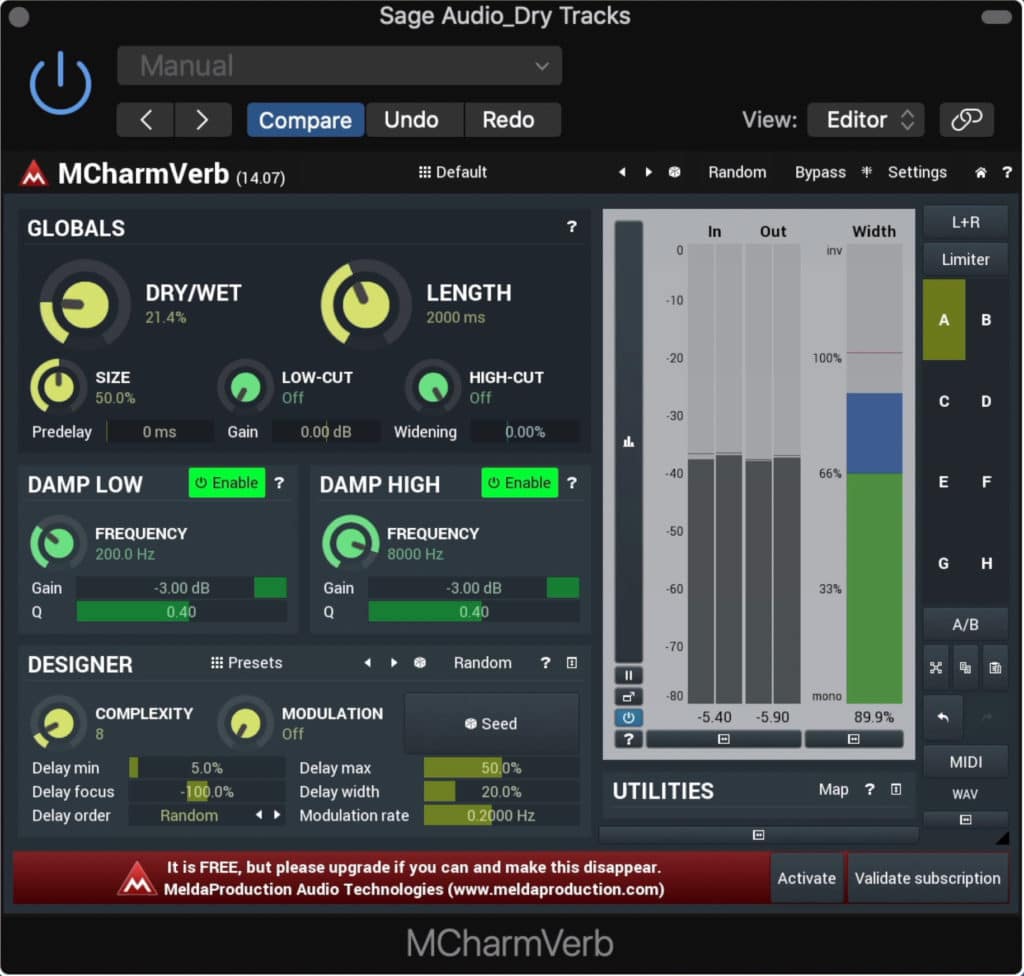
The MCharmVerb is a fantastic algorithmic reverb.
MCharmVerb by Melda Audio is a great algorithmic reverb, which allows users to modify reverb in a complex way.
Although some algorithmic reverbs don’t offer the best sound, MCharmVerb gives users enough flexibility to recreate realistic reverbs as well as some of the more popular unrealistic sounds.
Let’s take a look at the functions this plugin offers and consider what they may mean for your productions.
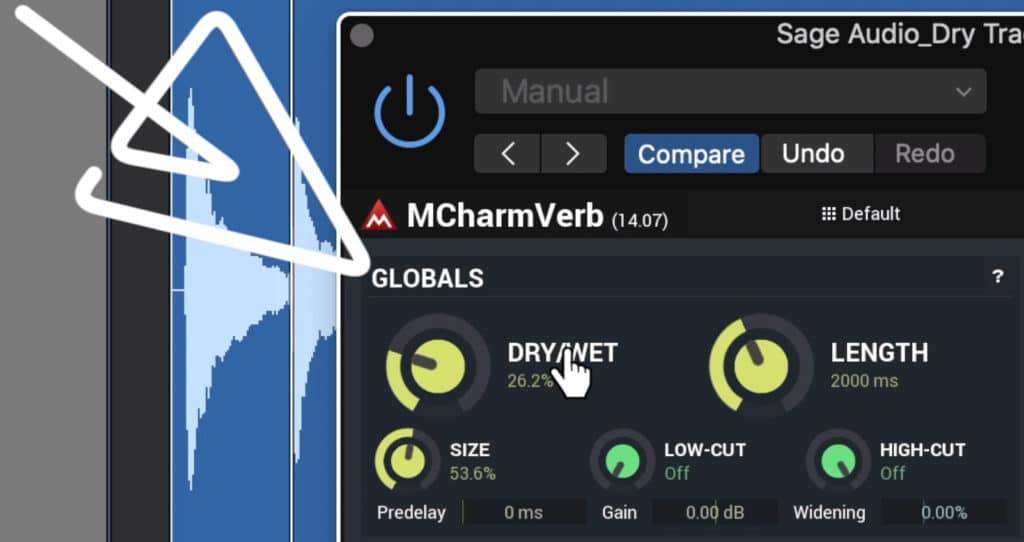
Up top in the Global Section, we have the Dry/Wet dial which controls how much of the signal is and is not affected by the algorithmic reverb.
In the global section you affect your reverb in a broader sense.
The length determines how long the reverb tail lasts in milliseconds, ranging from 100ms to an incredibly long 60 seconds.
The Size dial changes the visual size of the room, which means the delay times used to create the reverb change.
A low and high cut filter can be used to narrow the affected frequency range.
Pre-Delay, Gain, and Stereo Widening sliders are all available at the bottom of the global section.
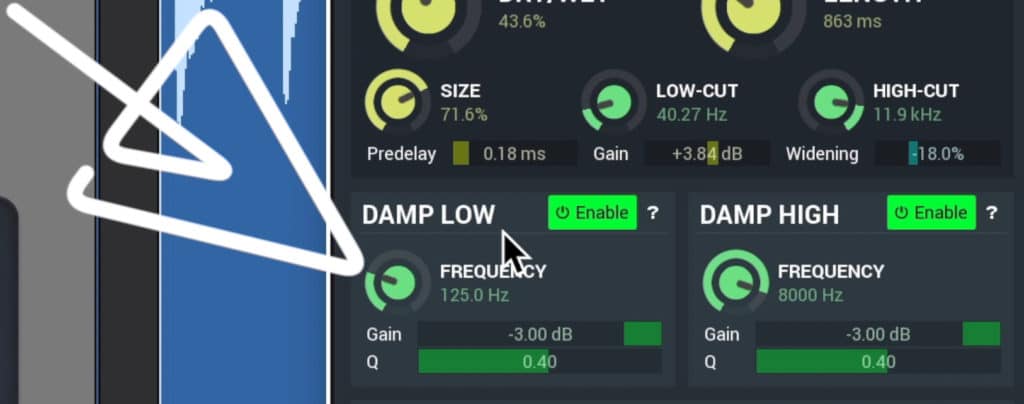
You can dampen the sound with these two bands.
Next,you can dampen both the low and high frequencies , meaning the reverb will not be as prevalent in these sections. The frequency dial lets you select the frequency you want to affect - the Q works like an EQ’s Q value, as does the gain slider.
The dampening sections can be enabled or disabled.
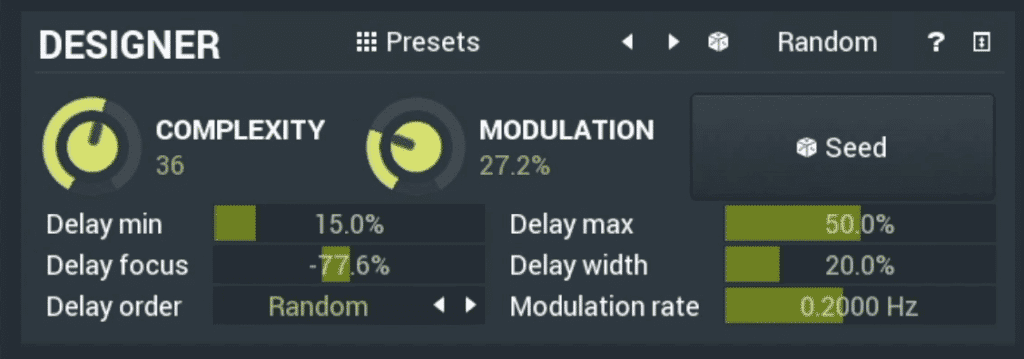
In the designer section, you can truly alter the timbre and character of your reverb.
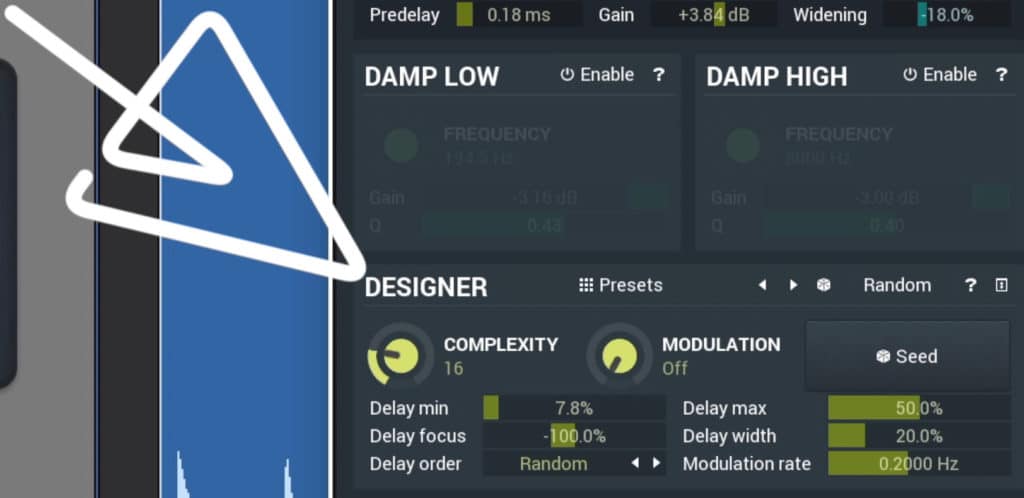
In the designer section, you can introduce more complex settings to affect the timbre of your reverb.
The complex dial lets you increase the number of delay taps, in turn making the reverb sound more realistic, or at the very least, more nuanced and detailed with less unwanted artifacts.
The higher the number, the more complex, and the more taxing the plugin will be on your CPU - keep this in mind if your intend to use this plugin on multiple tracks.
Modulation is to the right and causes the reverberation to modulate in its frequency. At lower settings this plugin uses modulation on just the input; at higher settings modulation occurs both at the input and on the reverberation.
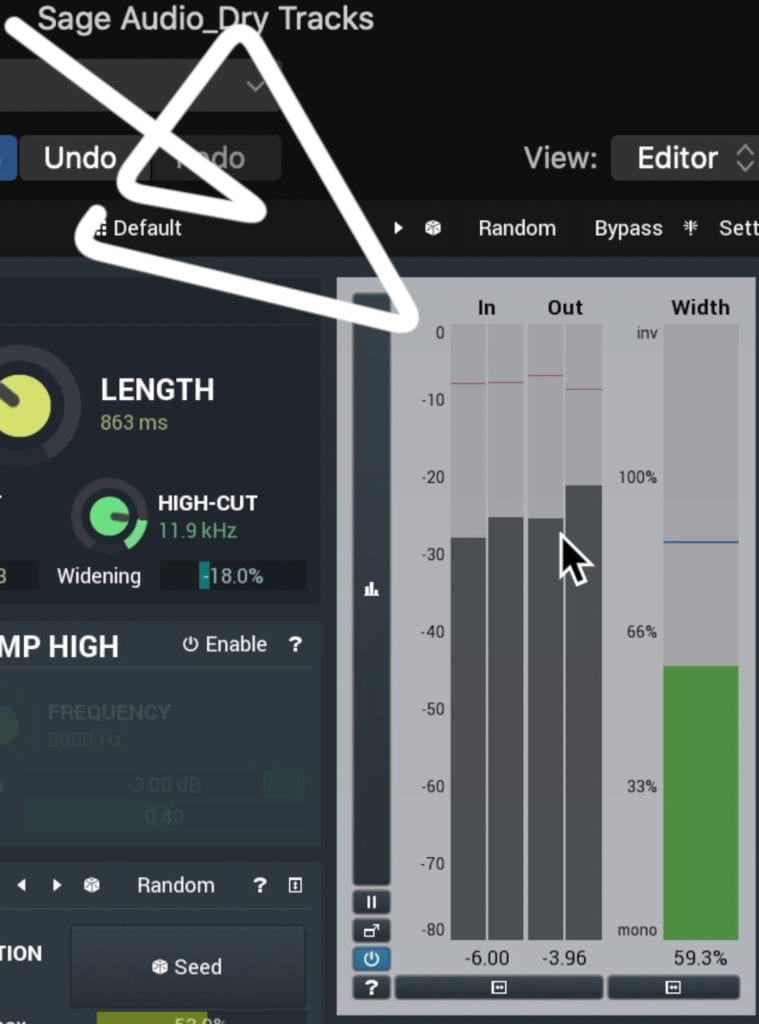
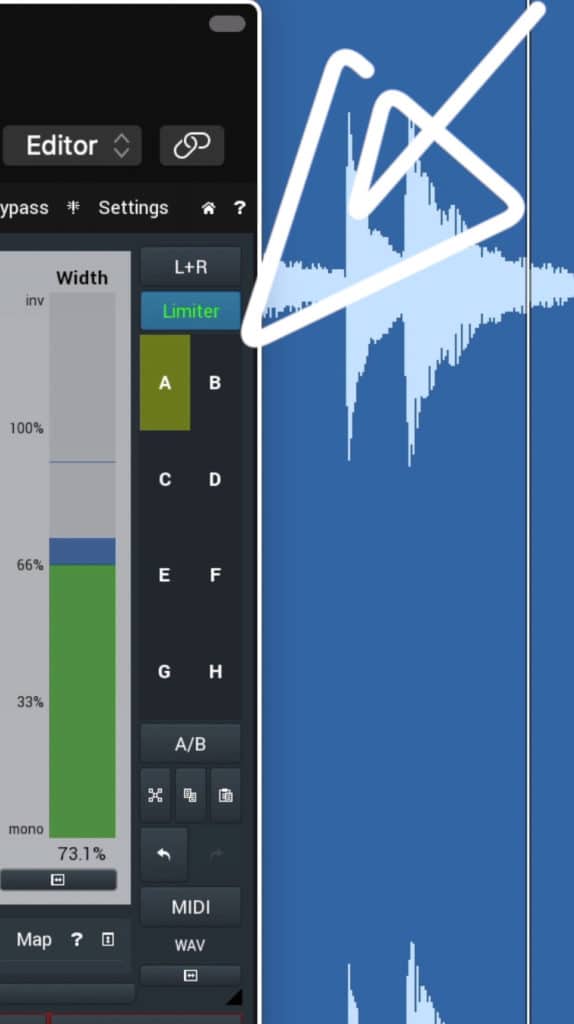
The input, output, and stereo width can be observed in the metering section.
When used at higher settings, modulation will cause a very unnatural and potentially unpleasant sound.
With the sliders below modulation, you can affect the delay characteristics. The Delay min is the minimum delay length used for your reverb, and the focus is the reverb’s preference for longer or shorter delays.
A lower percentage to the left means the reverb will use shorter delays more often, and the opposite is true for higher percentages to the right.
The Delay Order can be switched from random to more sequenced delay types. How this sequencing sounds will vary based on the other settings you’re using.
In the toolbar section you can enable a limiter to protect your ears. Be sure to turn it off once you're done using it.
The max delay length and the delay width can also be altered with the sliders, as can the rate of modulation. Typically, lower settings will sound more natural.
You can use the dice icon to randomize the preset selected, the random button to randomize the designer section’s settings, and the seed button to randomize the internal algorithm.
The seed button is a little bit of a mystery to me, so if you understand it better, please let me know in the comment section of the video.
The seed section can be altered between over 2 billion options , making it easy to randomize your reverb.
Notice the random buttons in this section - use them to randomize your settings.
The input and output can be observed in the metering section, as can the stereo width of the signal.
In the toolbar section, you can introduce a limiter to protect yourself from incredibly loud signals - this is helpful when you're randomizing your settings, but it should be turned off once you’ve ensured that the signal isn’t too loud.
One amazing feature of this plugin that would be really easy to miss is the Impulse Response loader - shown as the text IR in the toolbox section. Unfortunately, this feature seems to only work if you upgrade the Melda Plugins.
To upgrade the free Melda Plugins, it costs roughly $60 - but this will upgrade roughly 40 plugins.
If you’re using the MCharmVerb on your mixes and you’re ready to hear your mix mastered, send it to us here:
We’ll master it for you and send you a free sample to review.
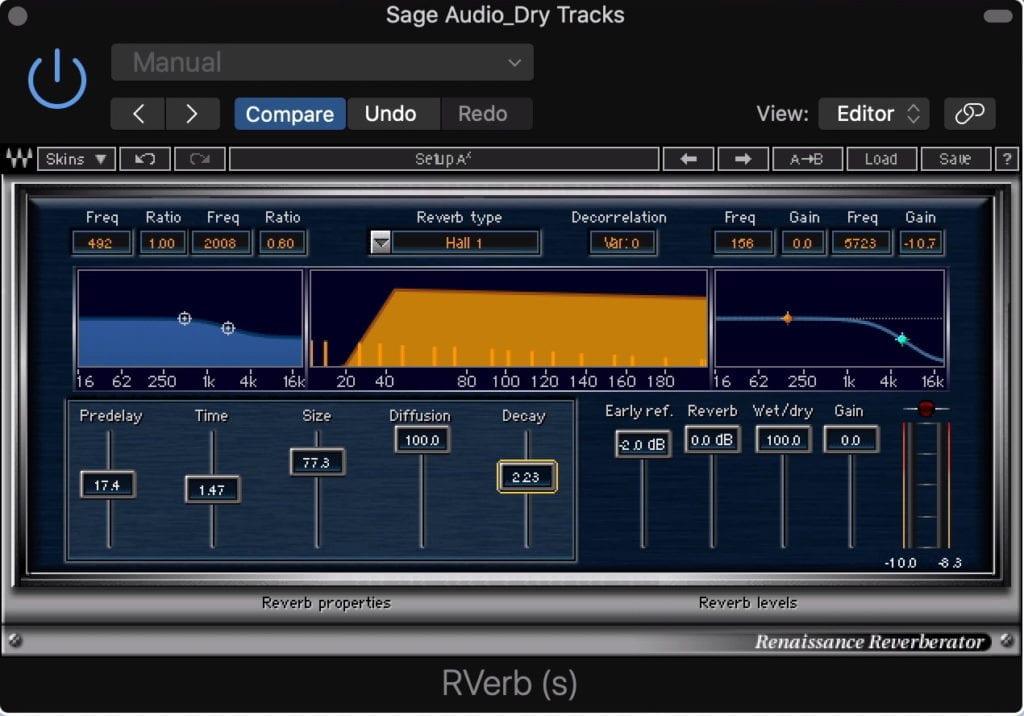
The Cheap Renaissance Reverb by Waves Audio ($59.99)
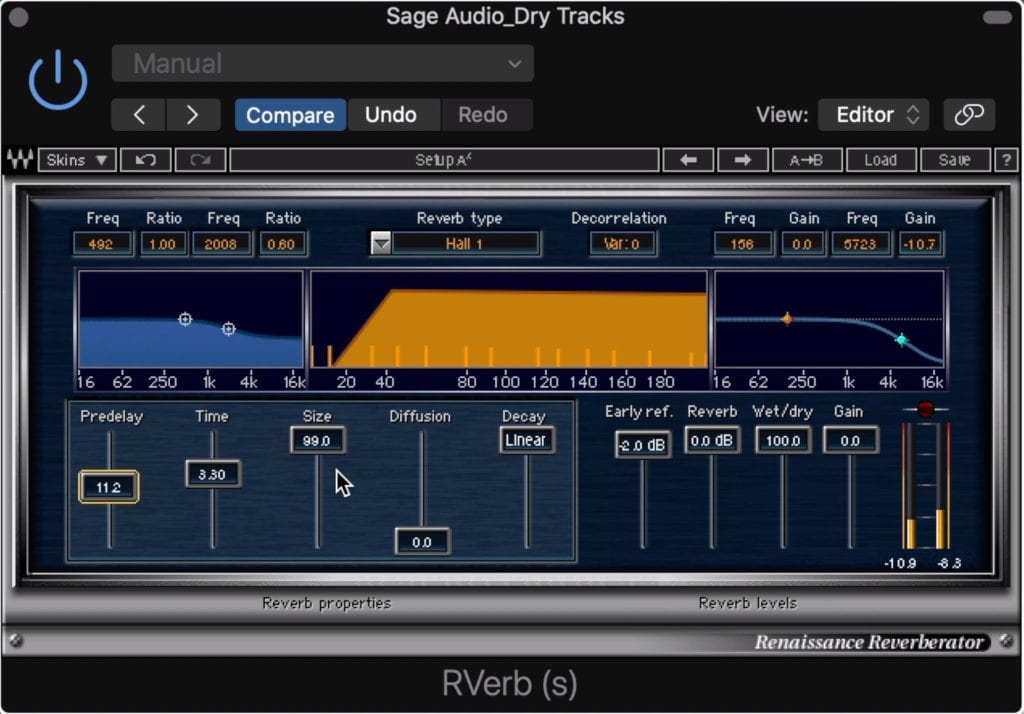
Renaissance Reverb or R Verb is a popular and easy to use algorithmic reverb.
Renaissance Reverb or R Verb as it's often referred to is a simple but effective reverb by the popular plugin developer Waves.
If you’re looking for a simplistic reverb to try out - one that isn’t too expensive, this is a good option.
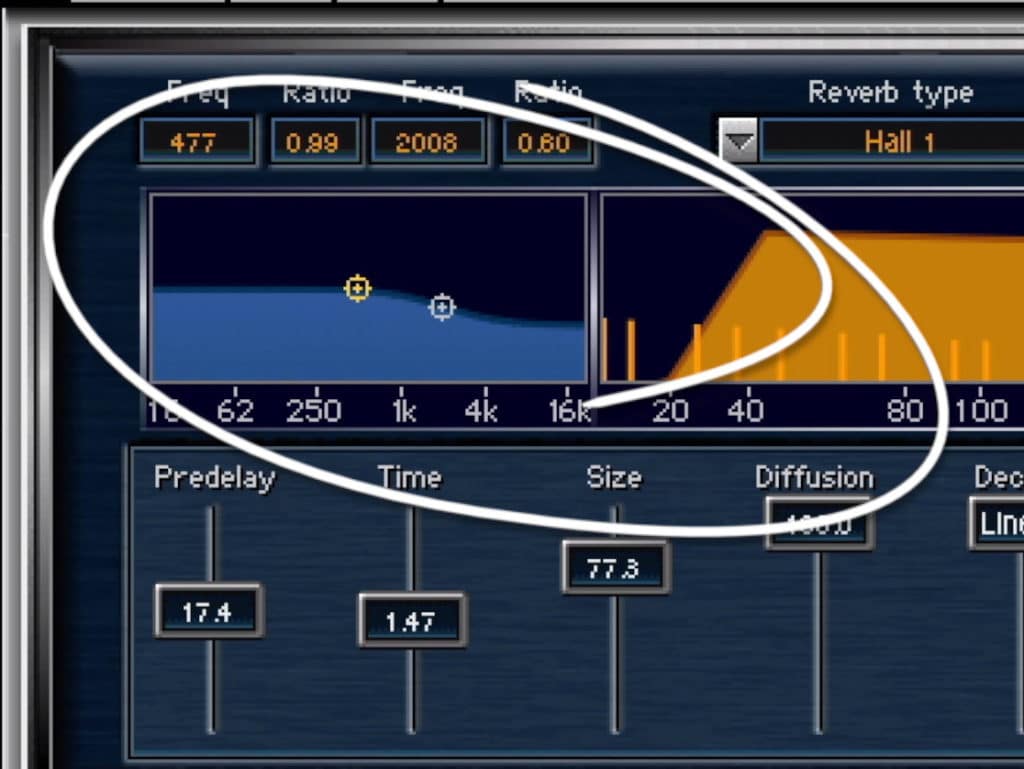
You can see a visual representation of your reverb in the center window.
It should also be noted that the R Verb is algorithmic , and doesn’t have the option to import a form of an impulse response.
What's nice about the R Verb is that it offers a visualization of the delays, as well as the virtual room size, that is creating the reverb. This can be observed in the time response window.
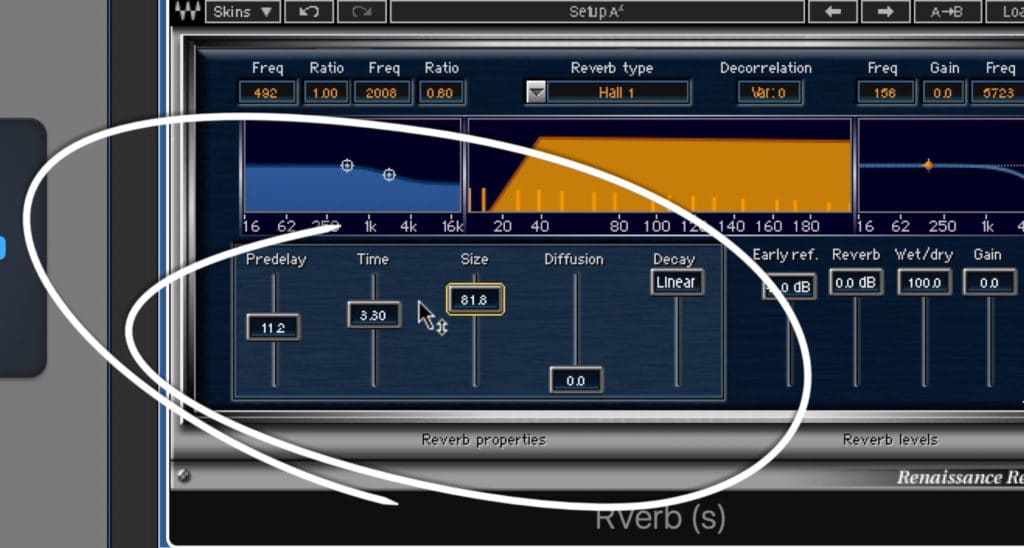
These 5 sliders are the plugin's primary functions.
Let’s look at the 5 sliders in the bottom-left section of the plugin:
Pre-Delay which alters the time before reverb occursTime which alters the length of the reverb tail - this ranges from 0.1 seconds to 20 secondsSize which alters the density of the delays and the attack of the reverbDiffusion which determines if the input or the early reflections feeds the reverb tail. At 0 the input creates the reverb tail, at 100 the early reflections create the tailDecay which changes the shape of the reverb tail, from a linear decrease an amplitude to a more irregular one.
To the right, you can affect the level of the reflections with the Early Reflections slider. The Reverb slider changes the overall amount of reverb.
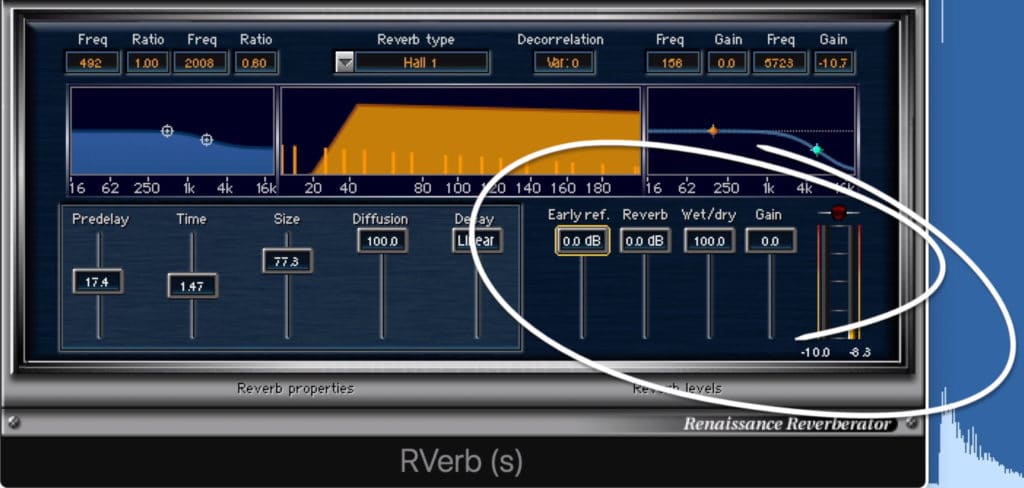
Early reflections and overall reverb can be affected in this right-side panel.
Wet/dry lets you affect how much of the signal is being affected by the reverb. Gain is your output gain.
Dampening occurs in this top left window - which gives you a high and low band.
To the top left you can alter the reverb dampening, meaning you can make it sound brighter or more subdued, as well as thinner or more bass-heavy. The damping section lets you control 2 bands, but unlike the MCharmVerb, you cannot alter their Q settings.
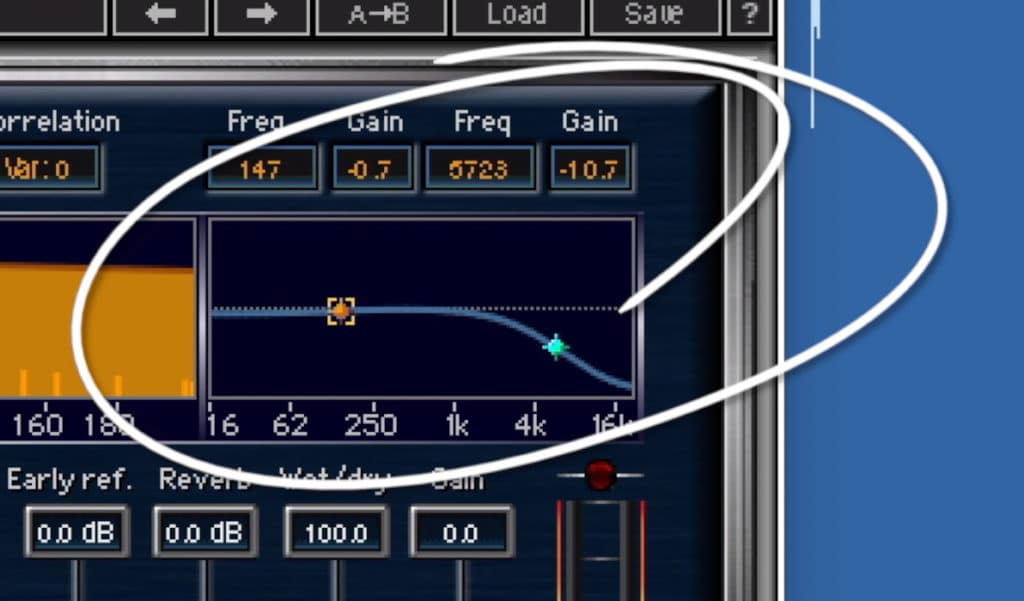
The reverb's EQ can be affected in the top right of the plugin.
The reverb EQ section affects the frequency response of the reverb tail. In this section, you can also control 2 bands.
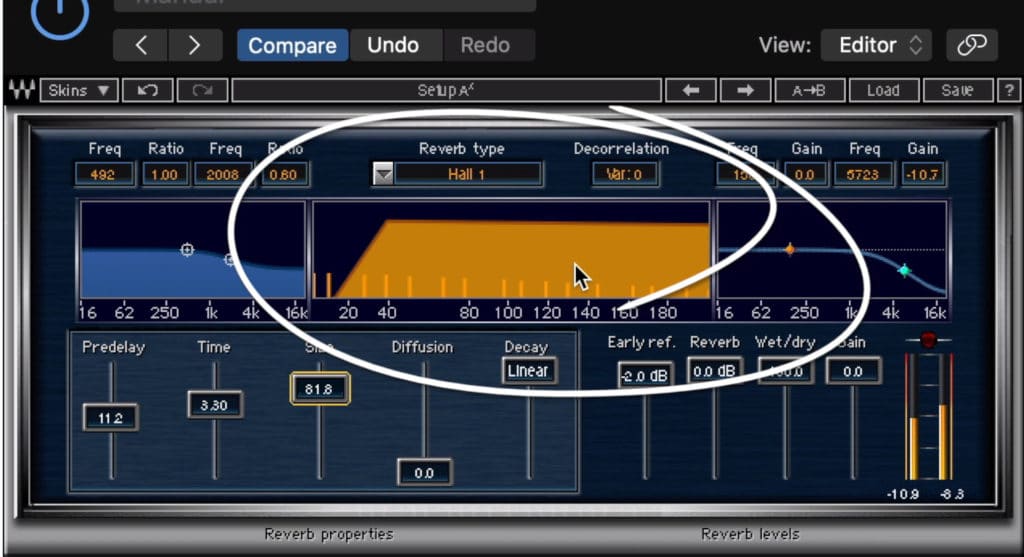
Lastly, you can change the reverb type between 12 different settings. The variation option alters the spacing of the delays, similar to MCharmVerb’s Order function.
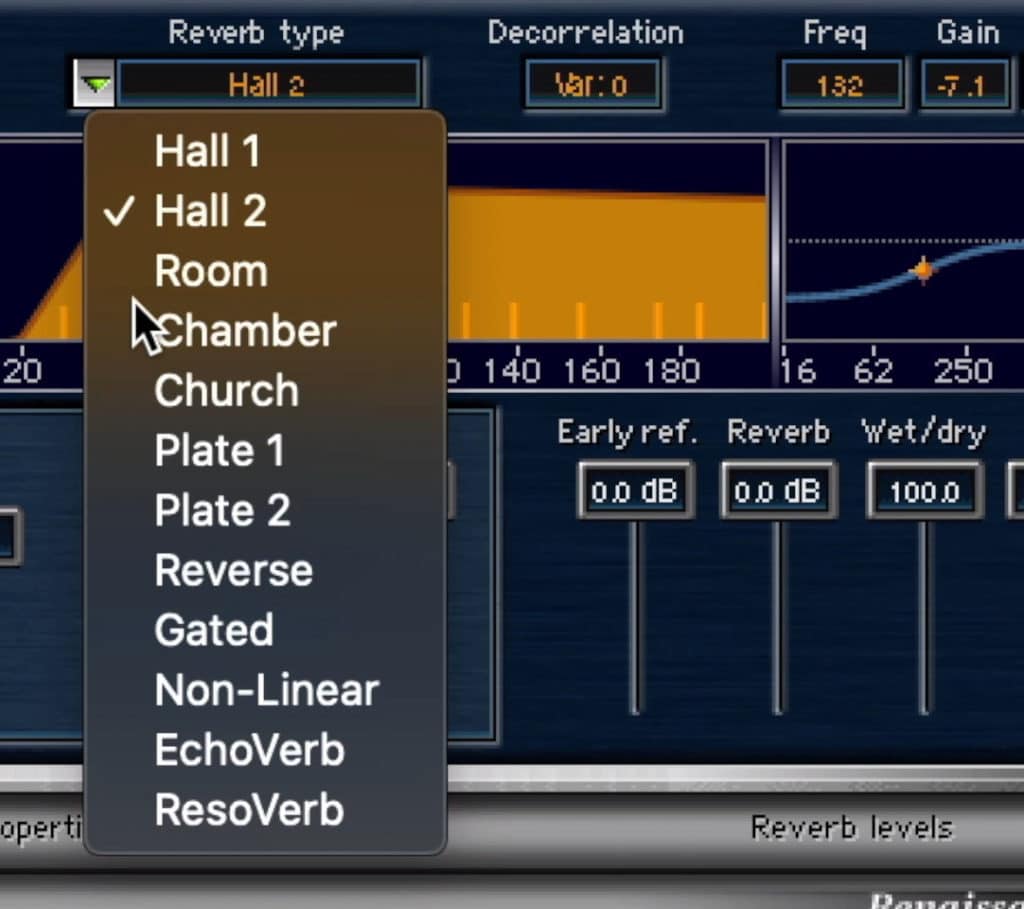
You can switch the reverb type in this tab on the top of the plugin.
Although the R Verb is an algorithmic reverb, it still offers a complex and occasionally realistic sound. With it, you can accomplish various reverb characters.
If you’re enjoying this blog post or video, and you’d like to check out another similar post, take a look at this one:
In it, we compare and contrast a free, cheap, and expensive plugin - similar to how we do here.
The Expensive Seventh Heaven Professional by Liquid Sonics ($299.99)
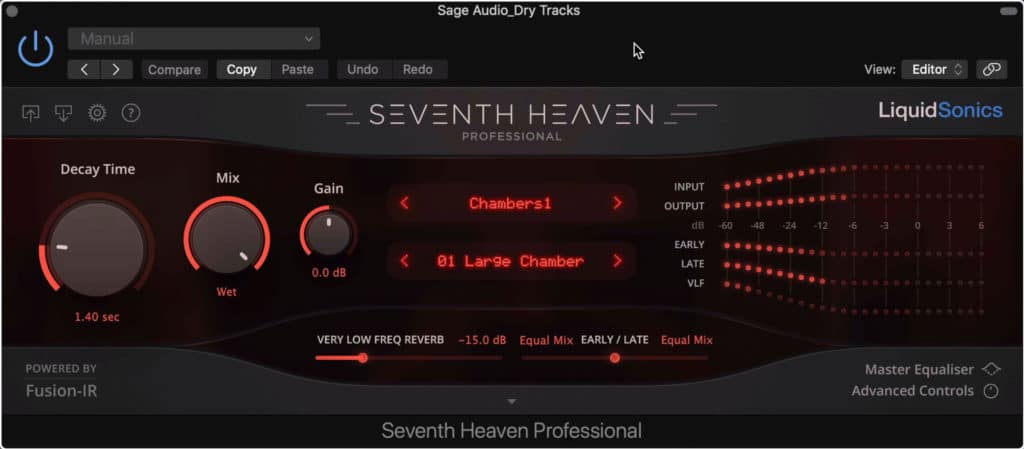
Seventh Heaven is an expensive but comprehensive plugin.
Seventh Heaven by Liquid Sonics is an emulation of the Bricasti M7 Reverb - hardware known for its smooth and immersive sound.
Whereas the hardware will set you back roughly $4,000, the plugin is about $300 and emits a very similar sound.

This plugin is modeled on the M7, and houses impulse responses from the hardware.
If you’re looking for some of the best sounding reverb you can find in a plugin, take a listen to Seventh Heaven.
Interestingly, the M7 is an algorithmic reverb, but Seventh Heaven is a convolution reverb of the algorithmic settings of the M7. So with plugin, you’re getting the impulse responses of the M7, with multiple IRs making up one setting.
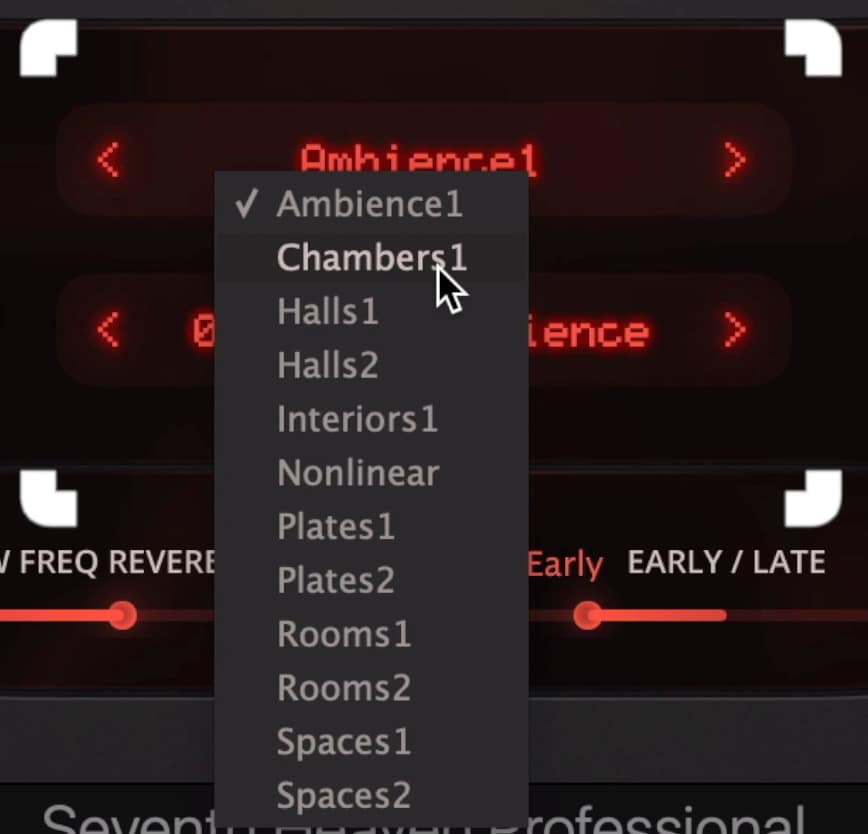
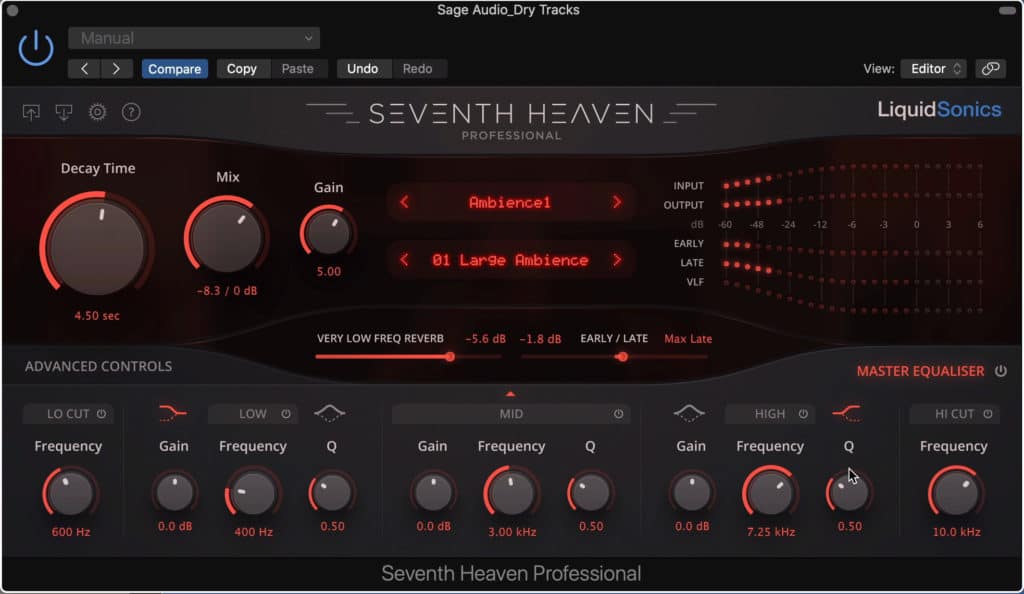
The presets are the main settings in the plugin.
The functionality is pretty straight-forward and easy to use.
Like the hardware, you’ll most likely one using the presets a lot. To access these select the room type, and then the sound you’re going for with the 2nd tab.
So. If you’re looking to add a realistic sound to your mixes, try adding in a Room present to emulate that of a recording studio.
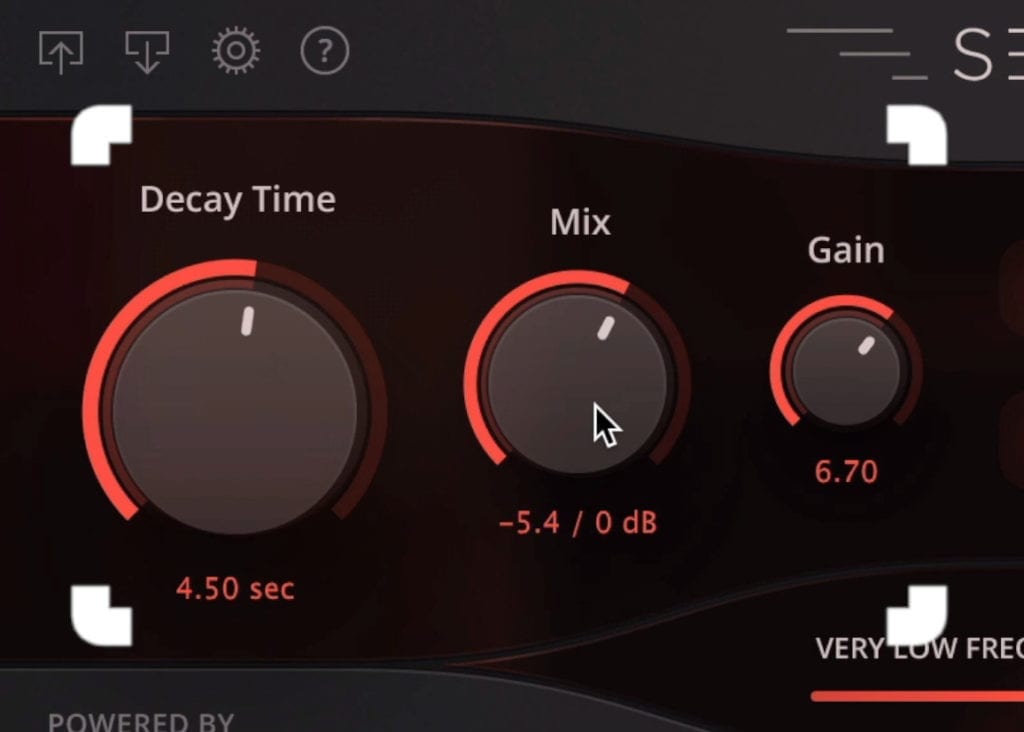
You can affect your decay, wet/dry, and output gain with these dials.
Or maybe if you’re processing vocals, try a vocal plate setting. There are enough combinations here to suit just about any mixing need.
If you want to further adjust these presets to better suit your mix, you can affect the decay time which ranges from .2 seconds to 30 seconds , the wet/dry mix, and the output gain.
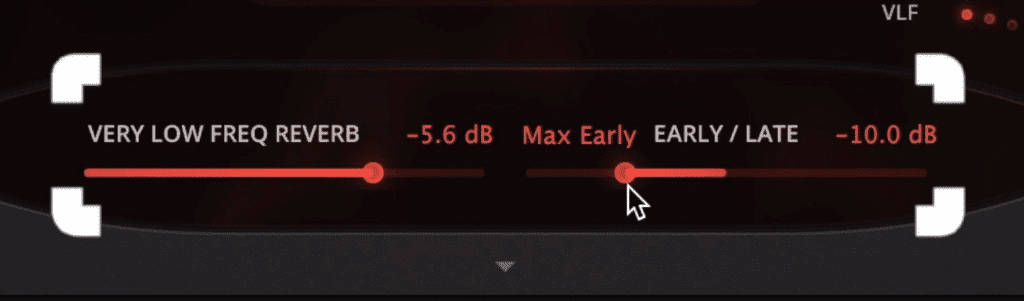
These sliders control the low frequency reverb gain, and the reflections.
With the 2 sliders underneath the preset section, you can affect the level of low-frequency reverb, as well as control the balance of the reflections.
Under the Advanced Controls tab, you can alter the pattern of the reflections, as well as the Pre-Delay. Delay can be introduced using the Time and Level dials. Both pre-delay and delay can be synced to the host BPM by clicking the metronome icon.
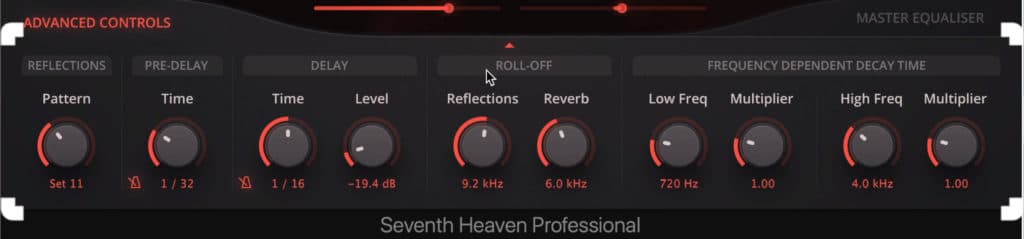
The advanced controls section gives you the ability to fine tune your reverb's settings.
Some dampening can be introduced with the Reverb Roll-off section - here, you can adjust the cut off of both the reflections and the overall reverberation.
The decay can be made frequency specific with the frequency-dependent decay time section. Two bands, a low and high frequency can be controlled with the frequency dial and a multiplier of this frequency.
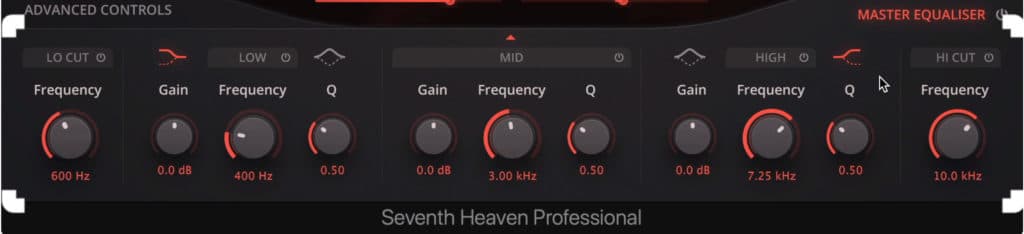
A master EQ section lets you create unique reverb tails.
Lastly, 1 section that is not included with the original hardware is the Master Equalizer section . With it, you can use 5 bands to subtly or greatly affect the frequency response of your reverb.
So, for example, if your bright plate setting wasn’t as bright as you wanted it to be, you could introduce a shelf filter at 20kHz, and boost the gain.
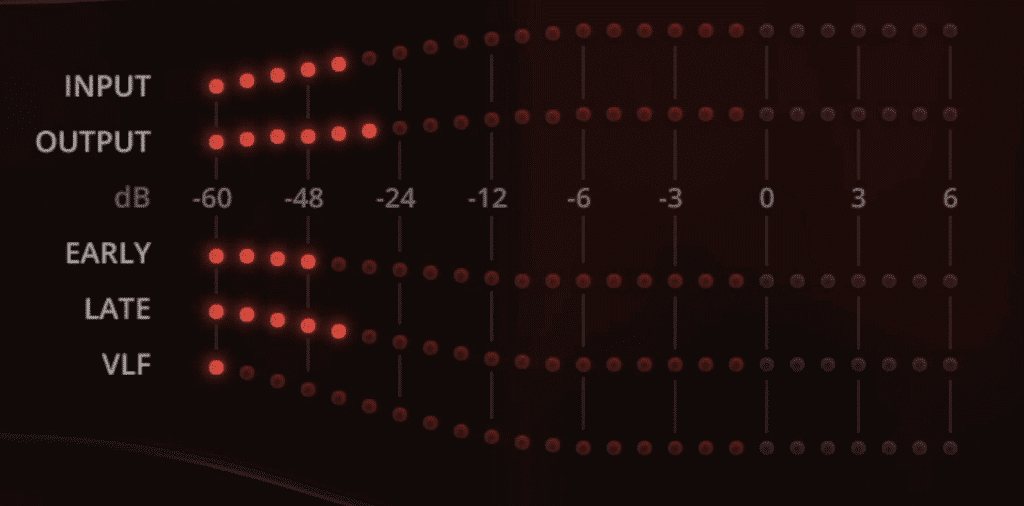
The input, output, early, late, and very low frequency reflections can be observed with the metering.
This section really adds a lot of flexibility to the plugin and makes following the reverb with an additional EQ more or less unnecessary.
For more great plugins, check out another one of our blog posts:
In it, we pick and listen to some of the best sounding mastering equalizer plugins currently available.
The Winner: Seventh Heaven Professional by Liquid Sonics
Although it’s the most expensive by far, Seventh Heaven has an unbelievable sound.
Its functionality may be similar to the other 2 plugins; however, the fact that this plugin uses impulse responses of one of the best reverbs sets it apart.
Our pick for the winner is Seventh Heaven by Liquid Sonics.
What you get is a close replication of a $4,000, high-end studio staple - the M7. The multiple preset make the plugin easy to use and versatile, while the advanced controls give you even more control over your signal than the original hardware.
This plugin kind of reminds me of the Weiss DK1 MKII in that is nearly perfectly replicates the sound fo the original. From what I’ve gathered, it seems that LiquidSonics went to great lengths to replicate the M7, and ensure that their sound matched it as closely as possible.
If you love reverb, or at least, understand its importance in a mix, you need to try this plugin. It
If you enter this key code into your iLok, LiquidSonics lets you try the plugin for free for 14-days:
5223-7288-2326-9224-8150-0830-4398-75
Granted the other 2 plugins are still great. They both offer a fair deal of flexibility and a decent sound.
The MCharmVerb in particular is an amazing free plugin. Both its sound and functionality give users a lot they can accomplish. The fact that you can increase the delay taps to up to 64 is pretty remarkable and gives new engineers a great opportunity at creating professional sounding reverb.
That said, when comparing these plugins using similar settings to Seventh Heaven, it’s difficult not to notice a difference. Even at the highest complexity, the MCharmVerb doesn’t offer the same sonic richness as our expensive pick.
If you have a mix that you’d like to hear mastered, send it to us here:
We’ll master it for you and send you a free sample for you to review.
Have you tried any of these plugins?


