Free vs. Cheap vs. Expensive Plugins: Digital EQs
There are a lot of digital equalizers out there. Some worth your time and money, and some are better left unused.
You might be on the fence about whether or not to buy an equalizer. Maybe your stock plugin isn’t enough and you’re looking for an upgrade , or maybe you’ve seen some ads for a new EQ plugin and you’re considering taking the leap.
Whatever the case, it helps to know if a costly plugin is worth it, or if you can get the same thing with a free VST.

Picking the right plugins can truly help your productions.
That’s why we thought we’d try something new and do an in-depth analysis of a free, a cheap, and an expensive digital eq plugin.
We’ll compare 3 different EQ plugins at very different price-points, and then make a decision for what’s the best value and what’s actually worth your time and money.
We’ll consider things like CPU usage , if the plugin generates harmonics if the plugin has any adverse or unwanted effects on the signal, the general functionality of the plugin, the aesthetics , and interface design, and of course, the cost.
We’ll also listen to the plugins (in the video above), so that we can hear the differences for ourselves.
The three plugins we’ll be covering today are:
- Free: The TinyQ by LJKB plugins
- Cheap: The Renaissance EQ by Waves
- Expensive: The Pro Q 3 by FabFilter
When we're done comparing them we’ll reveal our pick for the best of the three. Granted, whatever we pick as the best is just our opinion based on what we value, so if you have a different pick, leave it in the comments section - we definitely want to hear what you’re thinking.
Also, if you’re an artist or engineer, send us one of your mixes here:
We’ll master it for you and send you a free sample for you to review.
Free: The TinyQ by LJKB Plugins
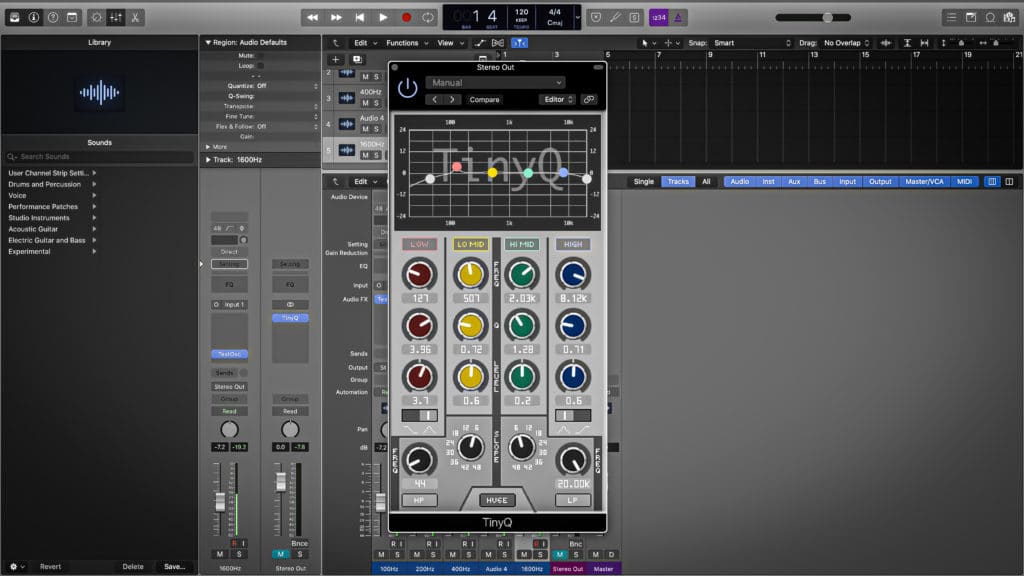
First, we'll be looking at the TinyQ by ljkb
We’ve reviewed this plugin before on one of our top 10 free plugins list. It’s a great, simple, and clean eq plugin - but let’s look at it on a deeper level.
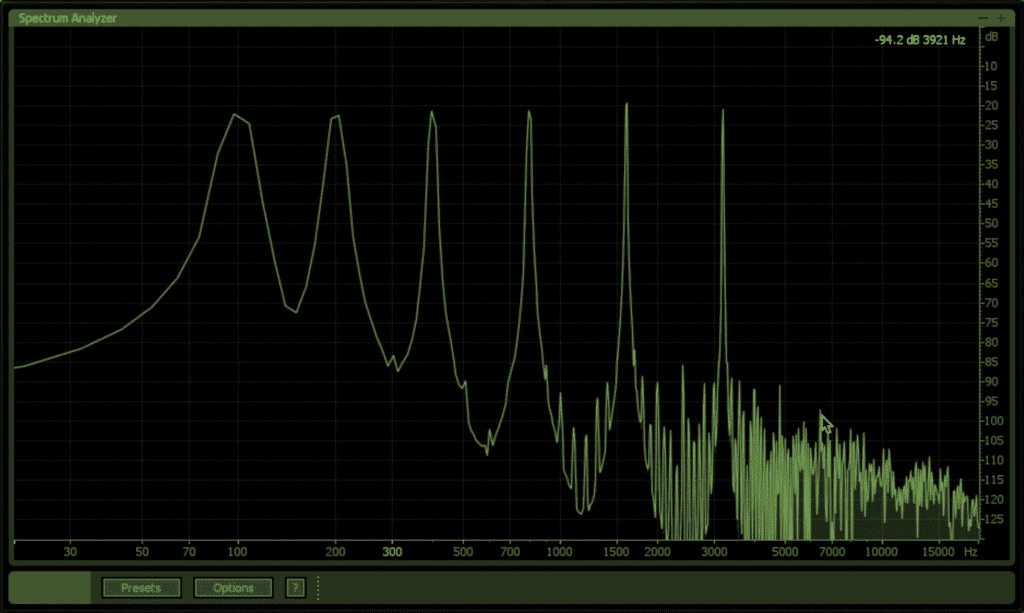
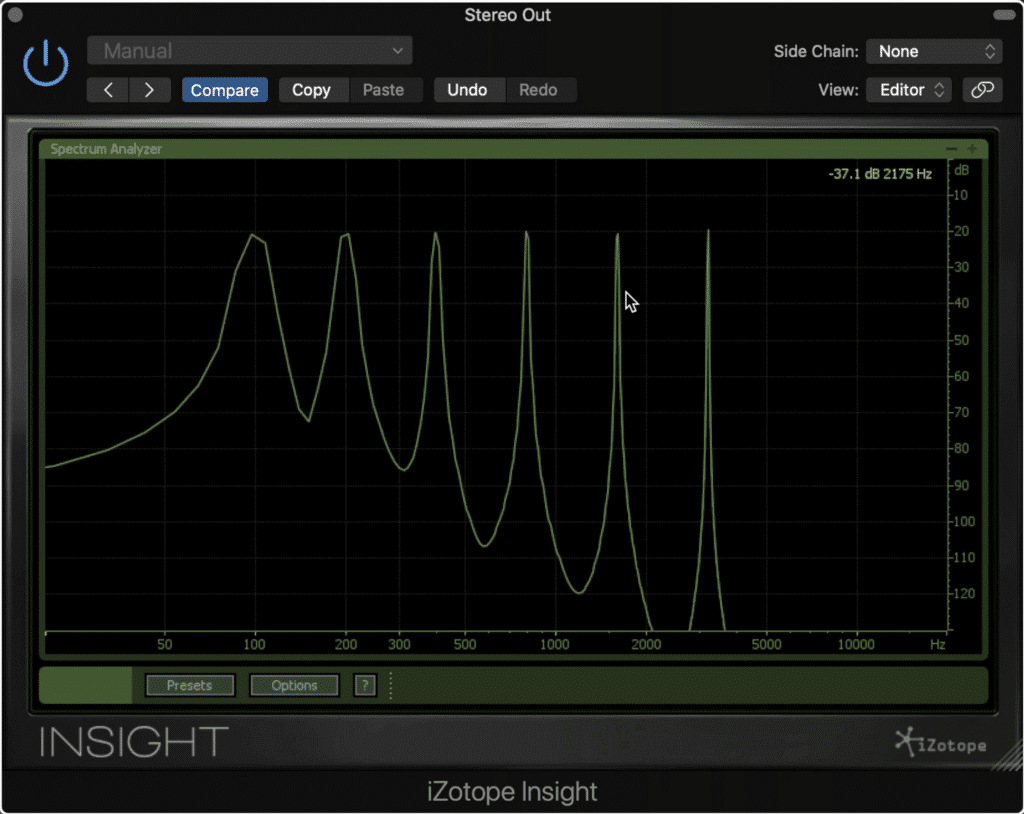
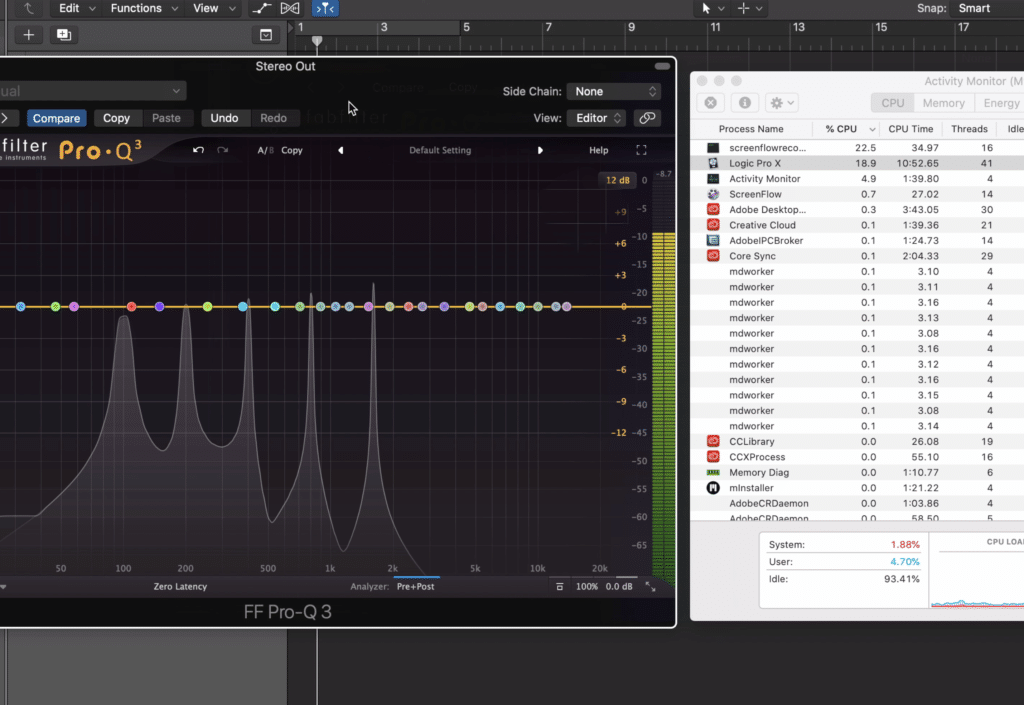
When testing these plugins we’re going to be using sine waves since they’re easier to observe than a complex waveform. We’ve got these sine waves set to 100Hz, 200Hz, 400Hz, 800Hz, 1600Hz, and 3200Hz.
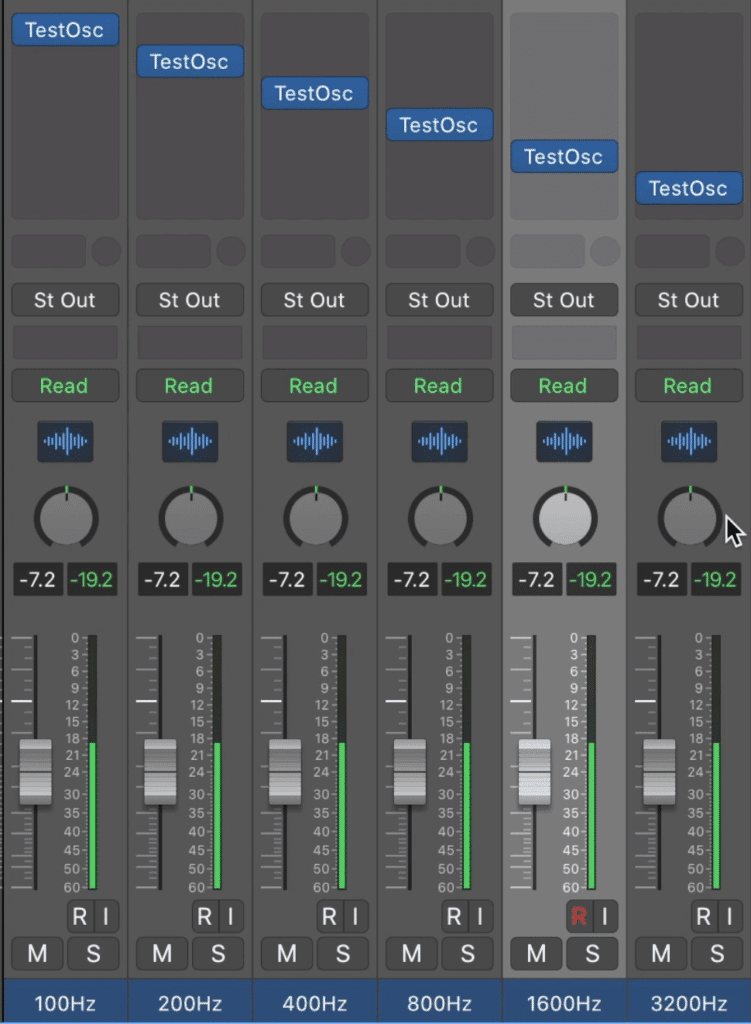
We'll be using these sine waves to test some aspects of the equalizers.
We’ll also be using a separate frequency and stereo image analyzer to observe the signal whenever changes are made.
We'll use this analyzer to observe some changes made and to ensure that the plugins aren't negatively affecting the signal.
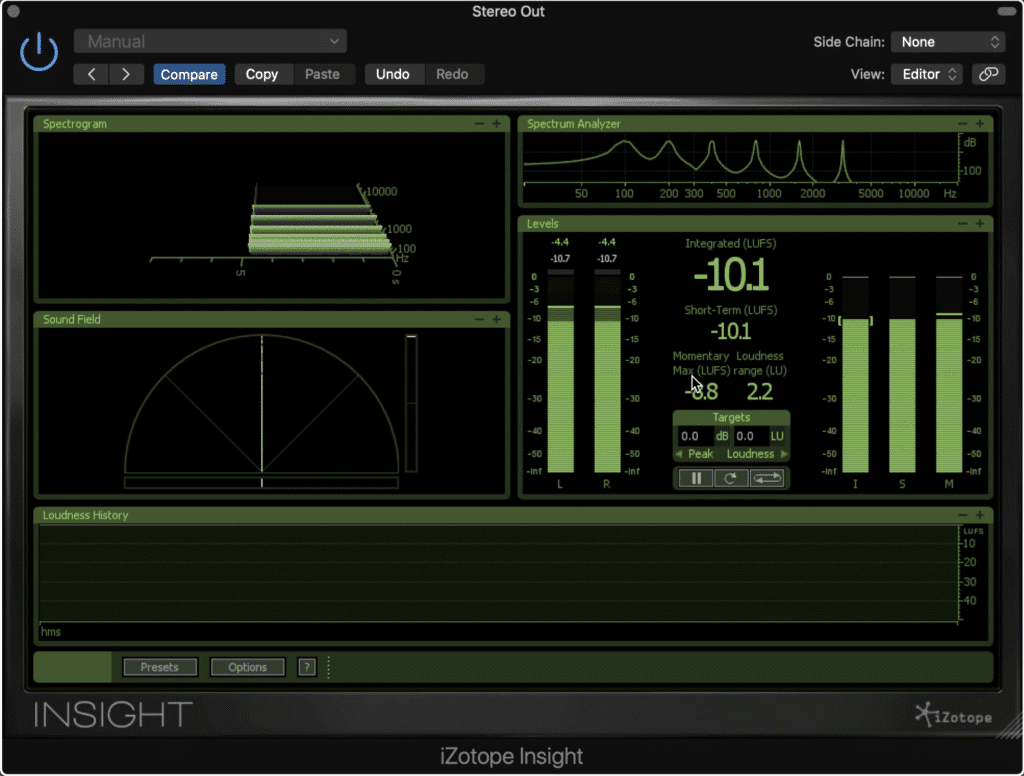
First, let’s look to see if this plugin generates any harmonics. Being a digital EQ, not an analog emulation EQ, we shouldn’t see any harmonics, but let’s check nonetheless.
It looks like all we see are the 5 sine waves, not any extra harmonics.
The TinyQ doesn't add any unwanted harmonics.
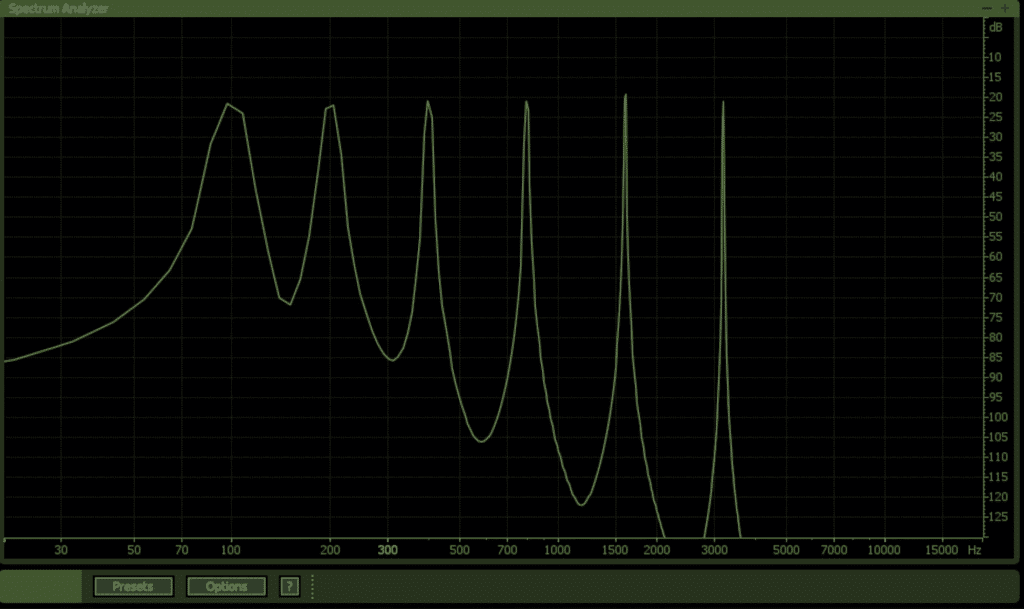
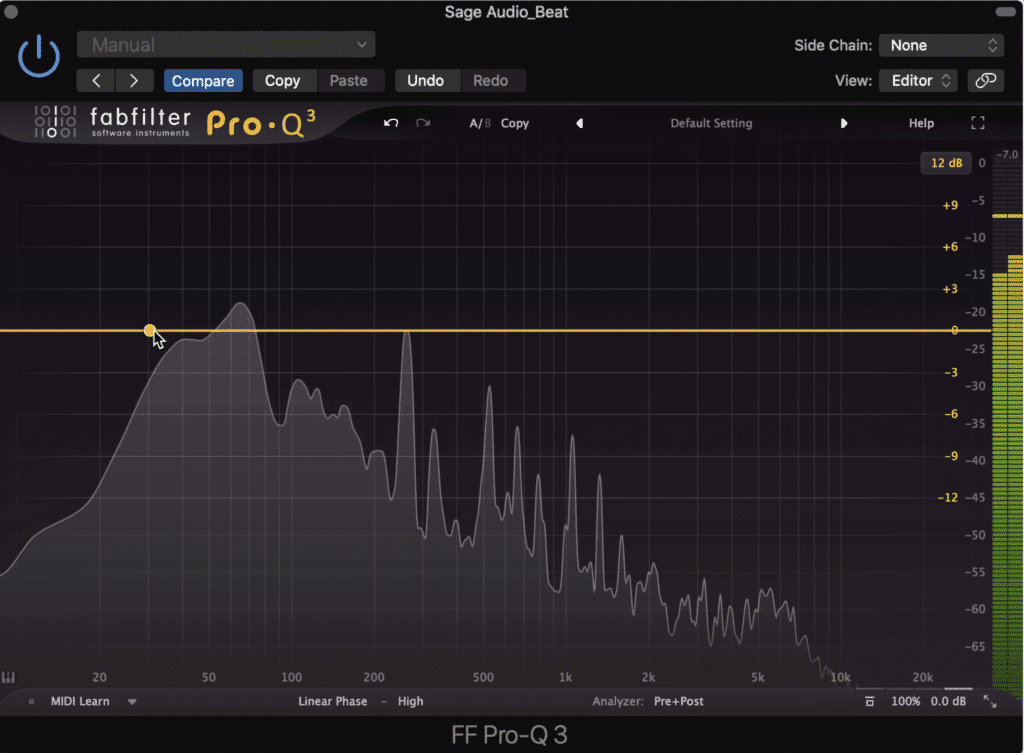
Just so you get a visual as to what these would look like, here’s what it would look like if we were using an analog emulation plugin.
For reference, this is what added harmonics look like
When it comes to any changes on the signal it looks like when the plugin is on, but none of the functions are being used, we aren’t seeing any differences to the stereo field, the level, or any other aspects of the signal. This means that the plugin isn’t using any forms of processing that it doesn’t explicitly showcase in its interface.
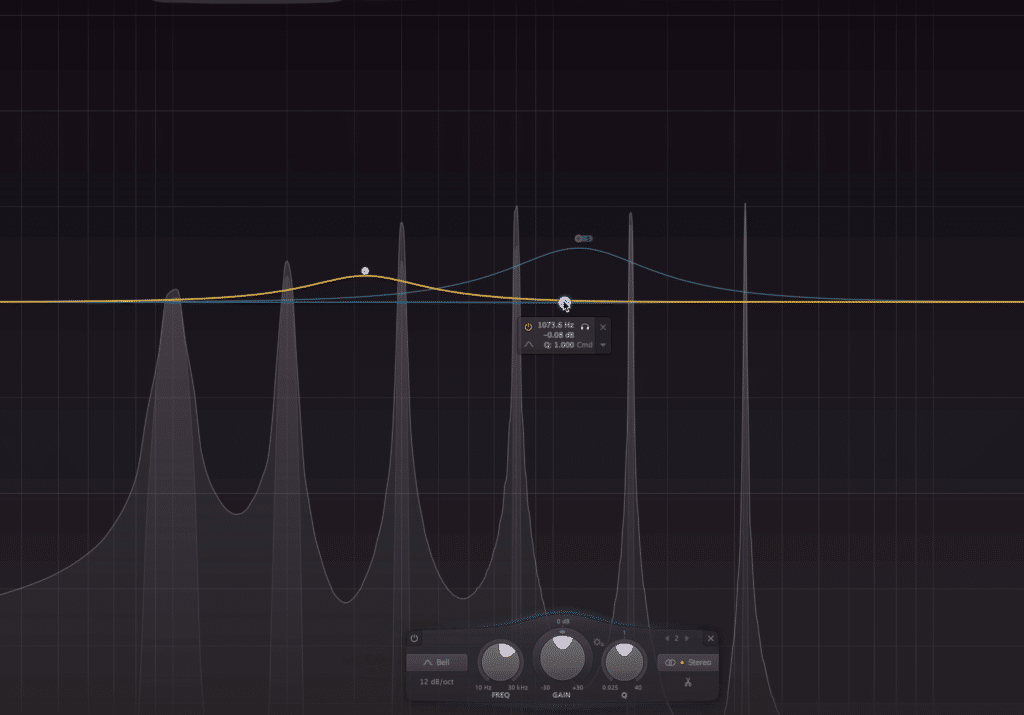
Let’s examine the actual functions to see if they’re accurate. Since we have a sine wave at 100Hz, let's affect that sine wave and see what happens. Notice that amplifying the frequency band in the tinyQ accurately amplifies or attenuates the sine wave.
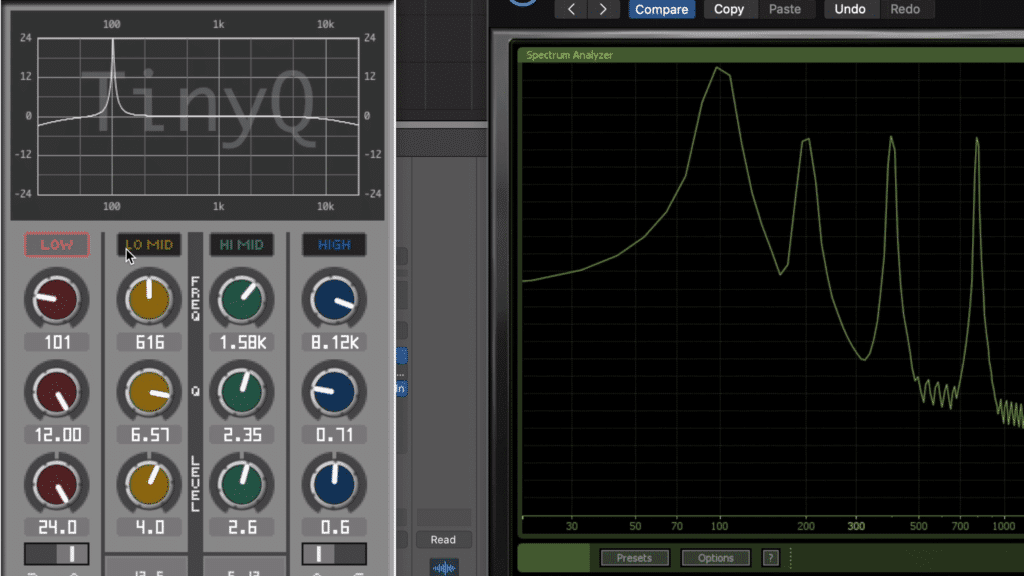
The TinyQ also accurately affects the signal via its eq functions.
With a higher Q, we’re capable of affecting the sine wave without causing any change to the other sine waves. This means that the EQ settings used to code the plugin are accurate.
Now that we know that the plugin isn’t altering the signal in any undesired ways, and that its functionality is well-designed, let’s consider what the plugin can do.
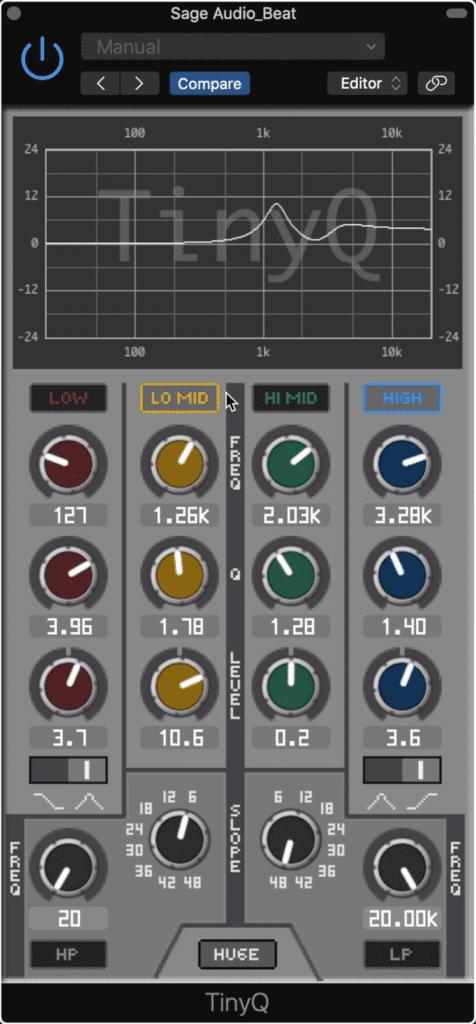
This plugin has 6 EQ bands in total.
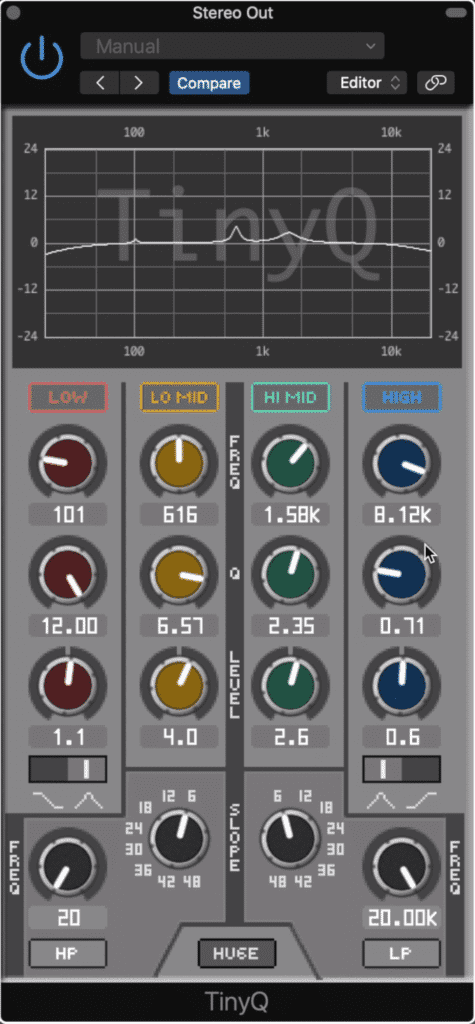
The Tiny Q has 6 bands in total. A high-pass and Low-Pass filter make up two of the bands, the lo-mid and hi-mid bands are bell filters, and the low and high filters are either bell or shelf filters. Each band has a range of 48dB, and Q’s that range from a very precise value of 12 to a very generalized value of 0.3.
The high and low pass filters can range the full frequency spectrum and can have slopes of up to 48dB per octave.
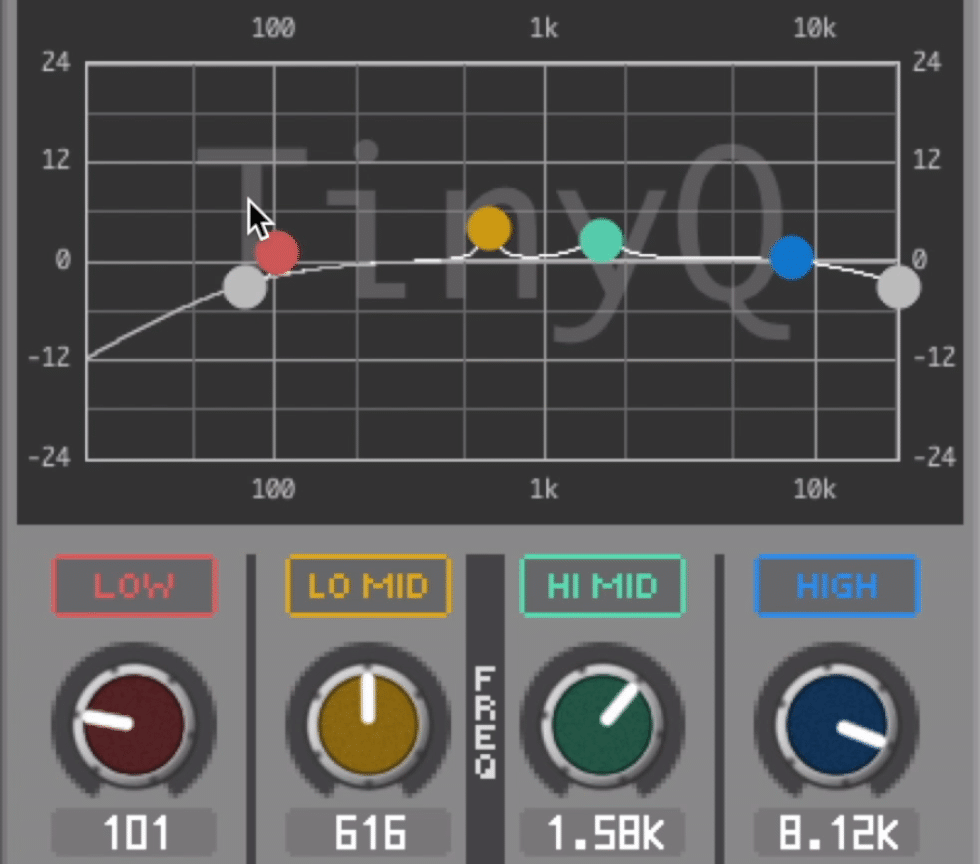
You can also drag and drop your bands in the top panel.
You can either affect these bands via the rotaries and switches, or you can alter them in the top display panel. Also, if you right-click this top panel you can change various aspects of the display, including the size of the window if an analyzer is present, and the gain range of the display.
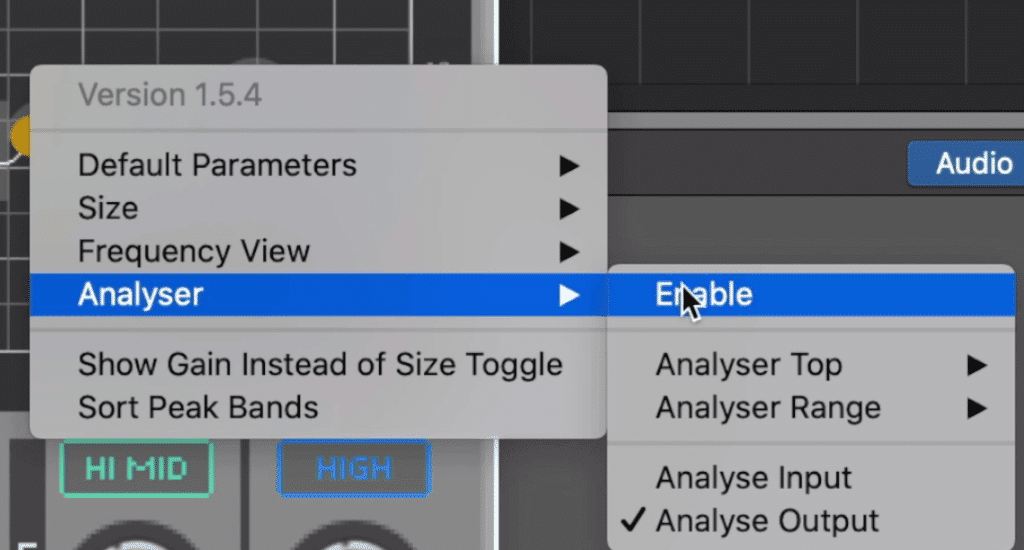
By right-clicking, you can affect various aspects of the plugin's display.
What’s also pretty cool is that there's a hidden output gain function. If you select ‘Show Gain Instead of Size Toggles’ you can now adjust the output gain of the equalizer.
The display looks low-resolution, but it works well with the aesthetic of the interface.
When it comes to CPU usage, the TinyQ has a pretty small footprint. With the sine wave generators and EQ running, CPU usage ranges from roughly 5 to 10% , depending on the bands that are being used, and how frequently the bands are changed.
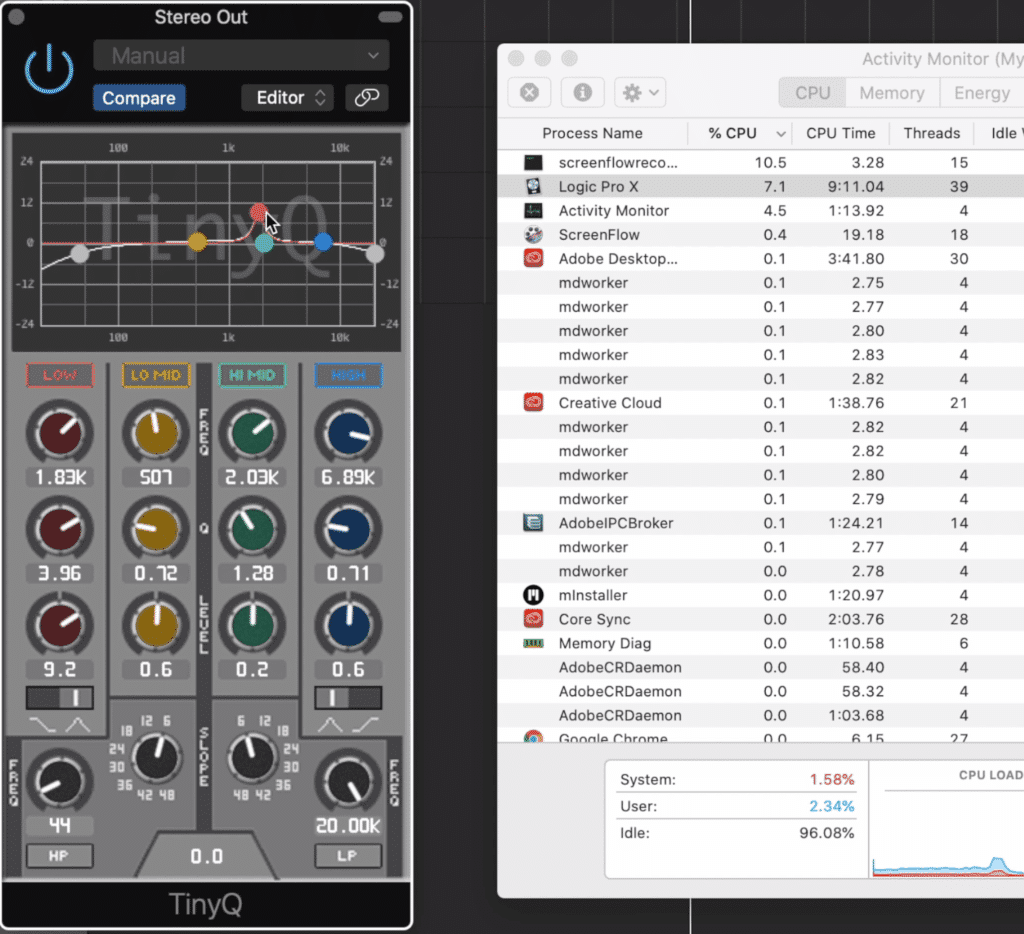
The CPU usage is pretty low with this plugin, making it a good option for mixing.
All-in-all this is a great plugin with a lot of functionality, and it costs nothing but the time it takes to install it.
If you’re looking for some more free equalizers, or want to learn a little more about this one, check out our blog post on the topic:
In it, you’ll find some of the best free eq plugins that work for both Mac and PC operating systems.
Cheap: The Renaissance EQ by Waves
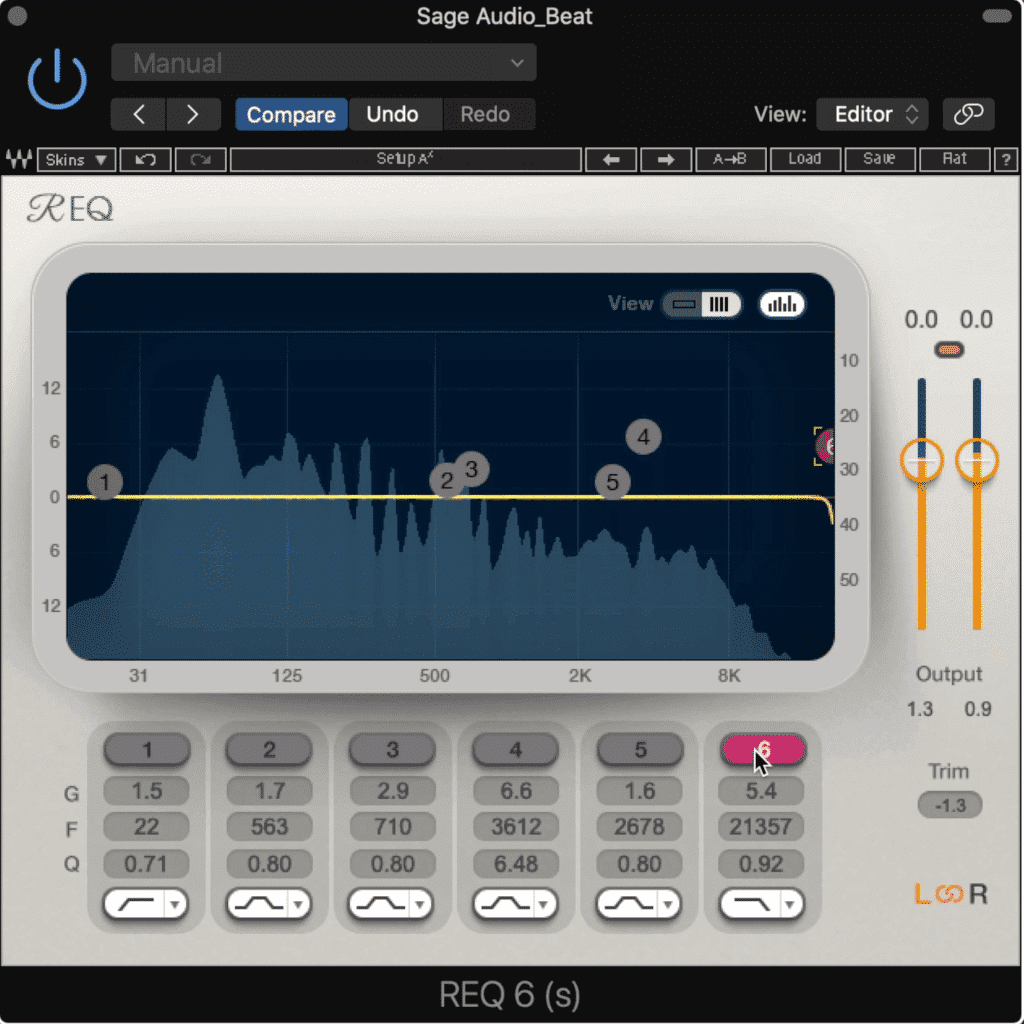
Next, we'll be considering the REQ from Waves Audio.
Next up is the Renaissance EQ from Waves. This one has been around for a little while and is definitely a pretty popular cheap EQ plugin. Currently, it costs $49, and goes on sale for about $29 every once in a while.
It looks like the REQ doesn't negatively affect the signal in any observable way.
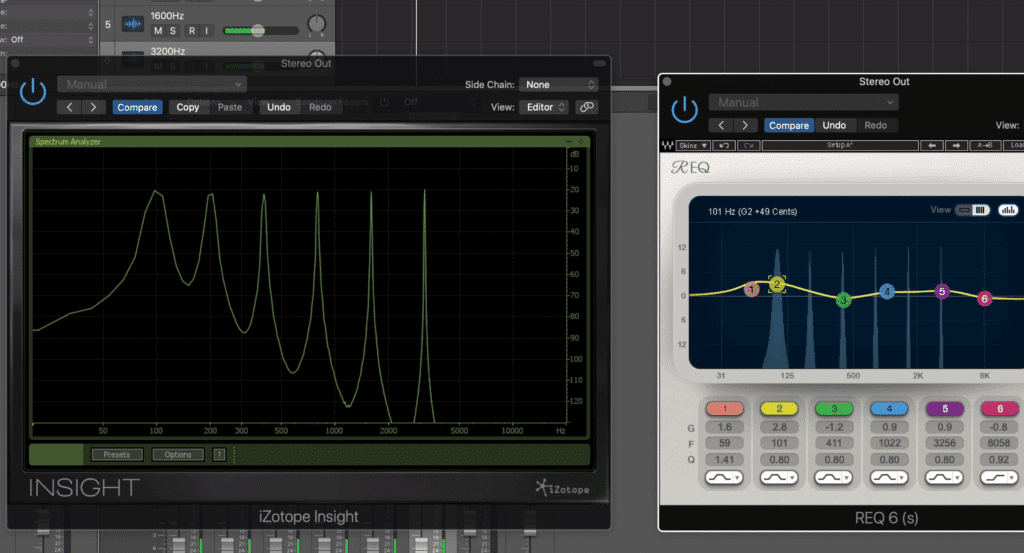
Following the same tests used before on the TinyQ, it looks like the Renaissance EQ also accurately affects the signal without introducing any unwanted changes or harmonics. If we do the quick amplification and attenuation to a sine wave we see that the EQ works as it should.
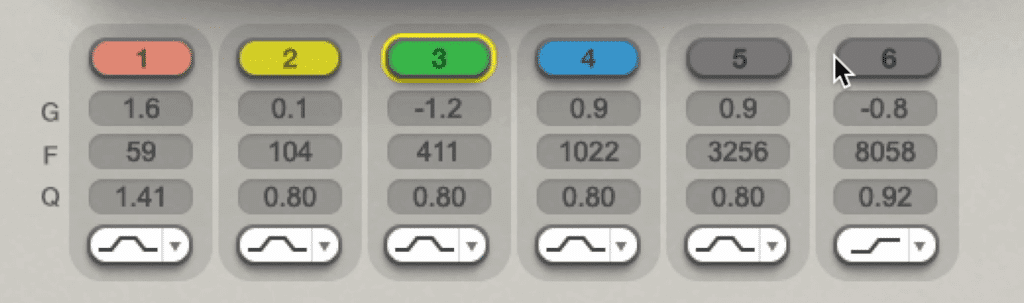
The REQ has 6 bands in total.
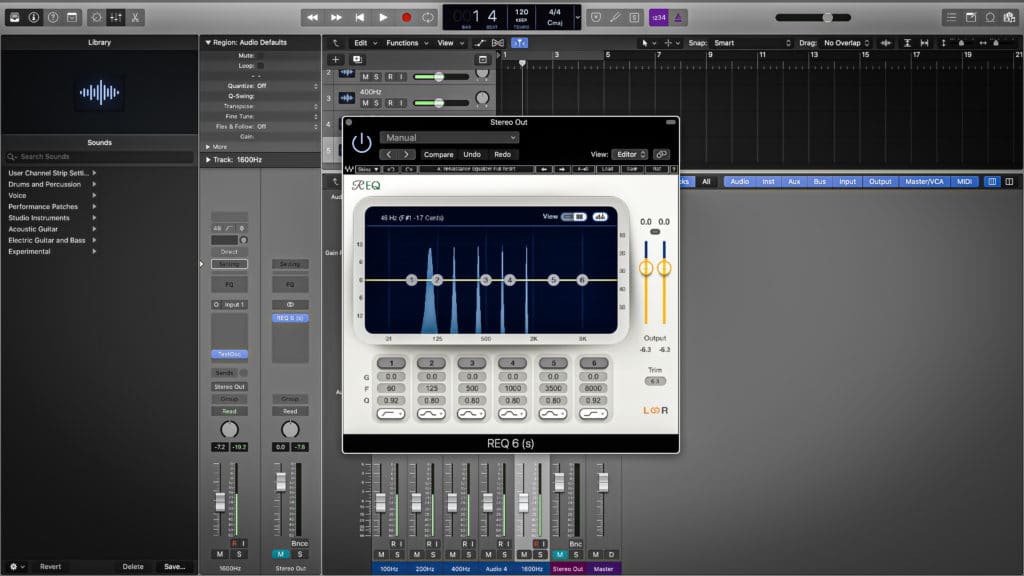
With that out of the way, let's talk about the layout and functions of the plugin. Like the TinyQ, the REQ for short has 6 total bands. Each of these can be enabled or disabled by clicking their respective number.
Each band has 36dB in available gain range, and Q's from .26 to 6.5
Each band has a range of 36dB , and Q’s that range from a somewhat precise value or 6.5 to a broad value of .26 . Already we’re seeing that the REQ has a smaller range of values for its band settings, resulting in less flexibility.
But, when it comes to the bands themselves, we do get more options. The lowest and highest bands each have 4 options - a bell, low or high-shelf, low or high-pass, and low or high-resonance shelf, depending on which band you’re altering.
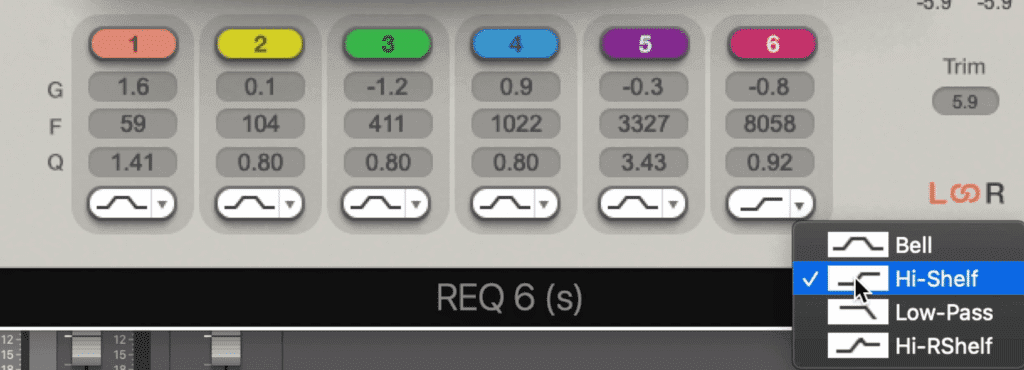
This plugin does give more options for filter types than the TinyQ.
Each band has a frequency range of 16Hz to 21357Hz , meaning you can affect some frequencies beyond the scope of human hearing.
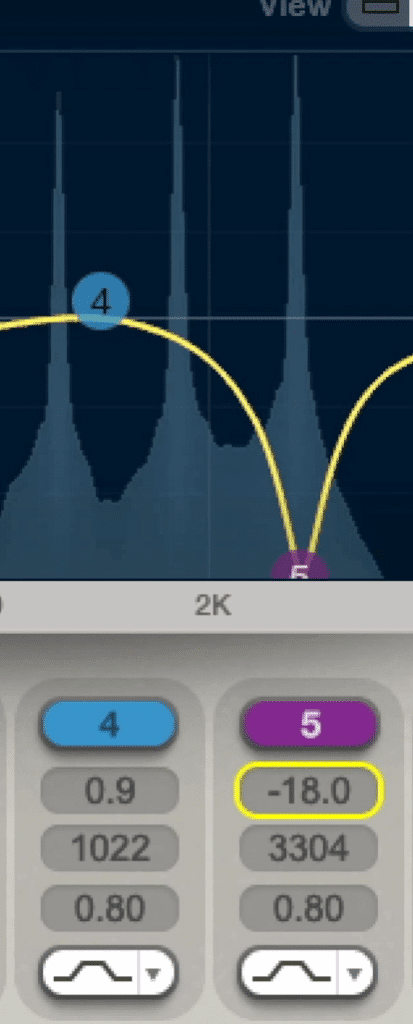
Like the TinyQ, you can affect the filters in the top panel, as well as observe an analyzer of the frequency spectrum. Each band can also be affected individually via an alternate view.
The size of the window can't be affected, but the display skin can.
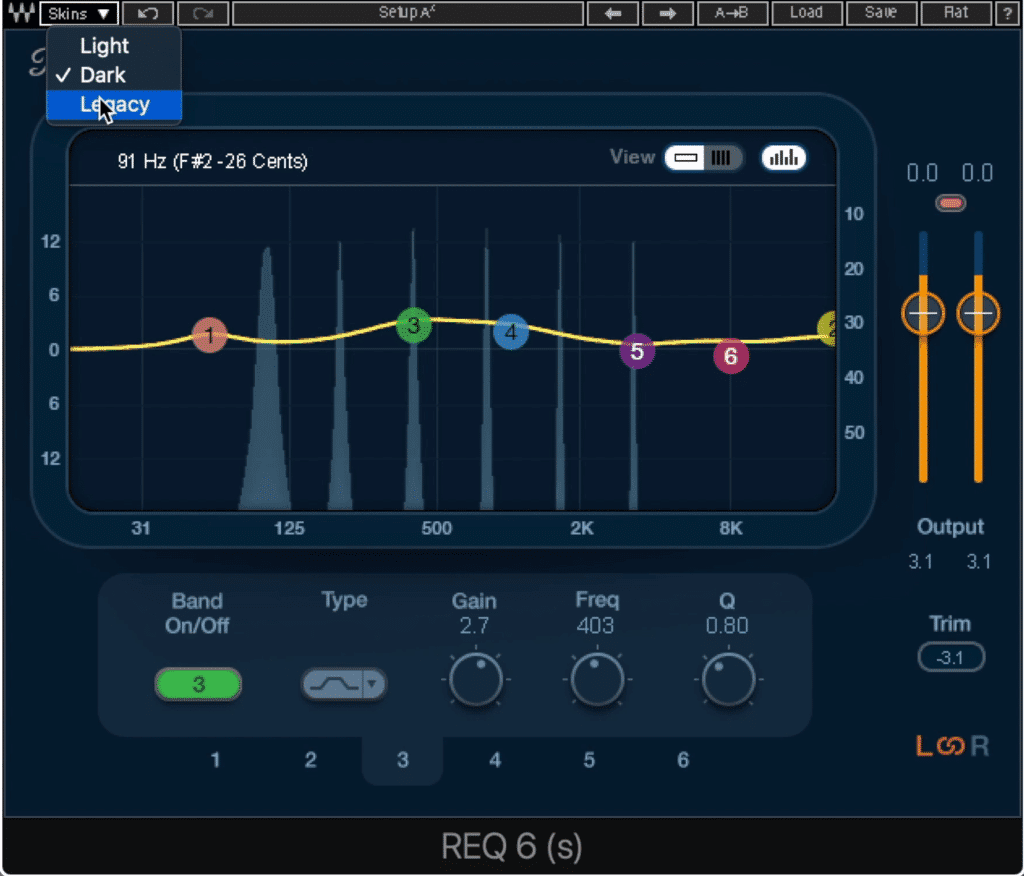
The display cannot be altered in size, but, 3 different skins can be selected ranging from the newer displays to the classic REQ display. Up top, we also have an A B setup tab that allows for quick comparisons of two different sets of settings.
Also, there’s an output that has a 36dB range and can be separated into left and right channels. As for the display, it looks like its a lower resolution, and personally, I don’t like the design. This is a subjective thing for sure, and if you feel differently let us know in the comment section.
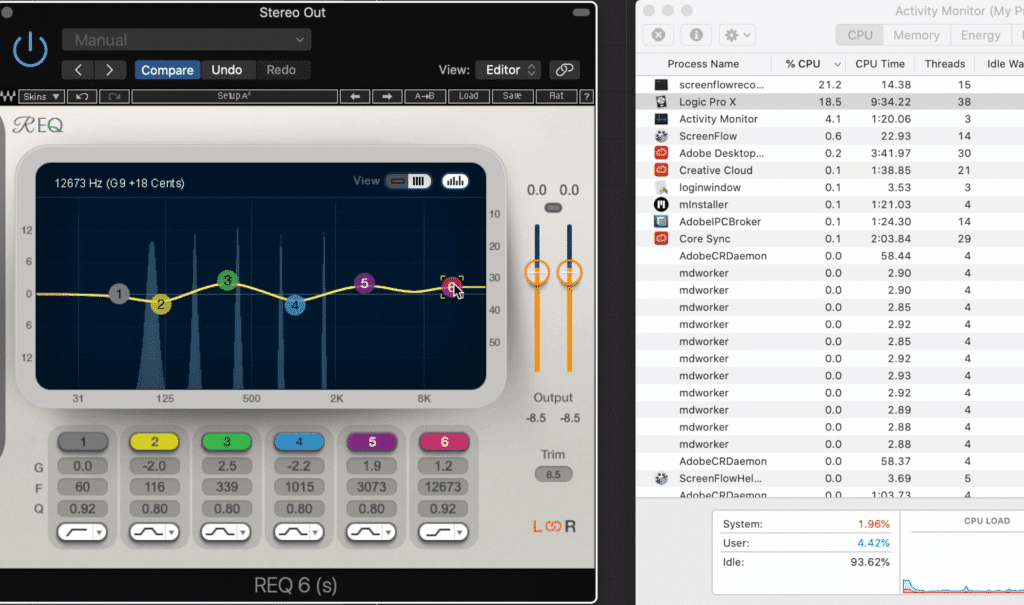
REQ has a surprisingly high CPU usage.
When it comes to CPU usage, the REQ takes up a surprising amount of space considering how limited it is. Depending on the number of bands being used, the REQ, along with the 5 test tones and the Logic Pro X DAW, take about from a little under 15% to about 20% of the CPU.
This is a pretty significant jump from the last plugin, and I’m not sure why it takes more computer processing to run.
All-in-all this is a good plugin, but I find it hard to justify spending about $50 on it, when its a lot like the free TinyQ plugin we just covered.
Let’s take a look at our last plugin and then decide which plugin, free, cheap, or expensive, is the best plugin.
But first, if you have a mix that you’ve been meaning to get mastered, send it to us here:
We’ll master it for you and send you a free sample for you to review.
Also, if you’re a fan of the waves line of plugins and want to know more about them, check out the blog post on the topic:
In it, we showcase the Waves MV2 plugin, as well as discuss how it can be used to augment distortion.
Expensive: The Pro Q 3 by FabFilter
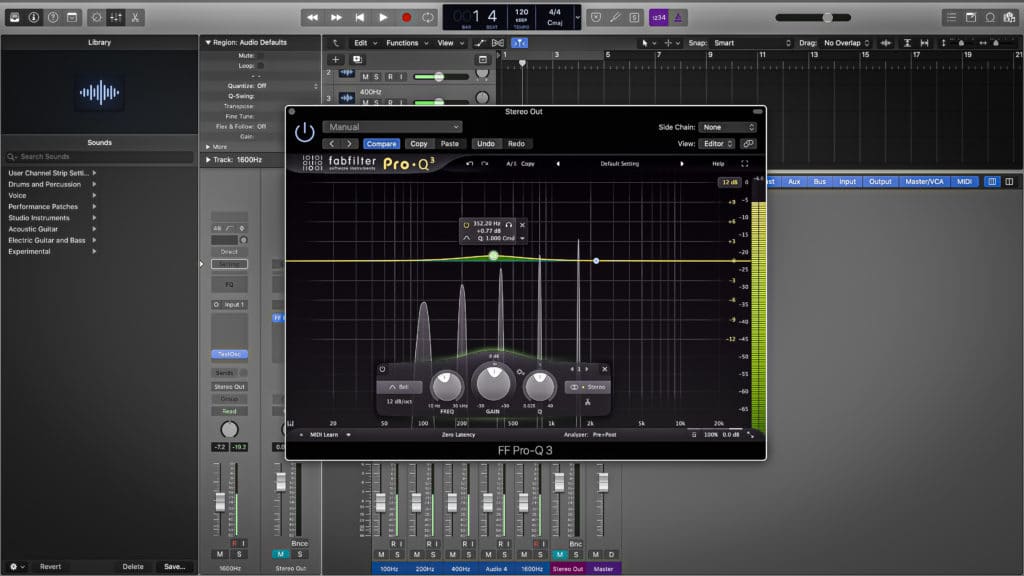
Last up is the FabFilter Pro Q 3
Last up we've got the FabFilter Pro Q 3 - a pretty popular equalizer from a reputable developer. At $179 , the cost can be a bit more than some are willing to pay, but the higher price tag does come with a lot of new and highly desirable functions.
The Pro Q 3 doesn't affect the signal in any undesirable way.
Following the tests we used on the other two equalizers, we see that this plugin doesn’t introduce any unwanted distortions or affect the signal in an unintentional way.
When it comes to the functionality of this plugin, there’s almost too much to cover. There are some many variables this plugin includes, as well as some unique and subtle display changes that could almost go unnoticed if you weren’t paying attention.
That said, I’m going to try to briefly cover all of its functions, but if I miss something let me know.
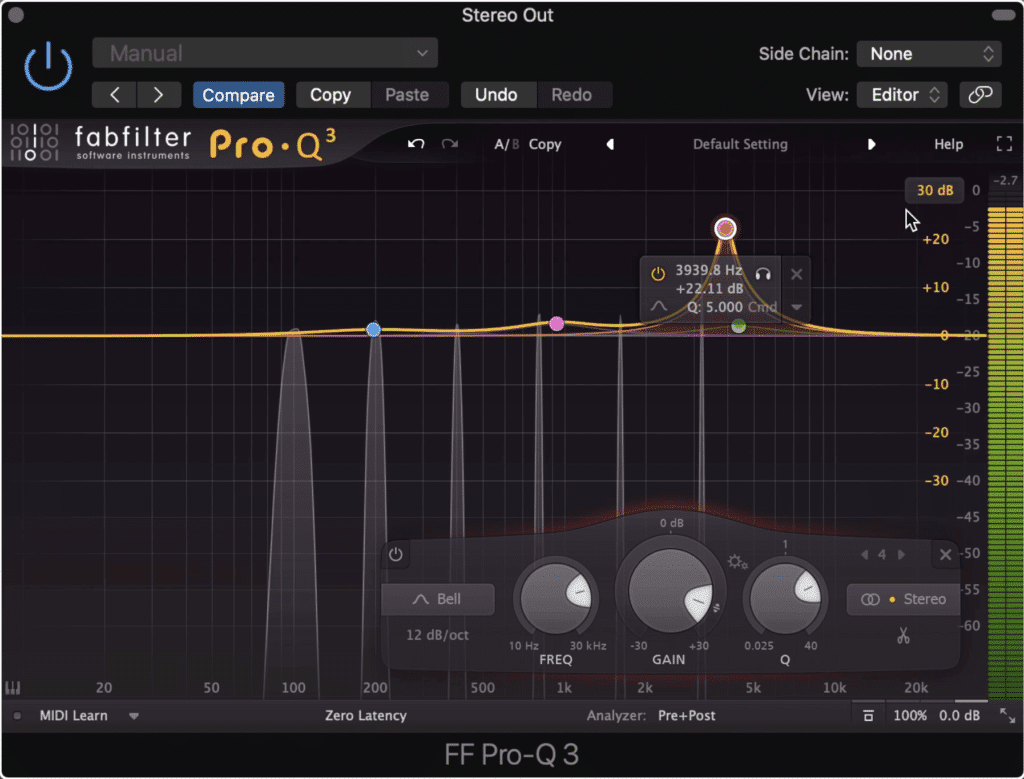
The FabFilter Pro Q 3 can create up to 24 bands.
First off, the Pro Q 3 can create up to 24 bands - any of which can be a bell, low or high shelf, low or high pass, notch, a bandpass, a tilt shelf, or a flat tilt filter. The slope of the low and high pass filters ranges from dB per octave to a completely flat, brick wall cutoff.
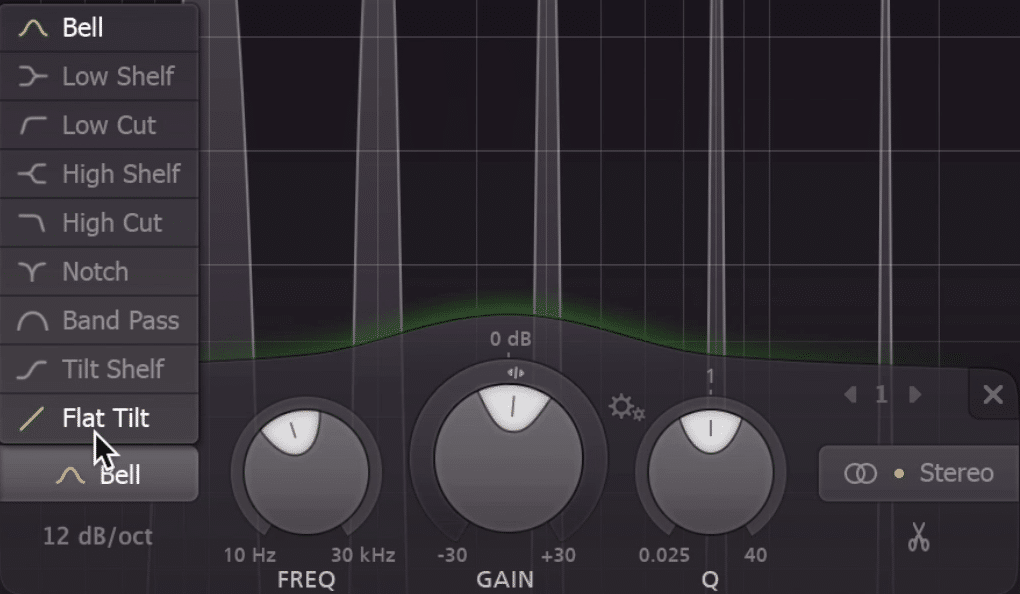
Each created band can be a lot of different filter types.
The frequency range of the filters is 10Hz to 30kHz and can be amplified or attenuated 30dB for a range of 60dB. The Q settings are an extremely wide value of0.025, to an incredibly precise value of 40.
You can also enable gain-Q interaction mode that closely emulates the effect the gain of a band has on the Q when working on a classic console.
Additionally, each band can be stereo, on the left, the right, the mid or side channels - meaning you can easily use this plugin to affect your stereo imaging.
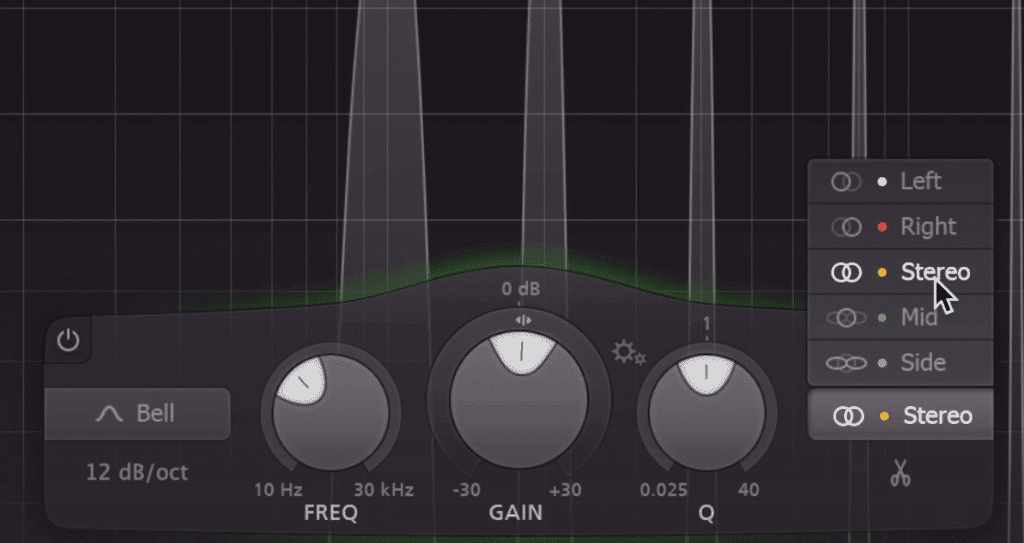
Each band can be put on the left, right, mid or side channel.
If this wasn’t enough, you can make your bands dynamic and have them trigger based on an automatic, or user-set threshold.
You can increase the latency of the plugin to create a cleaner or more natural sound with less phase cancellation. You can also alter your frequency analyzer in a number of ways , from the resolution, the range, the rate of speed or change, and the tilt.
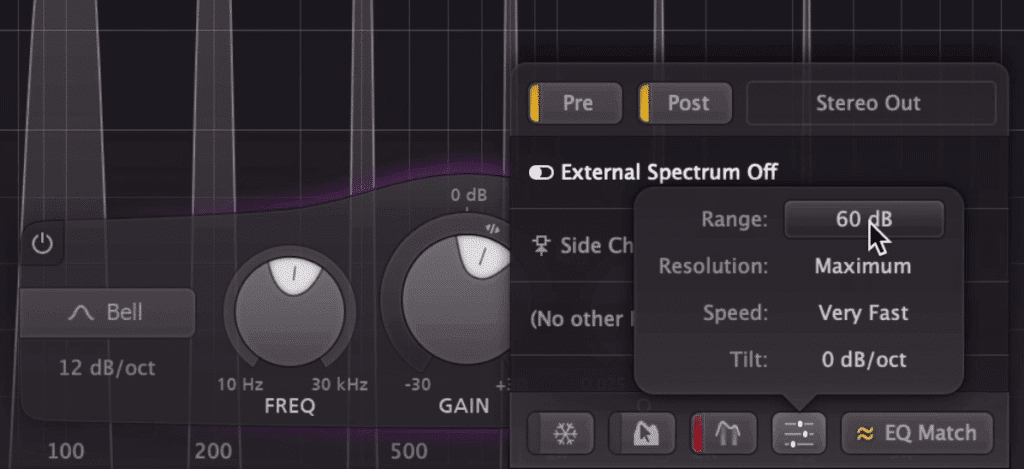
The frequency analyzer is customizable.
Additionally, you can enable a collision indicator that shows potential areas of masking based on your incoming signal or the side-chained signal. A freeze and spectrum grab mode gives you some new options for affecting and monitoring your signal.
EQ matching allows you to quickly emulate the frequency response of your side-chained signal - meaning you can quickly perform inverse eq matching to clear some space amongst similar instruments.
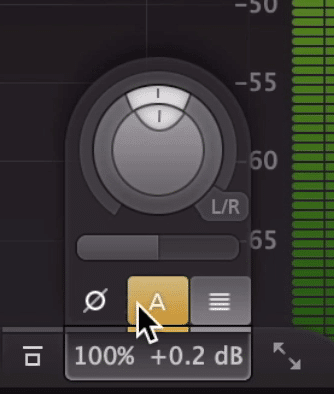
The output section gain makeup, phase inversion, gain pan, a gain slider, and general output gain.
In the output section, you’ll notice an auto gain function that compensates for any amplification or attenuation you created. There’s a phase inversion button to invert the phase, a gain scale slider for filter automation, an output level, and an output pan that can be switched from left and right to mid and side.
The window can be altered to 6 different sizes, including a full-screen option if you want to really hone in on the changes you’re making.
The display can become fullscreen and is 4k.
The display is 4k and looks fantastic. Everything is crystal clear and designed for ease of use, making the immense functionality of the plugin less intimidating.
Perhaps the most impressive part of this plugin is the CPU usage which is incredibly low considering the functionality of this plugin. Even with all 24-bands enabled, I’m still seeing levels under 20% CPU usage.
The CPU usage of the Pro Q 3 is surprisingly low.
This makes it a great plugin for mixing and mastering, as you can place it on every channel and still not strain your computer.
If you’re a fan of complex plugins and functionality, and you want to learn a lot more about audio processing, check out one of our in-depth blog posts.
Both of these blog posts get into the finer details of audio processing, as well as look at some of the more technical aspects of their respective topics.
The Verdict
Winner: The FabFilter Pro Q 3.
Our pick for the plugin most worth your time and money is the FabFilter Pro Q 3.
Although the most expensive of the 3 plugins we looked at, the FabFilter Pro Q 3 blows the other two plugins completely out of the water.
In terms of functionality, the other two didn’t come close - making that extra money well worth it.
We won’t detail every aspect of the plugin again, but simply put, you can use this equalizer to accomplish so many different tasks.
Whether you’re using it for equalization, stereo imaging via the mid-side functionality, or even compression with the dynamic EQ, this truly is a great and fantastically designed plugin.
Now, of course, a free plugin is a free plugin, so you might as well download the TinyQ and try it for yourself. If you’d prefer not to pay for a plugin, it’s a great option, and in our opinion is just a good if not better than the $50 Waves REQ.
The TinyQ is a great free option, so try it out if you're looking for a new EQ.
If you like the Waves REQ that’s great - we definitely aren’t saying it’s a bad plugin by any means, but it terms of functionality its just too similar to what you can get from a free plugin.
The REQ is a good plugin, but has limited functionality.
But these are just our thoughts - do you agree with our pick, do you not - let us know in the comment section.
If you have a mix that you’d like mastered, send it to us here:
We’ll master it for you and send you a free mastered sample.
Which plugin was your favorite?


