How to Get Your Master Loud WITHOUT Distortion
Use True Peak Limiting and Oversampling
Increase the Release of a Limiter to at Least 30ms
Try a Double Limiter Approach
Use the MetaPlugin with 8x Oversampling
Making a master loud without it distorting is a challenge.
Making your master loud without distorting it is one of the most challenging things a mastering engineer can do.
Although many would say to simply make the master quieter, and for good reason, this isn’t always an option. There are times in which an artist prefers a master to be loud, and to sound a particular way, and when this does happen you can’t simply tell the artist no.
With that said, it’s best to learn how to make a master loud without it distorting or becoming unpleasant sounding.
There are a few techniques, some specific settings, and one particular plugin that can help you achieve this. With that in mind, let’s cover how you can accomplish a loud master without causing distortion.
If you’d like to hear one of your mixes professionally mastered, send it to us here:
We’ll master it for you and send you a sample to review.
Use True Peak Limiting and Oversampling
One of the main ways to make a master loud is by using brick wall limiting; however, this is the primary cause of distortion during mastering.
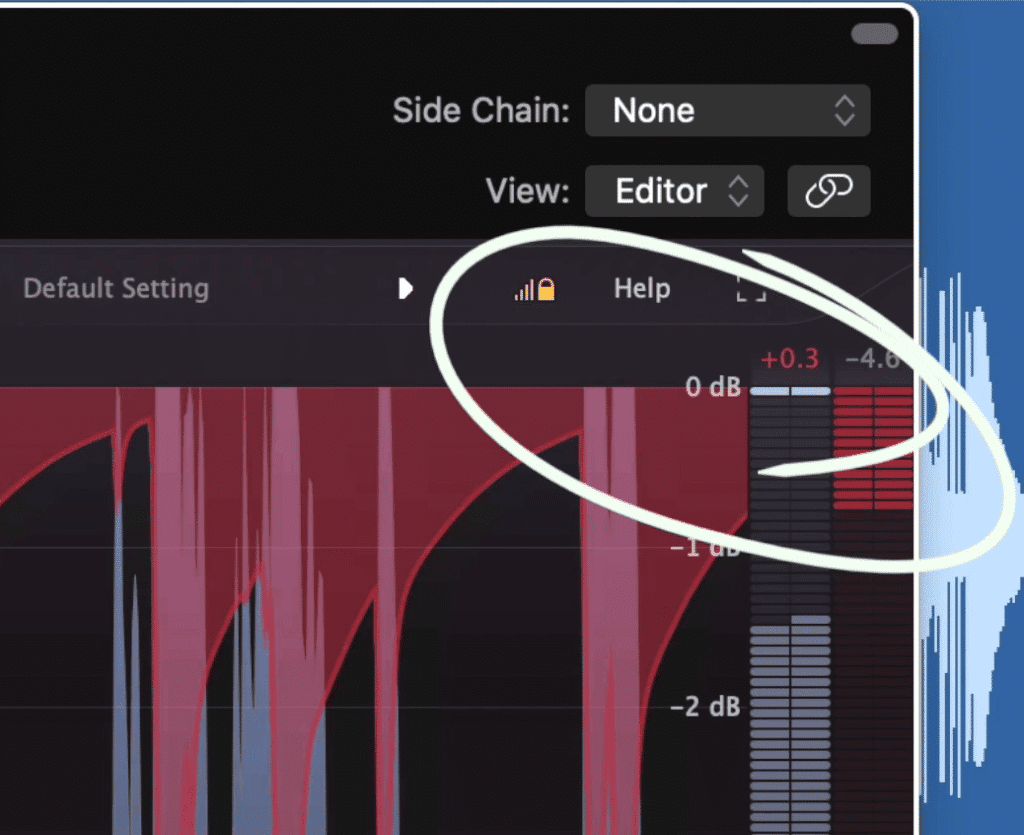
Notice the red +0.3 in the top right. This is indicating clipping distortion.
When a signal hits this brick wall, the waveform will distort as peaks are truncated. This alteration of the waveform is almost inevitable, but there is another negative aspect of brick wall limiting that can be avoided.
It’s called inter-sample peaking, and odds are if you’ve used a limiter, you’ve heard the effects of it. Essentially, inter-sample peaking is clipping distortion that occurs in-between samples and is the result of improper quantization.
What's worse, the louder a signal becomes, and the more a waveform is pushed against a brick wall, the more aggressive this clipping distortion will become.
The good news is that it can be avoided by using true peak detection. If you enable true peak detection, you significantly reduce the number of inter-sample peaks.
A few limiters that offer true-peak detection are the FabFilter Pro-L2, and a free limiter called Loudmax by developer Thomas Mundt.
But there is one more thing to consider when limiting - aliasing. If the sampling rate of your session is low enough, odds are you’re causing a form of distortion called aliasing, in which high frequencies that cannot be replicated are reflected down the frequency spectrum in the form of harmonic distortion.
This is why many plugins offer oversampling , which increases the internal sampling rate of the plugin’s processing, allowing those high frequencies to be replicated, in turn avoiding aliasing distortion.
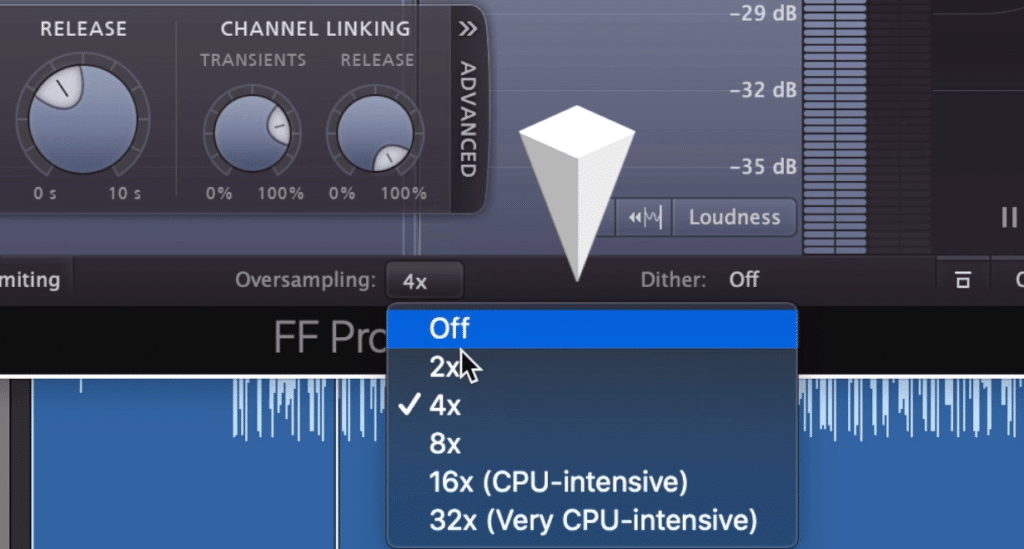
Oversampling is used to avoid aliasing distortion.
What’s more, this aliasing distortion can be loud enough to cause inter-sample peaking as well, so it needs to be avoided as much as possible.
To avoid it, use oversampling - the more the better, as much as your computer will allow.
Lastly, to reduce distortion when your track is converted to an MP3 or AAC file, reduce the output by about 1dB. This won’t increase your loudness, but it will reduce distortion when the track is uploaded or streamed.
To learn more about mastering for streaming services, here’s a video on that topic:
Increase the Release of a Limiter to at Least 30ms
Decreasing a limiter’s release time means that the signal is attenuated for a shorter amount of time. This helps make the master louder since the overall level returns to normal quickly.
However, if you use too short of a release time, you’ll cause significant distortion to your low frequencies. Since low-frequency waveforms are longer, and last a longer amount of time than high-frequency waveforms, setting a short release may mean that only part of the waveform is attenuated when it peaks.
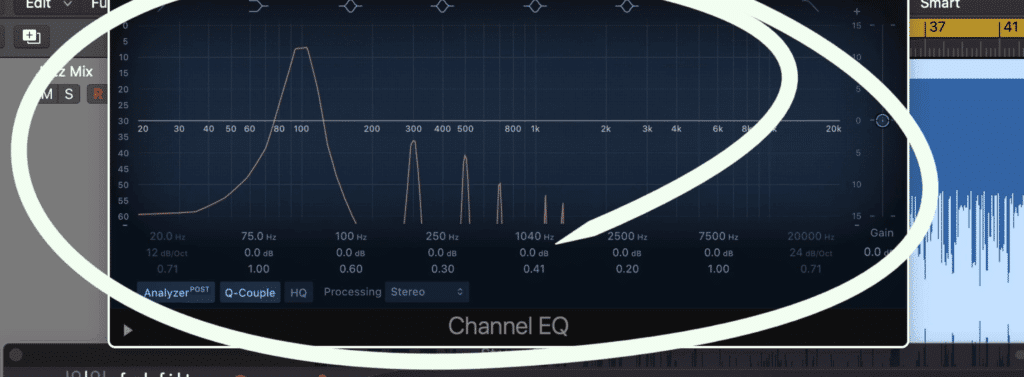
A quick-release will distort the low frequencies. Shown here is a 100Hz sine wave which has been limited with a short release. Notice the harmonics that formed.
This alters the low-frequency waveform’s amplitude in potentially the middle of the waveform, causing distortion to it.
With that in mind, set the release time of your limiter to greater than 30ms to avoid distorting low-frequencies.
Try a Double Limiter Approach
A double limiter approach is something that I’ve talked about before, and a technique that can achieve great limiting timbre without distortion.
Using back-to-back limiting can help you achieve a loud master without overwhelming one limiter.
By using 2 limiters instead of just 1 you reduce the pressure that would have been put on just 1 limiter.
Also, you can achieve a unique timbre by using 2 different types of limiters or 2 different models with different characteristics.
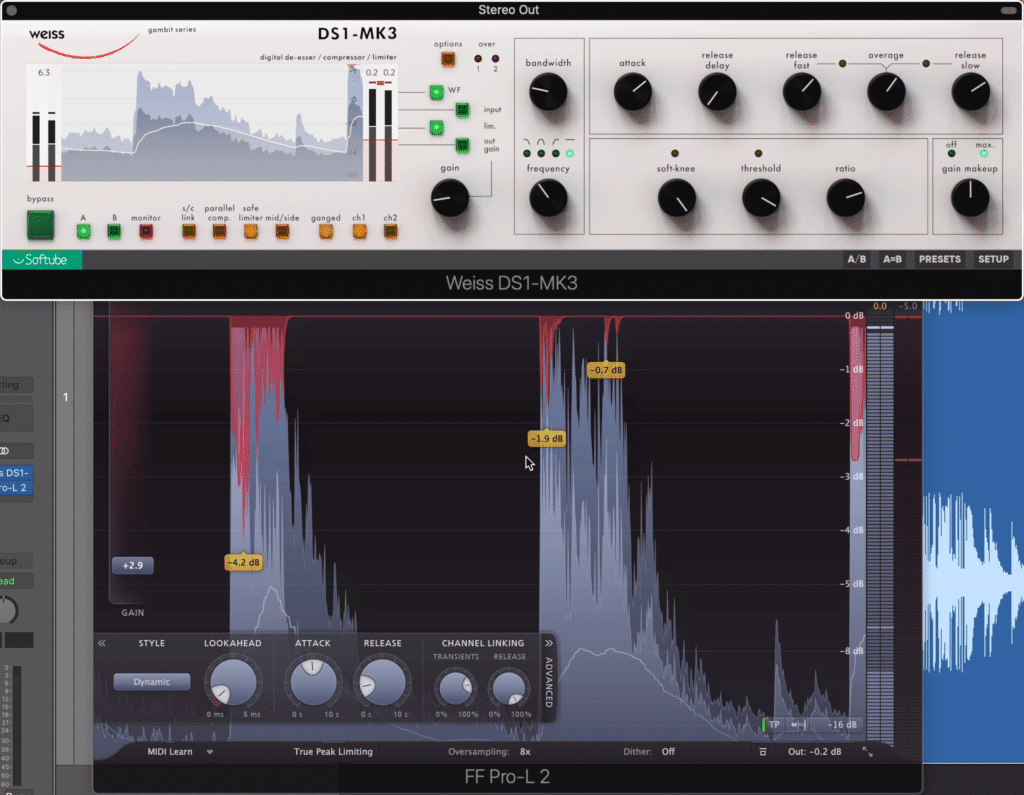
For this example, I’ll use the Weiss DS1 to compress and limit with a slightly slower release to smooth transients and increase the volume.
Then I’ll follow it with the FabFilter Pro-L2, using a more dynamic algorithm to cause mild expansion. Since some of the transients have already attenuated, we can use a slower attack and faster release to make this limiting louder.
One thing to keep in mind is that the attack I’m mentioning here is not like a compressor’s attack time, but instead, the time before the compressor’s release begins.
For more information on limiting and mastering in general, check out this video on the topic:
Use the MetaPlugin with 8x Oversampling
I usually don’t advertise for one plugin in particular since there are typically a lot of good options out for limiters, compressors, EQs, and so on.
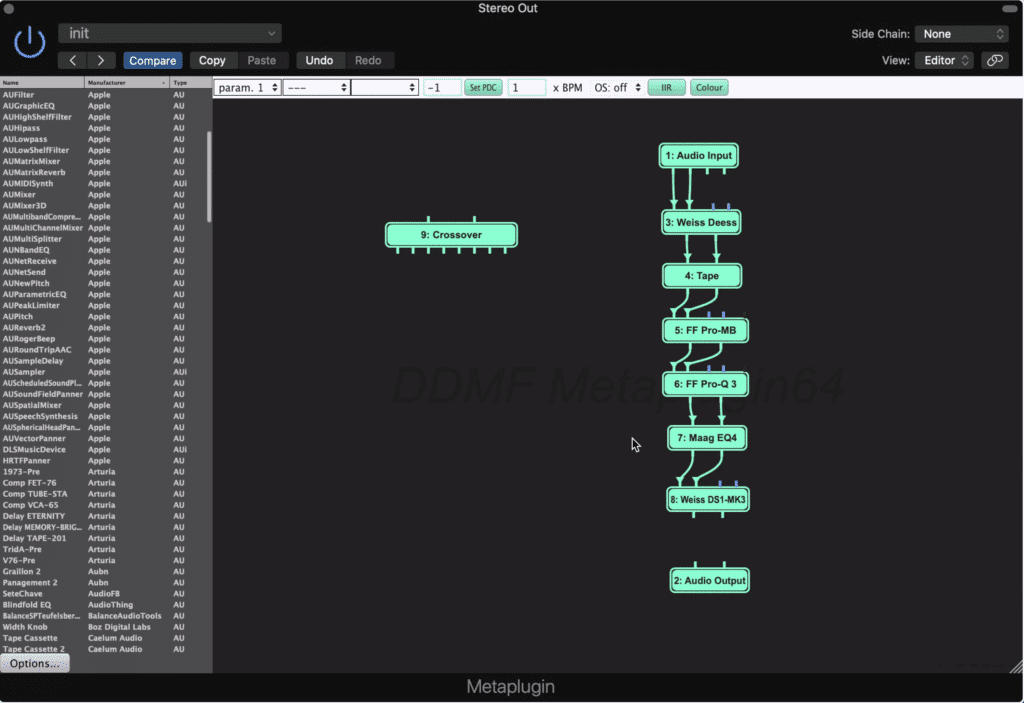
The Metaplugin allows you to move your entire mastering signal chain into it.
But this plugin is really one of a kind and can help you achieve a louder master without distortion.
The Metaplugin by DDMF has a lot of functions. You can really achieve a lot with it, like sending the low frequencies to one compressor, the highs to another, and making other exciting routing choices that can really change how you master music.
For example, your mastering equalizer can be routed into the plugin.
But the 1 function I want to focus on here is the universal oversampling.
For reasons that we’ve covered earlier, oversampling is important - it reduces aliasing distortion and subsequent inter-sampling clipping distortion.
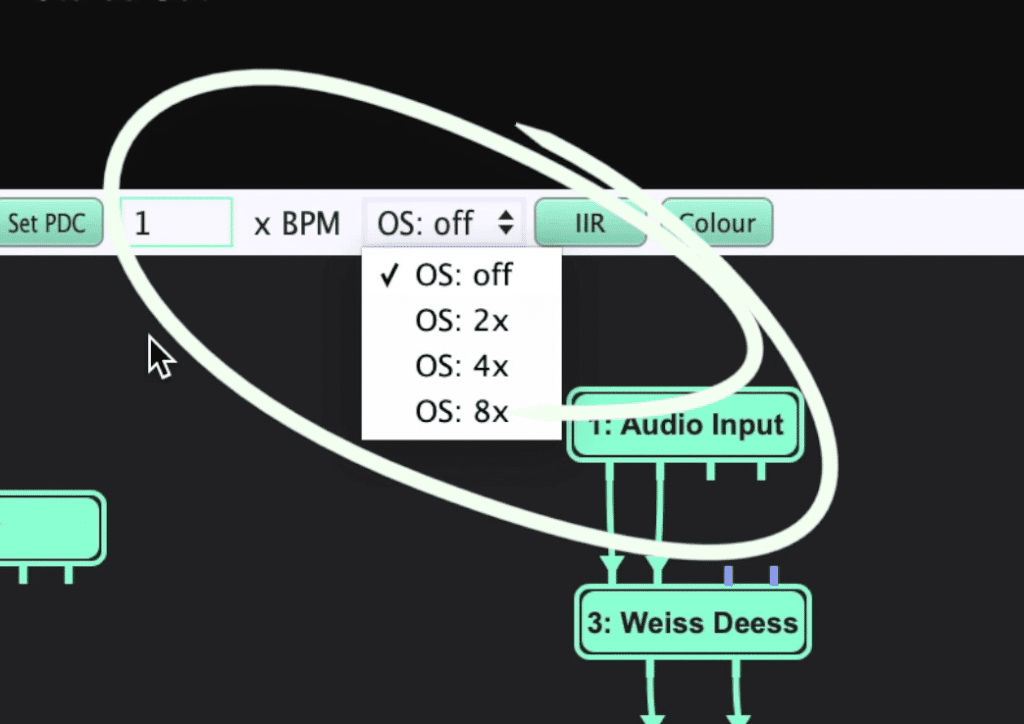
Once the signal chain is within the Metaplugin framework, increase the oversampling to affect all plugins.
The problem is, a lot of plugins don’t offer oversampling, so whether you like it or not, your session is slowly but surely building this distortion up over multiple plugins.
Fortunately, Metaplugin lets you introduce oversampling to all plugins that are within its framework. So, if you move your signal chain into the Metaplugin’s framework you can add oversampling to all of your plugins at simultaneously.
It’s one of those things that you’d have to hear it to understand the somewhat subtle, but nonetheless impressive effect it has.
Conclusion
These are 4 ways that you can increase the loudness of a master without causing distortion - but, there are definitely more methods out there that haven’t been discovered yet.
If you know of a way to increase a master’s loudness and avoid distortion, let us know about it in the comment section of the video embedded above. If it’s good enough, we may create a video dedicated solely to explaining how your method works and explaining what makes it unique.
For the time being, be sure to use true peak limiting and oversampling. Also, ensure that your limiter’s release time is around 30ms to avoid distortion but increase the loudness of your master.
Lastly, try using back-to-back limiters, or maybe try the Metaplugin to add sampling to the entirety of your signal chain.
If you’d like to hear one of your mixes professionally mastered, send it to us here:
We’ll master it for you and send you a sample to review.


