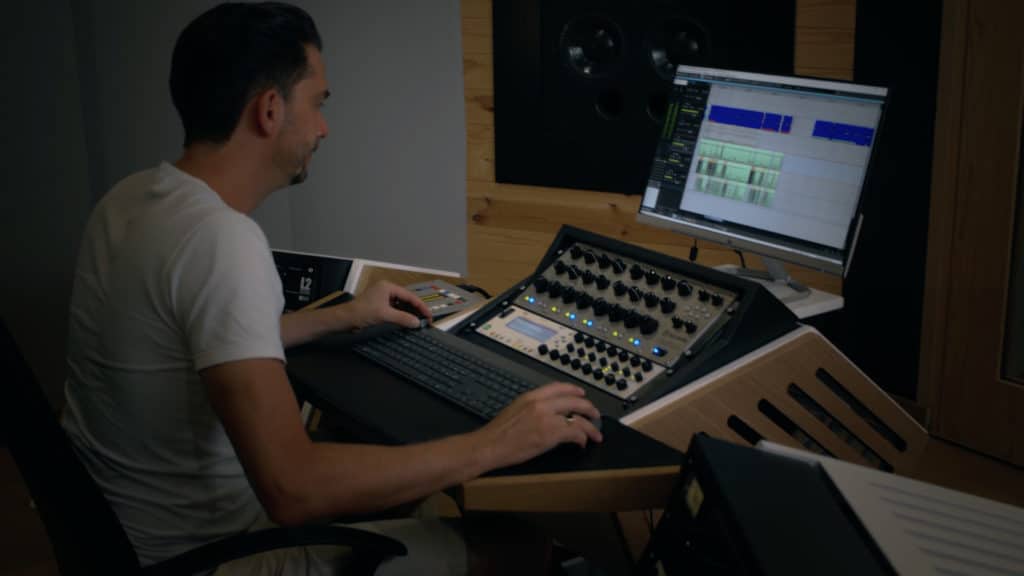
How to Master a Song in 11 Easy Steps
- Import your Stereo Mix into your DAW
- Reduce the Mix’s Amplitude with Clip Gain if its too Loud
- Insert a Mid-Side Equalizer and Use Subtractive Equalization
- If needed, use Compression (either stereo or multi-band)
- Insert Tape and/or Tube Emulation Saturators
- Insert a Mid-Side Equalizer and Use Additive Equalization
- Adjust the Stereo Image with your Mid-Side Equalizer
- If wanted, set up an auxiliary track for parallel compression
- On your master output insert 1 or 2 limiters
- Monitor the loudness of your song with an LUFS and dBTP meter
- Export your master and review it
Mastering a song can be difficult, but breaking it down into steps can keep things simple. With that in mind, let’s take things step-by-step as we discuss how to master a song.
Each of these 11 steps can easily be replicated by you at home, using a DAW. We’ll also break some of the steps down further into sub-steps to make things even simpler.
Mastering becomes easier when you break it down into steps.
The method we’ll be using, in particular the processing and the routing, is just one way to master a song - so if you find a different signal chain that works for you, then definitely use it.
Also, if you do have a signal chain that you enjoy, let us know in the comment section of the video - we’d love to hear your thoughts.
Additionally, if you have a mix that you want to hear professionally mastered with all analog equipment, send it to us here:
We’ll master it for you and send you a free sample for you to review.
Step 1: Import your Stereo Mix into your DAW
Before you begin working on your master, you’ll need to import the stereo file into your DAW. For many, this is as easy and dragging and dropping the file into your session.
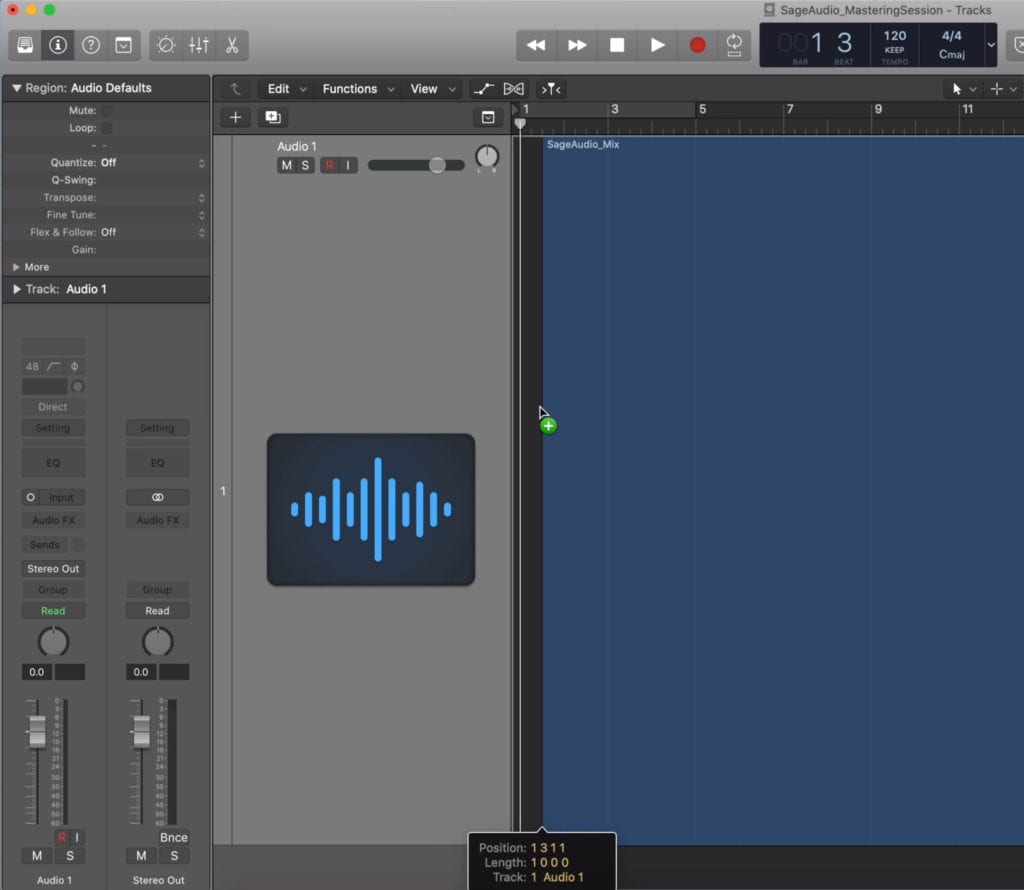
Import your mix into your DAW.
If your DAW doesn’t allow for that, then create a session with the same sampling rate and bit depth of as the mix, and then import the track into your session.
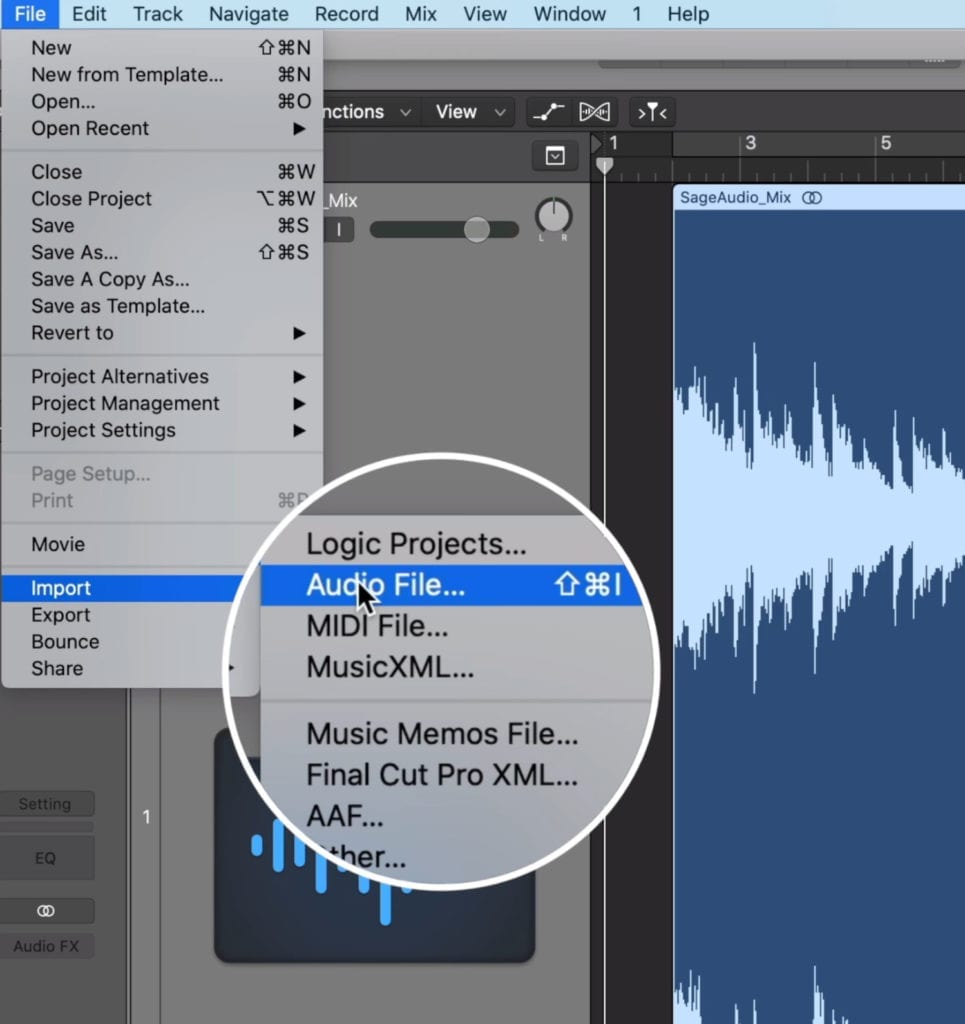
If you can't drag and drop the file, import it and set up your session.
Keep in mind that you should be mastering your mix at its original sampling rate and bit depth. For example, if your mix has a 48kHz sampling rate and 24 bit-depth, then your session should have the same settings.
Step 2: Reduce the Mix’s Amplitude with Clip Gain if its too Loud
This step should only be performed if your mix is too loud, and you’re unable to get a quieter version of the mix.

Headroom is incredibly important during mastering.
Having a mix that’s too loud can mean struggling to find enough headroom for your processing. If this problem is left unfixed, you may create clipping distortion when using processing.
Keep in mind that this clipping distortion can occur in between plugins, and may not even show up on your meters - so having enough headroom is truly important when mastering.
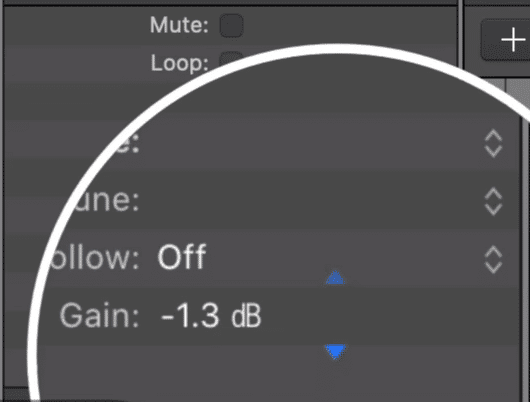
Use clip gain to reduce the gain of a mix if its too loud. Only do this is you cannot get a revised mix.
With that in mind, it’s best to turn down the gain of the track, instead of using the channel fader, or another method. By reducing the gain with clip gain, you ensure that the amplitude of the mix is reduced prior to any processing taking place.
In other words, you give yourself enough room to work and protect your master from unwanted distortion.
Step 3: Insert a Mid-Side Equalizer and Use Subtractive Equalization
Now that your session is prepared, you’re ready to begin processing the signal and shaping it in the sound that you want.
Insert a mid-side equalizer as the first plugin on your stereo track. For our example, we’ll be using the FF Pro-Q 3.
With this equalizer, we’ll be performing subtractive equalization, meaning, we'll only use this equalizer to attenuate aspects of the frequency response. The response being, the next few forms of processing will amplify the signal, and possibly make any issues with the mix worse.
That’s why it’s important to attenuate excessive frequencies first, before causing any amplification.
Here’s what I do when using subtractive equalization on a master:
Sub-step 1: Use a high-pass filter up to 15Hz on the Mid image. Make the slope of this highpass filter 24dB per octave.
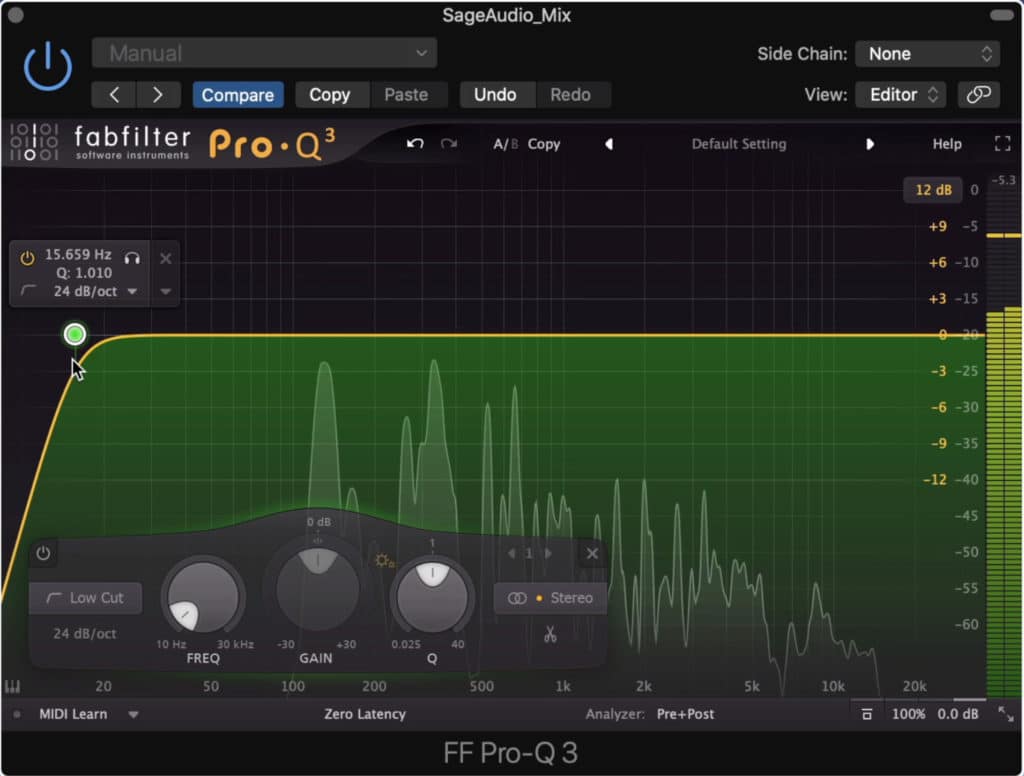
Notice the cut up to 15Hz.
Although this won’t be perceivable, it achieves more headroom. Since frequencies below roughly 20Hz aren’t perceivable, and can’t be played back on most speakers, the frequencies aren’t needed.
Additionally, the energy these frequencies have takes up headroom. By cutting out these frequencies, you’ll have more headroom, and in turn, can make the signal louder in the long run.
Sub-step 2: Use a high-pass filter up to 135Hz on the Side image. Make the slope of this high-pass filter 24dB per octave.
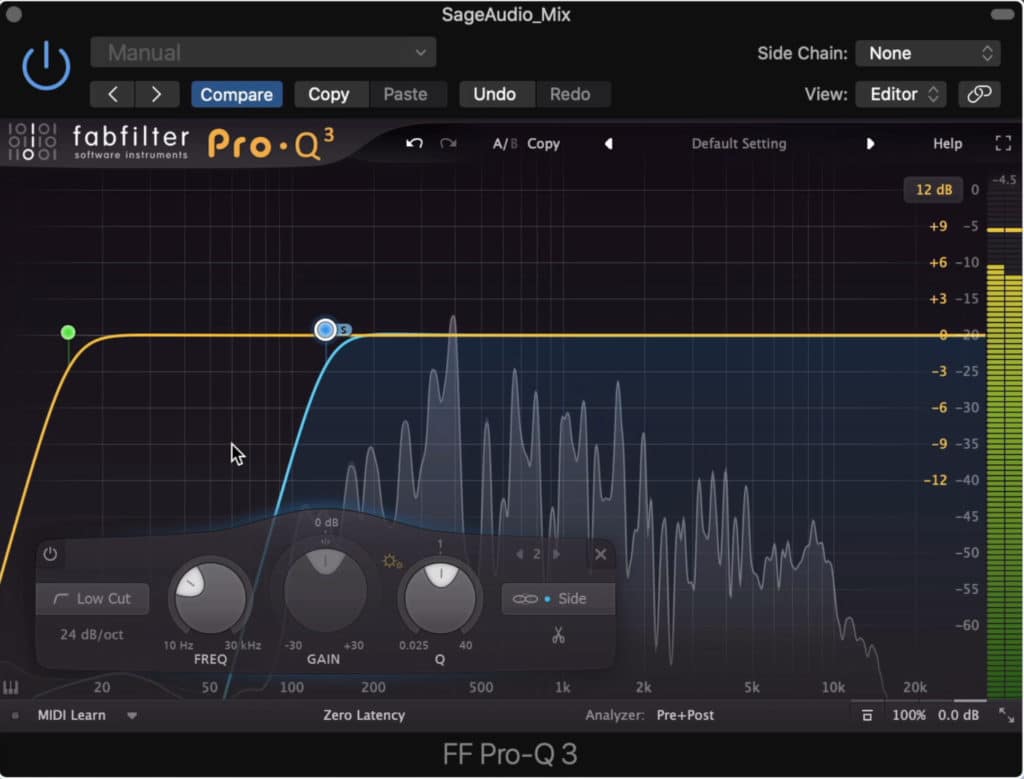
Notice the high-pass filter on the side image up to 135Hz.
By attenuating the low frequency of the side image you make the low-frequency range mono, or only located in the Mid channel.
This will keep your kick and bass focused, in turn making your master sound more driving and dynamic.
Sub-step 3: Once your low-frequency range is handled, listen to the higher frequencies and attenuate as needed.
What you need to attenuate depends on the mix and your master.
This attenuation will be more particular to the mix that you’re working on. That said, I can’t give you set frequencies you’ll need to attenuate.
Instead, listen critically to the mix and determine what needs to be adjusted. It’s best not to attenuate frequencies greater than 2dB to 3dB when performing subtractive equalization on a master.
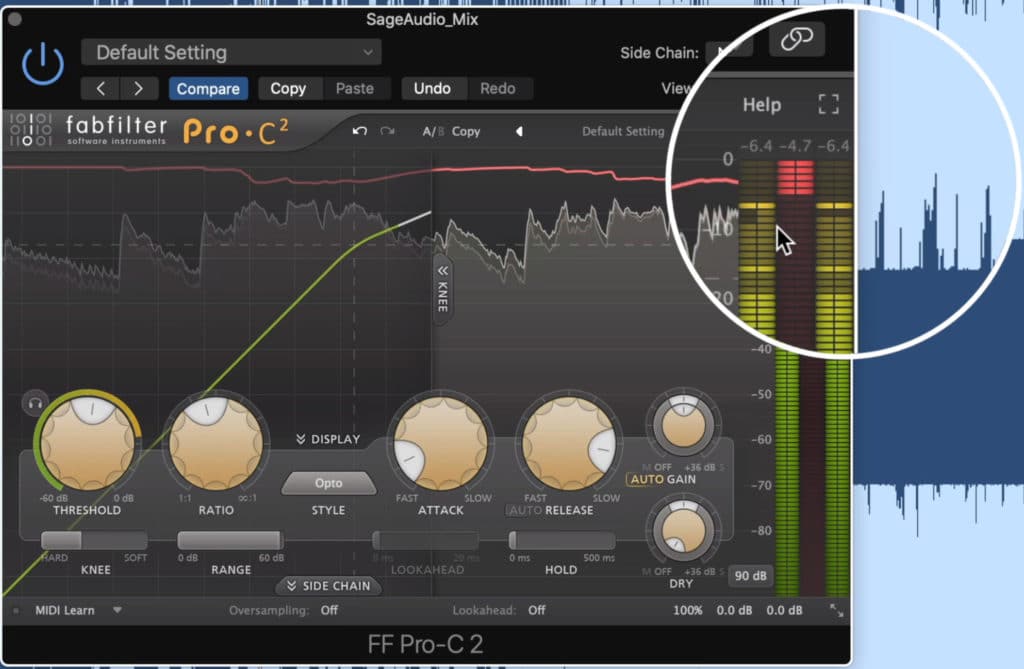
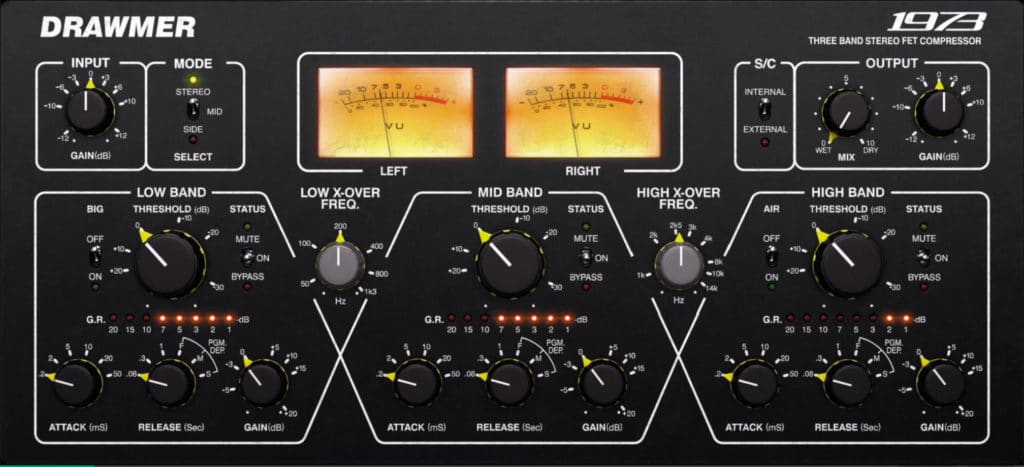
Step 4: If Needed, use Compression
Compression won’t always be needed when mastering. In fact, it’s often an overused form of processing.
But, if you intend to make your master loud, you’ll need to use compression to control the dynamics before amplifying the signal.
Compression controls dynamics and may be needed if you want to make a louder master.
How you compress your master is going to depend on the genre. Some forms of compression are better suited for dance music - for example, the compression retains transients and dynamic detail.
Another example is funk music - the compression used for this genre typically glues the sound together , meaning a longer release time will be used, and optical compression might be used too.
Try not to compress heavily as it negatively impacts the quality of a master.
Regardless of the type of compression, try not to attenuate the signal more than 3dB unless needed. Again, first, ensure that compression is needed.
If you compress an already heavily compressed signal you’ll create a lifeless sounding master.
Step 5: Insert Tape and/or Tube Emulation Saturators
Now that your dynamics are controlled and the frequency has been balanced, you can add some harmonics into your master.
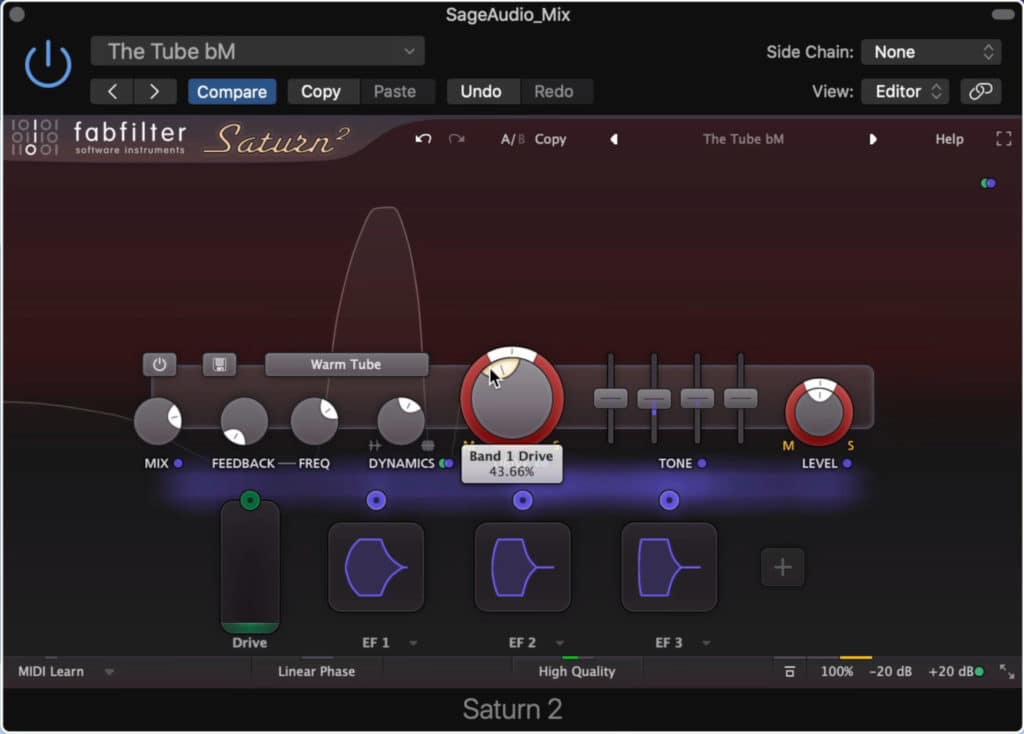
Saturation fills in some of the gaps in the frequency spectrum.
These harmonics make your master sound fuller and more impressive. Harmonics are multiples of your fundamental frequencies, which make those fundamental frequencies more perceivable.
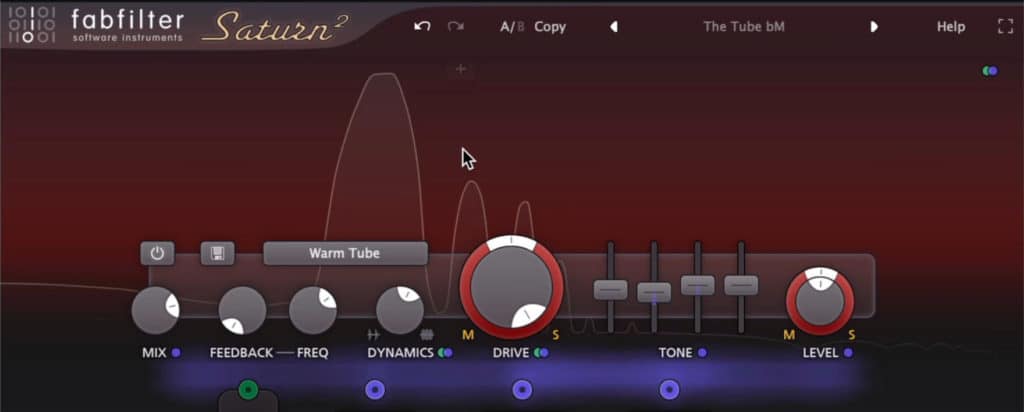
Above are the harmonics caused by Tube saturation.
Different electronics cause different harmonics to form - for example, tube saturation causes a strong second-order harmonic , whereas tape saturation causes more balanced even order harmonics.
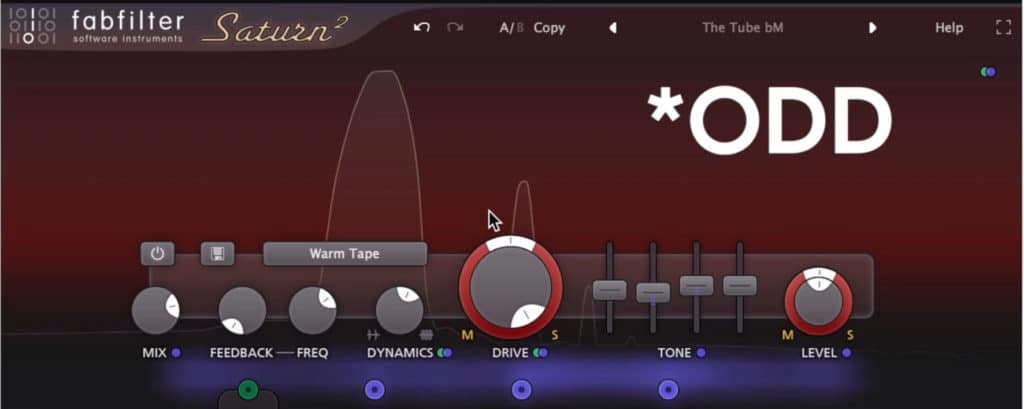
Above are the harmonics caused by Tape saturation.
When introducing saturation be sure to do so subtly. Saturation is a combination of the harmonic generation we just discussed and compression.
So if you saturation heavily, not only do you add a lot of distortion, you add a lot of compression. Too much of both of these things will be detrimental to the quality of your master.
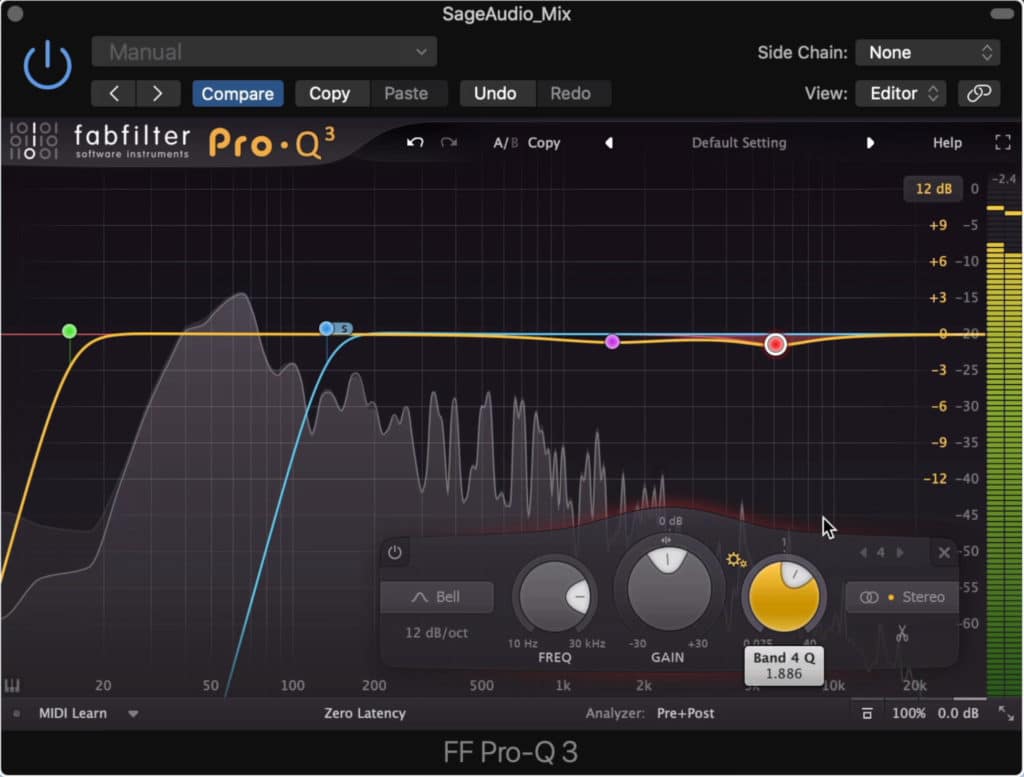
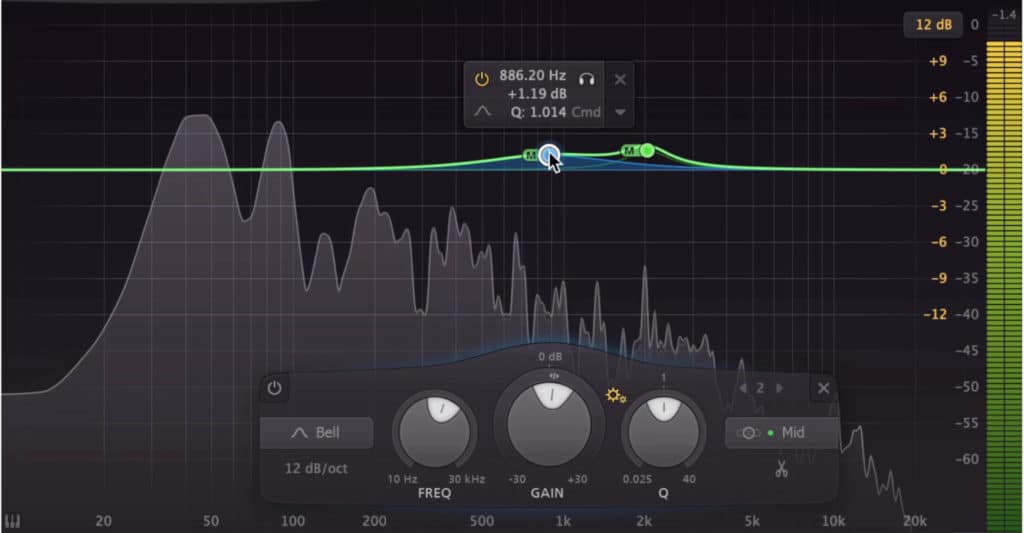
6. Insert a Mid-Side Equalizer and Use Additive Equalization
Using another mid-side equalizer, it’s time to amplify aspects of the frequency response that you like. Typically, these are minute or small changes, no greater than 2dB.
What you amplify will depend on your mix and master.
When it comes to additive equalization, there is no exact method for what to amplify. It’s going to depend on the mix that you have, what you like, and what you want to accent.
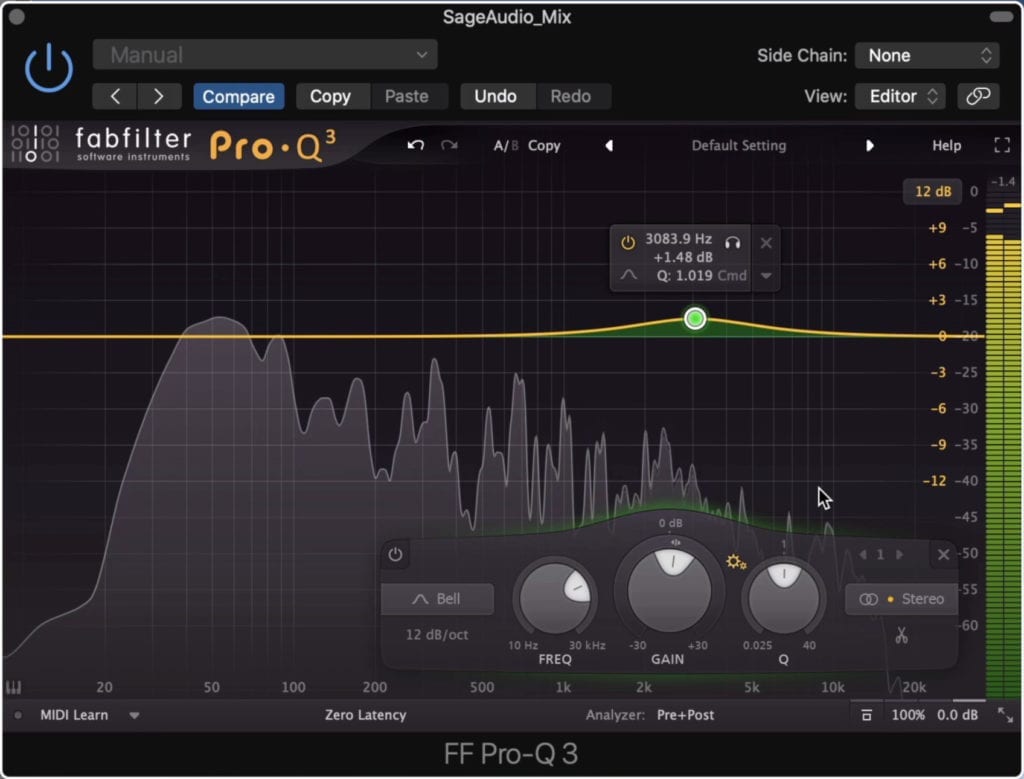
For example, if you’re noticing that the vocal is getting buried under some of the instrumentation, you may want to boost 2kHz in the mid-channel to bring some clearer parts of the vocal forward.
In the above example, we amplified frequencies to bring the vocal and mid-range forward.
Or maybe, you notice that the mid-range of the guitars isn’t powerful enough, you could amplify 900Hz with gentle Q to bring forward some of the mid-range.
Again, this will depend on your particular mix - be sure to listen intently to your mix when determining what to change.
You’ll also use this same equalizer to perform your stereo imaging, but let’s cover that in the next section.
If you want to hear your mix equalized with all-analog equalizers, let us master a mix of yours and send you a sample:
We’ll master it for you and send you a sample for you to review.
Step 7: Adjust the Stereo Image with your Mid-Side Equalizer
With your frequency response amplified in a way that best suits the mix you were given, it’s time to consider how mid-side equalization can affect your stereo image.
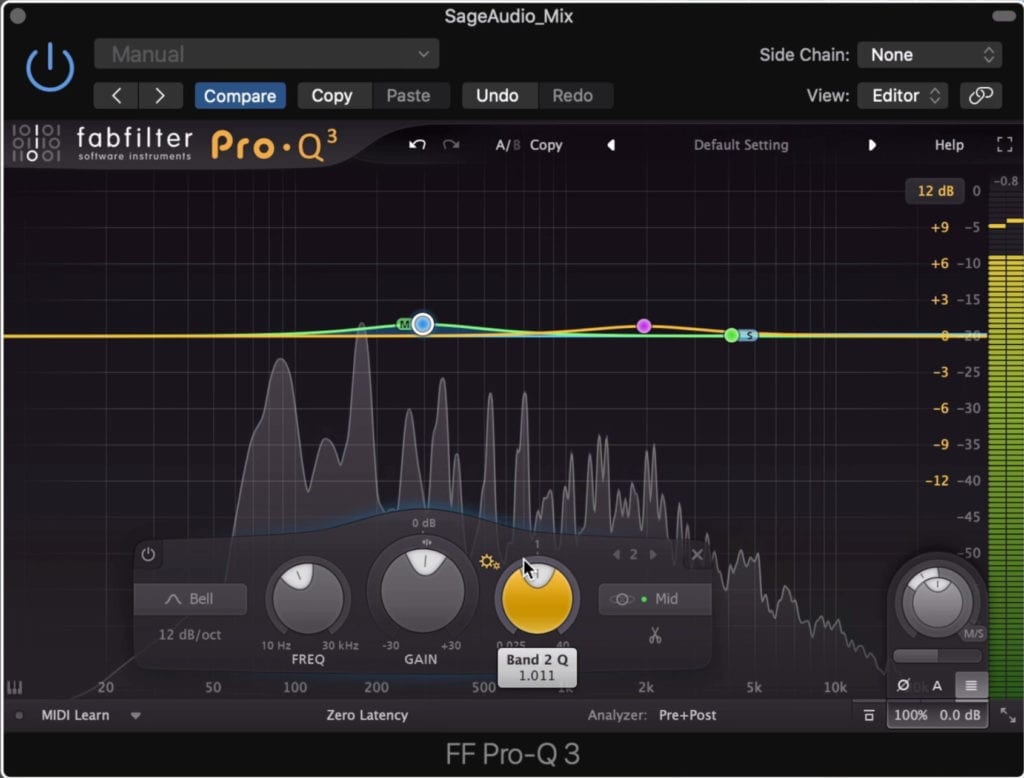
Mid-side equalization can be used to affect the stereo image of a master.
The Mid channel can be thought of as your mono or center channel. This is where the majority of powerful signals will need to stay.
Keeping a good portion of your signal mono or in the mid-channel ensures that the master can be played back on consumer-grade equipment. It also means that your master will sound focused.

The mid channel is completely mono, and is represented by 0 degrees when visualized.
That said, it doesn’t hurt to send some of the signal to the side channel. By amplifying the side image, we’re essentially causing the signal to expand into the stereo image.
This image is often visualized as a 90 and 180-degree field , with 0 degrees being the center.
If we want to make a wider image we can either amplify frequencies of the side channel or pan the signal more toward the side channel than the mid.
By decreasing the Mid gain you increase the stereo width.
If we want to make a more narrow image, we can amplify the Mid channel, or pan the signal more toward the Mid than the side.
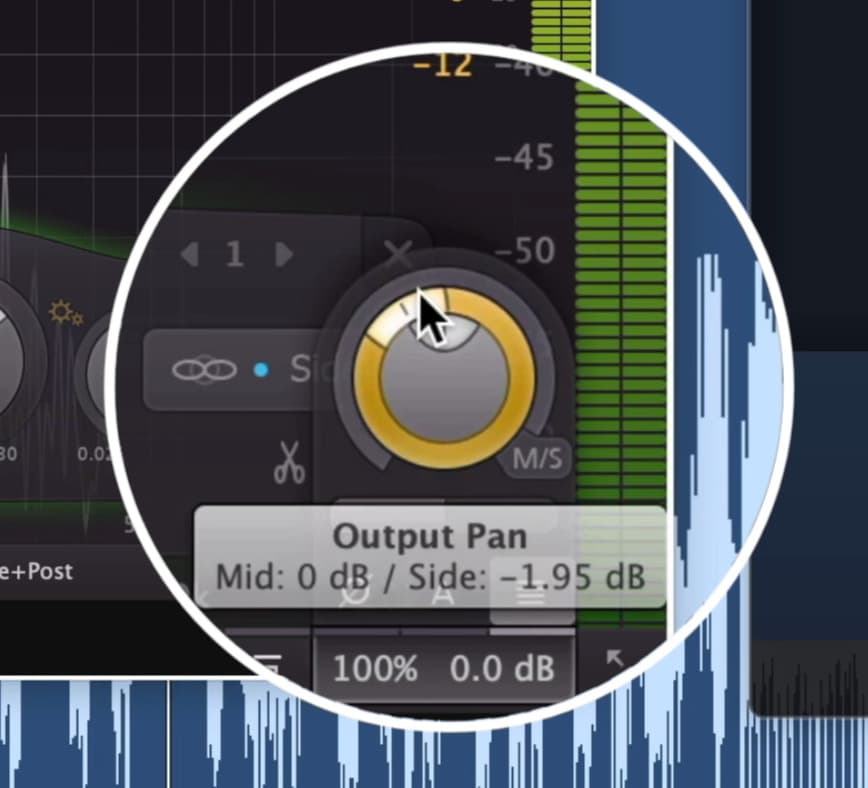
By decreasing the side gain you decrease the stereo width.
Typically speaking, low frequencies are made more mono, whereas high ones occupy both the mid and side channels. If you want to have a more impressive stereo image or width, try amplifying the side image with a shelf filter above 5kHz.
This will expand the stereo width and make for a more impressive master.
Step 8: If Wanted, Set up an Auxiliary Track for Parallel Compression
If you’re trying to create a more aggressive sounding master parallel compression can be helpful.
Sub-step 1: Create a Bus from your channel strip. Depending on the DAW you’re using, this will either create an auxiliary track automatically, or you’ll need to make one.
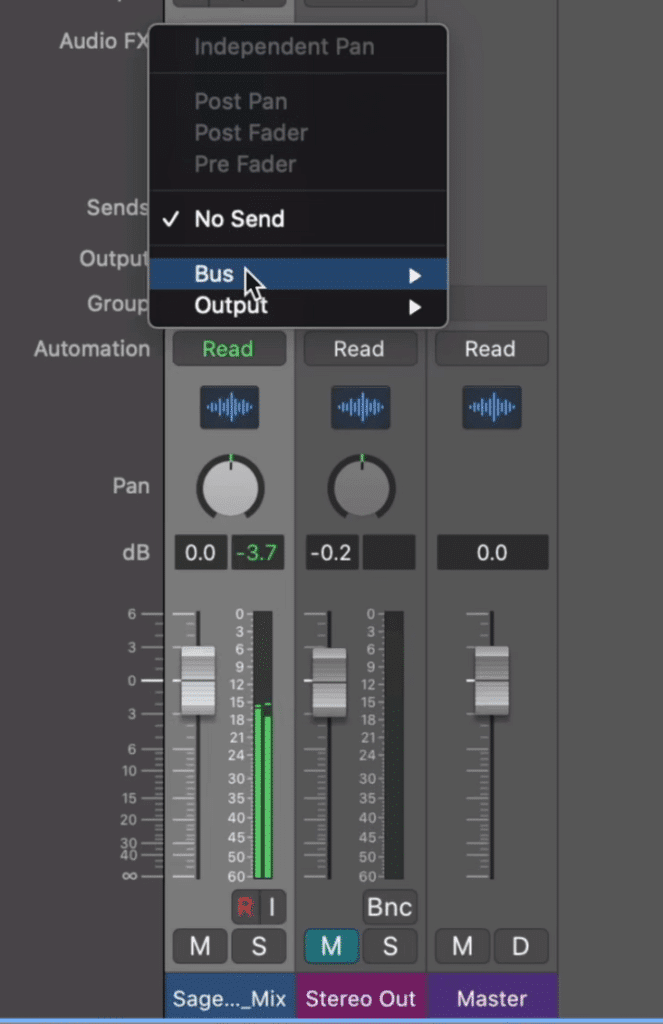
Set up a bus send.
Sub-step 2: Set the send of this bus to unity or 0dB. Bring the channel fade of the auxiliary channel down to a low volume.
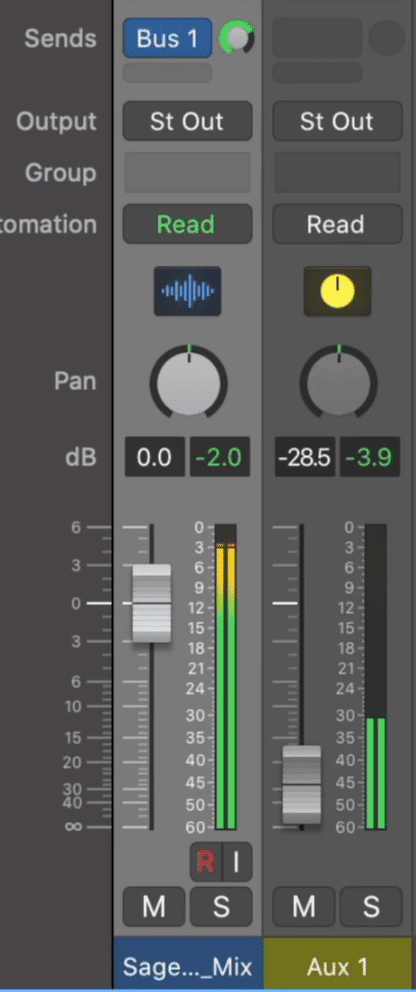
Set the bus send to unity and reduce the volume of you Aux track.
Sub-step 3: Insert a compressor on the auxiliary channel and heavily compress the signal. Slowly introduce this heavily compressed signal back in with your original signal by increasing the value of the channel fader.
Use a compressor you like the tone of and heavily compress the signal.
Typically, I have my parallel compression peak at -18dB on the channel fader’s metric, but feel free to introduce it a little more aggressively.
By using parallel compression you’ll heavily compress the signal, but keep things subtle enough by having the effect be a wet/dry blend with the original signal.
Parallel compression can be used instead of regular compression and is often helpful if you’re trying to achieve an overall greater loudness for your master.
If you want to learn more about parallel compression and bus compression, check out our blog post and video on the topic:
Step 9: On your Master Output Insert 1 or 2 Limiters
Using a limiter is a common choice during mastering. They’re needed if you want to protect your master from peaking and clipping distortion while making the signal loud enough to playback on consumer-grade equipment.
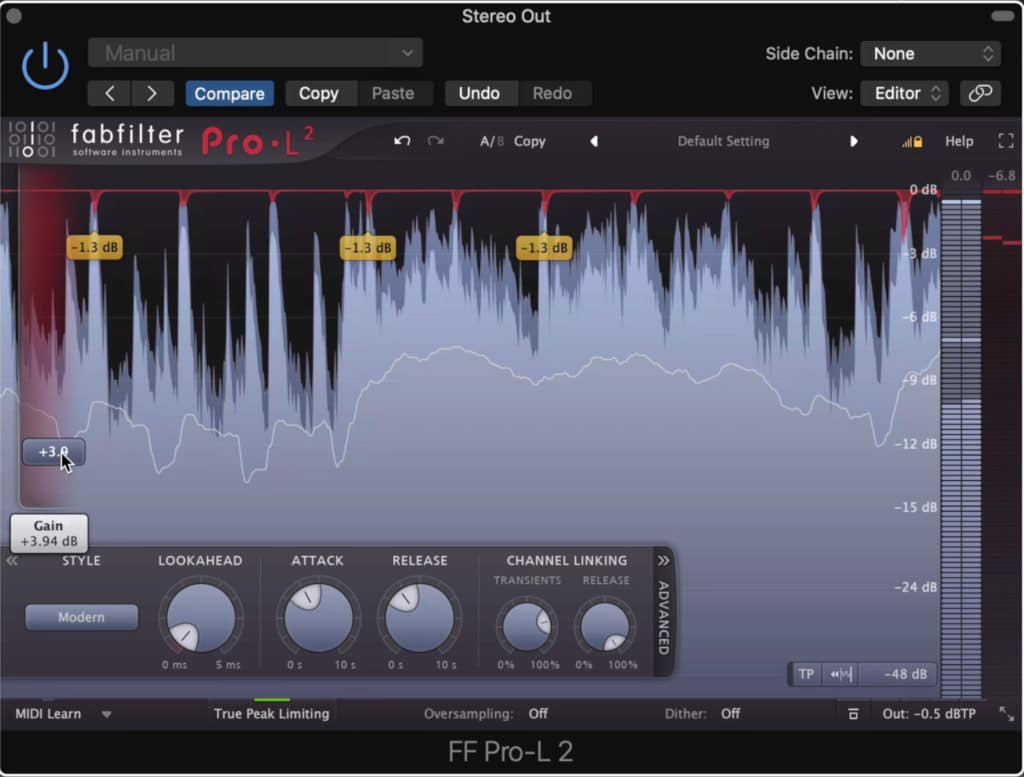
Limiters can cause distortion if you use them incorrectly.
It's important to not only know how to use one but also know some of the ways to get the best sound out of one.
One of the first things to understand about limiting is that it can easily cause distortion. If your signal is peaking at 0dB, you most likely are still distorting the signal - the reason being, inter-sample peaking is occurring, or the signal between the samples is peaking.

Your digital signal can peak and distort in-between its quantized samples.
That’s why it’s best to set your limiter too at least -0.5dB to ensure this doesn’t occur. Also, if it’s available, use ISP or inter-sample peaking detection or True Peak detection on your limiter’s output.
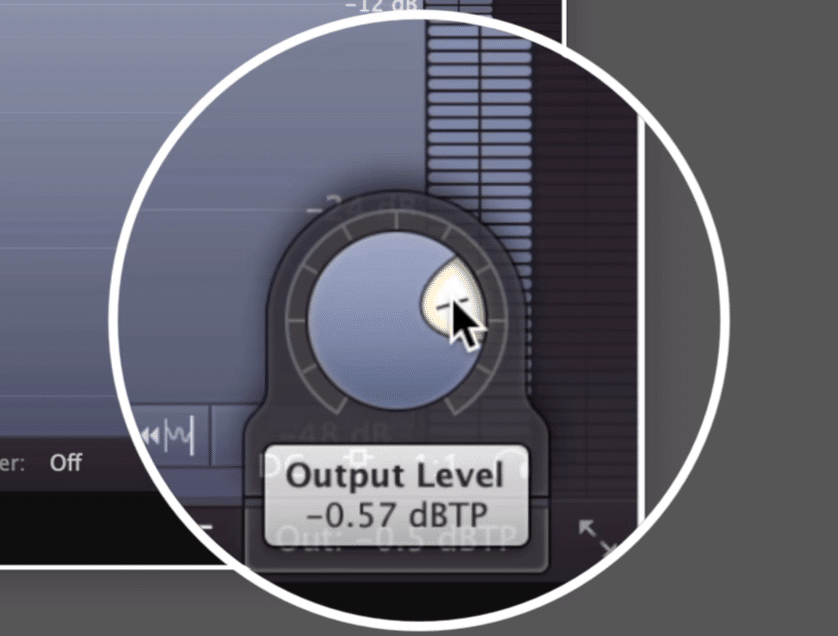
Reducing the ceiling of your limiter reduces the changes of inter-sample peaking.
Another way a limiter can cause distortion is with its release time. If you set a drastically short release time (one under 30ms) you’ll cause distortion. This is especially true for lower and mid frequencies.
With that in mind, use a release setting greater than 30ms to avoid distortion.
Lastly, if you plan on using a significant amount of limiting, try splitting the processing between 2 limiters. Although this isn’t going to alleviate your master from all of the artifacts caused by heavy limiting, it’ll reduce it slightly.
At this point, it’s a good idea to review all of your previous settings and ensure that clipping distortion is not occurring at any point in your signal chain.
If you’re interested in limiters and want some more free options, check out our video on the topic:
Step 10: Monitor the loudness of your song with an LUFS and dBTP meter
While you’re introducing limiting, also keep an eye on the signal’s loudness and the true peak value.
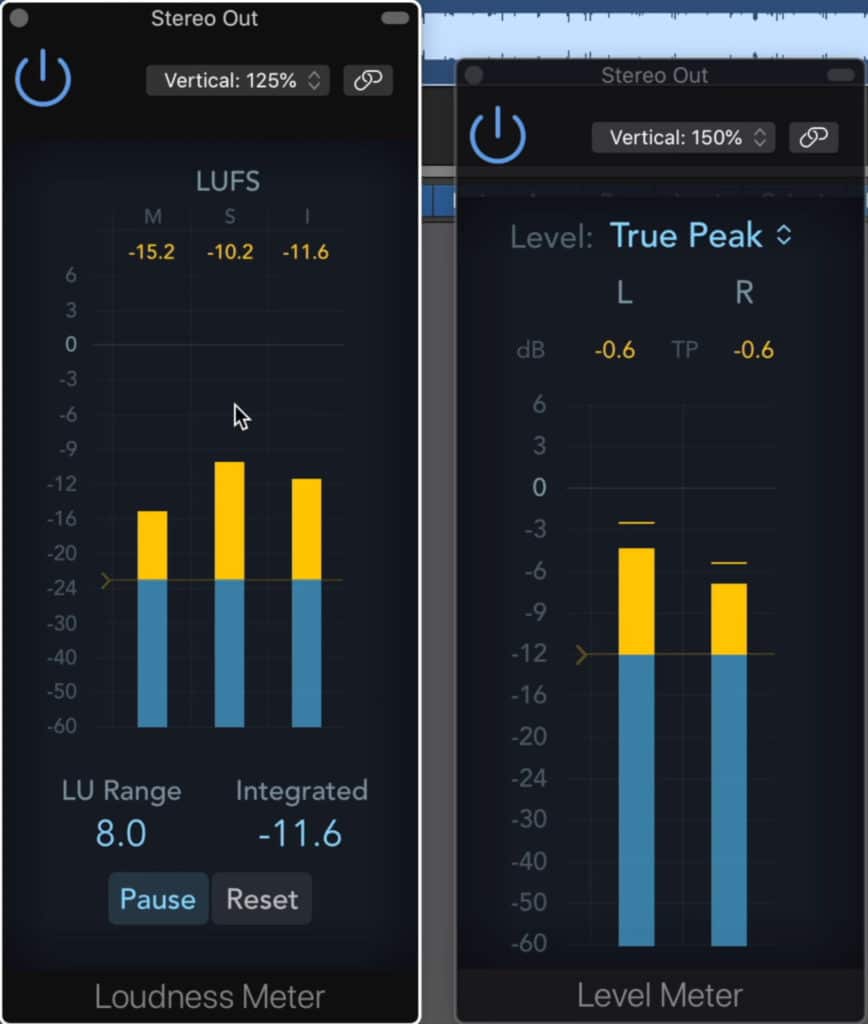
An integrated LUFS meter measures loudness; a true peak meter measures the absolute peak.
The loudness can be measured by using an integrated LUFS, whereas the peak should be monitored with a True Peak meter.
A good range for the loudness of your master is -16 LUFS to -9 LUFS.

-16 LUFS is a quiet master, and -9 LUFS is a loud master.
-16 LUFS will be suitable for quieter genres in which dynamics are incredibly important. -9 LUFS is a louder and more compressed master, which will be more suitable for pop and rap masters.
When monitoring the dBTP of your signal, be sure that it doesn’t go over 0dB. As stated previously, it may be better that the signal doesn’t pass -0.5dBTP. This is especially true for any master that will be uploaded online, as this process may change the amplitude of the signal by up to 0.5dB.
Keep in mind that various streaming platforms will introduce something known as loudness normalization. This process will turn your signal up or down depending on it’s integrated LUFS.
If you want to learn more about loudness normalization, how it affects a master, and the different settings used by various streaming services check out our blog post on the topic:
In it, you’ll find a lot of information on the topic.
Step 11: Export your Master and Review It
Once your master is finished and you’re confident in the settings you’ve chosen, it’s time to export the file of the master. When exporting your master, it’s best to know how the master is going to be distributed.
If the master will be put on CDs, it’s best to export it at a 44.1kHz sampling rate with a 16-bit depth. In this instance, if the mix was 24-bit, you’ll need to use dithering.
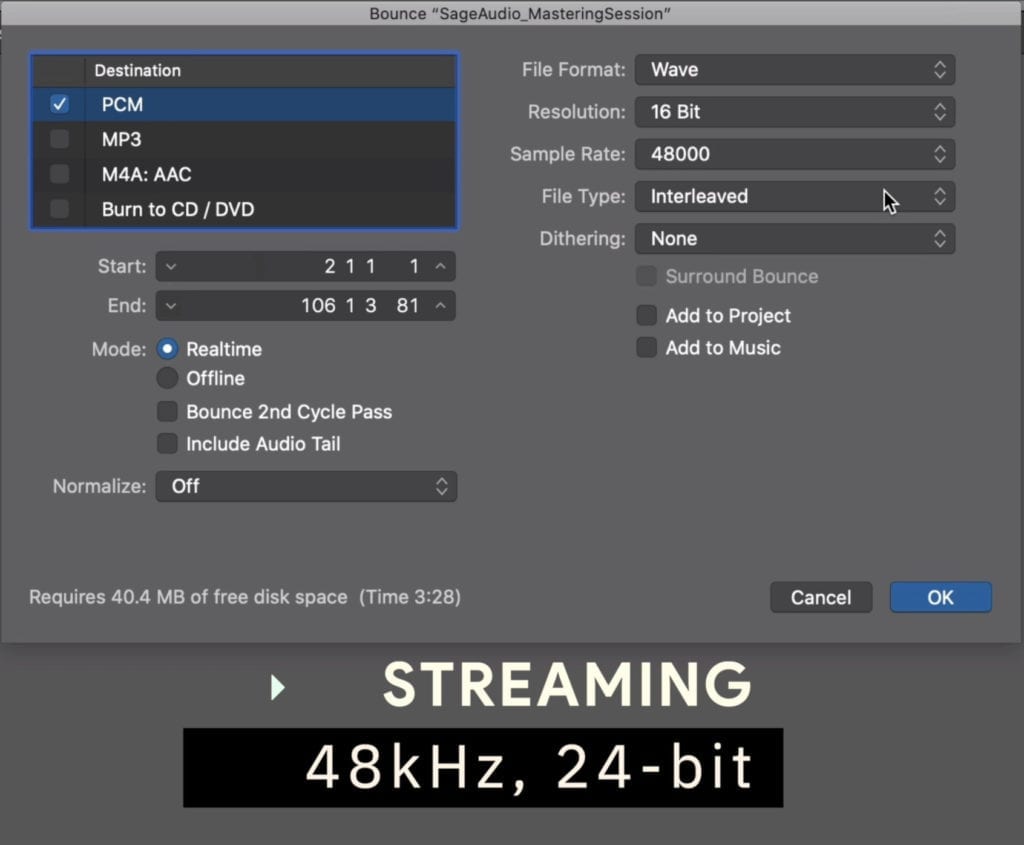
These are the correct settings to export your master if it will be uploaded for streaming.
If your master will be distributed using a streaming service like Spotify, you can export it as a 48kHz, 24-bit file , as most distributors will accept this larger file size.
If you’re mastering a track for someone else, it’s always courteous to export an MP3, a 44.1kHz, 16-bit WAV, and a 48kHz, 24-bit WAV file.
Conclusion
Mastering involves a lot of steps and variables to consider. Although we didn’t cover everything there is to know here, hopefully, these steps can get you closer to making the masters you want to make.
Whether you’re mastering something for the first time, or you’ve been mastering for a little while and want to improve your masters, the information here should be useful.
If you’re in doubt , or you’re finding that your masters are sounding incorrect or distorted, review the steps above and ensure that no distortion is occurring anywhere in your signal chain.
Also, always ask yourself if the processing that you’re using is helming or harming your master - over-compression is one of the most common instances of excessive processing so keep an ear out for that in particular.
If you want to hear how your mix would sound mastered professionally, send it to us here:
We’ll master it for you and send you a free mastered sample for you to review.
Have you tried the steps listed above?


