Mastering for Funk Music
Quick Answer
Mastering for Funk Music is the process of preparing a funk album for distribution by using various forms of acutely implemented audio processing. When a Funk mix has been mastered, it sounds impressive, dynamic, and balanced enough to playback on any consumer-grade equipment.
Mastering for Funk Music
When funk music first arrived in the 1960s, mastering it properly was a challenge. Engineers had to use the limited technology of the time to try and adequately prepare funk records for distribution.

Mastering funk music can be a challenging but rewarding process.
Granted, a lot of these records sound fantastic and are still closely emulated today in modern funk masters.
That said, the technology available today, be it modern analog hardware or increasingly complex and powerful digital processing, has made mastering funk music easier, and more readily available to more engineers.
With that in mind, let’s cover some of the key aspects of mastering funk music.

We won't be covering the full process, but, will delve into some very important aspects and steps of mastering Funk music.
Although we won’t cover the entire mastering process , or provide a step-by-step for how to master songs (although we do have this type of blog post available if you’re looking) we’ll delve into some of the aspects of mastering funk music that are unique.
We’ll consider the aspects of Funk music that make it unique, and how that translates to mastering.
Additionally, we’ll cover specific forms of processing such as compression and expansion, harmonic generation, limiting, as well as some techniques like parallel compression.
But first,it may help to consider what the ultimate goal is when mastering funk music. This way we can better understand how and why processing gets implemented the way it does.
What is the Goal When Mastering Funk Music?
When mastering funk music, the mastering engineer’s goal is to create a sound that is cohesive and glued together, yet maintains its spaciousness, dynamic impact, and transient detail. Balancing these two seemingly opposite elements can be difficult, but it is necessary when mastering funk music.

A good Funk master retains dynamics while still creating a cohesive sound.
What Makes Funk Music Sonically Unique?
Funk music is comprised of primarily percussive elements - the bass, guitars, or other instruments that are typically used melodically, work in tandem with the drums and percussion. With that in mind, funk music is heavily dependent on the precise timing of all instruments used in the composition.
The percussive aspect of the music can be emphasized during mastering , by introducing specific compression, limiting, and equalization settings.

Almost all aspects of a funk composition as percussive in some manner.
Now that we have a better understanding of what makes the genre a unique one sonically speaking, let’s cover the different aforementioned forms of processing.
How to Equalize a Funk Master
When using equalization on a funk master, it best to affect frequencies that emphasize the percussive nature of the mix.
Some of these changes will be additive and some will be subtractive.
Although the exact frequencies you affect will depend on the mix, there are some good starting points for your equalization.
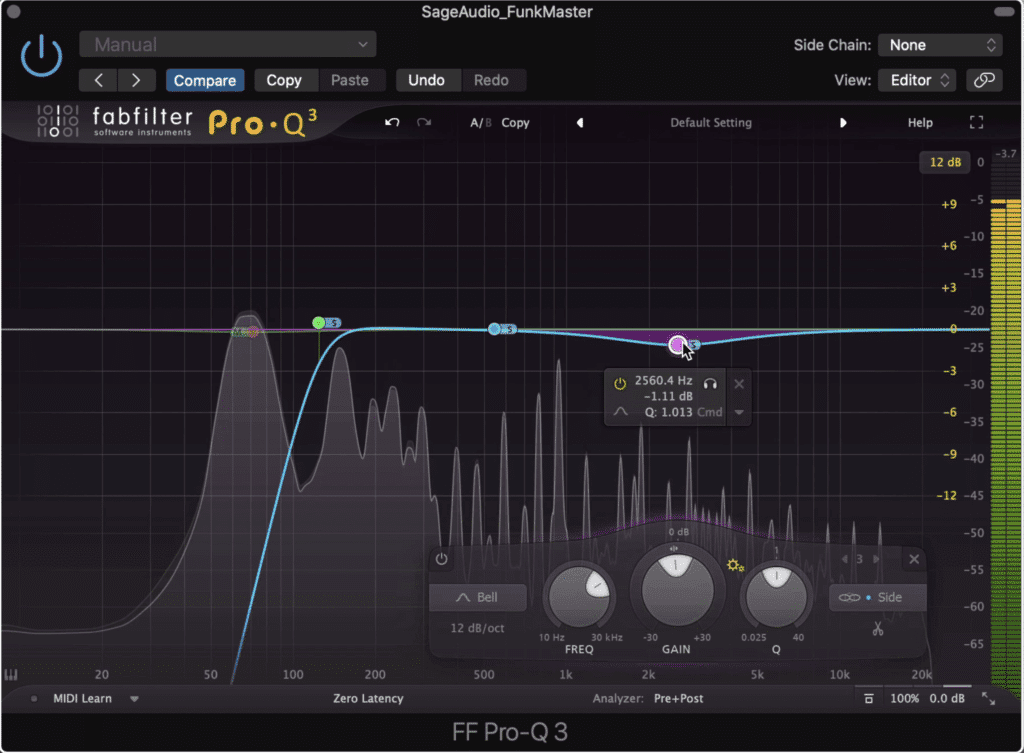
For these examples, you’ll need to use a mid-side equalizer.
The first thing to do is ensure that the bass and kick are mono or in the center image. This can be accomplished a few ways but this is the easiest method I know of.
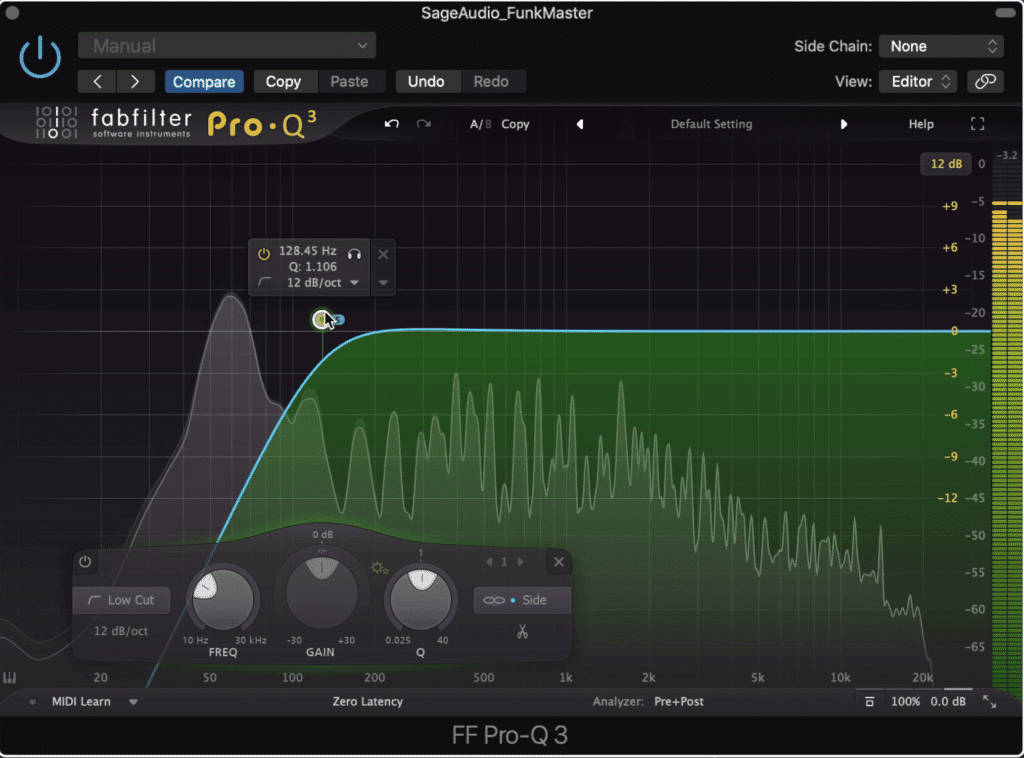
Using this method offers an incredibly easy way to make the low-end mono.
Using a mid-side equalizer,create a high-pass filter on the side image, and place it around the 130Hz point. This will attenuate any frequencies on the side image that are lower than this point.
Essentially, this will accomplish a mono low-frequency range, causing your kick and bass to be powerful and centered.
This also separates these frequencies from other ones in the side image, adding clarity and punch to your master.
The clarity of the low-end information in a funk mix is incredibly important because again, the percussive aspects of a funk track need to be upheld. By making these elements mono you ensure that they aren’t masked by other frequencies and instruments.
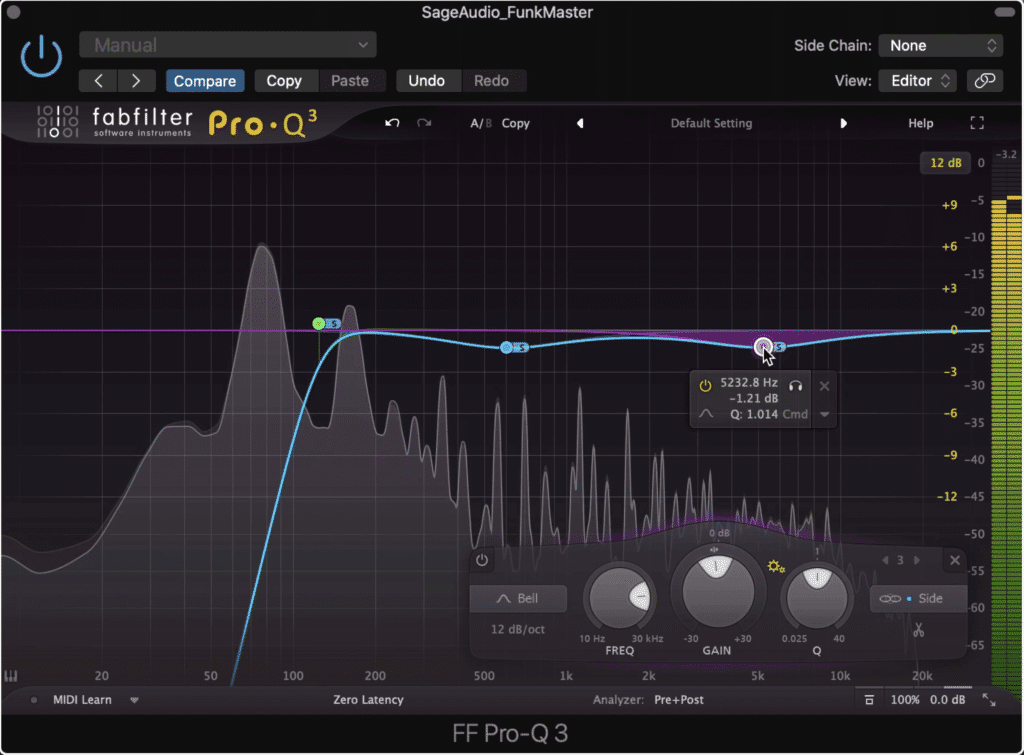
Use some more attenuative bands to reduce masking and add clarity to your master.
Using a critical ear, you can use this same method for other frequencies in your master. Attenuate aspects of the side image to see if it causes masking to anything in the mono or mid image, and vice versa.
This way you can prioritize certain aspects of the mix and decide which frequencies are most prominent.
How to Compress a Funk Master?
When compressing a funk master it's imperative that the transients of the mix are retained - this is accomplished by using specific attack and release settings. Furthermore, it helps to set these attack and release times to be in tempo with the track - this can be accomplished with a simple formula.
Compression levels out dynamics and should be used carefully.
So what does this look like practically?
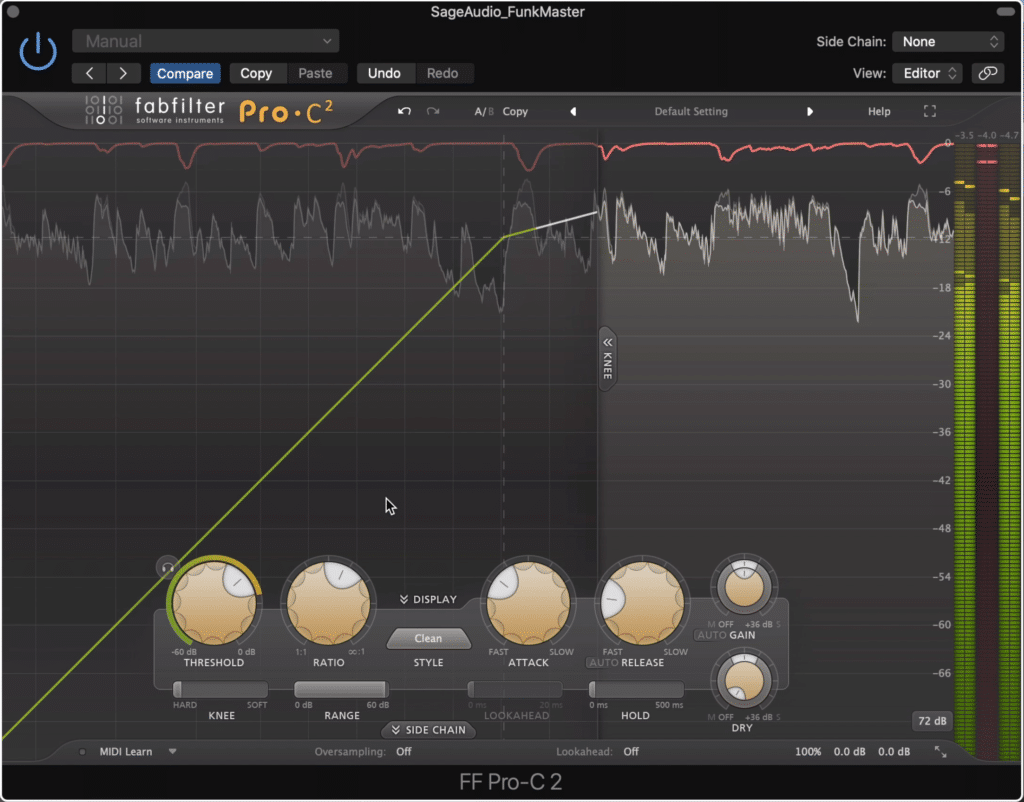
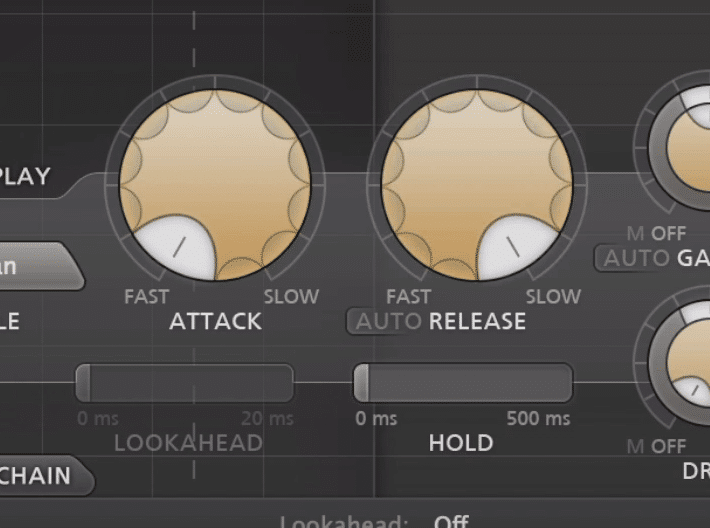
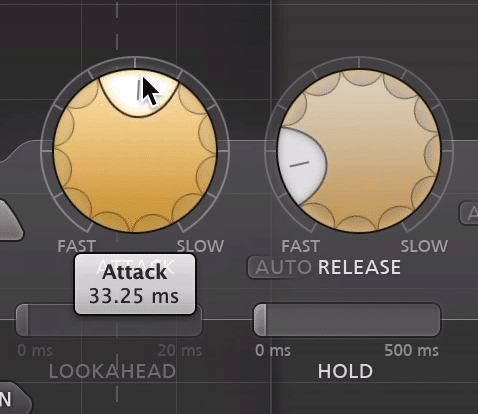
You can see on a compressor that you have various settings, including but not limited to the threshold, ratio, knee, lookahead in some compressors, and some other features.
Notice the attack and release functions - both of which play a large role in shaping compression's timbre.
You also have two functions called attack and release. The attack determines how long it takes before the compressor will begin to compress the signal that crosses the threshold.
The release determines how long the compressor will hold onto the signal after the signal has crossed the threshold.
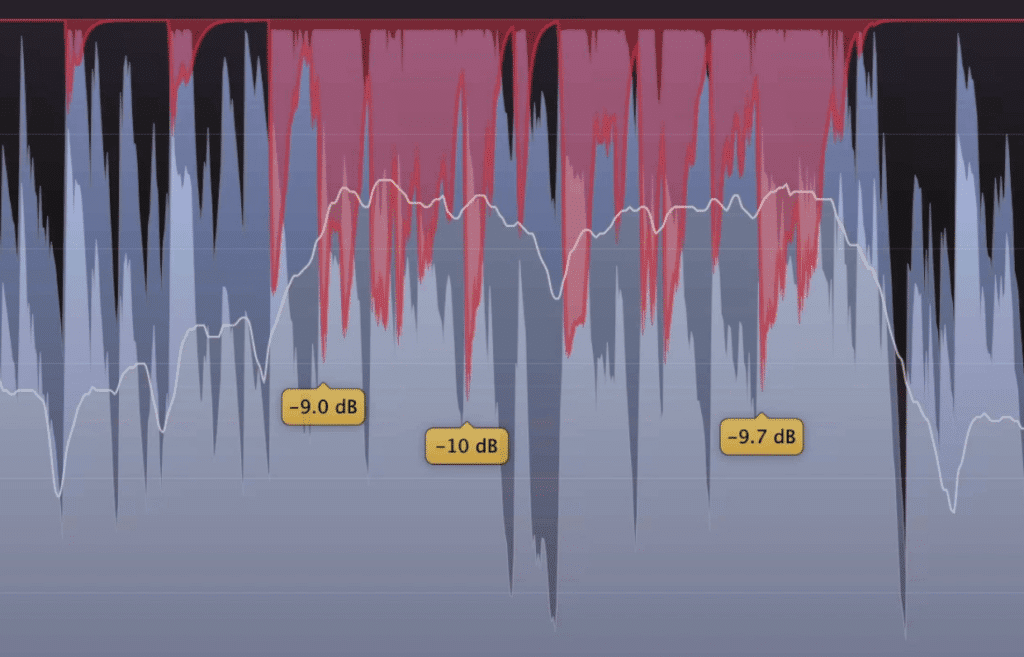
With that in mind, the attack and release can really affect the transients of a mix, and in turn, the timbre and clarity of the mix. For example, a short attack and long release mean that the compressor will compress sooner, and for longer.
A fast attack and slow release will result in more compression and smoother but less detailed sound.
This means that any transients like the snare, the kick, toms, or maybe the pluck of a guitar - basically any percussive instrument or aspect of the mix will be compressed and attenuated. As a result, it will be less perceivable and will detract for the overall percussive nature of the mix.
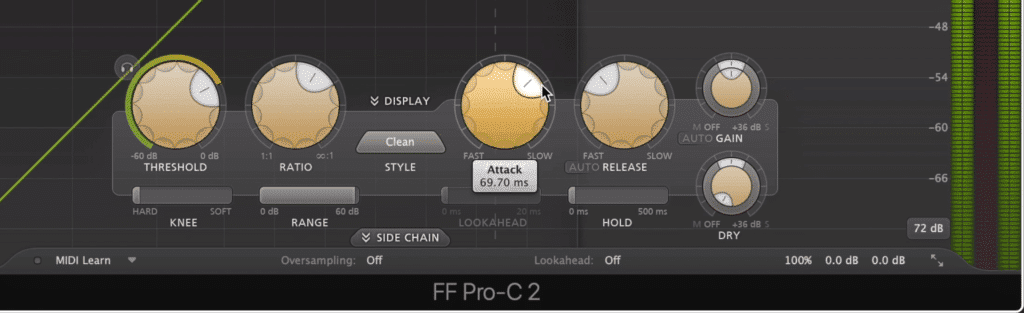
That’s why it’s best to use a longer attack and shorter release time when applying compression to a funk master. Because the compressor takes long to begin compressing, the transient can pass through unaffected.
Use a longer attack and shorter release to retain your master's dynamics.
Additionally, because the release time is short, the compressor does continue compressing long enough for other transients to become attenuated.
With a longer attack and shorter release, you’ll maintain the dynamics and transients of a funk master , while still contributing to a collective and cohesive, or glued together sound.
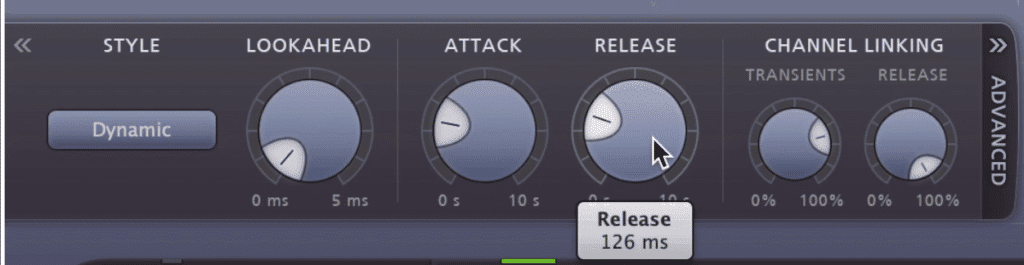
As we’ve covered previously, the percussive nature of a funk mix is something that needs to be upheld. With that in mind, the attack and release settings of a compressor should be set to be in time with the tempo of the track.
When this is accomplished, the actual compression and attenuation will become musical, in turn adding to the musical and percussive nature of the instrumentation. It’s a seemingly subtle change but one that truly augments the musicality of a master.
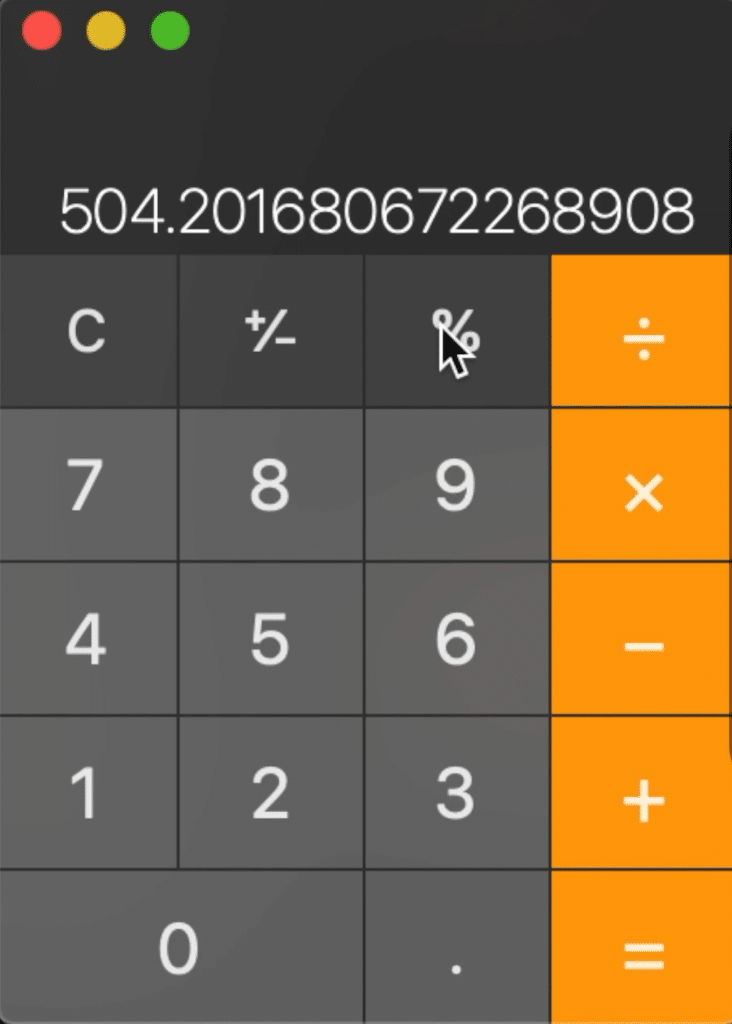
In this example, I divided 60000 by 119.
Some compressors have a built-in ‘sync’ or ‘in time’ function, but if yours doesn’t, simply divide 60000 by you BPM, and you’ll have the time of a quarter note in milliseconds. Use this time, and divisions or multiples of it, to set the attack and release of your compressor.
If you want to learn more about compressors, and how they can be used creatively to fix issues in mixes and masters, check out a video and blog post on the topic:
In it, we cover our picks for 5 great compression techniques.
The same can be said for expansion
Sometimes you’ll receive a funk mix that’s too compressed. When this occurs you definitely don’t want to compress any further; however, you can use a similar form of processing called expansion.
Expansion can be thought of as the opposite of compression - all the settings are identical, except instead of attenuating the signal, an expander amplifies it.
If you find that your funk mix is too compressed and you can’t alter the mix in any way, use frequency-specific expansion to make the kick, snare, and vocal pop more.
Simple set the threshold, and ratio as you normally would. Then use the same attack and release settings as before - preferably ones that match the tempo or BPM of your track.
Then create a range for the expansion - this is how much you’re allowing the signal to be expanded. Expansion greater than 3dB shouldn’t be used unless the track has been severely compressed.
How to Add Harmonics to a Funk Master
Adding harmonics to a funk master is a crucial part of creating a full and complex sound - one that translates well to consumer-grade playback equipment. To add harmonics to a master simply use an analog emulation plugin for a good sound, or use analog hardware for a great sound.
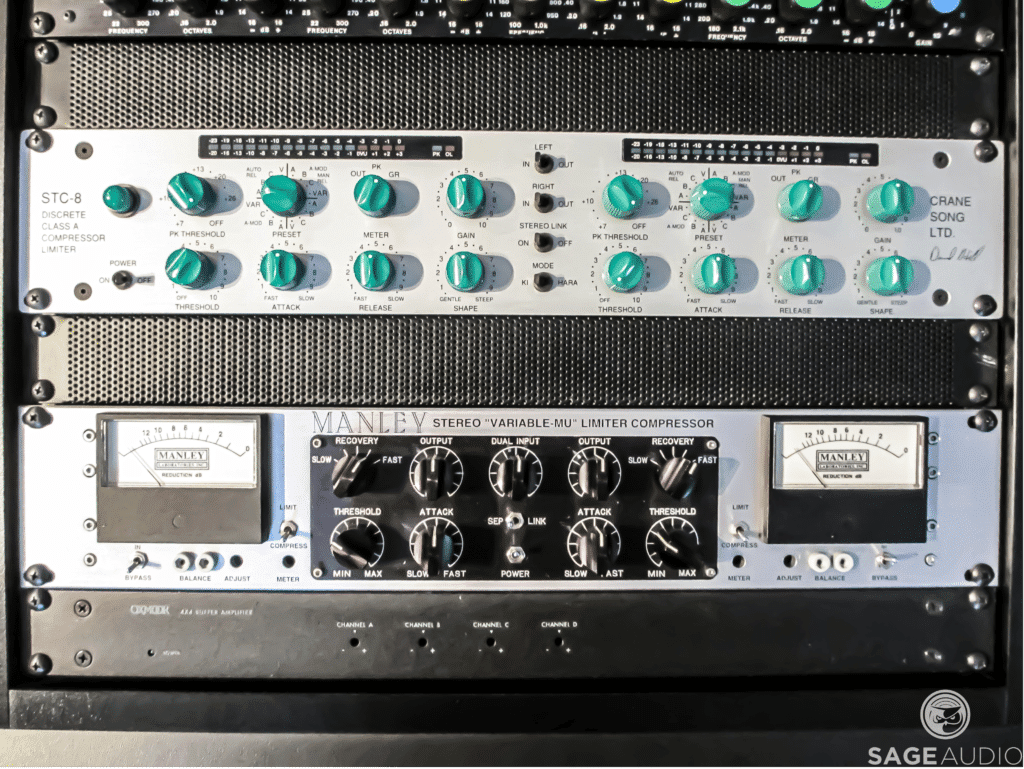
Analog processing creates the most complex harmonics.
Truth be told we may be a little biased when it comes to using analog hardware over digital processing (both are great don’t get us wrong) however; analog equipment does provide more complex and unique harmonic generation.
The reason being, all of the minuscule nuances that make hardware unique cannot be coded into plugins - at least not as of yet.
That being said, if you’d like to hear the effect analog hardware will have on you funk mix, send it to us here for a free sample:
We’ll master it for you using solely analog equipment so that you can review the difference for yourself.
Regardless of whether analog or digital processing is more suitable for creating funk masters, you can still use digital processing to create some great sounding harmonics that improve your master.
Again, simply insert an analog emulation plugin on your mix to create these harmonics.
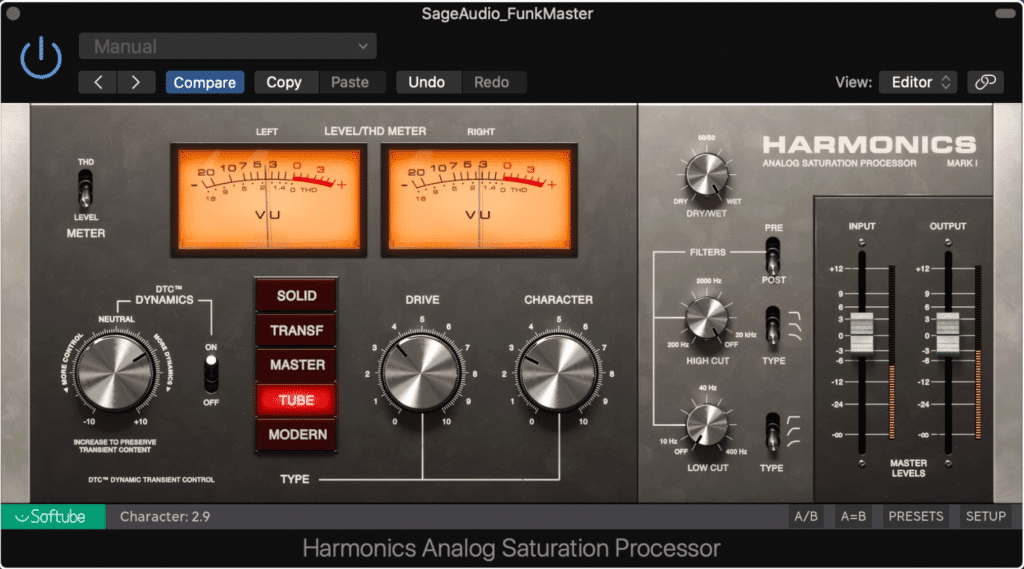
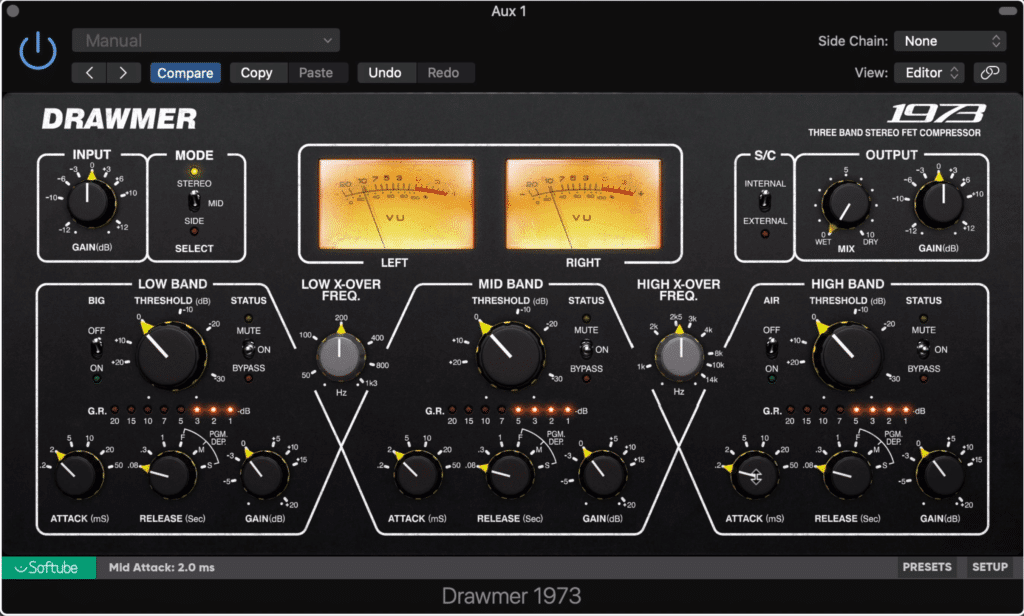
The Harmonics Analog Saturation Processor is a good substitution for analog processing.
Some plugins are better suited for this purpose than others - one example being the Softube Harmonics Saturation Processor , which offers multiple harmonic formations, a dynamics section, and some more functions that allow you to hone in your distortion.
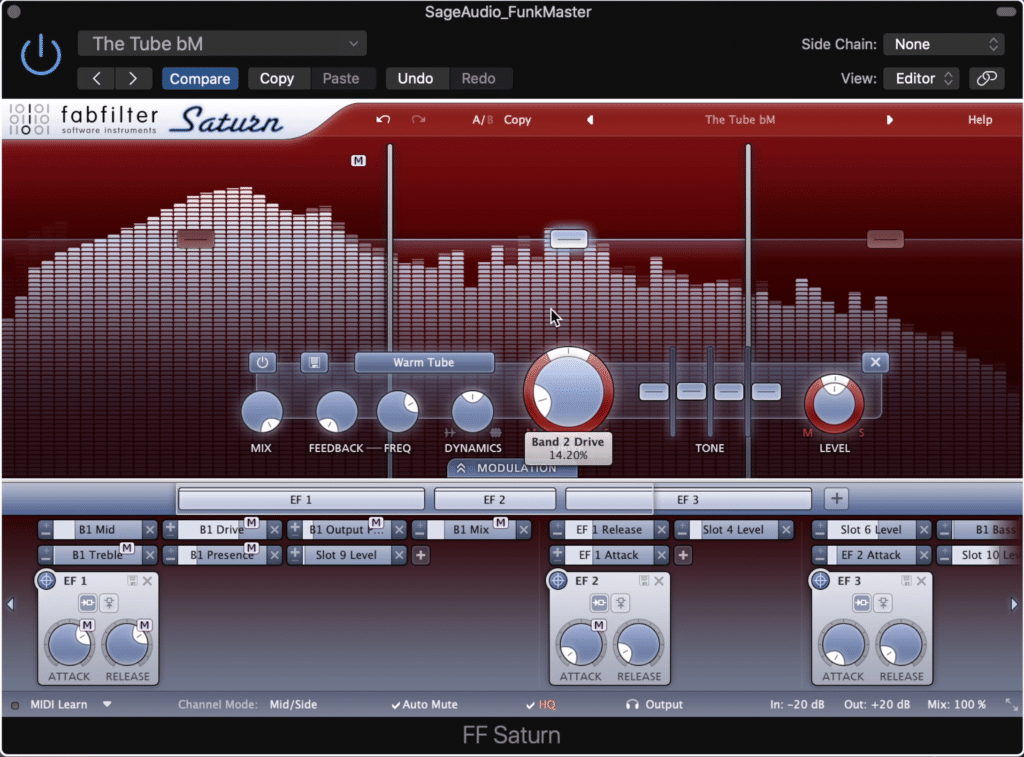
The FabFilter Saturn is capable of creating complex harmonic generation.
Another personal favorite is the FabFilter Saturn , which can be used for a multitude of purposes, but is primarily designed to emulate various amps. To my ears, this is one of the best analog emulation plugins available.
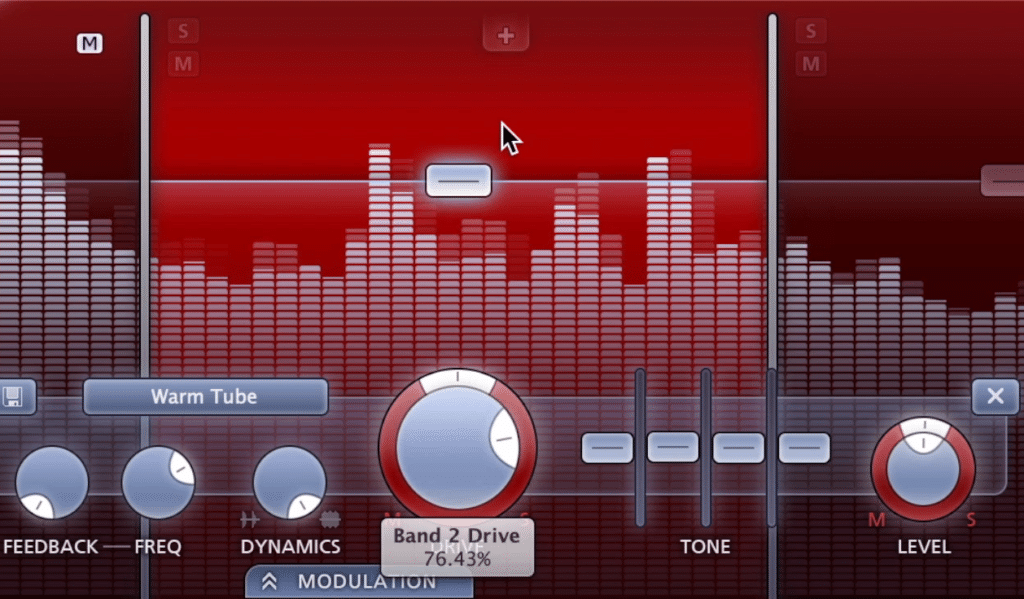
Be sure not to drastically distortion or saturate a signal.
If you’d prefer not to spend the money on these plugins, check out a list we created showcasing the best free saturation plugins:
We detail each plugin’s functionality as well as listen to the plugin in use.
Be sure not to use saturation and harmonic generation plugins excessively, as they can compress the mix, and may cause noticeable unwanted distortion is driven too much. As with most things in mastering, use your ears and think critically about how the changes you’re making affect the master.
How to Apply Limiting to a Funk Master
When applying limiting to a funk master, it’s alright to push the signal a little bit, but excessive attenuation and brick wall limiting should definitely be avoided. Aim for 3dB of attenuation, and hopefully less if the right amount of compression was used earlier on in the signal chain.
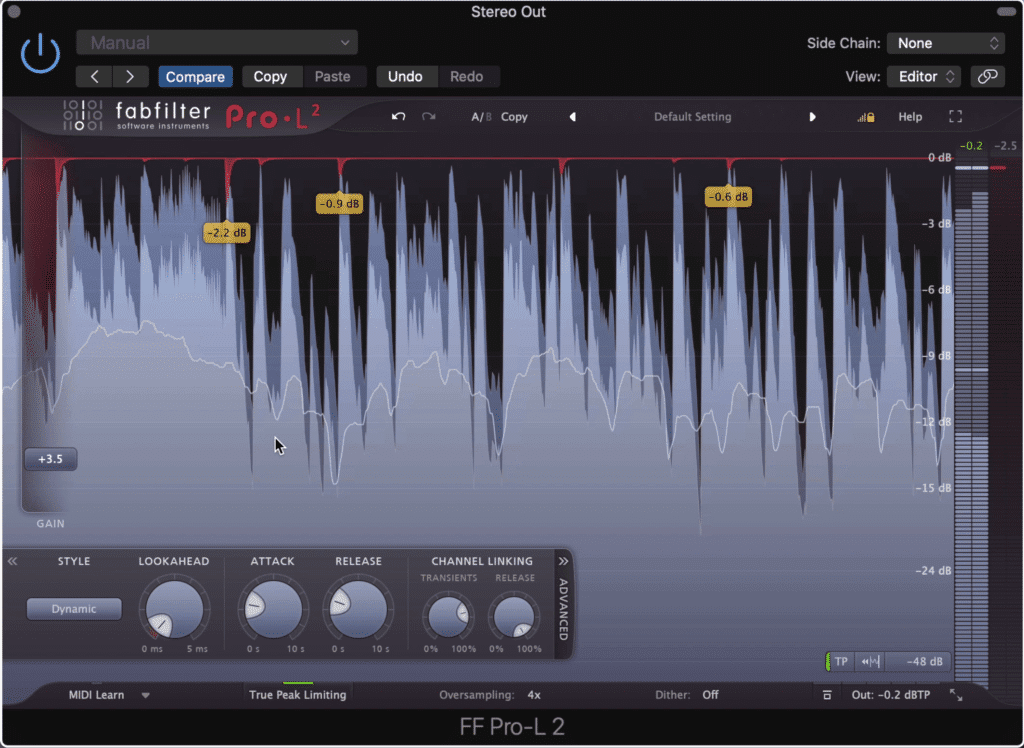
You can push a limiter slightly but be sure not to do so significantly.
Limiting is often an area of contention amongst mastering engineers. On one hand, it allows the master to become powerful enough to play on consumer-grade equipment without the need for that equipment to be significantly amplified.
Excessive limiting causes severe unwanted distortion and ruins the dynamics of a recording.
On the other, it can cause unwanted distortion, ruin dynamics, and affect the tonality of a master in a negative way.
Despite some of its drawbacks, there are safe and reasonable ways to use limiting. If a limiter is used cautiously - that is, without much gain reduction, then the dynamics and tonality should remain intact.
Use attack and release settings that align with the tempo of your track.
When it comes to mastering funk music, retain the dynamics means retaining the percussive aspect of the music. To do so, use attack and release times similar to what you used on your compressor.
That is, use times that are in tempo with your tracks BPM, and utilize a longer attack and moderately shorter release.
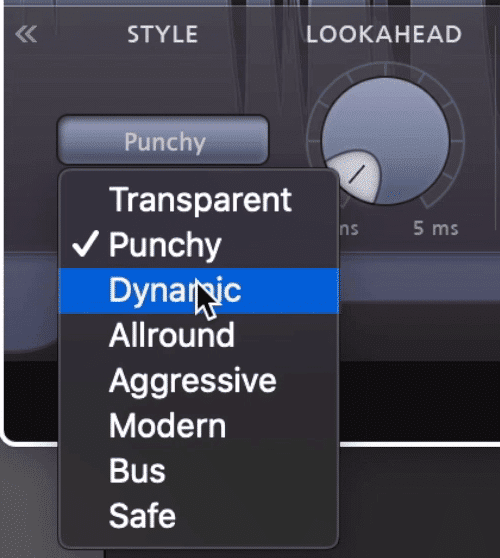
If an algorithmic section is available, find one that emphasizes dynamics.
Additionally, you can use a limiter than has algorithmic settings - some of which are perfect for retaining dynamics or punch in a recording.
How Loud Should my Funk Master Be?
A funk master’s loudness will depend on the medium to which it is being distributed, but if intend to release your music on streaming platforms like Spotify, an integrated -14 LUFS is a good starting point. To find this metric, use a LUFS or loudness meter.
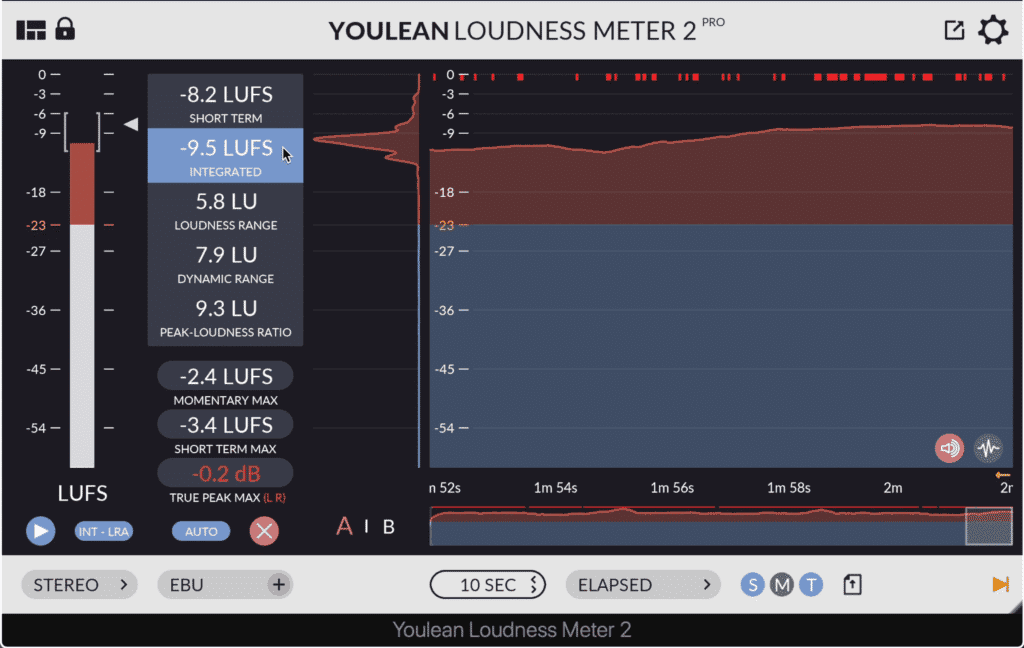
You can use a loudness meter to determine the loudness of your master. Place this at the end of your signal chain.
If you’re in doubt as to where to find one of these meters, your DAW will most likely have a free one titled Loudness Meter.
How to Use Parallel Compression on a Funk Master
Parallel compression is a fantastic tool for taking to quieter aspects of the signal and pushing them into more perceivable territory. When mastering funk music, you can increase the detail of the master by subtly introducing the parallel compressed signal in with the original and unaffected signal.
To do so, follow these simple steps:
Step 1: Create a bus send for your stereo mix’s track. Set this send to unity or 0dB.
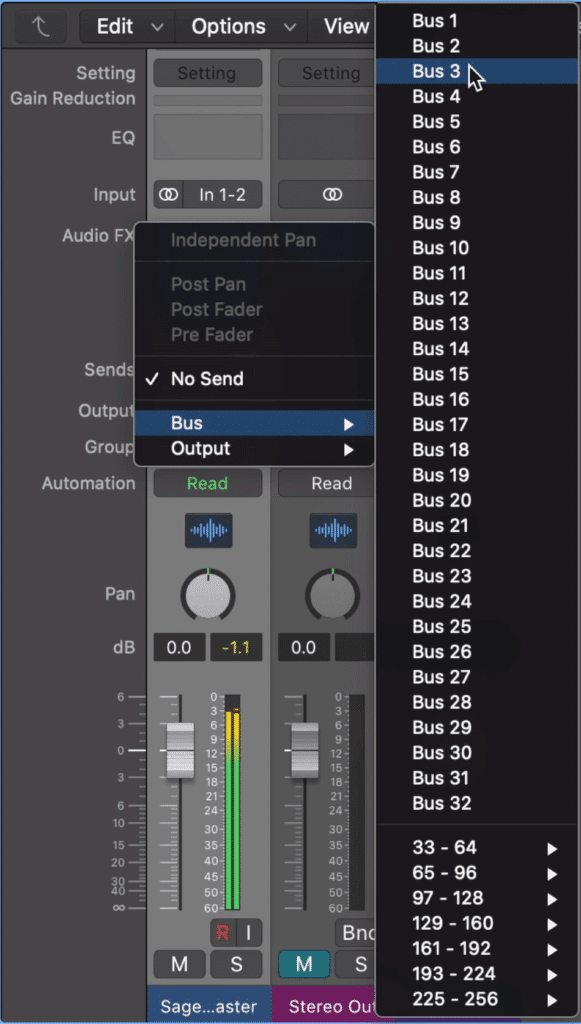
Create a bus and send the signal to an auxiliary channel.
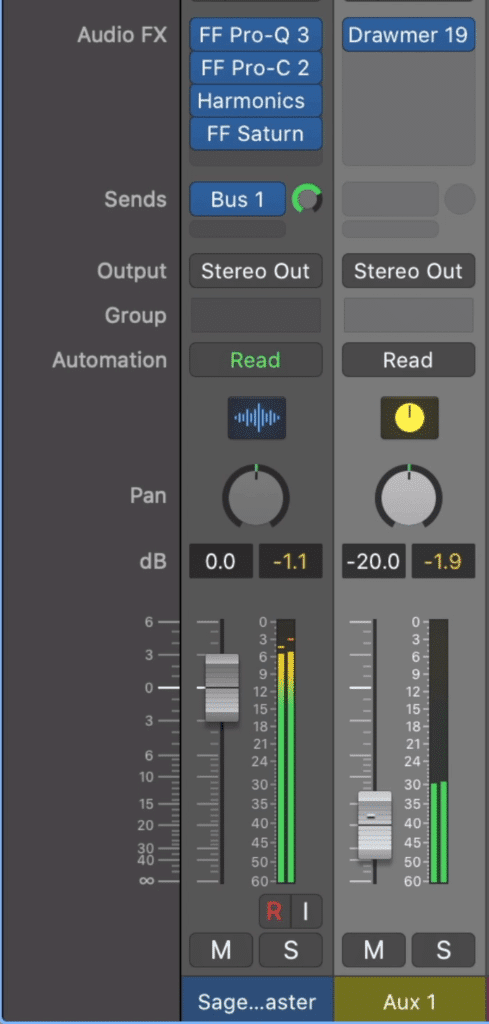
Step 2 : Insert a compressor on the parallel auxiliary channel, and heavily compress the signal. Be sure to use a longer attack and shorter release to preserve dynamics.
Insert a compressor you like the tone of and compress heavily.
Step 3: With your signal compressed, slowly blend the compressed signal back in with your original unaffected signal. This way you can create a balance between your dynamic signal, and the heavily compressed, low-level signal of the parallel compression.
Slowly blend the heavily compressed signal back in with your original signal.
Essentially, by lowering the peaks of the signal by using severe compression, and then amplifying the entirety of the amplitude, you increase the quietest parts of a recording.
When performed correctly, parallel compression increases quieter aspects of the recording.
This will make a funk master sound fuller and more complex, as aspects of the mix that would have normally been mastered are made more perceivable.
If you’d like to learn more about parallel compression and how you can use it to improve the sound of your mixes and masters, then check out our blog post and video on the topic:
It's full of great information on the routing and general premise of parallel compression.
Conclusion
Mastering funk music is a challenging but rewarding process. When you can create a glued together sound that still retains its dynamics, transients, and percussive impact, then you know you’ve created something worth releasing.
Although the process may seem daunting at first, remember to use your ears critically. Additionally, if you think you’re using too much processing, odds are you’ve introduced too many effects or have used these effects to too great of an extent.
Be sure not to follow our guide exactly, as your unique mix will call for different settings.
If you find yourself in this position, dial back some of your settings or perhaps remove a form of processing altogether.
This holds especially true with compression and limiting. Because funk music is such a percussive or beat and groove focused genre, removing transient detail and dynamics is a surefire way to mess up a good mix.
Always ask yourself if the compression you’re using is needed, or if the master truly needs to be loud if it results in lacking dynamics.
If you’re in doubt as to how to master your funk mix, simply send it to us here and we can take care of it for you:
We’ll master it for you and send you a free mastered sample for you to review.
Do you make Funk music?


