Mastering for Gospel Music
Quick Answer
Mastering for Gospel Music is the process of preparing a Gospel track or album for distribution with an emphasis on preserving dynamics, and the reverberation of the room in which the album was recorded. The processing used when mastering Gospel music depends heavily on the sub-genre.
Mastering for Gospel Music in Detail
Mastering Gospel music is a nuanced process - one that takes a compressive understanding of the genre in order to get right.
Due to the immense scope of Gospel music and how it has morphed over the many years that it has been a popular genre, mastering it requires both a technical and historical understanding.
When mastering Gospel music many aspects need to be kept in mind.
First and foremost, Gospel music is rooted in the Christian faith and was created and developed in Southern and Midwestern churches by many African American communities. The music is by its nature, incredibly emotive and powerful - two themes that need to be kept in mind during its mastering process.
When mastering Gospel Music, the emotive and powerful nature of the genre translates to highly dynamic passages, and the retention of a natural and relatable sound.
Granted, Gospel music evolved heavily over the years and was influenced by the recording technology of its day, so a natural sound isn’t always upheld; however, the church-like reverberation is always present in Gospel music.

Church-like reverberation has always played a role in Gospel music.
As you might imagine, retaining dynamics and the natural church sound is important when mastering Gospel Music.
With that in mind, let's explore mastering Gospel music, what makes it unique, and how it has evolved over the years.
We’ll consider various processing aspects like equalization, compression, distortion, and limiting and discuss how they’re introduced when mastering Gospel Music.
We'll cover equalization, compression, distortion, and other forms of processing as they relate to mastering Gospel music.
We’ll also discuss low-level compression and parallel compression , to see what role, if any, this type of processing can have on a Gospel master.
Furthermore, we’ll ask which is better for mastering Gospel music: Analog or Digital?
And lastly, we’ll create a Gospel master step by step for you to hear (in the video embedded above) - this way you can hear the processing that goes into a Gospel master, and how each step plays a significant role.
If you have a Gospel album that you need to be mastered, but you’d like to test one of your mixes out first, send it to us here:
We’ll master it for you and send you a free sample for you to review.
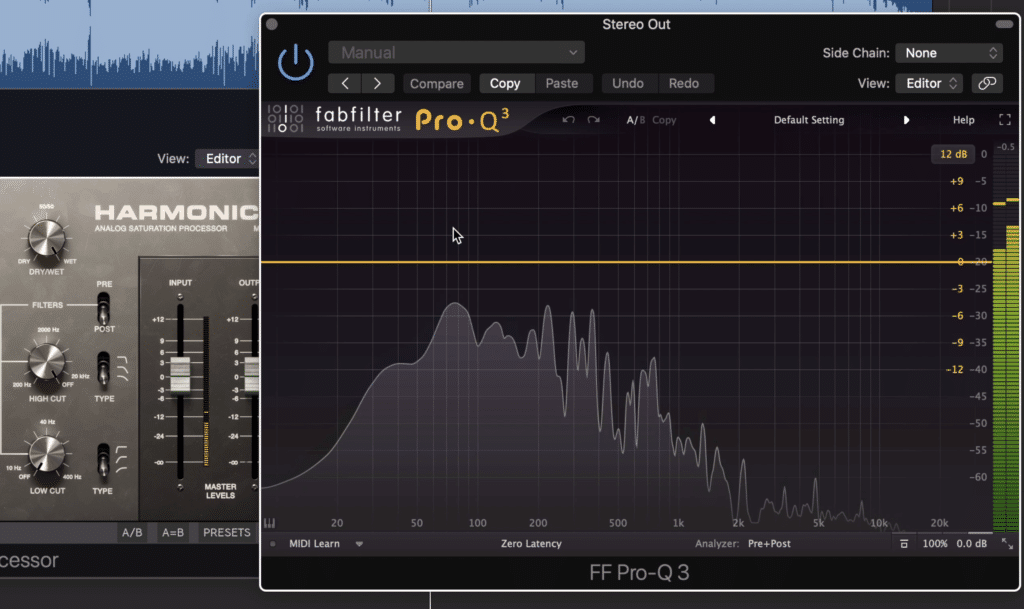
How to Equalize a Gospel Master
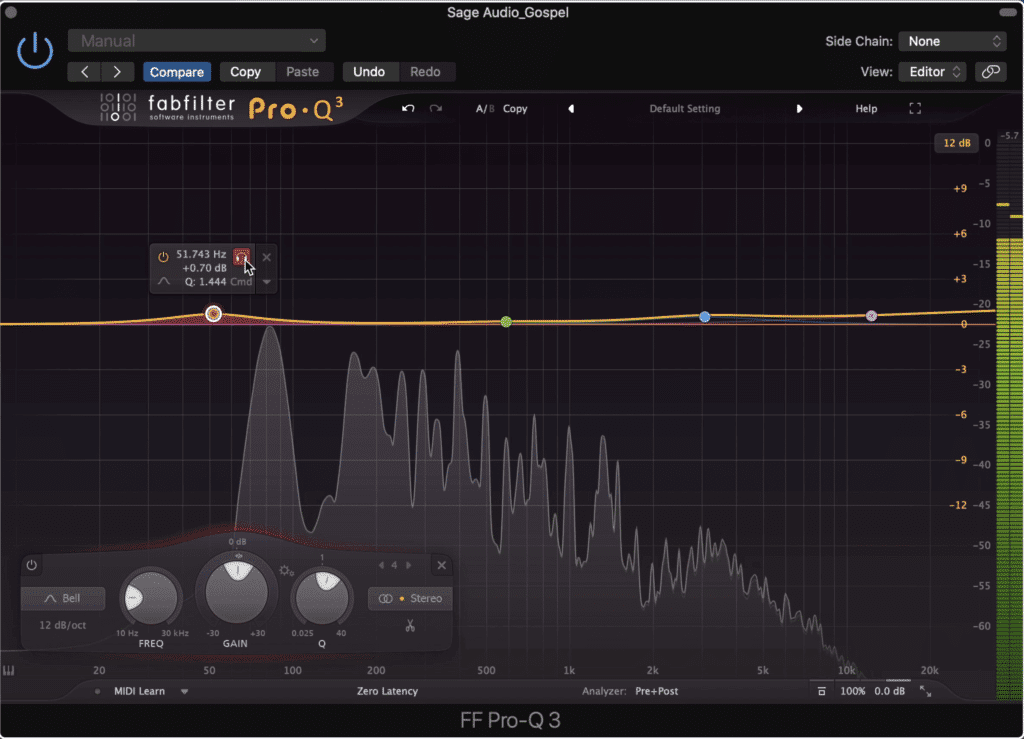
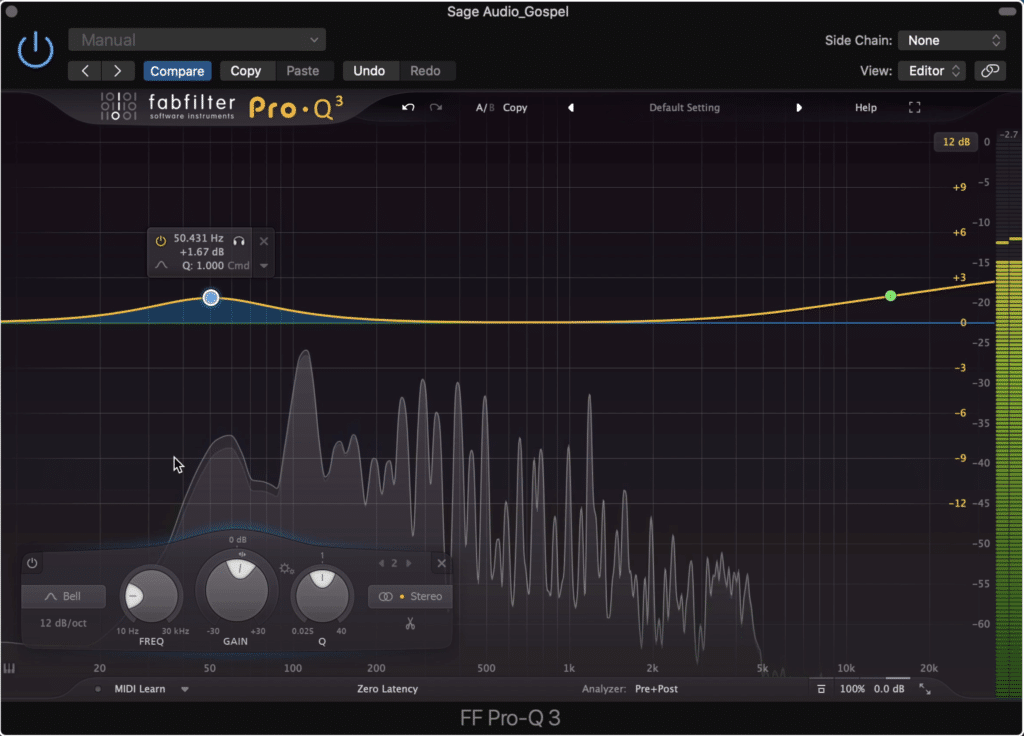
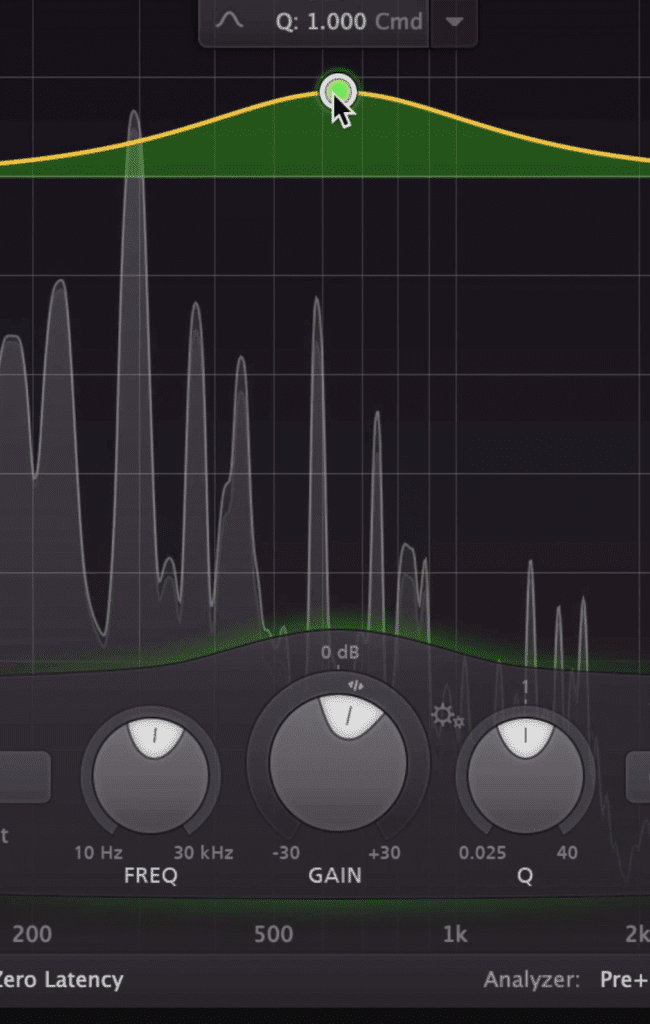
When equalizing a Gospel Master, be sure to introduce minimalistic changes to the frequency spectrum by using a larger bandwidth and only 3dB of total change. Too significant of a change could lead to noticeable and unnatural that doesn’t serve to augment the music or mix.
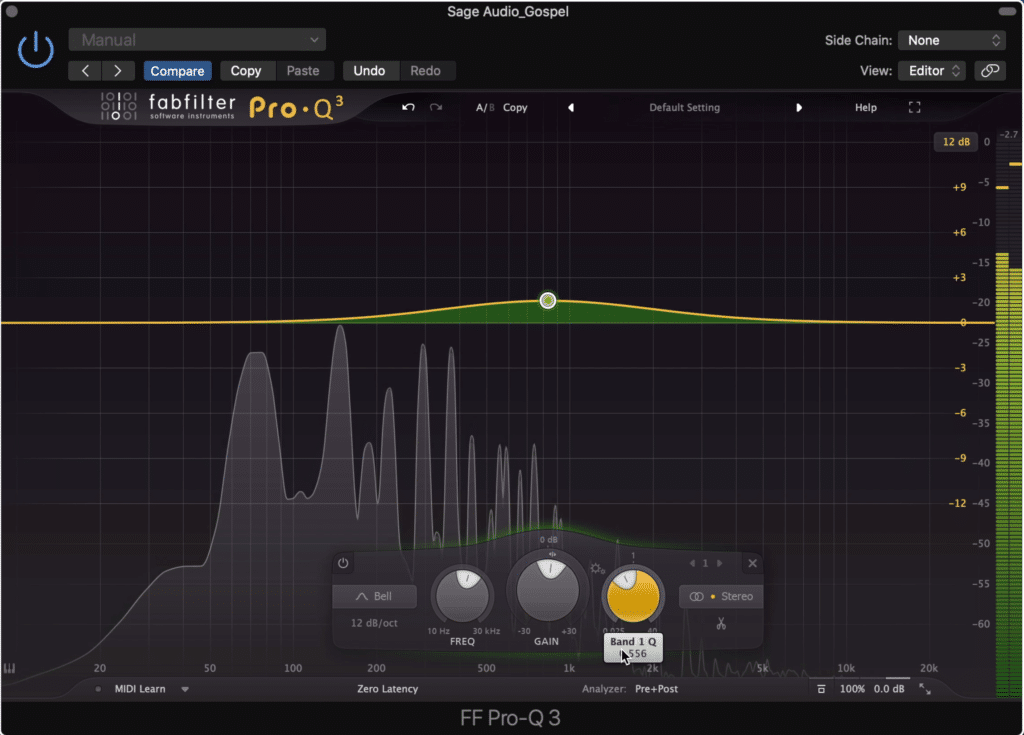
Make your EQ changes sound more natural by using a larger bandwidth, and smaller overall amplitude changes.
When creating your EQ bands, a lower Q/larger bandwidth setting results in a more natural sound - one that’s more indicative of musical changes in composition.
To accomplish this you can set your Q to octave based settings like:
- 1 Octave = 1.414
- 1/2 Octave = 2.87
If you’d like a more fleshed out list of these octave based settings, check out our blog post on the topic:
Or
Both blog posts offer some insight into these settings.
It’s also important to understand when to use additive equalization and subtractive equalization.
Additive equalization is used later on in the signal chain after subtractive equalization has taken out problem frequencies.
Additive equalization is the amplification of various frequency groups, whereas subtractive equalization is the attenuation of various frequency groups.
Typically it is better to start your signal chain with subtractive equalization, and to save additive equalization for later on - after your compression and distortion, but before limiting.
The reason being, it’s best to attenuate certain unwanted frequencies before compression (or the compressor will need to work harder and may become more noticeable) and before distortion or saturation (which may amplify these unwanted frequencies, making it harder to remove them).
Additionally, what you choose to attenuate and amplify may depend on the sub-genre of the Gospel music. For example, a Gospel track that is more indicative or earlier recordings will require a more natural sound.
In this instance, you’ll find that your primary goal will be to establish balance and not to hype up the sound in any way. This will most likely negate the need for high shelf filters that amplify the high-frequency range , or bell filters to bump up the kick and bass.
A bell filter on the kick frequencies and a shelf to amplify the higher frequencies will "hype" up the sound. This may work well in more modern Gospel, but should typically be avoided in more classic iterations of the genre.
But if you’re mastering a more modern Gospel record, one that should sound more in-line with current recordings, then hyping up the sound is more acceptable and expected by listeners.
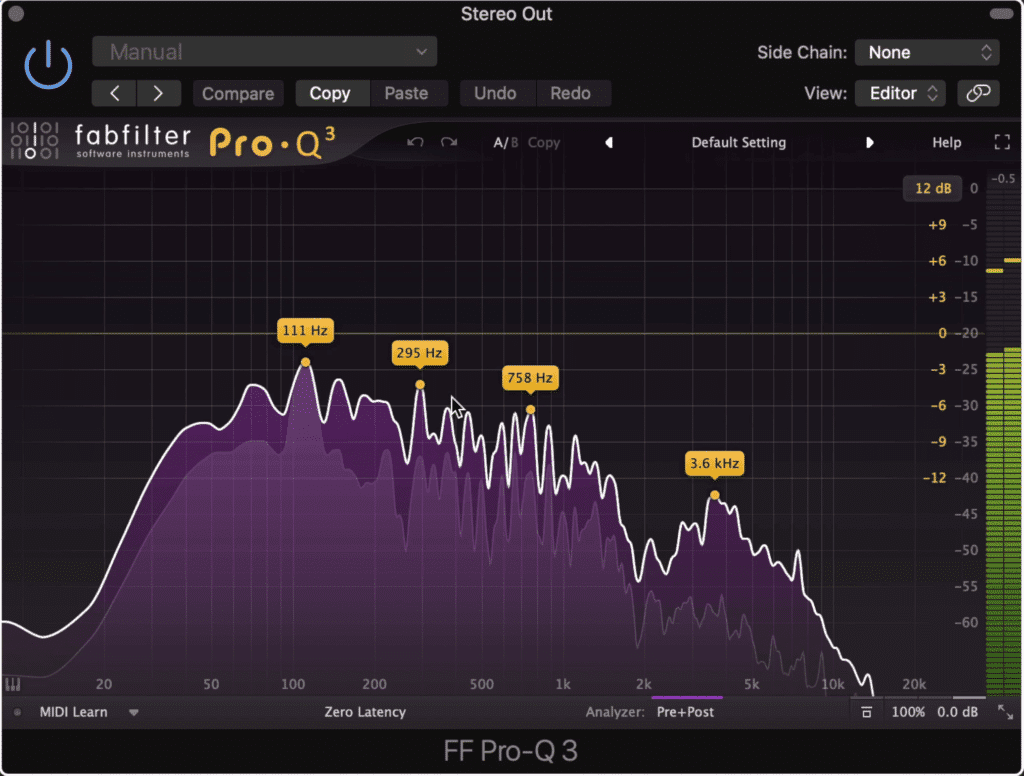
One interesting aspect of equalizing Gospel music is the role of the church acoustics and reverberations.

Church reverberation will affect how you equalize your master.
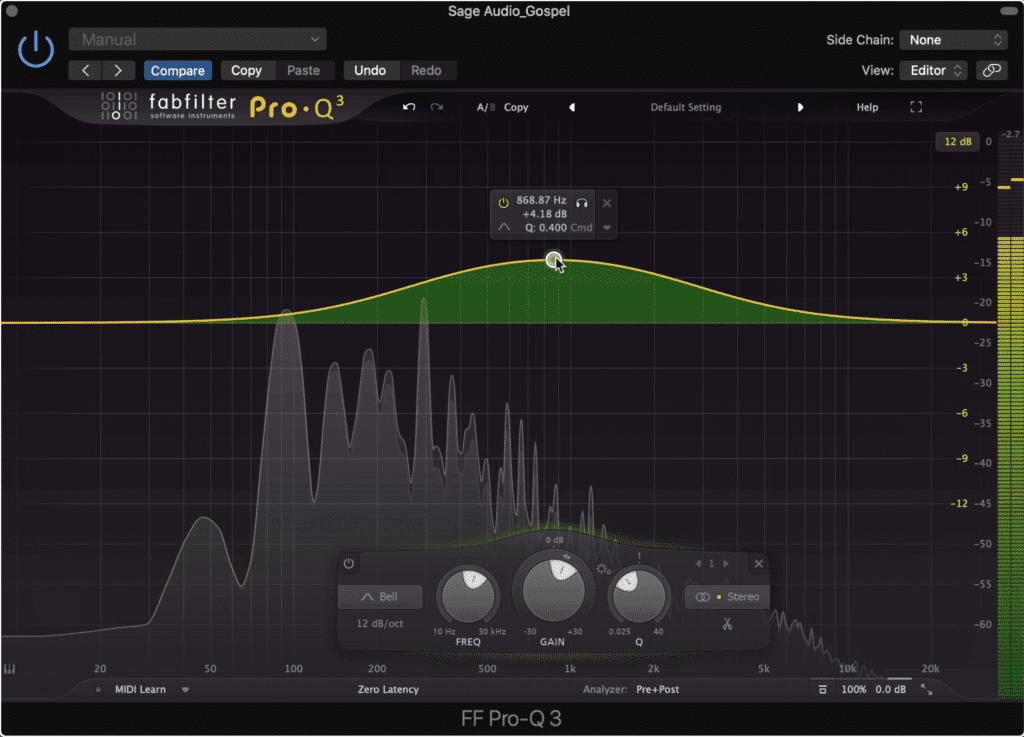
Most churches are designed to optimize the indelibility of speech - this is accomplished by causing the frequencies between 500Hz to 1000Hz to become slightly amplified in comparison to other frequencies.
500Hz to 1000Hz is more prevalent due to church reverb.
Depending on the mix you’ve received or created, you may need to attenuate or amplify this range. If 500Hz - 1000Hz has become too prevalent, it may be best to attenuate it.
If you find that the recording doesn’t sound like other Gospel recordings, try amplifying this area slightly to create a sound more indicative of the medium-sized churches most commonly associated with Gospel choirs.
How to Compress a Gospel Master
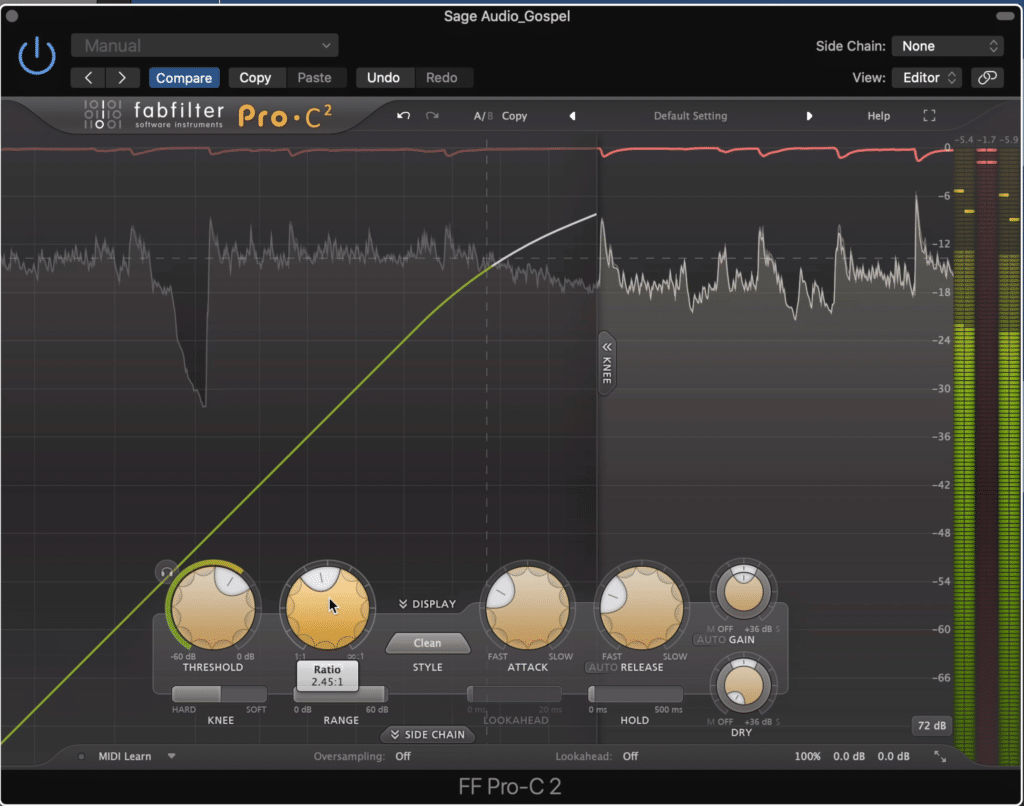
When introducing compression during a Gospel mastering session, it is best to compress in-time with the tempo of the track and to set a release that does not conflict with the reflections of the room in which it was recorded. Additionally, aggressive compression should not be used.
Compression can greatly impact the timbre of your master, and either augment or detract from a natural sound.
First, let’s consider the room acoustics and reflections of a church.
There is no doubt that the reverb created by a church alters the sound of a Gospel record - although this isn’t the only type of reverb used when recording Gospel music, more times than not church room reflections will make their way onto a Gospel record.

Church reverb will also affect how you set your compression settings.
But what does this have to do with compression?
Compression has the power to greatly affect the timing of a recording due to two functions:
Attack & Release
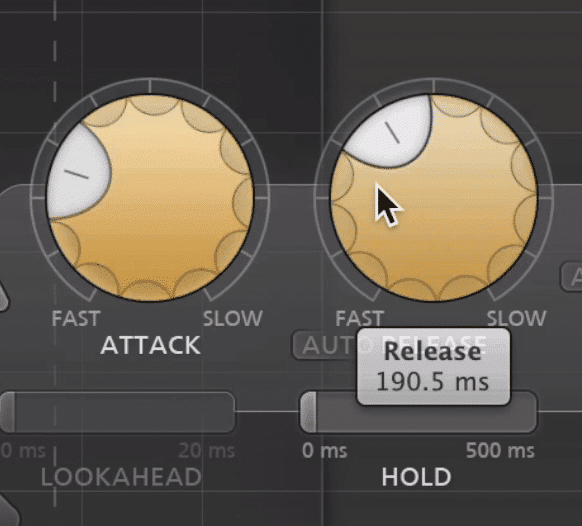
Attack and Release determine how soon a compressor begins to compress, and for how long that compression occurs.
These two functions determine when compression begins and how long it lasts - this means that various aspects of a signal can be compressed and in turn made less perceivable.
To follow this thought, compression has the ability to make the recorded room reflections less perceivable.
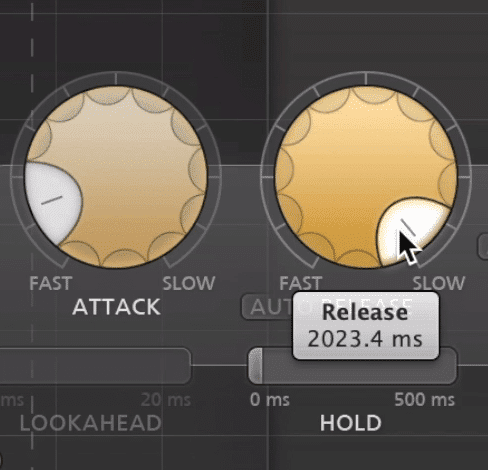
If your release is longer than the reverb time of the church, you will attenuate that reverb tail and create a less natural-sounding image.
This occurs when the release time is great than or set to be right in the middle of the reverb time. For example, if the reverb time of the church in which the track was recorded is 1.5 seconds , and the release time of the compressor is 2 seconds , then the compressor will still be compressing throughout the reverb tail.
This will in turn cause the reverb tail to become attenuated, making it less perceivable and in turn causing the track to sound less natural.
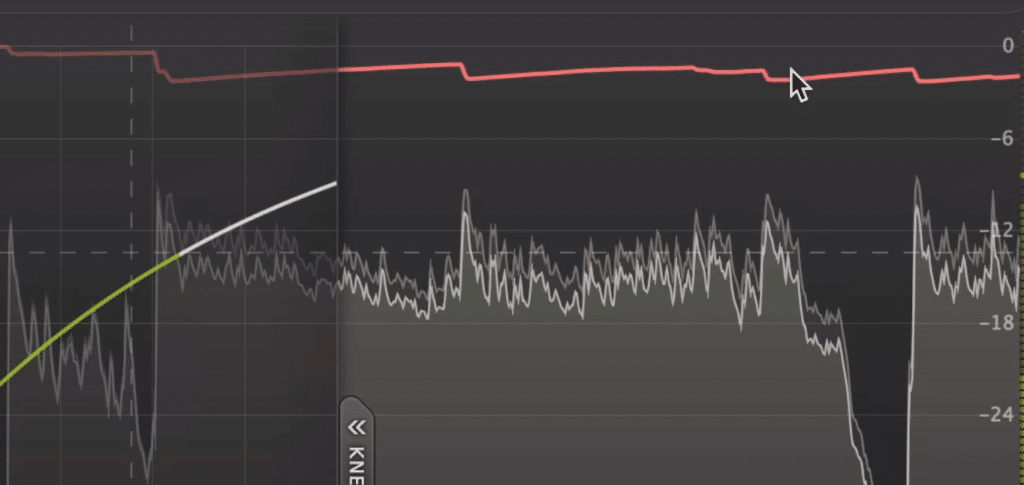
Notice how the longer release time causes the signal to be compressed for a significant duration.
With this in mind, because reverb is such an important part of Gospel music, it’s best not to perform any processing that directly inhibits or interrupts it. So when compressing a Gospel track, use shorter release times to avoid truncating the recording’s reverb tail.
Additionally, using excessive compression is something to avoid. Although dynamics play a role in almost every genre, they play a particularly important role in Gospel music.

A dynamic master helps listeners to feel as if they're in the room with the performance.
Dynamics lead to a more natural sound but also are intended to make the listener feel as If they are in the church with the choir and band. Just like during a church band’s performance, the emotion of the song is conveyed with varying dynamics.
With that in mind, the dynamics of a Gospel master need to be upheld. Compression greater than 3dB should be avoided - additionally, an engineer should seriously consider whether or not additional compression is truly needed at all.
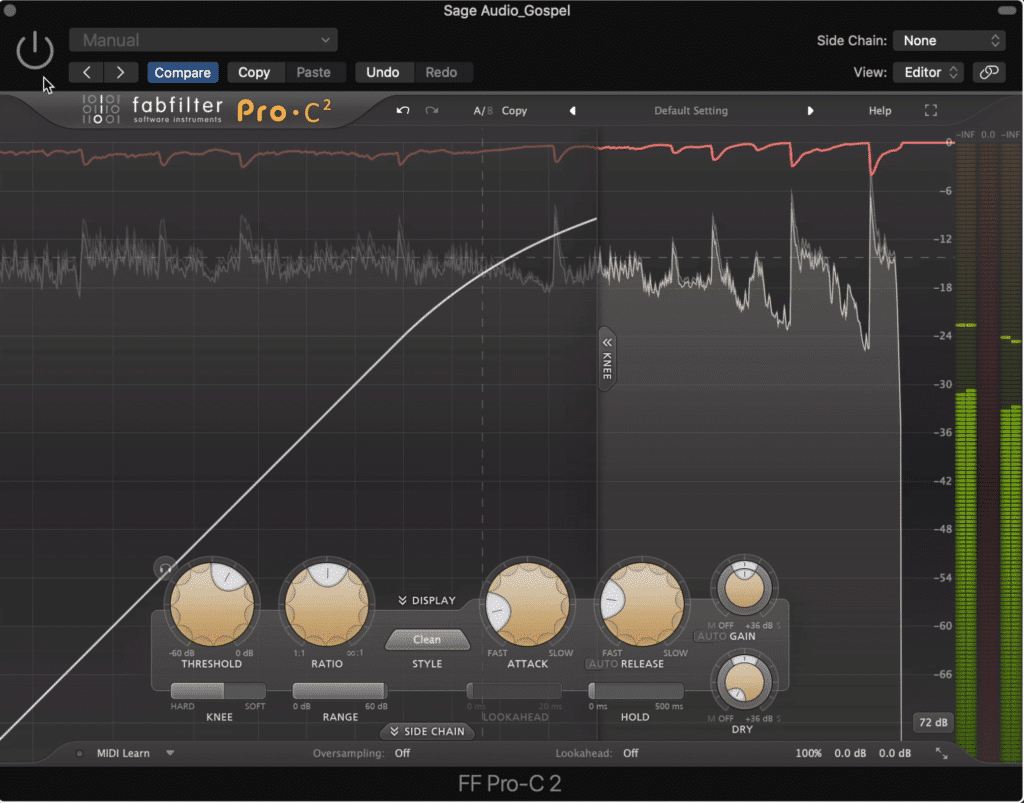
Compression greater than 3dB should be avoided. Furthermore, compression may not be needed at all.
If you’d like to learn more about compression, and some advanced compression techniques used in both mixing and mastering, check out our blog posts and video:
At least one of these techniques will be beneficial for your mixes or masters.
How to Apply Distortion to a Gospel Master
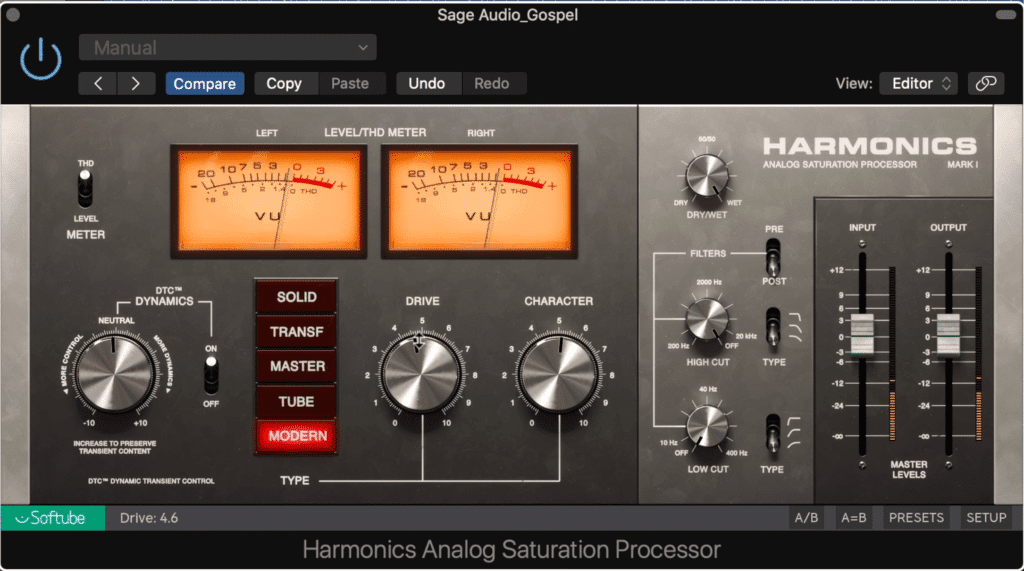
Although distortion typically has a negative connotation to it, distortion in the form of harmonic distortion can be a very beneficial form of processing when mastering. When applying distortion to a Gospel master, it’s important to introduce it mildly with less than 1% total harmonic distortion.
Distortion and saturation play a role in creating a full and complex sound.
When introducing distortion to your Gospel master, you can use either analog equipment or analog emulation plugins. Analog equipment will result in a more complex sound, but the gear is much more expensive than plugins.
With that in mind, if you plan to master your Gospel master yourself, you’ll most likely use analog emulation plugins to create saturation.
Saturation, although often conflated with the term distortion, is in actuality a combination of distortion via harmonic generation and soft-knee compression.
Saturation can take the form of tape, tube, transistor, and other forms of electrical component saturation - each evoking a unique form of harmonic generation and compression settings.

Tubes, transistors, and other electrical components can be saturated - resulting in a unique sound for each type.
What saturation does to the sound of a master is it creates a more full and complex sound. As harmonics are created, gaps in the frequency spectrum are filled.
Additionally, fundamental frequencies are made more prevalent and easily perceived due to the psychoacoustic effect harmonics cause. In other words, any harmonic or frequency related to a fundamental frequency has an additive effect on the fundamental, and can even make us perceive the fundamental when it isn’t even present.
Harmonics created from saturation fill in the gaps of the frequency spectrum.
This harmonic generation is paired with compression, which as you know, attenuates louder peaks and makes a passage more controlled and uniform.
By compressing the sound to limit dynamics, and increasing the permeability of the quieter aspects of the frequency spectrum with harmonics, saturation causes a master to sound louder and more impressive overall.
Saturation also causes compression which when combined with harmonic generation, causes the signal to look and sound more uniform across the spectrum.
Because saturation includes compression, it’s best not to add additional compression to a master when using saturation . Because the dynamics of a Gospel master are so important, excessive saturation should be avoided.
If you’d like to learn more about saturation and how it can be applied during mastering and mix, check out our blog post and video on the topic:
Additionally, if you’re looking for some free saturation plugins, here’s our pick for some of the best free plugins available:
How to Apply Limiting to a Gospel Master
When using limiting on a Gospel Master, how aggressive you limit depends on the sub-genre of the Gospel track or album. If the Gospel master is more indicative of a classic Gospel sound, then it’s best to use less limiting - if it sounds more modern, more limiting is acceptable.
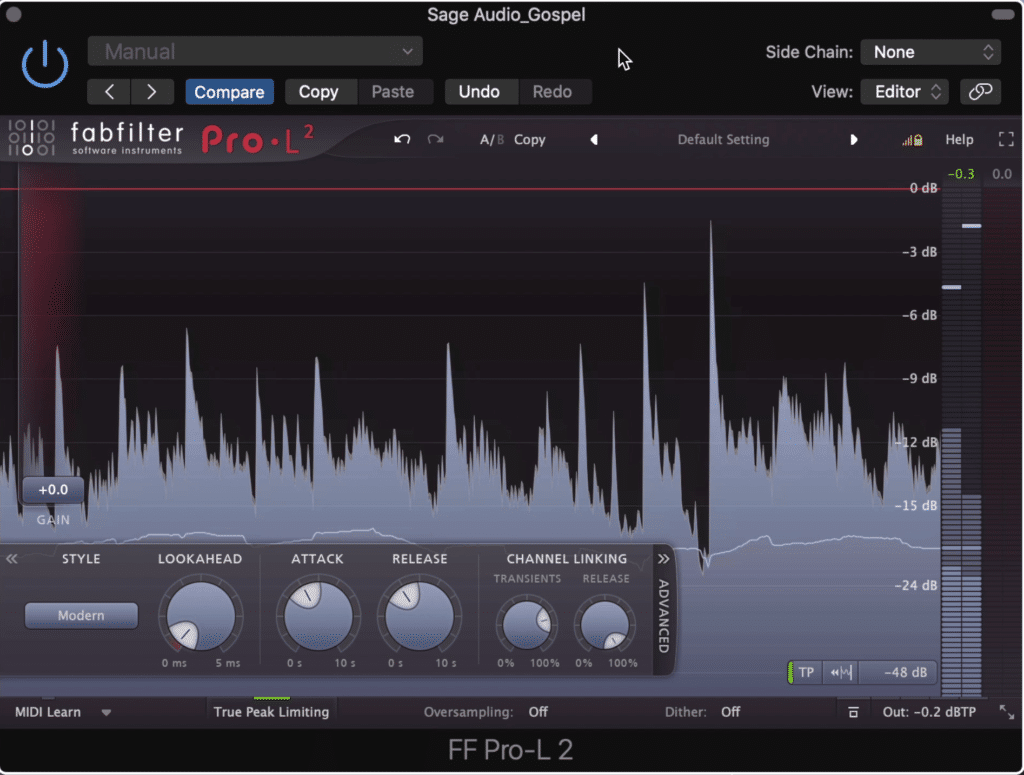
Limiting should be used sparingly in a Gospel mastering session.
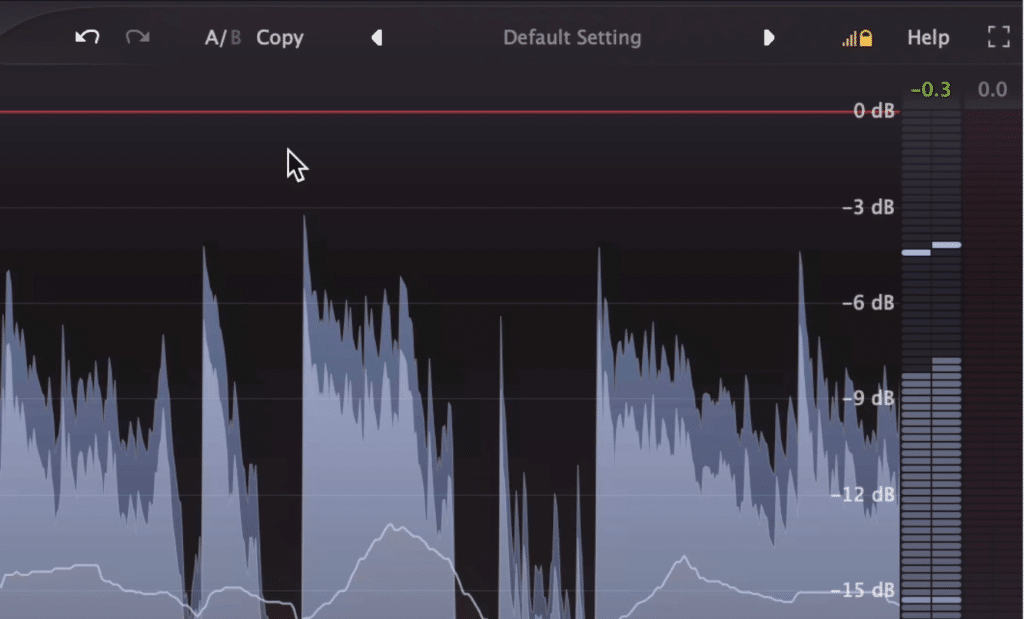
When listening to classic Gospel records, you may notice that they’re quieter than most. Although most classic recordings are by their nature quieter, it seems that classic Gospel music (even remastered classic Gospel music) rarely utilizes aggressive limiting.

When listening to Gospel music you may notice that it's quieter but more dynamic than other genres.
In fact, many classic Gospel masters never come close to peaking. The reason being, and we’ve considered this before, dynamics are incredibly important in the Gospel genre.
Dynamics are crucial in Gospel music and should be upheld as much as possible.
When it comes to more modern sounding Gospel records, gentle to mild limiting has become a more common occurrence when mastering the genre. When mastering modern Gospel music, try not to attenuate your signal by more than 3dB.
Ideally, the dynamics of the master can be controlled enough with compression and saturation to avoid the need for brick-wall limiting, but this may not always be a possibility.
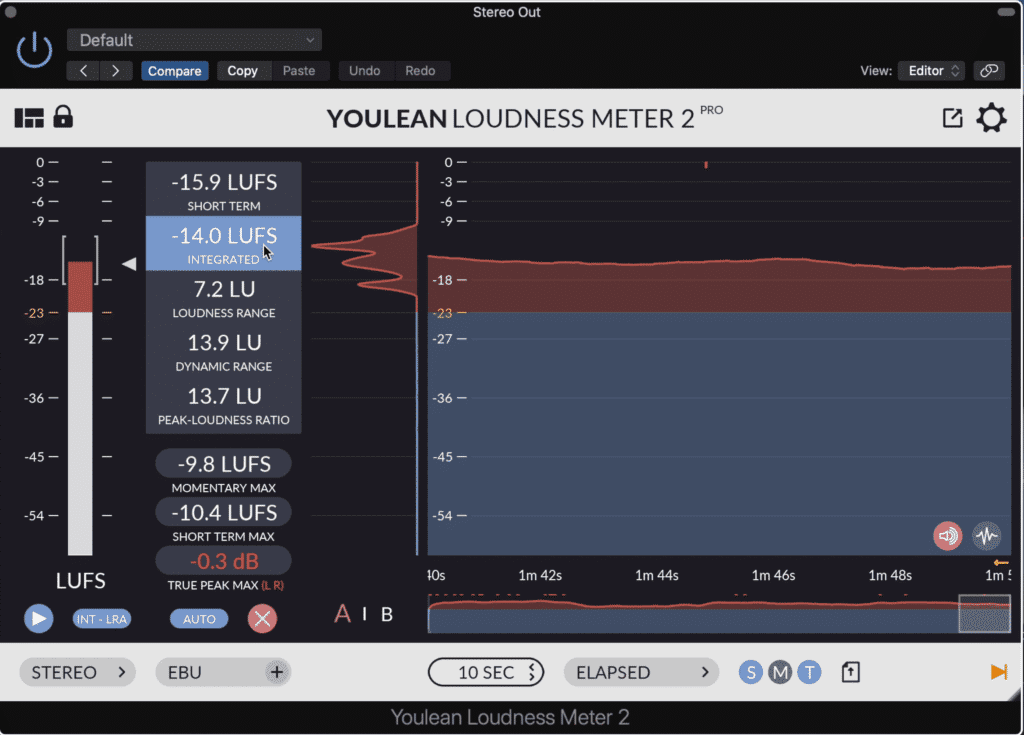
An integrated LUFS of -20 to -14 works well for Gospel music.
When mastering a Gospel album, an integrated LUFS from -20 to -14 is acceptable , with -20 LUFS being a more appropriate level for classic Gospel, and -14 LUFS being more suitable for modern Gospel masters.
How to Apply Low-Level Compression to a Gospel Master
Low-level compression and parallel compression can be utilized when mastering Gospel music to create a more dynamically controlled and full-sounding master. Parallel compression or low-level compression are great alternatives to typical compression and heavily limiting, as both control dynamics without creating unwanted artifacts.
Low-level compression is a form of processing that instead of attenuating dynamics like typical compression, amplifies quieter aspects of the signal.
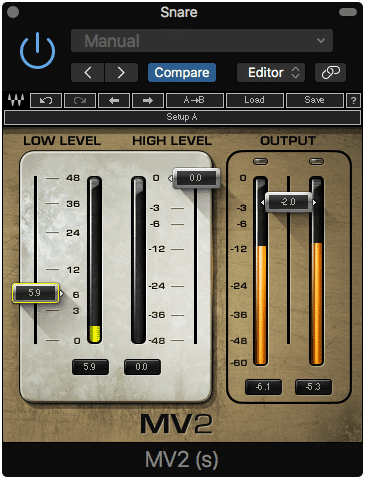
The MV2 is a useful low-level compression plugin.
A low-level compressor is essentially an expander that finds quieter parts of a recording, compresses it, and then amplifies it. This often increases the level of small harmonic distortions and other details , making for a more complex sounding recording or master.
In many ways, parallel compression accomplishes this same process. By drastically compressing the signal, and then amplifying it, parallel compression causes low-level information to become more easily perceived.
Furthermore, parallel compression performed with an analog emulation compressor imparts small distortions and harmonics onto the signal, causing the sound to become even more detailed.
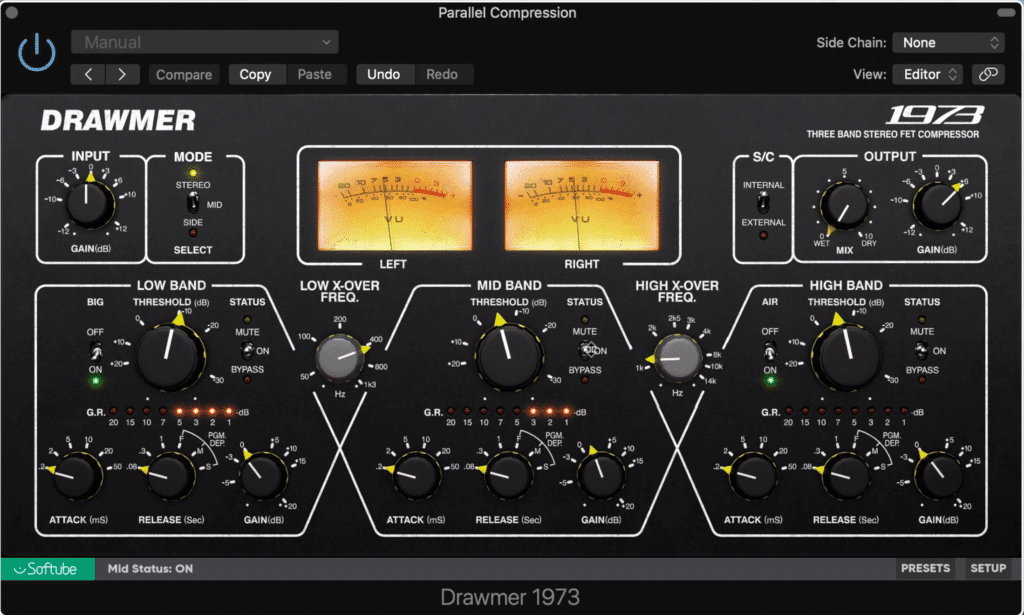
Parallel compression has a similar effect to low-level compression.
When it comes to mastering Gospel music, parallel compression and low-level compression should be utilized to make a master more detailed , and amplify quieter aspects like room acoustics and reverberations.
If you’d like to learn more about parallel compression, check out our blog post and video on it here:
What’s Better for a Gospel Master: Analog or Digital Processing?
When mastering a Gospel album, both digital and analog processing can be used to create a great sounding final product; however, the sound of analog processing is more indicative of Gospel records. Being a genre heavily rooted in a classic sound, analog processing is often the better choice.
Although analog emulation plugins can be used to recreate the sound of classic analog equipment, these plugins do not sound the exact same as the hardware they emulate.

Analog processing is more nuanced than analog emulation via digital processing. For a classic and more complex sound, try analog mastering for your Gospel track.
The reason being, coding all of the nuances that analog equipment imparts on a signal cannot be done.
Typically, analog emulation plugins can recreate the effects of compression and harmonic generation in a uniform fashion, or in other words, in a way that treats all frequencies in a similar way.
However, analog equipment affects the signal unique depending on the frequency, amplitude, transient response or ADSR of a signal, and many other factors.
In short, analog equipment creates a more nuanced and detailed sound, one that more closely evokes a sense of a classic recording . Again, because Gospel music is heavily rooted in these classic recordings, analog processing when mastering is an important step in creating a Gospel sound.
If you’d like to hear your Gospel mix mastered using solely analog equipment, send it to us here:
We’ll master it for you and send you a sample for you to review.
Conclusion
When mastering Gospel music, an engineer needs to consider the sub-genre of the recording. Once that is understood, the rest of the mastering process can be determined.
You either plan on creating a more dynamic and classic sound, or you plan to create a more modern sound indicative of current r&b and soul recordings.
Regardless of the sub-genre or modernity of the recording, one thing that always plays a huge role in Gospel productions is church reverb - so be sure that your processing only serves to augment the mix’s room acoustics.
If you’d like to hear your Gospel track mastered, send it to us here:
We’ll master it for you and send you a free sample to review.
Have you ever mastered a Gospel Album?


