What is Headroom for Mastering?
Quick Answer
Headroom for Mastering is the amount of space (in dB) a mixing engineer will leave for a mastering engineer to properly process and alter an audio signal. Typically, leaving 3 - 6dB of headroom will be enough room for a mastering engineer to master a track.
What is Headroom for Mastering in Detail
Although headroom isn’t the most exciting aspect of tracking, mixing, or mastering, it is an important part of the audio production process. That said, understanding what it means as well as some of the different measurements associated with it is helpful for any engineer.
I’ll be the first to admit , headroom, and the technical aspects associated with it (i.e. how it relates to dynamics, the different measurement types, how dynamics and headroom relate to the medium a track is released on, etc.) makes for a bit of a boring read. But, this knowledge is needed to create mixes and masters in the correct way.
There are definitely a lot of numbers floating around when it comes to ‘How much headroom should I leave for mastering,” with some engineer’s claiming that no headroom is needed, so long as the track isn’t clipping; however, there is definitely a need to explore this topic further, and to better understand mastering in general.
Establishing headroom is an incredibly important part of preparing a mix for mastering.
Here, we’ll cover some different measurement types, as well as consider the claim that “so long as it doesn’t peak, then there’s enough headroom.”
Additionally, we’ll establish a standard for the amount of headroom needed for mastering, as well as explain why this is and what factors come in to play when determining this number.
Furthermore, we’ll explore some of the negative ramifications of not leaving enough headroom, how it might delay your master being completed, and some ways that mastering engineers can work around a track without enough headroom.
Lastly, we’ll consider another aspect of audio production that ties in heavily with headroom - dynamics.
If you have a mix that you’re preparing to get mastered, send it to us here:
We’ll master it for you and send you a free sample for you to review.
What Measurement Type Should I Use for Headroom?
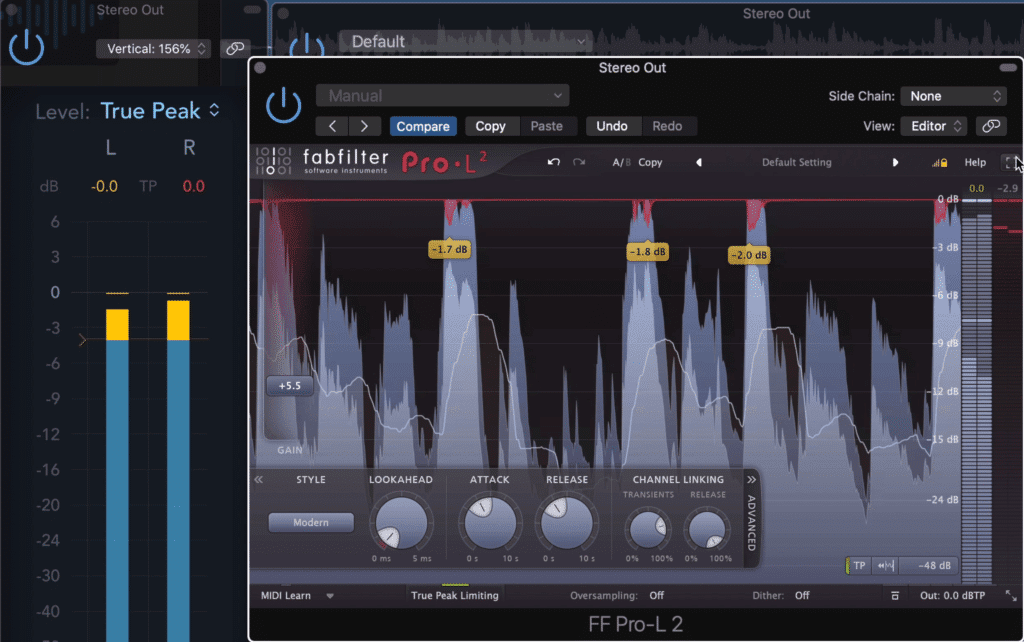
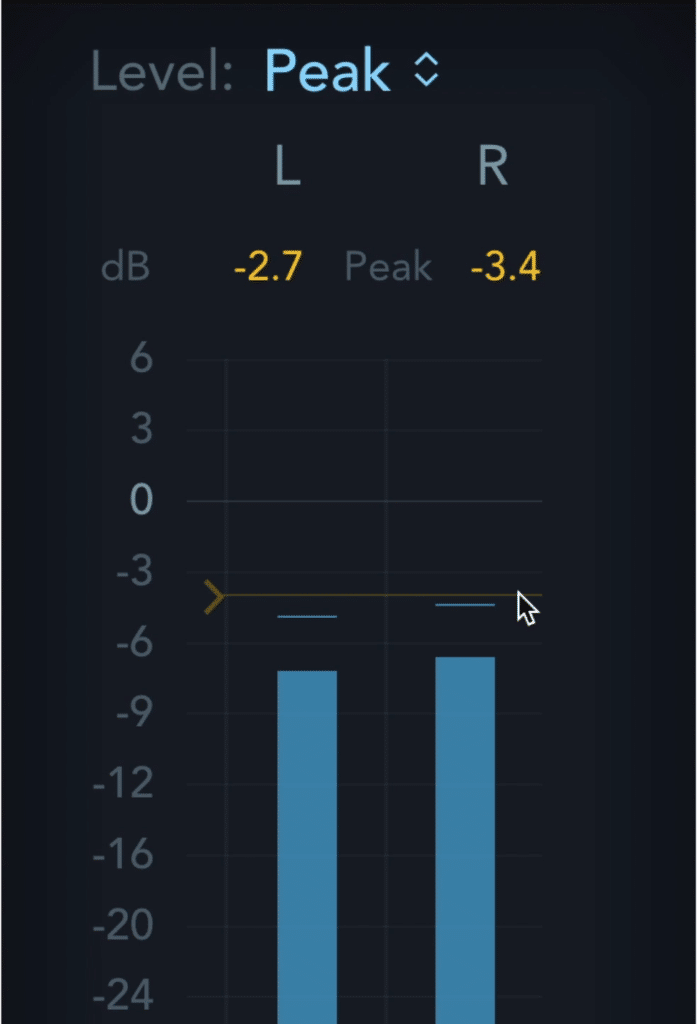
Typically, when someone requests a certain amount of headroom for a master, the measurement they’re using is dBTP or dB True Peak. Headroom is the distance between the loudest peak in your signal (represented as a negative number, ex. -4.2dB), and 0dB, or the absolute peak in digital audio.
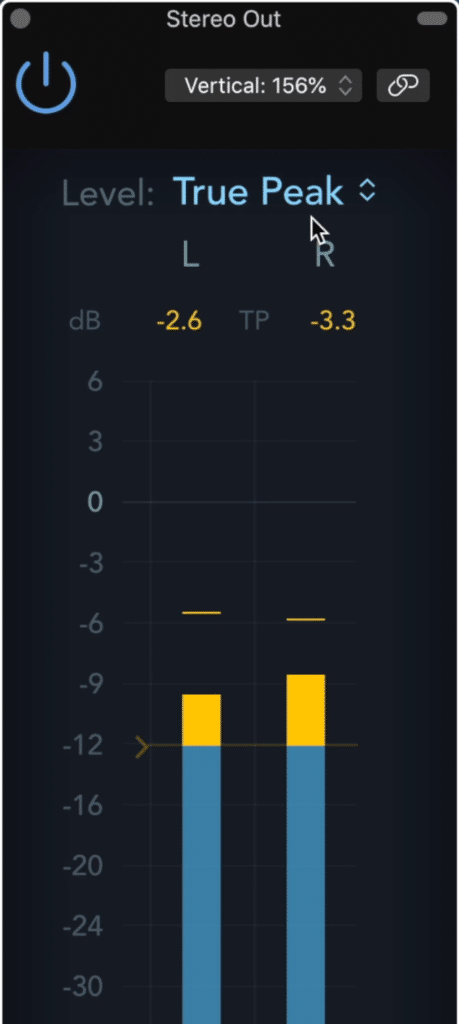
dB True Peak is the best form of measurement to use when determining your headroom.
dBTP is a measurement that considers not just the peak of your signal, but the inter-sample peak. In other words, this measurement takes into account the amplitude of your signal between digital samples in your audio signal.
dBTP measures the amplitude of a signal in between the samples, known as the inter-sample peaks.
Using this measurement type is important for a couple of reasons:
It gives you the most accurate depiction of the amplitude of your track

Space in-between samples can cause clipping as well. Its best to now when that level has been hit.
Inter-sample clipping distortion can occur in mixes if they're loud enough, even if a regular peak meter isn’t showing clipping.
There can be inter-sampling clipping even when regular peak meters don't show clipping.
Why Not Use RMS when Determining Headroom?
Although RMS is a great form of measurement suited for a lot of applications, finding the average volume of your track via an RMS measurement doesn’t account for potential peaking or “overs.” The RMS value will often be resented as a much lower number than dBTP and doesn’t represent peaking.
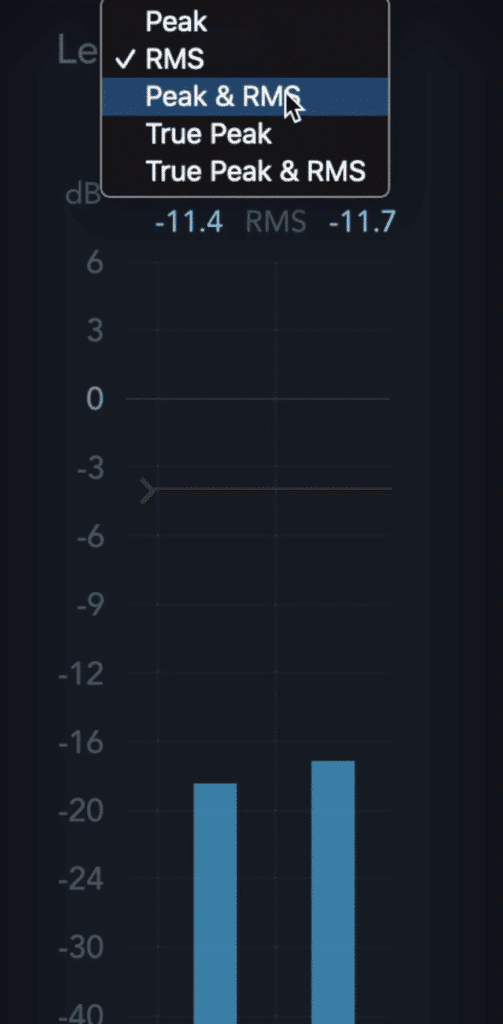
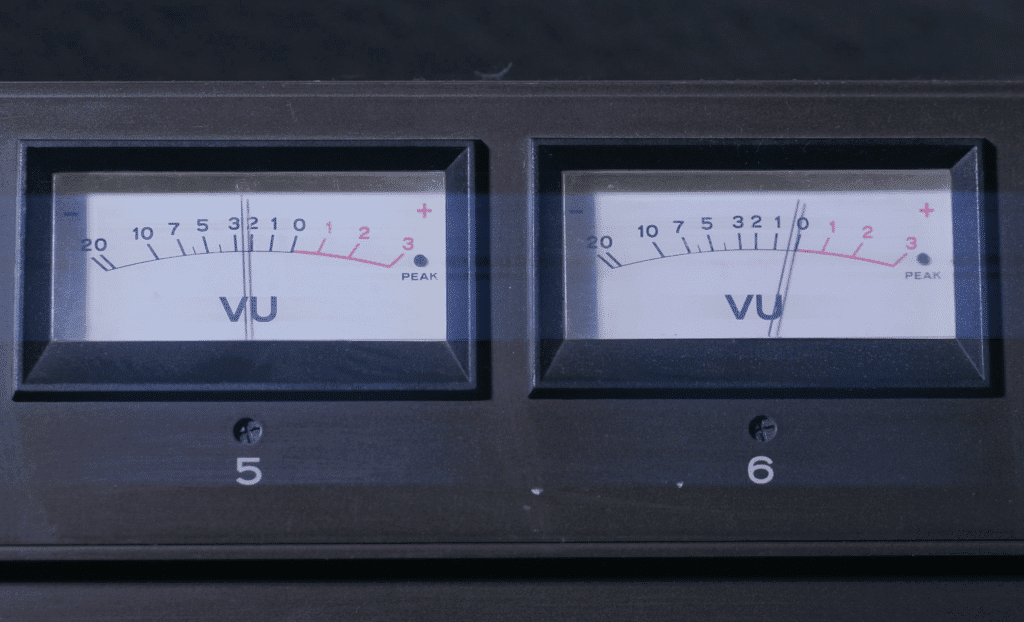
RMS measures the average volume of the track, but not the peaks.
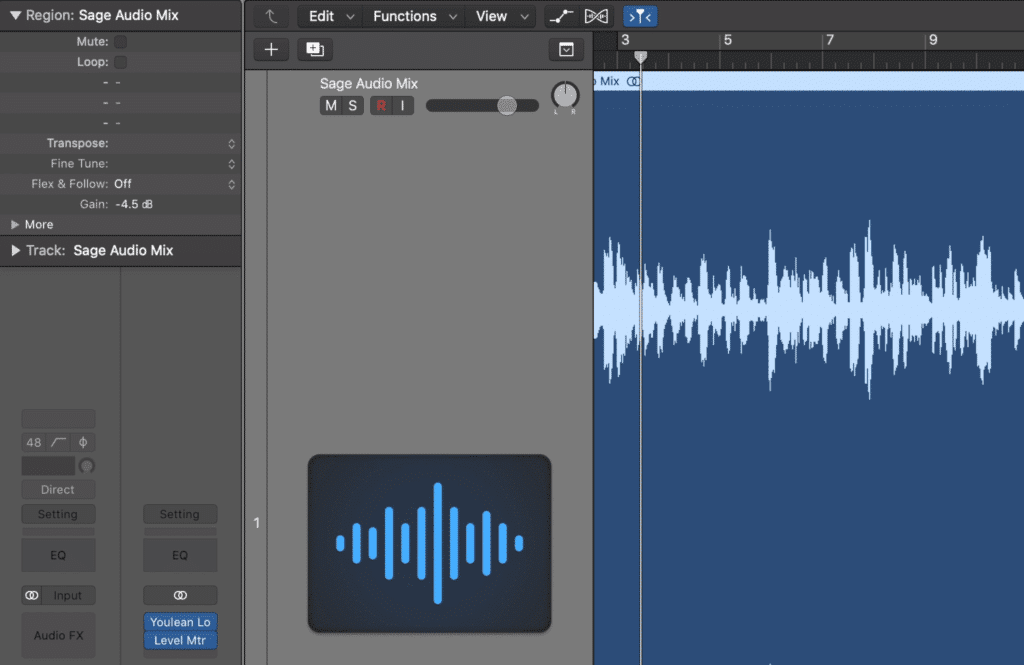
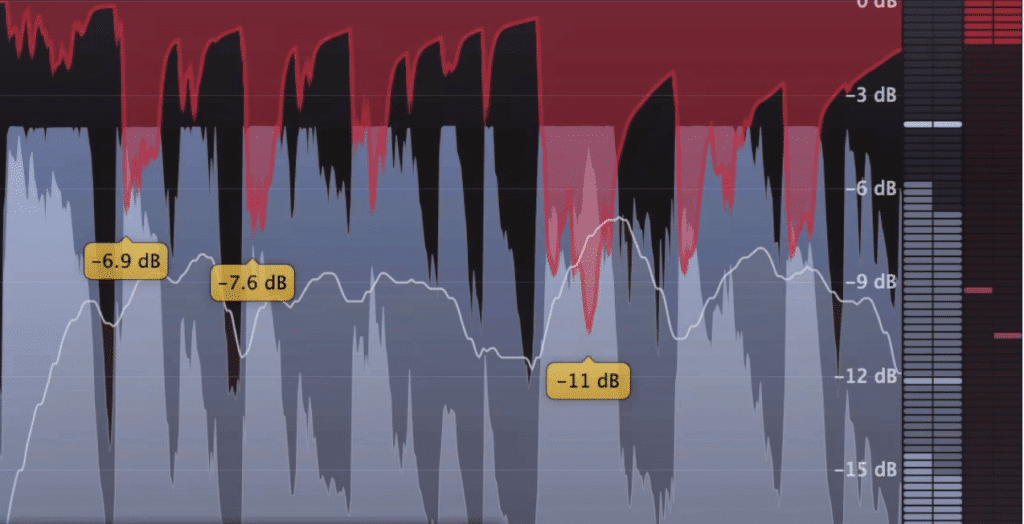
RMS is best suited for finding the average loudness of a track, which can be helpful when mixing and mastering. Additionally, you can compare the RMS level of your track with the peak of your track to get a good idea of what the dynamic range is.

Notice that the peak value is much higher than the RMS value.
But when it comes to determining the amount of headroom for a master, it’s best to use dBTP.
Why 0db is Not Enough Headroom for a Master
It has been claimed that so long as there is no clipping occurring, then 0dB is enough headroom for a mastering session. The idea being that so long as clipping distortion isn’t present, a master can be turned down and then processed at that lower volume.
It's been said that 0dB is enough headroom to send a mastering engineer, if clipping isn't occurring.
Although there is a solid argument for why this may be, the truth is 0db is not enough room for a mastering session to take place. There are some rare occasions in which a mastering engineer could alter the track without any issues, but these would be few and far between.
If a track's signal approaches 0dB, it'll most likely clip at some point.
The reason being, it’s highly likely that a master with this amount of headroom includes clipping and an unwanted brick-wall limiter.
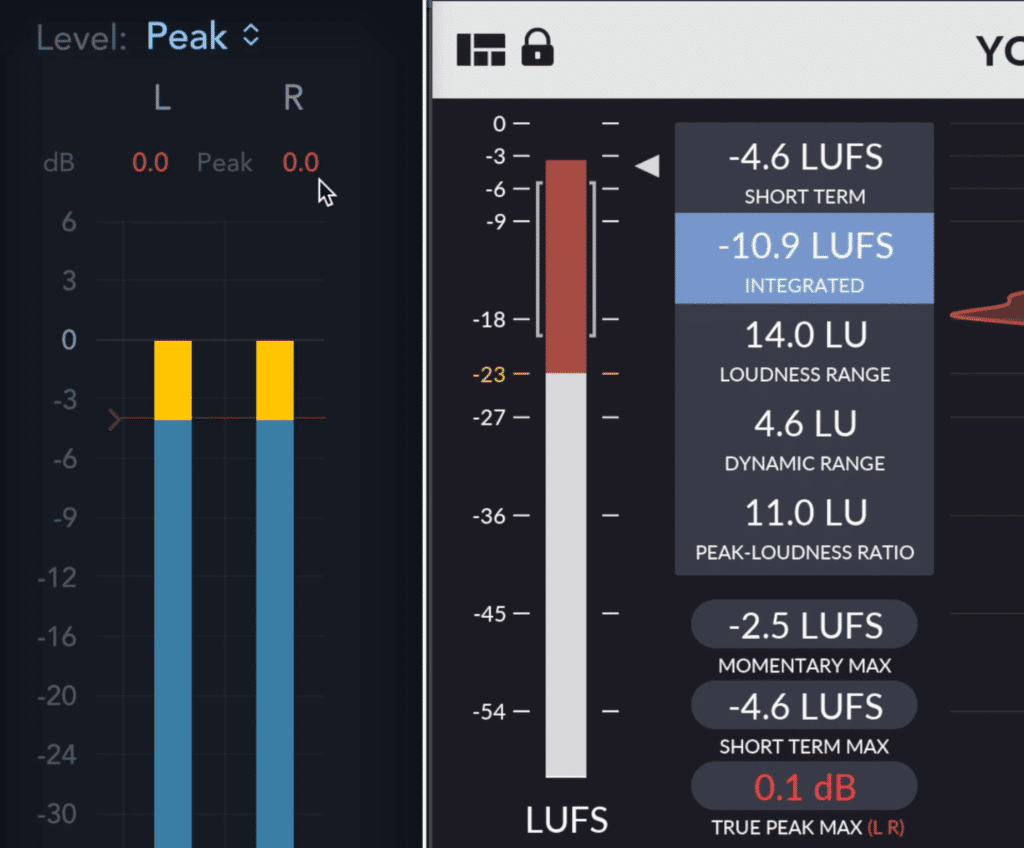
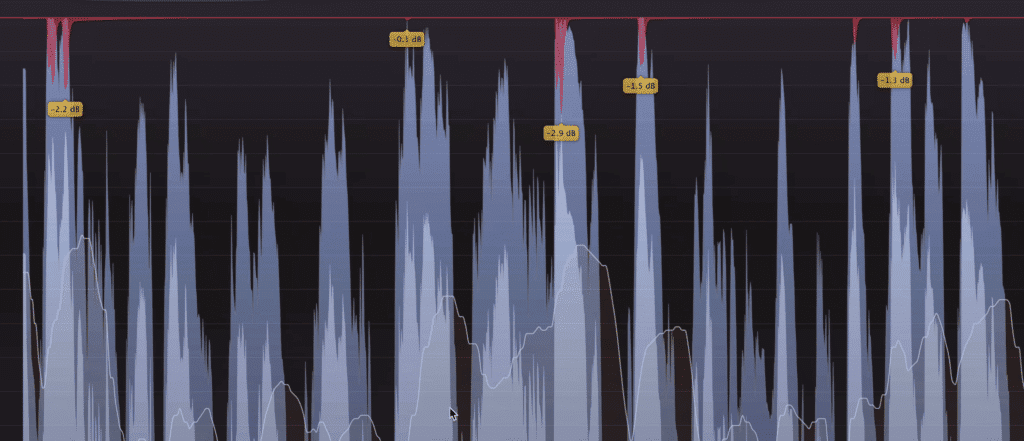
The odds are, if your track is peaking at 0.0dB, then you have inter-sample peaking. This causes mild, but unwanted clipping distortion.
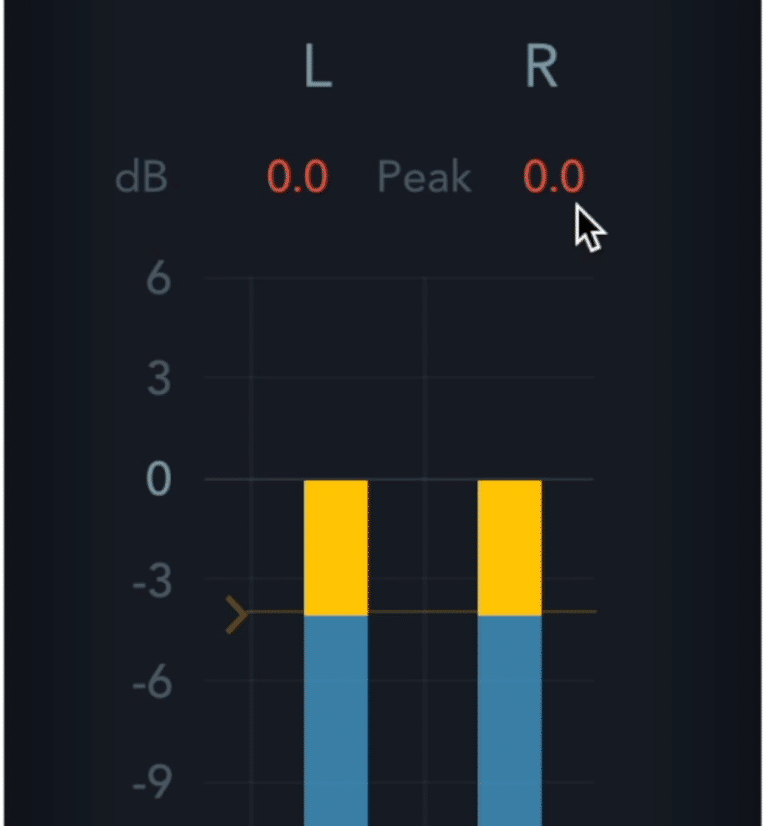
If you're setting your mix's highest level to 0dB, odds are you have inter-sample clipping distortion.
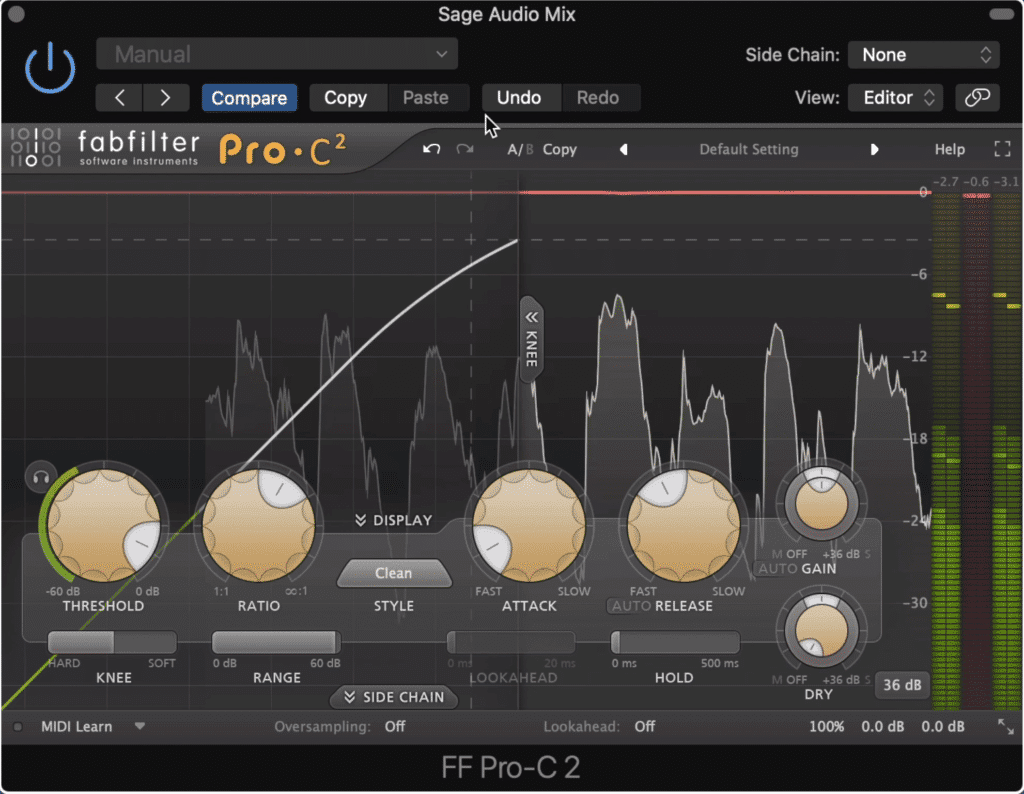
Additionally, it’s difficult to have your track peak at exactly 0dB without the help of a limiter. But, if a limiter is being used on the master output of a mix, then transients are being attenuated via a brick wall ceiling.
If a track is peaking at exactly 0dB, odds are it has a limiter on the master output.
For many mastering engineers, this would be a highly undesirable trait for a mix to have, as it would hinder their processing and result in a subpar overall sound.
When using a limiter, unwanted transient attenuation will take place.
If you’d like to learn more about mastering, check out our blog post on the topic:
It offers a compressive look at mastering, the types of processing it includes, and how you can go about mastering music.
How Much Headroom Should I Leave for Mastering?
Although the exact figure is up for debate, a good range for the amount of headroom to leave a mastering engineer is 3dB to 6dB. With this range established, you’ll give a mastering engineer enough room to perform their processing while ensuring that no clipping distortion occurs.
Use 3dB to 6dB of headroom, measured in dBTP.
When determining how much headroom to leave for a mastering engineer, it’s best to consider a couple of factors:
- How Loud you Want your Master to Be
- What Medium Your Track is Being Mastered For
If you want to have a louder master, odds are more compression will be needed to achieve higher levels of loudness. This will, in turn, reduce the dynamic range of a mix.
As a result, the peak of a mix can be higher (roughly -3dB) since the dynamic range will be more controlled. This means that the additional processing a mastering engineer will add to a mix is less likely to push the peaks into clipping.
Perhaps a better way to think about this is that the less dynamic a mix is, the higher it’s max peak can be without hindering a mastering engineer in some way.
If you want your master to be quieter, odds are it will have a greater dynamic range due to less overall compression. When this is the case, give a mastering engineer more room to work by lowering the max peak to roughly -6dB is a good idea.
What about the Medium a Track is being mastered for?
When it comes to the medium your track will be mastered for, the technical limitations of that medium will affect both the maximum overall loudness and the dynamic range - which in turn affects the max peak value (more on this in the section titled ‘How Do Dynamics Relate to Headroom?’).

Other mediums will affect the appropriate amount of headroom.
For example, a mix made for a vinyl record cannot be excessively dynamic, or more accurately, cannot have excessive spikes in volume. If this does happen, the needle of consumer-grade record players will likely be kicked out of the record’s groove.
Considering these peaks directly tie into headroom, you’ll need to keep an eye out for them as you establish the proper levels for mastering.
If you’d like to learn more about how Vinyl records affect the mixing and mastering process, check out our blog post on the topic:
It demonstrates the effect the vinyl record’s technical limitations have on audio production.
Another example of this phenomenon is when creating a mix that will eventually be streamed on Spotify. In this instance, a highly dynamic mix or master will be an issue when it becomes normalized.

Loudness normalization will affect the dynamics of your mix and may employ a limiter for mixes that are too dynamic.
In other words, if you have excessive peaks in a mix or master that’s intended for streaming, these peaks will eventually be truncated during loudness normalization. This is another reason to keep peaks in mind when establishing the headroom of your mix.
If you’d like to learn more about loudness normalization, and the effect it has on mixing and mastering, check out our blog post on the topic:
In it, you’ll find information on what levels are best suited for streaming services.
What Happens if I Don’t Leave Enough Headroom for Mastering?
If a track doesn't have enough headroom for a mastering session to take place then a mastering engineer can simply turn it down using clean gain reduction; however, this is not ideal. Ideally, the mix will have the proper amount of headroom for a mastering session.
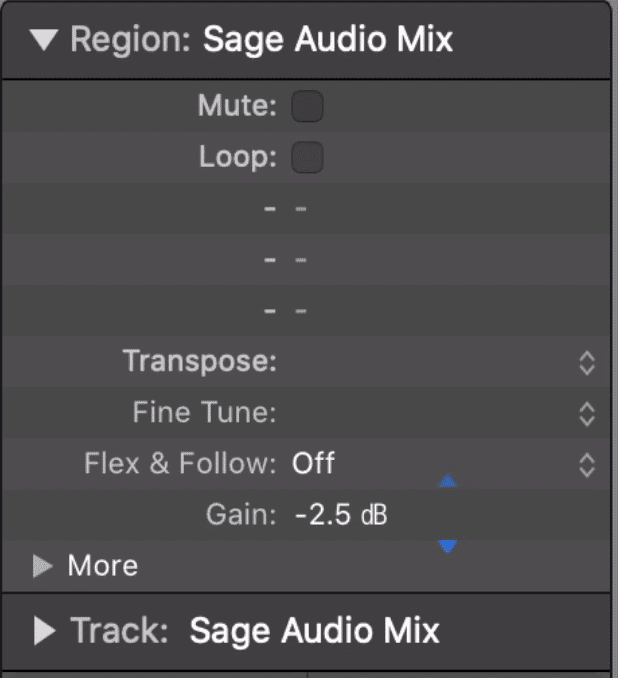
A mix can be turned down with clean gain reduction.
Besides the obvious reason of it being more convenient for the workflow of a mastering engineer, there is one lesser-known technical reason why it’s better to have the correct amount of headroom from the beginning.
When a mastering engineer needs to digitally reduce the gain of a track to perform their mastering, they’re in turn using less of the available bit-depth of that recording.
Turning down the gain of a mix means less of the available bit-depth is being used.
Without getting too into the technical semantics of bit-depth, the bit-depth of a recording determines the potential dynamic range of a track, as well as the accuracy with which samples can be assigned an amplitude.

By reducing the number of bits used, you're increasing quantization distortion.
When you reduce the amplitude of a mix in order to master it you don’t reduce the bit-depth, but you do reduce the number of bits being used. This can introduce quantization distortion (not significant distortion, but distortion nonetheless).
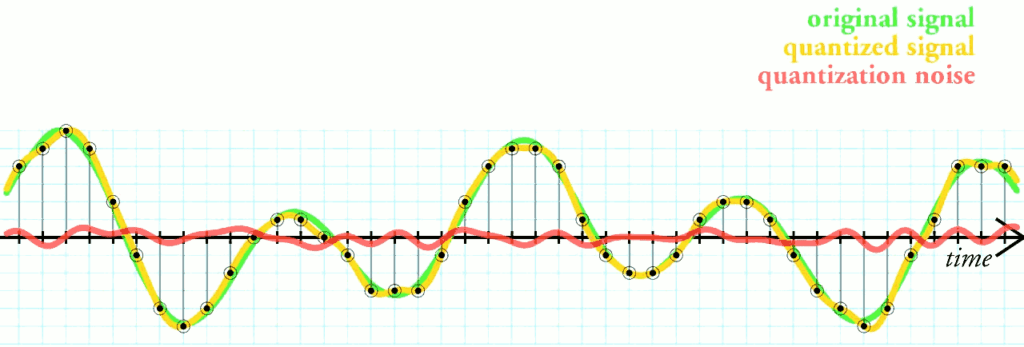
Quantization noise is the difference between the original signal and the quantized signal.
Granted, this is not an incredibly significant issue, but these small things do add up to what can be a noticeable effect on the quality of your master.
The bigger issue is when limiters are used on a mix in order to create headroom.
Sometimes, as a quick fix to creating an impressive mix, engineers will use a brick wall limiter - in this instance, they’ll increase the gain of the mix and reduce the ceiling in order to create a loud mix with headroom.
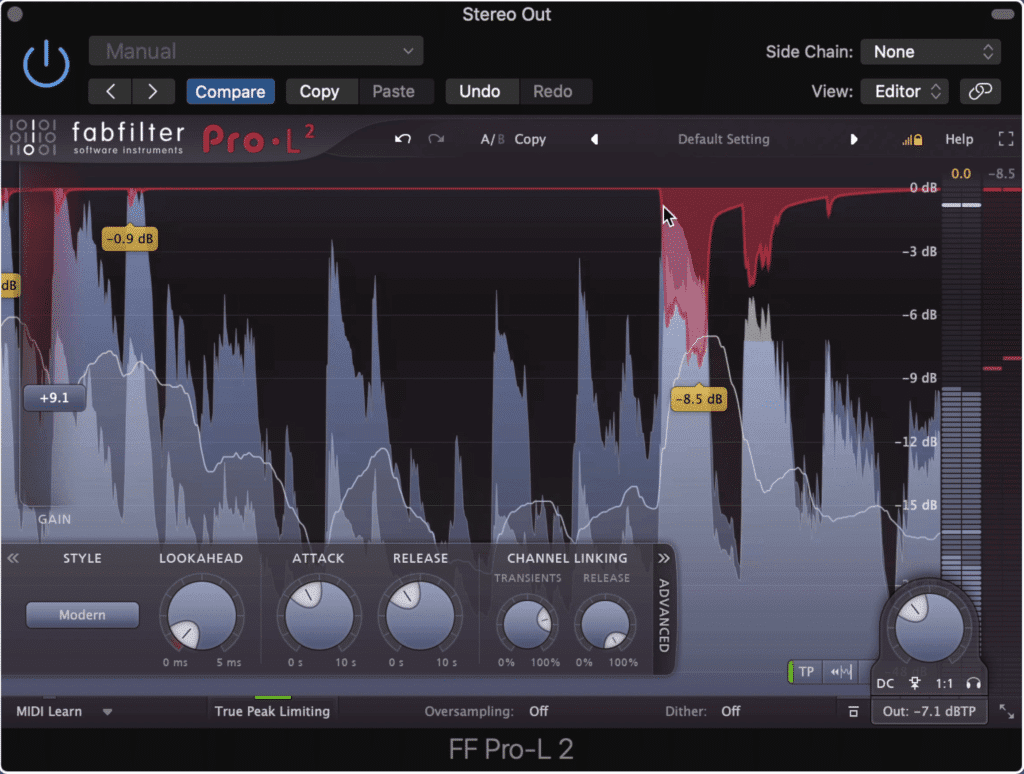
Limiters should not be used to pump up a mix.
But as we’ve briefly discussed before, using a brick wall limiter means truncating your transients and reducing your dynamic range - both of these things are not ideal.
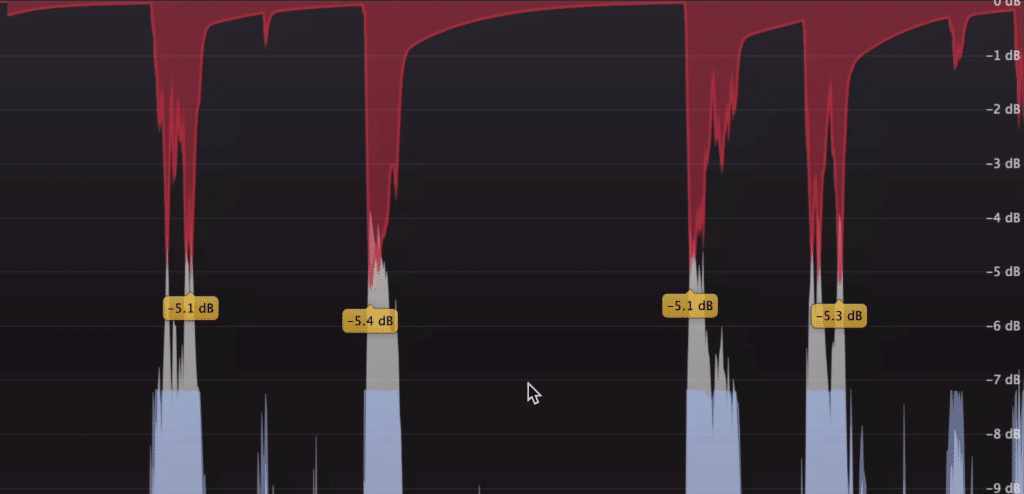
Limiters will truncate your dynamic range and affect the timbre of your mix's transients.
Instead of using a limiter to establish a powerful mix that has headroom, take the more arduous but better sounding routing and apply compression where needed. Essentially, never use a limiter as a means to truncate your dynamics when mixing.
If you're trying to control your dynamics, it's better to use compression throughout your mix.
This brings us to our next point - headroom and dynamics are closely related and relevant when preparing a mix for the mastering process.
How Do Dynamics Relate to Headroom?
The headroom of a mix exists only in relation to the maximum peak value of the signal - in other words, the room for the loudest peak to 0dB is your headroom. Your dynamic range is the room from your quietest peak to your loudest peak.
Dynamics and headroom are both defined by the loudest peak of a signal.
This means that the two, Dynamics and Headroom, are inherently tied together. What they share is that they are both defined by the loudest peak of a signal.
You can also define your dynamic range as the distance between your RMS level and your loudest peak, but still, the loudest peak is a defining factor.
With that said, if your track is quieter and has a low dynamic range then you’ll have a lot of headroom. If your track is loud and has a low dynamic range , you will have less headroom due to the louder overall level of the signal.
But why is this important?
Although a decent amount of headroom is important, what’s just as important is the dynamic range of your track.
You can still have headroom with little dynamics. Dynamics are just as important as headroom.
For example, if your loudest peak is -4dB, but you only have 1dB of headroom, a mastering engineer is going to need to work incredibly hard and in a creative way to restore the missing dynamics in your mix.
In this example, although there is a decent amount of headroom, the dynamic range or lack thereof is a much more important issue.
A mix can be too dynamic.
The opposite of this particular problem can also present an issue for mastering engineers - that is, a mix that is too dynamic.
If your mix is too dynamic, it most likely has a loud maximum peak to establish this dynamic range. With that in mind, a fair amount of compression will be needed to tame any extreme or excessive peaks in a signal.
When a mix is too dynamic, more compression will be needed during mastering.
When this occurs, compression will become noticeable causing unwanted artifacts from that compression. All this to say, that too dynamic of a mix can become just of big a problem as a mix without dynamics.
If you want to hear one your mixes mastered with an emphasis on the dynamic range, send it to us here:
We’ll master it for you and send you a free sample for you to review.
Conclusion
Headroom is a seemingly simple yet ultimately complex topic. When considering headroom and what it means for mastering, an engineer needs to think about:
- The dynamic range
- The maximum peak, or dBTP of a signal
- The average level, or RMS level of the signal
- The intended medium of distribution
- The desired loudness of the master
All of these aspects either directly or indirectly relate to establishing headroom for mastering - understanding these aspects means understanding how loud a signal should be prior to the mastering process.
If you’d prefer not to consider all of these aspects, it’s still best to follow some simple guidelines for ensuring your mix has enough headroom for a master.
Leave at least 3 to 6dB of headroom - in other words, have your signal’s max peak be between -6dBTP to -3dBTP.
Ensure that you have a significant dynamic range if you intend to have a quieter master, or a moderate dynamic range if you intend to have a louder master.
Never use brick wall limiting, as it truncates dynamics and can cause unwanted distortion. Additionally, limiting can cause a tonality that isn’t beneficial for the tonality of a master.
In short, using limiting during the mixing stage should be avoided.
If you have a mix that you would like mastered, send it to us here:
We’ll master it for you and send you a free mastered sample for you to review. This way you can determine if your mix is ready for mastering, or if some additional changes need to be made first.
How much headroom do you leave for mastering when you mix?


