Top 5 Free Synth Instrument Plugins
5. Mono/Fury - Full Bucket Music
4. Cheese Machine 2 - 2getheraudio
3. Noisetar - NUSofting
2. Ragnarok - Full Bucket Music
1. Push - Sampleson
A good sounding synth can be hard to come by. Sometimes they have too particular of a sound that doesn’t exactly match the genre you’re creating.
Sometimes they’re too awkward to control, making finding the right sound difficult. Whatever the case may be, having a synth that you like and want to use regularly is an important thing for any engineer, artist, or producer.
With that in mind, we sought to create a list of free synths that you can use and try out for yourself.

Finding a good and free synth is an important task for engineers.
Some of these synths are a little similar, but each offers unique tonalities, interfaces, and general purposes. Hopefully, at least one of these synths will make their way into your collection and into the music that you create.
In this list, we have 5 unique synths. We’ll cover their functionality, consider how they’d most likely be used in a composition, and listen to examples of each (in the video embedded above).
In these examples, we’ll cycle through some of the presets to get a good idea of the range of sounds the plugin can create.
If you’ve been working on a composition or track, and it's ready to be mastered, send it to us here:
We’ll master it for you and send you a free mastered sample for you to review
5. Mono/Fury - Full Bucket Music
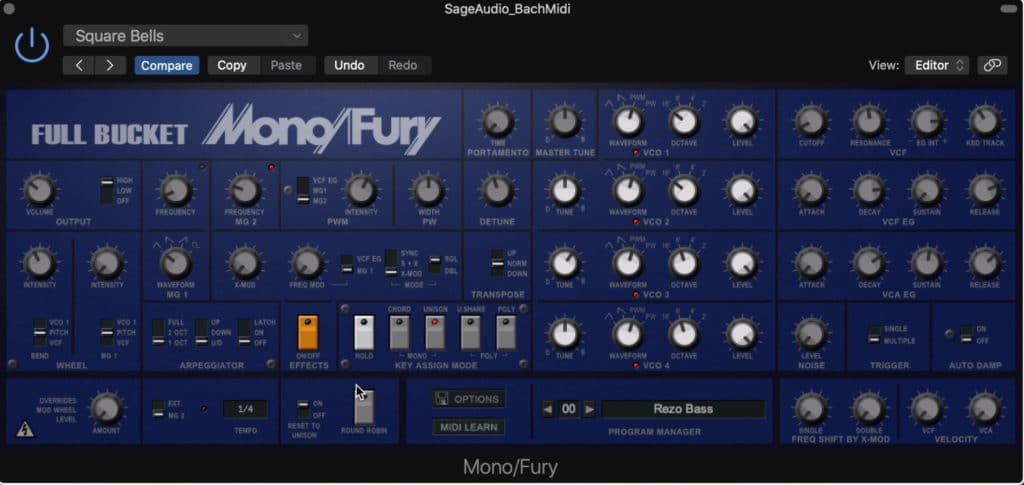
Mono/Fury is an analog emulation of a Mono/Poly Synth.
Full Bucket music makes a lot of great synth plugins, all in the same classic style that’s showcased in this plugin.
The tone the Mono/Fury creates is undeniably analog, as it evokes the sense of the 1980s Mono/Poly synth that it’s based on.
First, the Mono/Fury has 4 VCOs or Voltage Controlled Oscillators. With these rotaries you can switch their waveform types between triangle, sawtooth, pulse with modulated and fixed widths.
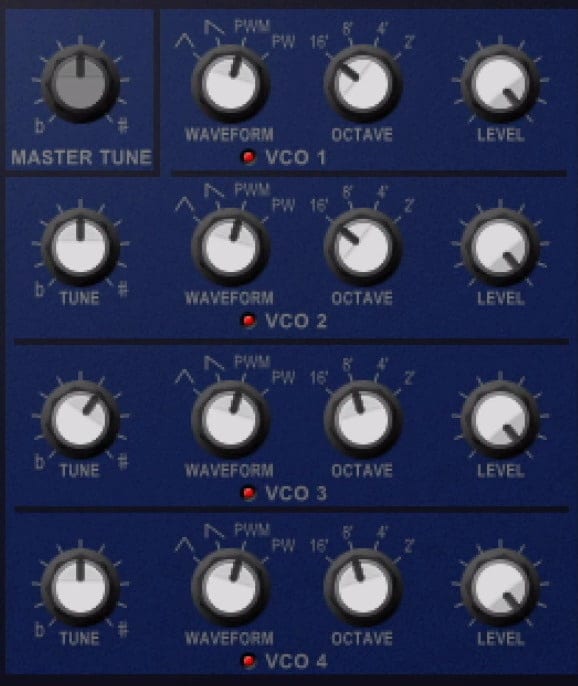
In the VCO section you can alter the oscillation
The VCO’s can also have their octaves changed between 4 settings. For 3 of these VCO’s, you can also change the pitch.
To the right, you’ll notice Voltage Controlled Filters and Envelope Generators, that drastically alter the sound of your VCOs. In short they introduce resonance and lowpass filters, as well as some additionally changes to the frequency response.

The VCF and VCF EG allows you to alter the envelope.
You’ll find more of these filters in the bottom right section, except these filters directly respond to the midi’s velocity.
In the top middle, you’ll notice two functions that work in tandem with one another - the Portamento and Master tune . These two functions create pitch bends and establish the time between these pitch bends.
Although there’s a lot more to cover with this synth, let’s focus on two more important ones, the Effects and Key Assign section, and the MG 1 modulation section.
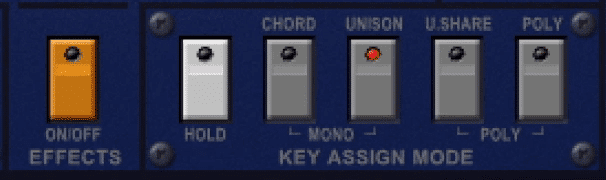
The Ket Assign section alters how the VCOs interpret and divide midi data.
First, the Effects and Key Assign section determines how your VCOs react to midi data.
In "unison mode" all VCOs play at the same time. When "unison share" is selected they all play if one note is played, but divide the notes when more are played. In Poly mode, each note is played by a different VCO. This setting offers the most unique sound, as each note has a unique tonality.
In the MG-1 section , you can create additional modulation for the entire signal. These are created based on the wave type, x-mod which affects the intensity of the modulation, and the frequency of the modulation which can be synced to the tempo.
Lastly, there’s a simple output section that offers one dial for the volume, as well as a dim switch.
If you’re looking for additional free plugins, check out one of our other blog posts on the topic:
It details 7 drum plugins in the same way these synths are being detailed.
4. Cheese Machine 2 - 2getheraudio
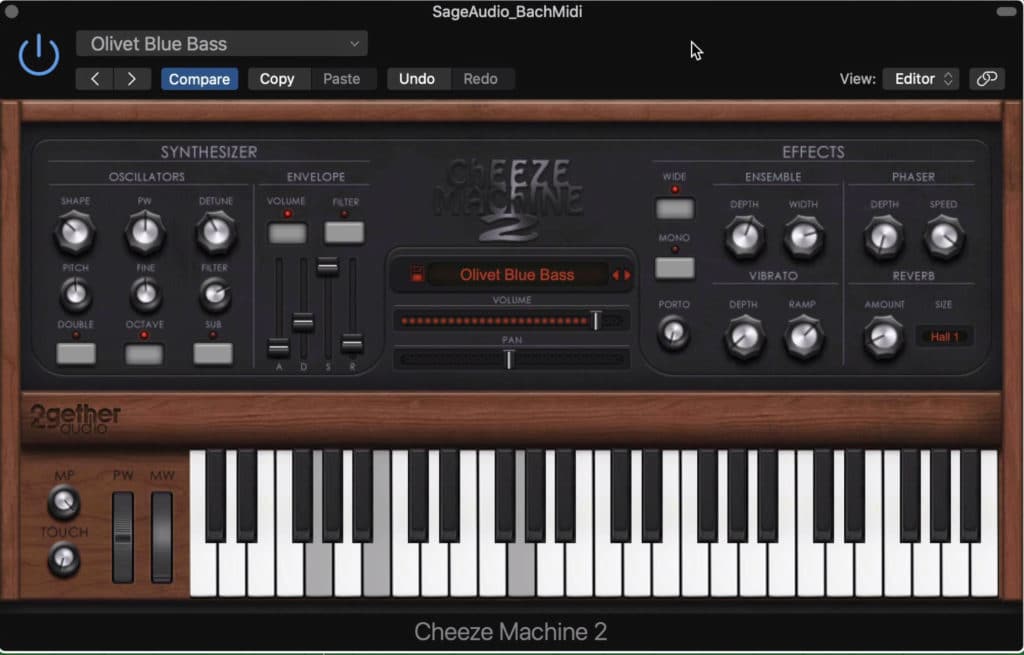
The Cheeze Machine 2 is a simple yet powerful synth plugin
If you’re looking for a synth with a classic sound, but with a simpler interface and more intuitive design,the Cheese Machine 2 is a great straightforward option.
On the left, in the Oscillator section, you have various functions with which you can affect your oscillators.
You can change the wave shape , the pitch, pulse width, fine-tuning, the detune, and resonance filter with these 6 rotaries.
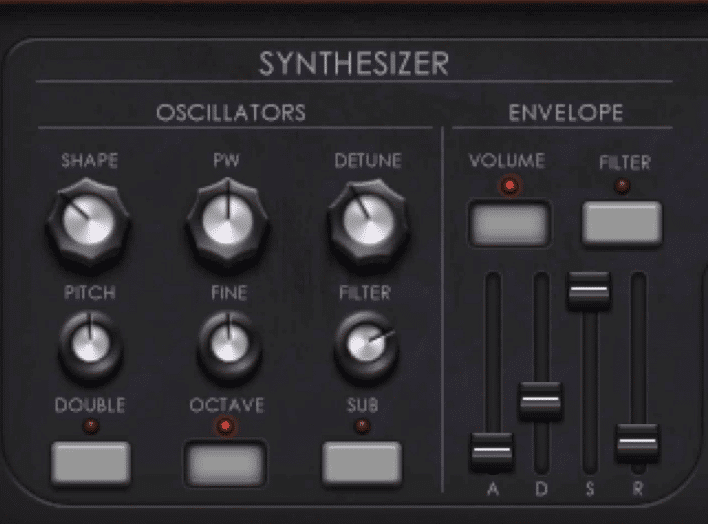
In the Synthesizer section you can affect you oscillators and ADSR.
Additionally, you can double the voicings, change the octave, and enable a sub frequency with the buttons on the bottom. To the right, you can alter the ADSR of your signal, respective to the volume of the waveform, and the filters you’ve applied.
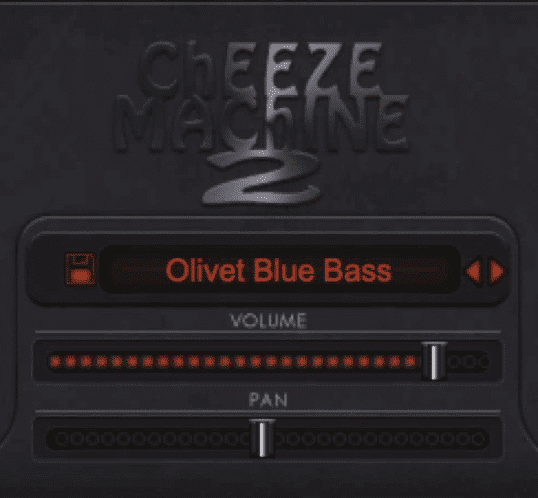
In the middle you can switch the preset, alter the volume, and adjust the pan
In the middle section, you can switch between presets to get a good idea of what the plugin can do. Additionally , a volume and pan slider is available.
On the right side of the plugin is the Effects section. In this section, you can alter the ensemble, introduce a phaser, introduce vibrato, and include reverb with 5 different reverb types.
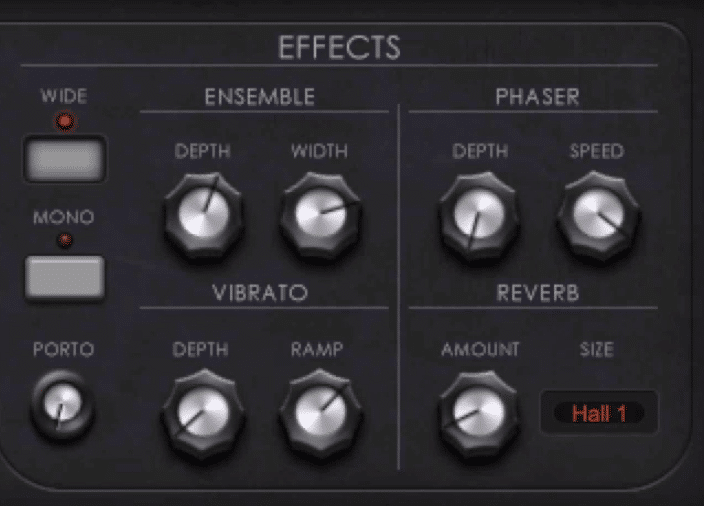
The Effects section includes ensemble, phaser, vibrato, and reverb, as well as portamento.
Additionally, portamento tuning is an option, with the effect available in both the mid and side image.
Lastly, at the bottom of the plugin, you’ll find the keyboard or piano roll, which you can use to sample sounds.
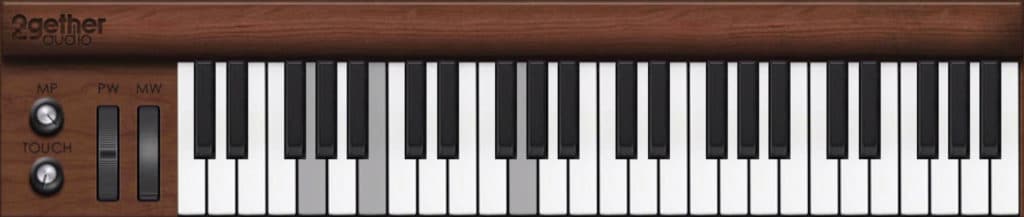
At the bottom, a piano roll can be used to test sounds.
To the left are your pitch wheel and modulation wheel, which can be used to introduce sporadic tuning and modulation. The dials on the left affect the modulation amount by introducing portamento tuning to the modulation , as well as affecting the sensitivity of the modulation.
3. Noisetar - NUSofting
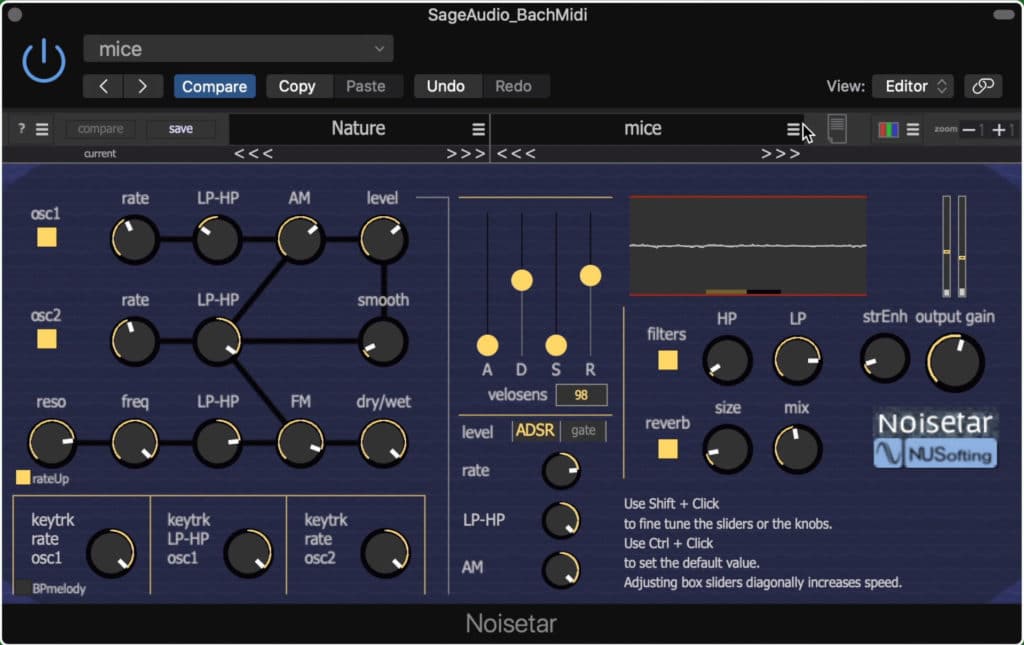
The Noisetar is best suited for strange and experimental projects.
Although Noisetar doesn’t offer much in the ways of a traditional synth, it does allow users to create unique sounds and noises outside the realm of traditional music. That said, if your music leans more toward the experimental or maybe cinematic , this will be a good synth to try out.
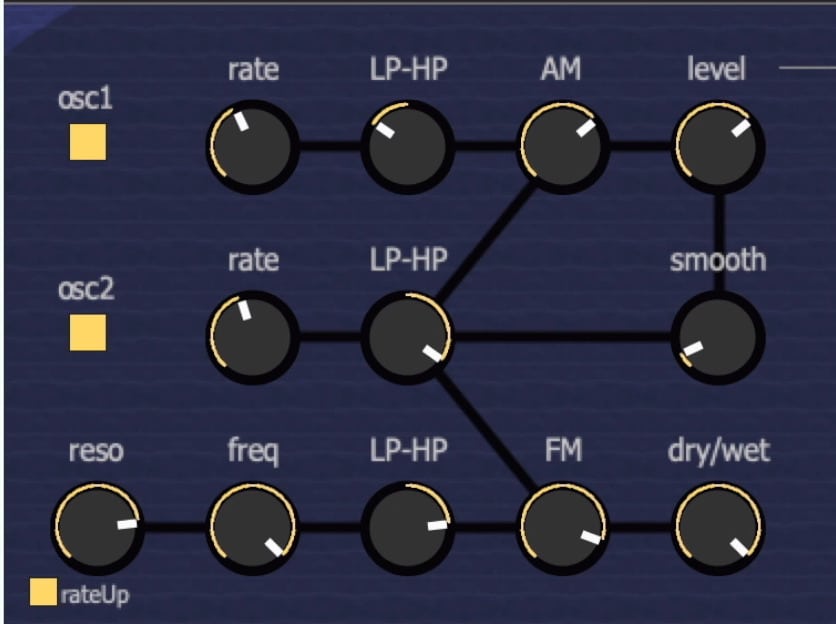
2 Oscillators are affected by various parameters, both respectively and collectively
This synth has 2 oscillators , both of which are collectively affected by the dials in the center. The rate and lowpass high-pass filters are respective to each oscillator, but functions like amplitude and frequency modulation are collective.
The smooth function reduces aliasing by reducing the high frequencies of the oscillation. The level determines the loudness.
A resonance filter is as the bottom, with the first rotary serving as the gain of the resonance bump. You can then alter the resonant filter’s frequency, frequency response, frequency modulation, and blend or wet/dry.
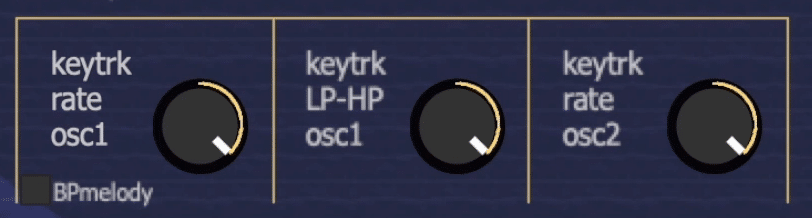
The bottom section allows for key-tracking to occur.
In this bottom section, you can adjust the key-tracking which allows you to alter your oscillations with modulation via your computer’s keyboard. You can also enable a bandpass melody which creates a bandpass filter at the frequency of the note you’re playing.
In the middle, you’ll notice the ADSR of the synth can be altered with sliders. Simply increase or decrease these sliders to affect your ADSR . A graphic pops up when affecting these to offer a visual representation.

The ADSR of the signal can be affected.
The velosens value underneath this is the velocity range that will be affected by this ADSR.
Underneath this, you can adjust the rate of oscillation for your ADSR, a bandpass’s pitch or frequency, and the amplitude modulation.
In the top right window, you have an oscilloscope of the notes and sounds that are being played. You can zoom in or out with a slider underneath this window.
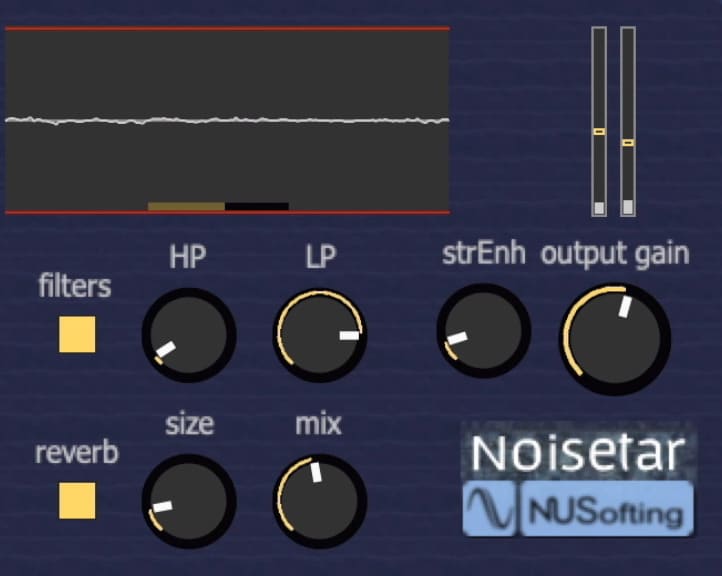
In the output section there is an oscilloscope, additional filters, reverb, and a stereo widener.
Low and high pass filters can be enabled , as can a reverb. This reverb is adjustable based on the size of the room, and the amount it is blended in with your dry or original signal.
The strEnh function seems to introduce delay which causes stereo spreading of the signal. At the zero value the signal sounds much more centered, whereas, at the value of 1, the signal sounds expanded outward.
The output gain acts as you would imagine, allowing for an increased or decreased output.
Up top, you can switch between various presets. These are really helpful for understanding the plugin, so try them out if you feel lost like I did when first using this plugin.
This RGB icon allows you to switch between different color schemes for the plugin in case you’d like to customize its look, or if you have difficulty perceiving certain colors. Lastly, clicking the plus or minus 1 button adjusts the size of the plugin.
If you’d like to learn more about free plugins, or if you’re trying to expand your library of effects, check out one of our other blog posts on a similar topic:
These are just a few of the many blog posts and videos that may help you with your engineering.
2. Ragnarok - Full Bucket Music
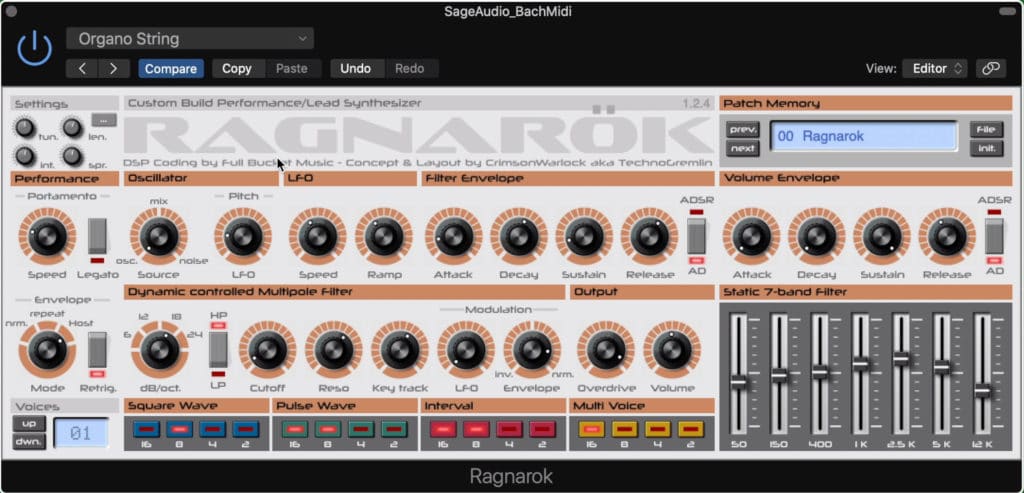
Ranganok is based on a one of a kind synth.
The second Full Bucket Music plugin on this list, the Ragnarok is based on a very unique synth. Created to mimic the workings of a custom, one of a kind synth , this plugin achieves a sound that most other plugins simply cannot.

At the bottom, you can use 4 different banks to affect your oscillators.
The Ragnarok has 4 oscillators working in tandem which can be observed at the bottom of the plugin. There is a square wave, a pulse wave, an interval wave which is another square wave one 5th above the fundamental, and multi-voice oscillator.
This multi-voice is 3 additional oscillators that are slightly detuned to create an impressive chorus-like effect.
The numbers correspond to various octaves, with 16 being the lowest and 2 being the highest. What’s unique about this plugin, and the hardware it emulates, is that it allows you to enable multiple octaves per wave, in turn, making 4 oscillators sound like 16.
The original hardware was monophonic, but the plugin allows you to add up to 64 voices at the expense of extra CPU.
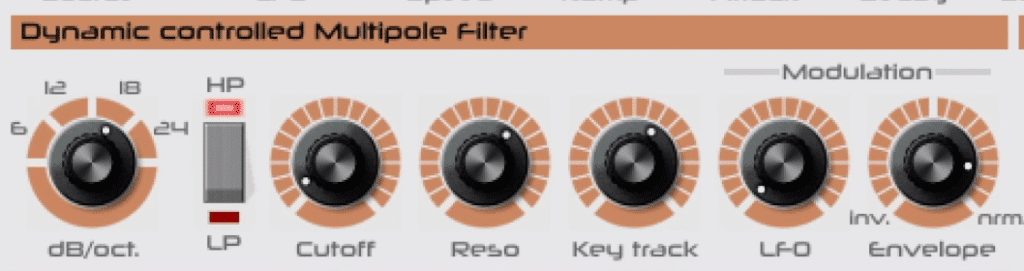
The signal can be affected with a dynamic filter.
The Dynamic Controlled Multipole Filter is a unique EQ section with which you can alter the timbre of your synth. You can enable either a high pass or low pass filter , which can have its slope alters by the dB per octave rotary.
From there you can change the frequency of the cutoff and the amplitude of the resonance. The key track function changes this cutoff when higher or lower notes are played.
Modulation can be introduced via an LFO - this modulation can have its envelope inverted as well.

In this section, the LFO's timbre and frequency is altered.
In the top section, you’ll find more parameters with which you can affect your oscillators. The source dial introduces white noise, while the pitch accomplishes what the name suggests.
The speed of oscillation as well as the initial amplitude of the LFO can be altered with the speed and ramp dials. The oscillator's filter or ADSR can be altered with the 4 corresponding rotaries.
The ADSR can be switched from the full envelope to just its attack and decay. This same ADSR functionality extends to the volume envelope.
In the performance section is your portamento which introduces a glided or blurred pitch between notes. Legato causes the last note to be sustained during this glide.

The performance and settings section allows you to alter various aspects of the plugin's overall performance and behavior.
The envelope of the oscillation can be normal, repeat, repeat which causes the signal to repeat in time with the LFO’s speed , and Host, which causes the signal to repeat in time with the host bpm.
Some of these features can be further altered in the settings menu under the “… ” tab.
In the settings section you can change the universal tuning, the trigger length for the repeat options, the interval of the interval section (meaning you can make it something other than a 5th above the fundamental ), and the tuning spread of the multi-voice section.
On the far bottom right you have a 7 band equalizer , allowing you to affect the overall frequency response of your signal. The output section to the left allows you to control the output level, as well as introduce some harmonic distortion.
Lastly, at the top right you can switch between multiple settings.
1. Push - Sampleson
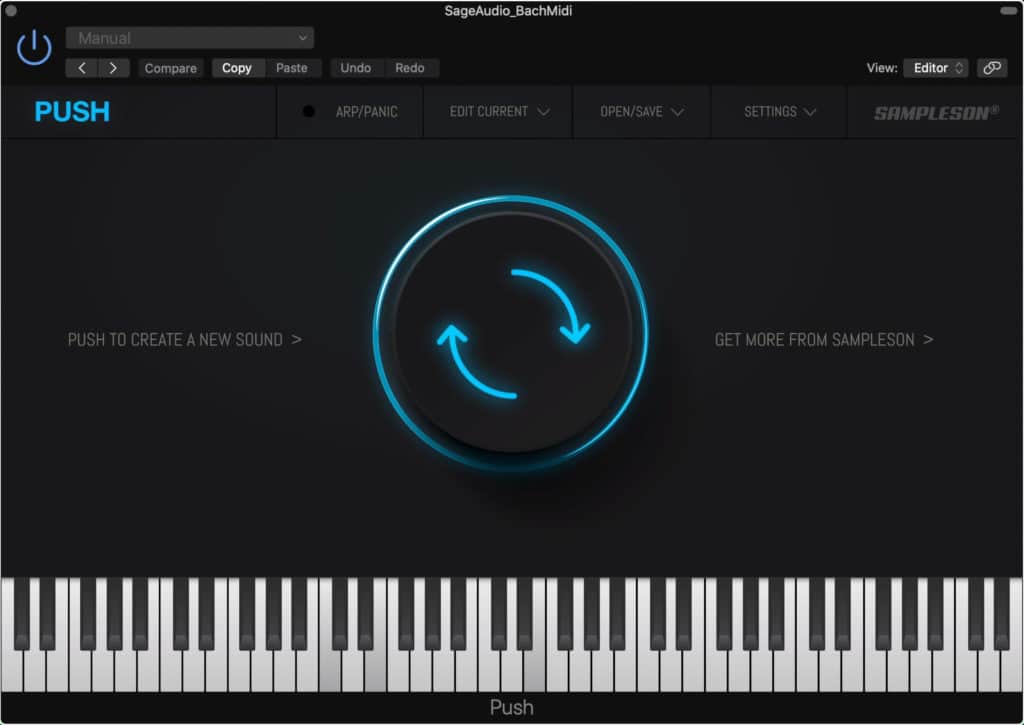
Push is a very simple, easy to use plugin.
If fumbling through hundreds of settings to create a synth sound doesn’t sound appealing, Push is a fantastic alternative.
The primary focus of the Push synth is a randomization button, which alters all functions of the plugin to create a new sound. This way you can spend more time creating, and less worrying about what a certain button or dial does.
If you do find a setting you really enjoy you can save it for future reference - making the plugin one of the quickest ways to find new go-to settings.
If you’d like to adjust the settings manually, click on the edit current tab to begin customizing your settings.
In this window, you can change the number of voices up to 6, and detune these voices. Your 2 oscillators’ waveforms can be switched between 5 different wave types . You can also change the octave of these LFOs and their fine-tuning.
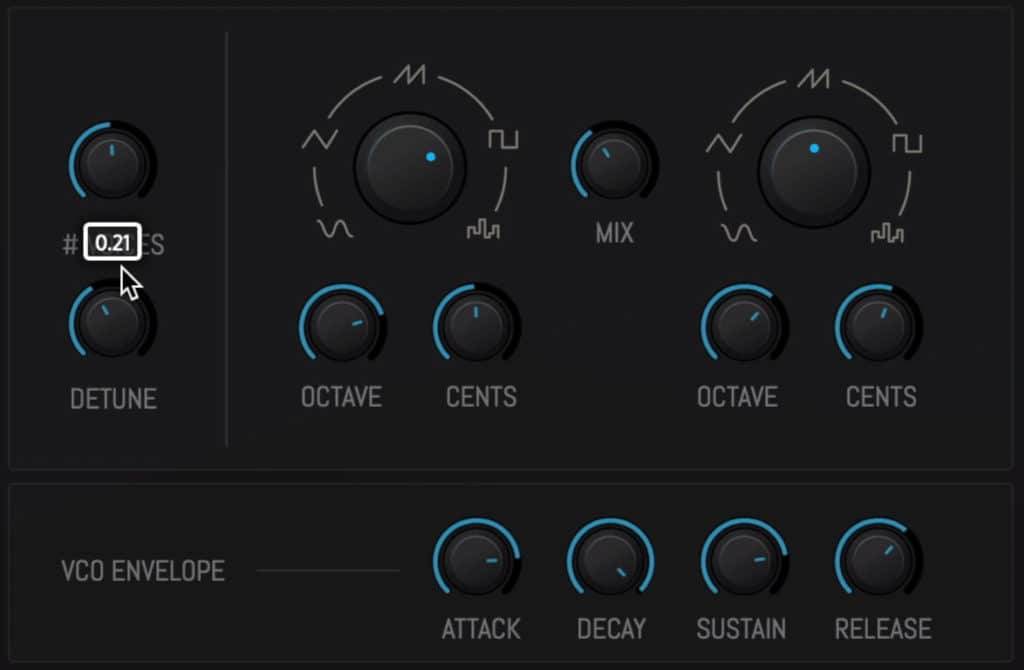
In this section, you'll notice a voice section, two oscillators with various settings, and an VCO envelope.
The envelope or ADSR of your oscillators can be altered in the VCO envelope section.
To the right, you can introduce an EQ filter , with 5 different filter types. The resonance and cutoff frequency of this filter can be adjusted, and velocity modulation can be enabled.
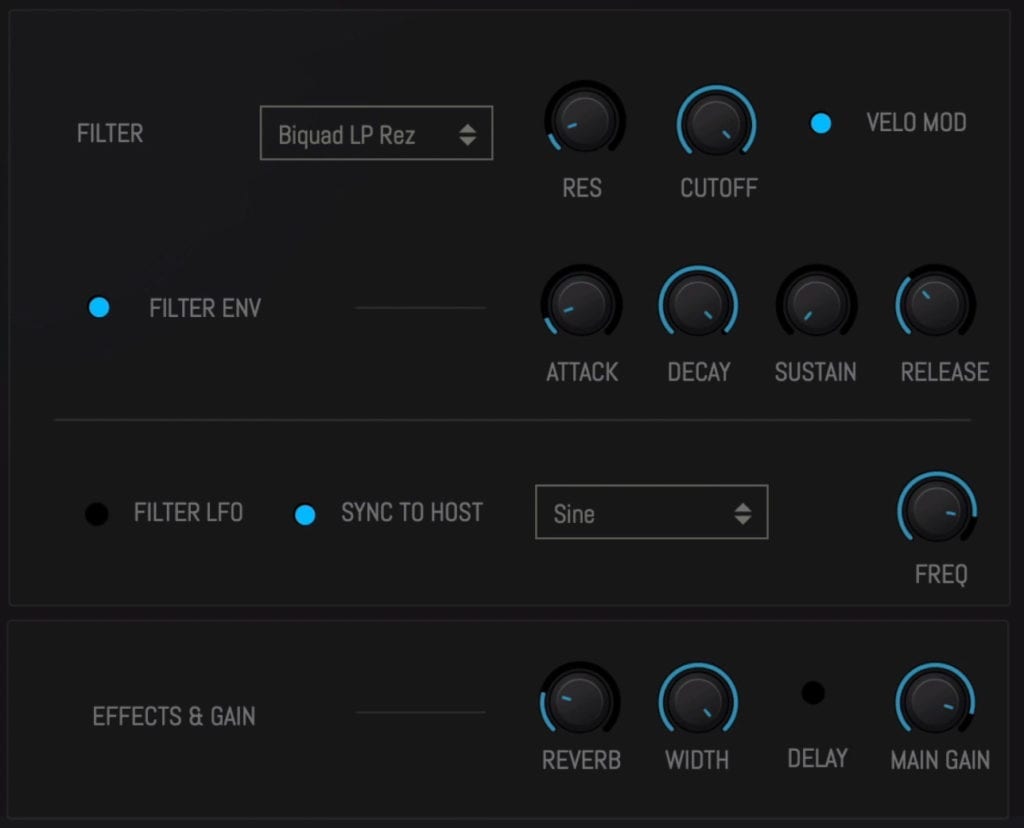
Here you can introduce filters, as well as effects.
The envelope of this filter, or ADSR, can also be changed.
Below this section, you can create a modulator that cuts the signal out at various points. These points can be synced to your tempo or host bpm , modeled on a waveform type, and occur more or less frequently.
The reverb, width, delay, and gain dials are at the bottom.
To the left, you’ll notice an LFO designated to pitch , which can be used to cause detuning modulation. This can be altered based on a waveform type, and frequency
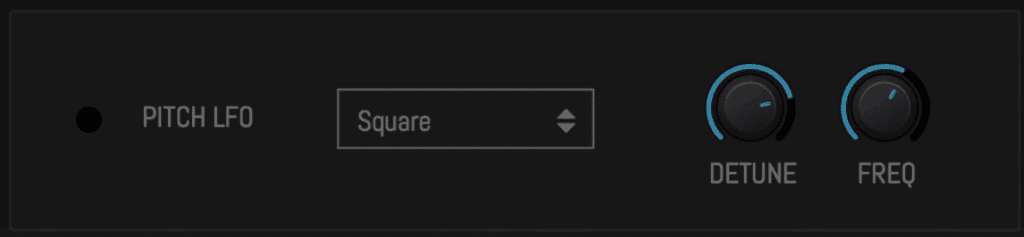
A pitch LFO can be introduce to add variance and a unique quality to your synth.
If you want to turn on an arpeggiator, simply click the Arp/Panic tab up top to enable it.
Lastly, you can sample the sound you’ve created, or have had randomly generated with the piano roll at the bottom of the plugin.
This plugin is perfect is you want to create sounds without spending too much time doing so.
If you try this synth out and find it useful, let us know in the comments section of the video.
Also, if you have a synth-heavy track that you’d like to hear mastered, send it to us here:
We’ll master it for you and send you a sample for you to review.
Conclusion
These synths barely scratch the surface of what’s available. There are so many free and purchasable synths being developed on a weekly or monthly basis, that it's hard to keep up.
With that in mind, let us know if you’ve been using a free synth that we missed here. Our picks, although good synths, definitely don’t cover the full range of what’s out there.
Regardless, hopefully, the ones listed here with evoke some creativity and cause you to approach a song in a different way.
If you do end up using one of these synths, please let us know! We’d love to hear your thoughts and to learn how you ended up using the synth/what settings created the sound you chose.
Whenever you finish the track you’re working on, be sure to send it our way for a free mastered sample of it:
We’ll master it for you and send you a free sample for you to review.
Have you tried any of these synths?


