How to Master for Streaming
Quick Answer
- Use subtractive equalization to attenuate trouble frequencies
- Use compression or dynamic equalization to control dynamics
- If desired, use parallel compression to amplify lower-level signals
- Generate harmonics using analog emulation or analog equipment
- Optional: Use an emphasis, de-emphasis eq technique to accentuate distortions
- With mid-side equalization, amplify desired frequencies and widen the stereo-image
- Optional: Using additional stereo imaging to widen or narrow the image
- Optional: Use dynamic equalization to introduce more dynamics
- Utilize limiting to protect against overs, but do not use excessively
- Measure and moderate the integrated LUFS of your signal
How to Master for Streaming in Detail
Mastering definitely looks different from engineer to engineer. The gear used, the order in which it is used, and to what extent it's used truly depends on the mastering engineer.
The signal chain used depends on the mastering engineer.
With that in mind, the steps listed here are merely a suggestion from a tried and true mastering signal chain. This particular signal chain works well for almost all mastering applications and will work particularly well if you intend to release your music online or on streaming services.

The signal chain shown here will work well for streaming services.
Whether you’re just now beginning to master music, or you are a more experienced mastering engineer, try this signal chain out and see how it can be altered to better suit your personal preferences.
Regardless of personal preference, one particularly important aspect of mastering for streaming needs to be kept in mind - the process known as Loudness Normalization greatly impacts how an engineer masters music for streaming, so this will need to be taken into consideration throughout the entirety of your mastering process.
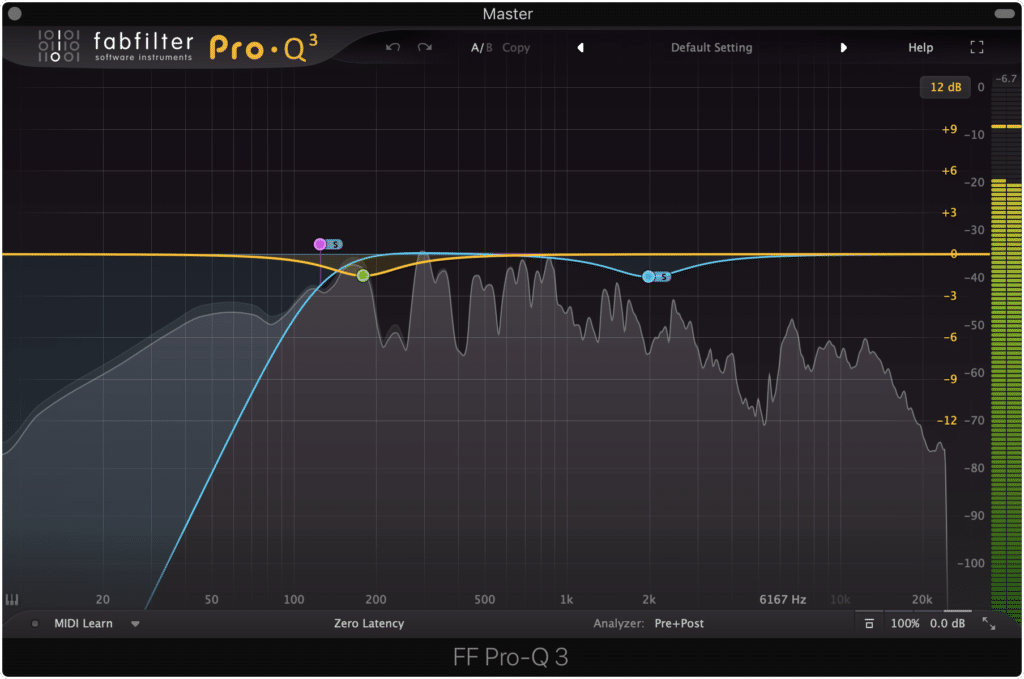
![]()
Loudness Normalization occurs on all streaming services.
If you’re unfamiliar with loudness normalization and what it means for streaming, definitely take a look at our other blog post prior to continuing with this one.
It details how loudness normalization can positively and negatively impact your master.
With that in mind, let’s take a look at how to master music for streaming.
If at any point you’d like to hear your music mastered for streaming, you can send us a mix of your music here:
We’ll master it for you with streaming in mind, and send you a sample for you to review.
1. Use Subtractive Equalization to Attenuate Trouble Frequencies
Subtractive equalization is always a great first step to take when mastering. Essentially, any frequencies that need to be attenuated can be attenuated at this point - this way you don’t amplify these frequencies with other forms of processing , resulting in the need to use more aggressive processing later on.
Subtractive equalization ensures that trouble frequencies are attenuated.
Simply put, taking care of these frequencies early on means you won’t need to introduce more processing later in your signal chain; avoiding unnecessary processing is key to retaining sonic quality in a digital mastering session.
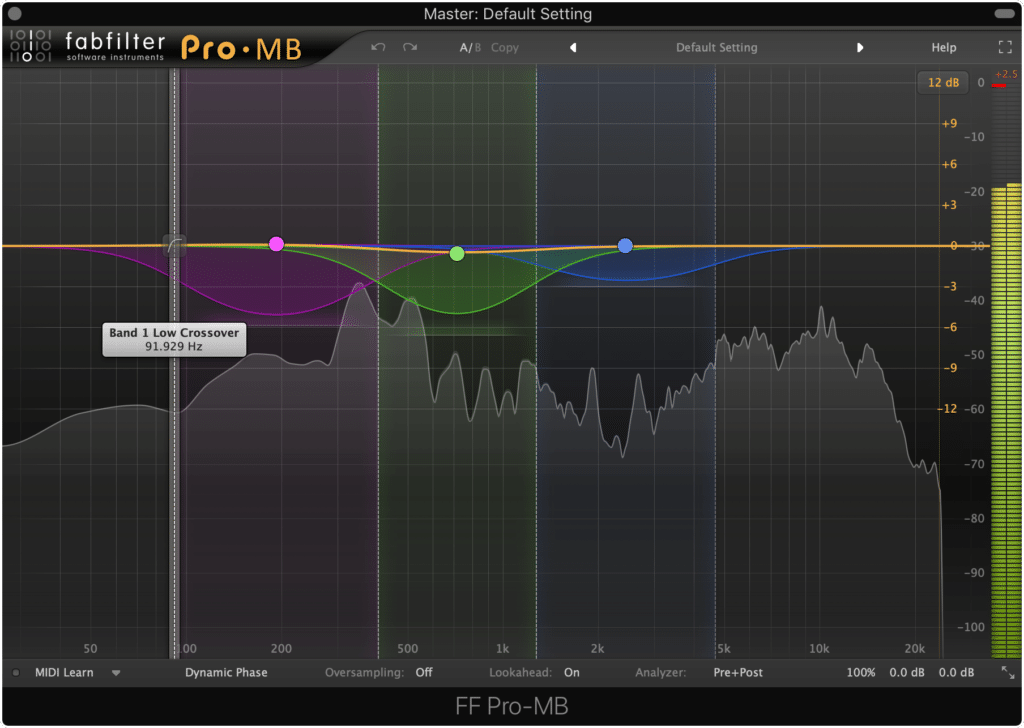
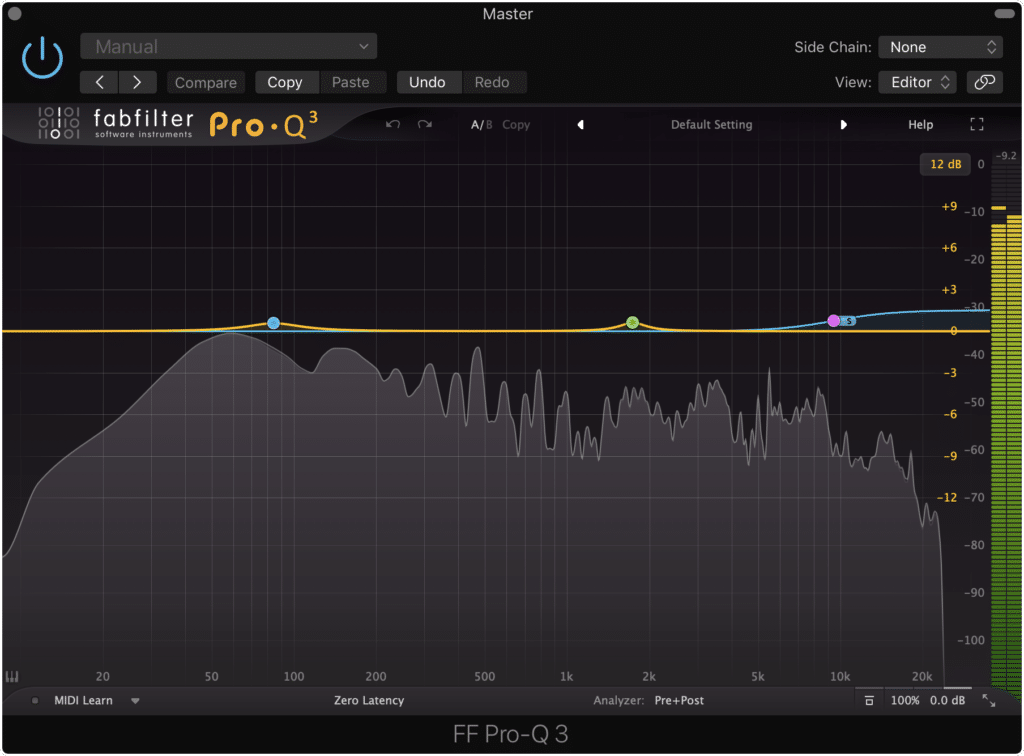
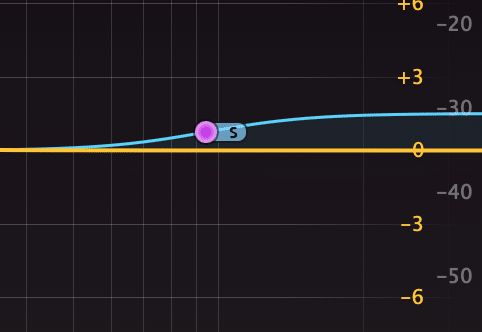
When attenuating these unwanted frequencies, a mid-side equalizer may work best. This way you can attenuate your side image using a high-pass filter, to create a mono low-end.
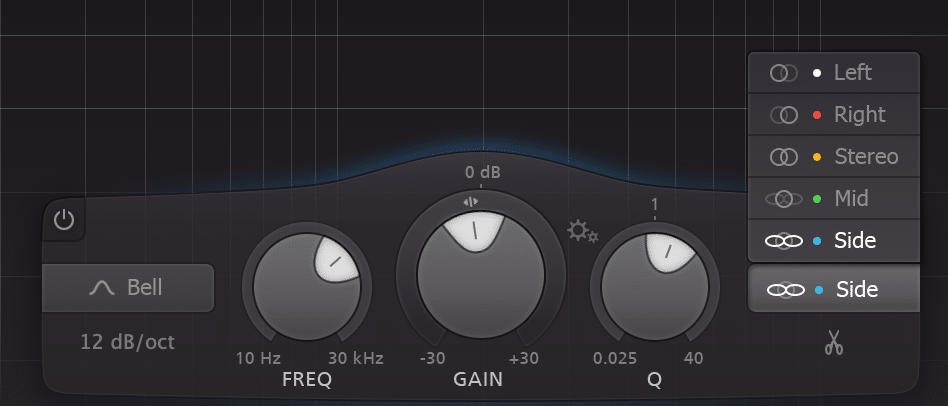
Mid-side equalization gives you greater flexibility.
This is a quick and effective way to affect your stereo image and to create a focused low-frequency range.
Additionally, if you’d like to make the vocals more apparent or cut though heavy instrumentation, you can attenuate 2kHz on the side image using a bell filter. This way the mono image of the vocals won’t be masked by whatever is happening on the side image.
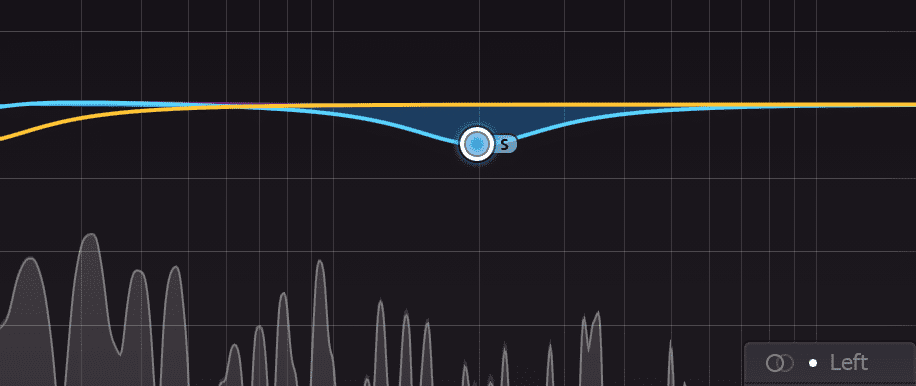
Cutting some of the side image can free up space for the mono image.
Using mid-side equalization to attenuate frequencies you don’t want in your master is a practice in utilizing phase cancellation - once you understand how powerful phase relationships can be , you’ll be surprised with how much you accomplish with just one equalizer.
If you’d like to learn a little more about phase relations and how they’re crucial to understanding audio, check out our blog post here:
It offers information that can truly help when mastering music for streaming.
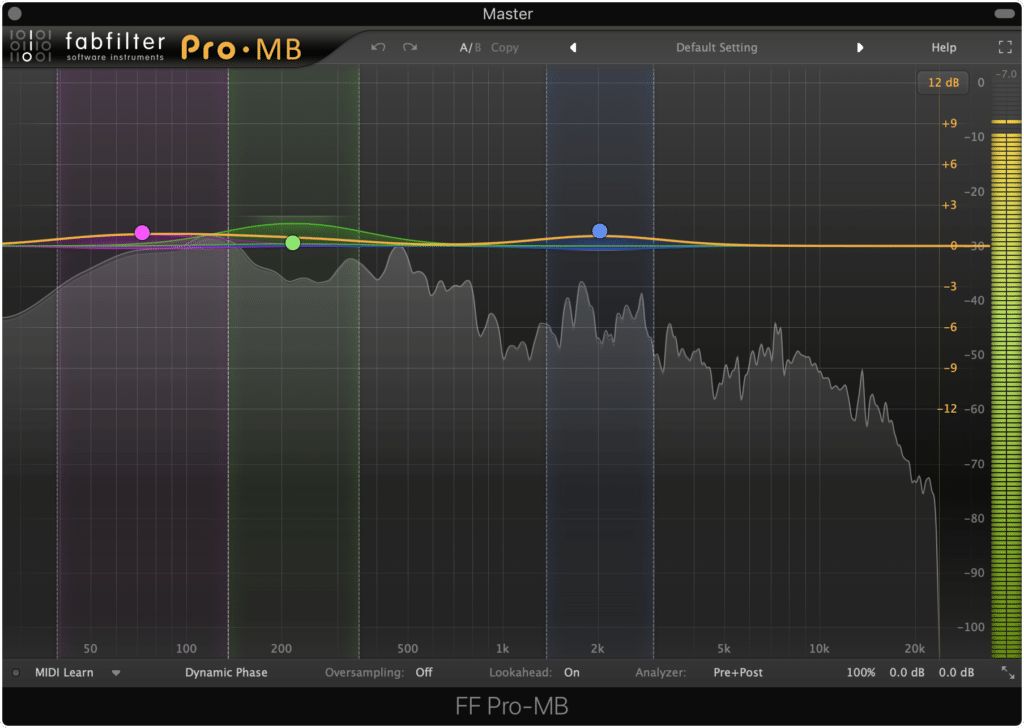
2. Use Compression or Dynamic Equalization to Control Dynamics
Just like with subtractive equalization, compression with either a multi-band compressor or with a dynamic equalizer helps to minimize processing later on. By controlling dynamics early in the signal chain instead of amplifying them in one way or another, less severe processing will be needed.
Similar to subtractive equalization, compression attenuates frequencies that need to be attenuated.
A multi-band compressor is the best option for this type of attenuation. By using a multi-band compressor, you can hone in on the frequency range causing the issues and compress only those frequencies.
The same goes for dynamic equalization plugins. With a dynamic equalizer you can isolate the frequencies in need of attenuation or compression, and control dynamics more accurately.
When compressing for this purpose, it’s best not to use a traditional stereo compressor as they don’t compress as accurately as a multi-band compressor can - but of course, if a stereo compressor offers tone you enjoy then use whichever compressor you find is best.
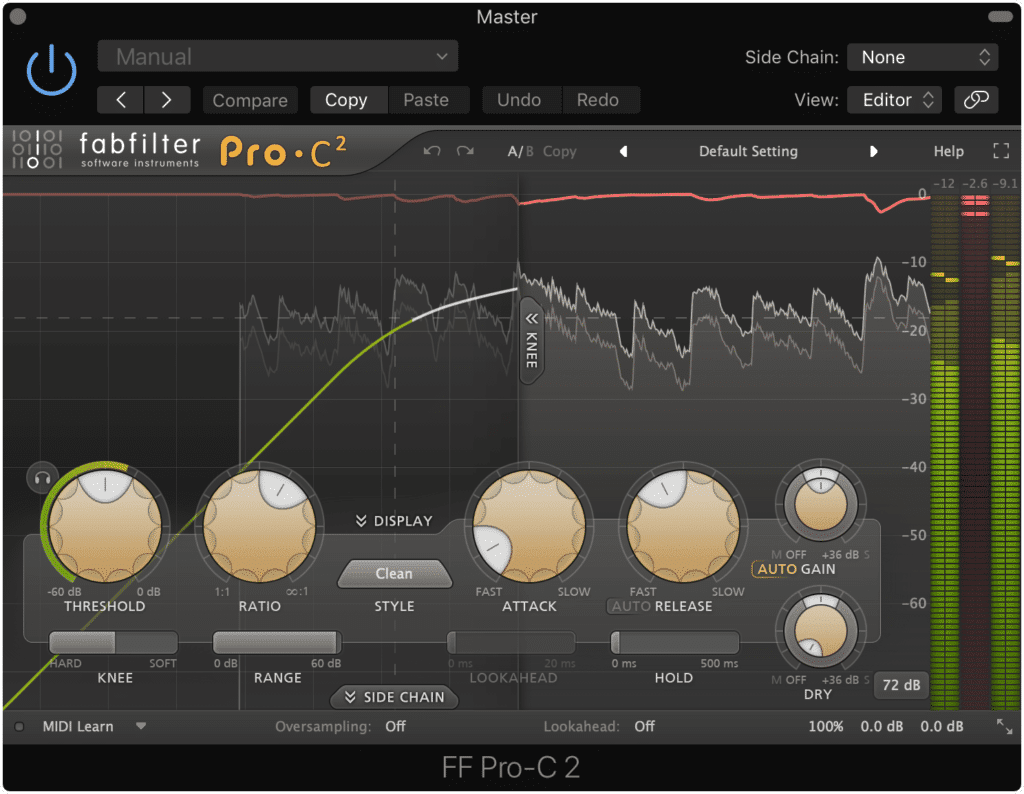
A traditional stereo compressor will not be as accurate as a multiband compressor.
Regardless of how you compress your mix, be sure not to leave any extreme dynamics in. If you export your master somewhat quietly but have extreme dynamics, they will distort both during the encoding process and during loudness normalization.
If you’d like to learn more about how to use a multi-band compressor, especially when mastering, check out our blog post that details various compressor settings:
It shows how a compressor can be used to accomplish very specific and particular tasks when mastering.
3.If Desired, Use Parallel Compression to Amplify Lower-Level Signals
It should be noted that this is an optional stage of mastering, and its utilization depends on the mix (as most things in mastering do.) With that in mind, parallel compression and other variations of low-level compression can greatly and positively affect the sound of your master.
There are a few ways to accomplish it:
- Use a Low-level compression plugin (ex. Waves MV2)
- Use parallel compression as a send or auxiliary track at the end of your signal chain
- Use parallel compression as a send or auxiliary track in the middle of your signal chain
The first way to accomplish this is pretty simple. All you’d need to do is insert the low-level compressor in your signal chain and adjust its settings.
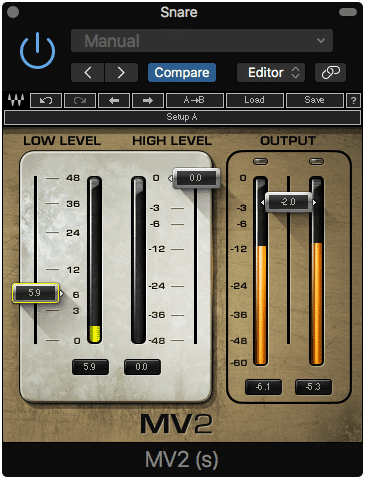
A low-level compressor plugin can have a similar effect to parallel compression.
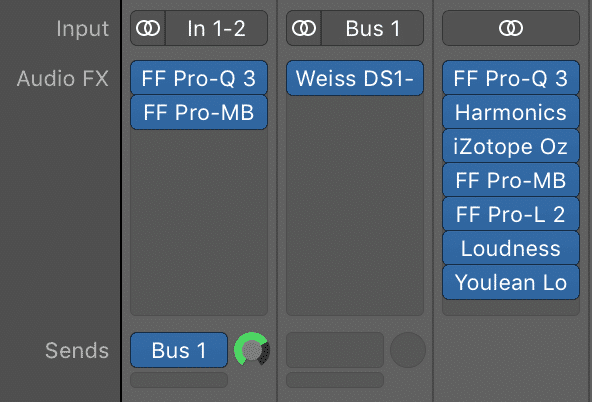
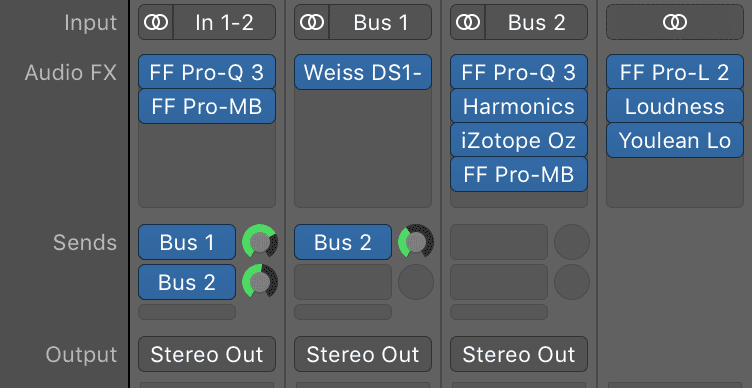
Things become a little more complex when sending the signal to an auxiliary track. If you send your signal to an auxiliary track with a parallel compressor, then that compressor will only receive the signal at the end of all your other processing.

Notice that Bus or Aux send occurs after all of the other inserts.
In other words, if you use a bus to send the signal to a compressor, that bus will send the signal after all other processing in your signal chain. In this instance, the parallel compression happens last.
If you don’t want to this parallel compression to be the last thing in your signal chain, you may need to route your signal a little differently.
Say you wanted this parallel compression after your subtractive equalization and compression (steps 1 and 2 above,) how would you accomplish this?
Once you send your signal to the auxiliary parallel compression, you can continue your processing on your master output as pictured below.
Notice that the signal is routed through a couple of inserts, then to the parallel compression, and then processed further on the output channel.
Or, you could create a send from your parallel compression auxiliary track to a new auxiliary track, as well as a send from your original track to this new auxiliary track and continue the processing from there. Of course, this is a little more convoluted but it does allow you to control your signal the way you want to.
Here is a picture of this type of routing.
Although this is a little more complicated, it does offer greater flexibility.
However, you choose to utilize parallel compression or low-level compression, using it properly can add a lot of character to your master.
When it comes to mastering for streaming, since mastering to very loud levels no longer makes much sense due to loudness normalization, low-level compression amplifies the quieter aspects of a mix in the way excessive limiting normally would. That being said, low-level compression and parallel compression are truly helpful forms of processing when mastering for streaming.
If you’d like to learn more about parallel compression, and how to make it and your master sound better, check out our blog post on the topic:
It shows how to get a more complex sound from your compression.
4. Generate Harmonics Using Analog Emulation or Analog Equipment
If you’ve read any of the blog posts on this channel or watched any of our videos you may have noticed how often we mention harmonics - and that’s because they’re one of the most important aspects of audio processing. Whether you’re tracking, editing, mixing or mastering, harmonics can play a huge part in shaping the sound of any recording.
Adding harmonics is a very important part of audio processing.
That’s why they’re so often introduced intentionally during mixing and mastering. Introducing harmonics creates a more complex and upfront sound, that for one reason or another, is incredibly pleasant to listen to.
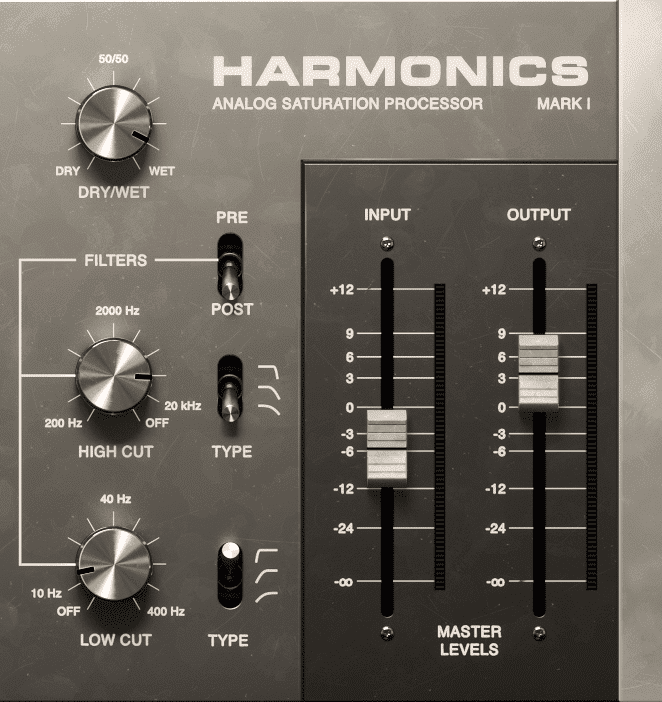
Introducing harmonics can be accomplished by using analog mastering services. In this case, the very act of running the electrical signal through analog hardware introduces harmonics.
Harmonics occur when running a signal through analog equipment.
But if you’re working in a digital system and doing digital processing, you’ll need to use some form of analog emulation to create these harmonics. This analog emulation may take the form of a plugin, or perhaps a DAW modeled after an analog console like the Harrison Mix Bus series.
The Harrison Mix Bus DAW models its components after analog equipment.
However you choose to add harmonics, adding them at this stage will help to create a better sounding master , one step closer to being ready for digital distribution.
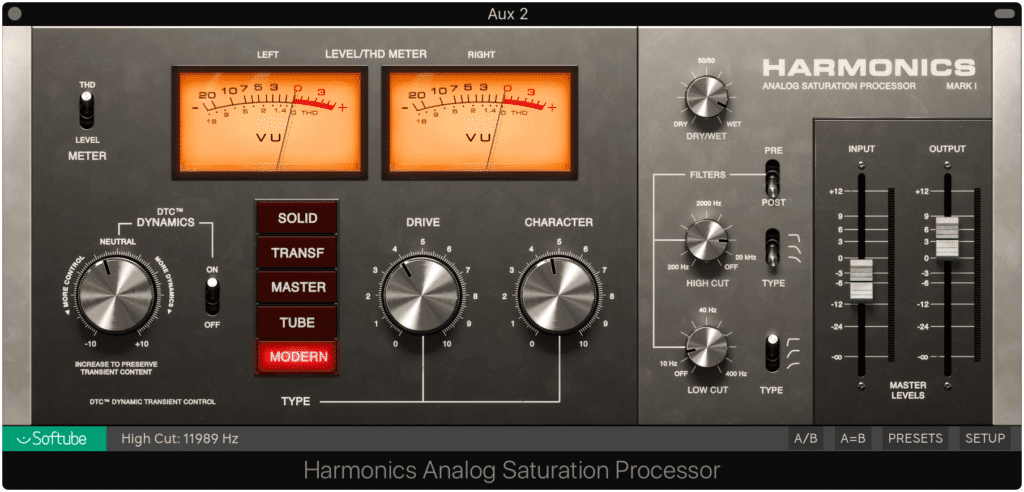
Analog emulation plugins are an easy way to add harmonics is a digital system.
If you’d like to know more about harmonics, check out our blog post about analog equipment:
It shows just how big of a role harmonics play in creating a good sounding master.
Or, if you’d simply like to hear how these harmonics sound you can send us a mix here:
We’ll master it for you and send you a free sample for you to review.
5. Optional: Use an Emphasis, De-Emphasis EQ Technique to Accentuate Distortions
An emphasis and de-emphasis technique is typically used during a vinyl mastering session to compensate for some of the technical limitations of a vinyl record; however, it can be used in any session to create some unique effects.

This technique is usually used during vinyl production but can be used for other purposes.
Simply put, you can use an eq boost prior to distortion, harmonic generation, compression or any other form of processing, and then follow it with eq attenuation in an equal and opposite manner.
This technique is created using two equalizers.
The idea being, you can drive a certain frequency into distortion, compression, etc. and then nullify that eq boost with equal and opposite eq attenuation. Doing so means that the distortion, compression, etc. will work harder on those frequencies, and then be balanced out with the subsequent equalizer.
If you’re curious about how you can do this for yourself or are unsure about the signal flow, check out our video on the topic:
In it, you’ll see how you can accomplish an emphasis de-emphasis technique and its different applications.
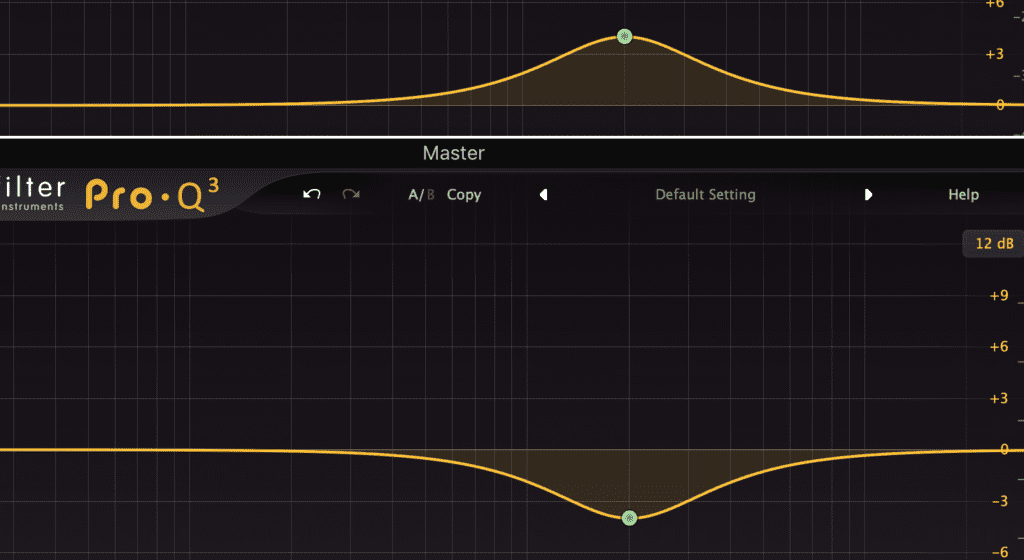
6. With Mid-Side Equalization, Amplify Desired Frequencies and Widen the Stereo-Image
Unlike some of the optional or less common options on this list, additive equalization occurs in almost every mastering session.
Amplifying the side image will also widen the side image.
Opposite to subtractive equalization, additive equalization is the process of finding everything you like about a mix and amplifying these parts to exactly how loud you feel they should be.
This process can be difficult, especially if the overall amplitude of the track will change, but additive equalization can make a huge difference when mastering and needs to be done correctly.
Using mid-side equalization for this stage gives you greater control of this amplification process. For example, if you’d like the reverberation of the higher frequency range to be louder, but you don’t want to amplify the high-hat or sibilance in the mono image, amplifying the side image is the best way to accomplish this.
To amplify reverberation, oftentimes the best solution is to find it and amplify it on the side image.
Whatever you do choose to amplify, be sure to listen to the mix intently during additive equalization. This process will most likely have the largest effect on your master so choose what you amplify wisely.
7. Optional: Use Additional Stereo Imaging to Widen or Narrow the Image
If you found that amplifying the side image using mid-side equalization did not widen your stereo image enough, you can use various forms of delay processing to enhance this stereo image.
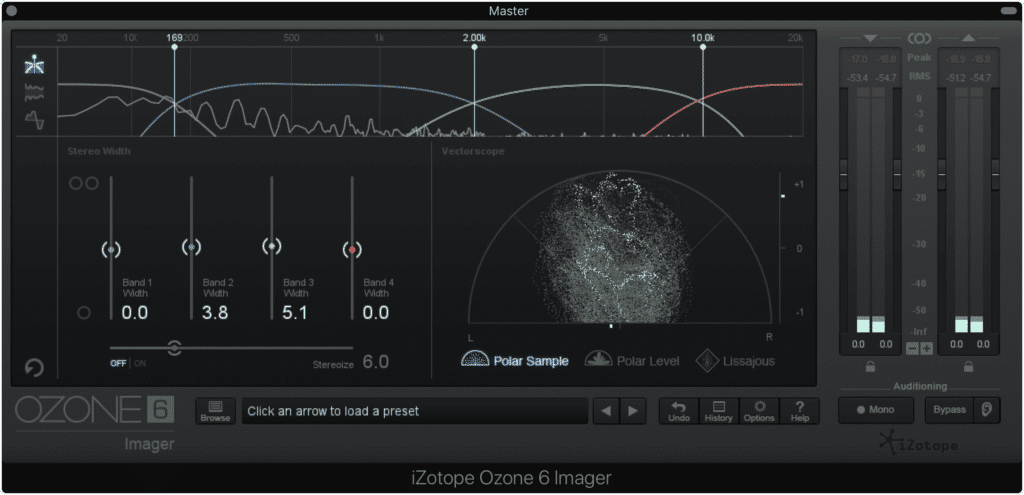
Additional stereo imaging can be used to further widen the image.
These stereo imagers include but are not limited to:
- Izotope Imager
- Waves S1
- Ozone Image
If you’d like to learn more about free or affordable stereo imagers, check out our blog post on the topic:
It should be noted that although additional stereo imaging can sound great, excessive widening of your stereo image may make the signal sound washed out or unfocused. Just like everything else in mastering, use stereo imaging carefully.

Keep your listener's equipment in mind. A wide stereo image will not translate well on all playback systems.
Although the digital formats such as CDs and streaming services can handle very wide images without an issue, that doesn’t mean all playback systems can handle it. Keep your listener’s playback equipment in mind when mastering.
8. Optional: Use Dynamic Equalization to Introduce More Dynamics
You may have encountered a mix in which compression wasn’t needed during mastering. This would, of course, negate the need for further compression and dynamic control, and possibly introduce a new issue you’ll need to remedy.
If you received a mix that was too compressed, one that lacked a significant dynamic range or clear and distinct transients, you may need to do some expansion.
Frequency specific expansion will work best for this step.
Just like with compression, the more accurate you can make the expansion, the better. This means that the best option is to use dynamic equalization or multi-band expansion.
Be sure to only target the frequencies you want to expand.
The most common frequency ranges to expand would be 60Hz -100Hz to expand the kick drum, 180Hz to 240Hz to expand the snare drum, and 1.5kHz to 2.5kHz to expand the lead vocal.
The kick is the most common highly dynamic instrument. It plays a large role in keeping recordings dynamic.
If you find that this expansion isn’t working as well as you hoped, and isn’t remedying the excessively compressed mix, try revisiting your subtractive equalization to see if there isn’t more “room” you can free up.
For example, if you find that expanding the vocal isn't working, try cutting 1.5kHz to 2.5kHz on the side channel to make the vocal more apparent and to ensure you are primarily expanding the lead vocal, not other instruments in that frequency range.
9. Utilize Limiting to Protect Against Overs, But Do Not Use It Excessively
This aspect of mastering changes the most due to streaming. In most digital formats a signal can be mastered loudly without much consequence, at least other than the lacking dynamics that come from significant limiting.

Although CDs could be made excessively loud, the same tracks cannot be made as loud when distributed to streaming services.
However, when mastering for streaming, the process or loudness normalization greatly impacts how loud a master should be made, meaning limiting can lead to some unintended repercussions.
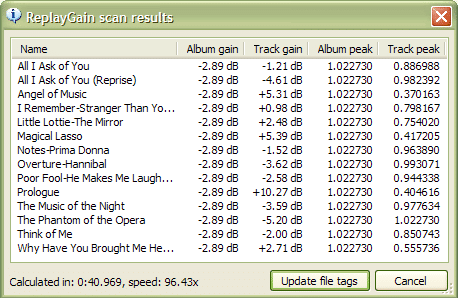
The software known as ReplayGain makes gain changes to tracks prior to streaming.
For example, Apple Music normalizes audio to roughly a -16 integrated LUFS.This means that any master made louder than -16 LUFS will be turned down in the form of clean gain reduction.
In other words, if a master was made excessively loud at the expense of dynamics and transients, all of this effort will be for nothing after loudness normalization.
This is just a brief overview of how loudness normalization affects streaming, so if you’d like to learn more about it check out our blog posts on the topic:
Both show the complexities how loudness normalization and the streaming services that use it. If you’d like to learn more about how to properly use limiting to affect your track’s loudness, then these are good sources.
In short, you no longer need to make an excessively loud master for it to be perceived as loud. Loudness normalization will do the work for you whether you want it to or not, so the best option is to protect your master from peaks using a limiter, but not to drive it excessively.
The best course of action is to increase your tracks integrated LUFS to roughly -14 at the most, and then decrease your limiter’s output to -.5dB. This way loudness normalization can be performed properly, and your master won’t clip during the encoding process.
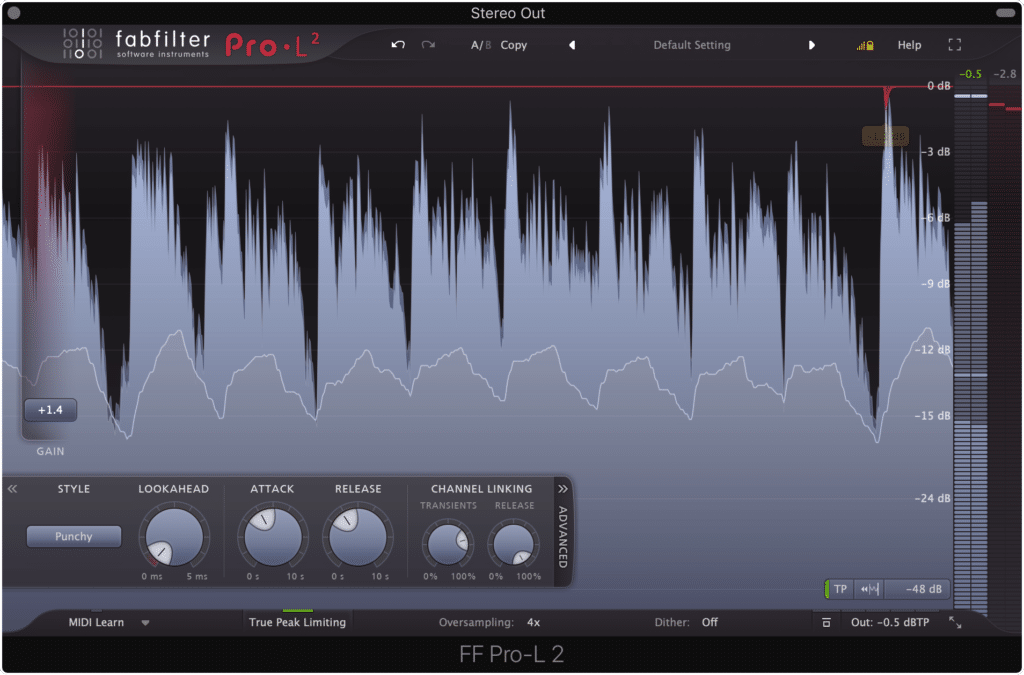
Setting the output of your limiter to -.5dB protects the signal from clipping during the encoding process.
10. Measure and Moderate the Integrated LUFS of Your Signal
Once you’ve begun to use limiting to increase the loudness of your master, you should simultaneously reference an LUFS meter to measure and moderate your track’s loudness. There are many options for LUFS meters, including free ones provided by your DAW.
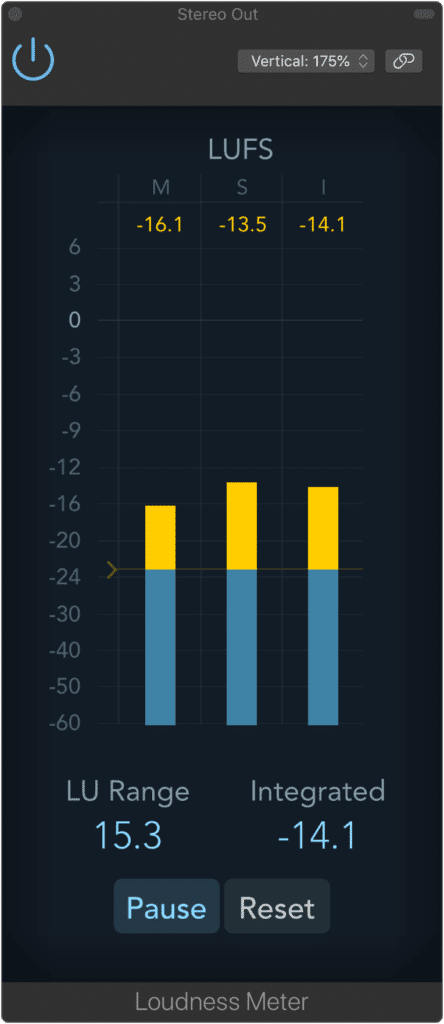
This Loudness meter is included in your DAW.
Here are Some Purchasable LUFS Meters:
- Izotope Insight
- Waves WLM
- Nugen Audio Mastercheck Pro
- MeterPlugs LCAST
If you don’t have a free LUFS plugin included with your DAW, and you’d prefer not to purchase one, the‘YouLean Loudness Meter’ is a great free option that offers all the needed metrics for measuring your master’s loudness.
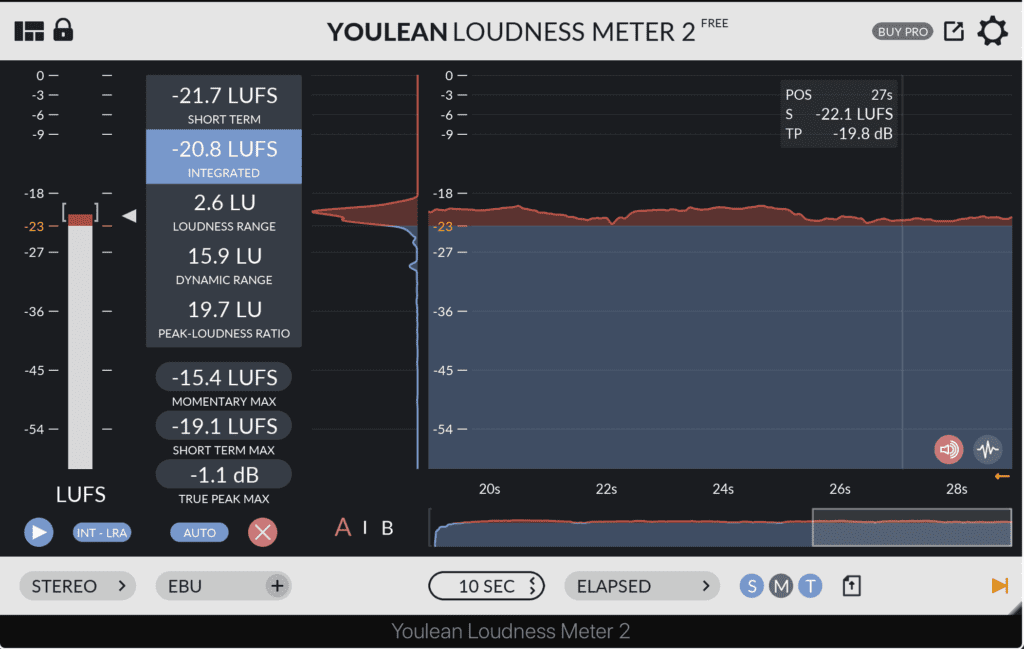
The YouLean Loudness Meter is free and a very useful LUFS meter to have.
When deciding the appropriate loudness of your master, keep loudness normalization in mind and always remember that although a louder master may sound better at first, it will not sound better once it has been normalized.
Conclusion
Mastering for streaming is a lot like mastering for other mediums; however, loudness normalization plays a big role in changing certain aspects of it.

You no longer need to make a loud master to have it be perceived as loud.
You no longer need to make a loud album to be competitive - this loudness is roughly the same amongst all albums on streaming services. With that said, the best way to make your album or record sound better on a streaming service is to follow the steps above and to ensure your tracks retain their dynamics and transients.
If you’d like to learn more about how streaming affects mastering, check out these blog posts on the topic:
They go into greater detail about how streaming affects the master process.
Also, if you’d like to hear your mix mastered for streaming, send it to us here:
We’ll master it for you and send you a free mastered sample for you to review. This way you can hear how a master made for streaming differs from other masters.
Have you ever mastered a track for streaming?


