How to Master Music for TV and Sync Licensing
Quick Answer
Mastering music for tv and other sync licensing opportunities includes creating multiple versions of the song you intend to submit. Although most broadcasting occurs at an integrated loudness of -24 LUFS, mastering for tv and film will vary in loudness, and be dependent upon the type of programming.
How to Master Music for TV and Sync Licensing in Detail
The process of mastering for sync licensing is certainly different than typical mastering. Granted, certain aspects like ensuring overall sound quality, avoiding unwanted distortions, creating a balanced frequency spectrum, and other aspects of mastering remain similar if not the same.

Most mastering sessions occur as a stereo session; however, mastering for sync is typically stem mastering.
However, there are many variables that need to be considered when mastering music for film, tv, or other sync licensing opportunities. Furthermore, the technical differences change almost entirely.
Although the basic principles of digital recording and processing, i.e. sampling rate, bit depth, and other technical factors remain the same, the overall perceived loudness, as well as the signal chain and processing methods, alter drastically.
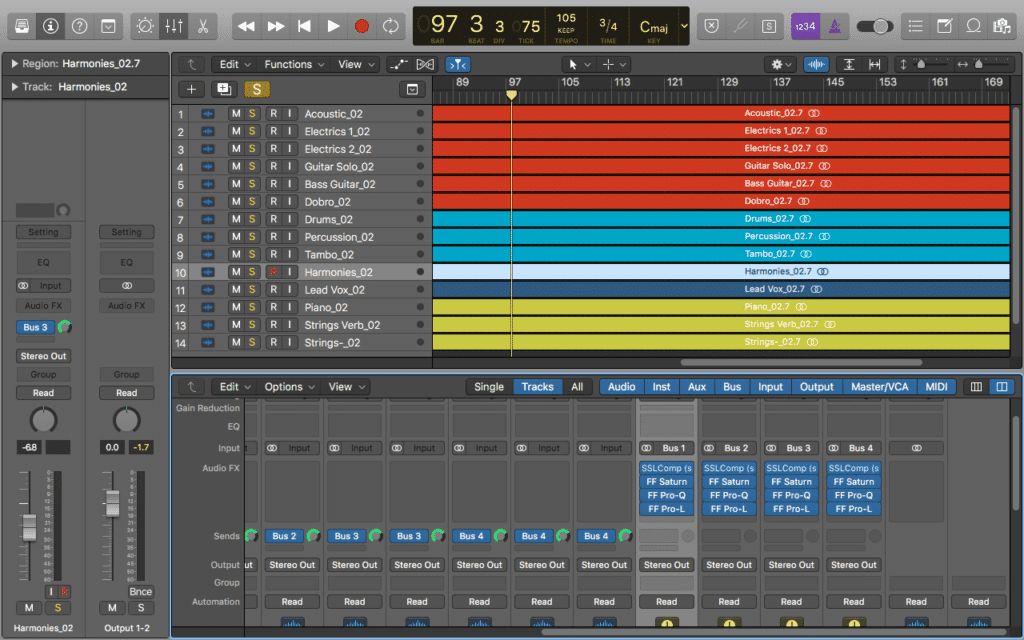
The routing of a sync mastering session is much different than a typical mastering session.
In order to better understand how to master for tv and sync licensing, let’s delve into a session and compare the differences between it and the familiarity of a typical mastering session.
With this session, we’ll be able to determine what processing is used, and how you can model your processing after this. Additionally, we’ll learn what not to do when creating multiple versions of your master for sync licensing.
We’ll also be looking into how the type of programing affects how the music will be incorporated, which may have some implications for the master you create.

Unlike a music release, the master does not stand alone. It will most likely be combined with other audio.
If you have a mix that you need mastered for sync licensing, or perhaps just in general, send it to us here:
We’ll master it for you, and send you a free mastered sample of it.
What does a Mastering for Sync Session Look Like?
Typically, mastering sessions are set up using a stereo mix file. All processing then occurs to this stereo file.
Most mastering sessions use a stereo file as the source signal.
When mastering for sync licensing, typically the mastering session will be accomplished using stems, or groups of recorded instruments. Using these groups will allow for flexibility when bouncing your tracks.
Stems include the full instrument group and all of its relative processing, like reverb compression, etc.
Of course, this added flexibility is a good thing, as it allows you to create multiple versions that producers can then use in accordance with what they’re trying to accomplish for a given scene or segment - but technically speaking, it will present some challenges during mastering.
Say you had a stem mastering session in which you added the entirety of your processing to the stereo output. This would work fine for a stereo mastering session; however, as you begin to export various versions of the song, you may run into some complications.

When creating masters for sync, do not use your master output for processing.
The reason being, when instrument groups are either added or muted, any processing on the master channel will process the information differently, and therefore create a different sound.
A compressor on the master output will compress differently whenever a differing signal is put in.
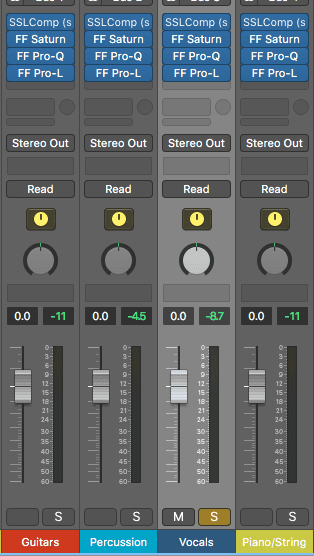
For example, say you have all your processing on the stereo output, and one of your plugins is a compressor. This compressor, as all compressors do, reacts to the signal based on its incoming amplitude.
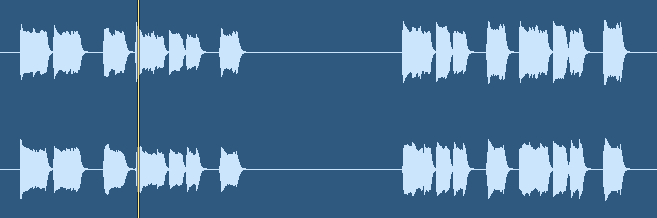
If you were to export a track with all of the stems and then export a track with half of the stems muted, how would this affect your compressor?
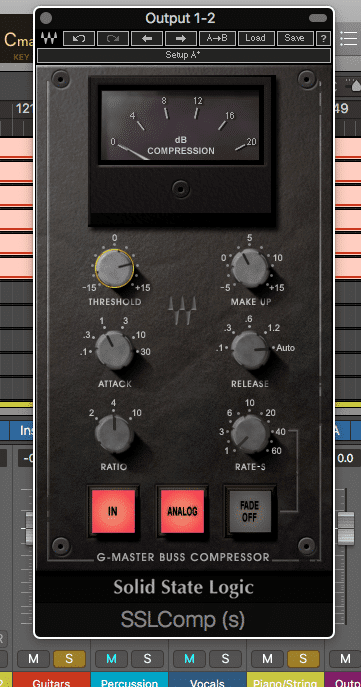
In this example, the Guitars and Pianos/Strings are running through the compressor. If another signal was sent through, the compressor would react differently.
As you can imagine, changing the amplitude of the signal going into your compressor, will in turn change that compressor’s behavior, which will alter its sound. With that said, if you were to use this method for all of your exports, each one would sound different, considering the processing would be different.
This is especially problematic is your exports are intended to be combined at any point, to recreate a full mix. This would be the case for stems intended to represent full instrument groups.
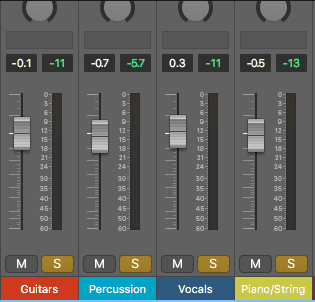
Ideally, you could bounce these 4 shown stems out independently, and if recombined after being exported, it would sound the same as if they were all exported at the same time as one stereo file.
With that in mind, it is best to keep any processing on the stereo output to a minimum and attempt to retain that processing to the individual stems or groups of those stems.
How to Keep Processing on the Stems, Not the Output
The obvious answer to this issue is to solely process the stems - this way if the stems were to be bounced out individually, when combined, they would recreate the entirety of the stereo master.
This process starts by finding like groups of instruments, or ones that you'd like to process together.
Granted, trying to do this with say, 16 stems, may be a bit of a challenge, or take up too much processing power. If this is the situation you find yourself in, there is an easy solution.
How to Easily Consolidate Stems:
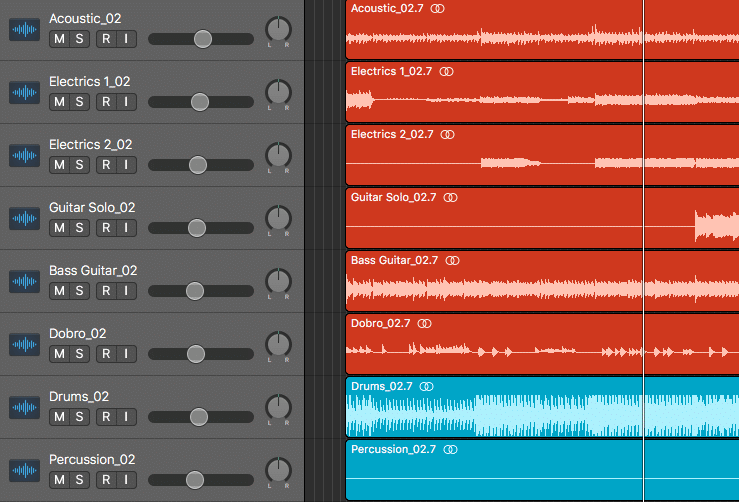
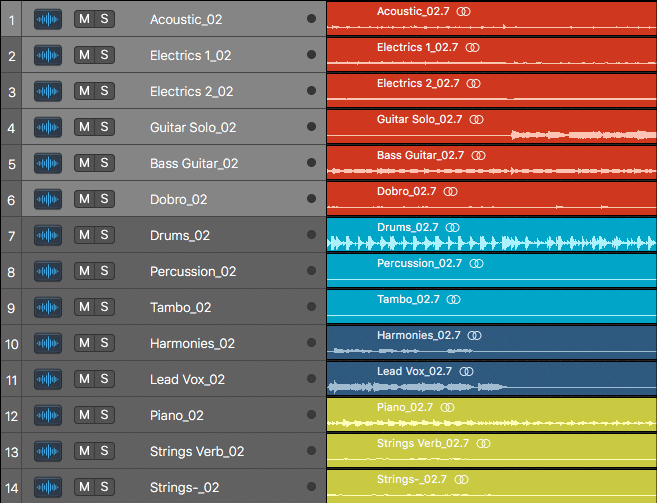
Step 1: Organize your session into groups of instruments you’d like to pair together. For example, all of the stringed instrument stems, or all percussion stems.

Color coordinating your tracks will help keep your sync mastering session organized.
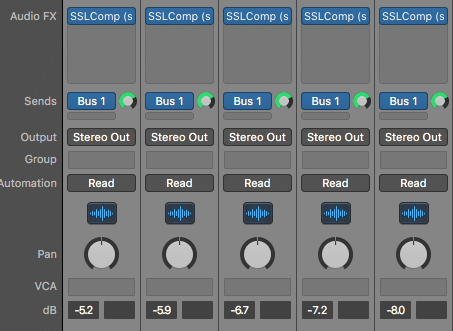
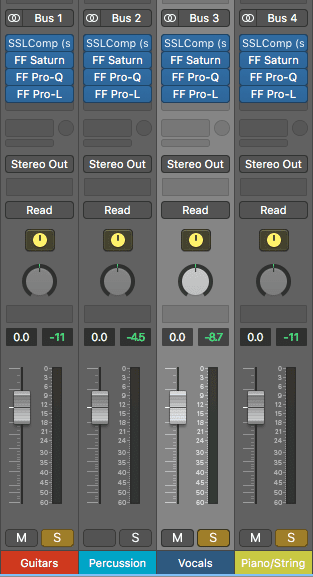
Step 2: Using a bus or an aux send, send these stems to an auxiliary track. Set the send to unity, and be sure to name your auxiliary track with an appropriate name.
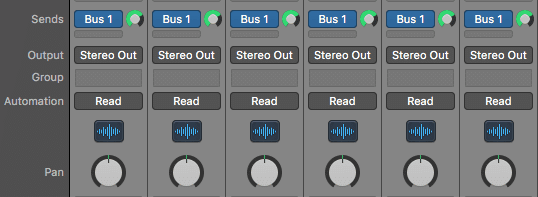
Send your groups of stems to auxiliary channels using a bus or aux send. The exact method depends on the DAW you're using.
Step 3: Repeat this process for all groups of stems that you’d like to process collectively. Again, set the sends to unity and name the auxiliary track accordingly.
Create these auxiliary channels for the drums, or vocals, or whichever way will make it easiest for you to create the versions of your master you need.
Step 4 : Once each group has been sent to its respective auxiliary track, solo the auxiliary tracks, and begin working exclusively with them. You can still adjust the channel faders of the individual stems to affect how much of it is sent to the auxiliary track (given that the aux send isn’t ‘pre-fader’).
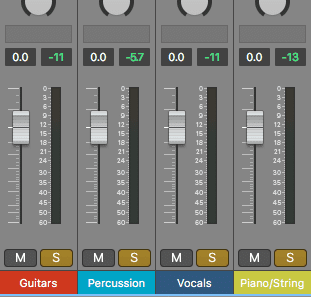
After routing your signal to auxiliary channels, solo these channels to only monitor them.
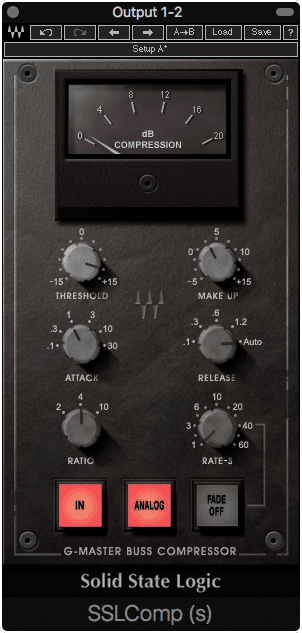
Step 5 : Begin to add processing to the auxiliary channels.
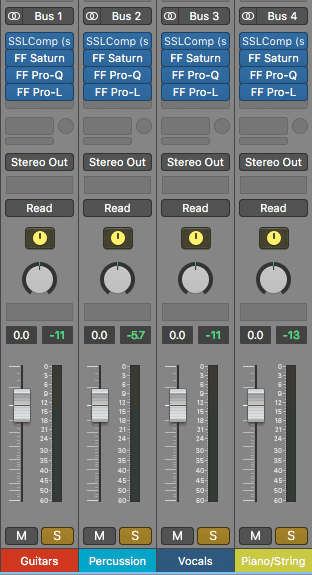
Processing to these stems should be modeled after processing used for typical stereo mastering.
Step 6 : Ensure that after processing, there is no clipping or peaking on your master output. No limiter should be used on the master output.
Ensure that after processing, your output is not peaking.
You can now adjust the channel faders of your auxiliary channels to quickly adjust each stem groups volume. You can also solo and export any individual group or groups of stems, making it incredibly quick to create a new version of your master.
To create a new version of your master, simply solo the group stems you want.
Furthermore, if you were to implement auxiliary sends for reverb, delay, or any effect you wanted to use in parallel to your stem, you could route that send to your auxiliary group send. This way, you can easily adjust the amount of processing, or even bounce that processing out individually, or omit it from your bounce.
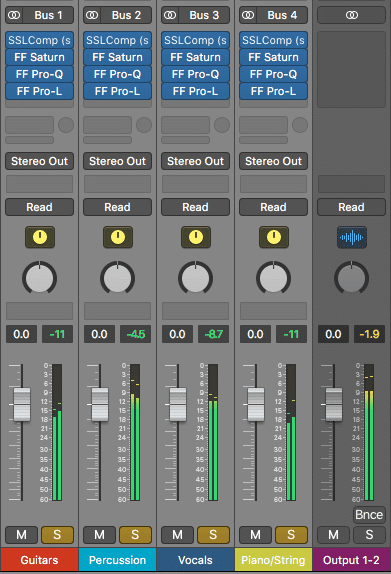
For example, this option would result in a master without percussion.
This same technique can be used during the mixing process, to create multiple mix versions. The only difference would be the type of processing applied to each auxiliary channel.
The reason for doing all of this routing is to add flexibility to your sync mastering process, considering many versions of your master will need to be created. It could be detrimental to your chances of garnering a sync license if the stems you created, which were meant to be combined to create a full master, didn’t combine correctly.
By using this method, you can ensure that your stems can be recombined without sounding different from your full stereo master , and you can easily create new versions of your master without introducing unwanted processing errors.
If you’d like to learn more about the type of processing that you could add to your auxiliary tracks to create your master, check out a blog post on that topic:
It goes into great detail about how you can master music, using a well-established and thorough signal chain.
If you’d prefer to have someone else master your mix or mixes, you can send it to us here:
We’ll master it for you - all you’d have to do is create a short account and upload the song.
What Master Versions Should I Create for Sync Licensing?
Now that you know how to accurately create stem groups that accurately combine to recreate your stereo master, and how to easily create new versions of your master, the next logical question is, what versions should I create?
In all honesty, this will depend on the library you’re uploading to; however, there are some important versions that almost all libraries and producers will want and expect.
Typical Versions of Your Master to Export for Sync Licensing:
- Instrumental (No Vocals or Vocal Processing)
- Vocal Only (No Instrumental or Instrumental Processing)
- No Percussion (Only Instrumentation and vocals, with No Drums or Percussion Instruments)
- Percussion Only (No Vocal, Instrumental, or Instrumental Processing)
In addition to these versions, you may want to create a drum and bass version, or export only the guitar stems - again the process detailed above will allow you to quickly do this. Furthermore, 30-second versions or 60-second versions may also be desired by the producer to preview the track.
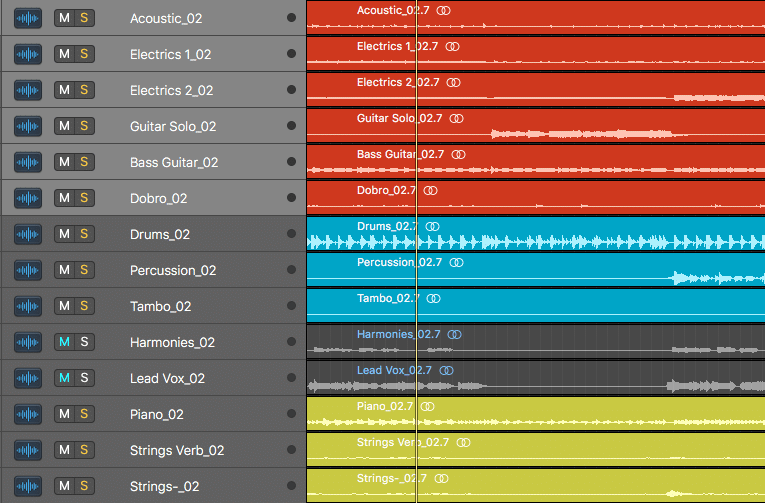
This example would result in an instrumental.
These are some things to keep in mind when creating masters for sync licensing. You’re not creating only one version, you’re creating multiple versions that can either be combined together or stand-alone.
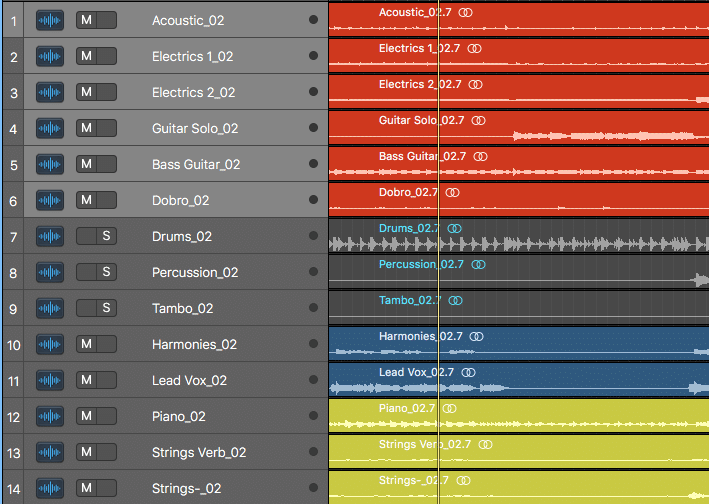
This example would result in a master without percussion. Deselecting 'Solo' on the auxiliary channel will automatically mute all tracks routed to that auxiliary channel.
If you’re curious about stems and want to know more about the difference between typical mastering and stem mastering, check out our blog post on the topic:
It’s full of great information about what stem mastering actually is.
How Loud Should a Sync License Master Be?
An audio master used for sync licensing can vary in amplitude, and will most likely be turned down during the video production process. With that in mind, there is no need to use significant gain reduction; however, the track should be somewhat close in volume to a typical master.
-16 or -15 LUFS is a good level to master your music to - be it for sync licensing or a traditional release.
As stated previously, tv programs are typically aired with an integrated LUFS of -24. When hearing this, some might come to the conclusion that the master should be made at the same volume; however, this is necessarily the case.
When considering all of the various noise that may be in a program, such as dialogue, ambient noises, or perhaps explosions and crashes if it’s more action-oriented - it may be in the best interest of the mastering engineer to have their master sound similar to how a typical master would.

Movies and television productions include a lot more ambient noise than a traditional music release.
With that said, your sync master should be upheld to the same sonic standards to which your typical master would be upheld. It should sound balanced, full, and complex like a traditional master would.
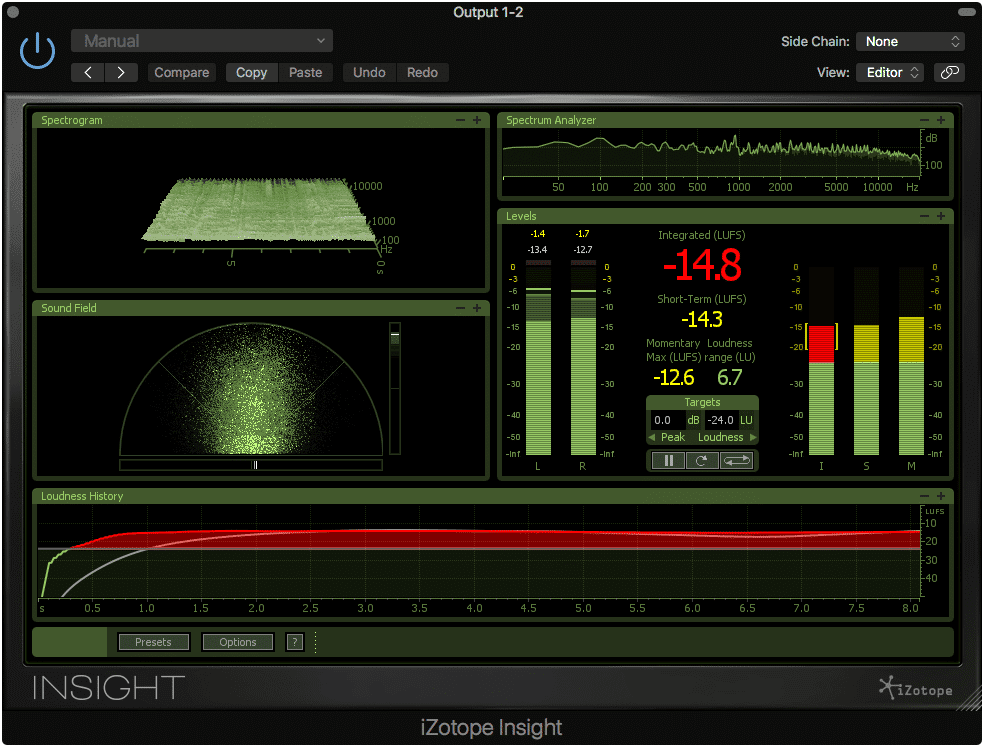
The primary difference is that there is no known LUFS to which you should master. For example, if you were to master for Apple Music, you would likely master your track near -16 LUFS; however, this same target doesn’t exist when mastering for sync and television.
![]()
Mastering for a streaming service or music medium like a CD, makes what loudness you should master to more obvious.
This lack of a clear and distinct answer is exacerbated by the many variables a television program can have. Since the LUFS is measured based on the integrated loudness of the program, and not the dialogue, listeners who want to hear the dialogue will need to turn up and down their programs due to various changes in the additional sound sources present in the recording.

The strange loudness standards that dictate the loudness of television programs often results in having to adjust a program's volume.
I’m sure you’ve come across a situation in which you’ve had to turn up and down a show, simply to hear the dialogue, but then you're met with the music or the ambient noise making the volume too loud. This is primarily due to the loudness of programs being determined by the entire program’s LUFS and not just the dialogue's.
All this to say, that determining the best loudness of your master can be difficult given the many variables inherent to a television show’s, commercial’s, or movie’s audio.

Determining the best loudness for television can be difficult - especially if you don't know what other sound sources will be in the program.
With that in mind, it’s best to master your sync master to a reasonably loud level and to master any stems intended to be combined, to a level that when combined, equate to the volume of your stereo master.
If you don’t know what a good loudness for mastering is, you should look into a blog post we have on the same topic:
It details the different volumes that work well for modern mastering, and why these levels work.
The Differences between a Sync Mastering and Traditional Mastering Session:
- Sync mastering sessions are typically stem mastering sessions, whereas traditional mastering sessions are stereo.
- Sync mastering sessions result in multiple versions whereas traditional stereo mastering sessions typically only result in one version per song.
- The volumes used for a traditional music release are well known by mastering engineers and serve as a reliable target, whereas, mastering for sync licensing is more variable and can depend on the project.
If you’d like to learn more about digital mastering, you can check out our blog post on the topic :
Or, if you’d prefer to learn about analog mastering, take a look at the blog post we’ve written about that:
Conclusion
Mastering for sync licensing it definitely a different practice then mastering for a traditional music release. the fundamentals are the same in terms of compression, limiting, equalization and so on, but, the actual structure of the session, as well as the final product, is very different.
When Mastering for Sync Licensing you Need to Keep Certain Things in Mind.
These include:
- Knowing the general type of production to better understand the context the master would be included in.
- Know which versions either the library you’re uploading to, or the producer are expecting, and then create those versions.
- How to create versions of your master that can either be combined to create the full stereo master, or standalone.
- How to create a new version of your master without creating or introducing unwanted processing errors.
Just like a traditional music master, your sync master should sound good, full, complex, and inviting to any listener; however, it shouldn’t be loud to the extent of needing excessive limiting.
Considering most masters will need to be turned down, creating an excessively loud master serves no purpose. Furthermore, losing dynamics can lead to a lackluster master, so it’s best to have one that is slightly quieter, but preserves dynamics.
Additionally, to create a sync master, you need to be able to separate your processing in a very specific manner. If you haven’t already, it’s best to read the section titled “How to Keep Processing on the Stems, not the Output.”
It demonstrates how you can arrange your session and route your signal in such a way, that multiple versions can be created without processing errors. Once you understand how to accomplish this, you can create the multiple master versions typically required for sync licensing.
These include instrumentals, vocal-only versions, versions without drums or only drums, and a slew of other options that producers need to adequately incorporate music into their productions.
Whenever you do end up creating these masters, keep in mind that they do not stand alone - they’ll be included in scenes with dialogue, background noise, and perhaps explosions or other special effects.
With that in mind, simply try to create the best sounding master possible - as a balanced, full, and complex master will be needed to compete with the other sound sources used.
If this is something you’d rather leave to a mastering professional, send us your mix or mixes here:
We’ll master it for you and send you a free mastered sample.
Have you ever mastered a song for television or a sync licensing deal?


