Mastering for Pop Music
Quick Answer
Mastering for Pop Music means understanding the balance between creating a sonically competitive master, and retaining the dynamic range. Often times, pop music gets mastered so loudly, that the dynamics are almost nonexistent; creating a loud master, that retains dynamics is key to creating a great pop master.
Mastering for Pop Music in Detail
When you listen to a modern pop album or single, what do you hear? Can you hear every nuance and detail of every instrument? If you can, you’re listening to a great pop master.

A pop master pushes the instrumentation up front and allows everything to easily be heard.
Mastering a pop track is all about taking the quietest aspects of the recording, and pushing it to the forefront. Doing so means capturing and portraying the most detail possible , and making it perceivable to the listener, regardless of how entry-level their playback system may be.
We can see evidence of this phenomenon when considering how other genres are listened to; when someone wants to hear their favorite classical or jazz record, their playback system needs to be top-notch. A classical music aficionado will soon need to become an audiophile if they want to hear the details of their favorite recordings.

When compared to other genres pop music is definitely more compressed and up front.
To appreciate pop, a car stereo will suffice; the reason being, everything is pushed so far forward, that even without the best amplifier, a pop fan can hear everything they need to appreciate the music.

Pop music will sound good on almost any amplification system due to its upfront sound.
The key to understanding mastering pop music is finding out how to achieve having easily perceivable instrumentation without having to degrade the audio. There are many methods that result in upfront instrumentation but also result in negative consequences such as clipping distortion, and a lacking dynamic range.

When mastering pop, an engineer needs to wary of clipping distortion and other issues that may arise.
With that said, let’s look into how this can be achieved without sacrificing dynamics, or ending up with a subpar master. We’ll also be delving into the expected overall loudness of a pop master, its typical frequency spectrum, and how distortion can be used to support this expected loudness and typical frequency spectrum.
If you have a pop track you’d like mastered, send it to us here:
We’ll master the track for you, and send you a free mastered sample for you to review. This way you can hear our services for yourself, before making any commitment.
How to Make Your Master Sound Upfront
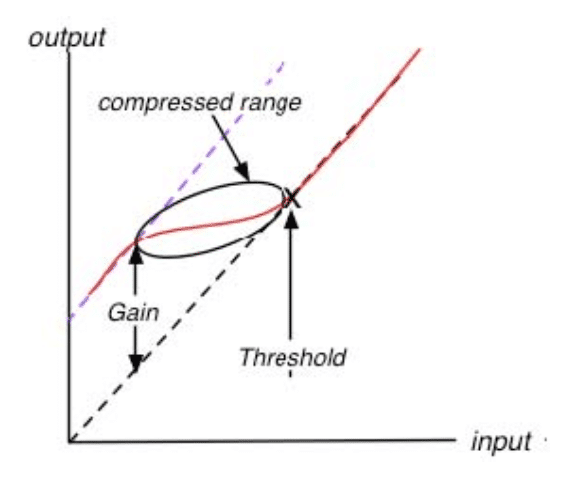
There are many ways to make a master sound upfront, however, the arguably best way is to use low-level compression to augment the quieter aspects of a track. You could also use excessive compression; however, this results in a severely truncated dynamic range, and a less overall enjoyable master.
Limiting pushes quieter aspects of a mix forward.
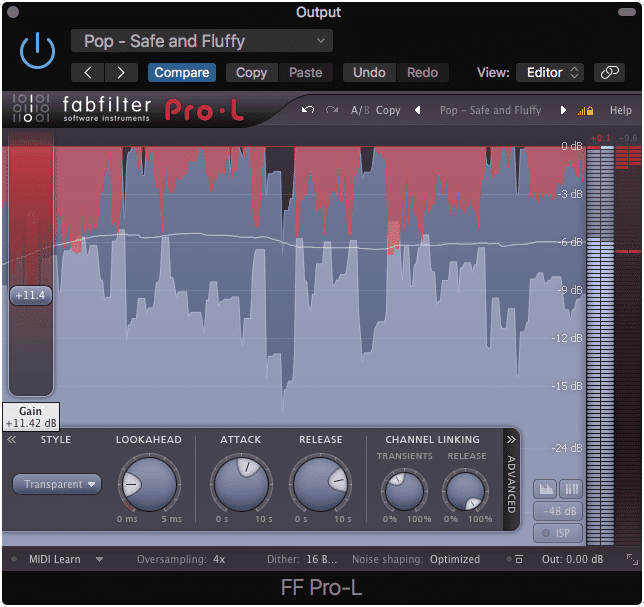
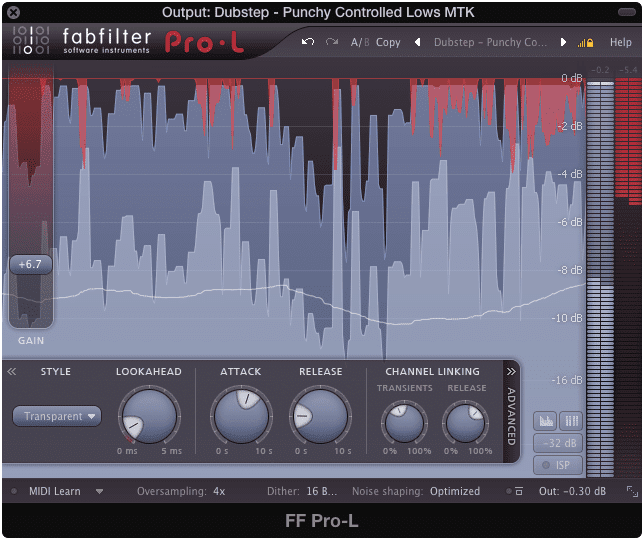
Typically speaking, the upfront sound we were discussing earlier comes from making the master louder than normal. By pushing the signal with a limiter, truncating the transients, and amplifying the quieter, often less perceivable aspects of the track, a louder master ultimately results in a more detailed master.
Pushing quieter aspects of a mix to the forefront often results in a more detailed sounding master.
Again, there are some major setbacks by using this method.
Creating an Excessively Loud Master Can Result In:
- Clipping distortion during playback
- Inter-sample Clipping distortion during playback
- Clipping distortion during the encoding process
- A Lacking dynamic range
- A fatiguing listening experience for listeners
So, how do you create an upfront master without having to resort to excessive limiting and compression?
The easiest way as stated above is to use a low-level compressor. A low-level compressor works by capturing the quieter parts of a recording, compressing, and amplifying them.
From the Wave's MV2 Manual - a depiction of the MV2's low-level compression.
By using this type of processing, you can entirely circumvent the need for attenuating the dynamics or transients when trying to amplify the nuances of a recording. This way a master can remain dynamic, retain its transients, and offer an upfront sound, without having to sacrifice one desirable aspect for another.
When mastering pop music, this technique, or really, this form of processing, offers a great way to create this expected upfront pop sound, without having to resort to excessive limiting. This way you can avoid clipping distortion, lacking dynamics, and all the other negative effects of excessive limiting, while still delivering the sound people expect and want to hear.
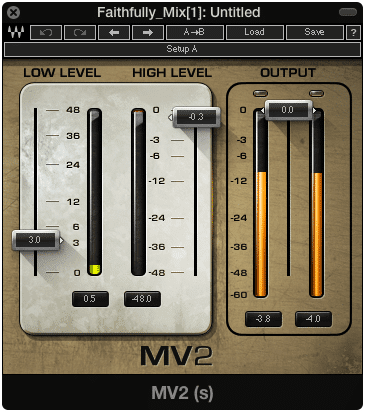
Low-level compression amplifies the quieter parts of a recording.
Furthermore, choosing low-level compression over excessive limiting may mean ushering in a new pop master sound. One that delivers on what people expect, but improves upon the previous method of creating it.
If you’d like to learn more about using low-level compression when master, check out our blog post detailing a tried and tested mastering signal chain:
It shows how low-level compression can be used in conjunction with other forms of processing, to create a great sounding master.
But, if you still prefer to master pop music using excessive limiting, let’s look at what is actually occurring to a sound source in order to better understand it.
Perhaps the best way to visualize this process is by considering the ADSR, or attack, decay, sustain, and release, of a single instrument.
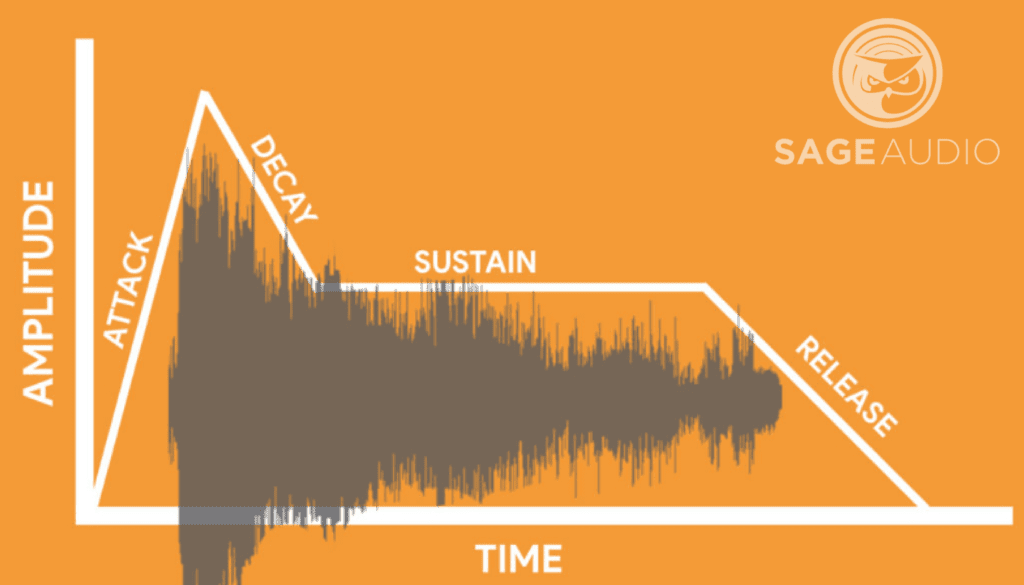
Attack, decay, sustain, and release make up the timbre of a sound source.
Imagine compressing a snare. A snare has a very loud attack and decay, but a quiet sustain and release. Although the sustain and release of the snare contain a lot of detail and would make the snare sound larger and more enjoyable, the amplitude is too quiet to have much of an effect.

A snare is considered a very transient instrument, without much of a sustain or release.
So what happens if you were to compress or limit this snare?
Limiting works by pushing the signal louder and into a brick wall compressor, which attenuates the signal when crossing the threshold. In turn, the attack and decay are made quieter, or at the very least remain at the same volume, while the once quieter sustain and release are amplified.
A limiter pushes the signal forward, making quieter aspects louder, and in turn, affecting the ADSR of all sound sources in the signal
A similar process occurs when creating a pop master and using excessive limiting. By attenuating the attack and decay while amplifying the overall signal, these quieter parts become louder and louder, until they nearly match the amplitude of the attack and decay elements of the ADSR.
Making the decay, sustain, and release aspects of the ADSR as loud or almost match the attack, creates a very detailed sound.
When this occurs, the quietest parts of a recording an easily perceived, the depth of the recording is diminished, and the master sounds upfront.
How Loud Should a Pop Master Be?
Although the specific loudness may vary from track to track, pop masters range in loudness from -11 LUFS to -8 LUFS. Although it isn’t recommended to master your pop track to as loud as -8 LUFS, it is nevertheless a loudness to which many pop tracks are mastered.
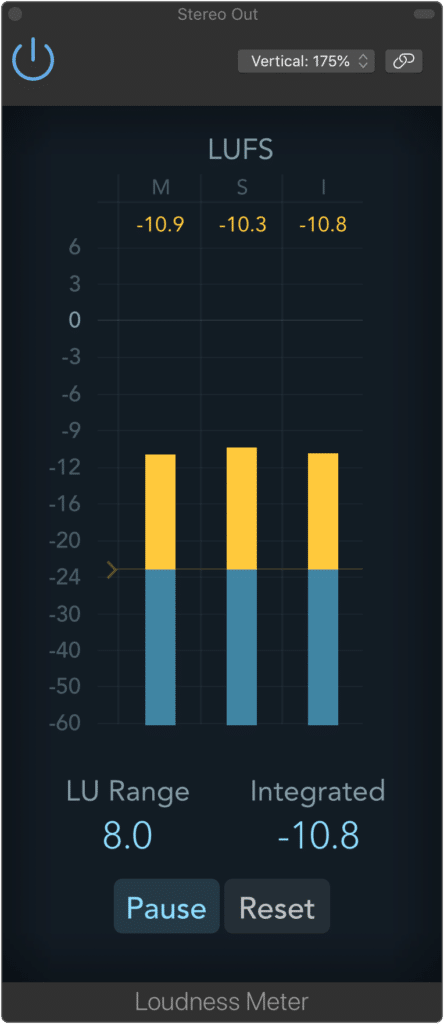
The loudness of pop masters range, but some are as loud as -8 LUFS!
It should, of course, be noted that mastering to louder levels almost inevitably results in a lack of dynamics. If this is the case, then why are pop masters so loud?
There are some reasons why pop masters are so loud:
- Listeners expect a loud master
- Mastering Louder results in upfront instrumentation
- Louder is often perceived as better sounding
Because pop masters are expected to be loud, and this loudness causes the instrumentation to be more easily perceived, the sound created from a loud master has become associated with the genre itself.

The loud sound of pop and the effects a loud master creates are often associated with the genre itself.
With that said, it’s difficult to create a pop record without adhering to this production standard. This isn’t to say that a loud master makes for a better sounding master, just that listeners expect it and in turn, a loud master has become part of the genre.
How does Loudness Normalization Affect Mastering for Pop Music?
If you’ve read some of our other blog posts, you may have noticed a common theme - that being, loudness normalization is greatly impacting how loud masters are exported and distributed.

Loudness normalization has greatly affected how loud pop masters are made. Loudness normalization has greatly affected how loud pop masters are made.
The reason being, loudness normalization applies clean additive or subtractive gain to a signal prior to it being streamed. When this happens, all tracks are played back at a very similar “normalized ” level.

Loudness Normalization causes loud masters to be turned back down during playback.
As a result, even the loudest masters will be turned down and played back at the same volume as all other tracks. Because of this, most mastering engineers see less of an incentive to master their tracks to louder volumes; however, the practice is still pretty commonplace in pop mastering.
If you’d like to learn more about how loudness normalization affects mastering, check out our blog post on the topic:
It shows how normalization affects loudness, and the negative effects it can have for both excessively loud, and quiet masters.
In short, loudness normalization almost negates every benefit a loud master offers. This means that the distortion it causes, and the lack of dynamics that result from it, become harder to ignore for mastering engineers.

Loudness normalization decreases the incentive to make a master louder than it needs to be.
With that said, more and more engineers are choosing to master their pop music quieter , retain dynamics and avoid distortion, and allow loudness normalization to affect the volume.
When doing so, and mastering pop music, a low-level compressor will almost need to be used to emphasize the quieter aspects of a recording and create the upfront sound a pop master is known for.
What is the Typical Frequency Spectrum for a Pop Master?
A pop master typically has an amplified high-frequency range, and an amplified low-frequency range, while maintaining a balanced mid-frequency range. Ideally, the lows and highs are slightly accentuated in a pop master, to emphasize the kick and the cymbals or high-hat.

Drums are often accentuated in pop masters due to an emphasis on the low and high frequencies.
Of course, the instrumentation of pop songs vary slightly from song to song and pop sub-genre to sub-genre, but this same frequency spectrum is generally followed. The highs should be crisp, present and easily perceived, while the lows should be full and present.
Furthermore, the frequency spectrum will generally be full from the low-level compression used, or from the amplification associated with excessive limiting. So in short, it should sound full, complex, detailed, upfront, and with a present low and high-end.
Additionally, any equalization used during the pop mastering session can be, and should be used to subtly affect the stereo image. This can be accomplished by using mid-side equalization.
The most common uses for mid-side equalization when mastering pop music is making the low-end mono, and amplifying the side frequencies to create a greater stereo width.
How to Create a Focused and Wide Pop Master
Step 1: Using a mid-side equalizer, create a high-pass filter on the side image, and attenuate up to 140Hz.
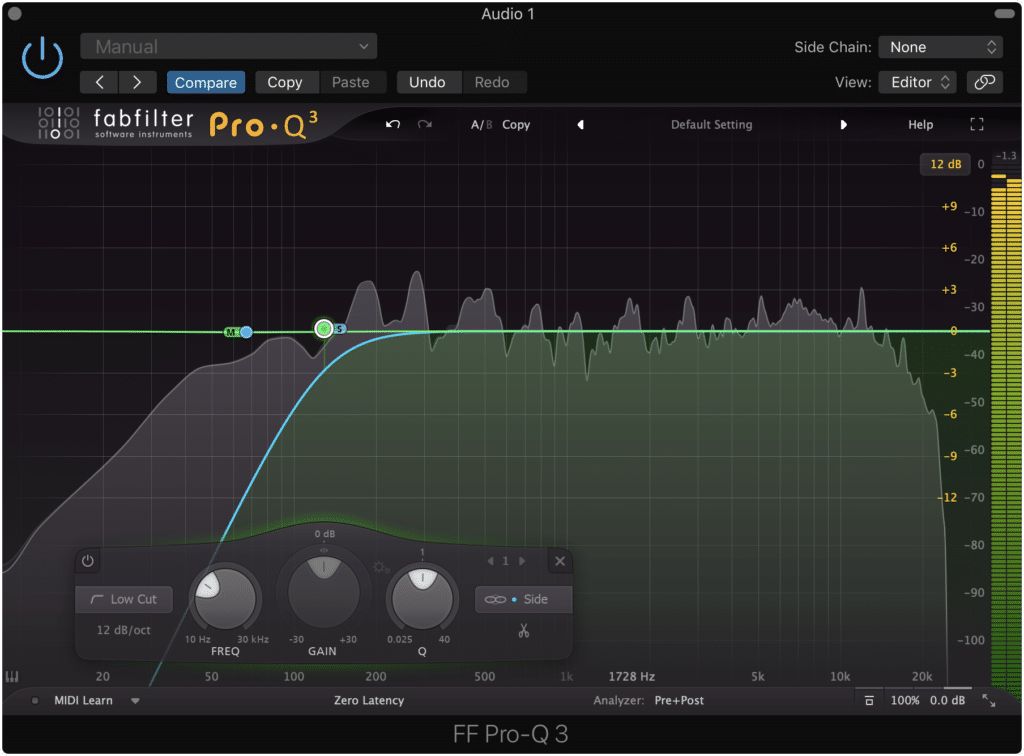
Cutting the side image up to 140Hz makes the low-end mono.
Step 2: Using a shelf filter, amplify the side image’s high frequencies. So this subtly, but enough to be noticeable and effective.
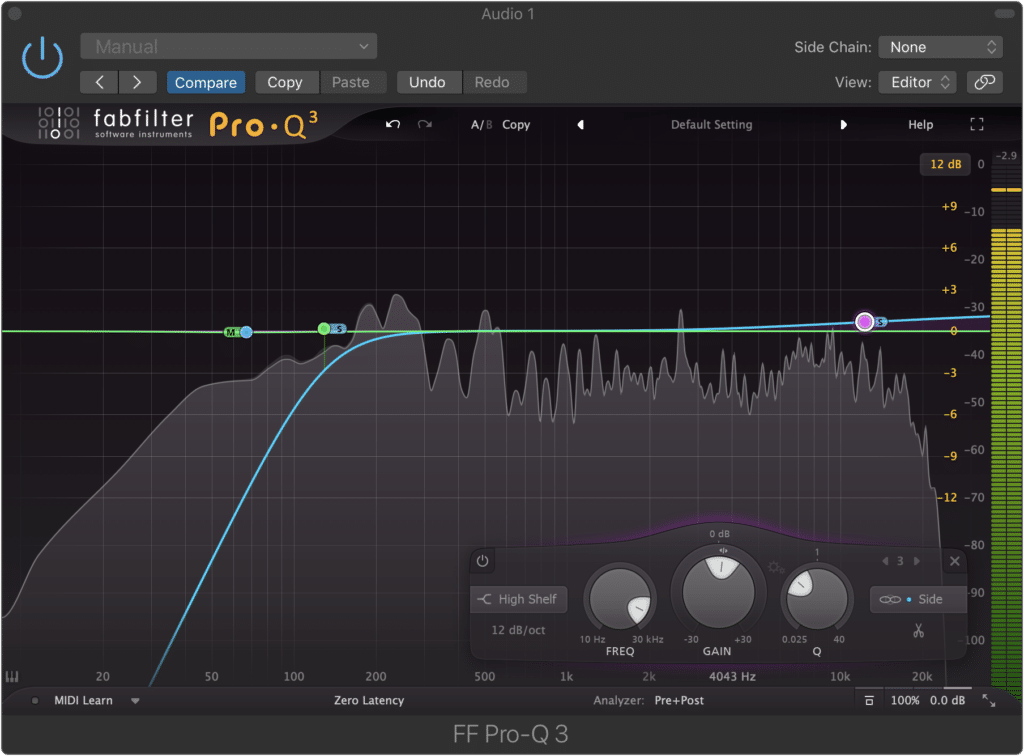
Amplifying the side image increases the stereo width.
By following these two steps you essentially make the low-end mono, by cutting it out of the side image. In turn, your master will sound much more focused.
By amplifying the side image’s highest frequencies, you increase the width of your master and add some air to it - something most pop masters have a fair amount of.
Using Distortion in a Pop Master
Distortion can be used in a pop master to increase the overall perceived loudness, fill the frequency spectrum, and increase the perceivability of the quieter aspects of the recording. In short, distortion, especially in the form of harmonic generation, can augment all the things listeners of pop music expect.
Analog emulation plugins like the one shown above can introduce harmonic generation.
How to achieve harmonic generation?
The easiest way to add harmonics to your master is to use either analog emulation or distortion plugins. Honestly, it’s that simple.
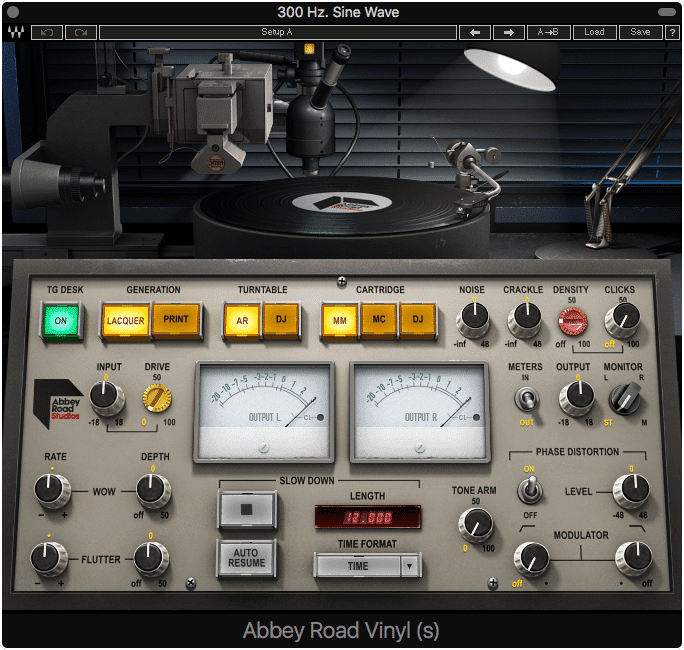
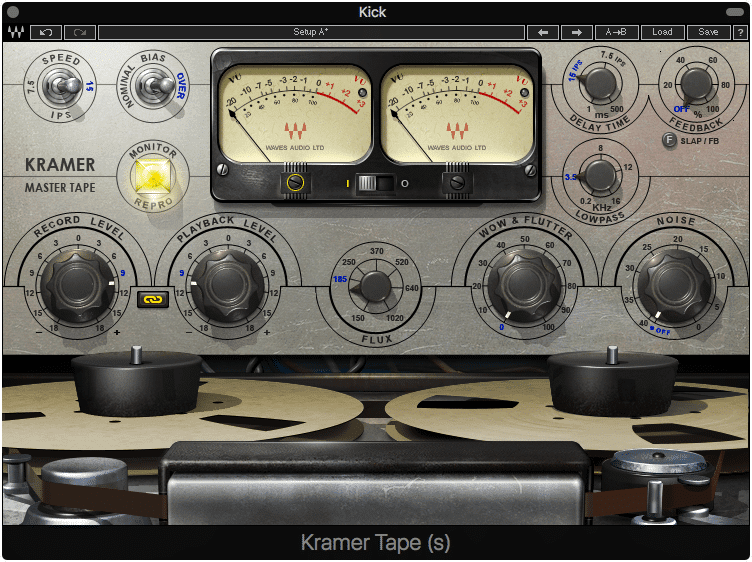
Any analog emulator is used to generate harmonics often associated with classic hardware.
Most analog emulation plugins automatically add this form of distortion, hence their sought-after sound. Furthermore, using analog equipment to master a pop track automatically adds these harmonics by running the signal through the hardware.
Analog equipment is arguably the best way to introduce these harmonics.
With that said, if you’d like to hear how this could affect your master, send it to us here:
We’ll master it for you using solely analog equipment, and send you a free mastered sample for you to review.
Or, if you’d simply like to learn more about how analog equipment and harmonics affect a signal, check out our blog posts on the topic:
Both blog posts offer valuable information regarding harmonic distortion.
When mastering a pop track, it’s important not to use harmonic distortion excessively, especially if you intend to use low-level compression or excessive limiting to achieve an upfront sound.
If you use excessive distortion and low-level compression, then the quieter aspects of that distortion will be amplified, and most like result in an unpleasant sounding master. Furthermore, if you use excessive limiting in addition to excessive distortion, not only are you amplifying the quieter aspects of distortion, you’re combining it with any distortion created from that excessive limiting.
If using distortion based processing, be sure not to add additional unwanted distortion to your track.
All-in-all using harmonic generation excessively will almost always result in an unpleasant and heavily distorted sounding master.
Conclusion
Mastering for Pop Music is certainly a bit more difficult than it looks on paper. Granted, there are simple methods for making a master loud, but these methods become much more complex when you attempt to make the master sound great.

Making a pop master sound upfront but without distortion or lacking dynamics is the real challenge of mastering pop music.
There is no doubt a huge difference between a loud master and a good sounding loud master. Understanding this difference, and the methods with which to achieve the intended effect is what separates a knowledgeable mastering engineer from others.
By using low-level compression or limiting and compression, distortion, and equalization, you can create a great sounding pop master, that sounds loud and with upfront instrumentation.
Low-level compression helps by bringing quieter aspects of the recording to the forefront. Using it often means you’ll no longer need excessive compression or limiting.
By implementing low-level compression, you can avoid having to truncate your master’s dynamics to achieve amplification of the quieter aspects of your recording. This means your pop master can sound just as upfront as an excessively limited master, but with a retained dynamic range.
When this method is coupled with the popularization of loudness normalization, it makes more sense to use low-level compression, and depend on loudness normalization for the loudness, than to use the previously popular method of squeezing the master as much as possible.
Once this is accomplished, gentle harmonic generation can help fill any gaps leftover in the frequency spectrum, resulting in a full sound. Be careful not to add too much harmonic generation, since the low-level compression may have already amplified quieter distortions.
With the right amount of low-level compression and harmonic generation, gently boosting the frequency spectrums low and high-end frequencies can be used to both emphasize pop-based instrumentation, but also as a way to affect the stereo image.
By using a mid-side equalizer, the lower frequencies can be made mono, and the higher frequencies can be amplified on the side image to make the overall stereo image wider. this way you can simultaneously equalizer your master, and perform stereo imaging-based effects.
If you’d like to hear your pop track mastered, you can send it to us here:
We’ll master it for you and send you a mastered sample of that mix for free.
Have you ever mastered a pop mix?


